


Architectural Concept Renderings: How Professional 3D Artists Create CGI Showstoppers
Architectural concept renderings are so much more than illustrations. They are marketing materials that need to amaze, captivate attention, and immerse viewers into the atmosphere of the project. And this can be achieved with 3D graphics — on one condition though.
The 3D visualizer working on the architectural project needs to be a CGI expert and a real artist. For there are quite a few nuances that go into the creation of high-end concept 3D renders. First things first, a 3D visualizer needs to be an accomplished storyteller. That is, they need to know how to set a certain mood. Like choosing a season, time of the day, weather, light, adding character with small creative elements. Moreover, the 3D artist needs to love and understand architecture and design. In this case, they will ask the right questions, and fill the gaps on their own if necessary. And most importantly, the 3D artist needs to know what the materials look like and behave with respect to the environment. Which requires a lifetime of work and observation! Such a 3D ninja will understand that the white stucco wall, for instance, will have a rough surface and be covered with flaws over time. And that the road in real life will probably have patches and won’t be super-even.
When all these factors are united, a showstopping architectural 3D visualization is born. So today, we want to show you how the process unfolds, and what exactly a CGI artist does at every stage. Want to know how the masterpieces are made? Then read on and see for yourself!
#1. Architectural Concept Development
Andrii Diachenko, our Senior 3D Specialist and Mentor, created 4 CG renderings for the internal competition. He decided to create a brand-new concept, with help of architects who work with us.
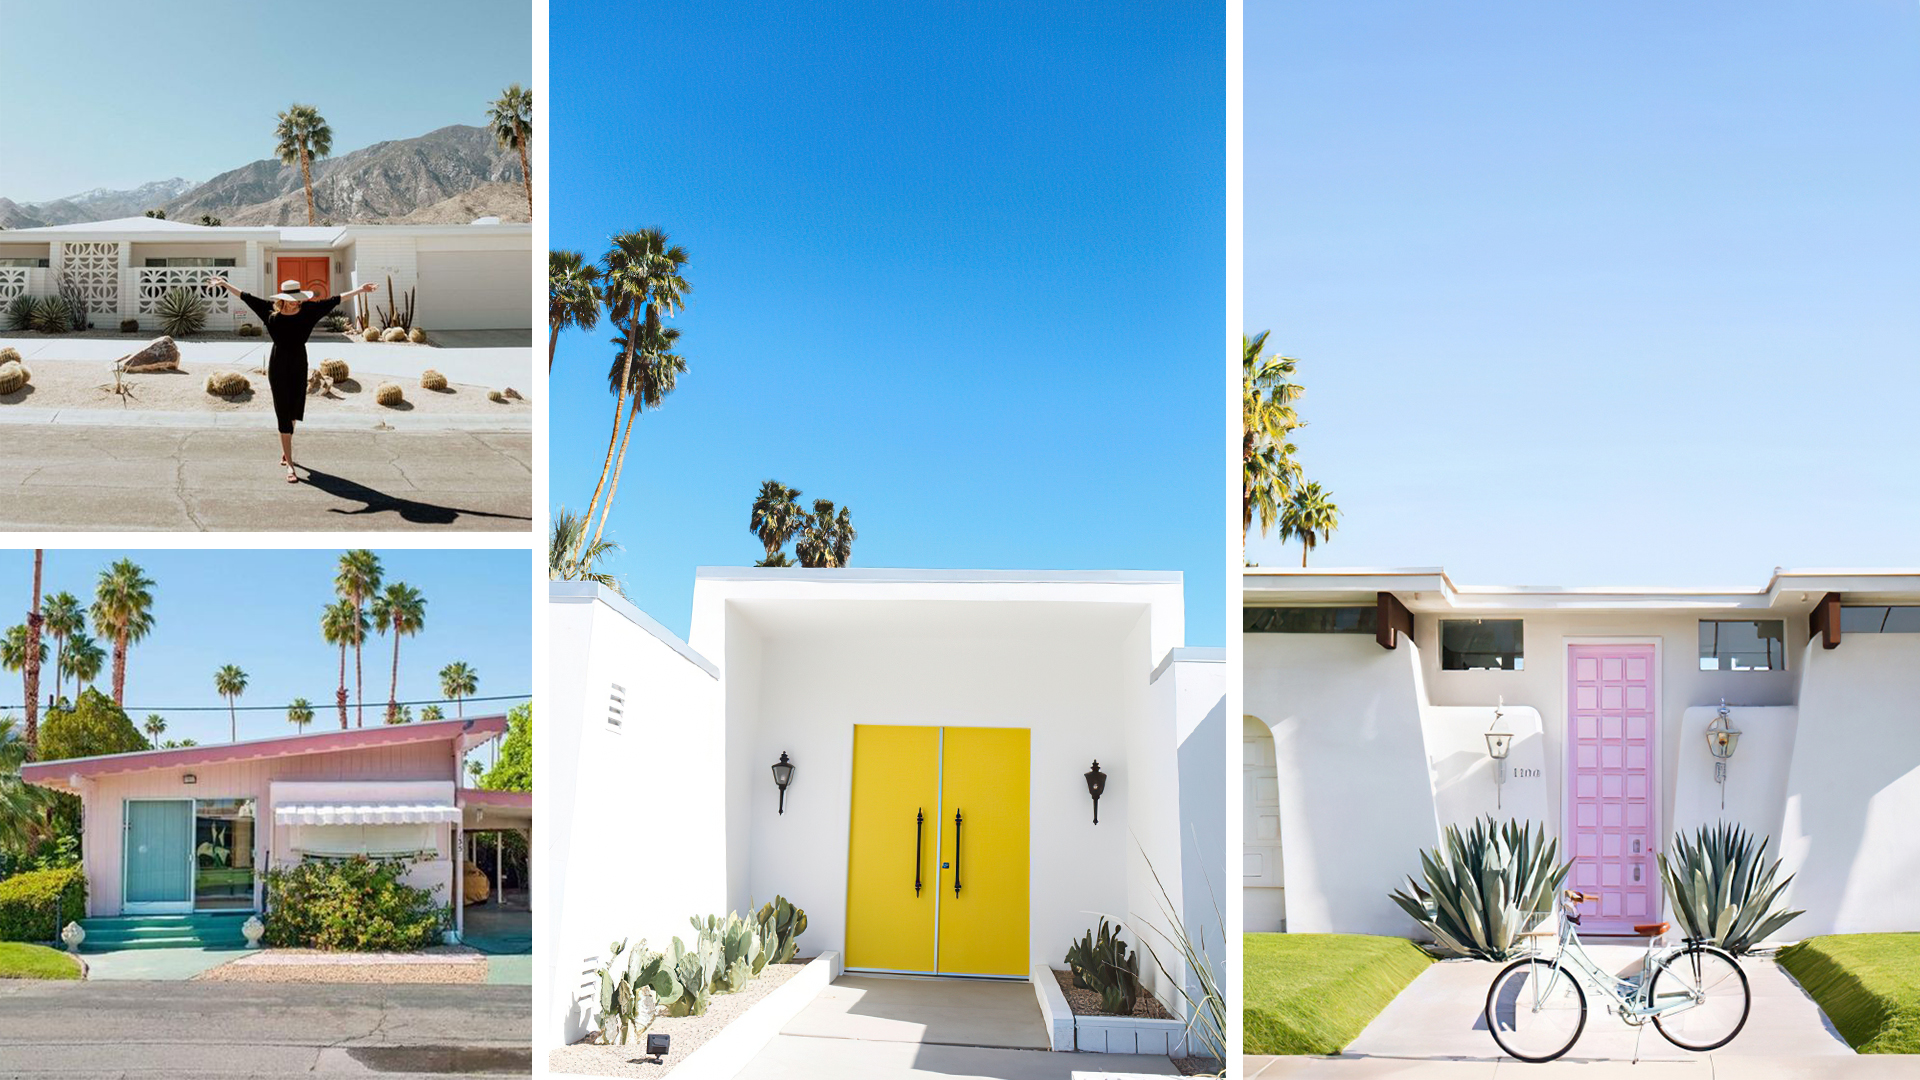
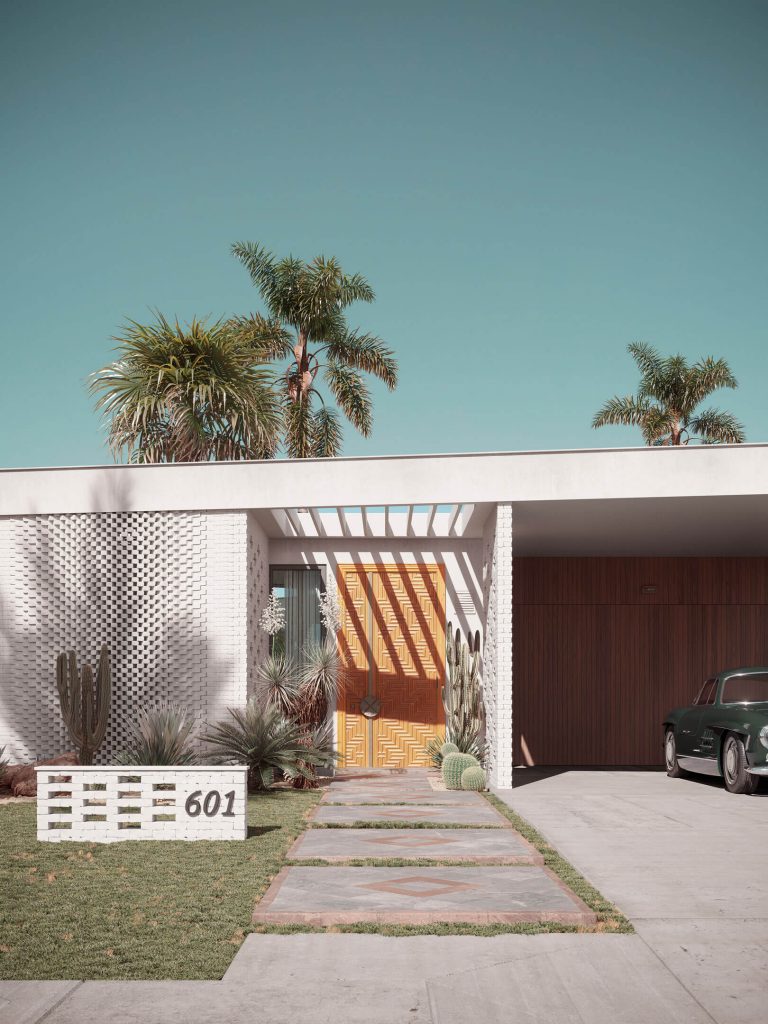
The 3D visualizer chose a renovation project. He had in mind a Mid-century house built around 1965 in Los Angeles. It’s a complex and artistic task, for the architect needs to renovate the building, fill it with modern comfort while preserving its historical character. And the 3D renderings need to tell the story of the property that would make such a unique and luxurious home.
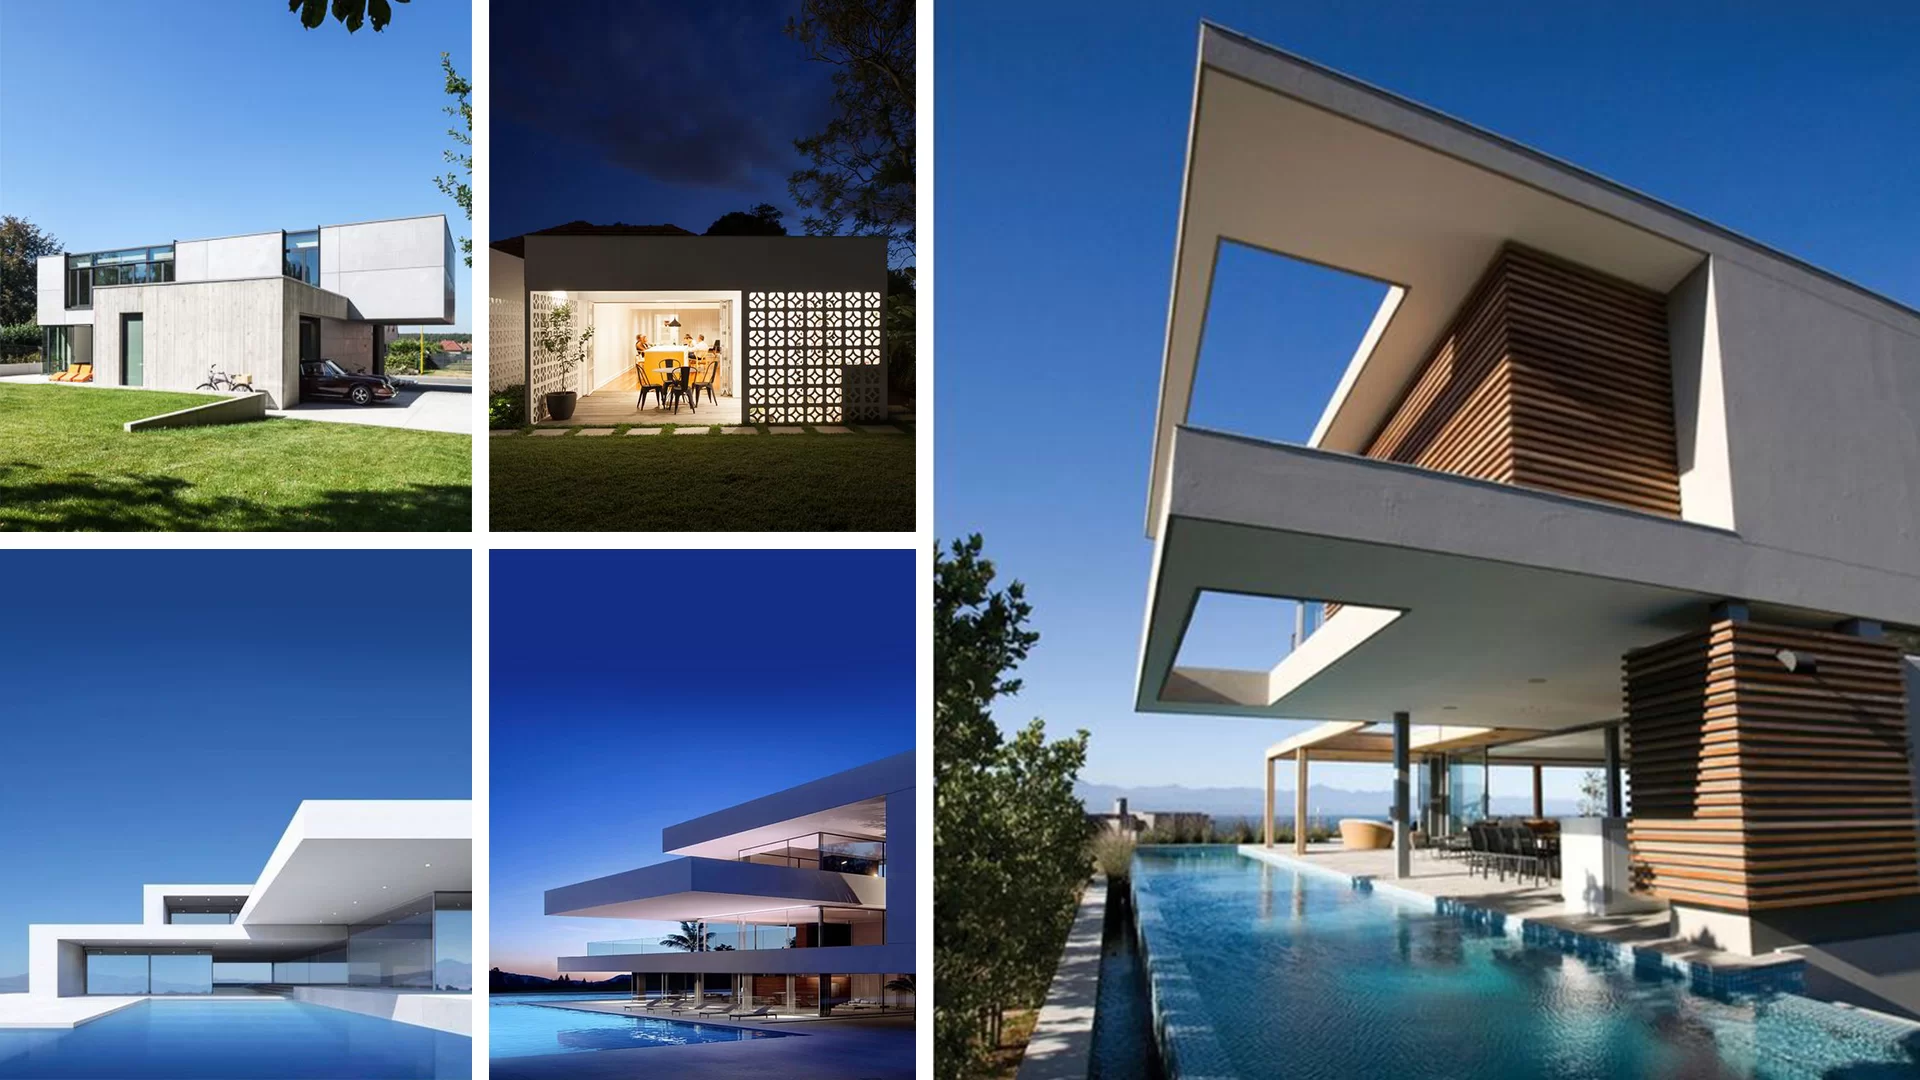
Look at the main 3D rendering of this series. These vibrant colors, mind-blowing retro cars, and people just enjoying the moment and the LA sunshine — would you like to join them? We’d go there in a heartbeat! And that means the 3D artist nailed the task.
#2. Choosing the Format

Out of 4 architectural concept renderings, the main shot is widescreen, and the other 3 are vertical. The reason Andrii chose widescreen for the main 3D visualization is that it is the format of movies, and we are used to perceiving stories that way. Therefore, a widescreen would reinforce the atmosphere in the 3D render.


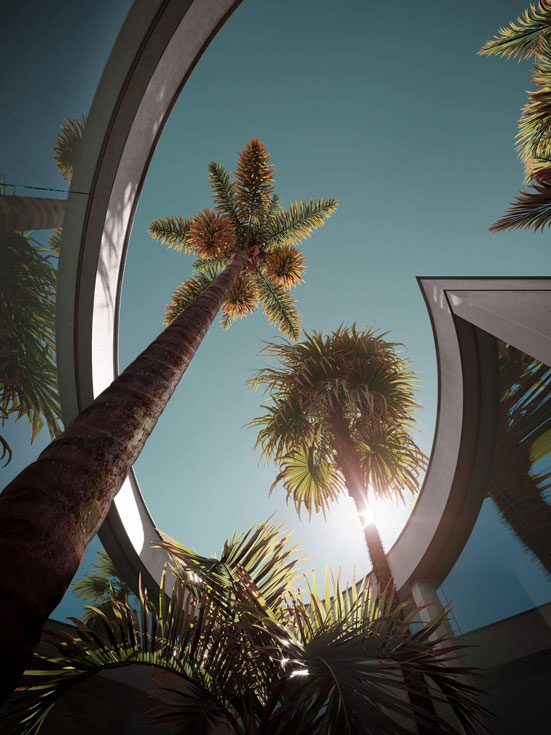
Now if the widescreen pic is about telling the story, the other 3 ones are additional shots aimed at showcasing specific architectural features of the project. And vertical format suits this purpose perfectly. Let’s look at the third 3D rendering, for instance.
It shows the effect of the curved wall. On the one hand, the feature is functional. It was conceived to build the space around a huge palm so as to preserve the tree. On the other, it looks unusual and adds character.
And not only to the exterior design. For curved walls and amazing LA sights called for another ground-breaking feature — curved panoramic windows. Which means that the space will get lots of sunlight, and the line between interior and exterior will be blurred. What a beautiful way to feel surrounded by nature! Every day in such a house would feel like a special moment. And the 3D rendering shows both the architectural feature of the concept and the effect it’ll have on the inhabitants’ lives.
#3. Looking for Inspiration
Before proceeding to the creation of architectural concept renderings, Andrii made extensive research on every aspect of the future scene. And that involved looking for reference imagery on lots and lots of aspects. This is hard work yet it pays off beyond all expectations. Let’s learn some of the elements the 3D specialist looked for.
a) Reference Images for the Mood
After looking at different options, the 3D artist came to the conclusion that cloudless sky and bright sunshine are the best background for an architectural concept in Los Angeles.
b) Reference Images for the Location
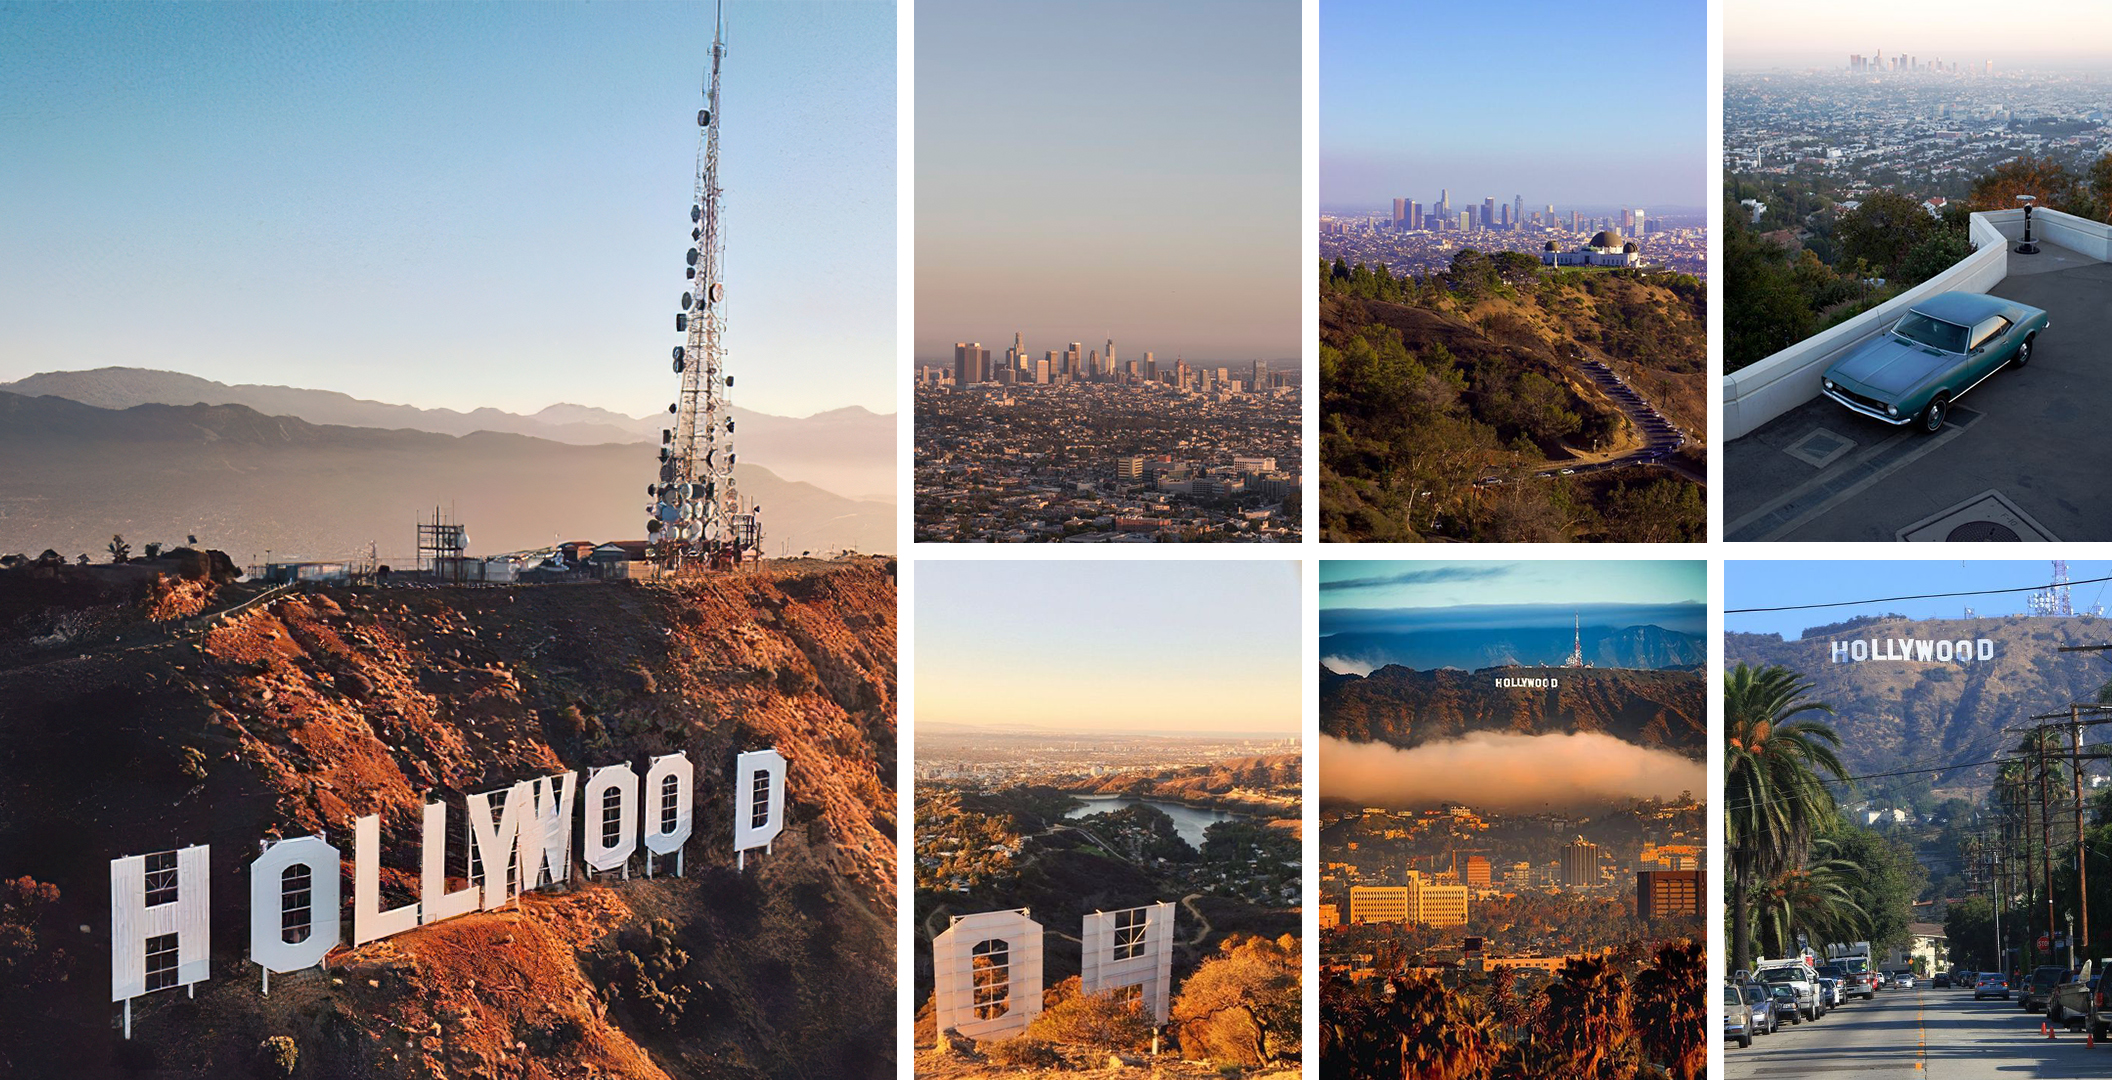
When working with full CGI concept 3D renderings, and no photomontage involved, it’s important to make sure that the surroundings look authentic. If it’s supposed to be LA, then it should look like LA. If it’s Paris, then it should be recognizable too.
In order to find that look, Andrii went on Google maps and looked carefully at the LA streets. He noted the characteristic details which he would then include in the 3D visualizations.
c) Reference Photos for Streets
Road is an important part of an urban landscape. It sounds like a simple enough thing to visualize, yet for a realistic rendering, that’s not the case. The truth is, a road rarely looks brand-new. It usually has patches and stains of dirt.
In addition, the CG specialist found out how typical streets look. They aren’t usually even but slanting. As well, Andrii looked at how the palm trees are planted, what the lawns are like, and how the drainage is placed.
d) Inspiration for Background Details
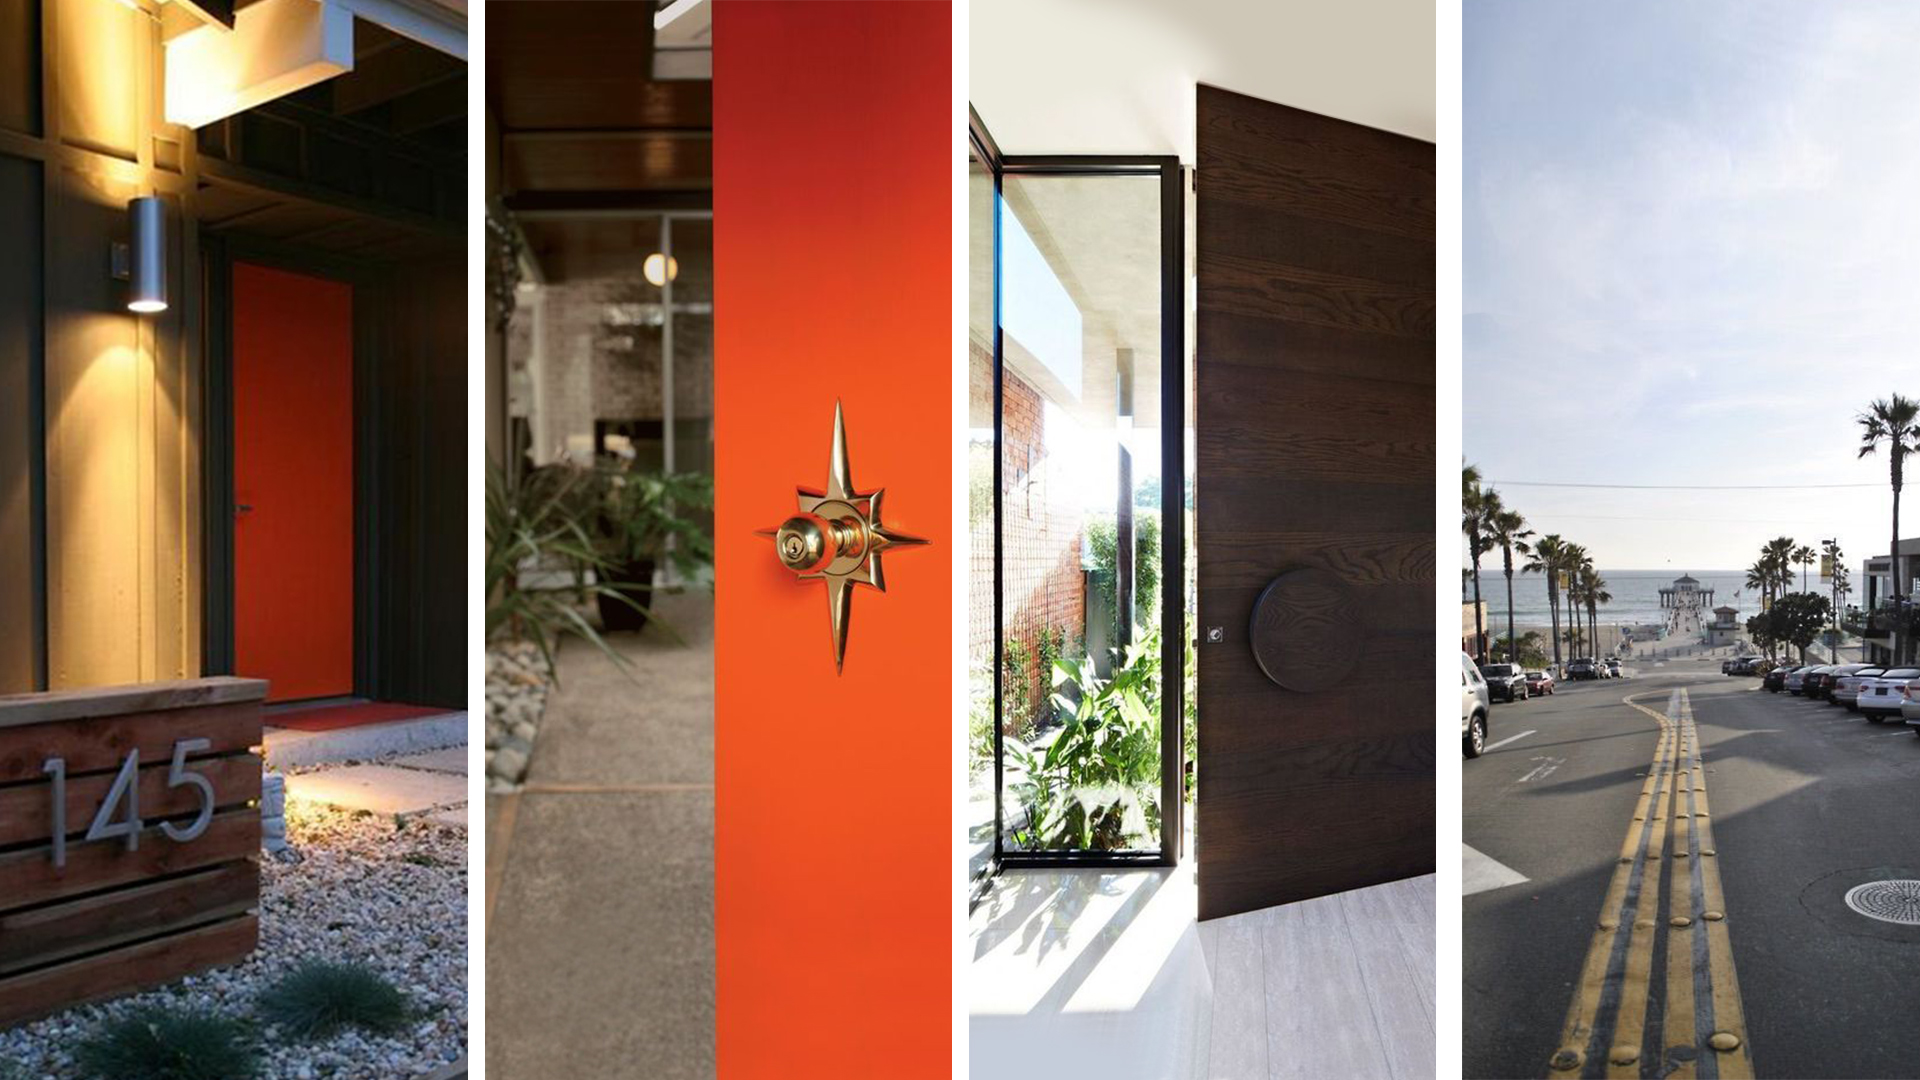
At this stage, the 3D specialist closely examined small details like door handles and house numbering — what it looks like and where the numbers are usually put.
e) Reference Pictures for People Figures
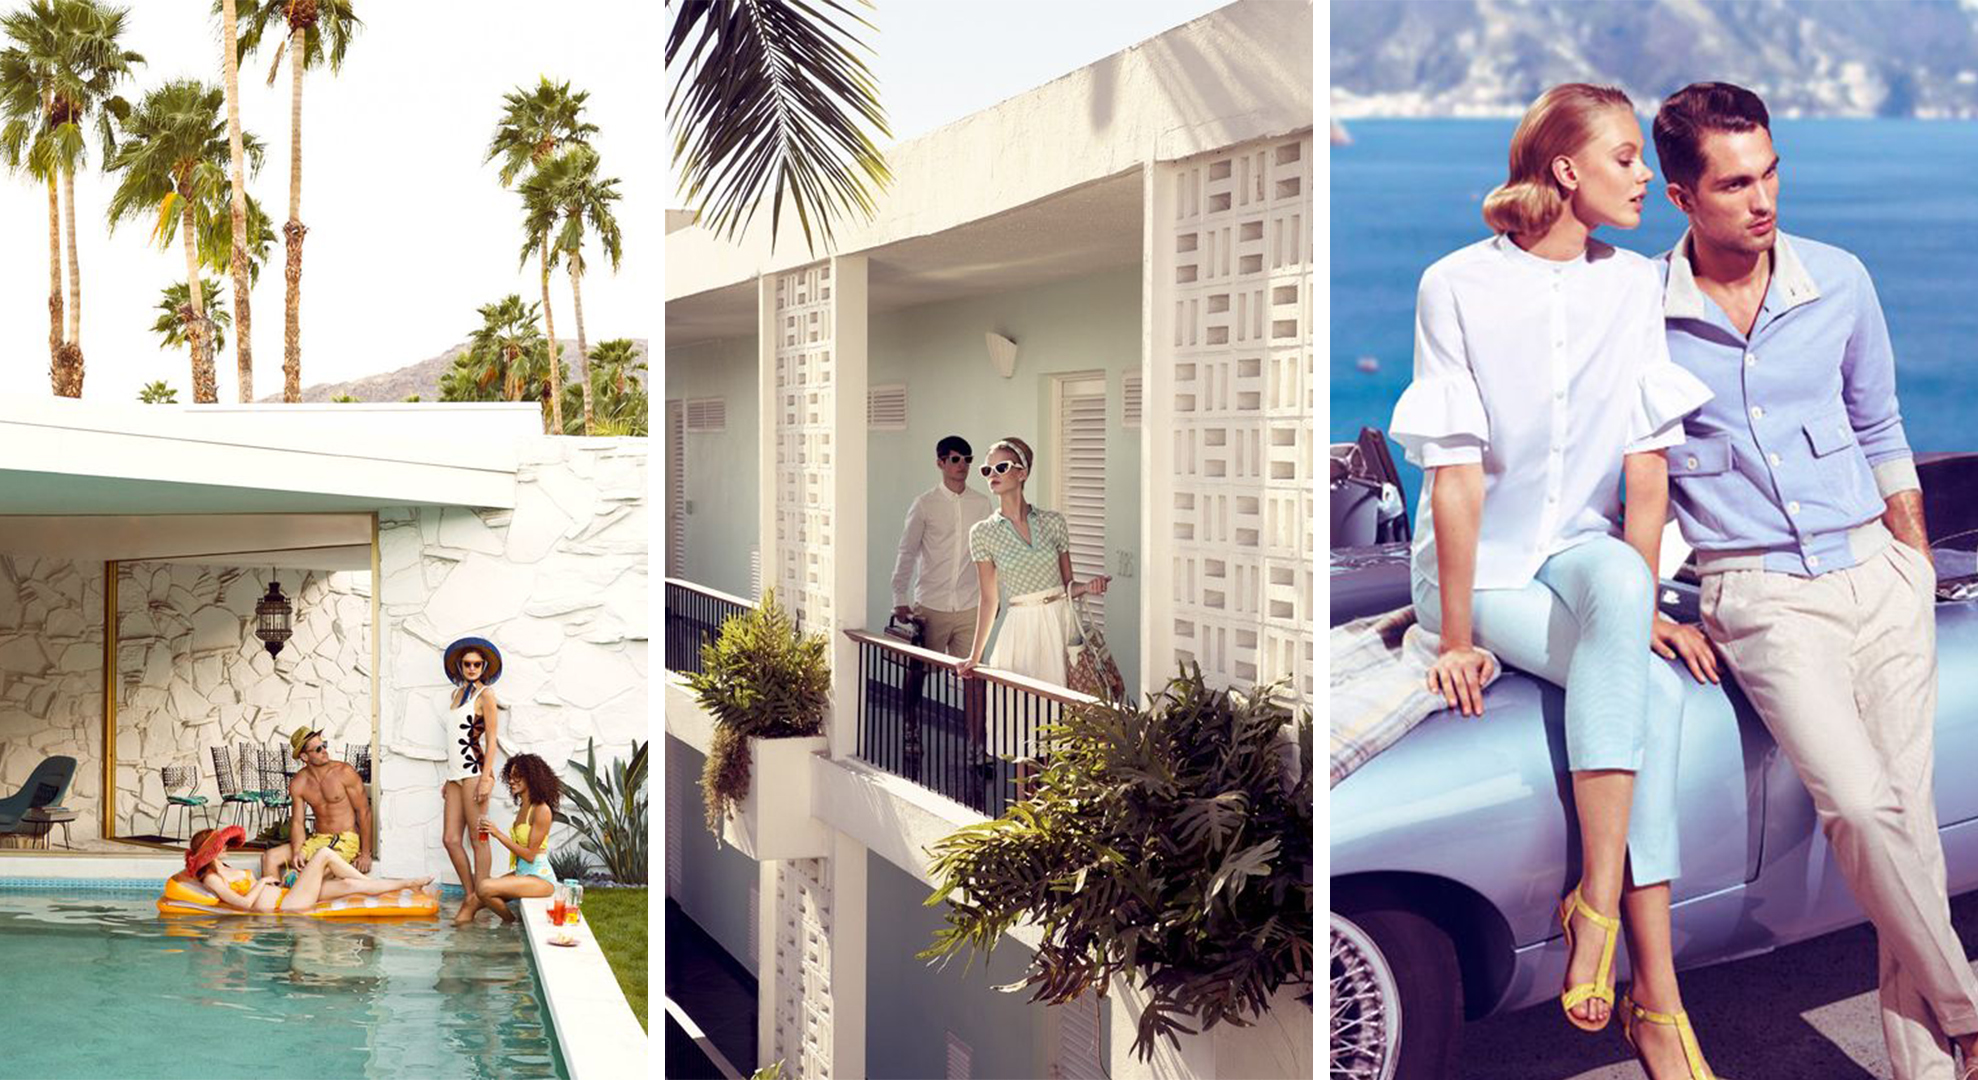
The 3D artist knew he’d want to “populate” the architecture concept renderings. So, he gathered some inspiration. He was mostly interested in finding the right type of people. Would these be friends, or a young couple, or a family with kids? He also looked at the figures’ clothing, hair, emotions.
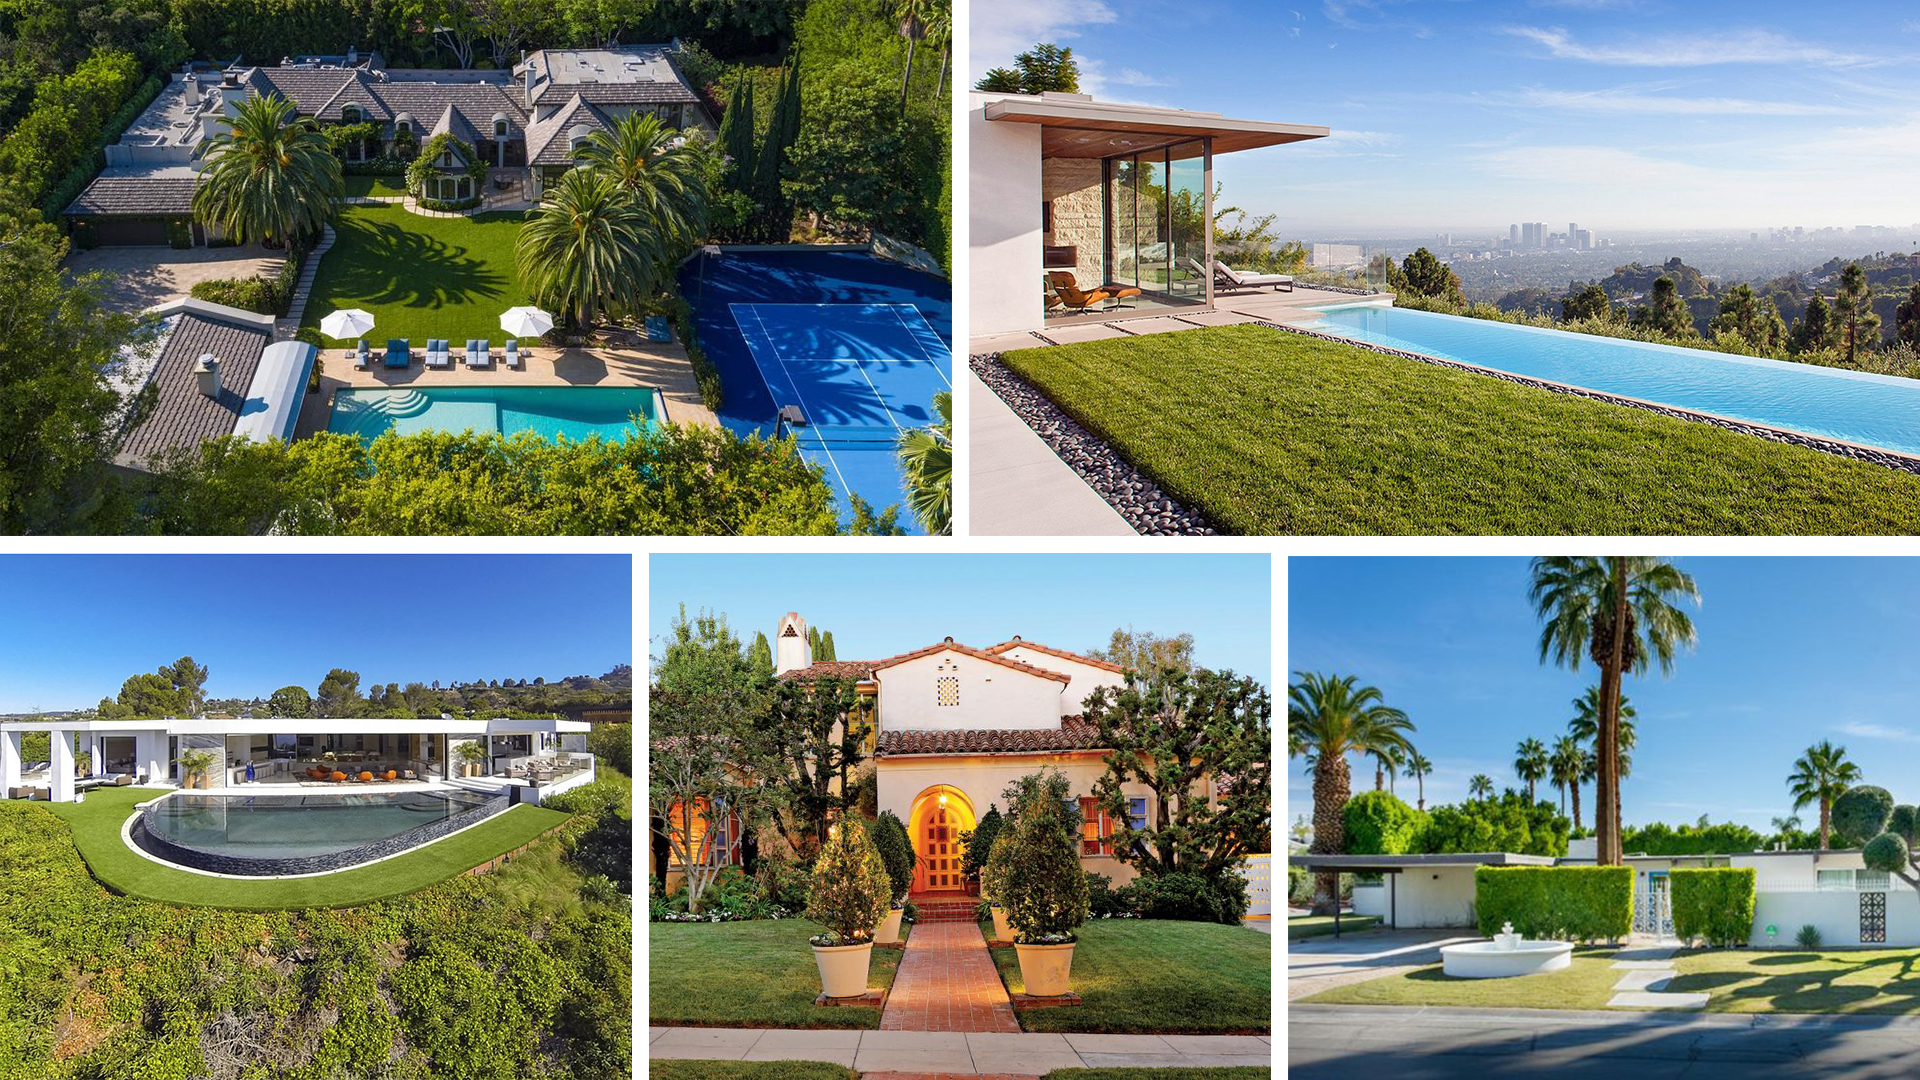
f) Reference Photos for Exterior Design
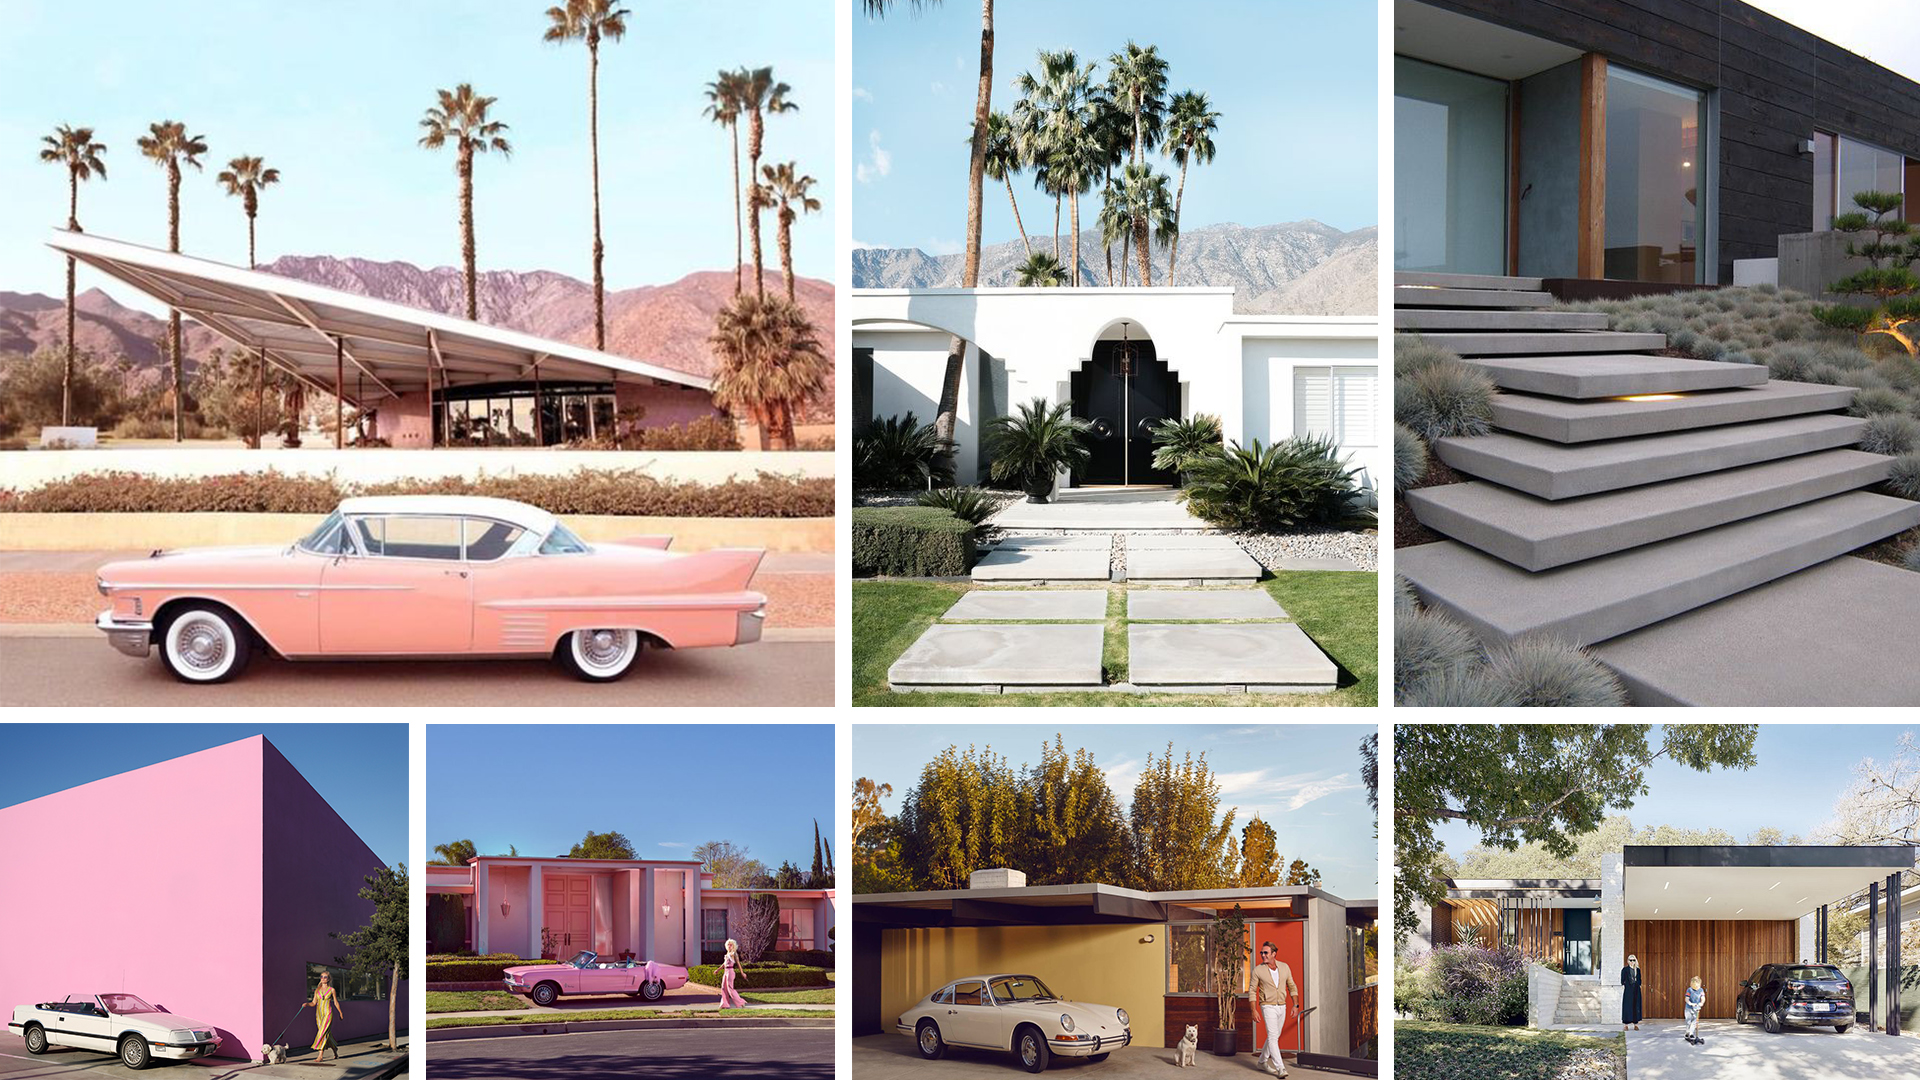
To create a new architectural concept, Andrii needed inspiration. So naturally, he looked through a whole series of images. Here are some of the pics the 3D visualizer liked especially.
g) Reference Photos for Interior Design
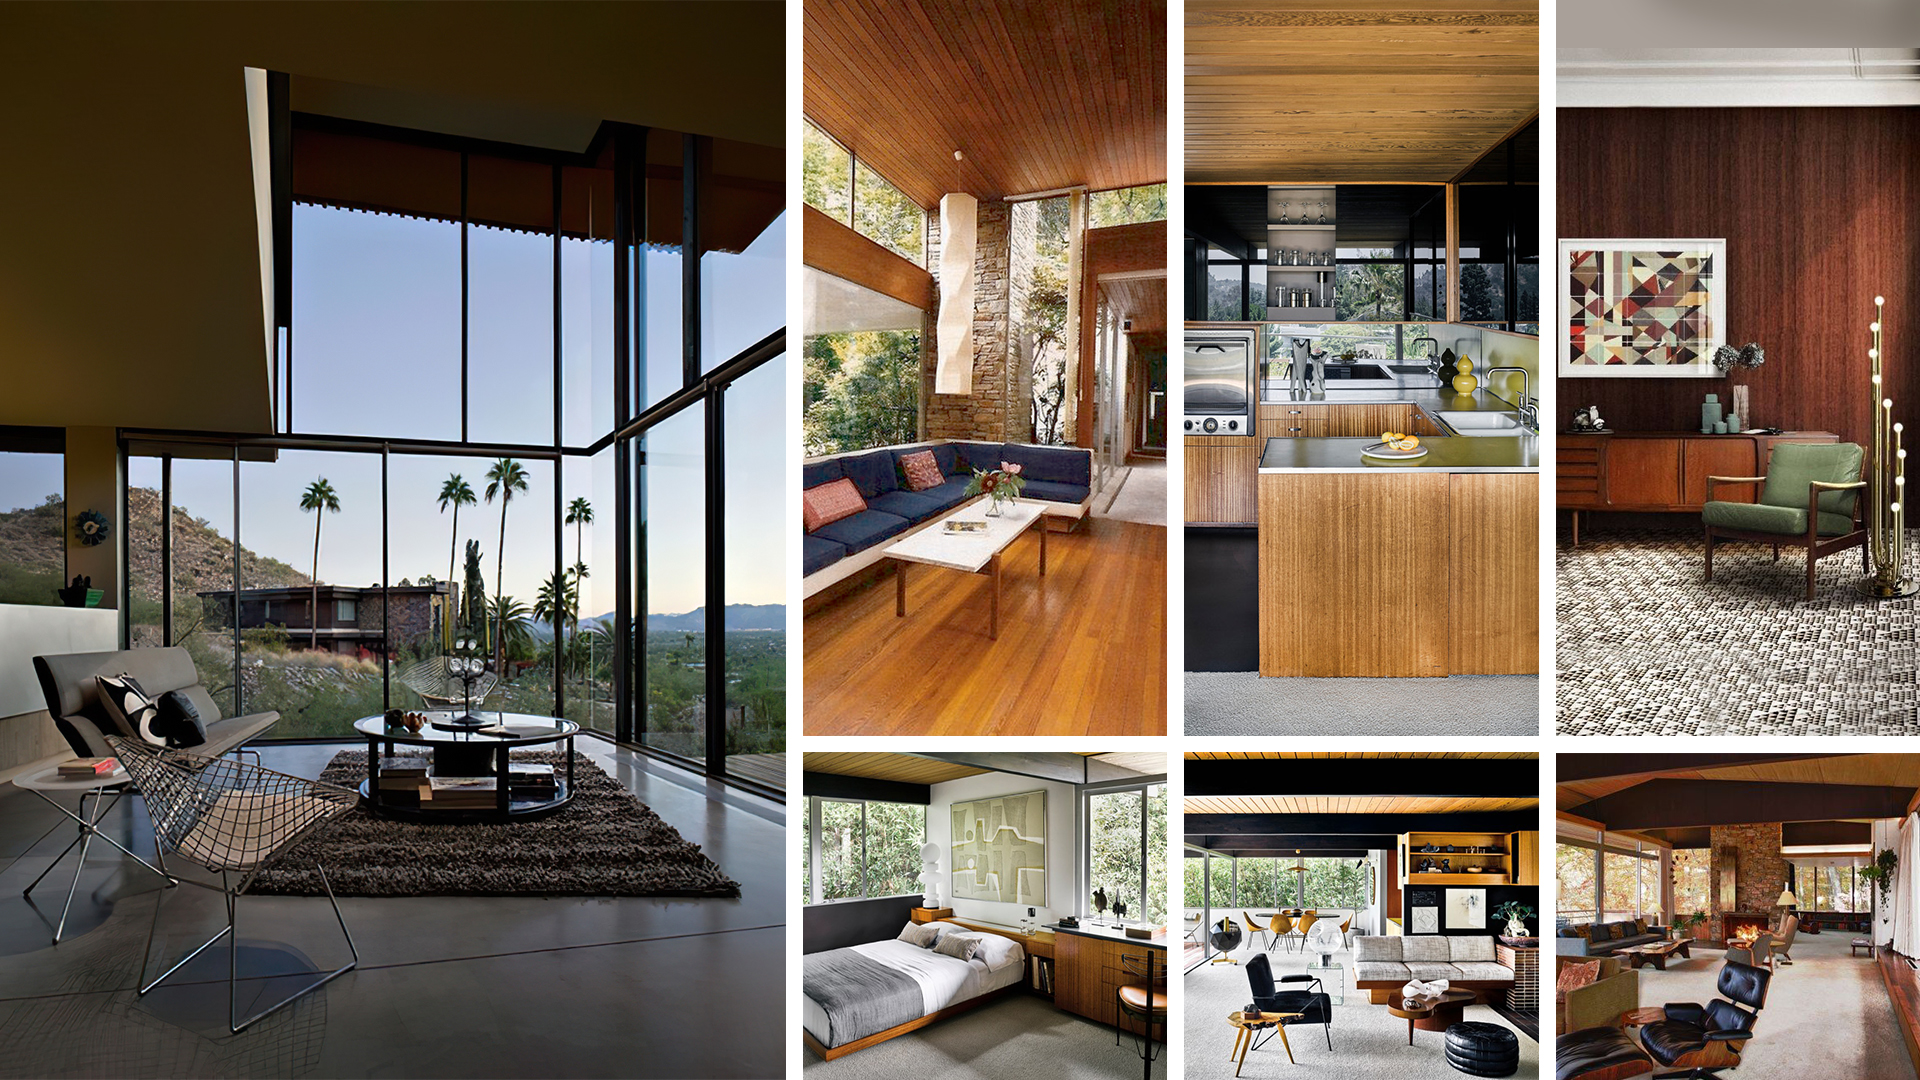
Even though the interior was not to be featured in 3D architecture renders, the 3D artist needed to know the rooms’ placement and overall style. So here are some of the shots he found inspiring.
h) Reference Photos for Cars
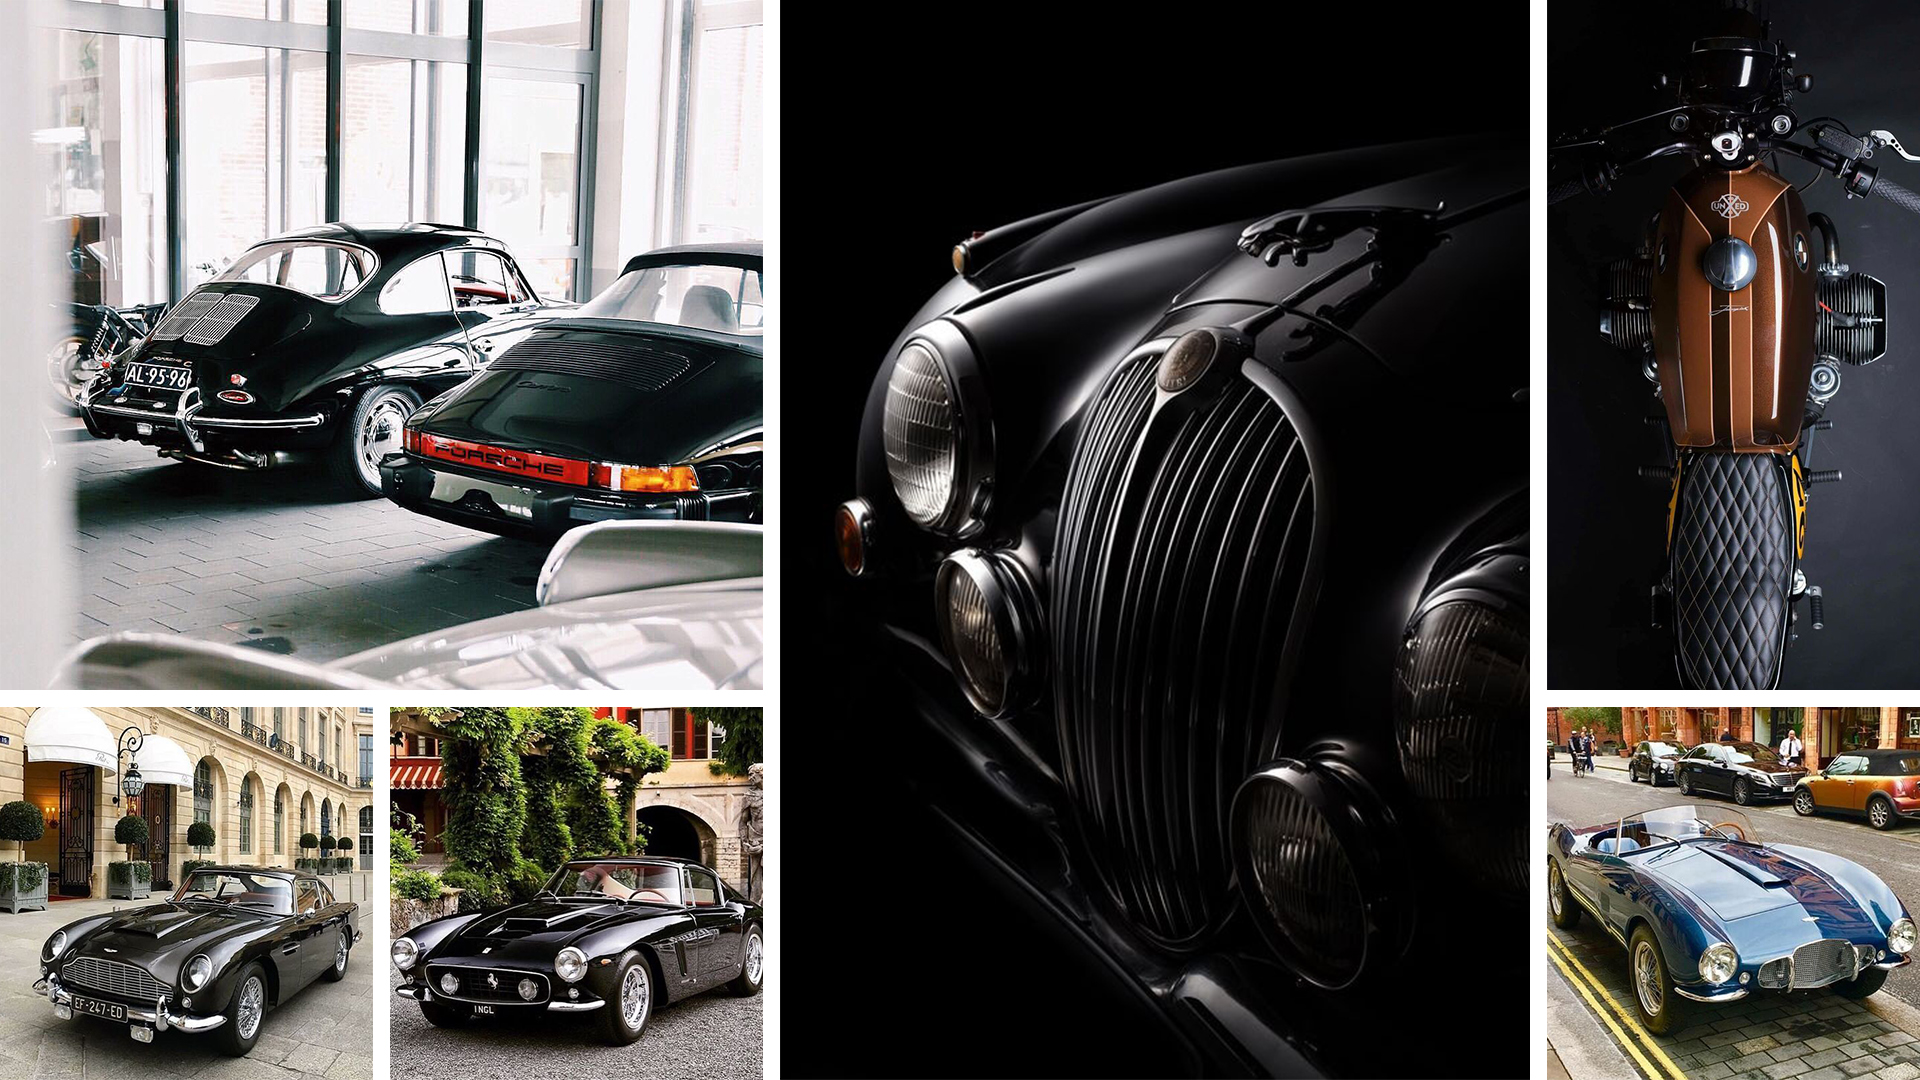
A Mid-century renovated house is an extremely stylish choice. So it makes perfect sense that the house owners and neighbors drove restored luxurious vintage cars. Wouldn’t that be classy? Andrii looked through dozens of 3D models and pics before he settled for the Mercedes-Benz 300sl launched in 1954, and Pontiac Bonneville launched in 1958.
i) Parametric Brick Wall
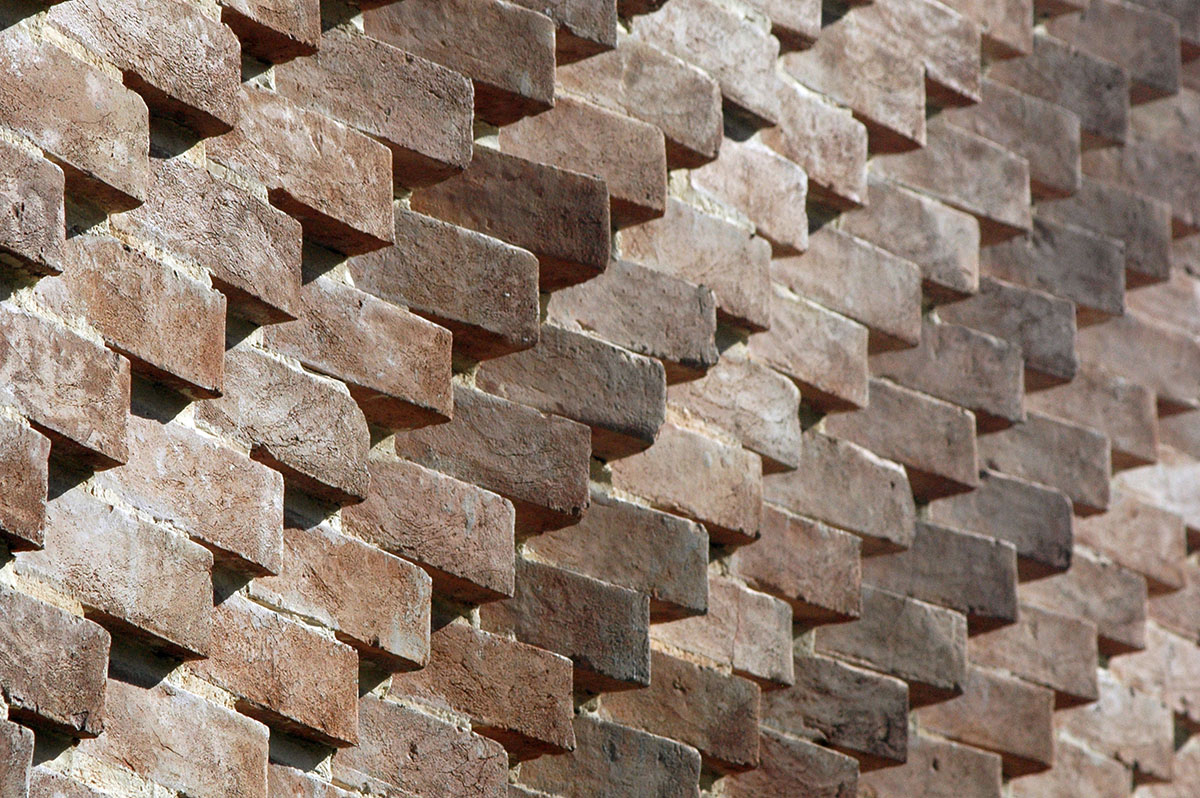
This is another chic feature Andrii wanted to show in his architectural concept renderings. The idea is not common for residential buildings and is downright rare for computer-generated imagery, because of the “wave” this type of brickwork has. It’s rather difficult to reproduce in a 3D render.
#4. Sketching
First, the 3D artist drew a rough sketch to define the shapes and lines of the architectural concept. Then, he made a more detailed sketch showing the house from different sides.
#5. Grayscale 3D Modeling
At this stage of the architectural rendering process, the 3D artist conveyed his vision in 3DS Max. He built the road, the architecture, etc. The task was to see if the concept would have the impact the specialist wanted. So he applied some materials, planted palm trees, applied an HDRI, and pre-rendered the picture.
In general, the 3D artist liked the look. However, he decided to make some changes to the architecture, and choose different views from what he thought initially. So he adjusted the scene accordingly and got the grayscale 3D model of the final version you saw. In case you’re curious, here’s the first version of the architectural concept renderings.

#6. Developing Geometry and Applying Materials
At this stage, Andrii worked on a multitude of tiny details that are necessary to photorealistic architectural concept renderings. Especially since these were to be rendered in 5K so that every nuance would be visible.
First, the 3D visualizer looked at the references for every object to be featured in the 3D renderings. He then added these nuances and details to the virtual scene. They are way too numerous to even try to mention them all, but here are some examples.
First, when a 3D artist builds any object in 3ds Max, it has razor-blade sharp edges. But it doesn’t look that way in real life. Have you ever seen a table with edges like knives? Or a wall. That’s right — because they don’t exist. So the 3D artist softened all the edges in the scene.
Other examples would be adding profiles to windows, hinges to the doors, lamps and exhaust fans where they should be in accordance with construction standards and norms, and many more. Working on details of a 3D rendering scene involves a lot of hard work.
#7. Working on Landscape Detail
To create photorealistic architectural concept renderings, it’s not enough to use, say, one single plain for the road and just apply a material to it. Far from it. To make everything look real, a lot of work has gone into building every element of the landscape.
Let’s examine the paving slabs. Andrii made each slab separately, so as to avoid an unnatural homogeneous look. Furthermore, the 3D visualizer made some of them “sink” in the ground, as they do in real life over time.
The same goes for road curbs. The 3D visualizer made them look old and used. Plus, he made them separately and then combined the pieces by hand. Owing to that, the curb doesn’t look geometrically perfect and smooth but super realistic.
The road seems to be an easy task. There can be no tricks, right? Actually, there are a few details. Like the fact that the road can’t have an impeccably even surface. It should be built in the form of a parabola so that the water flows into the drainage channels. So the 3D specialist adjusted its geometry and placed the drainage channels there too. The latter can’t be seen because of the view, but the 3D visualizer made them just in case this area appears in any of the exterior 3D images.
Here are some other examples of work on the landscape:
- Slightly raising the ground around the palm trees, where the roots are.
- Elevating the surface of the land on which the house is placed.
- Placing the tiles that serve as outdoor stairs.
#8. Working on Materials


Some materials were added during the work on geometry. But they served as preliminary ones, for general understanding. However, most of the materials you see in these architectural concept renderings were made during this very stage.
It would be useless to go into the technicalities of the process. What one should do here is to appreciate how artistic it is. To get impeccably realistic materials, a 3D visualizer needs to know what they look like in real life. And seeing them properly and noticing details takes a lot of time and practice.
For instance, stucco walls in the final photorealistic 3D renders aren’t immaculate white. The 3D visualizer “spiced up” their surfaces with flaws like traces of corrosion, water leaks, and patches of dirt.
Or, let’s look at the concrete plates. Each plate is created separately, and there’s darker material between them. That’s exactly how the plates begin to look over time when the dirt accumulates in the spaces between them.
Moreover, Andrii realized that there just aren’t that many brand-new roads, and they don’t stay that way for long. So he added traces of patching to the road in the architectural concept renderings.
The lawn is a sheer perfection too. The 3D visualizer made orange patches there, like for the sun-scorched grass. Another mind-blowing thing about it — a lawn-mower effect, when the grass looks “brushed” in different directions. For when the lawn-mower works, it goes first in one direction, and then turns back and goes in the opposite one. And this effect the 3D specialist recreated in the concept 3D renderings.
Why go at such a great length? Well, if the viewer is not an artist, they won’t see these things. But they will 100% register them subconsciously. And if these elements aren’t there, the image would feel fake.
When all materials were applied, it was time to set the light. The 3D visualizer chose an HDRI environment with a sunny day and cloudless sky. The time in the architectural concept renderings is around 12-14 o’clock.
#9. Post-production


Now it was time for finishing touches that would enhance the impact of 3D visualizations and their story. Here are the most important things done at this step:
- Adjusting the color scheme to reinforce the retro effect and make the concept renderings look like oldish photos. This new palette is based on 2 complementary colors — turquoise and red-orange.
- Tweaking the images’ contrast and sharpness.
- “Populating” the renderings. Which always requires skill and artistic touch. First, Andrii blurred the hands of the girl in the car to show the movement. Next, he needed to add the driver. The trick is, the figure should be seen through the windshield. To achieve the right look, the 3D visualizer applied the “Reflect” layer over the glass.
- Adding a palm tree using Photoshop. The trees in the architectural concept renderings are 3D models but for one. In the pic showing the curved wall from bottom to top the tree on the left is seen from very close up. And no 3D model can be as flawless as to look photoreal when shown in such detail. Especially in 5K. So Andrii found a photo of the palm tree, perfected it, and inserted it in the 3D rendering.
Now, you know how high-end architectural concept 3D renderings are created and what the process requires. True photorealism is about having the knowledge, vision, and choosing the right tools and techniques to achieve the goal. Moreover, top-notch results are impossible without well-organized communication between the 3D artist and the client. With all these elements combined, one can get jaw-dropping visuals that will take the audience’s breath away.
Need high-end architectural renderings or animation for your concept or design? Then contact us and get top-notch 3D visualization services. We’ll provide you with art pieces you’ll be proud to use in your presentation and marketing campaigns.
Want to learn how much your project costs? See how we evaluate 3D rendering projects

Irma Prus
Content Writer, Copywriter
Irma writes articles and marketing copy for ArchiCGI. Her dream is that more people discover the power of CGI for architecture. Irma is into neuromarketing, ruby chocolate and Doctor Who series.