3D Rendering for Construction Materials: a Recap of CGI Projects Done for Steni Company
Using 3D rendering for construction materials is the smartest way to market these products. Let’s see why! When new building materials are launched, the brand naturally has no visual examples of their real-life usage yet. Due to long planning and building circles, it can often take 2-3 years from developing a new material until seeing it on an actual building. Does it mean the brands have to use plain photos of panels, stones, or bricks for product promo? Absolutely not. With CGI, it is possible to get photorealistic images of new materials incorporated in any architectural design — even before someone actually buys and applies them. That’s exactly why Jan Terje Nielsen, the brand officer of Steni, contacted our architectural rendering company.

Jan Terje Nielsen
At that time, Steni, a manufacturer of sustainable stone composite facade panels with sales companies in Norway, Sweden, Denmark, and Finland, has just launched a new collection. The brand needed some top-class visuals to promote those stylish stone- and glass-covered panels in the markets of Europe, the United States, and Canada. And they decided to try 3D rendering services. They chose ArchiCGI for the job because they liked the quality of our renders, as well as competitive pricing, fast delivery, and a handy CRM system.
As for now, we’ve done different types of CG visuals for Steni’s products. In total, our team has completed more than 30 CG visualization tasks for the company. Now, they use CGI not just for marketing, but also for internal training and motivating their sales teams.
Below you can see the preview of the renderings we created for this project.
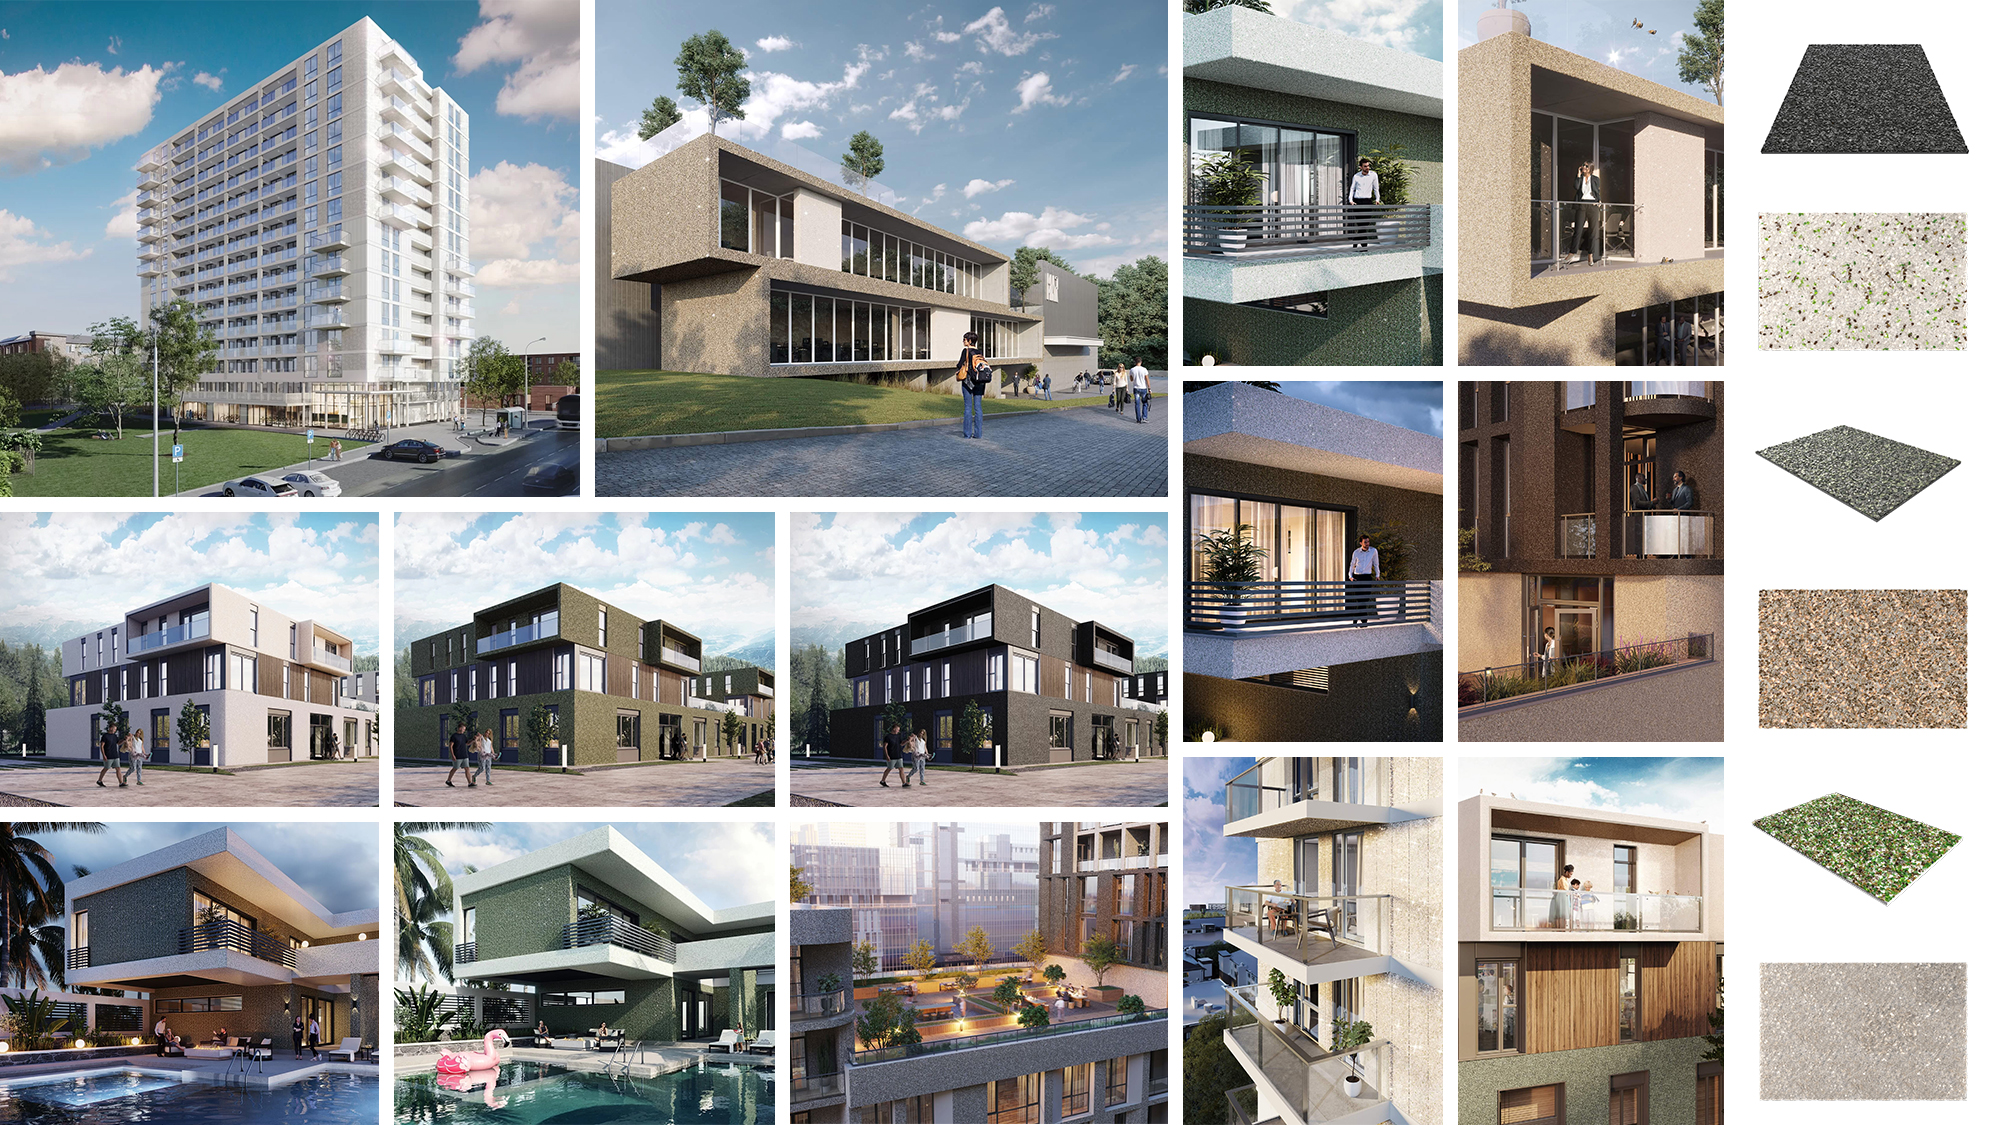
Read on to learn how the project unfolded and see results in full resolution.
#1. The Scope of Work
The Steni brand needed 3D rendering to showcase how the panels would work in the context of different architectural designs. We were asked to show the construction products as organic parts of luxury villas, offices, schools, and apartment buildings. So, the client needed residential, public, and office rendering services.
Get your project estimated in just 1 hour - fill out this brief!
All of the visualizations must be in 4K resolution. Some of the designs needed to be rendered in both daytime and nighttime views to show how construction materials would look at different times of the day.
At the end of this article, we’ll show you the results of all the above-mentioned tasks. As a bonus, you’ll see silo and close-up renderings as well as the 3D animation we’ve done for Steni.
And now, we’ll introduce you to our typical workflow of creating 3D rendering for construction materials on the example of an apartment building CG design.
#2. The Workflow
The working process of making CGI for construction materials consists of several stages. These include creating textures, building a 3D scene and applying those textures to it, making corrections, rendering the images, and finalizing them with post-production. Let’s see how it all happens.
#2.1 Making textures for photoreal 3D visualization
To produce CG rendering of panels, we needed to recreate their surfaces in 3D first. In order to help us with that, the Steni representatives provided us with plenty of visual references. Namely, we received:
- close-up photos of the products;
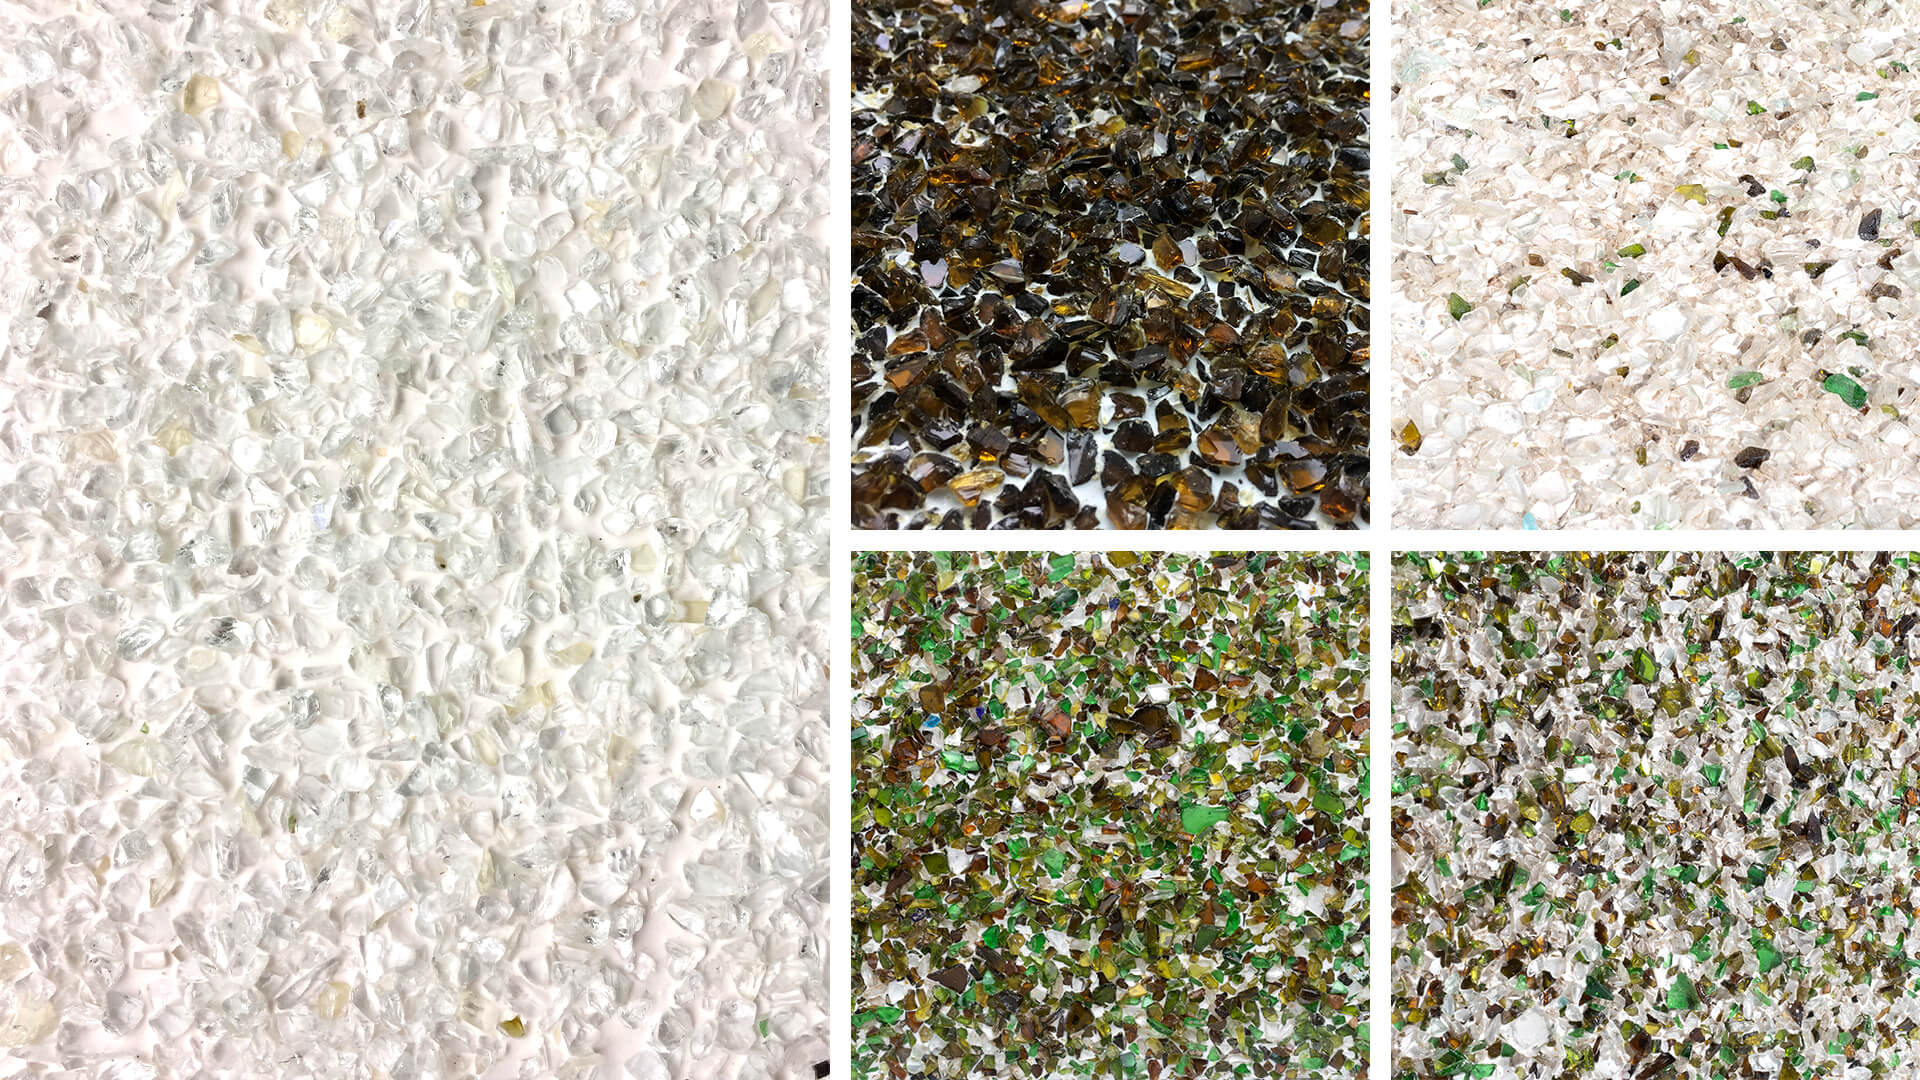
With such an abundance of references, our 3D specialist had no trouble recreating all the surfaces in 3Ds Max with 100% accuracy. You can see the results below.
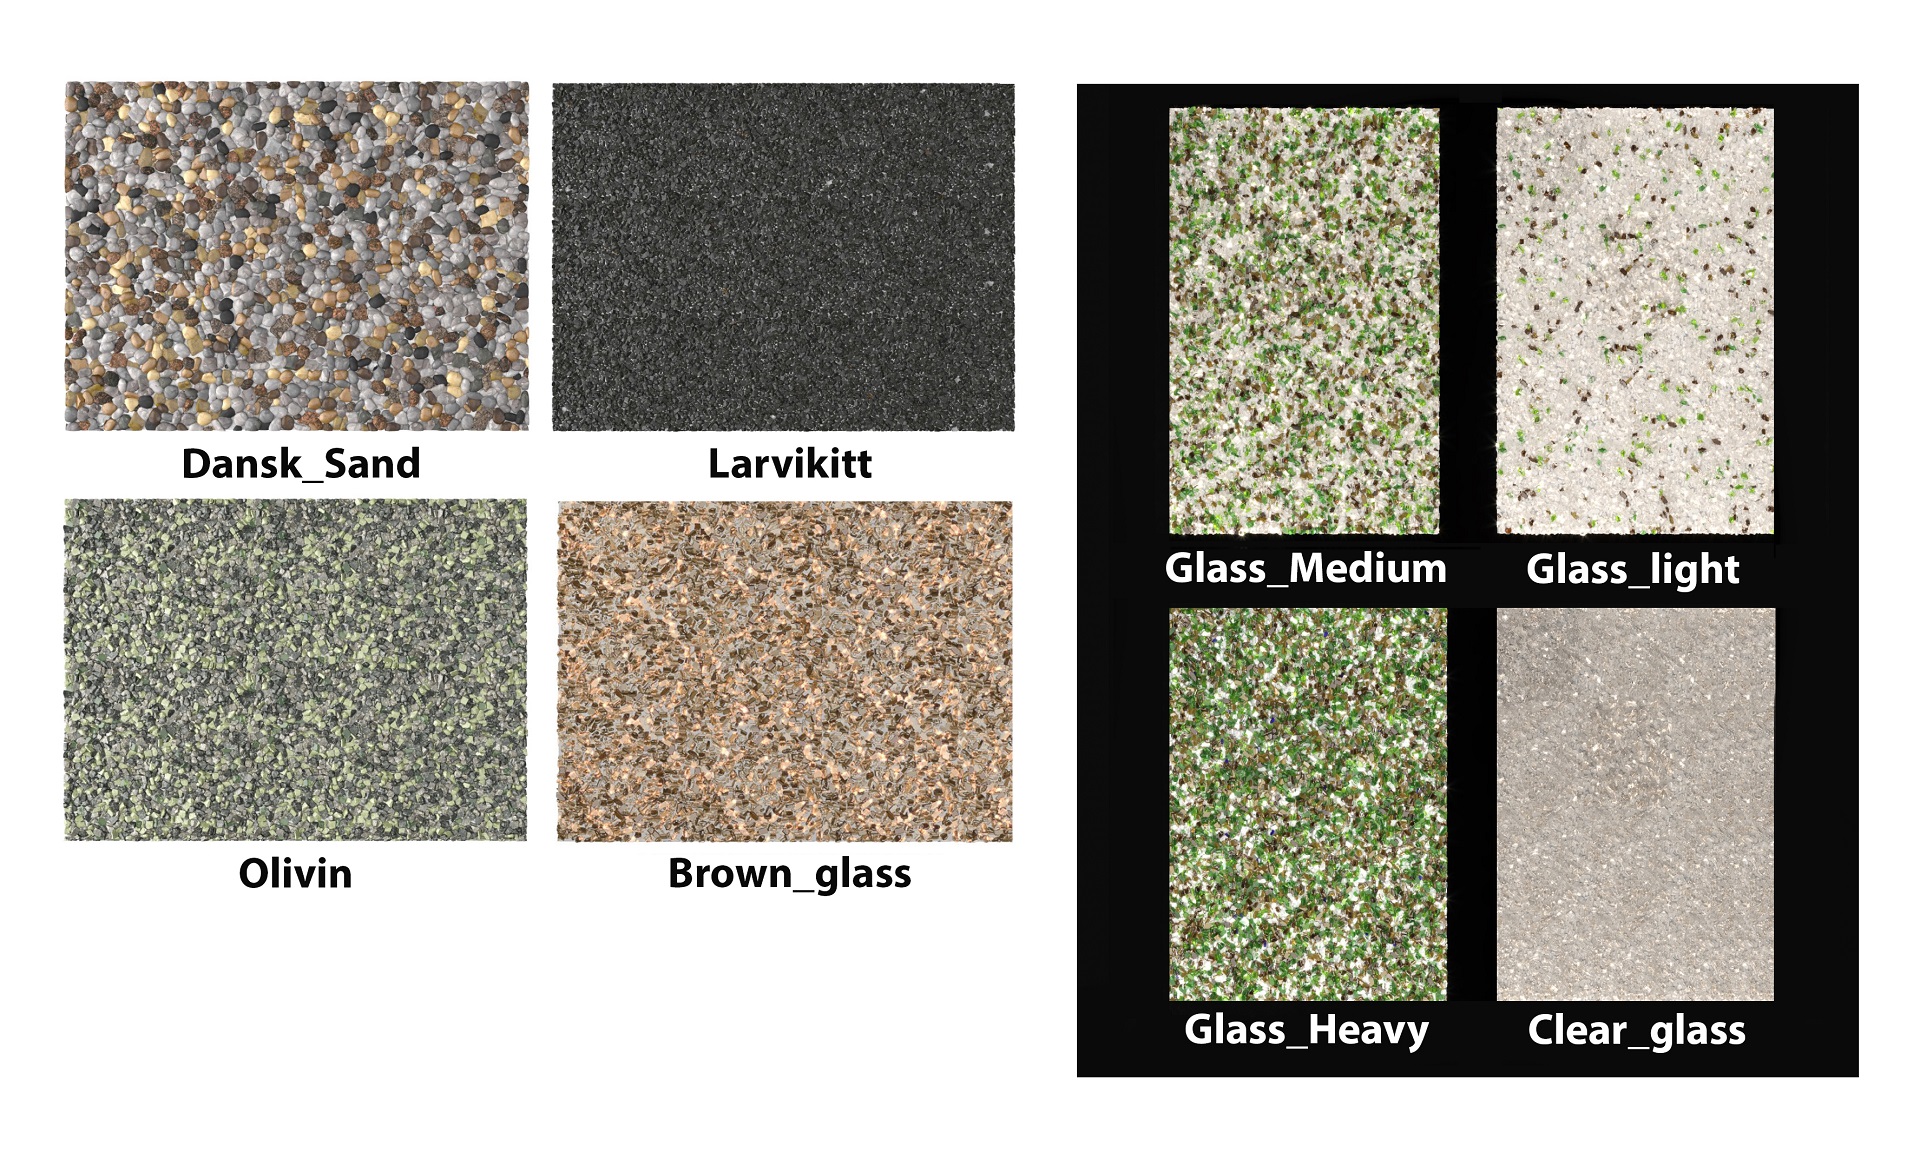
These textures of construction materials were ready to be used for photorealistic architectural rendering.
#2.2 Specifying the 3D scene details
Jan Terje sent us visual references for every type of construction to be depicted in renders. Below are the images he provided as inspiration for an apartment building design.
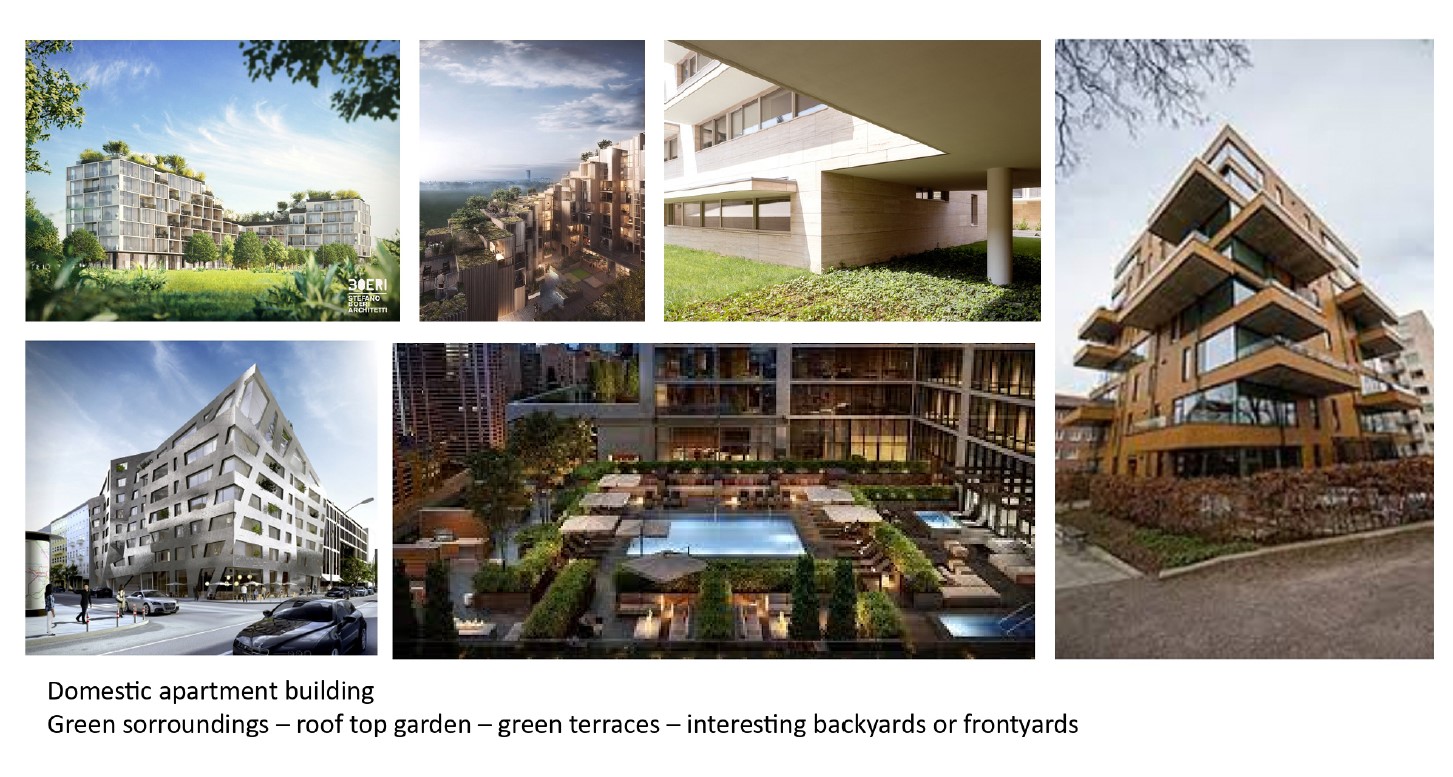
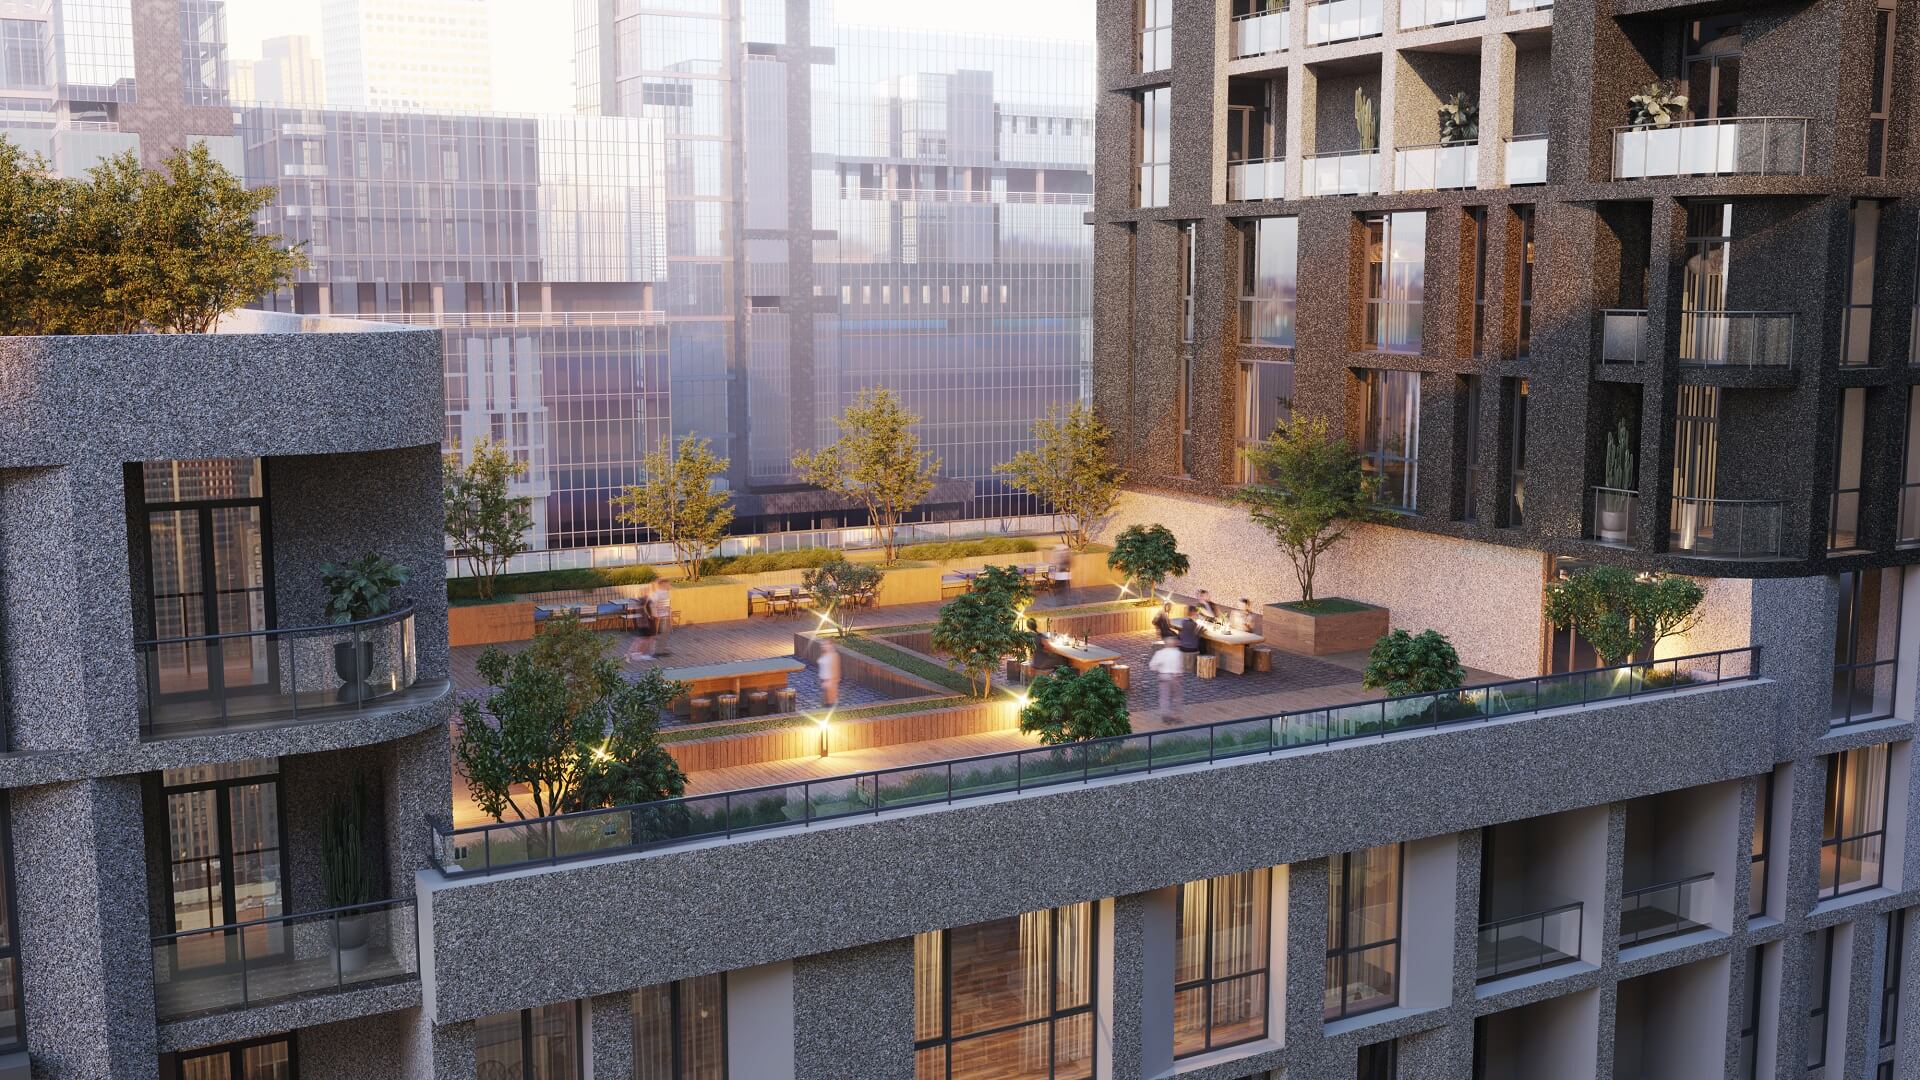
As you can see, it had to be a modern multi-apartment residential building with a rooftop garden. The facades didn’t have to be heavily glazed because the Steni construction materials must be seen clearly on most parts of the structure. As for the lighting, Jan Terje opted for a sunset setting. He also asked to choose a camera angle that would provide a good view of the rooftop terrace.
After receiving the instructions, our architectural visualizer immediately got to work. She built a scene in 3Ds max, rendered the required view in grayscale, and showed it to the client.
#2.3 Correcting the intermediate results
The 3D visualizer sent Jan Terje this grayscale render to let him check the camera angle, composition, geometry, and proportions.
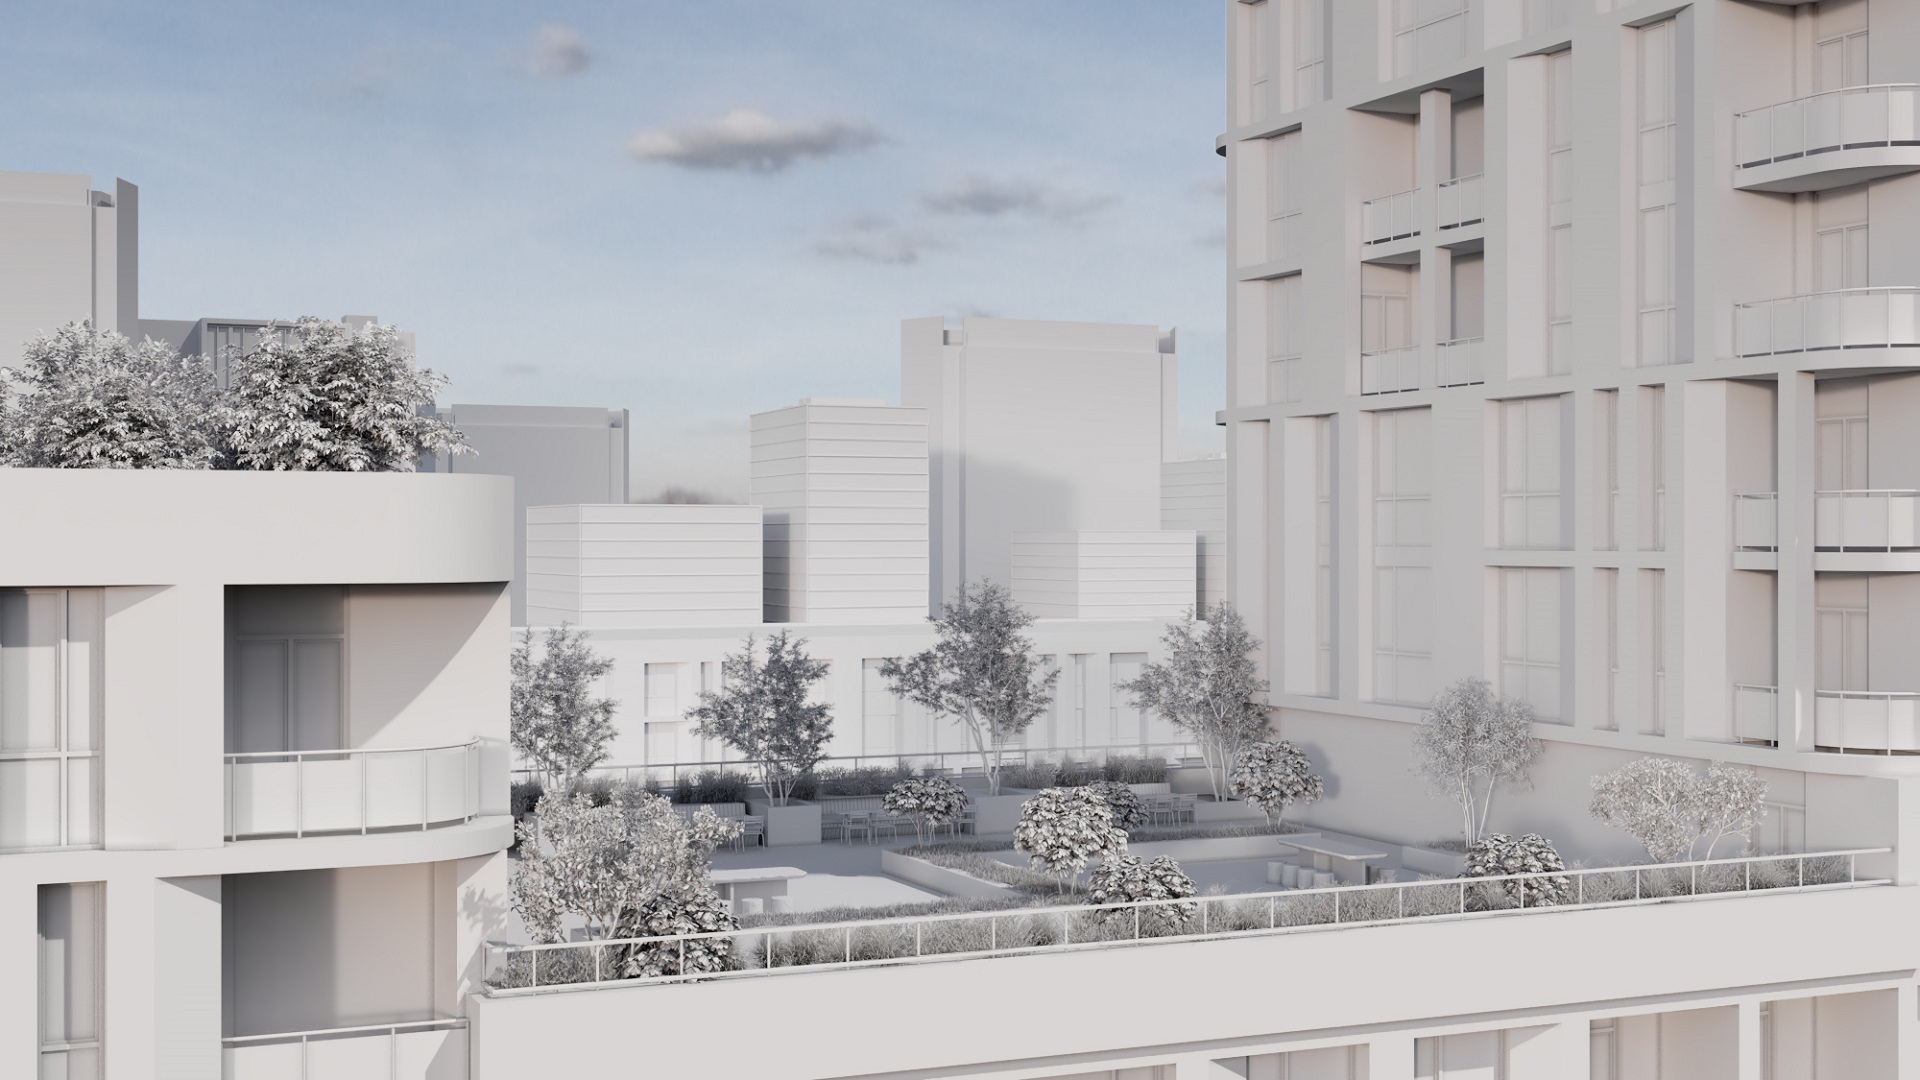
Jan Terje was happy with the image and approved it without any corrections. At this point, he specified the two types of panels to be used in this 3D rendering:
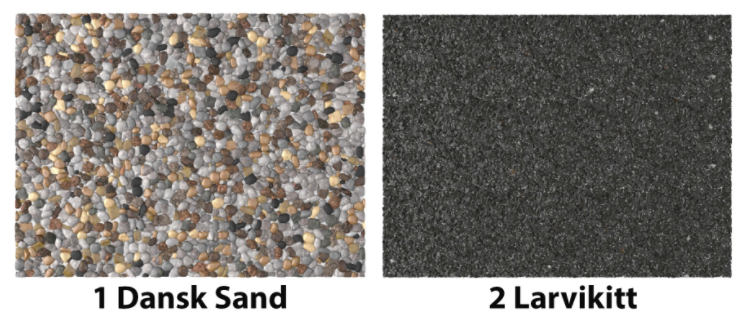
The CG visualizer took the requirements into account and got back to work. First of all, she slightly adjusted the camera angle to ensure a better view of the garden. Then, she added more buildings in the background and made them taller. This way, the 3D artist imparted more realism and aerial perspective to the rendering.
The next steps were applying textures to both front and background buildings and adding greenery and lights in the windows and on the terrace. After doing that, the artist rendered the image and showed it to Jan Terje.
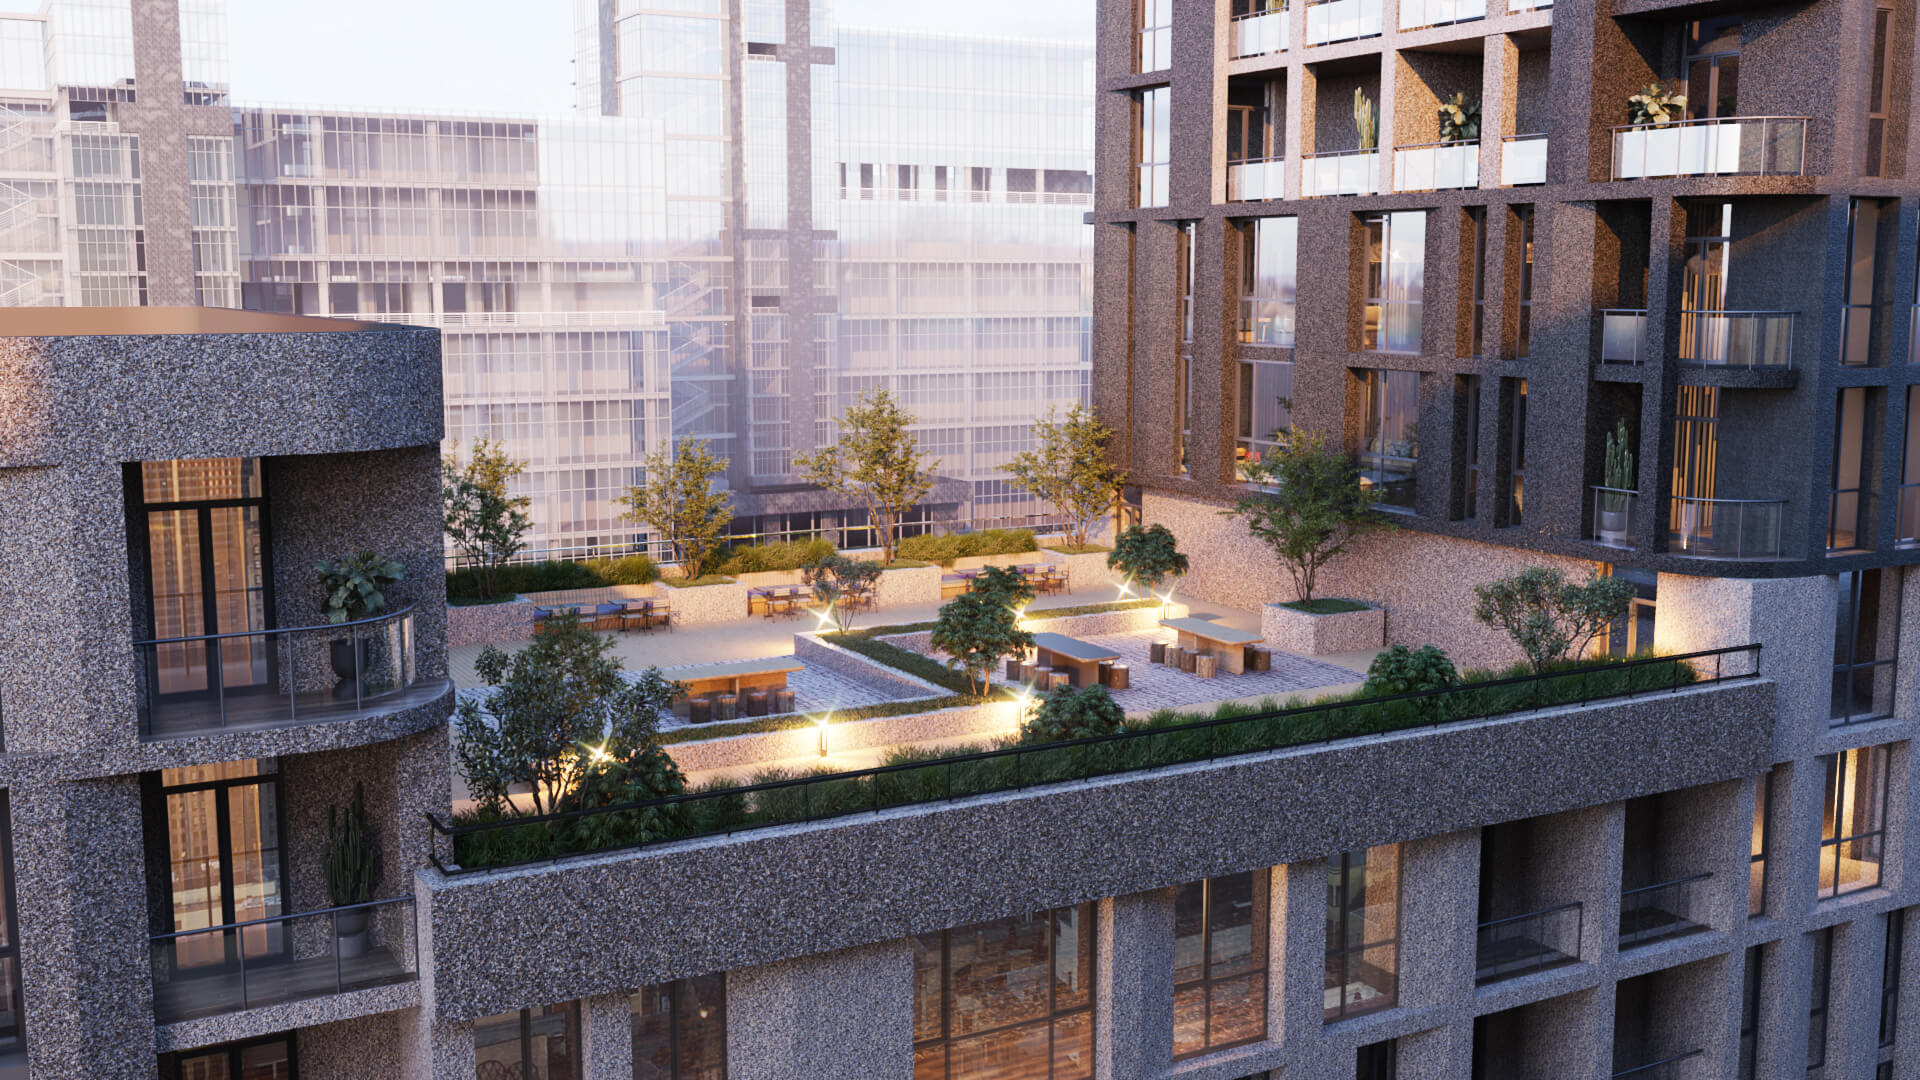
The client said the rendering looked great and there was only one thing to change. Namely, the stone aggregate seemed to consist of lighter bits than in reality. So, we were asked to make it look more like real-life samples. Our CG visualizer did it, and the work on this 3D rendering for construction materials was almost complete. There were only a few final touches left to add.
#2.4 Post-production
During the post-production, our artist introduced a couple of small yet meaningful changes to the image using 3Ds Max and Photoshop. Here’s what she did to fine-tune the rendering:
- made the lighting on the terrace brighter and warmer to ensure a cozier feel;
- slightly decreased the amount of greenery in the front to provide a more detailed view of the rooftop space;
- enlivened the scene by adding 3D models of people. She took those from our company’s large stock of CG assets.
After that, the CG visualizer rendered the image in 4K resolution and presented it to Jan Terje.
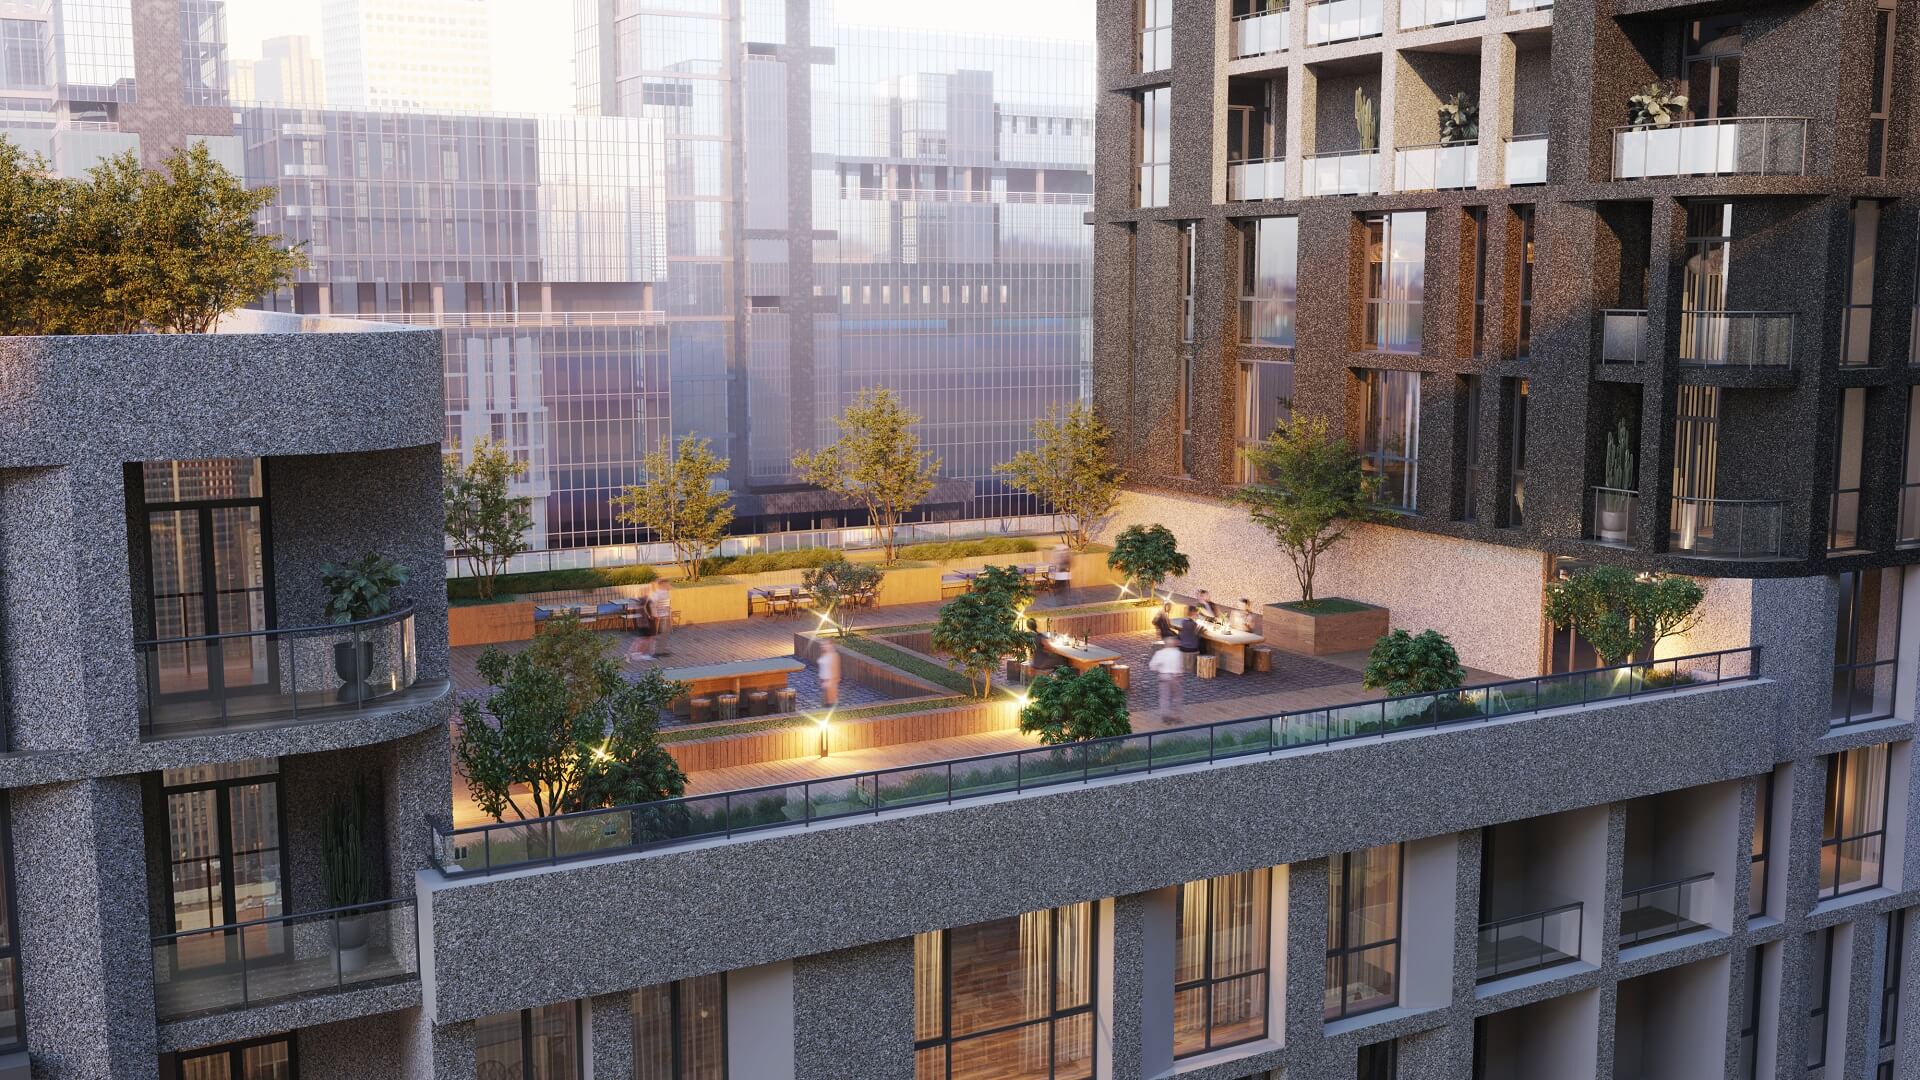
Our client loved this finalized 3D rendering for construction materials and approved it right away. So, the work on this image was over. And now, let’s take a look at the results of other tasks we’ve done for Steni.
#3. The entire range of CG visual materilas done by ArchiCGI for Steni
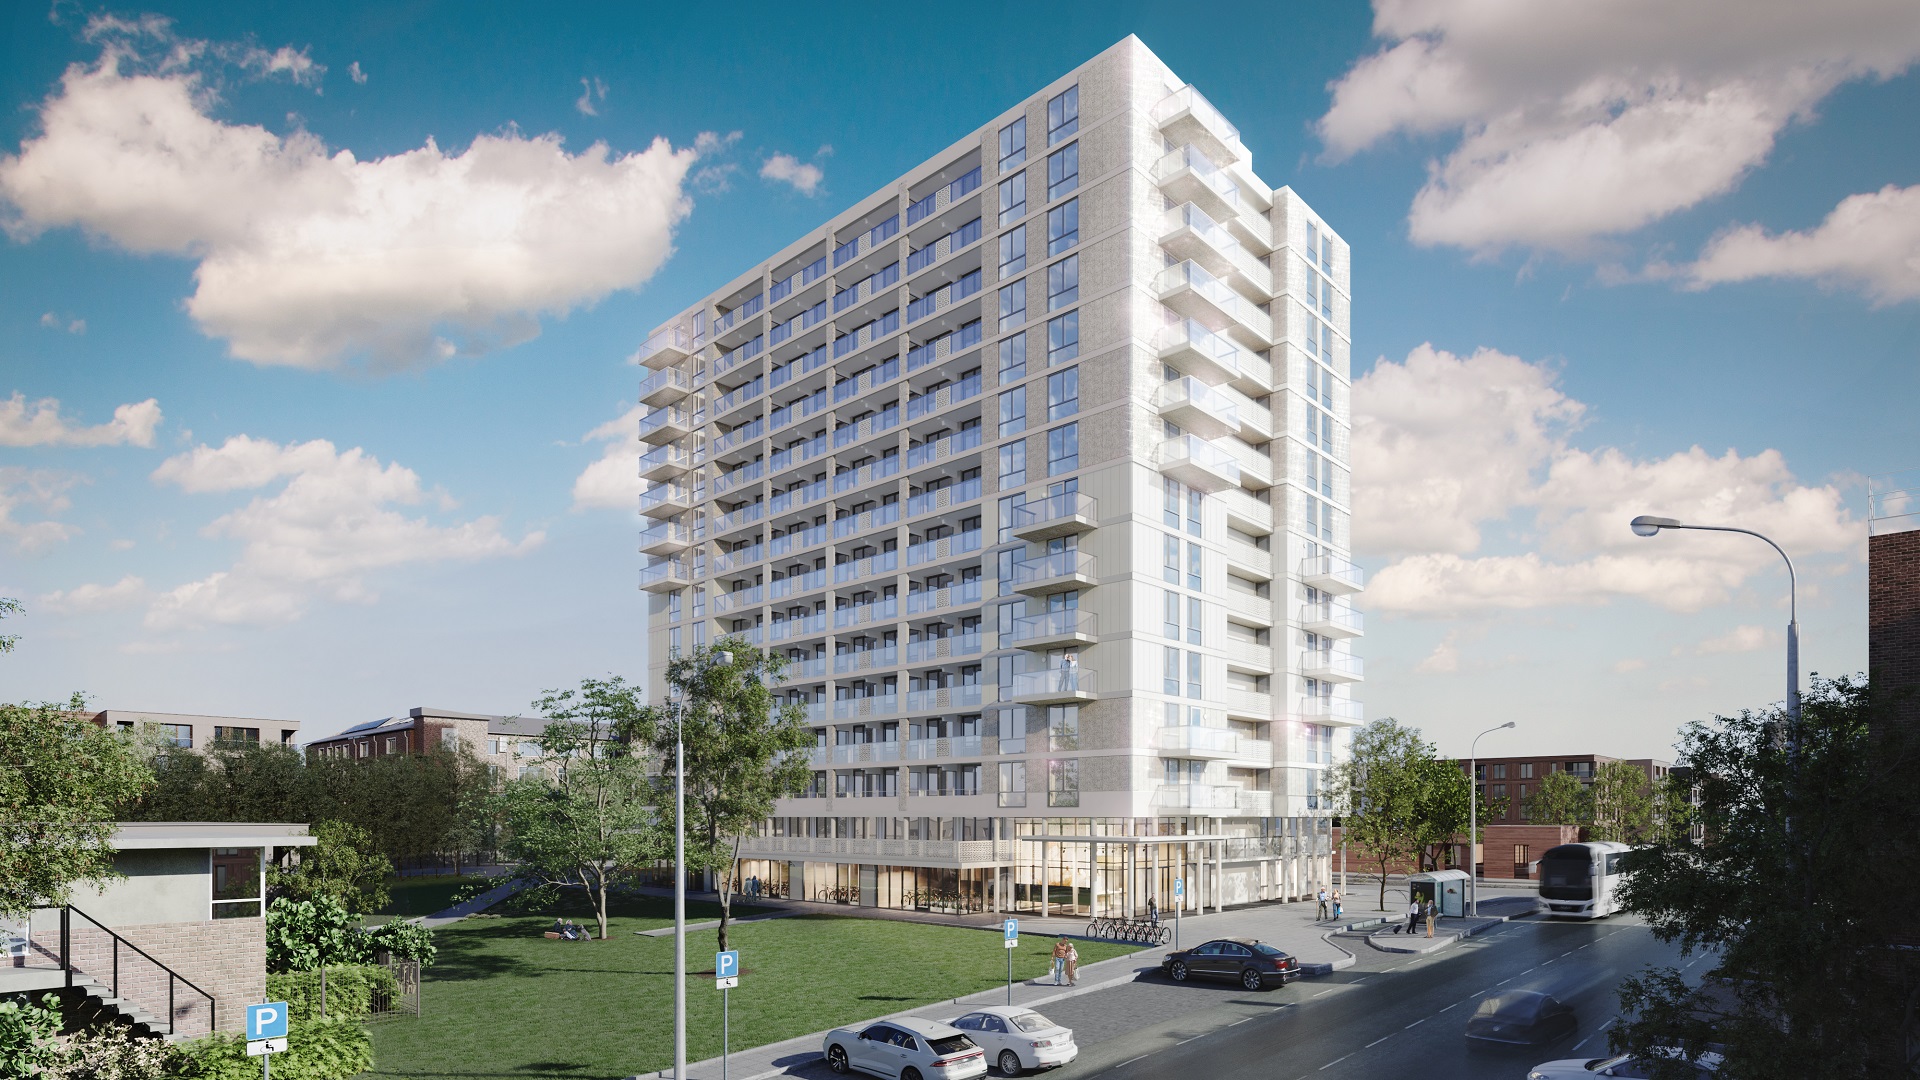
We begin our overview of visuals with lifestyle 3D renderings. These are the images presenting construction materials in different types of architectural designs. Above, you’ve already seen how we showed the panels as parts of an apartment building. And below you will find some more examples showcasing other types of buildings with the Steni panels used in them.
#3.1 Lifestyle 3D visualization for construction materials
Here are 3D renderings showing different types of Steni construction materials in the design of a school.
Here, you can see the materials shown in the design of an office building.
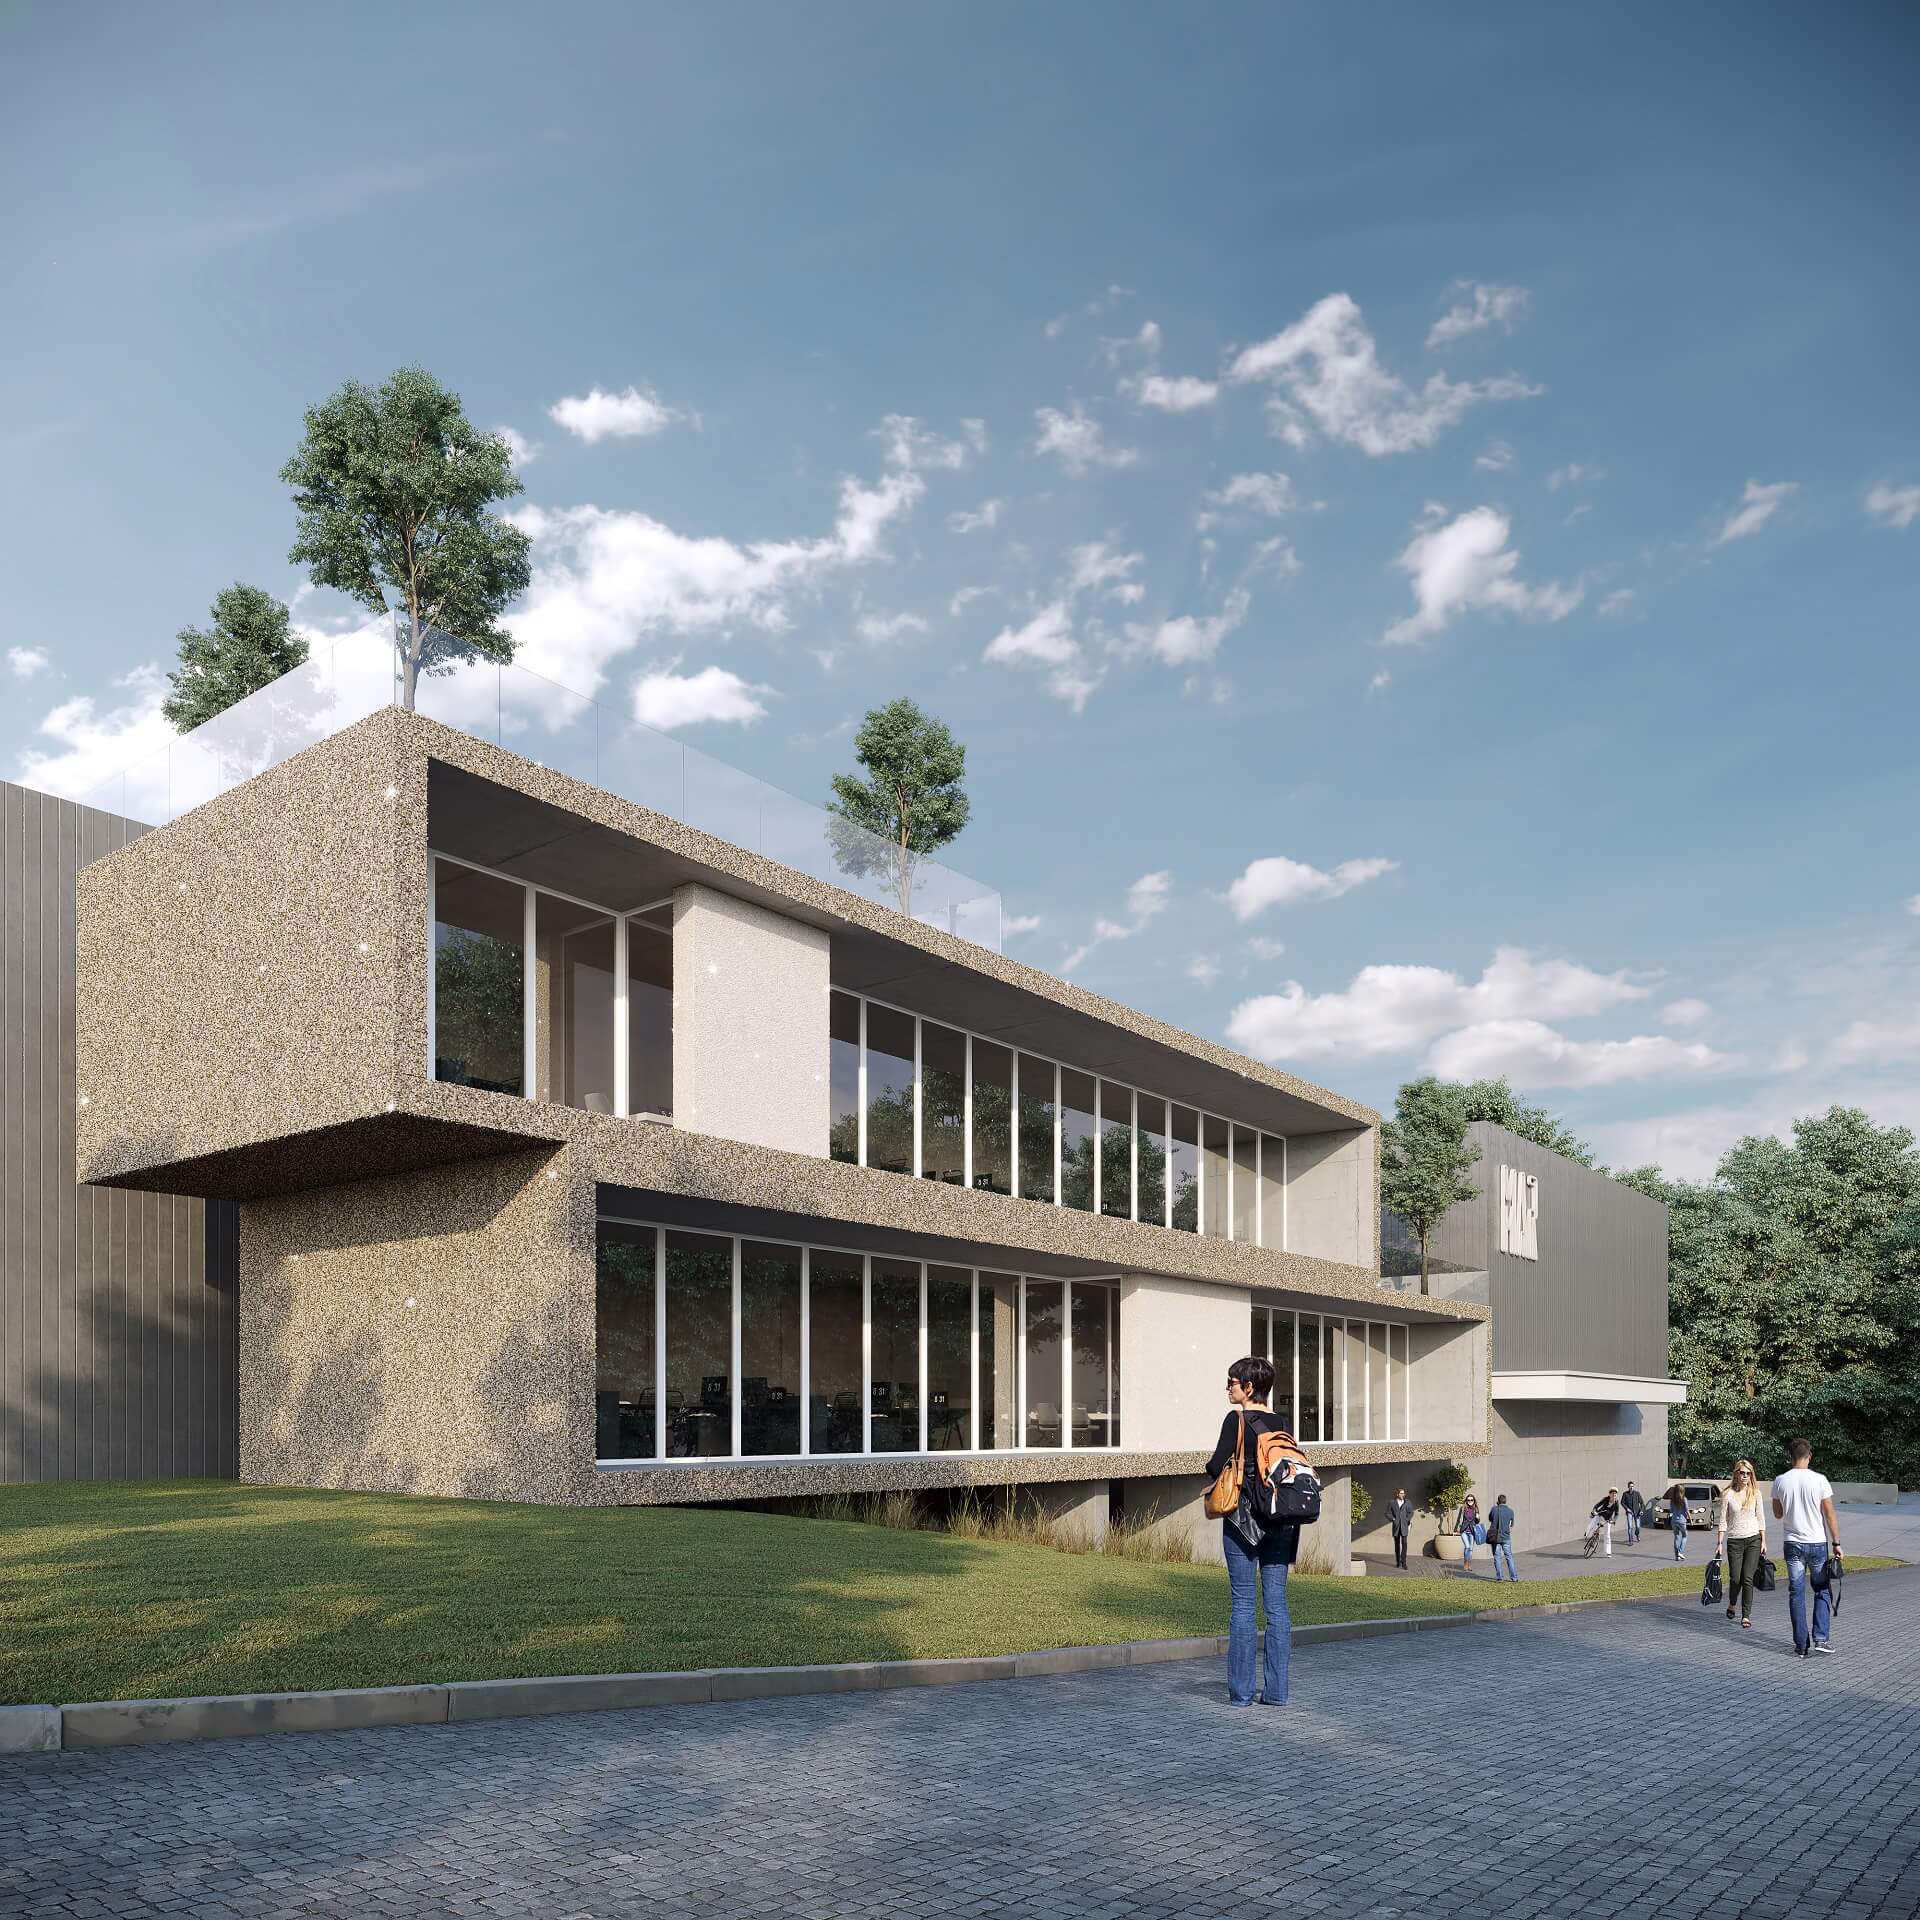
And this CG rendering demonstrates how materials would look in the construction of a multi-story apartment complex.
We’ve made daytime and nighttime views to showcase how materials would look in different lighting.
#3.2 CG modeling and silo rendering of construction materials
Apart from showing building products in various contexts, our client wanted to demonstrate them separately in silo renderings. So, our specialist made 3D models of all the panels and textured them, ensuring the surfaces look 100% similar to the real ones. Then, the artist rendered the models on neutral white and black backgrounds.
Each panel was shown from 3 angles. Here are some of the resulting images.
The 3D models were used not only in silo renderings that you can see above. They also came in handy for making the close-up lifestyle renderings of panels. By “covering” the structures with 3D modeled panels instead of flat textures, our artists imparted an additional volume and realism to the construction materials in images. You will see them in the paragraph below.
#3.3 Lifestyle close-up views of building products
Close-up 3D renders let the viewers examine the surfaces of construction materials in detail. In this case, the images show panels in real-life usage scenarios, ensuring exceptional believability. Take a look.
Last but not least, we’ve made a 3D video for Steni’s construction materials. Let’s check it out.
#3.4 CG animation for construction materials
The digital video we’ve made for Steni explains the installation process of their wall panels called Terra. In the 3D animation, one can also learn about the benefits Terra provides to houses and cottages on stilts.
This 3D architectural animation was used as marketing material on the company’s YouTube channel and website.
The ArchiCGI team thanks Steni company for fruitful cooperation and the opportunity to write this case study. Also, we are very grateful to Jan Terje for appreciating the results of our work. Below, you can see some warm feedback he has left in our CRM system.
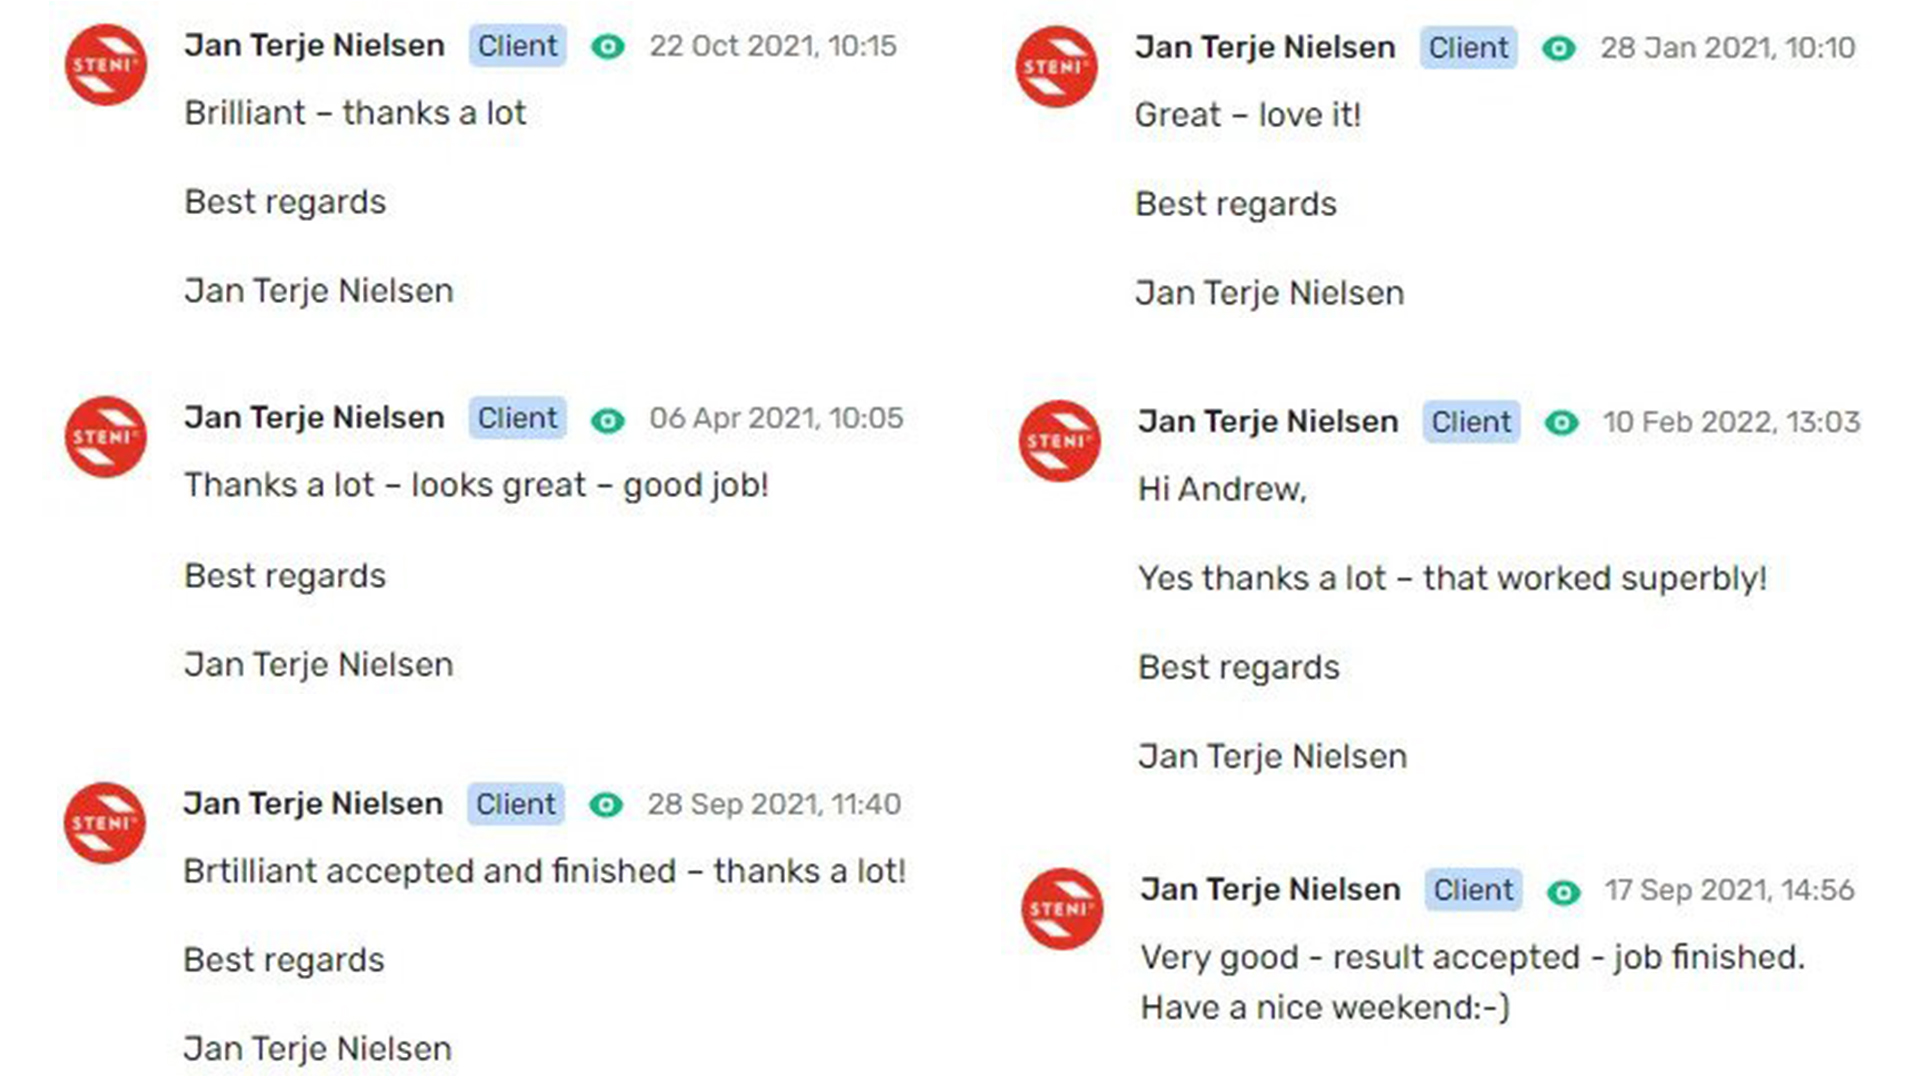
We are looking forward to working on more of Steni’s projects soon!
Hopefully, it was useful for you to learn about the types of 3D renderings a professional archviz studio can offer to manufacturers of building products. And we are sure that knowledge of the inner workings of the 3D visualization workflow will help you in your future CGI projects.
Need top-quality 3D rendering for construction materials or architectural designs? Contact us for CGI services and get results that exceed your expectations!

Catherine Paul
Content Writer, Editor at ArchiCGI
Catherine is a content writer and editor. In her articles, she explains how CGI is transforming the world of architecture and design. Outside of office, she enjoys yoga, travelling, and watching horrors.
Like this project? We’ve got plenty more! Check out these CGI beauties.


