Restaurant Interior Rendering for Lavitta's Creole in New York
Jimmy contacted our studio in November 2021 for exterior and interior design renderings of the restaurant. Since then, the planned location of Lavitta’s has changed twice. Only in November 2022, the chef finally found his dream space in Upper Manhattan. Our team is happy to have helped him along the way, making the restaurant design 3D visualizations for each location. And we were excited to know that our joint efforts paid off! Lavitta’s Creole is now open and welcoming guests.
In this case study, you will see how our cooperation with Jimmy went. You’ll learn everything about the creation of restaurant design 3D rendering, including what references it requires and how the workflow is organized. This project is a clear example of our 3D rendering services in New York City, developed for a client choosing between multiple concepts. In the end, you will see all the renders we created for all three locations and find out which one of the 3D versions will come to life. Read on to see the full workflow.
#1. The Concept and Scope of Work
Jimmy dedicated the restaurant to his beloved mother and even named it after her. So, he wanted it to be a place his mom would fall in love with at first sight. When describing the concept and its atmosphere, our client said that the restaurant would have to feel homey and warm. Also, its design was supposed to look classic and authentic, standing out beautifully in the urban surroundings of New York.
As for the scope of work, our team was to make 2 interior and 2 exterior views. Let’s start with the latter.
#1. The Making of Exterior 3D Renders
Our task was to create 2 eye-level exterior views of the future restaurant:
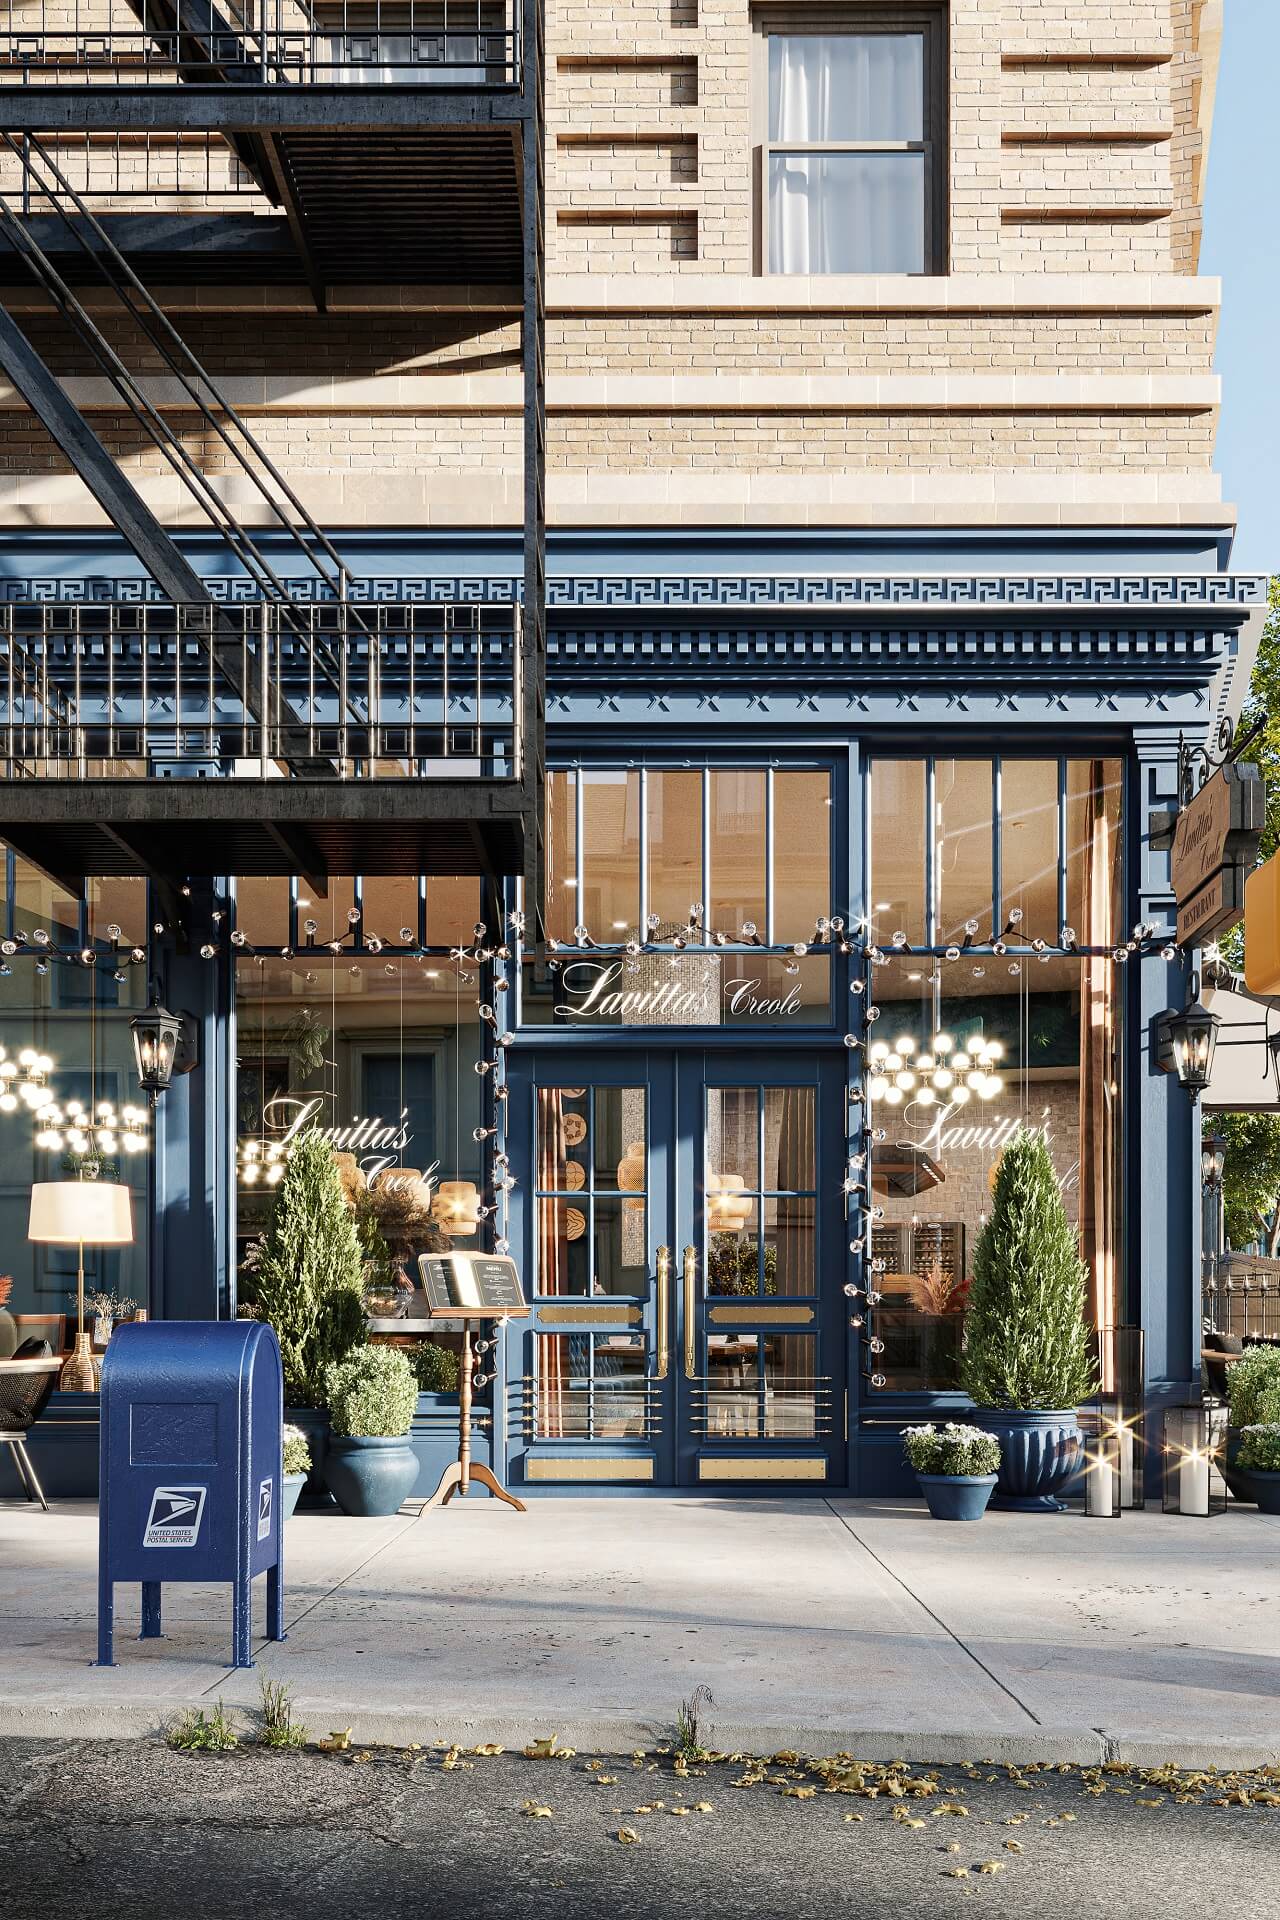
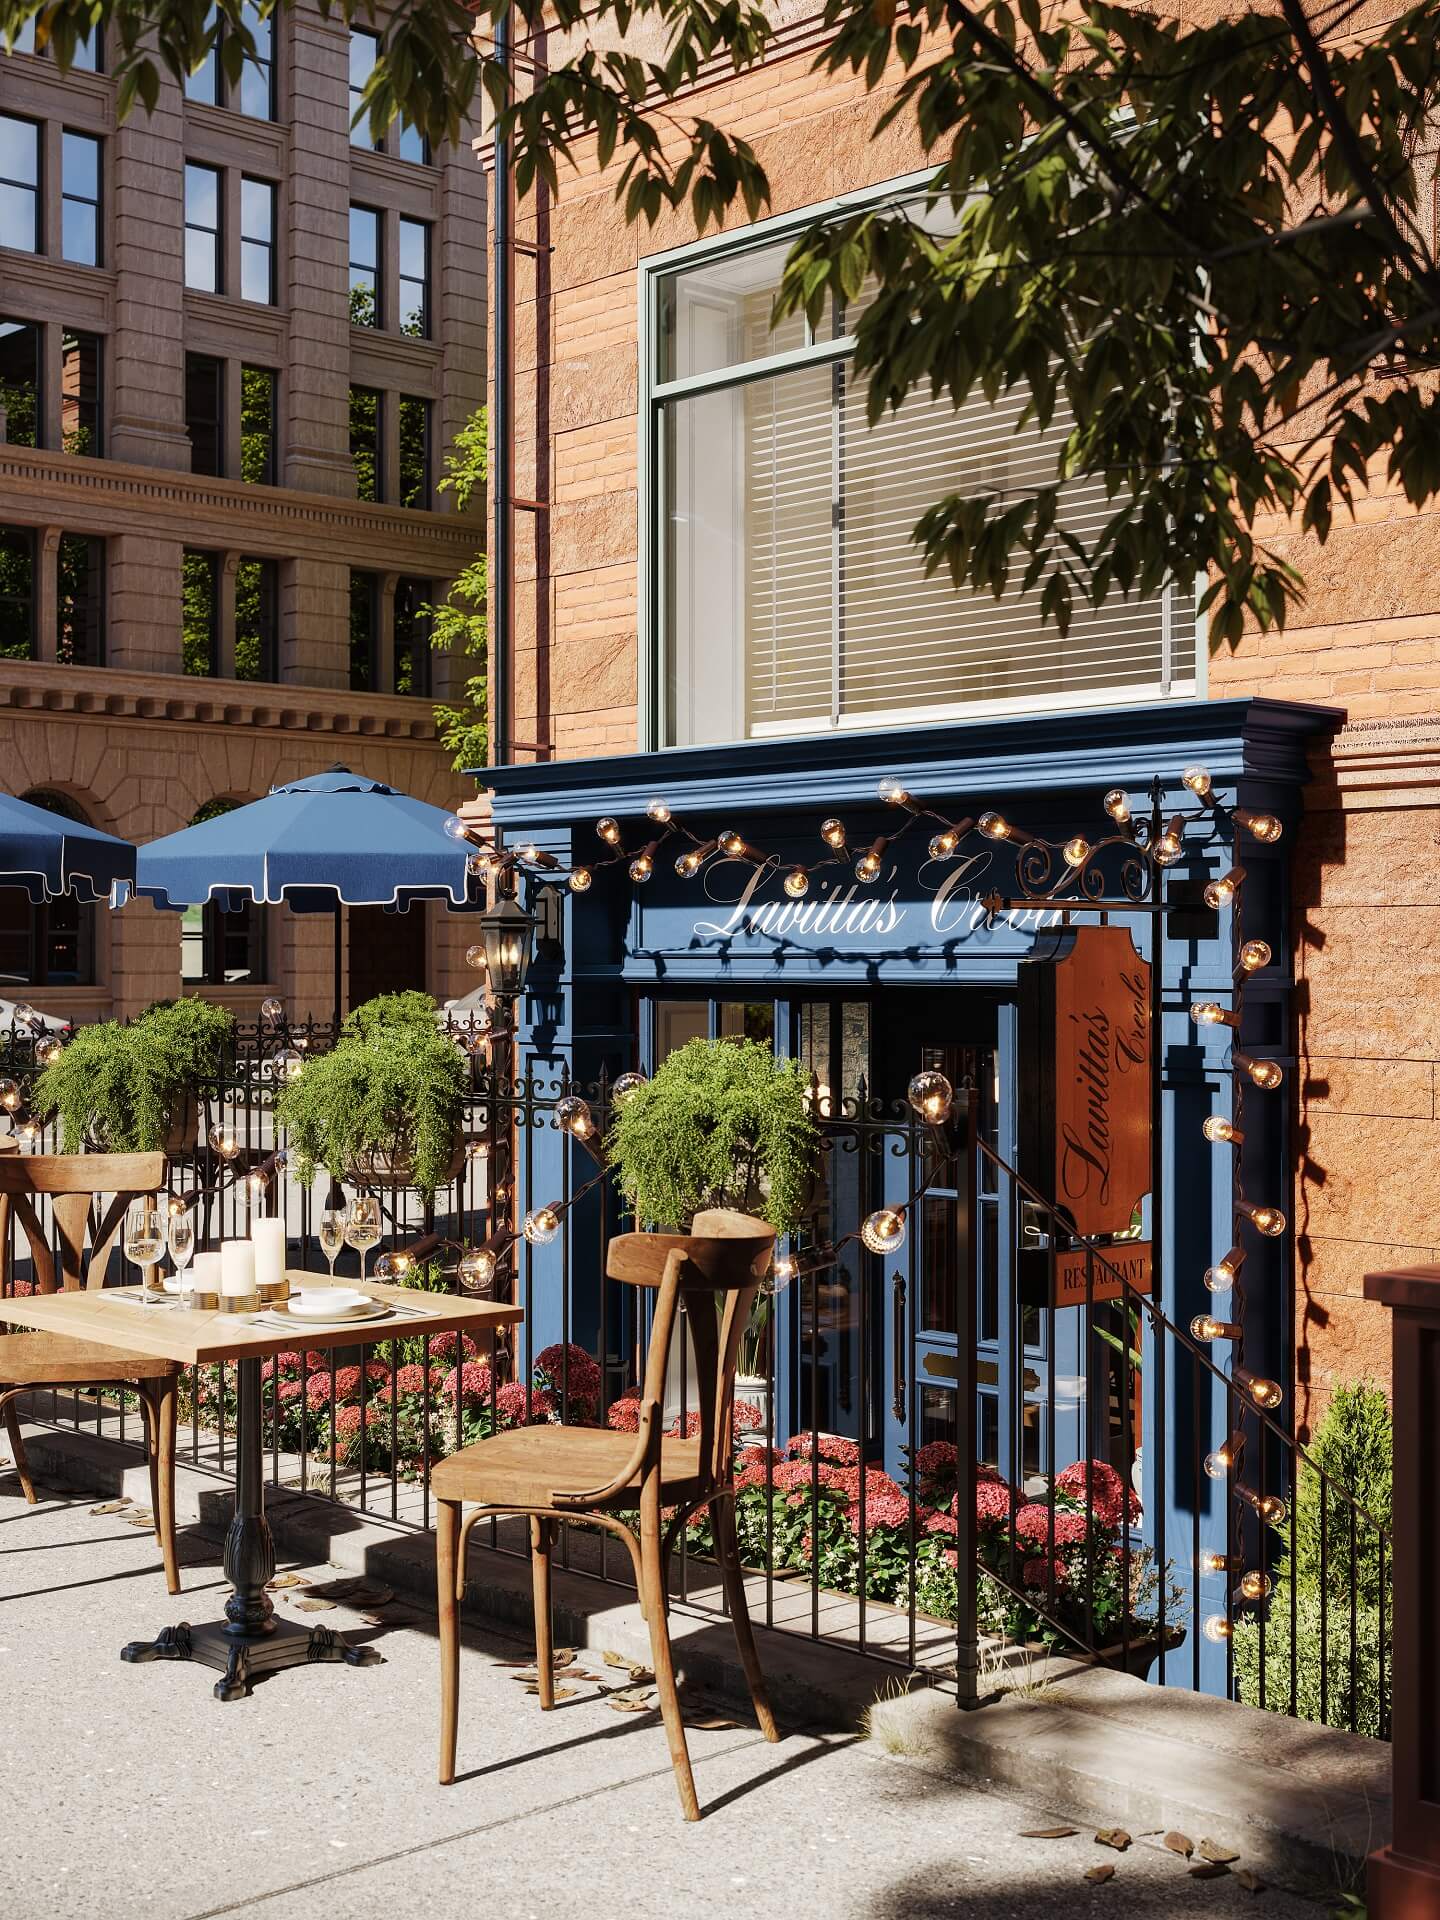
- one rendering demonstrating the front view of the place. It must be focused on the entrance design;
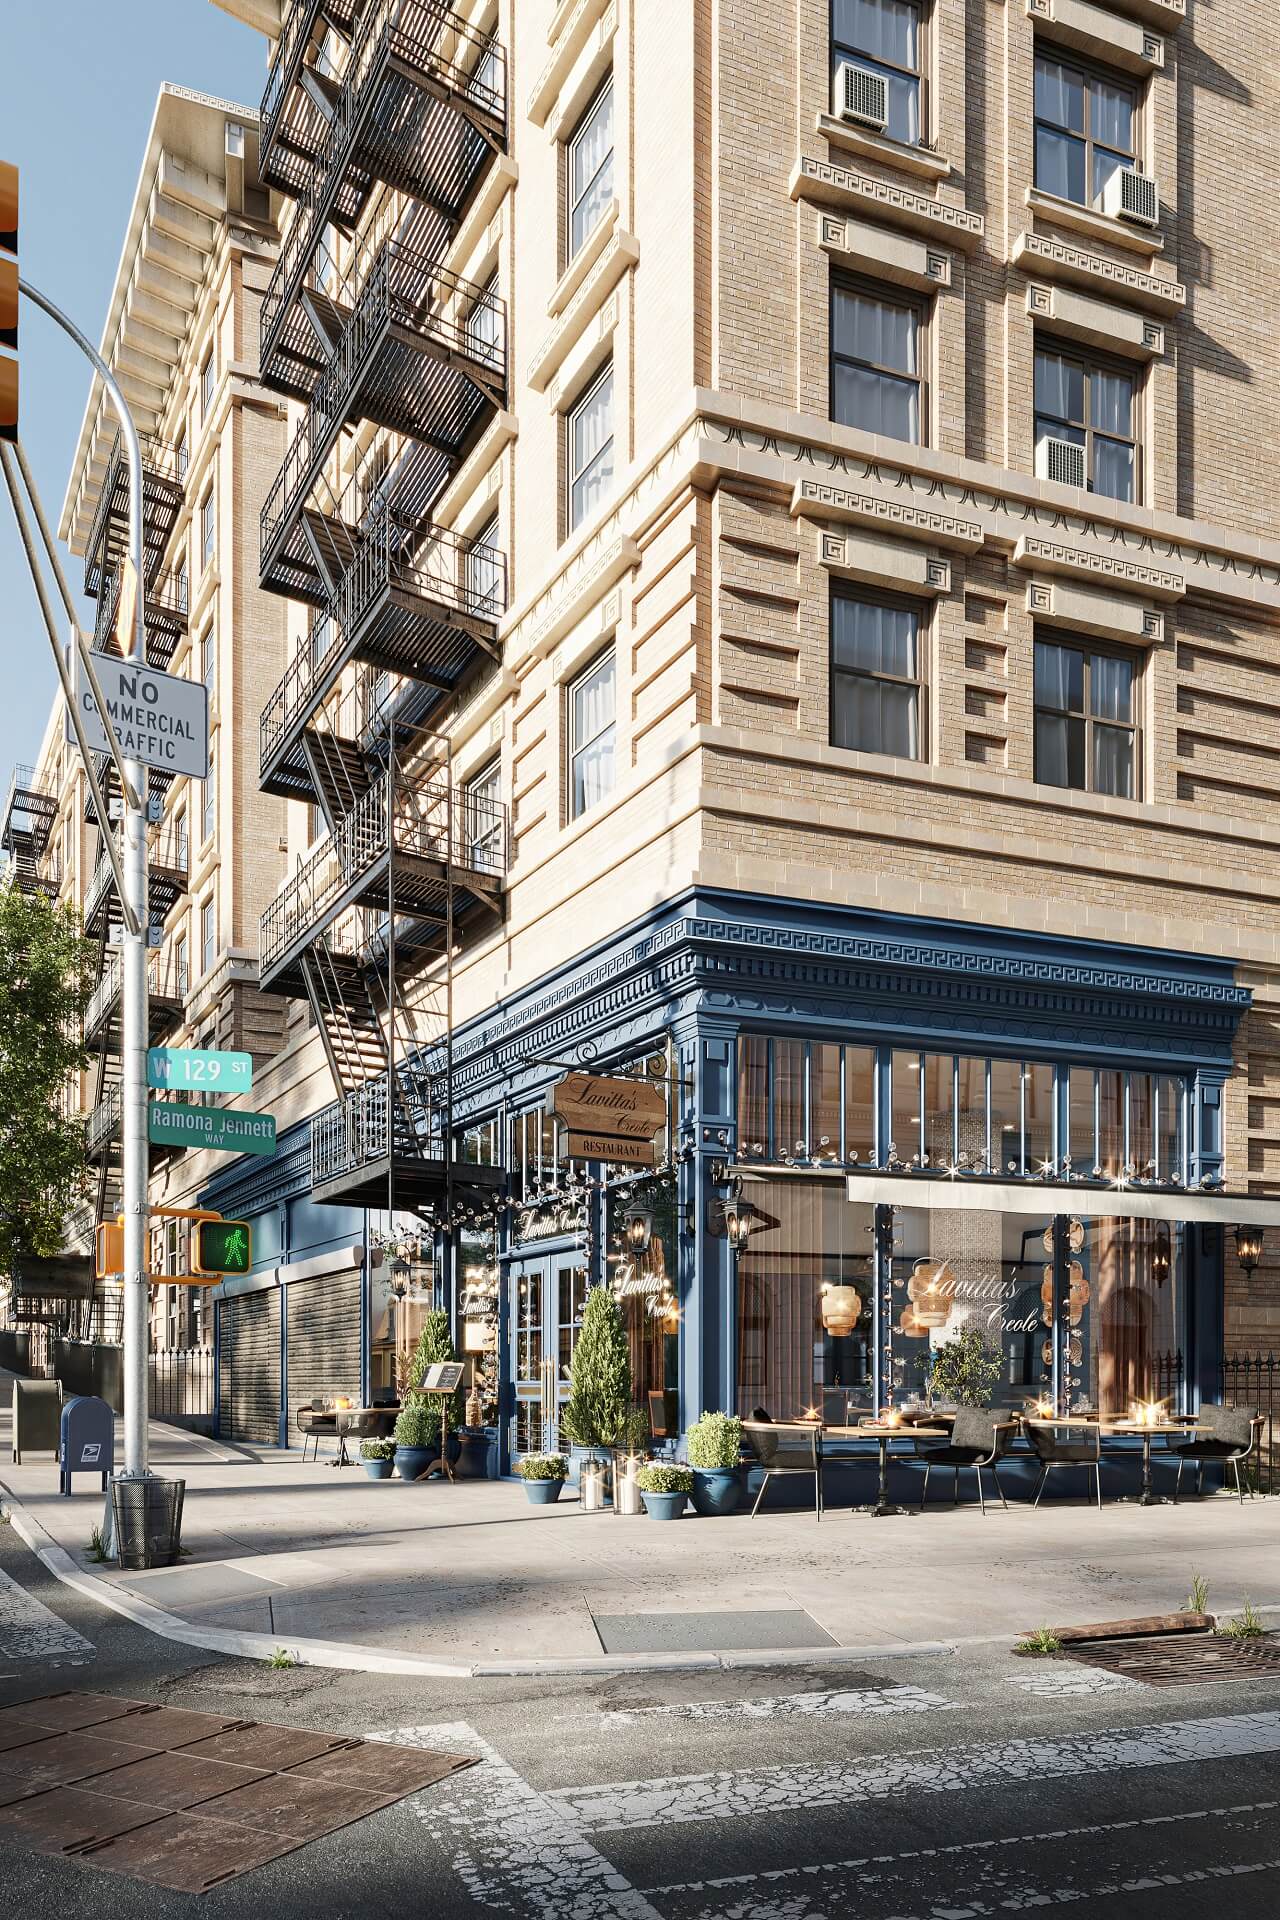
- and the second rendering showing the restaurant at a 3/4 angle a bit from afar. It was supposed to give a fuller picture of the location.
Let’s take a look at the reference materials Jimmy provided to help us complete this restaurant design 3D rendering task.
Elevate your exterior design project with photorealistic 3D visuals that help clients confidently approve your proposals.
#1.1 The References
Our client did not have drawings of the building. Instead, he took lots of photos of it from different angles and sent them to us. Also, he provided our team with precise measurements of the ceiling height, the dimensions of the facade details above the entrance, and the height and width of the windows. The restaurateur noted he would like us to make the windows a bit taller in the CG imagery.
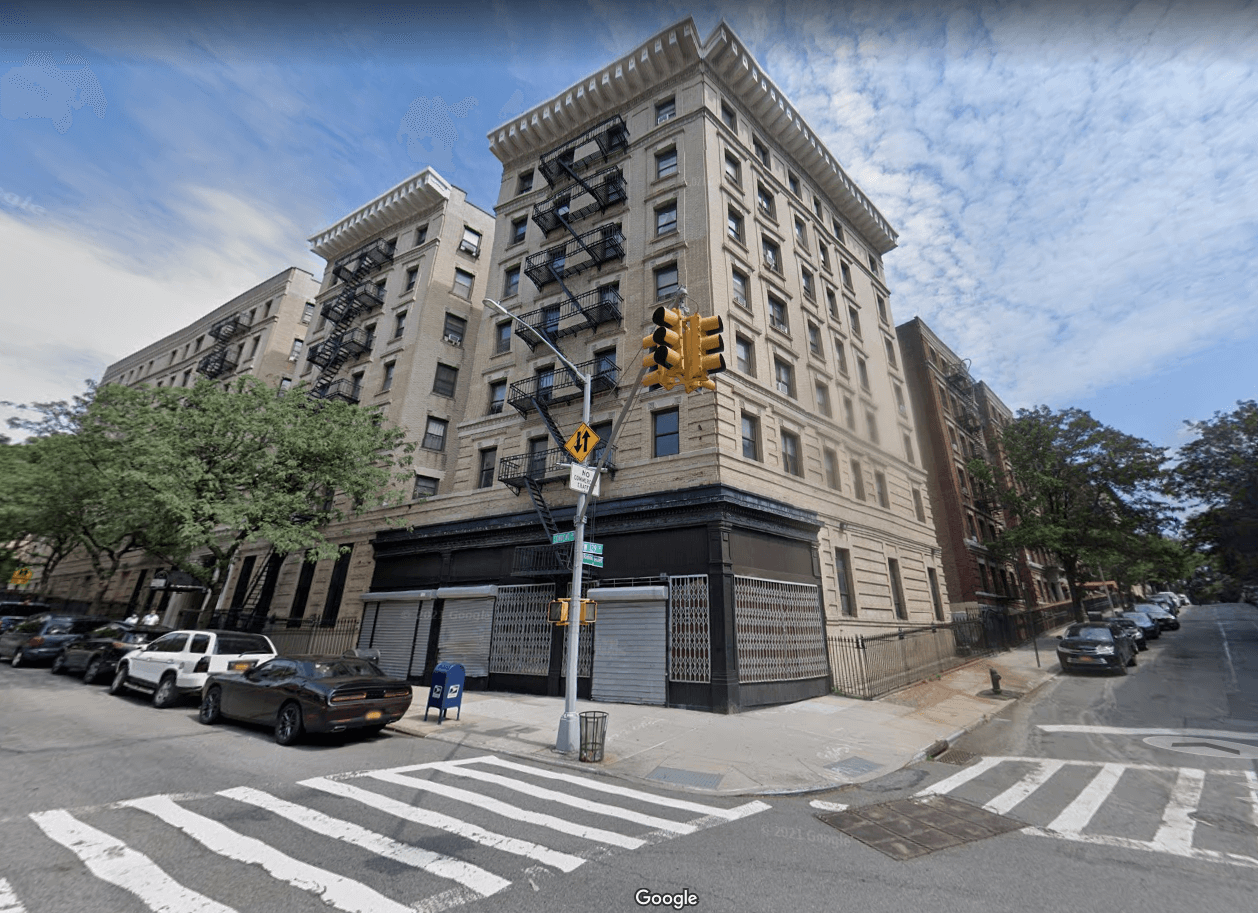
He also gave us a Google maps location of the place so that we could examine it in more detail.
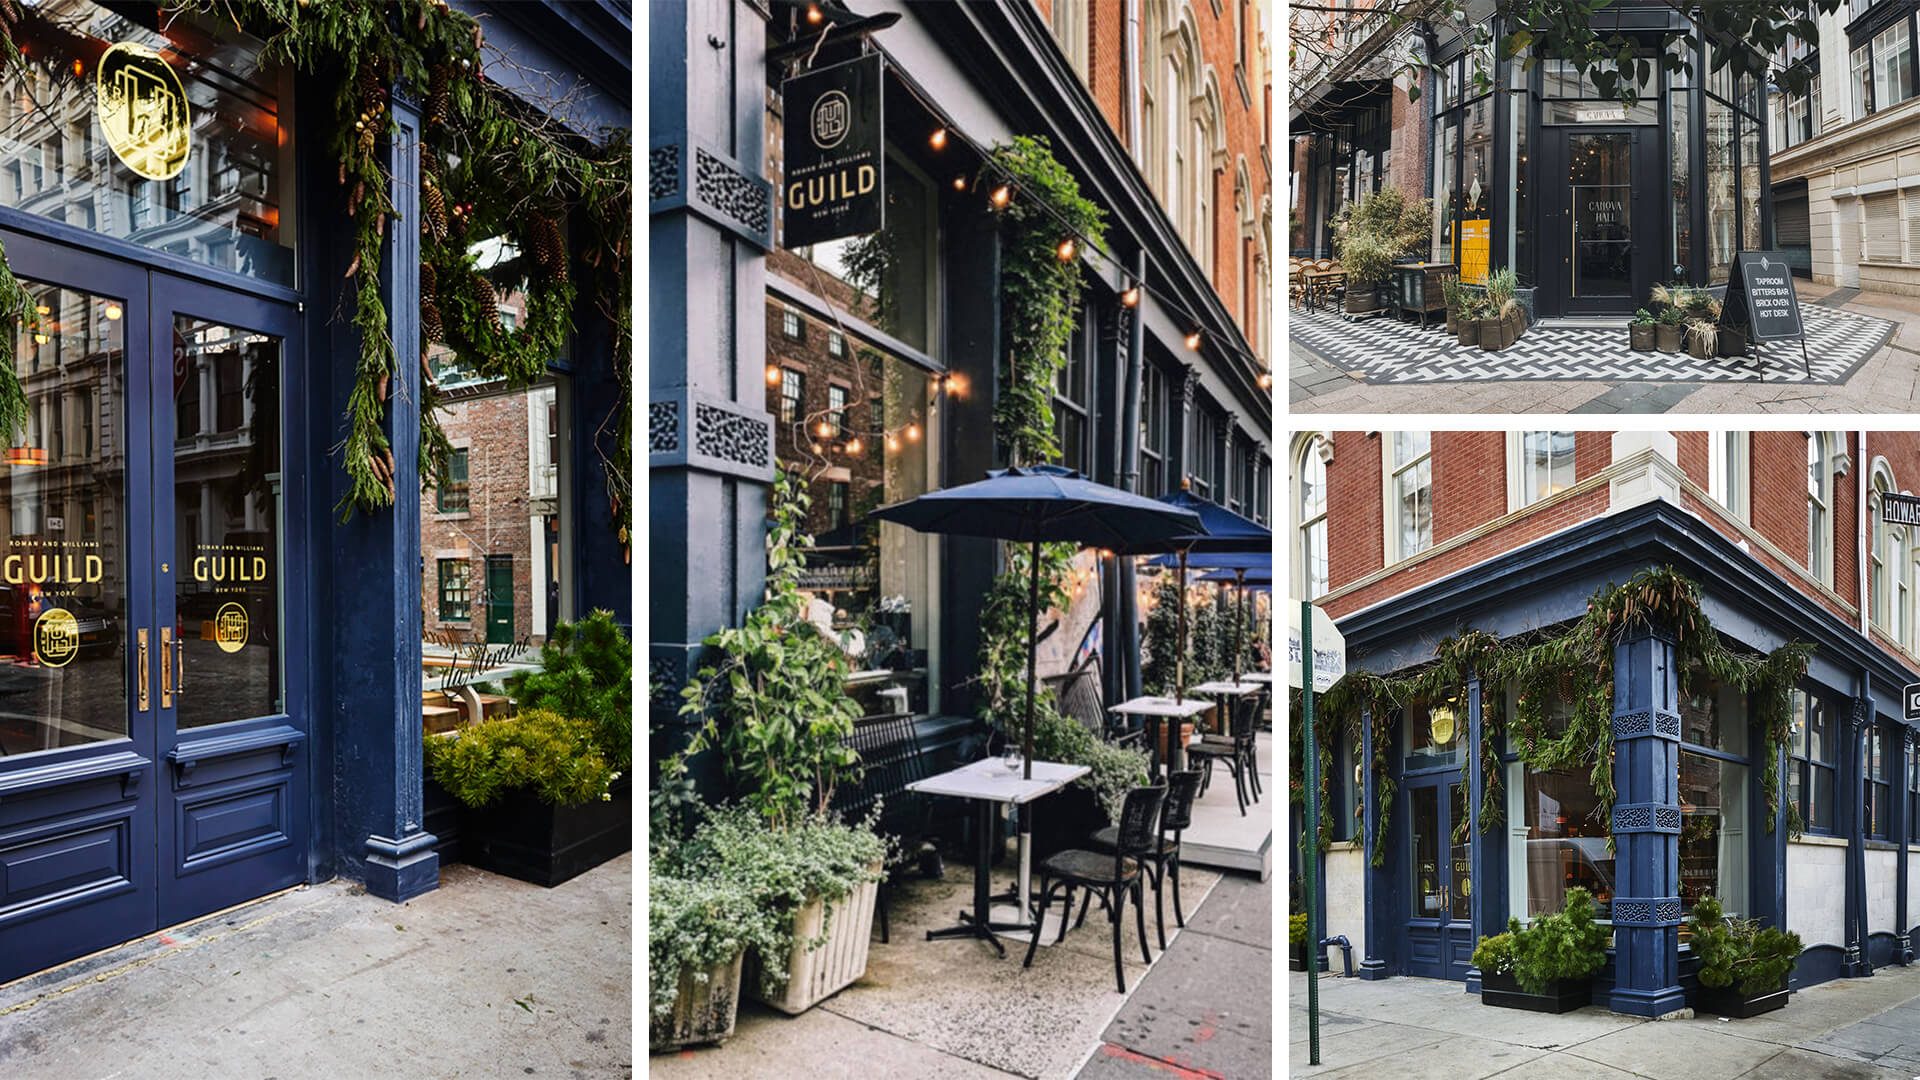
To illustrate his preferences for the entrance and facade design, Jimmy sent us a couple of photos of places he liked.
As for the season and the time of the day in the rendering, the restaurateur told us to go for a fall sunrise. A setting like that would allow him to show the lighting inside the restaurant in the best way.
After receiving the references, we were ready to start. Now, we’ll show the process of restaurant rendering creation step by step.
#1.2 The Workflow
First, our artist modeled the building and its surroundings in 3ds Max. This is what the scene looked like in grayscale mode, with no colors.
Then, the artist set the lighting and applied materials and textures. The next steps were 3D rendering for exterior images and showing them to the client.
Jimmy liked these restaurant design 3D rendering results. He said:
The client requested that we make a few tweaks to the plants and decorations as well as add a signboard and a standing menu holder. After doing so, we submitted the updated renders to him. Here they are.
As you can see, these renderings didn’t show the interior in the windows yet. That’s because it was yet to be added. How so?
The thing is that the interior and exterior rendering parts of this task were done by two different 3D artists. They worked in parallel to make the whole process faster. Eventually, both scenes had to be merged to give a complete picture of the restaurant’s design.
So, let’s see how we provided 3D interior rendering services for the restaurant. The resulting 3D renders were then combined with the exterior images.
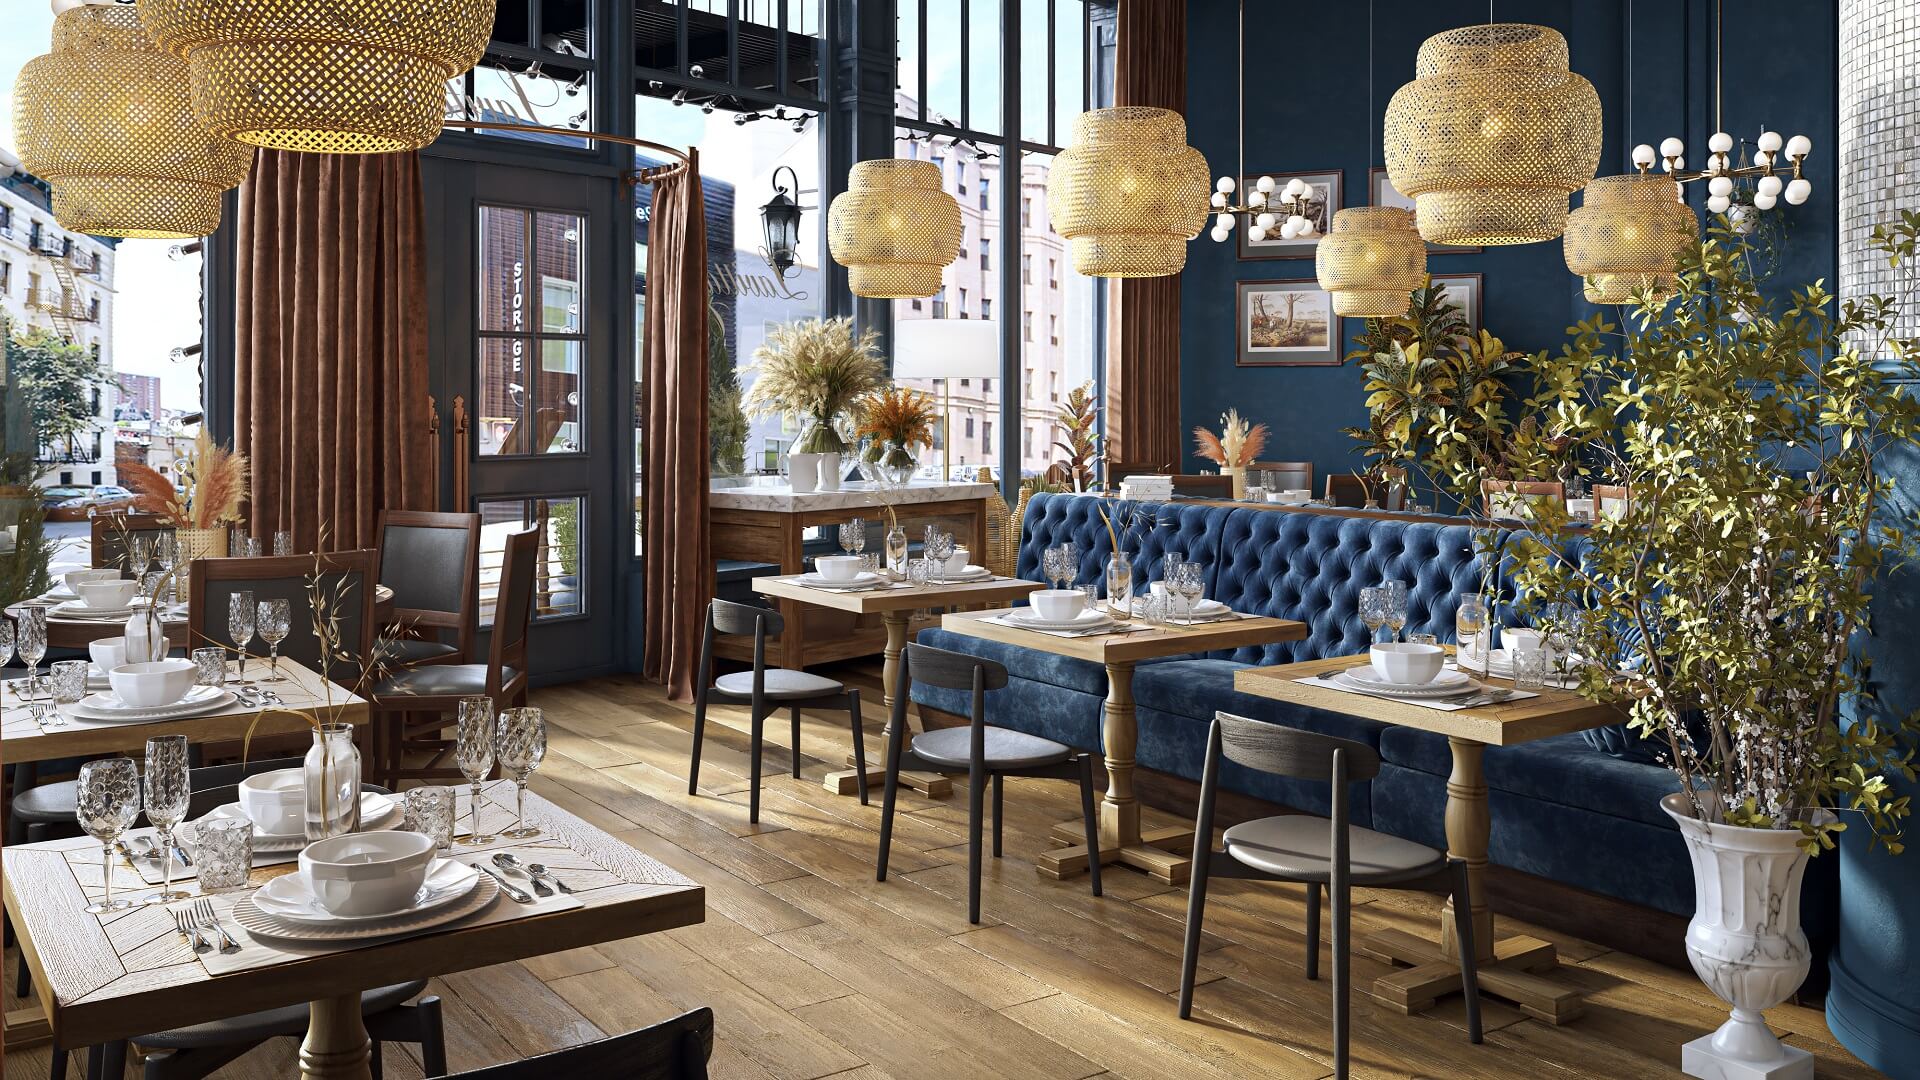
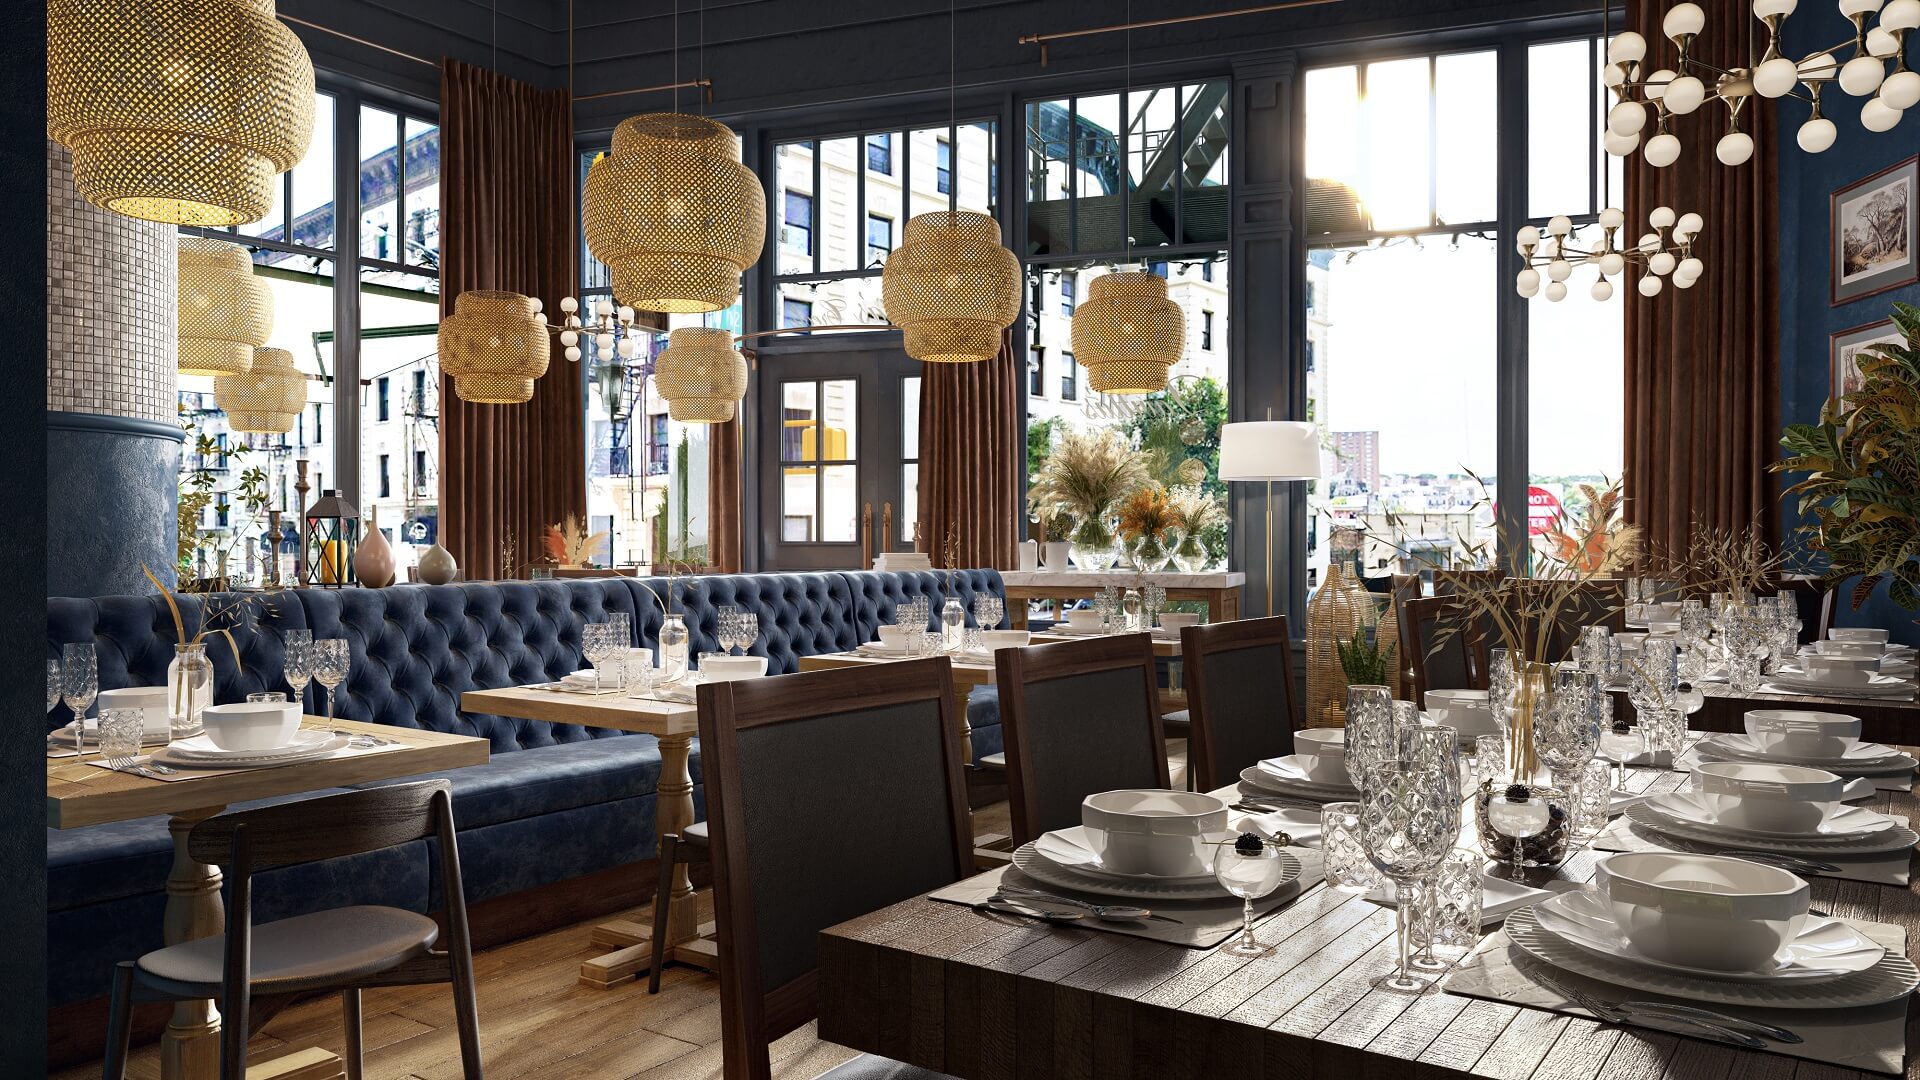
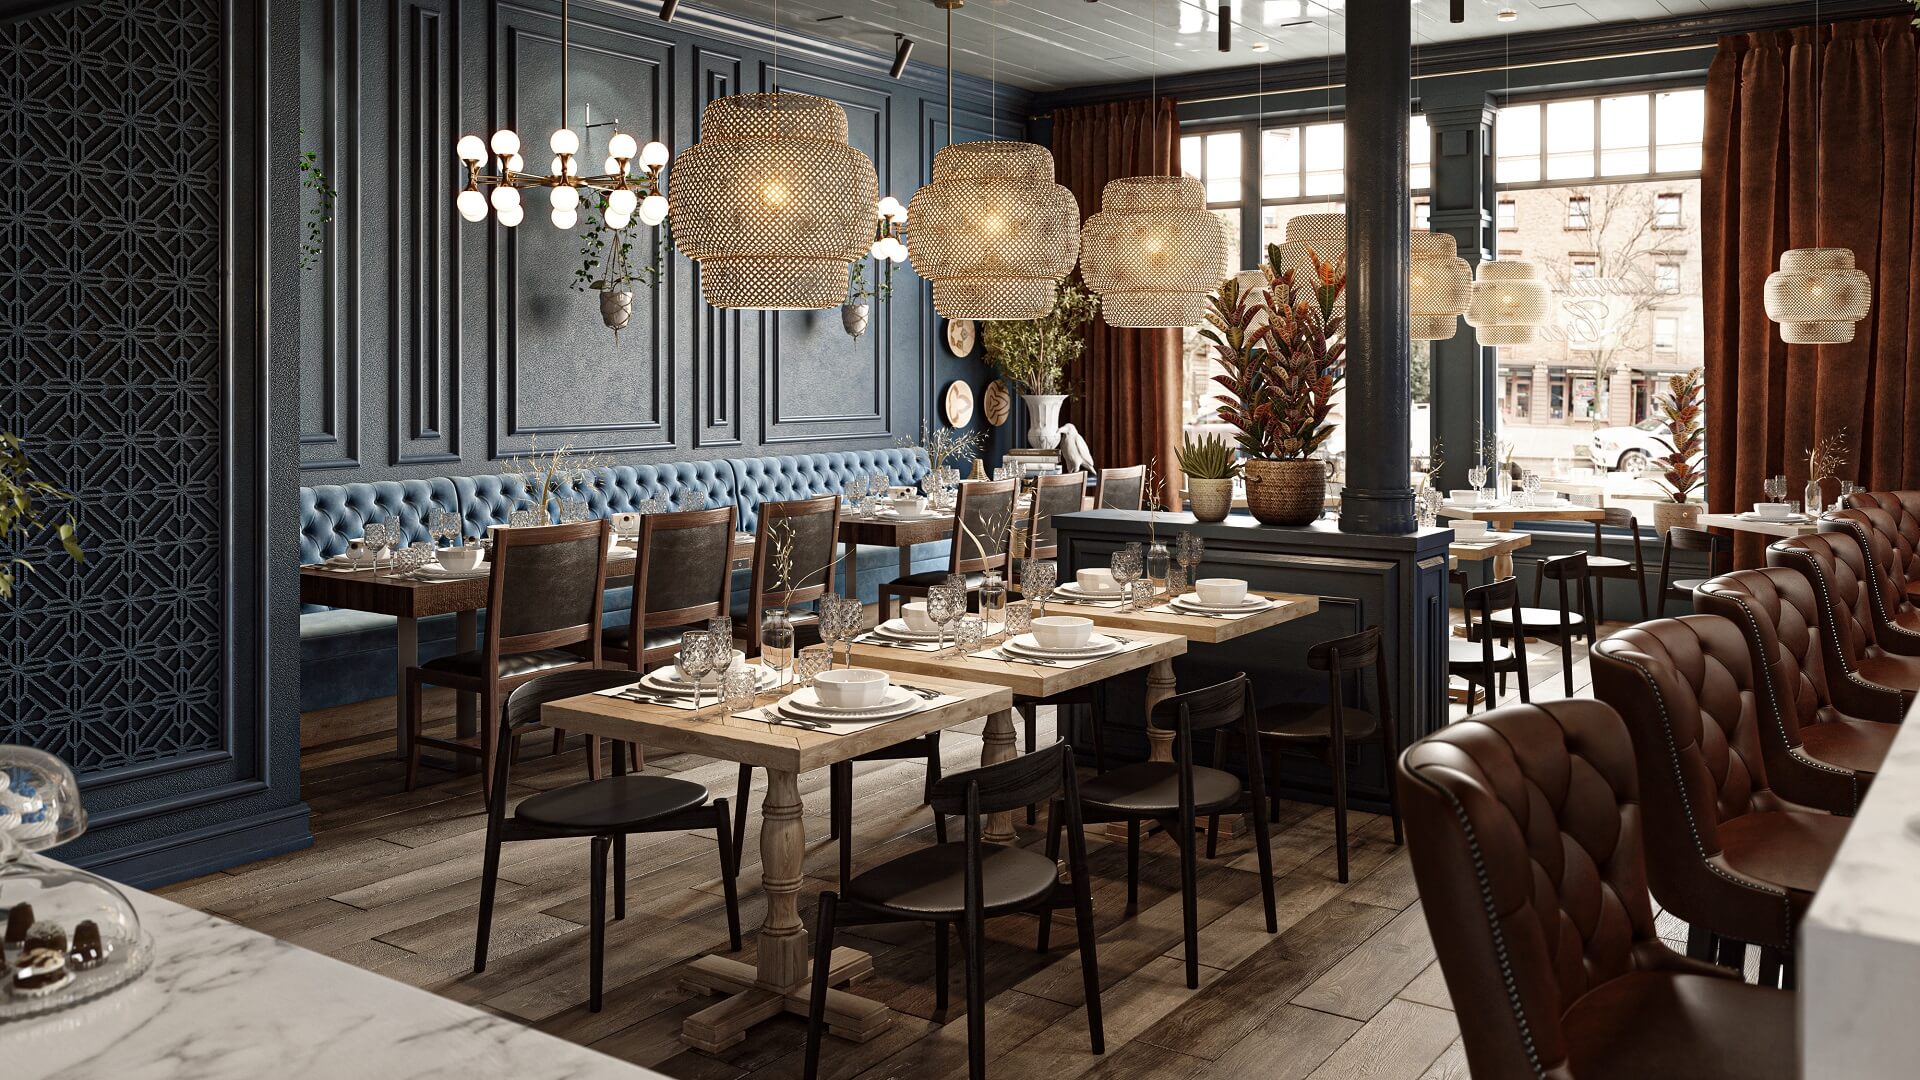
#2. The Making of Interior 3D Renders
We were asked to make 2 interior views of the future restaurant:
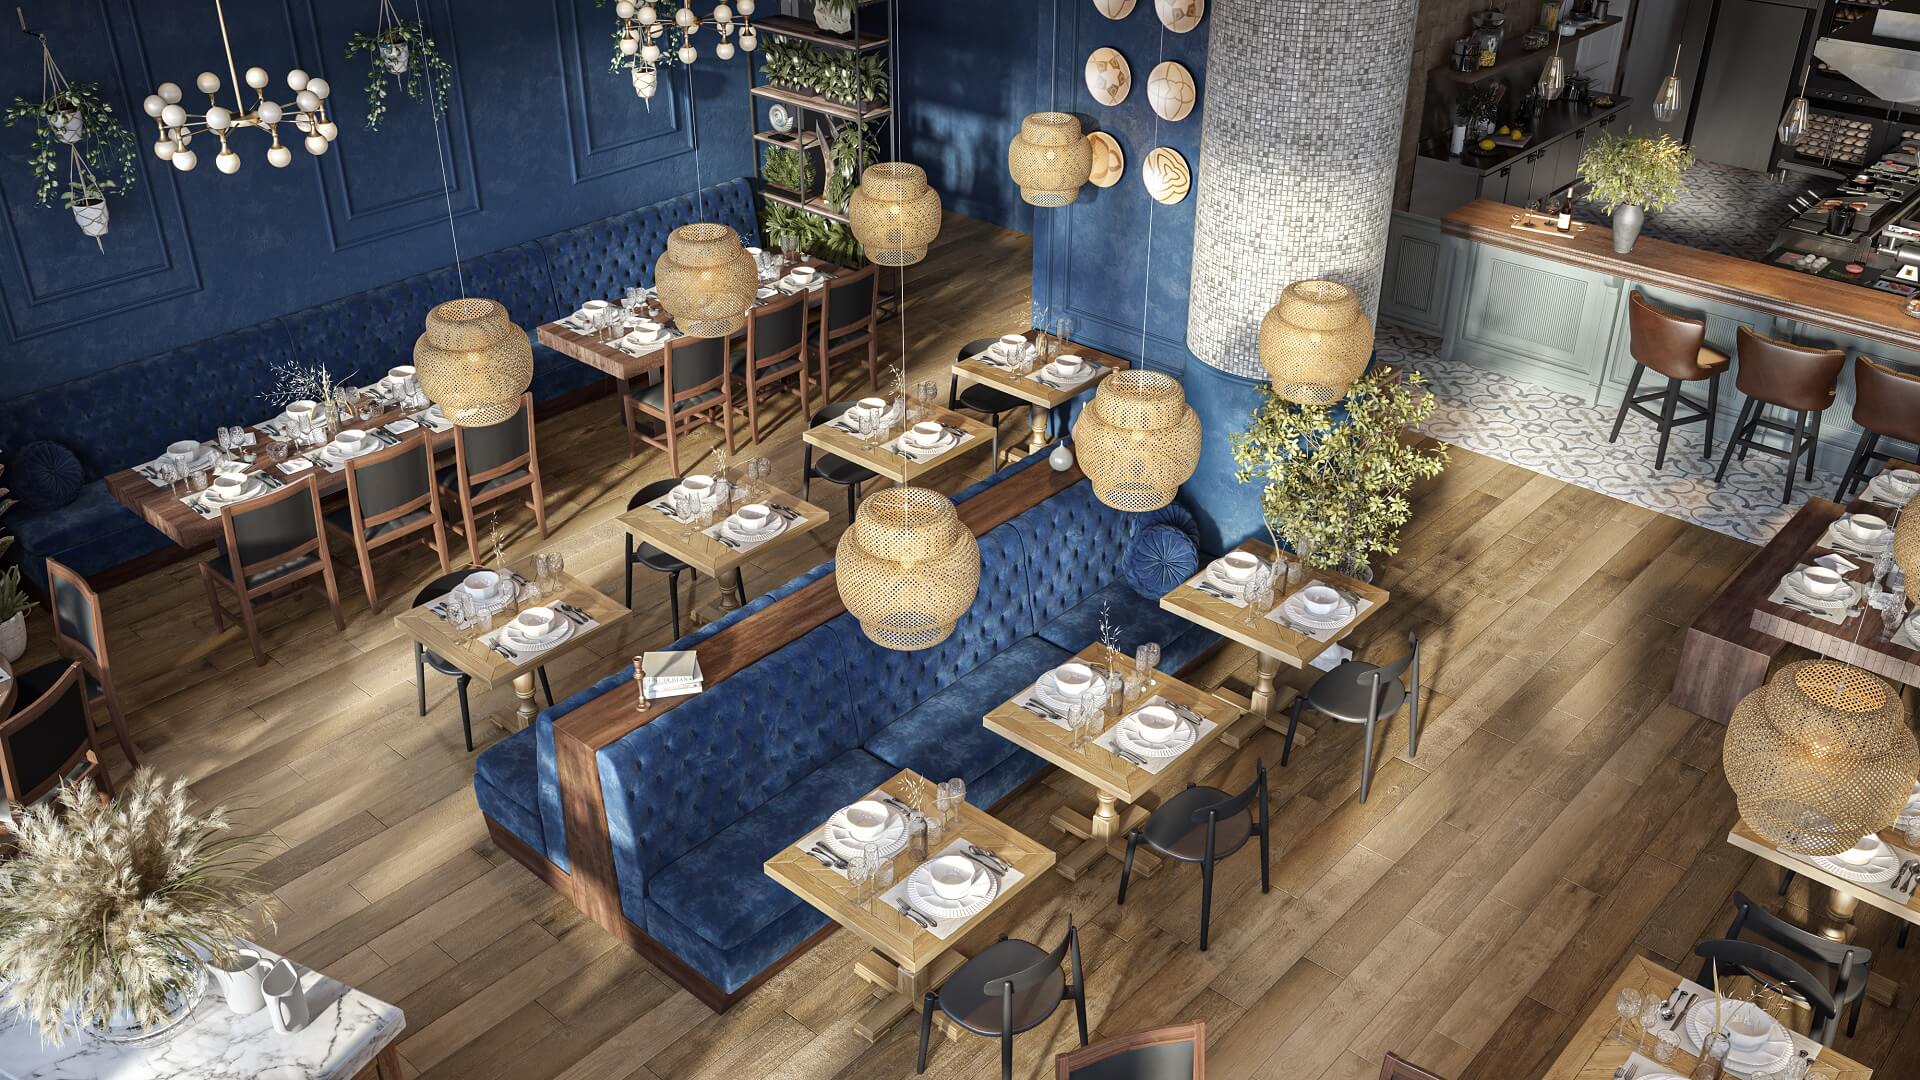
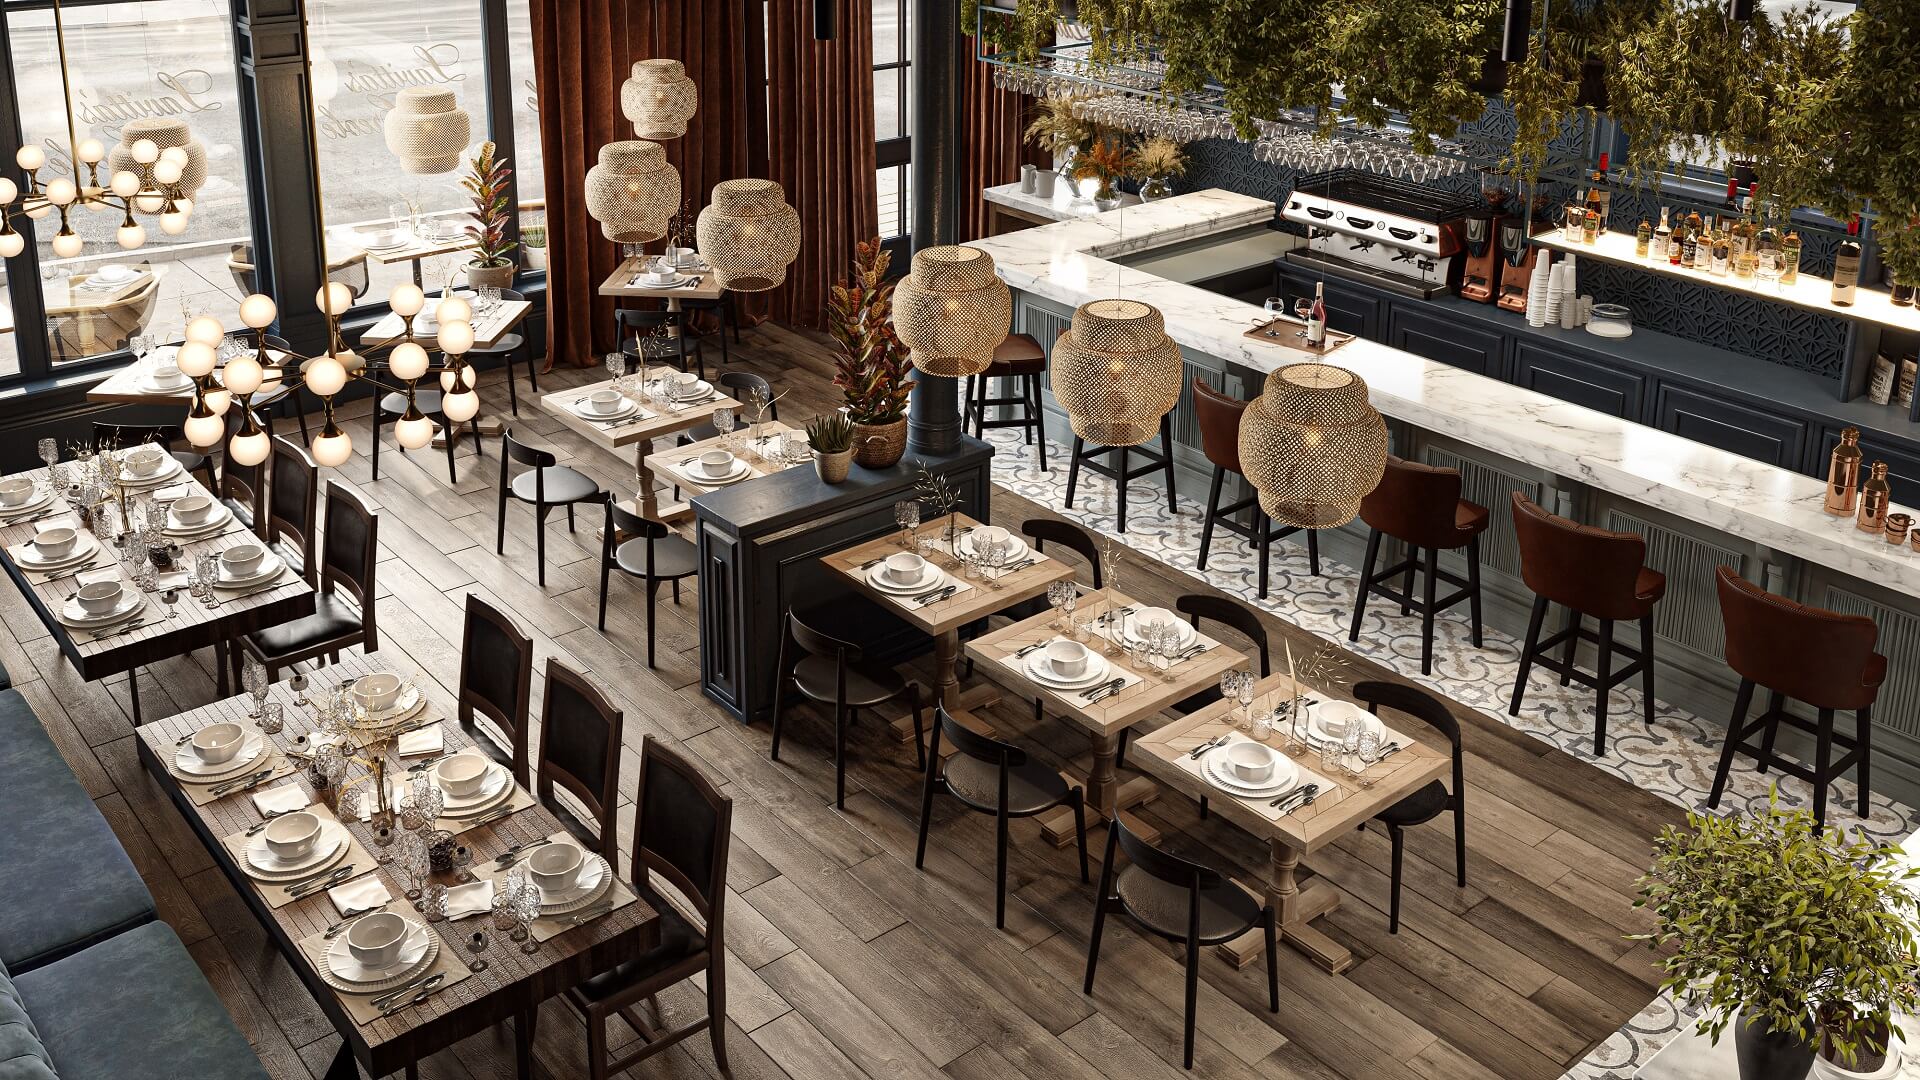
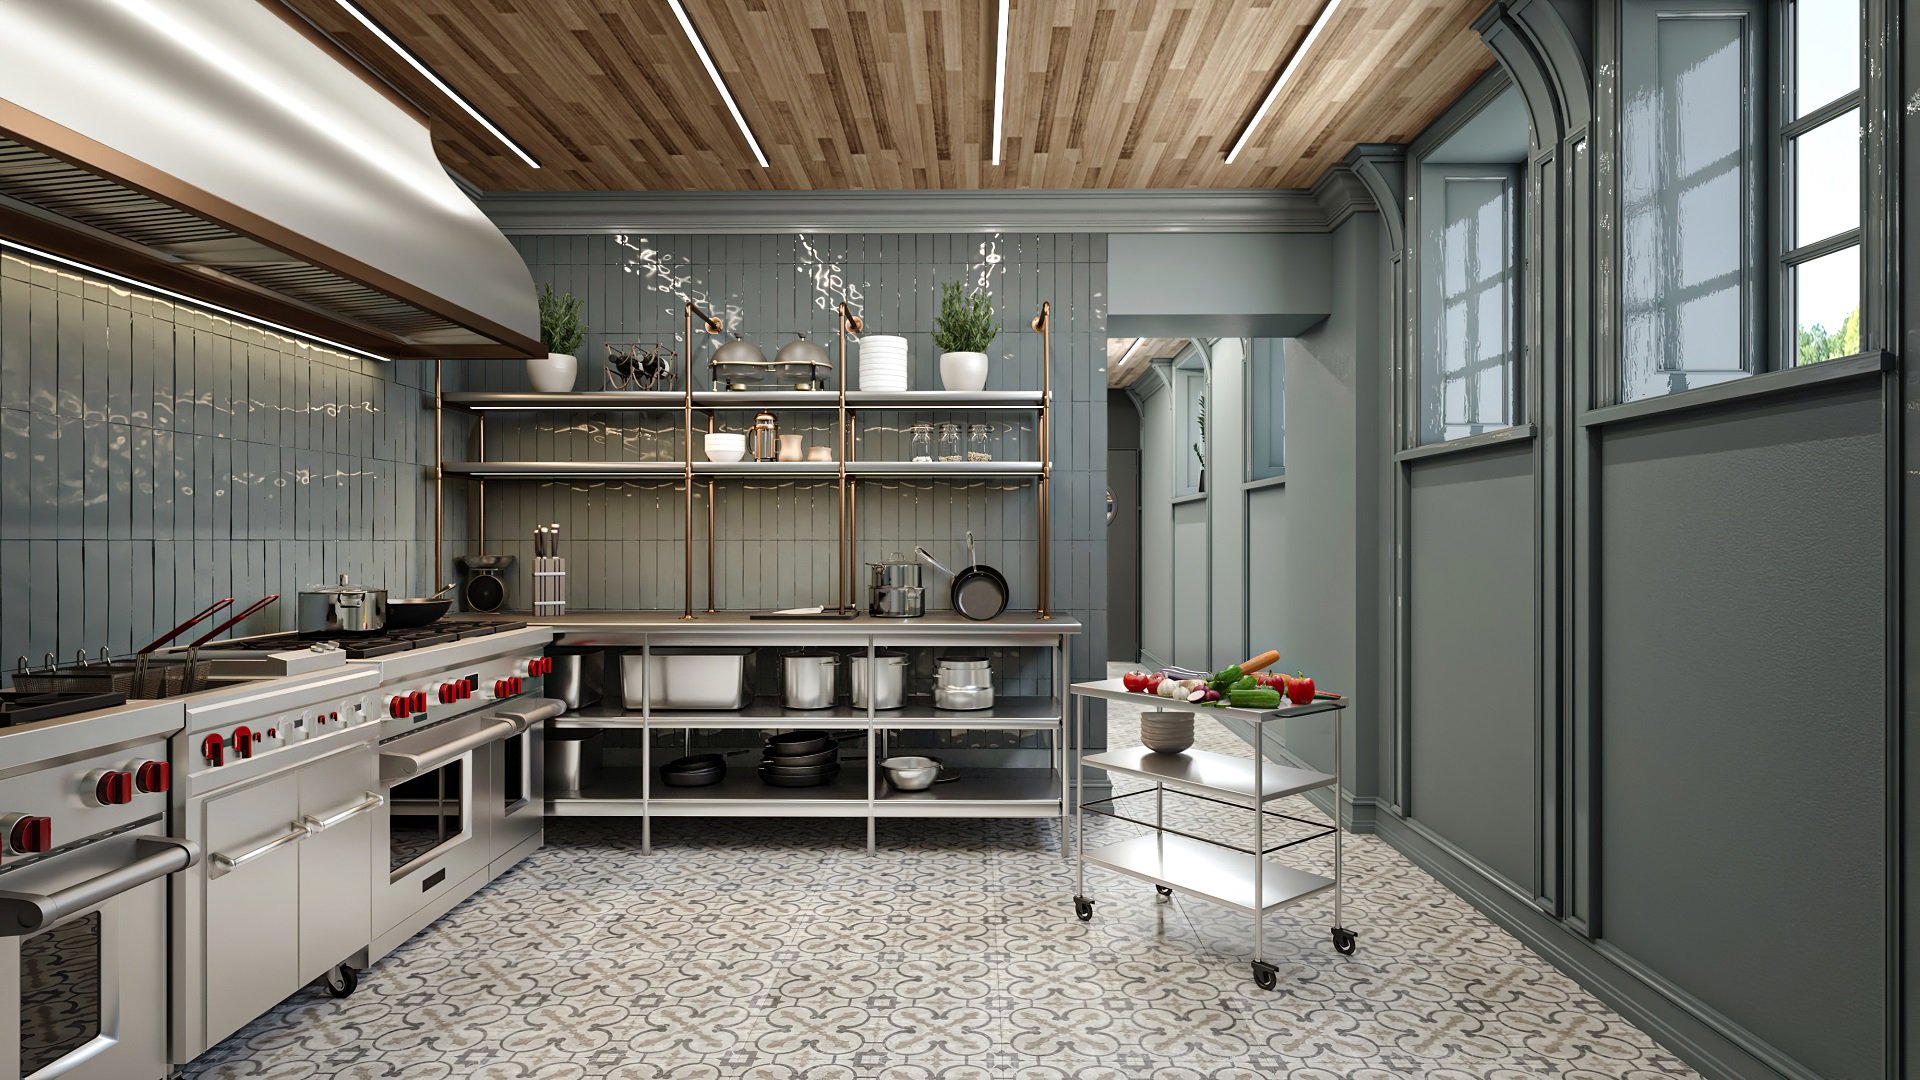
- a down view showing the overall space design, including furniture layout and an open kitchen;
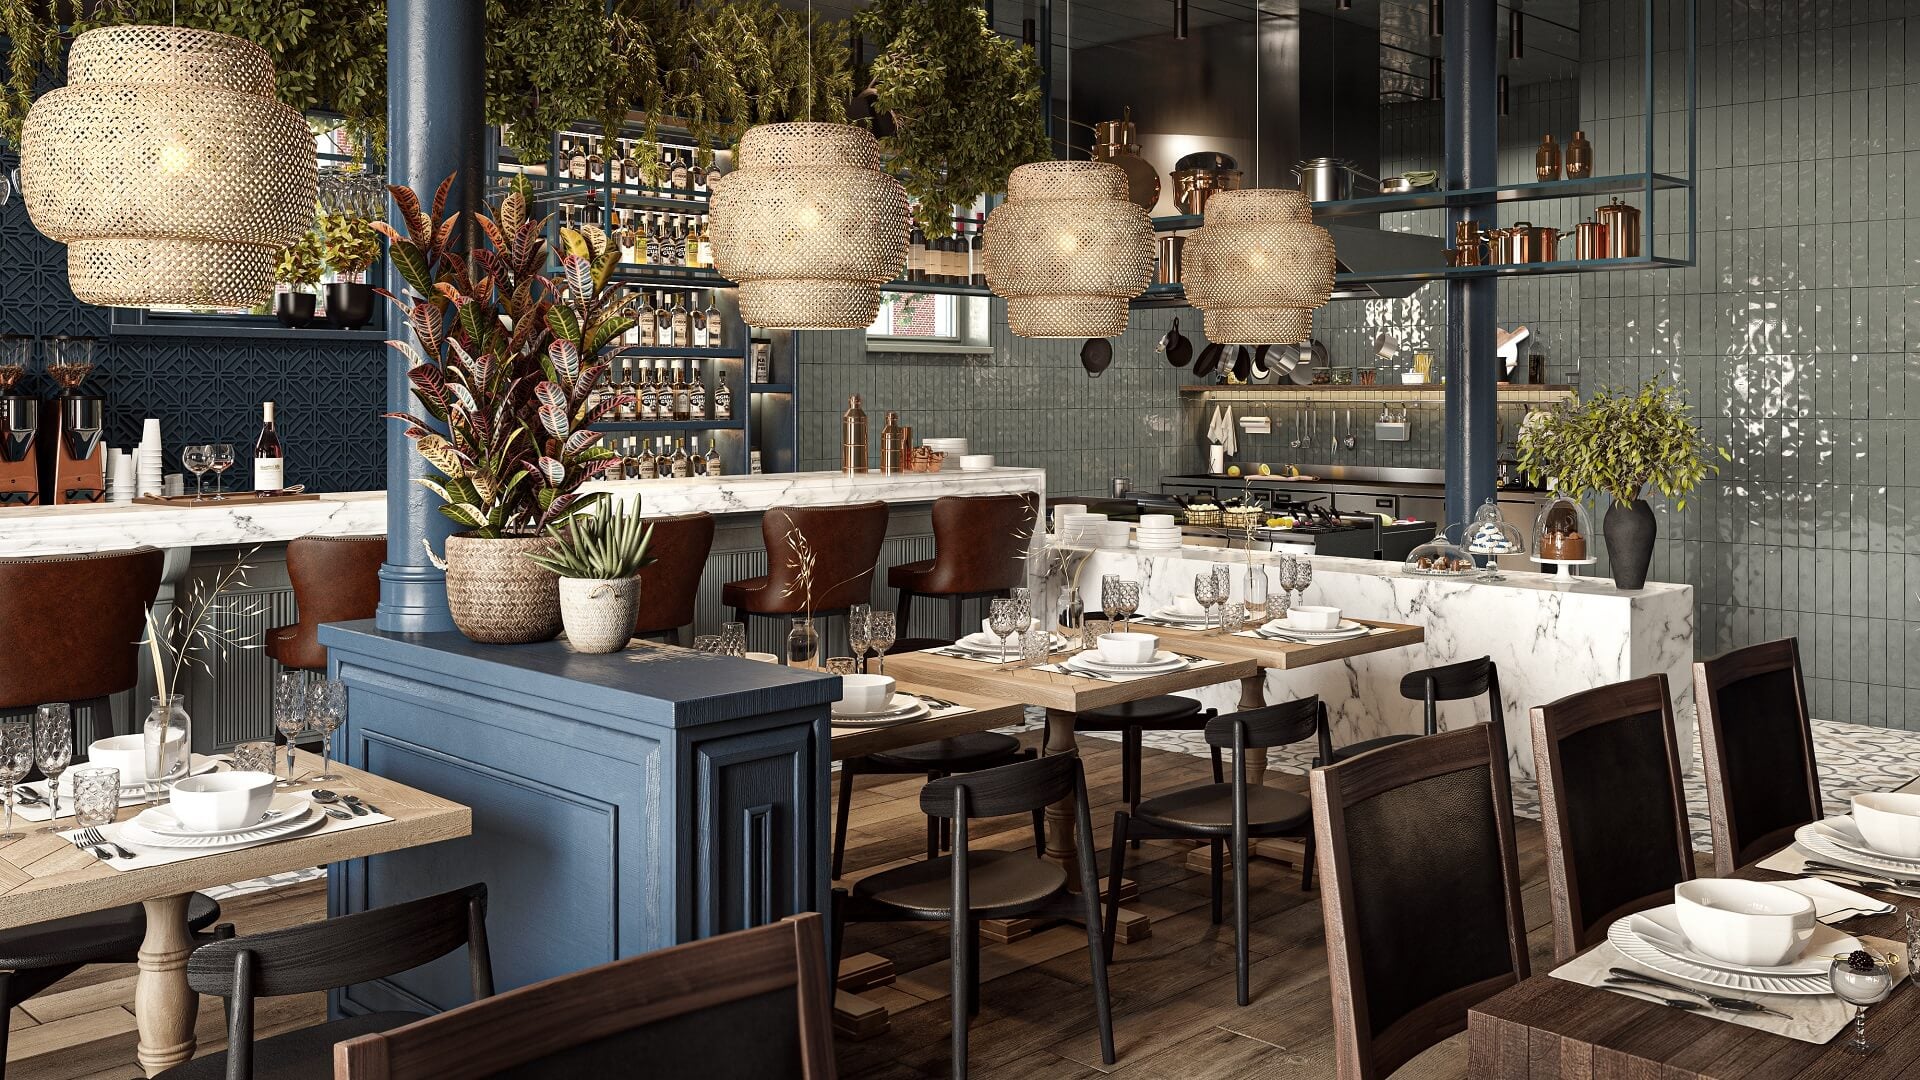
- and an eye-level view, demonstrating the interior closer and in more detail.
Strengthen your design presentations with professional interior rendering
The restaurateur provided us with a comprehensive pack of references for the task. Let us show you what it included.
#2.1 The References
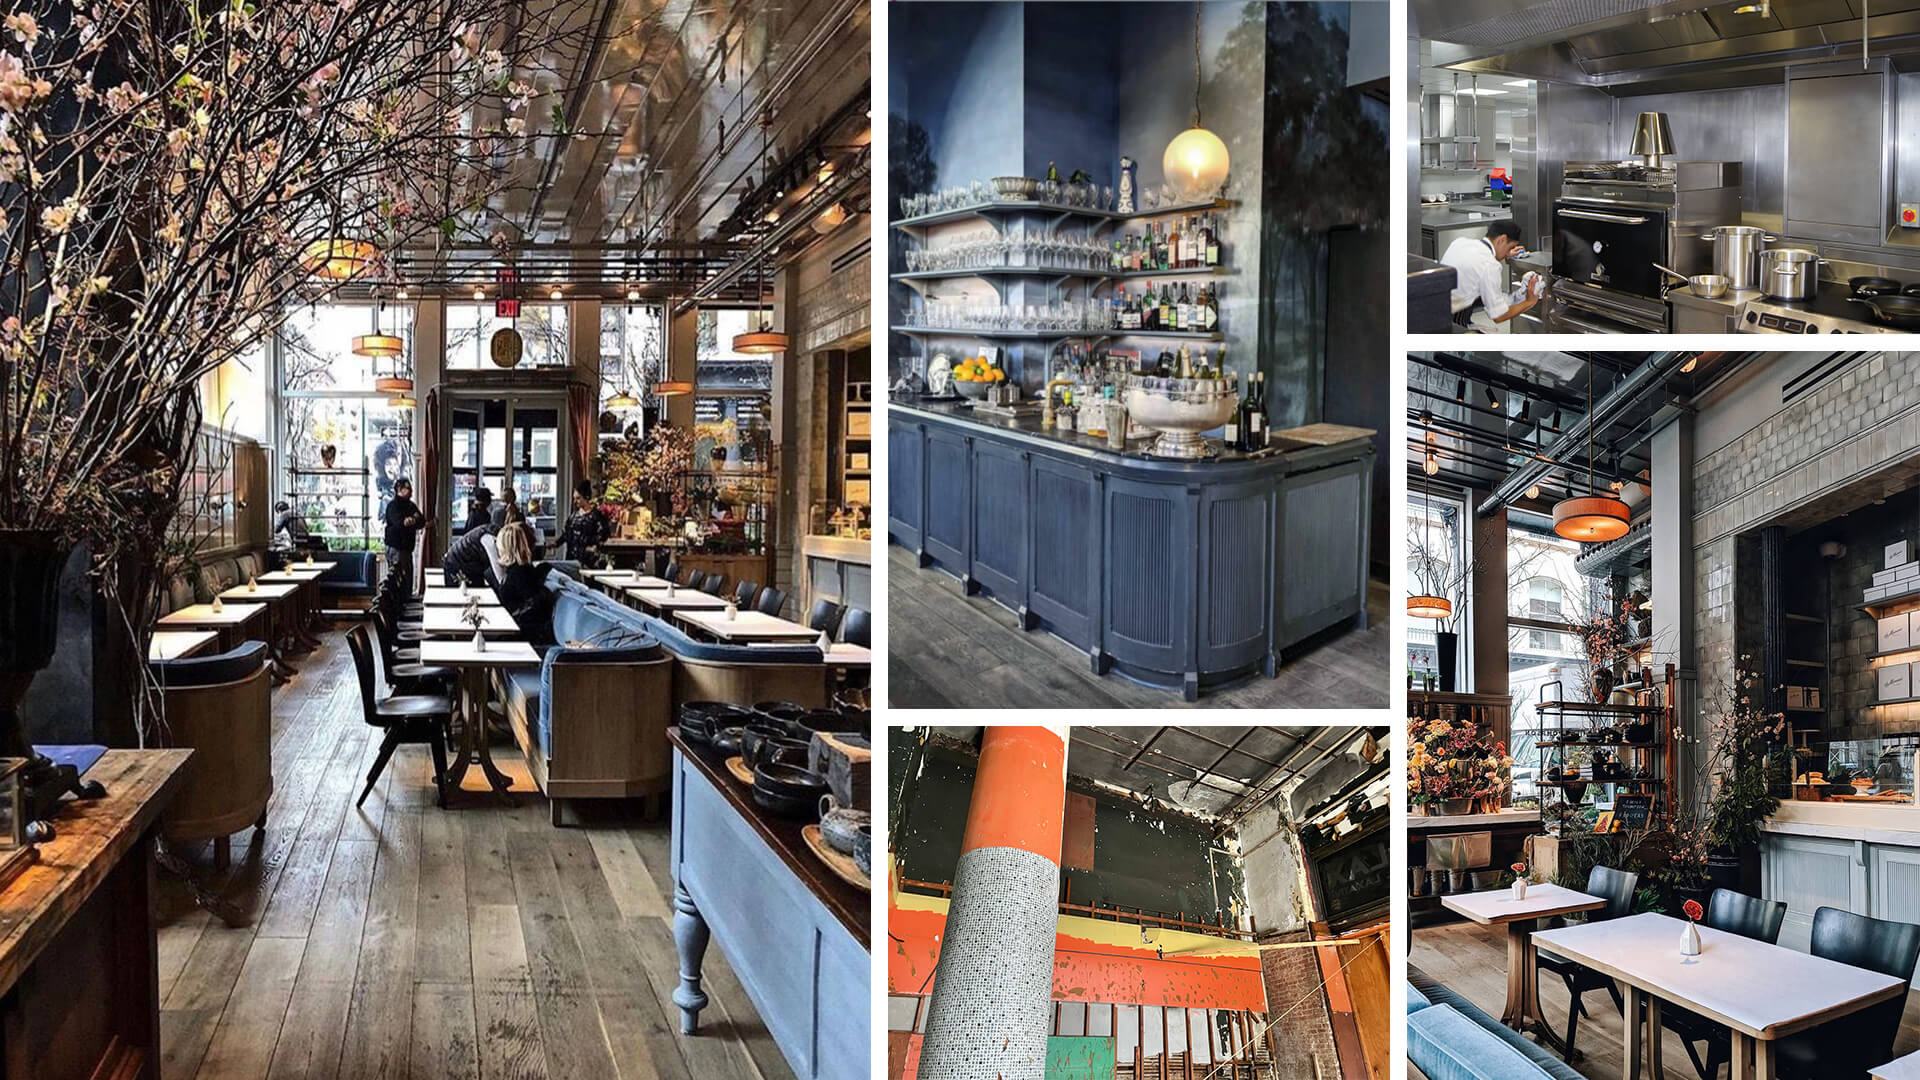
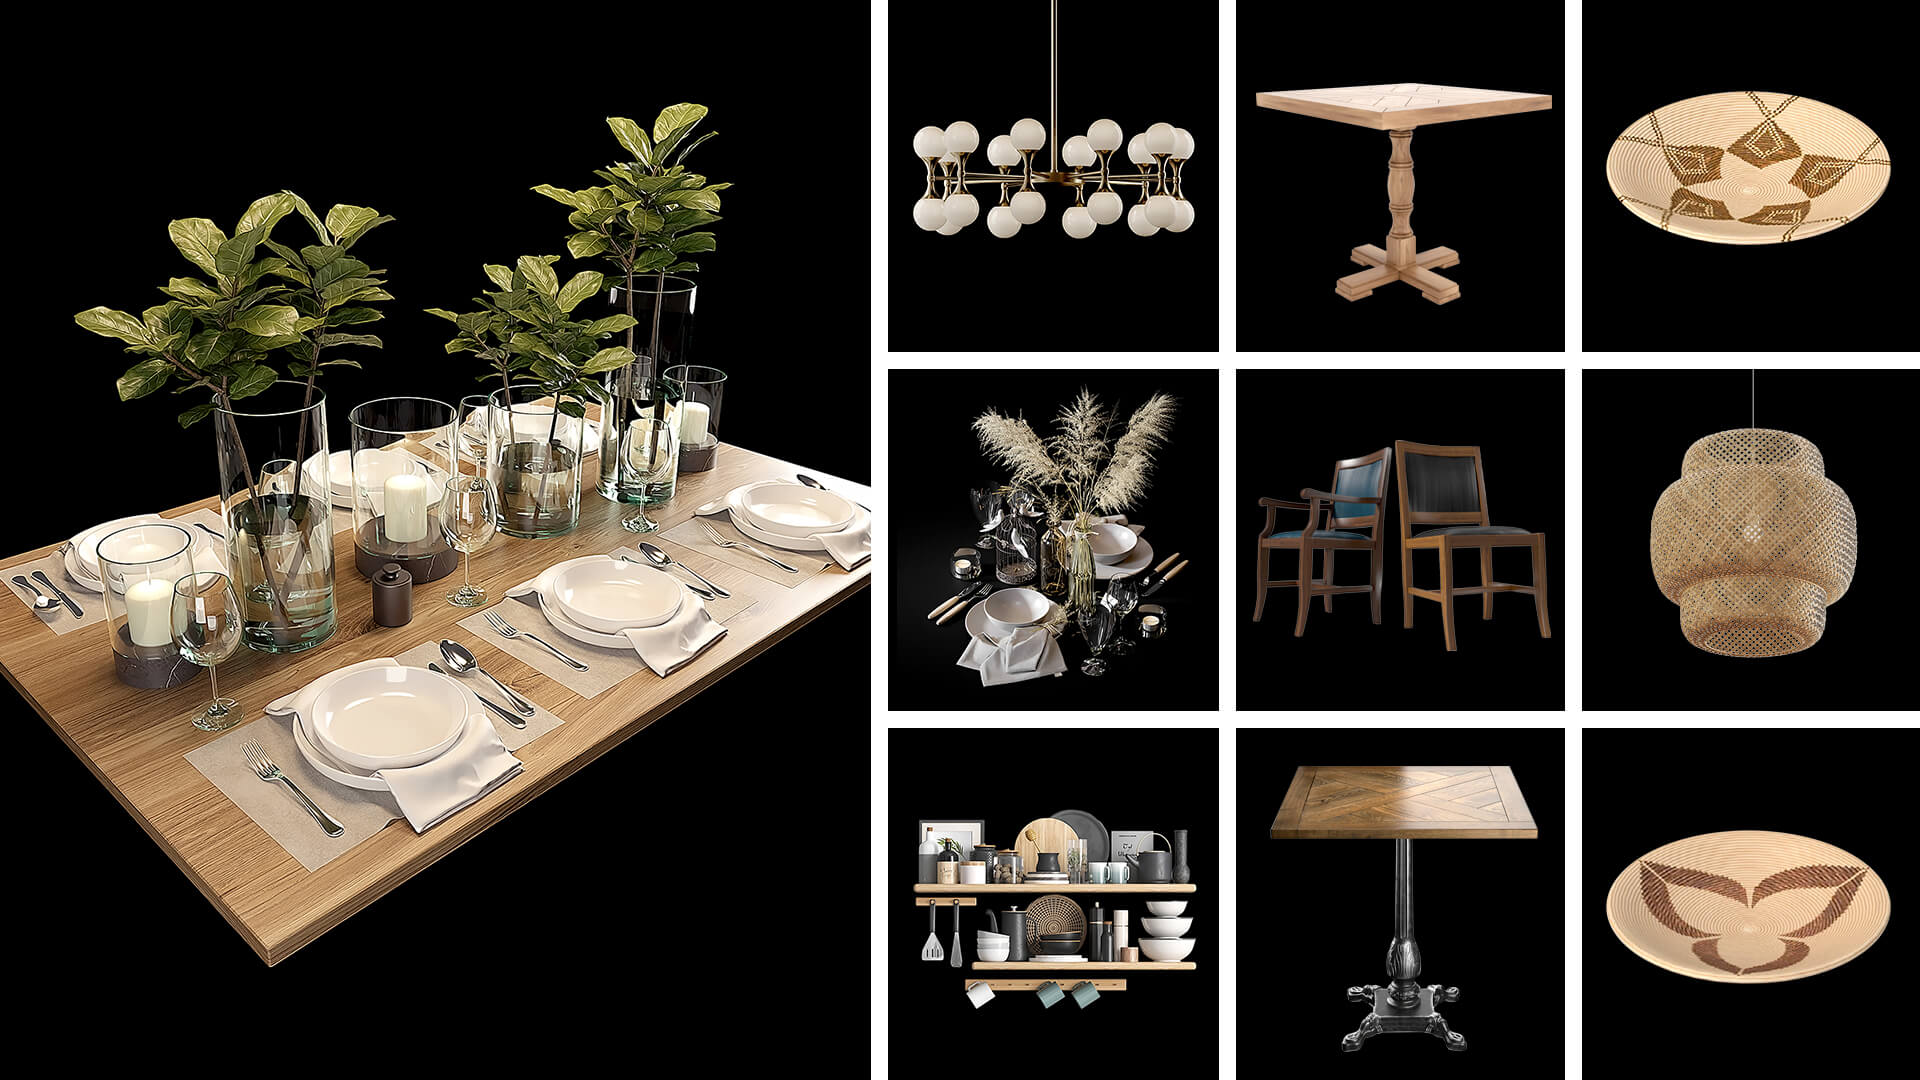
Jimmy sent us measurements and photos of the future restaurant’s internal space. He also provided us with photos of the interiors that inspired him and mentioned a few furniture brands he liked. In addition, our client chose plenty of references for furniture, decor, lighting fixtures, tableware, and cooking equipment in our extensive library of 3D assets.
Having considered all the references and requirements, we got down to work.
#2.2 The Workflow
Our artist started by modeling the space in 3ds max. After the scene was ready, she made a couple of viewport screenshots and sent them to Jimmy for review. At this point, it was necessary to receive his feedback on the interior architecture and furniture layout.
Jimmy confirmed that everything was correct. So, we moved on to the next stage. Our artist set the lighting and added textures, materials, and all the necessary details to the scene.
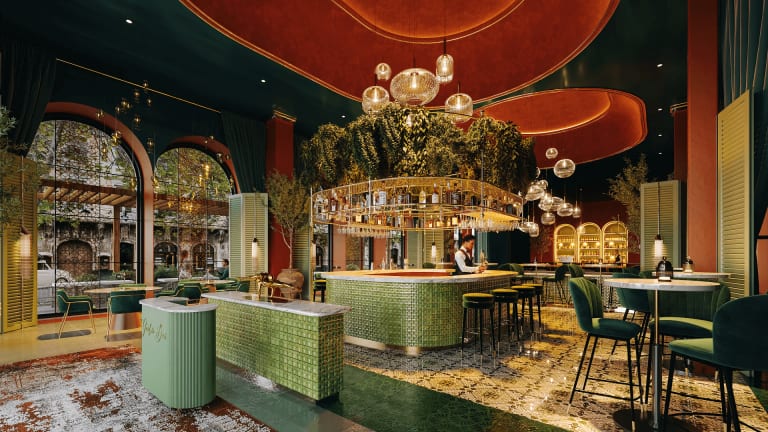
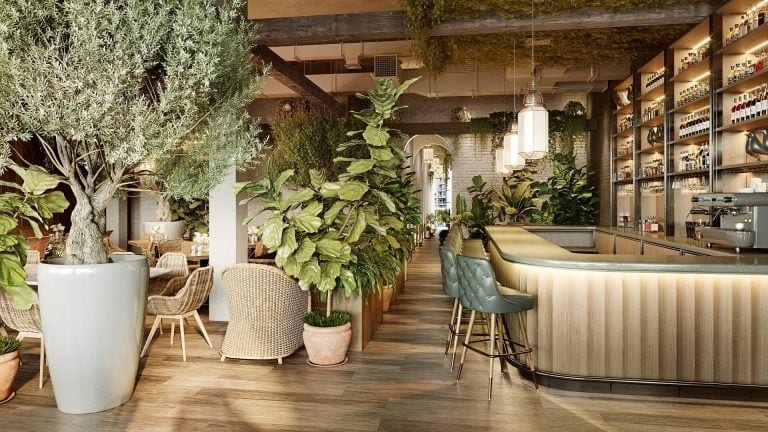
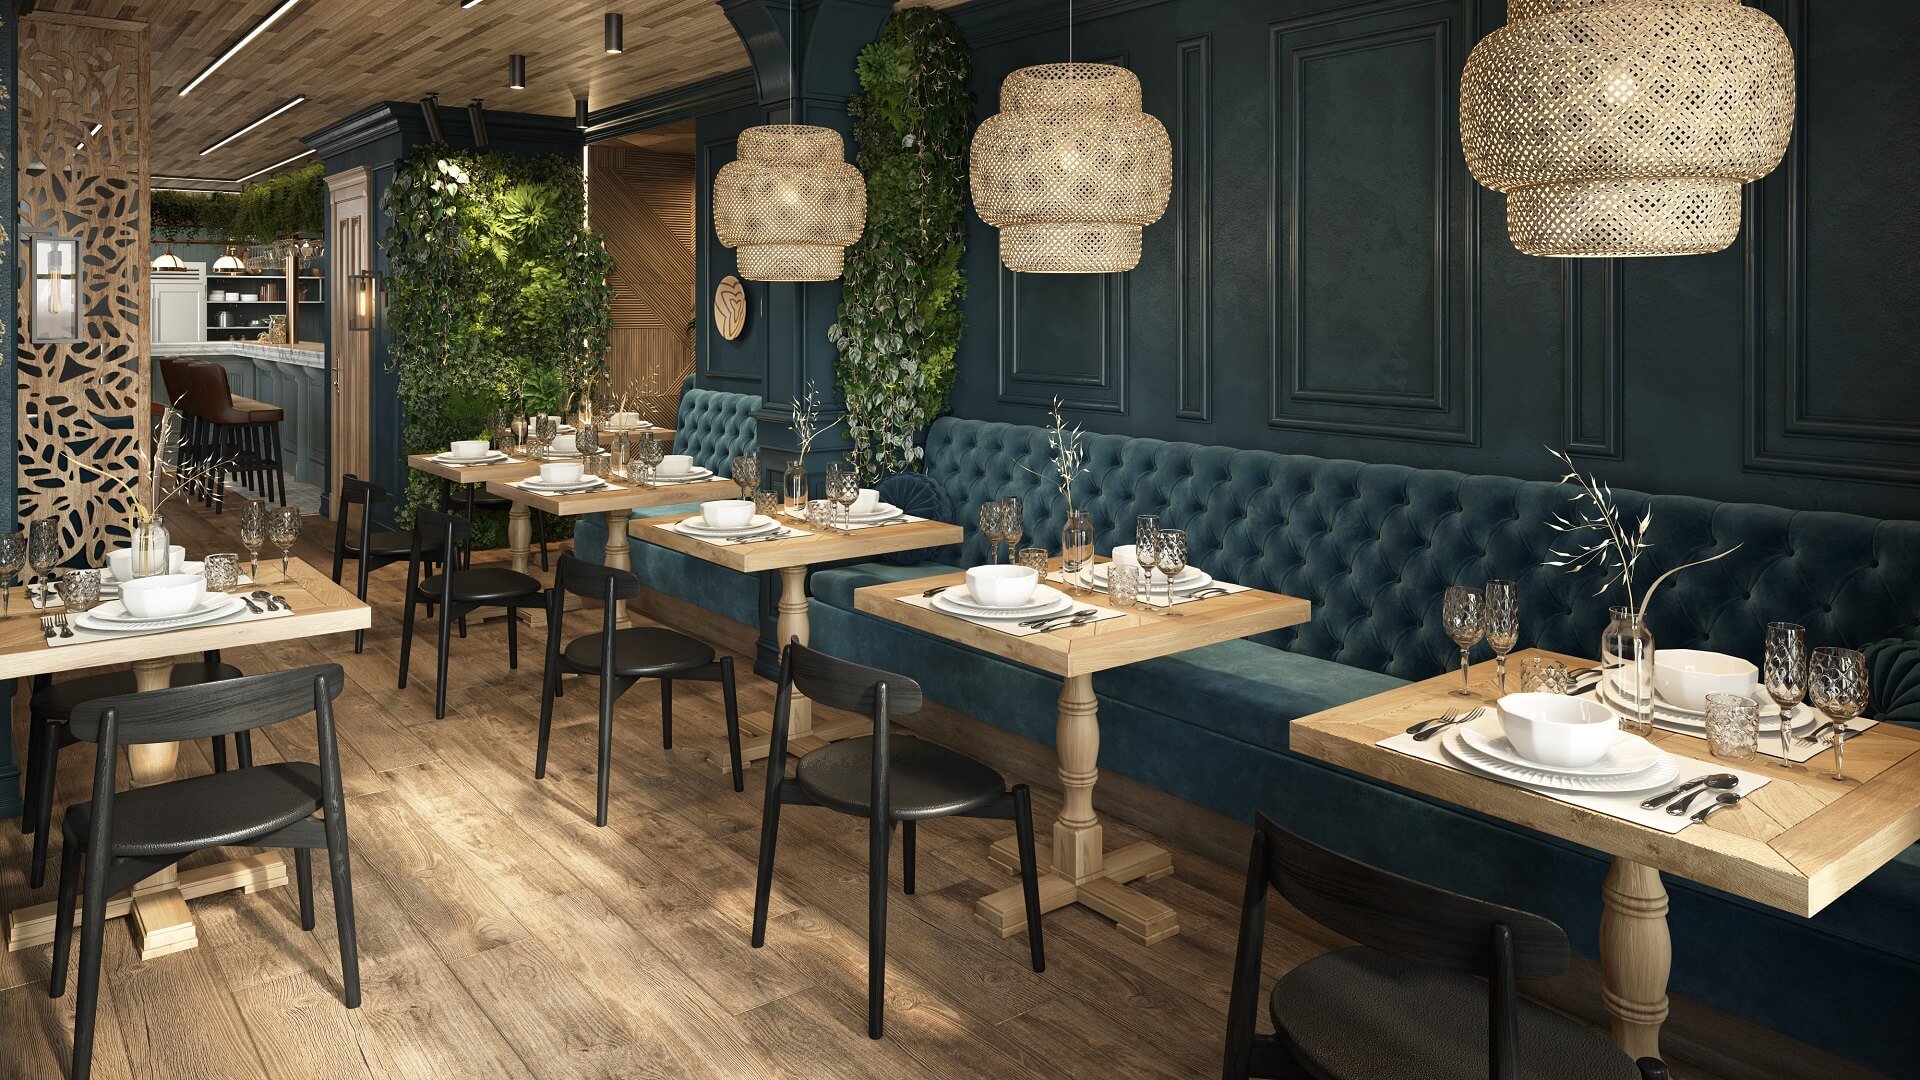
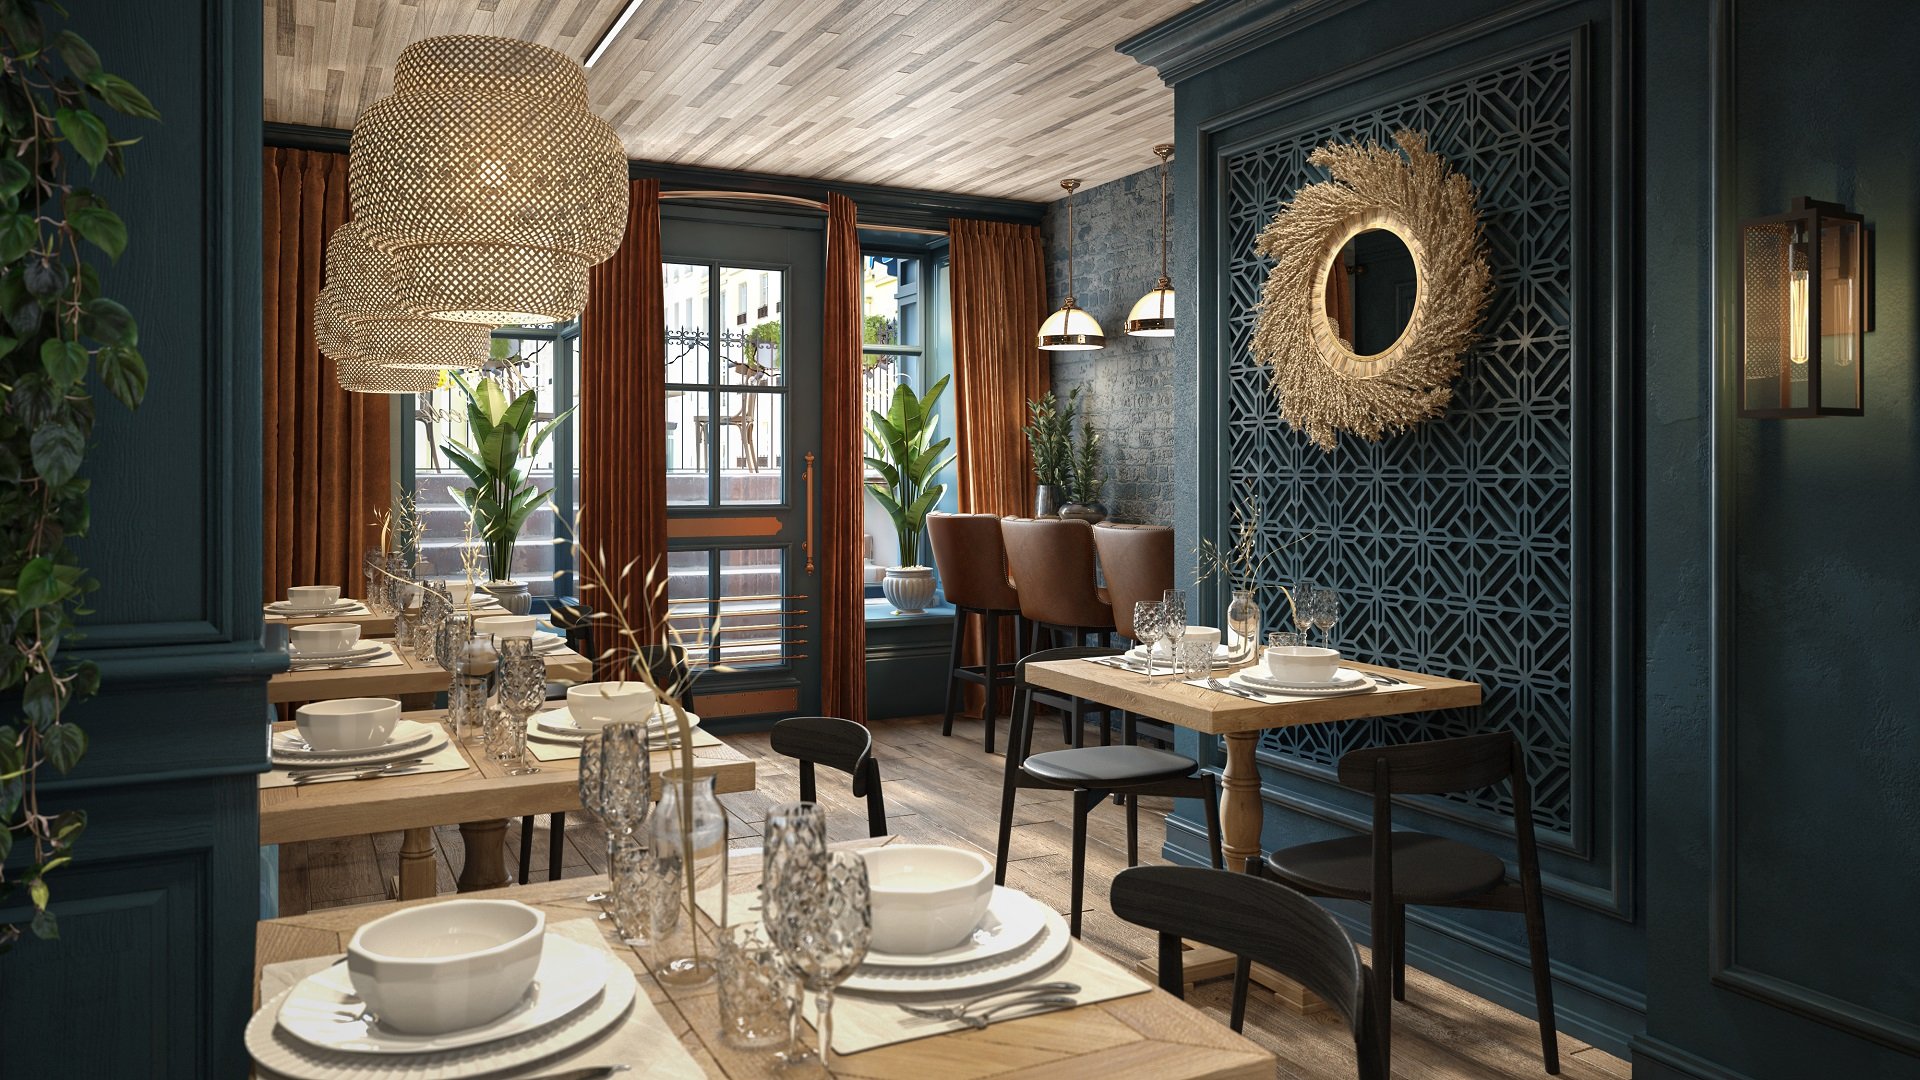
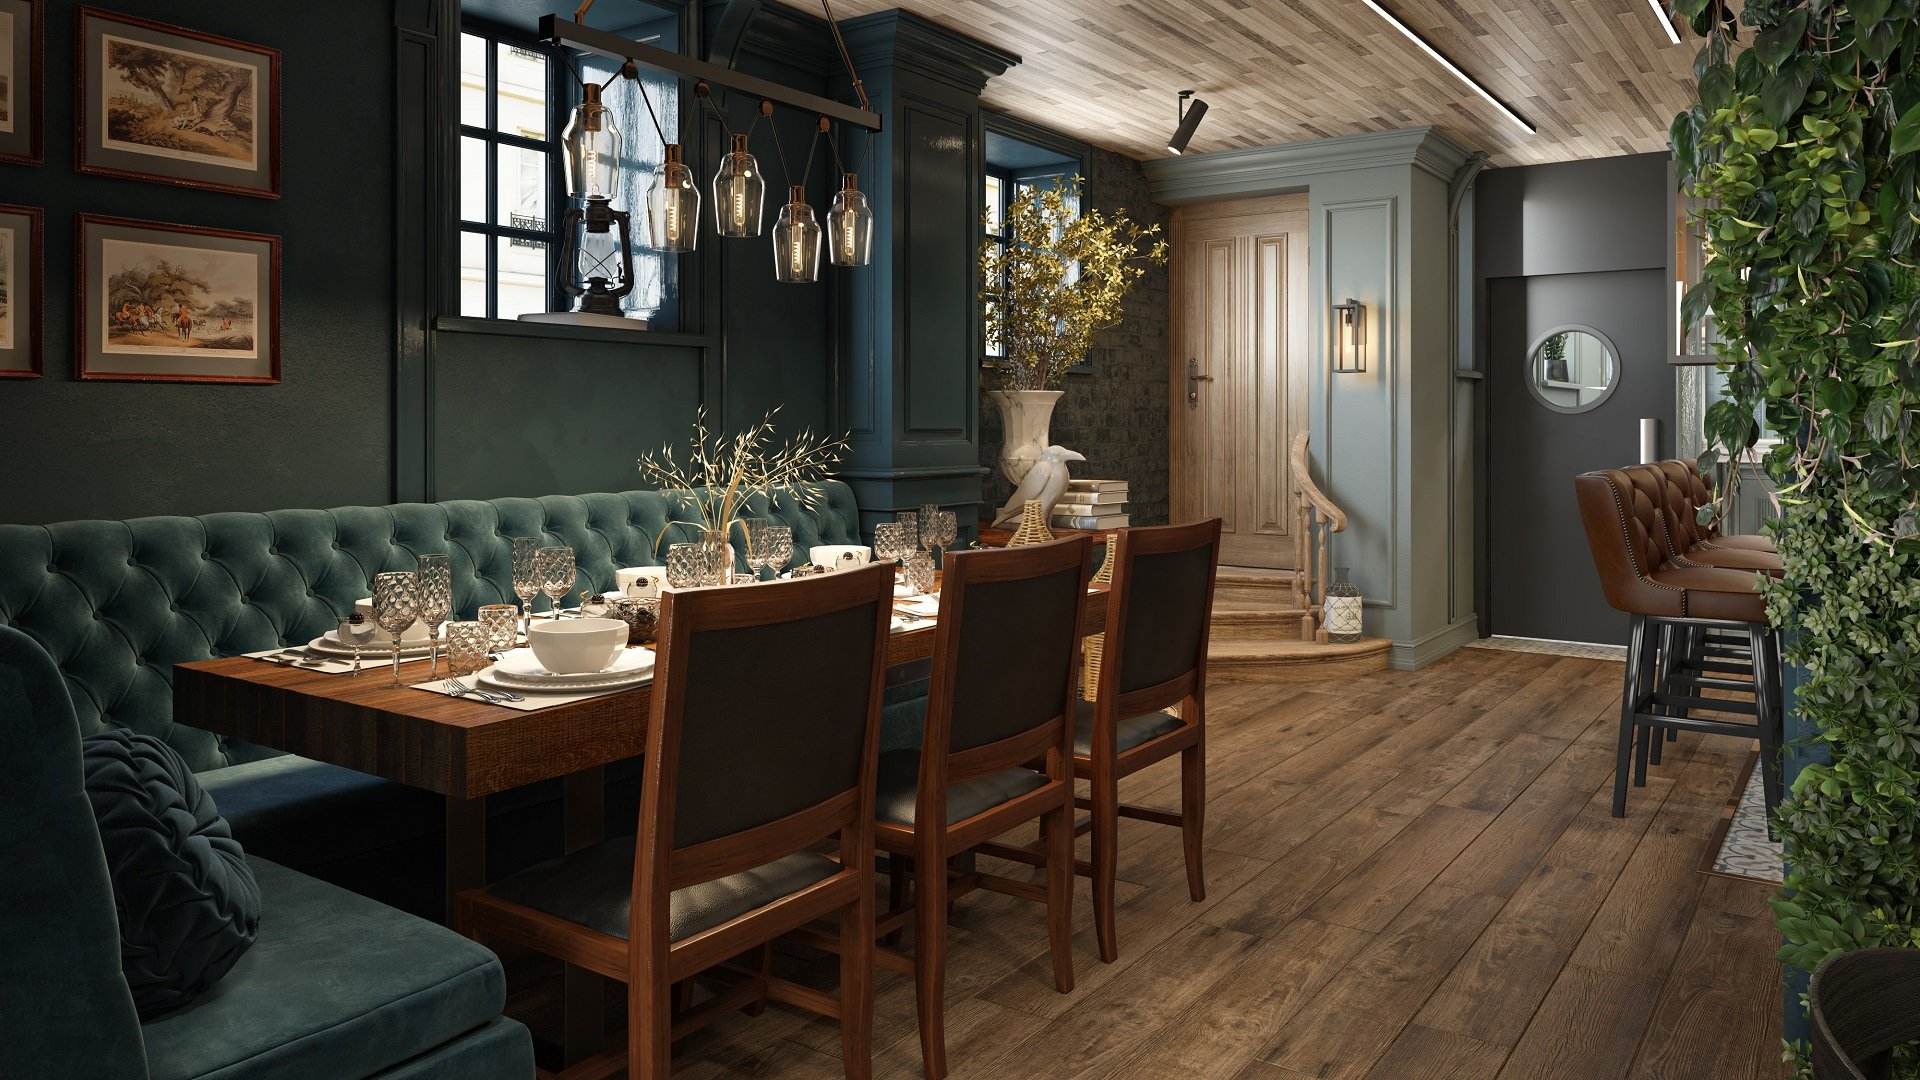
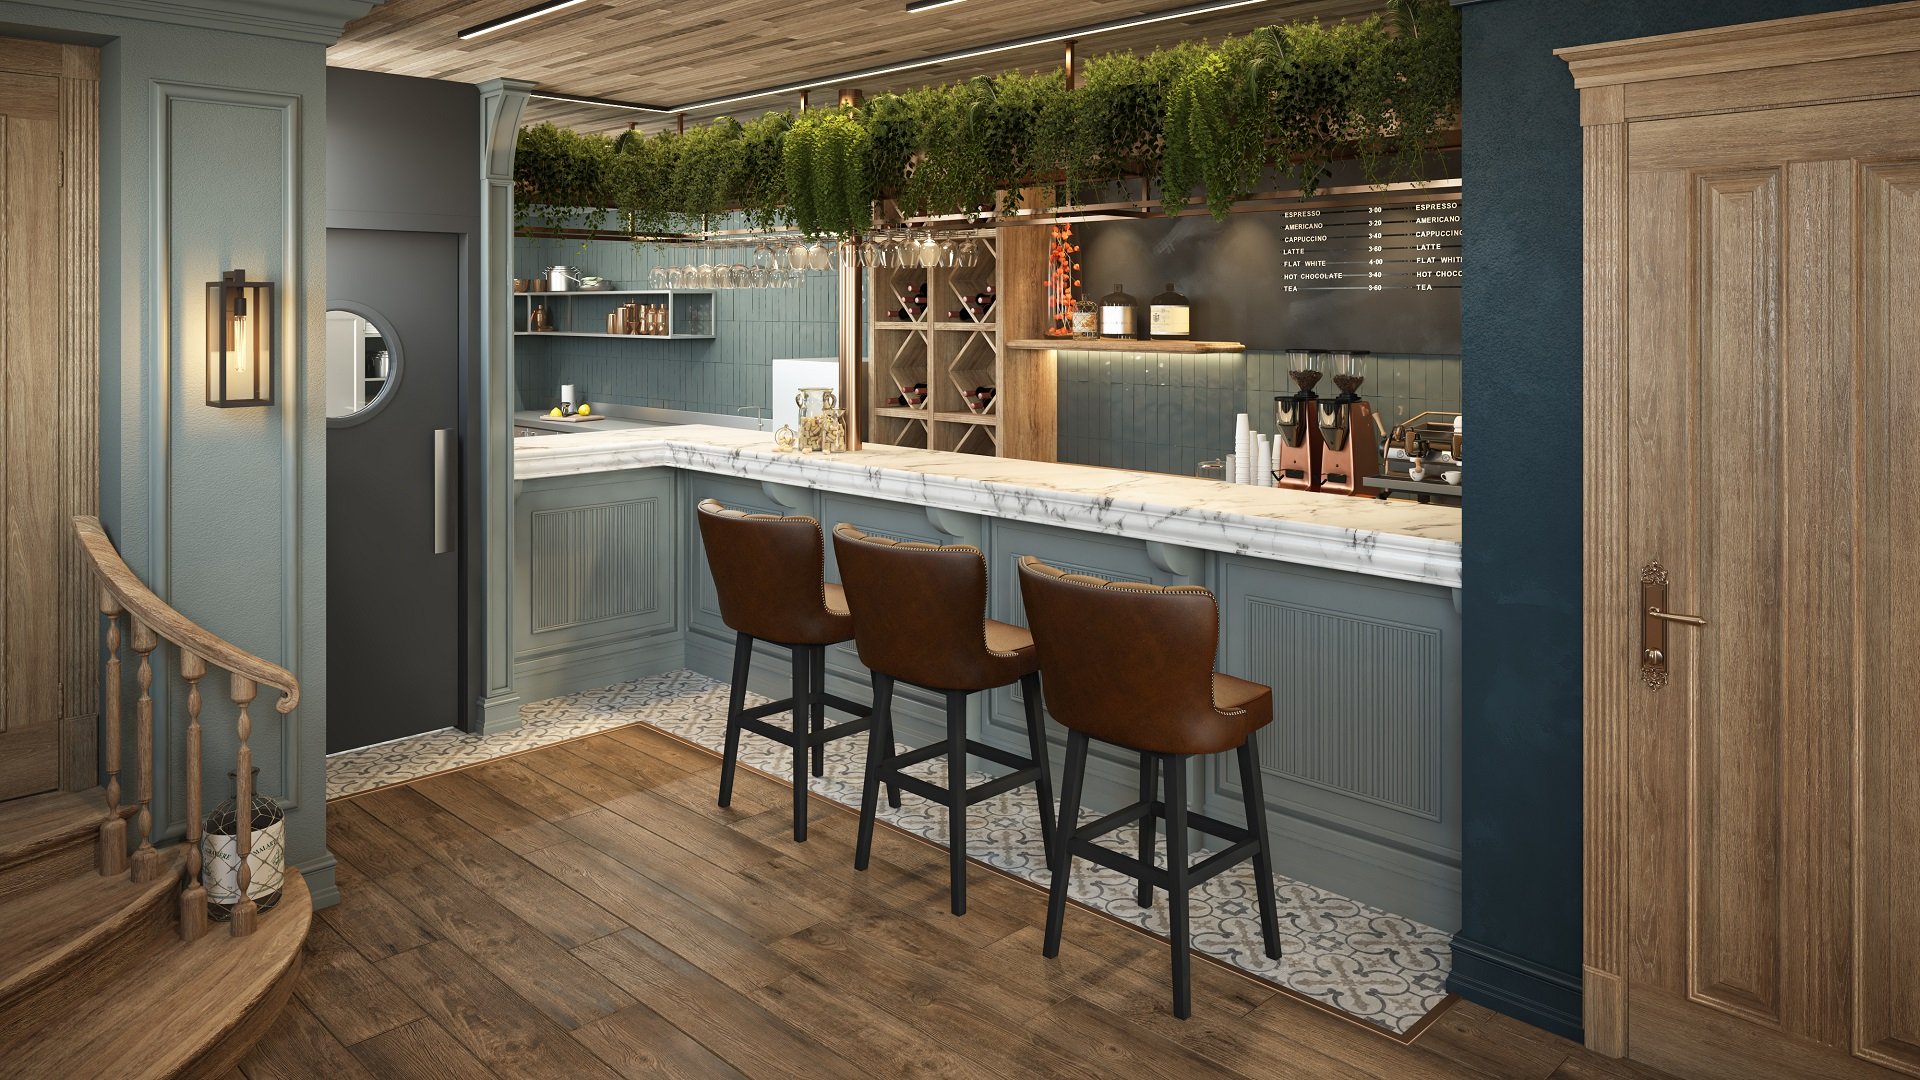
Then, she proceeded to render the 3D images. She made two views that were agreed on at the beginning and also decided to offer a third, bonus rendering. The artist did so because she found this close-up angle of the space exceptionally atmospheric. Here are all three CG images.
Jimmy was happy with the results. He just asked us to make several adjustments regarding colors and secondary details such as lighting fixtures and plants.
Our artist introduced all the necessary corrections and also did CGI post-production to fine-tune the lighting and details. Here is how Jimmy reacted once he saw the finalized result:

At this point, the only thing left to do was to merge the exterior and interior scenes. It was needed to make the interiors visible in the windows in the exterior images. For this, our artist had to do the following:
- export the 3D models from the interior scene to the exterior one;
- check settings to make sure all the materials still looked photorealistic and fix them if necessary.
Our CG expert did that and then completed the images with some finishing post-production touches. Now, let’s take a look at the outcome.
#3. The Result
Here are the final results of this restaurant design 3D rendering project. They were all made in 4K, 300 DPI resolution to be further printed in A3 format for a presentation.
Do you like it? The results exceeded our expectations — a warm, authentic Creole atmosphere fully captured in CGI.
However, Lavitta’s restaurant 3D rendering story did not end here. That’s because Jimmy was still in search of the most suitable place to realize his project. So in a few months, he contacted us again and asked to make renders of the same design but at new locations. Of course, we were glad to help.
#4. The 3D Images of the Restaurant Design for New Locations in NYC
These times, the process went much faster, as our team already had ready-made models of furniture and decor and knew the client’s preferences for design, colors, lighting, and camera angles. What’s more, we already had a scene with the modeled architecture. It helped us a lot, as the new locations looked pretty similar to the first one. That meant we just needed to tweak the existing scene instead of making new ones from scratch. So, here are the images we’ve made for the second spot.

The renders for the second location maintained the same quality and atmosphere as the first.
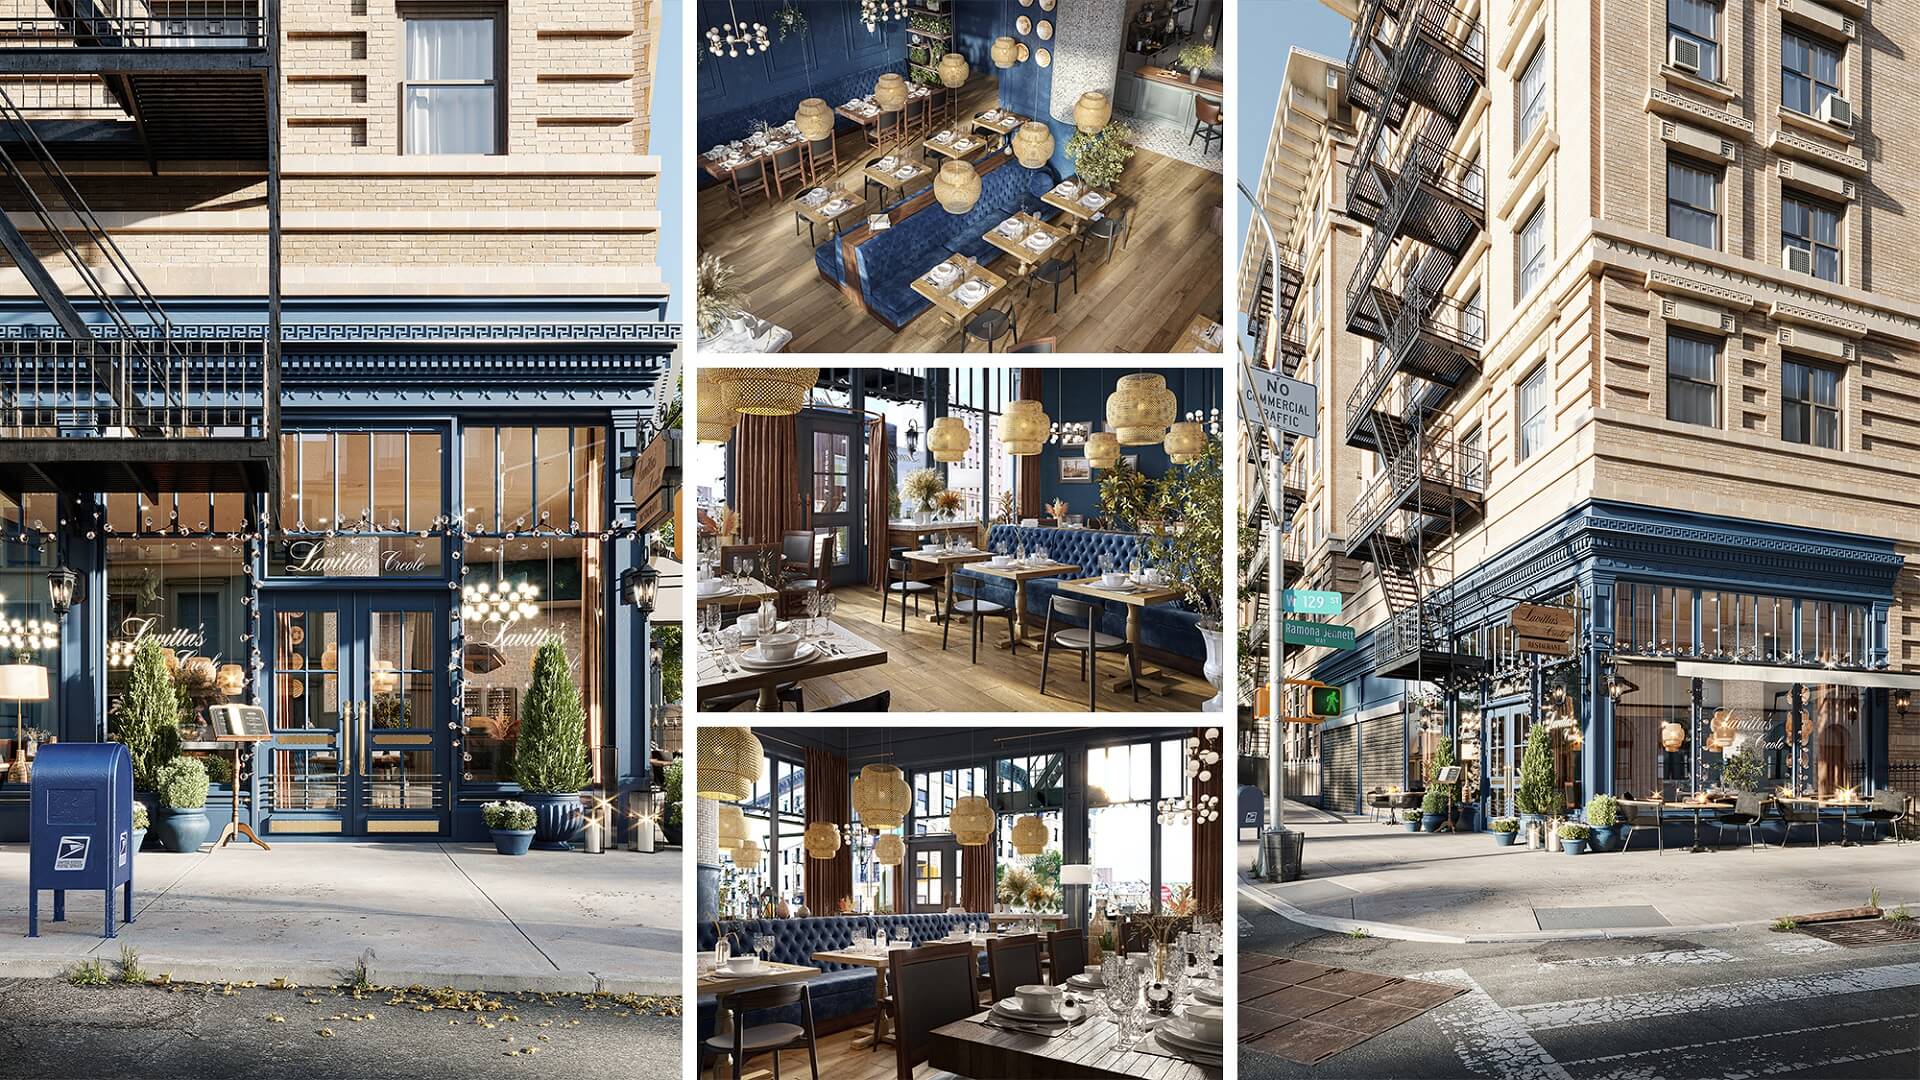
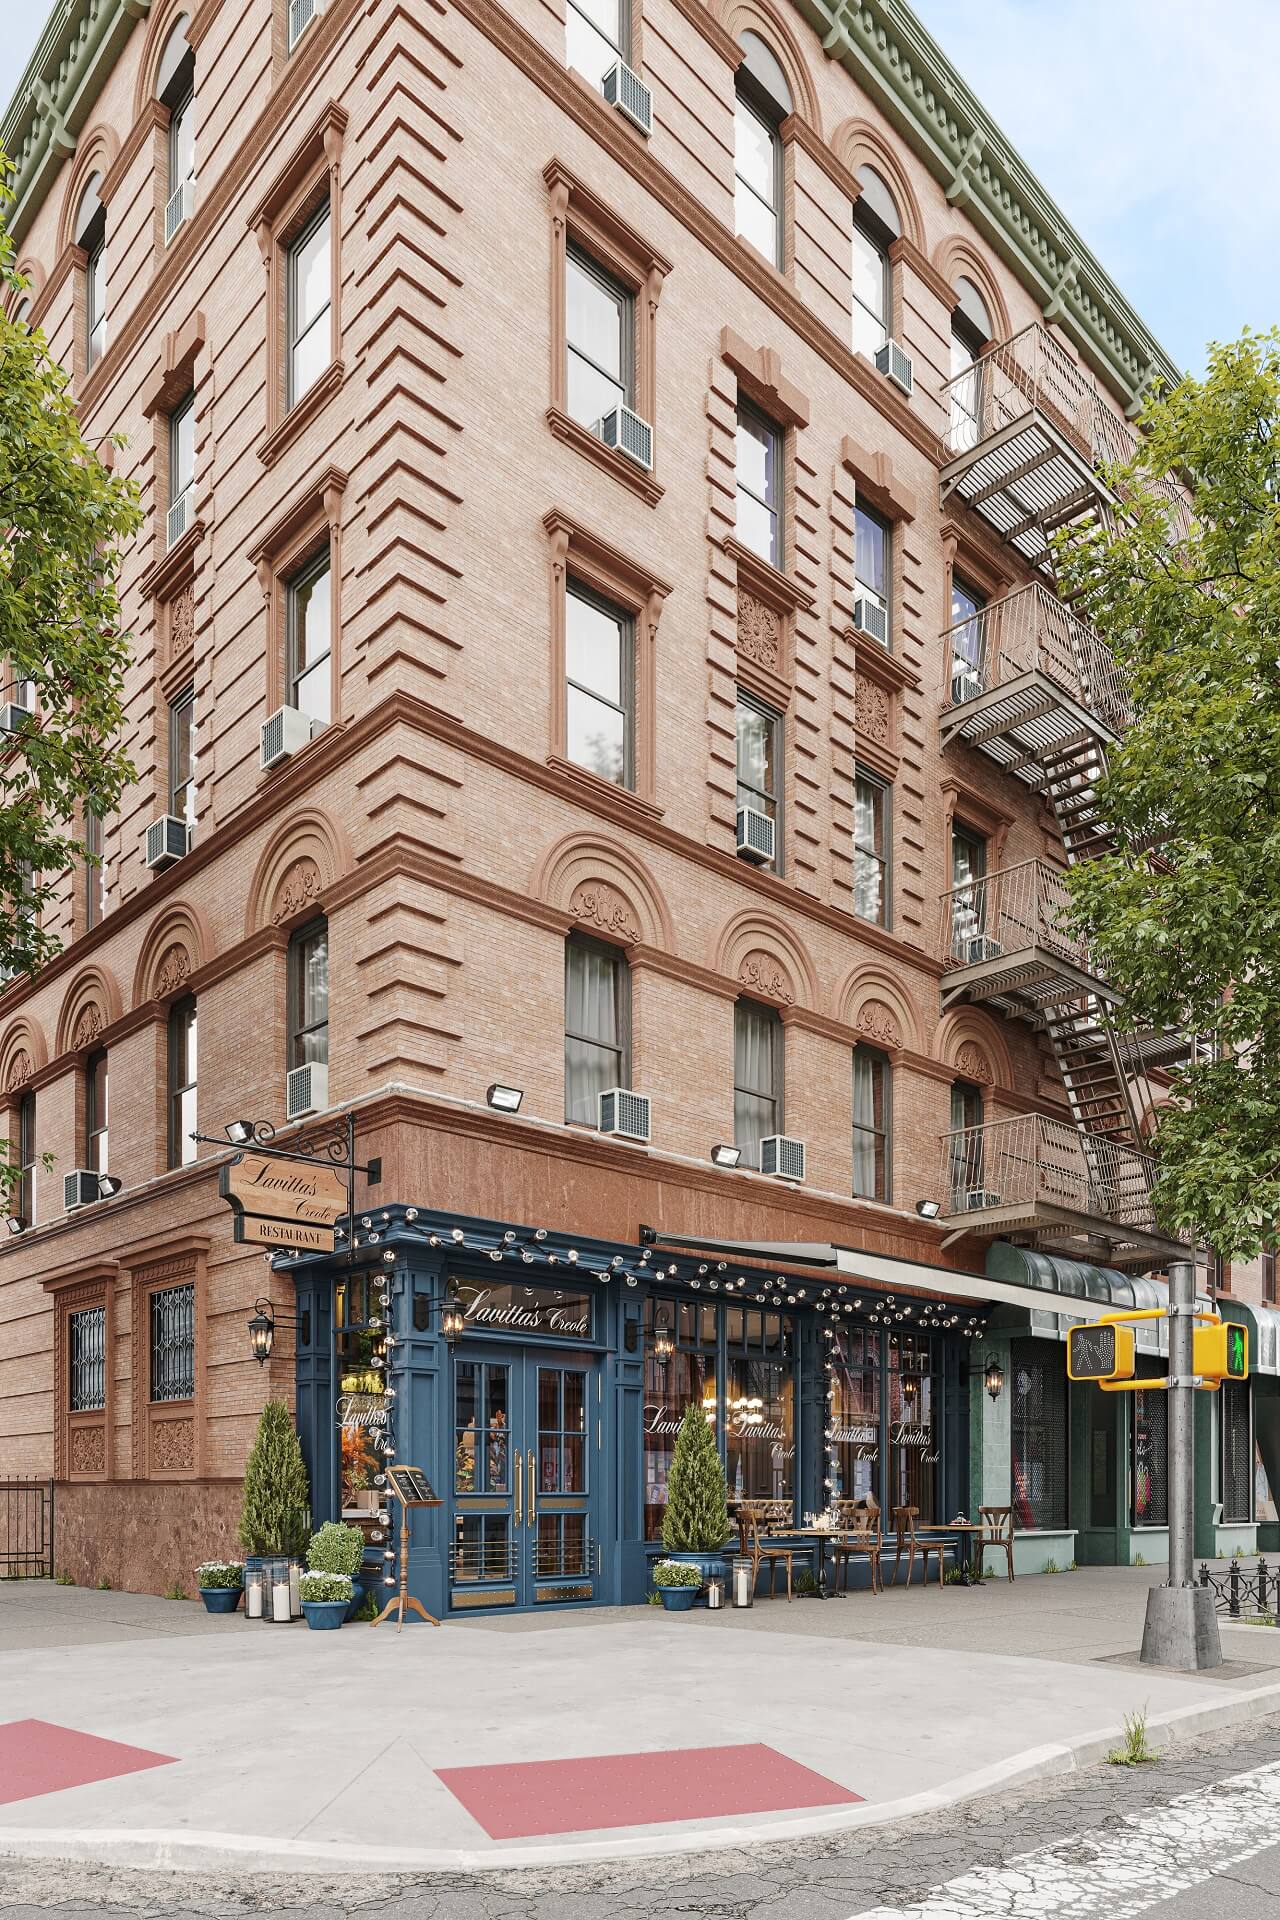
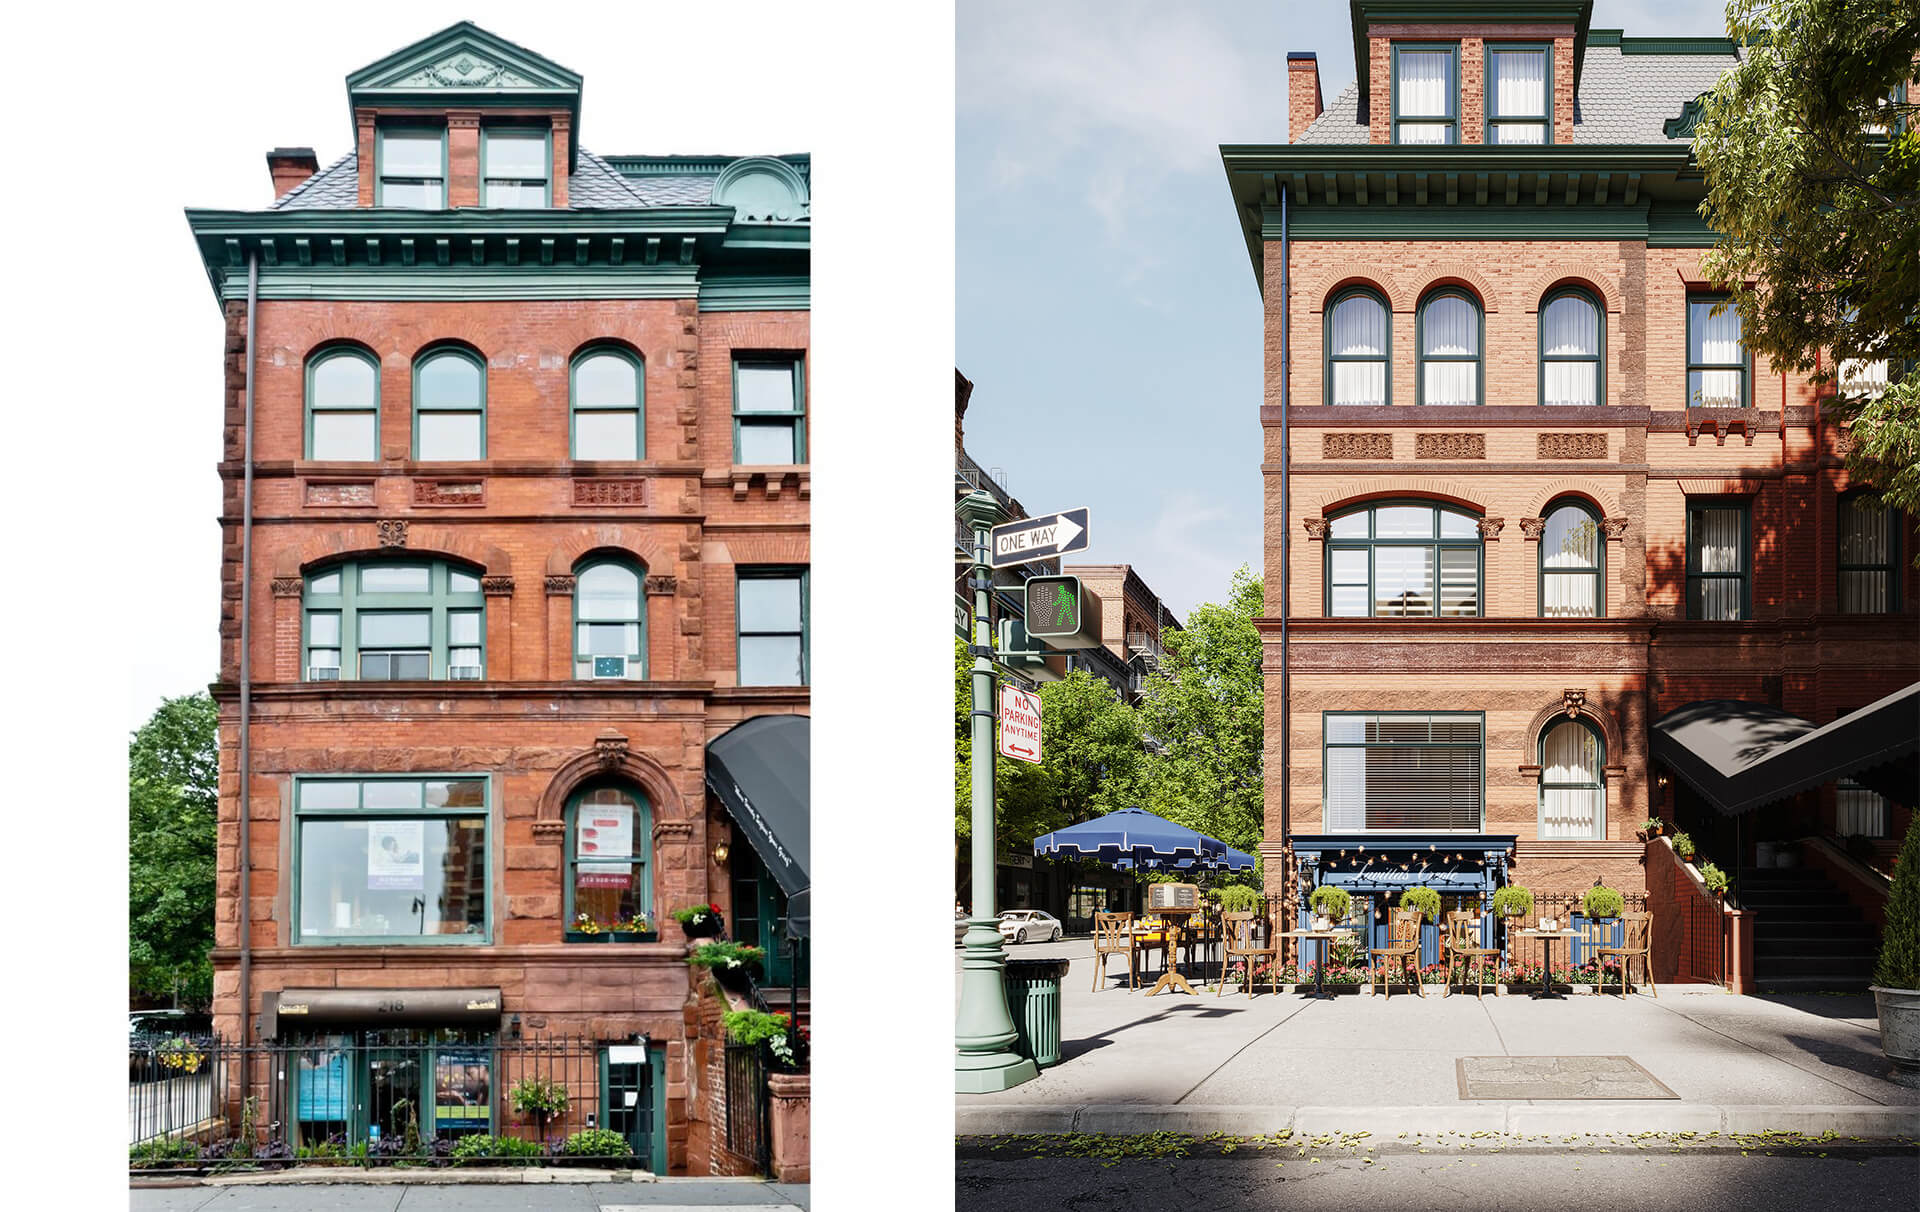
But only at the third attempt did the restaurateur find and lease the perfect place. Just like two previous times, it was on the corner of an old brick building in Manhattan. Let’s view the renders we made for the final spot!
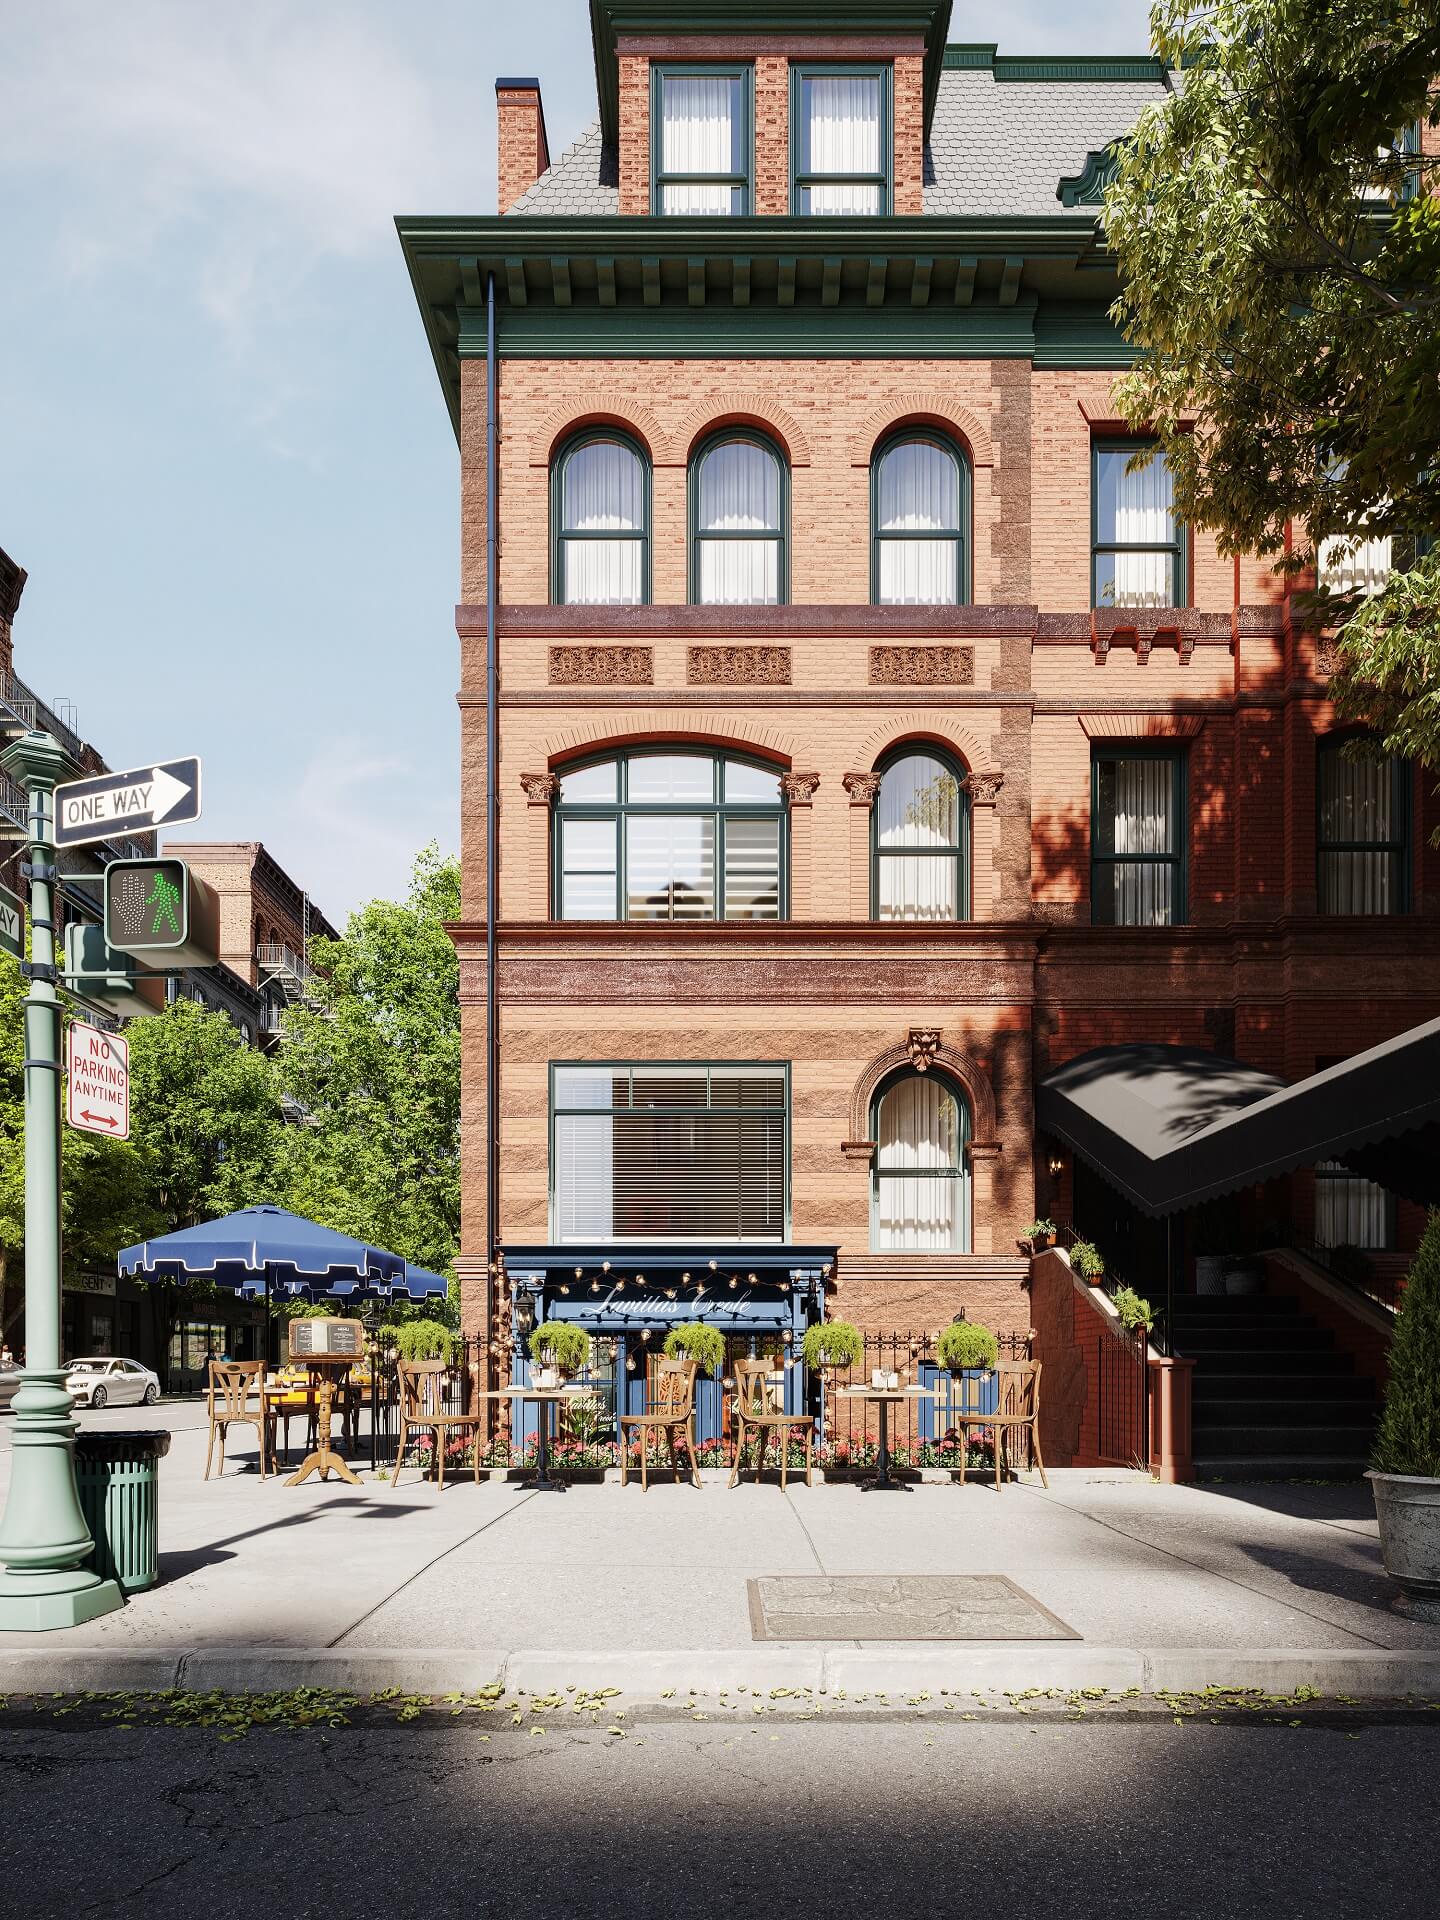
And by looking at the images below, you can compare the real photo of the location (on the left) to the 3D rendering of it (on the right). As you can see, the only significant difference between them is the presence of the yet-to-be-built restaurant in the 3D visualization. This side-by-side comparison shows exactly how CGI bridges design and reality.
The ArchiCGI team is very grateful to Jimmy Thomas for entrusting this beautiful restaurant design 3D rendering project to us. We wish that Lavitta’s Creole is always full of happy guests and that it makes its owner prosper. Our team hopes we will be lucky enough to visit this dining place ourselves one day. And, of course, we’re eager to work on more amazing projects together!
To see more examples of how we handle restaurant CGI, check out our 3D rendering of a restaurant case studies. And for practical advice on getting the best results from this type of visualization, see our restaurant rendering services tips.
Also, we invite you to take a look at our case study with more examples of 3D rendering in New York State to see more work in this area.
Want to learn how much your project costs? See how we evaluate 3D rendering projects
Need quality CGI services for your commercial or residential design projects? Contact us to schedule a call with our client manager who will consult you on the types of 3D visualization you need and quote your task!

Catherine Paul
Content Writer, Editor at ArchiCGI
Catherine is a content writer and editor. In her articles, she explains how CGI is transforming the world of architecture and design. Outside of office, she enjoys yoga, travelling, and watching horrors.