


Architectural Rendering Project for a Villa by the Lake
This story began when Ilya Mikhailenko, Senior 3D Artist at ArchiCGI 3D visualization company, was inspired by a design from his colleague’s architectural rendering project. It was created a few years ago, and the 3D Artist wanted to give it a new life.
Initially, it was a modern private residence situated in an urban area. Ilya turned it into a luxury vacation rental on board of a Spanish lake.
He then replanned the project interior and changed the way the property was presented. In the end, the villa undergone a complete overhaul — only the exterior remained.
Step 1. Finding References for a New Rendering Project
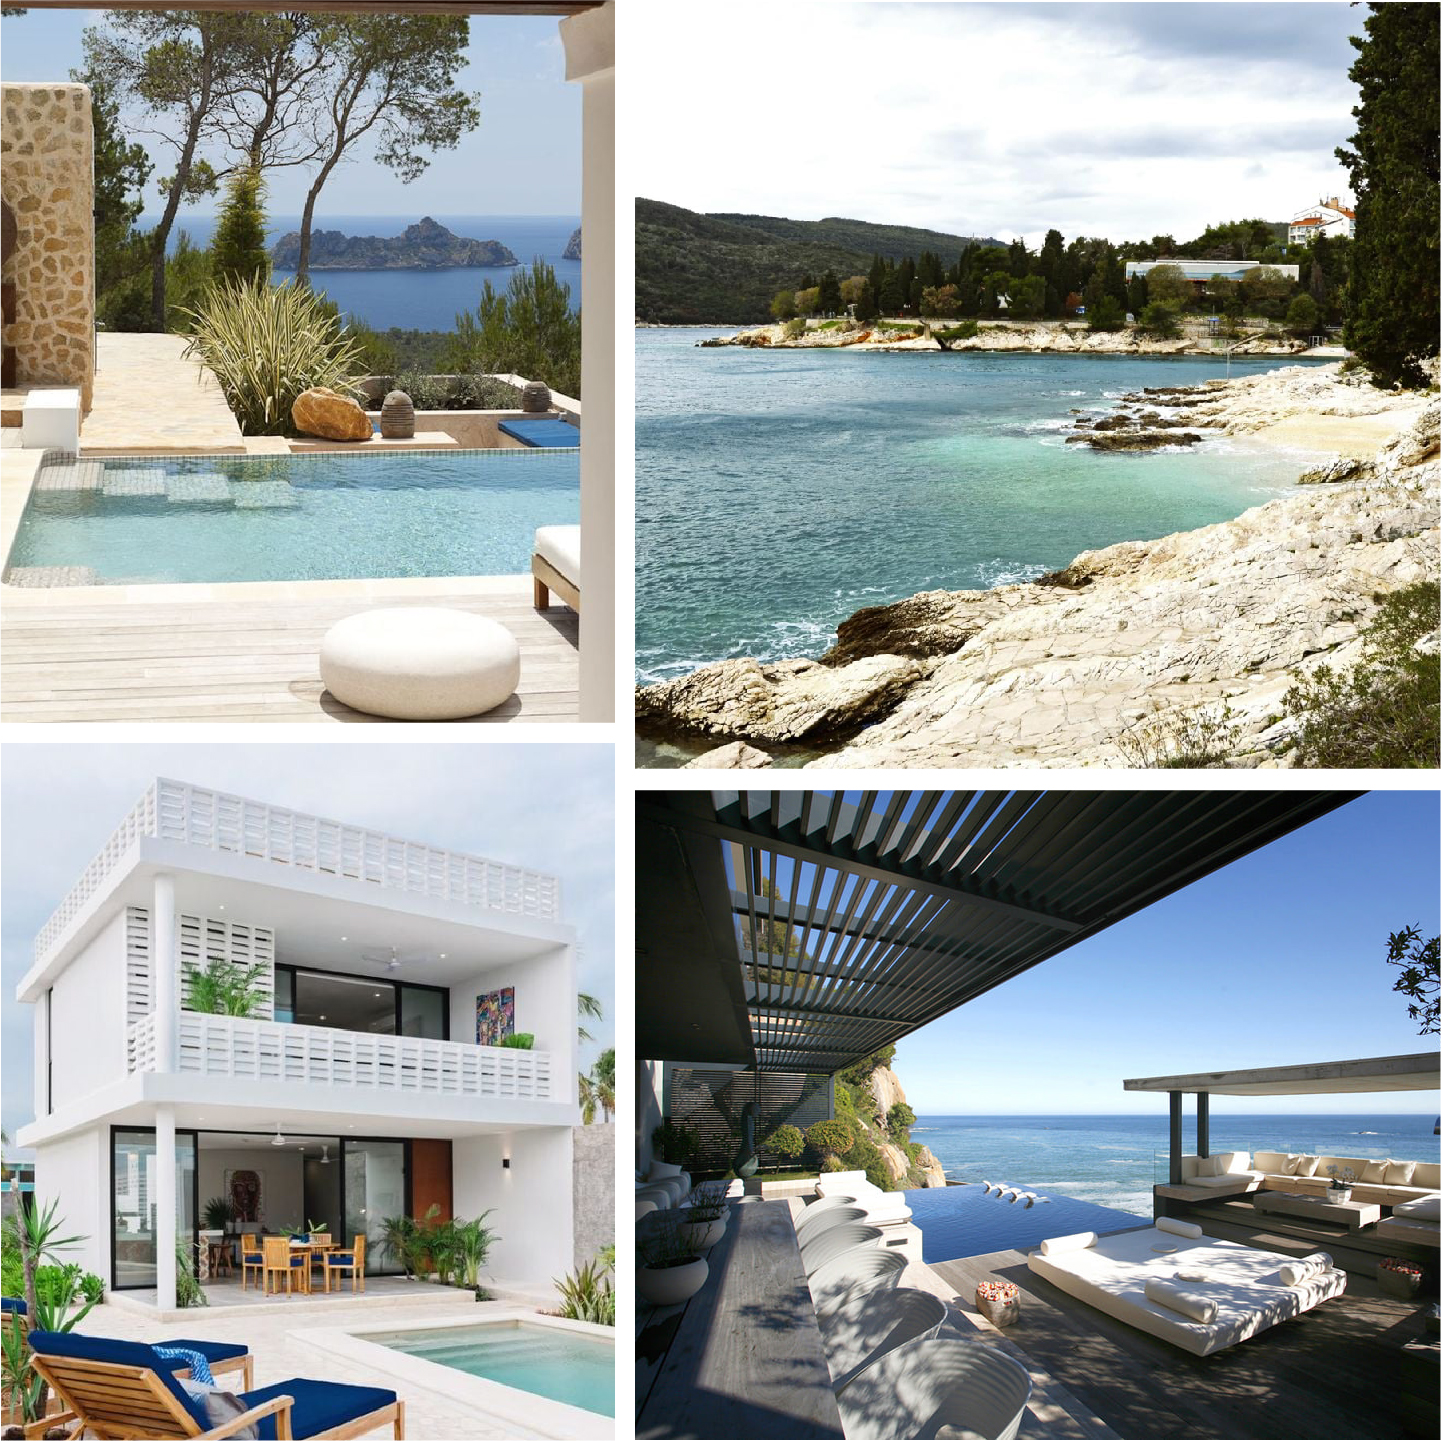
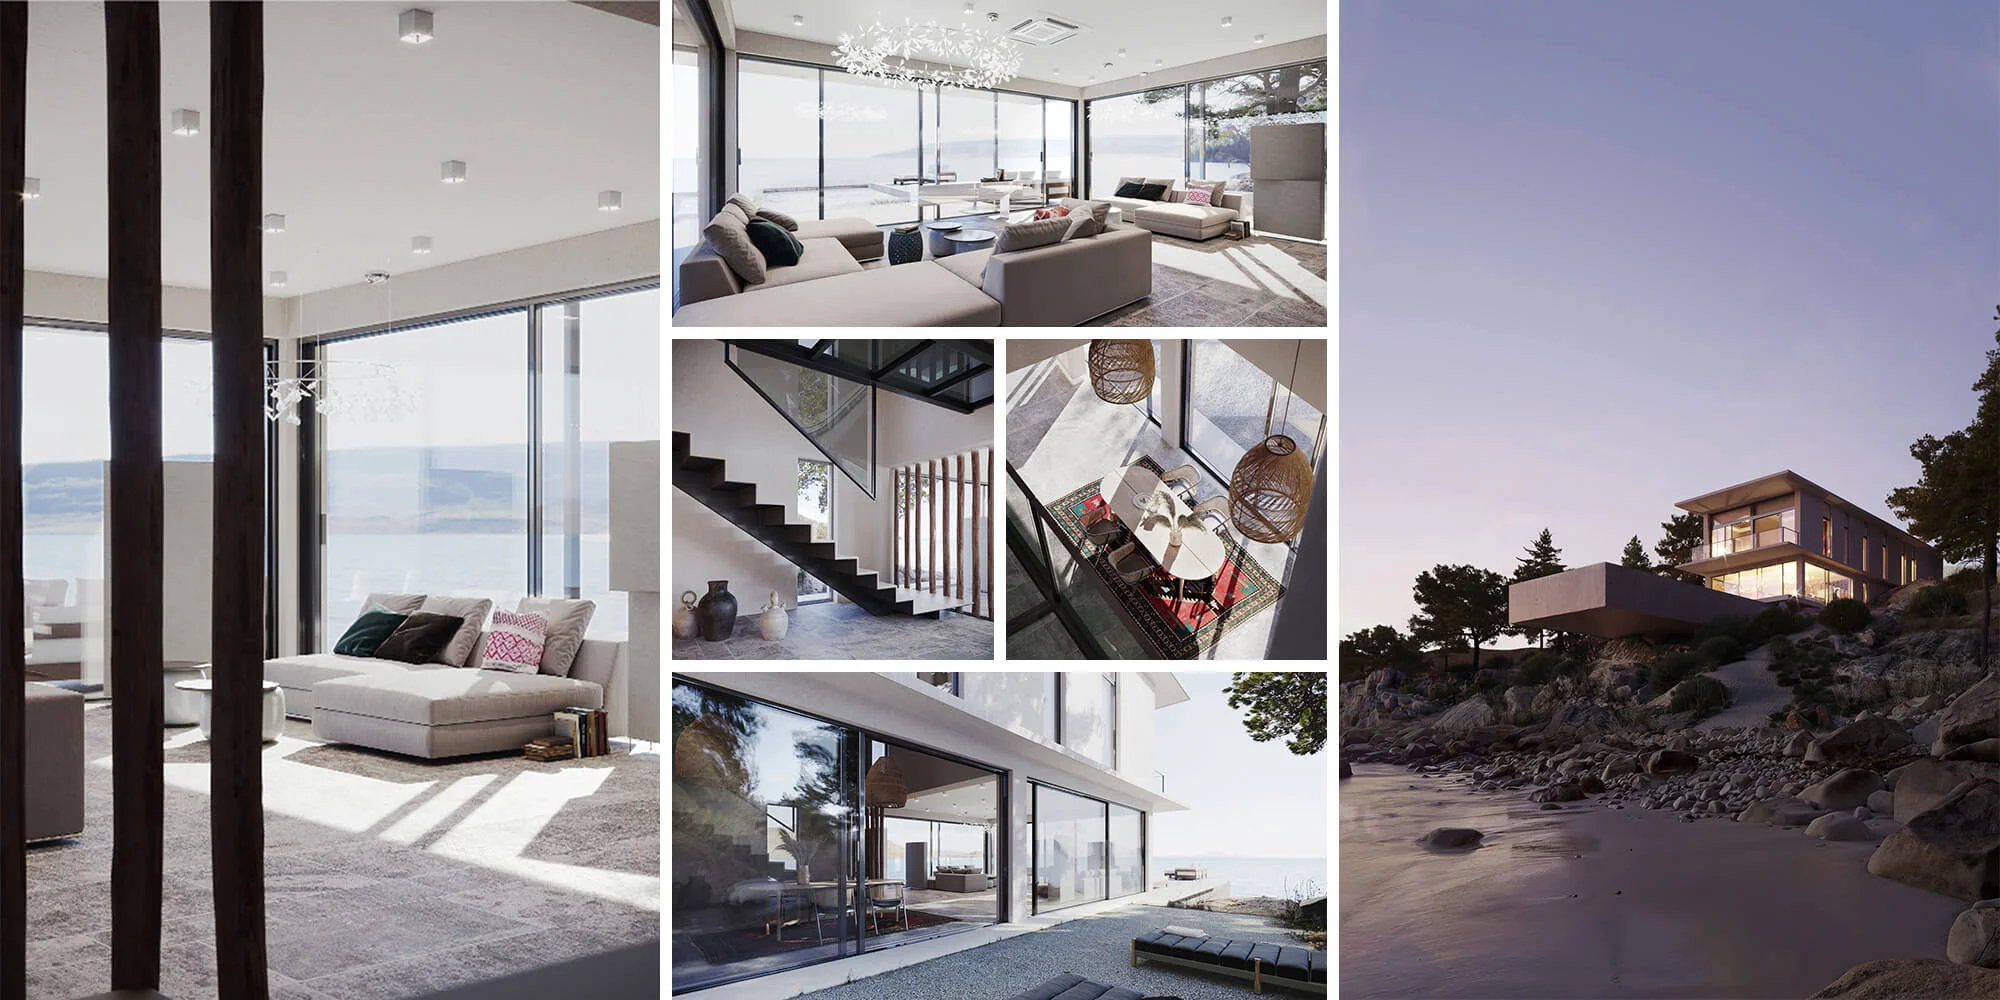
To form a vision, Ilya found references for the mood, materials, building structure, landscape, light, even the greenery. Above are some of the images he chose.
Step 2. First Version of the Main View
Choosing the view for an architectural rendering project is a creative process. So Ilya tried out multiple versions. He drew sketches, made preliminary 3D visualizations until he found the perfect composition. To test the concept, along with the color scheme, the 3D Artist first created a sketch in Photoshop on iPad.
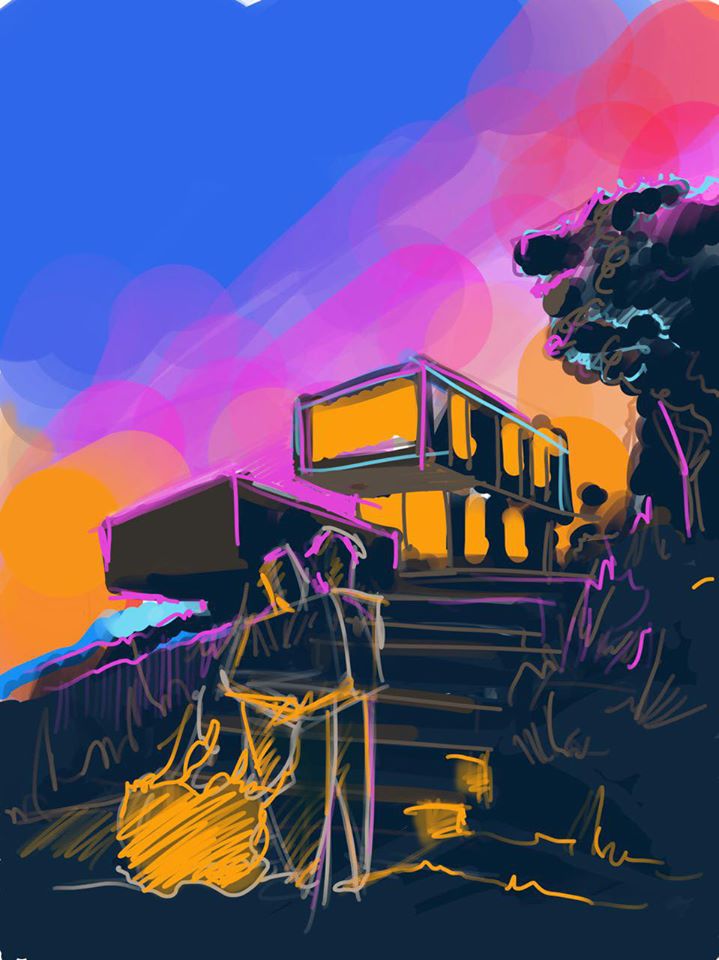
Then, the 3D Artist drew a paper sketch and created a preliminary 3D rendering — to further explore the concept he had in mind. Ilya wanted the villa more distanced from the shoreline. The space in the forefront would be perfect for parties, spending time with friends and just enjoying the magnificent sunset. So the 3D Artist wanted to highlight that benefit in the architectural rendering — by lighting a fire there, adding people around.
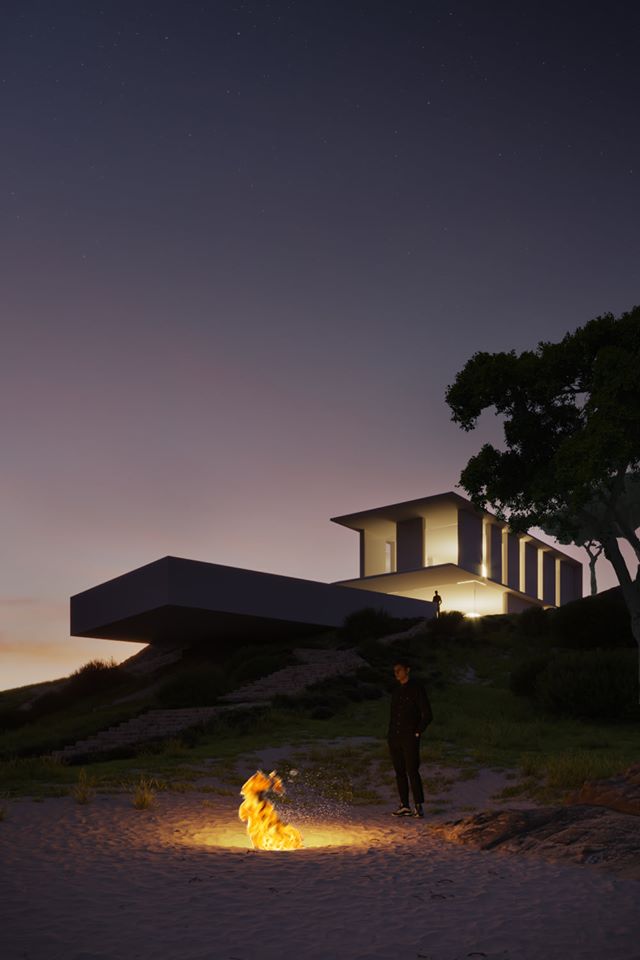
As he looked at the results, however, the 3D visualizer realized that the chilling zone took the focus away from the architectural project. Most importantly, it downplayed the property’s main advantage — amazing views.
So Ilya moved the villa closer to the shore. That would allow vacationers to get most spectacular views, and eliminate all elements distracting from the property. Then, the 3D artist started working on architectural design. He got help from a professional architect, who created drawings for the villa, advised on how to show best the terrace swimming pool in the architectural rendering.
Step 3: Second Version of the Main View
#1. New Concept
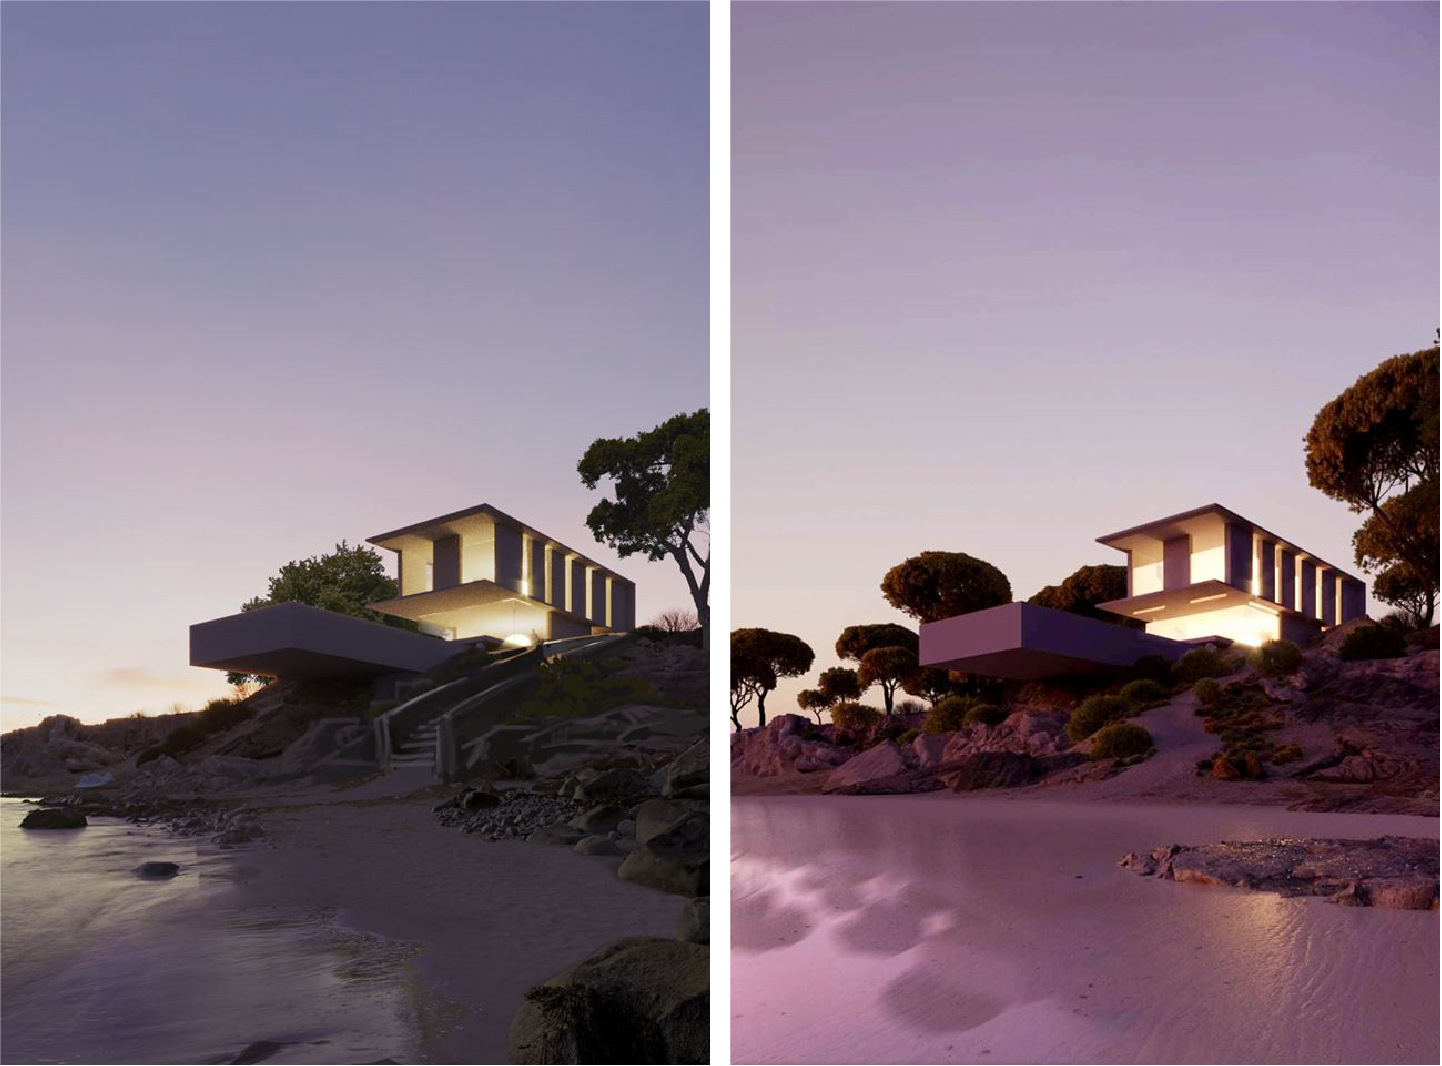
Once the concept was ready, Ilya started work on the second version of the architectural rendering project. This time, all attention was focused on the building. So the 3D Visualizer eliminated all distractions, added the coastline, beach, stones, changed the stairs. As a result, he got the preliminary rendering in the left — the first draft, with half of the elements made in Photoshop.
New surroundings do not overpower but complement the villa design. To check out the complete look in CGI, Ilya reconstructed and polished the missing part of the surroundings in 3D Max. He created the coastline, added trees, “chiseled” the stones in Photoshop — and got a perfectly balanced composition and a harmonious look.
#2. Final Version of the 3D Exterior Rendering

At this stage, the task was to finalize the main view. Si IIya started with the architectural project. He worked on the concept with our Architect, who made the drawings and helped with the design. They chose the post-and-beam structure, filled the niches, created the layout for the first floor.
With the architectural design finalized, Ilya created the surroundings in CGI. He built the coastline, united it with the rest of the view in one harmonious picture, worked on the realism of the trees. As a result, we’ve got a photoreal landscape.
Next, came the time to develop the interior design — for it could be glimpsed in the architectural rendering. So the 3D Artist designed the interior in accordance with the chosen style.
Usually, when a whole team is involved in delivering exterior and interior visualisation services, different 3D views are developed in parallel. But as our 3D Artist created this project for himself, he worked alone and had to go step by step.
Step 4. Interior Design Rendering
- The Narrative
For presentation, Ilya opted for a film transition strategy. So that first, the audience sees the 3D architectural exterior rendering of the project, next comes interior 3D visualization, and then — drawings. All renders are connected by one or several common elements so that the viewer always understands where he is. This way, the first 3D rendering introduces the audience to the architectural design, while the following interior renders show the functionality of the space. They come as one single system, with each element complementing the other.
Such a presentation makes a ready marketing material. For the client or website visitor can just look through the project and understand everything he needs.
- Planning
Based on what a tenant would like to see in a vacation rental, Ilya designed the future path of the viewer in the architectural rendering project. He drew a plan for the sequence of camera views to define their exact order and the way they will transition. To see how the views work together aesthetically and functionally, the 3D Artist created a collage.
- Interior Design Creation
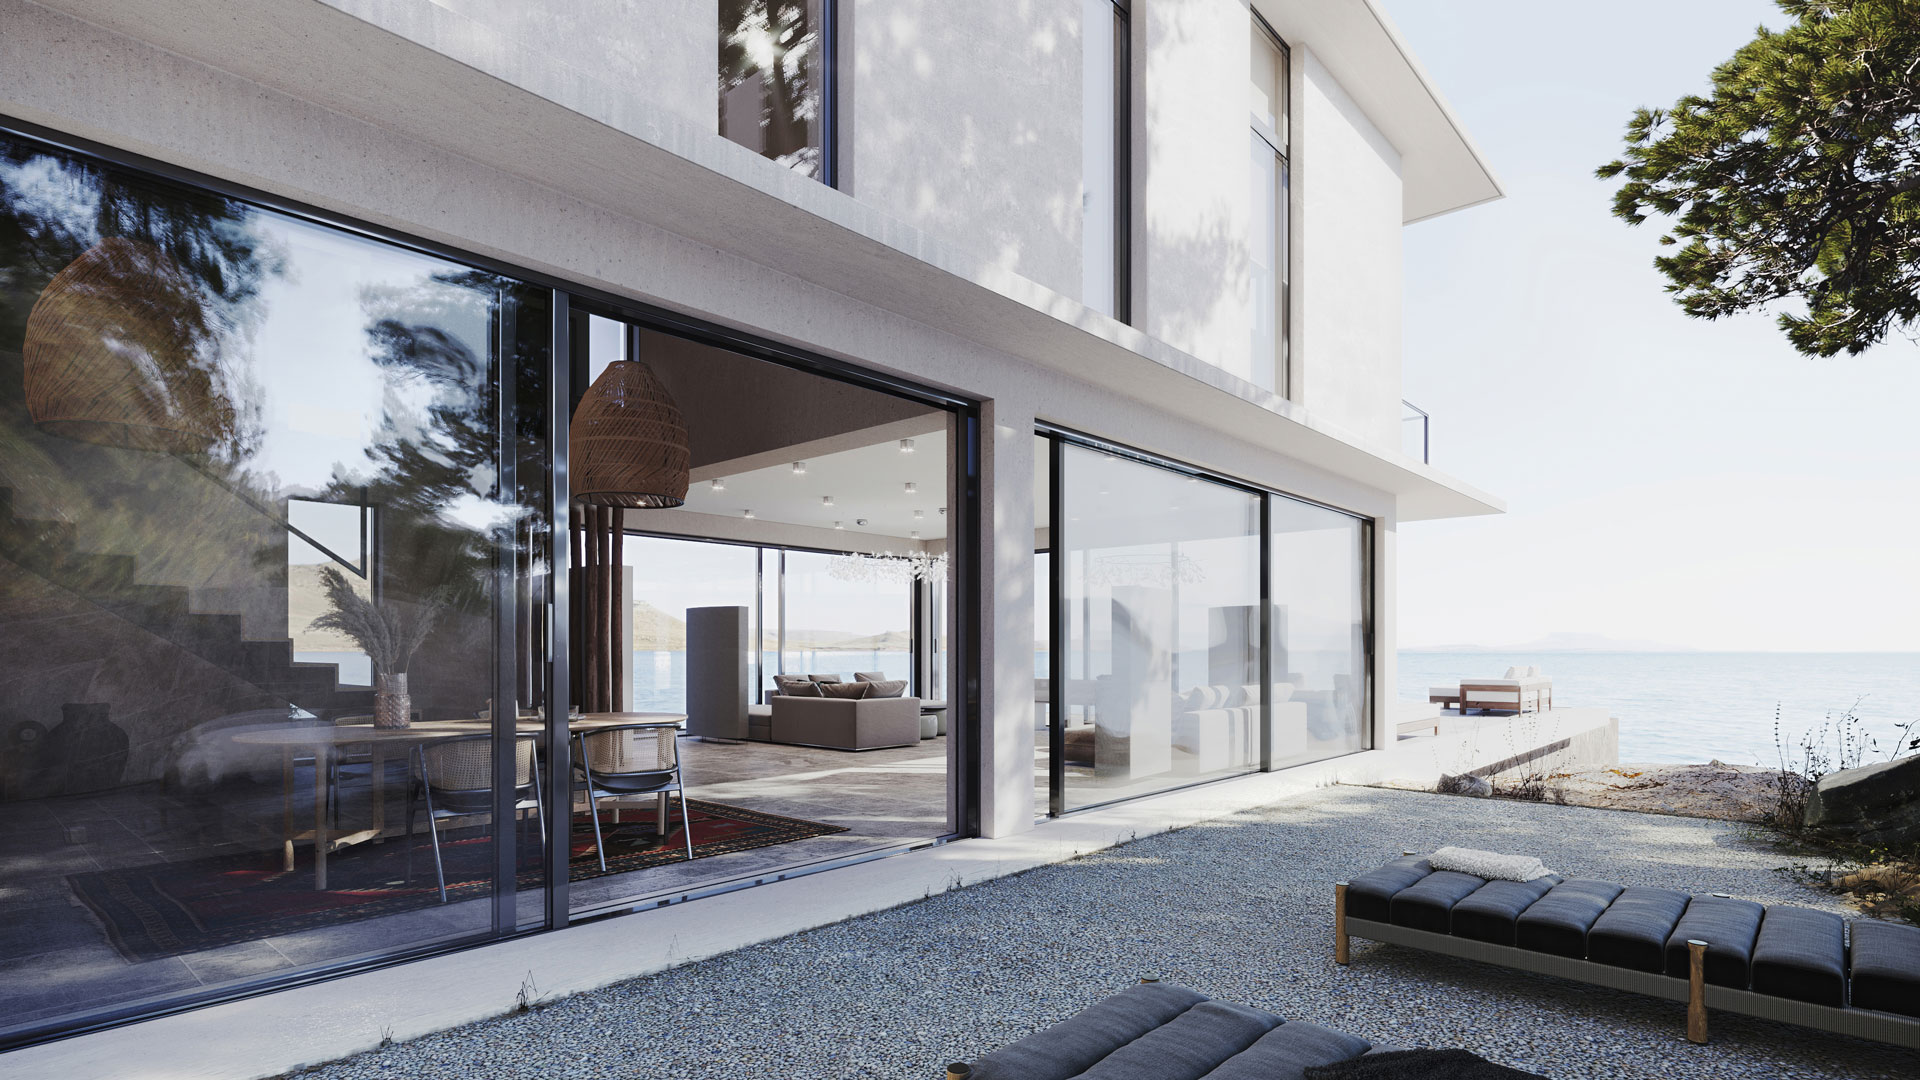
The main selling point of this architectural project are breathtaking views on the lake. And the post-and-beam structure was perfect for that, for it allowed for creating floor-to-ceiling windows. Now, these will help vacationers enjoy their holiday to the full! And they become the centerpiece of each interior rendering.
There is practically no decor in the villa — the emphasis is on shapes and materials. This combination of scarcity and quality makes for a luxurious look. All materials in the interior can be found in the landscape around, which lends the space a feeling of harmony.

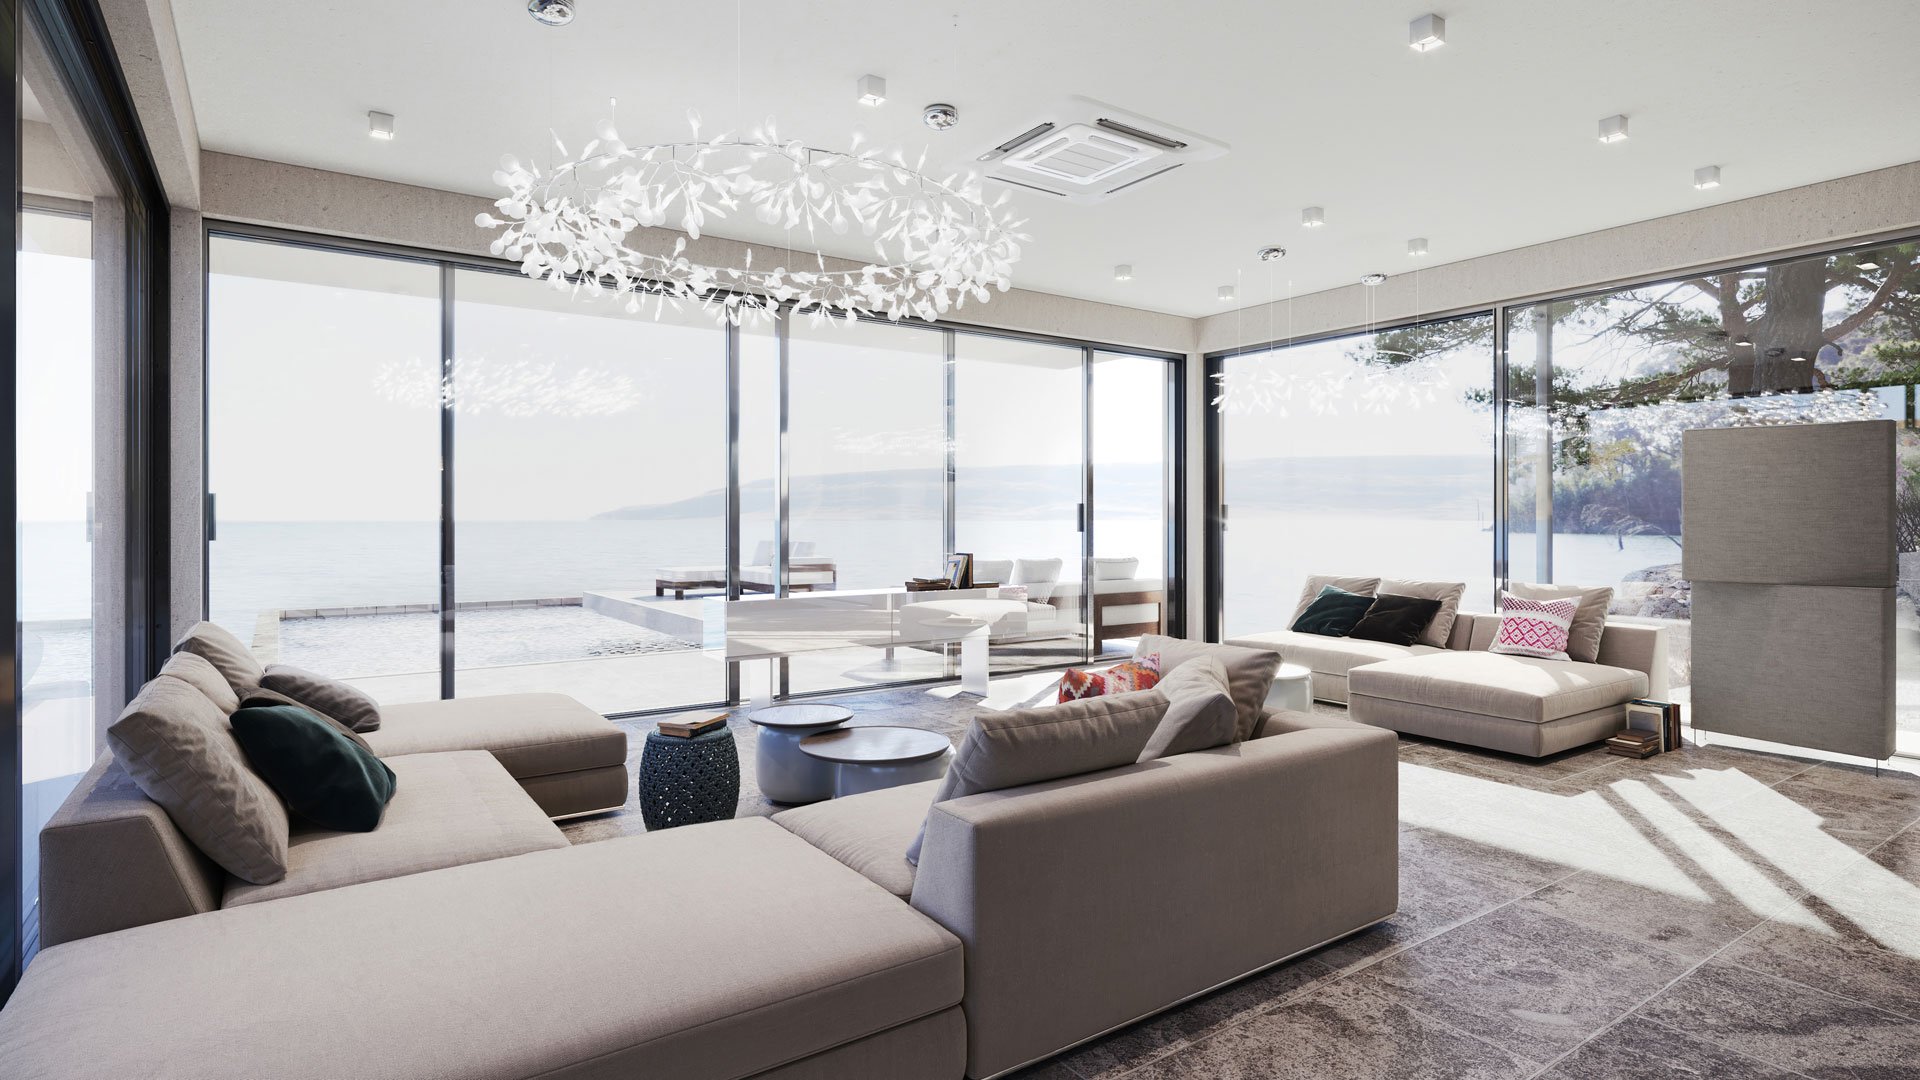
To ensure that the interior can be replicated, Ilya selected the furniture and furnishings 3D models from well-known European brands. This way, one can easily complement the architectural rendering project with a ready shopping list — and deliver additional value to the client. The only custom element are stairs, but they can be recreated too. The 3D visualization pictures them with all the important structural details in view.

The furniture is comfy, elegant and simple. It doesn’t overpower the space, allowing to keep the focus on spectacular window views. To add the place more character, Ilya spiced up the minimalist look with Spanish national decor elements. They look cool and have a functional value too. For these objects serve as landmarks helping the viewer track his movements in the space as he looks through the imagery.
We are very proud of the way this architectural rendering project turned out and happy that the author decided to share it with us. It’s a real source of inspiration.
Need visual materials that will take your clients’ breath away? Then contact ArchiCGI 3D rendering company. We’ll create digital masterpieces for your marketing and presentation.
Want to learn how much your project costs? See how we evaluate 3D rendering projects

Irma Prus
Content Writer, Copywriter
Irma writes articles and marketing copy for ArchiCGI. Her dream is that more people discover the power of CGI for architecture. Irma is into neuromarketing, ruby chocolate and Doctor Who series.