

3D House Exterior Rendering for Madison Paige: Sydney Villa Case Study
ArchiCGI partnered with Madison Paige, a Sydney-based architectural design firm specializing in new homes and knockdown-rebuild projects across Sydney. The firm is led by Neel Lochan, a multi-award-winning consultant recognized for high-end residential work. For their latest project — an Art Deco-inspired Palm Springs Villa in one of Sydney’s premium locations — Neel required professional residential 3D rendering to support the upcoming website launch and marketing campaign.
It was absolutely critical to get this project right for Neel. The Palm Springs Villa marks the brand’s expansion into subdivision and development of the high-end luxury real estate. Professional house rendering services were essential to showcase the brand’s maiden project on their upcoming website and successfully market the project and capture the right clientele. According to Chaos and Architizer’s industry research, photorealistic CGI remains the most valued deliverable in architectural projects — which is exactly why high-end visualization mattered here. So, in April 2021, the young and talented architectural designer contacted ArchiCGI studio for 3D house exterior rendering services.
This CGI project was interactive and collaborative. Throughout the process, the architectural designer fine-tuned the design and setting details on the go. Our task was to show the architectural designer through photorealistic visuals how every new idea worked — until the final result met the client’s expectations.
As we’re writing this case study, the website of Neel and Madison Paige is still being developed. Once it’s the website is complete, the 3D architectural visualization of the sleek house will serve as the main hero shot on the homepage.
The full workflow behind this 3D house exterior rendering project is below — with references, revision rounds, and final results.
The Scope of Work & References
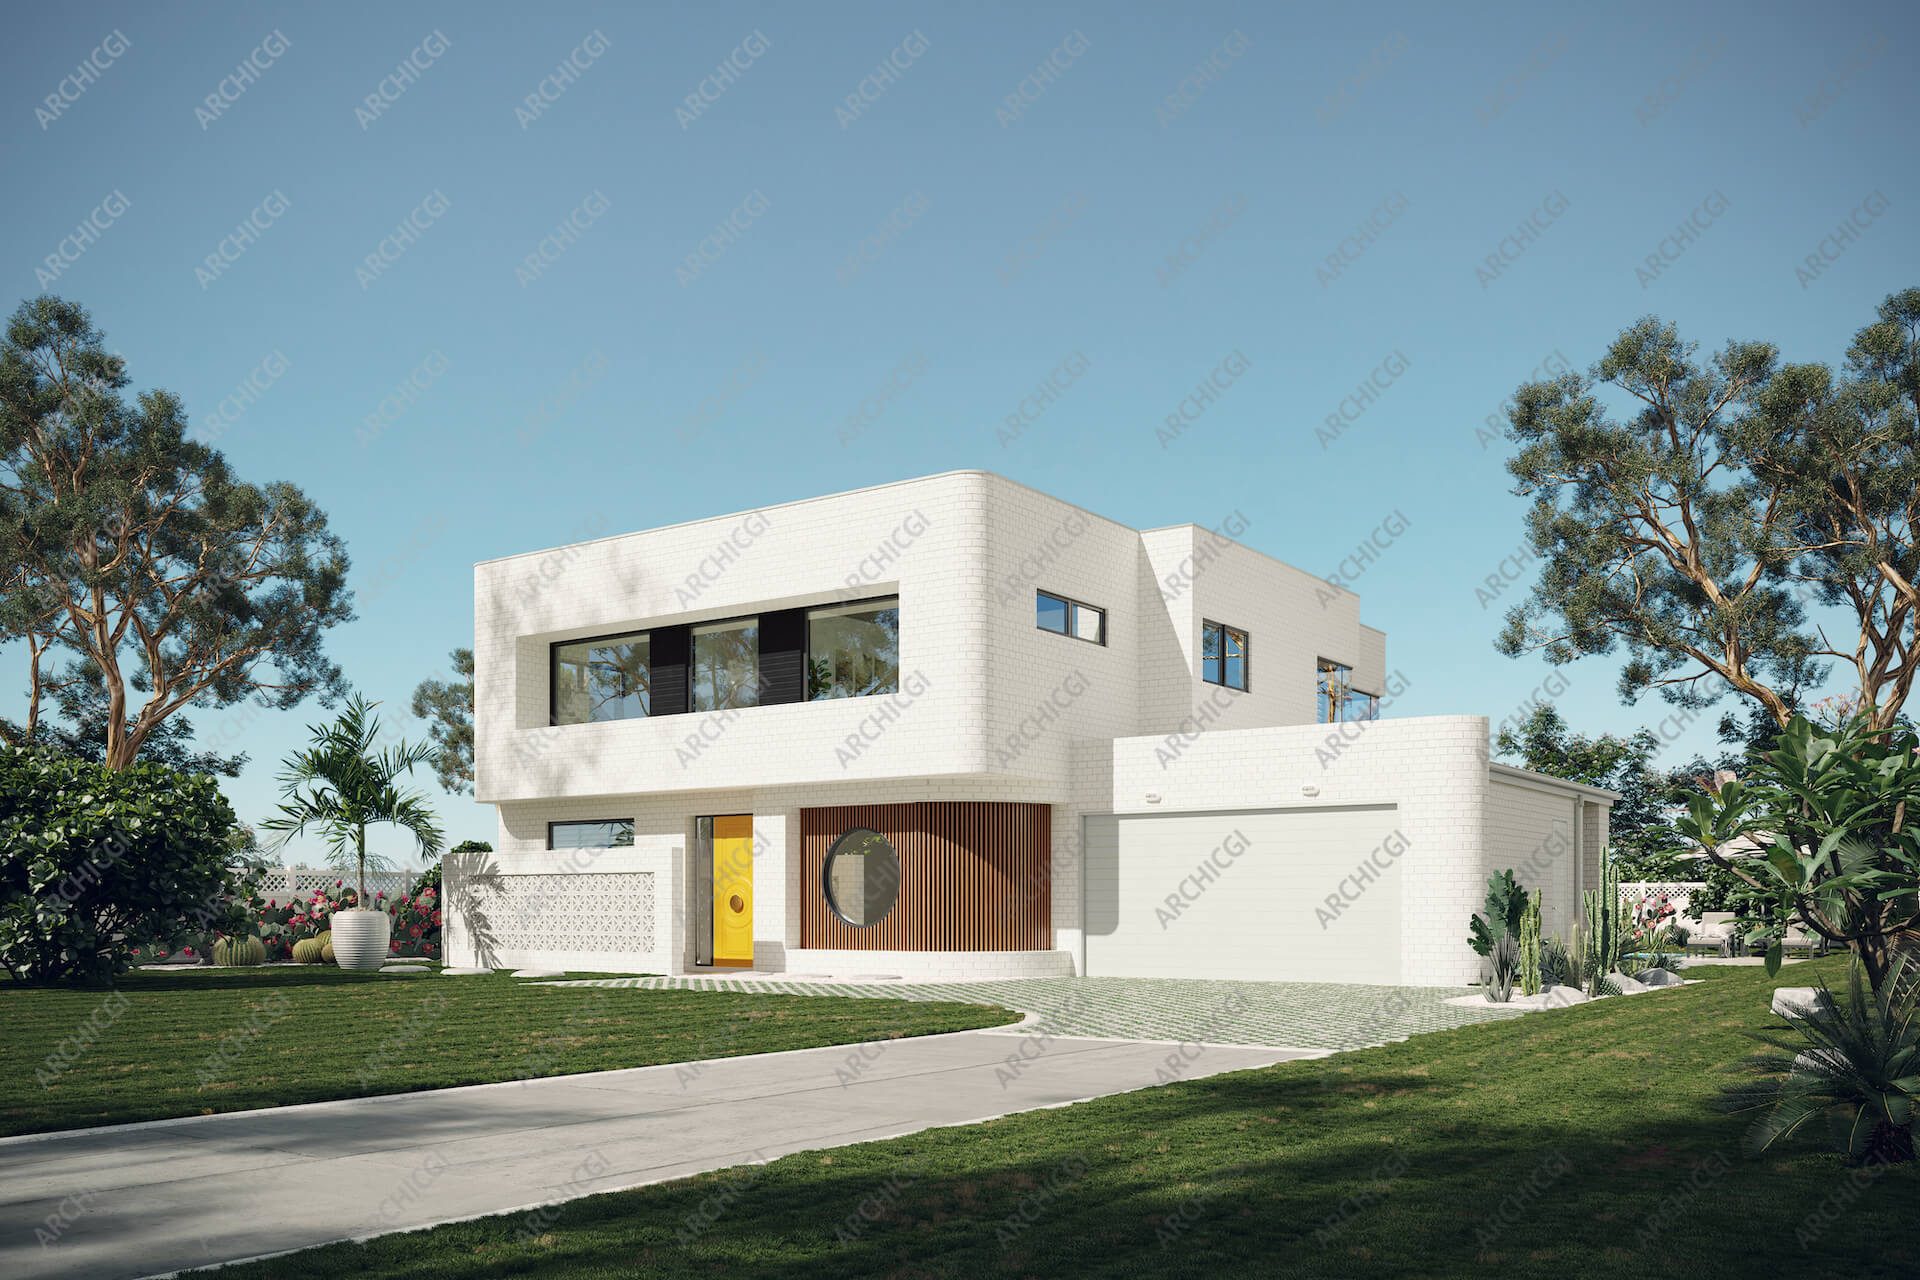
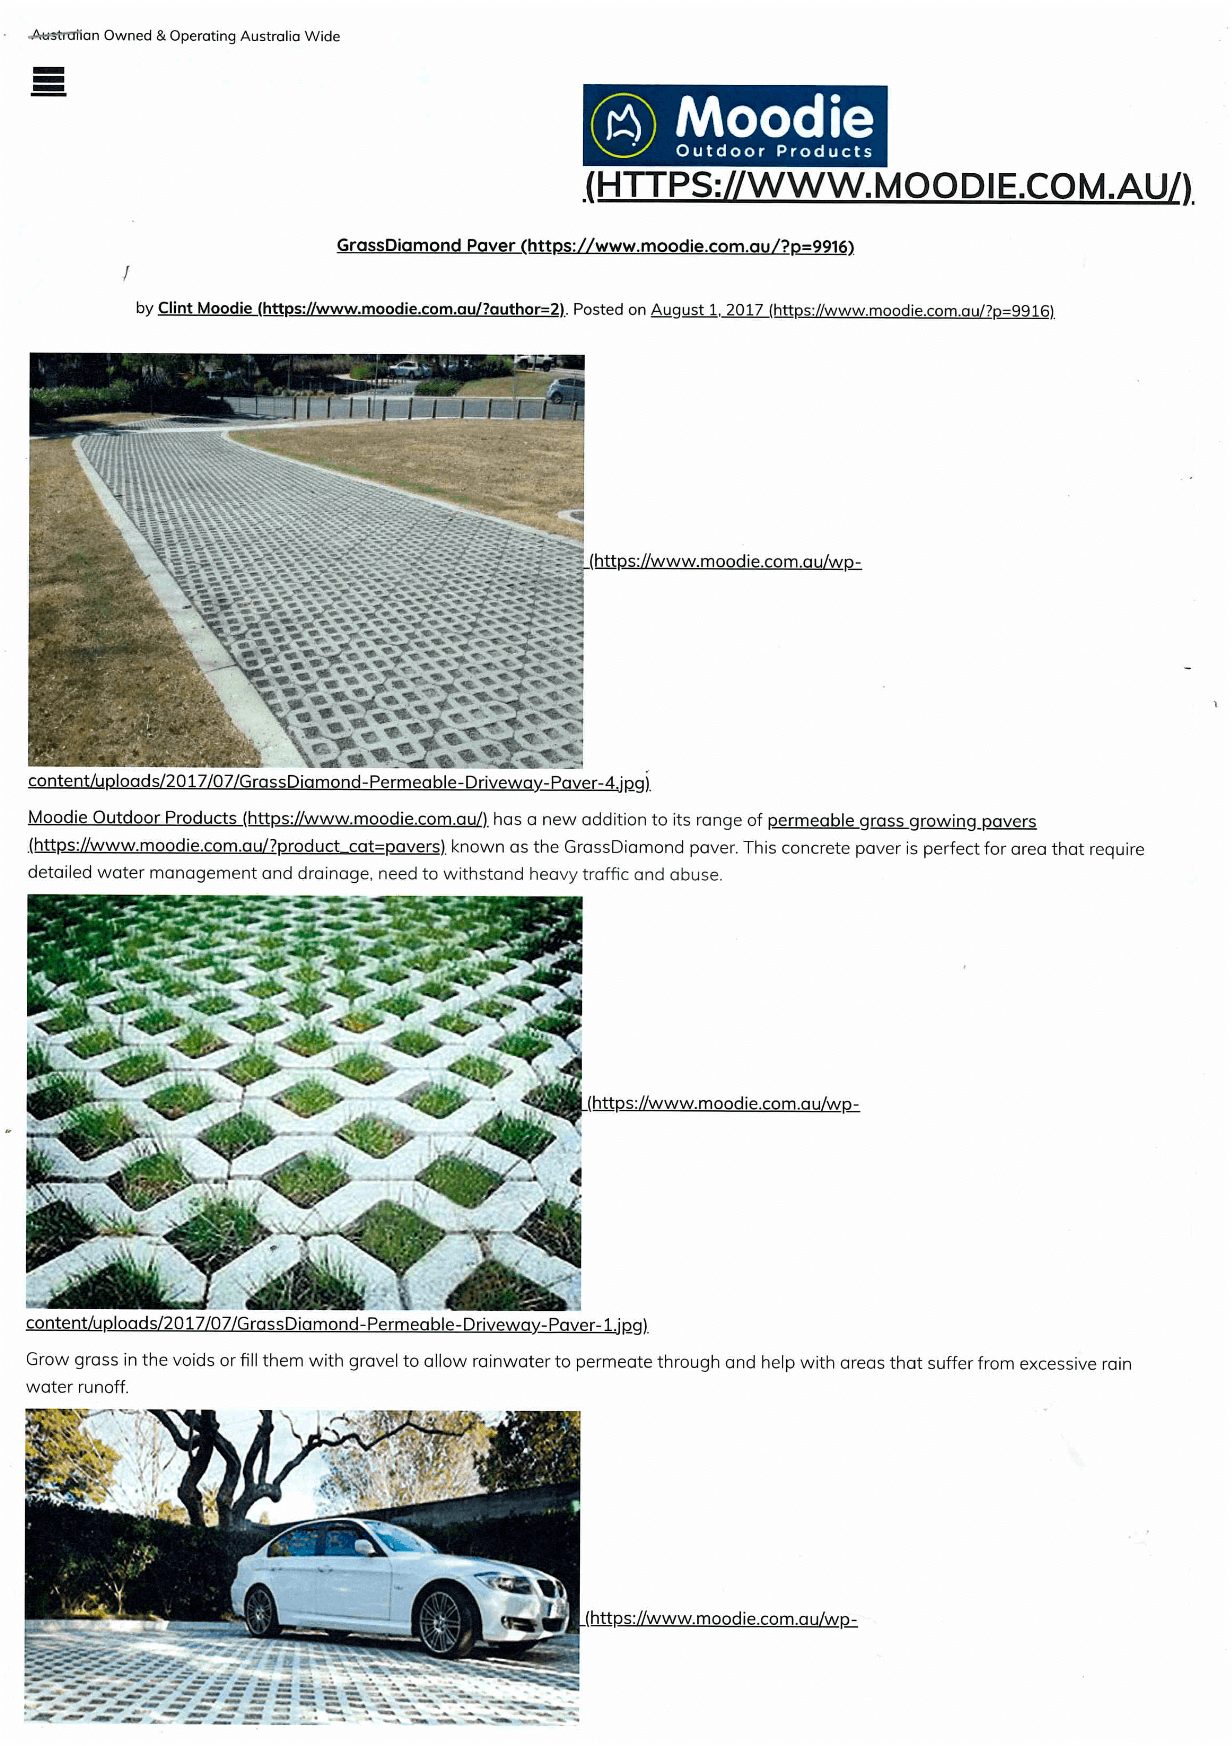
Neel asked us to make one photorealistic 3D house exterior render in 4k resolution. The CG image needed to show the facade of the building and some of its surrounding territory.
For this task, the client provided the following visual references:
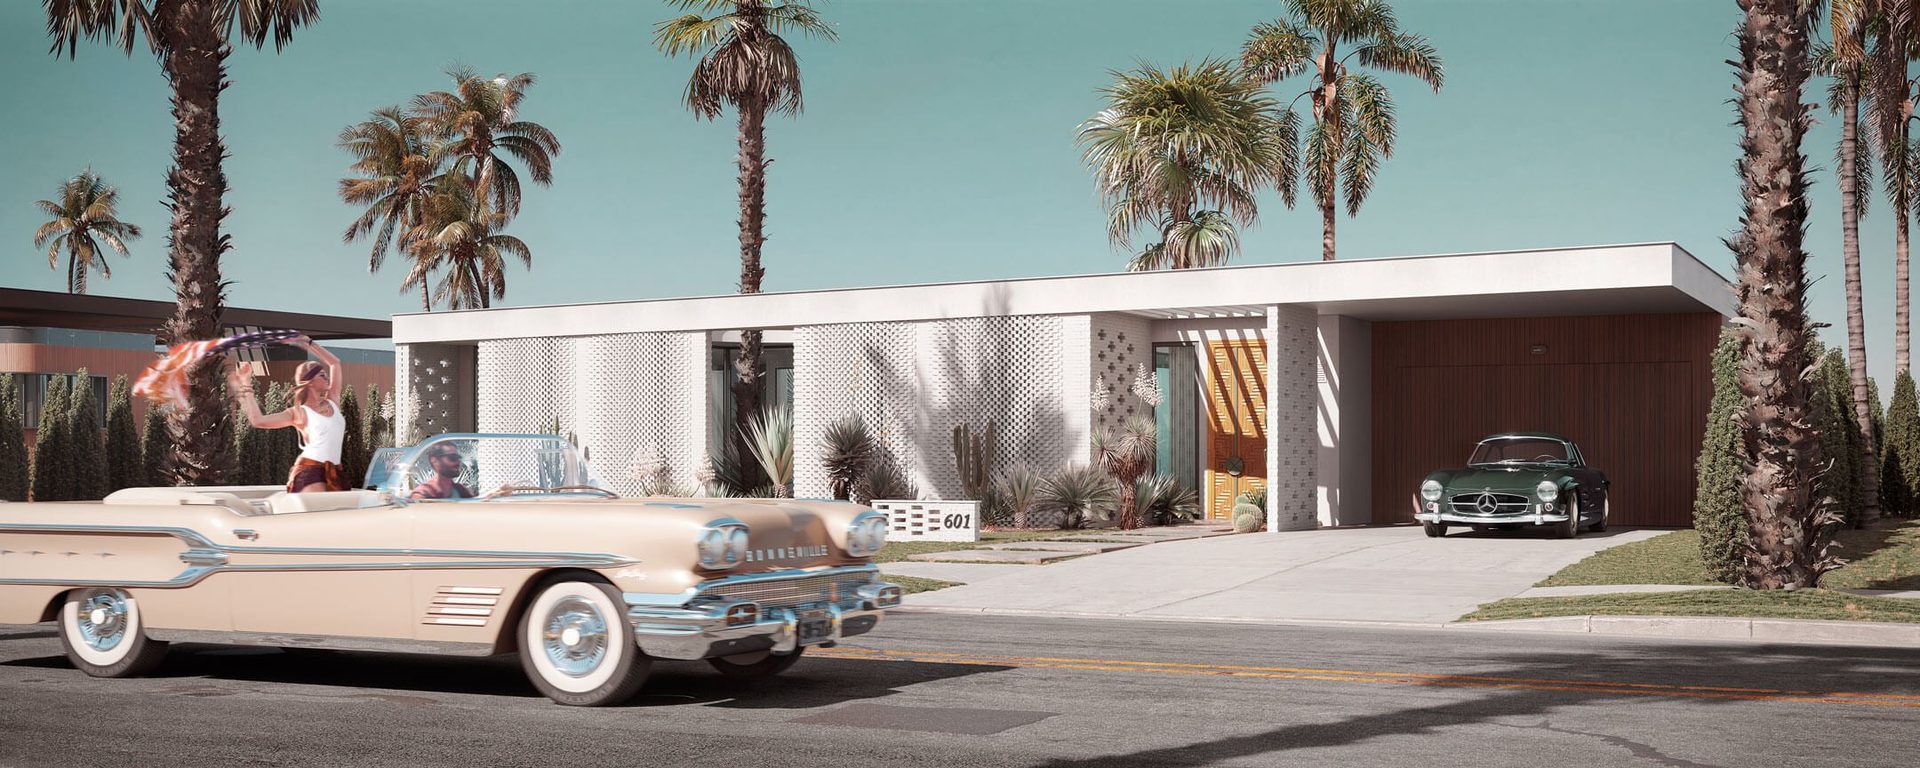
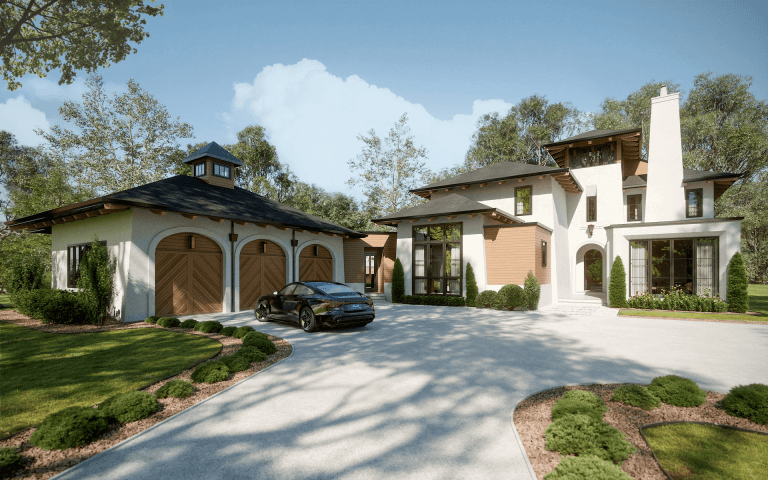
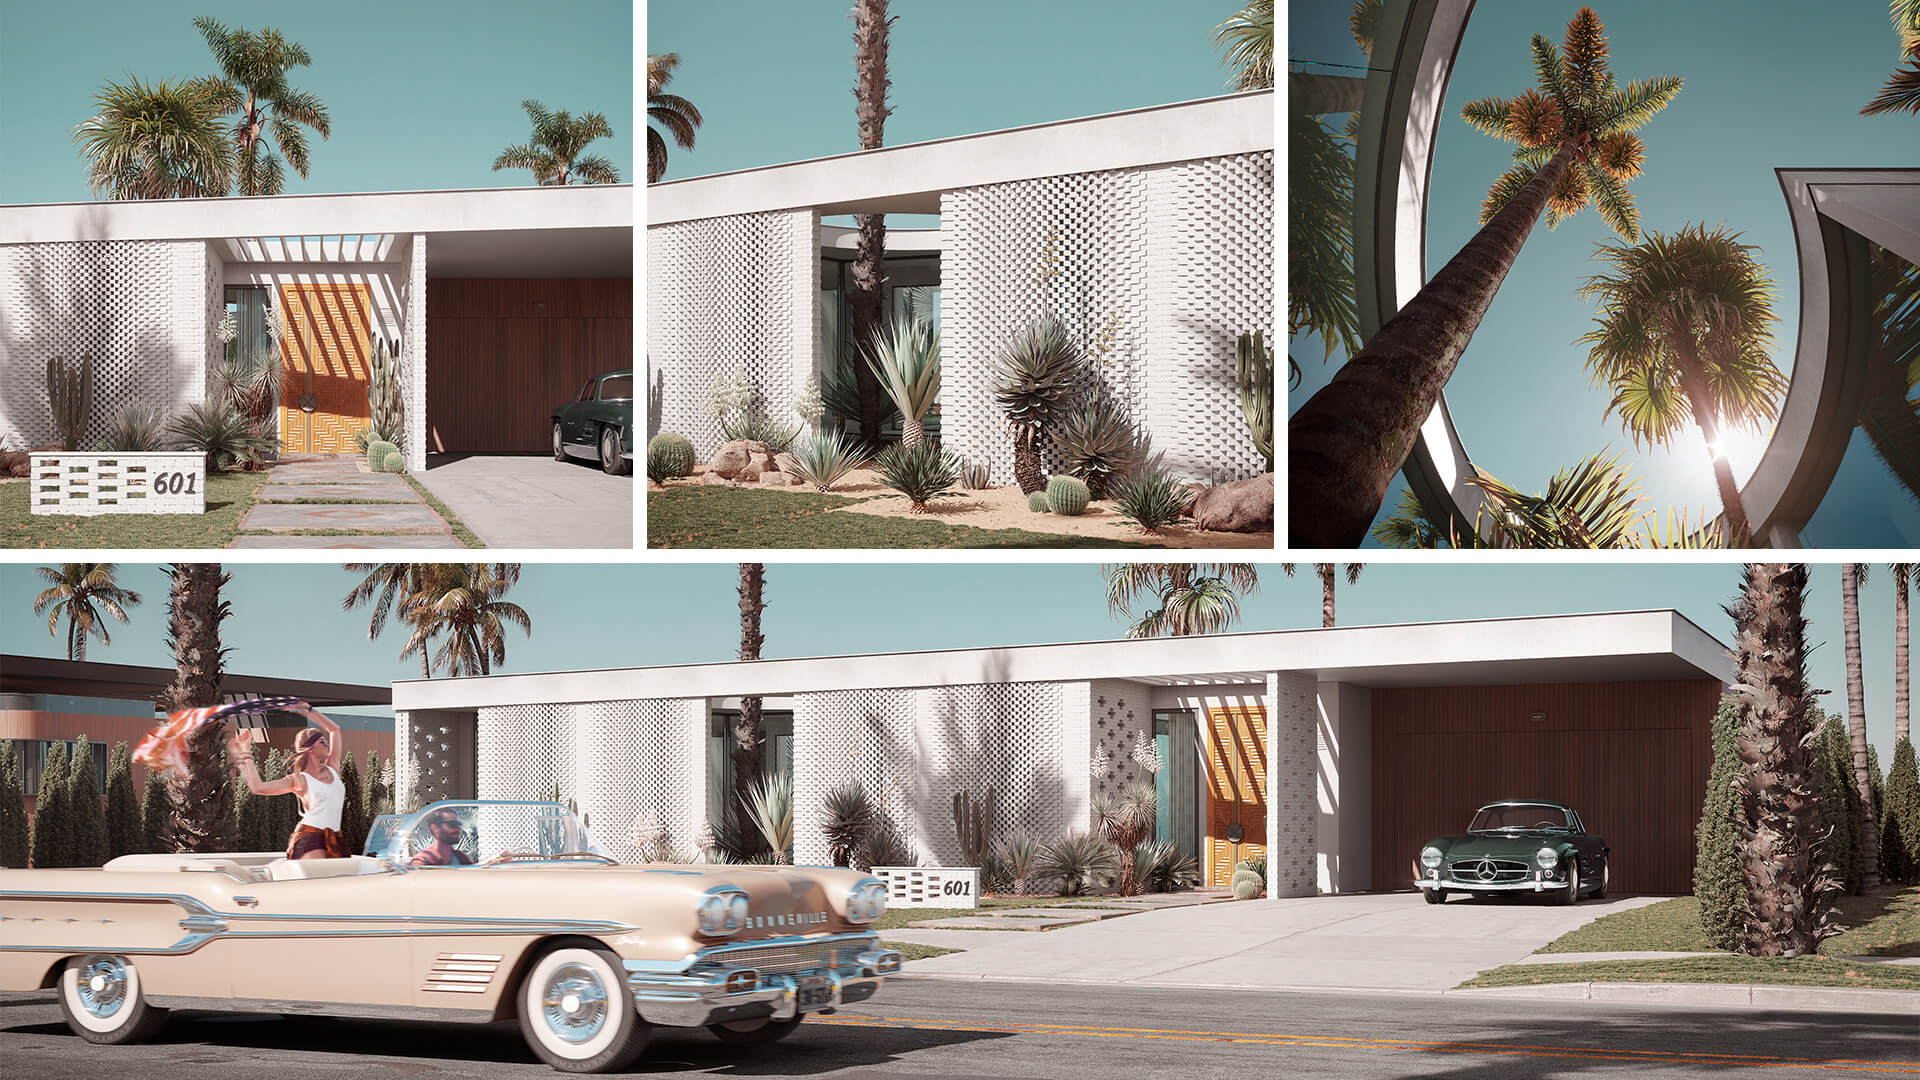
- the Hollywood Villa series of architectural concept renderings from our portfolio. The customer liked their look and wanted us to use them as a reference for the environment, landscaping, and overall post-production style;
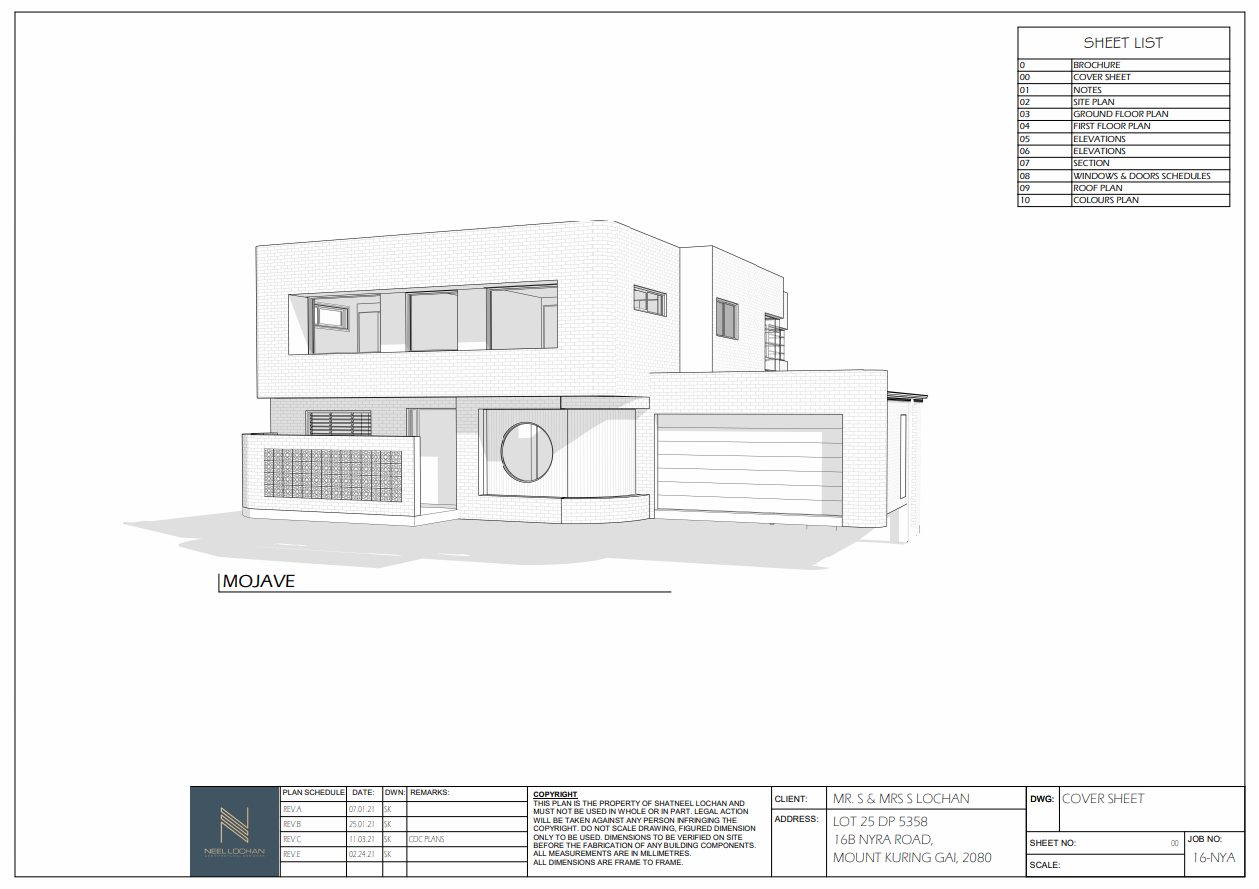
- a drawing showing the house exterior from the preferred angle;
- a Revit model of the building;
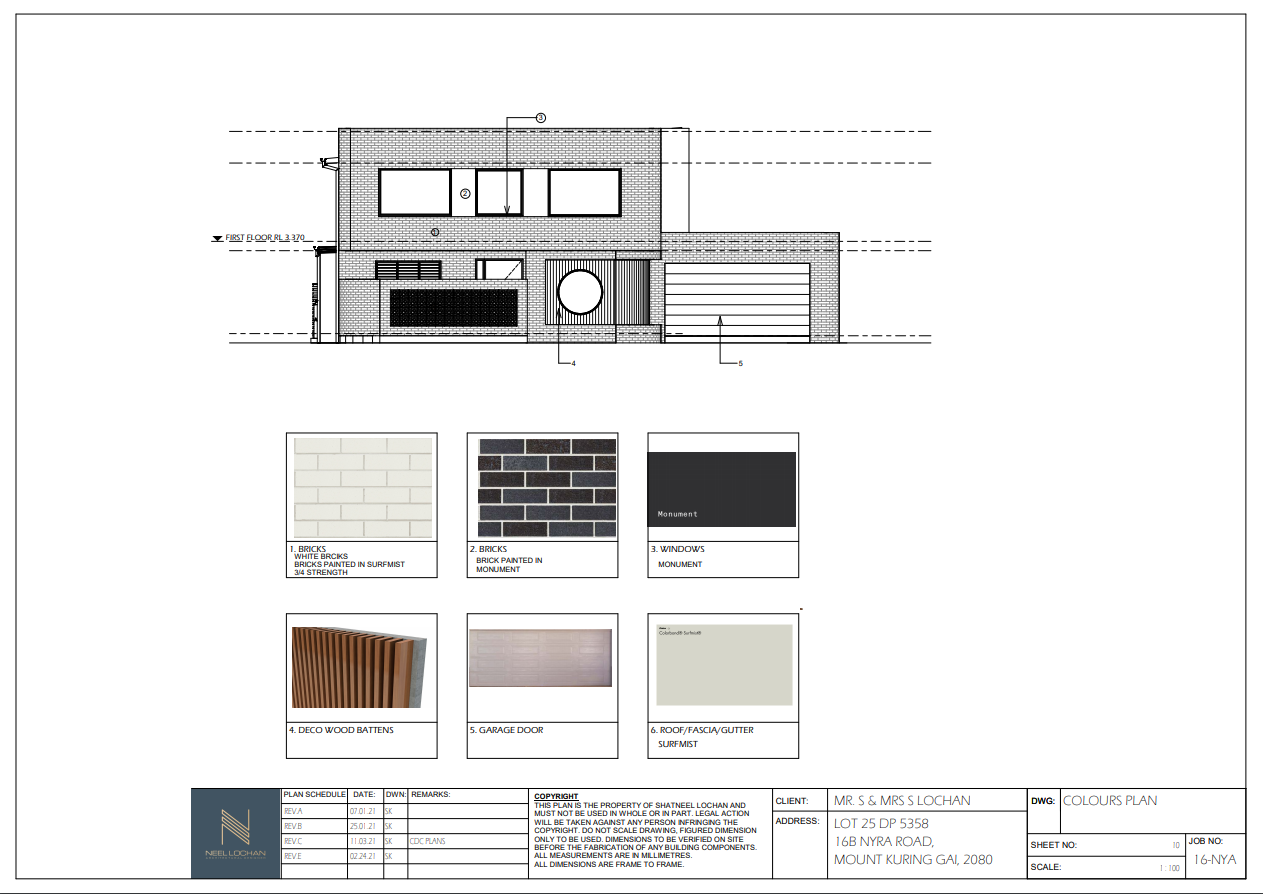
- a finishes and colors plan;
- a Google Maps location of the area where the house could be built. It served as a reference for local vegetation;
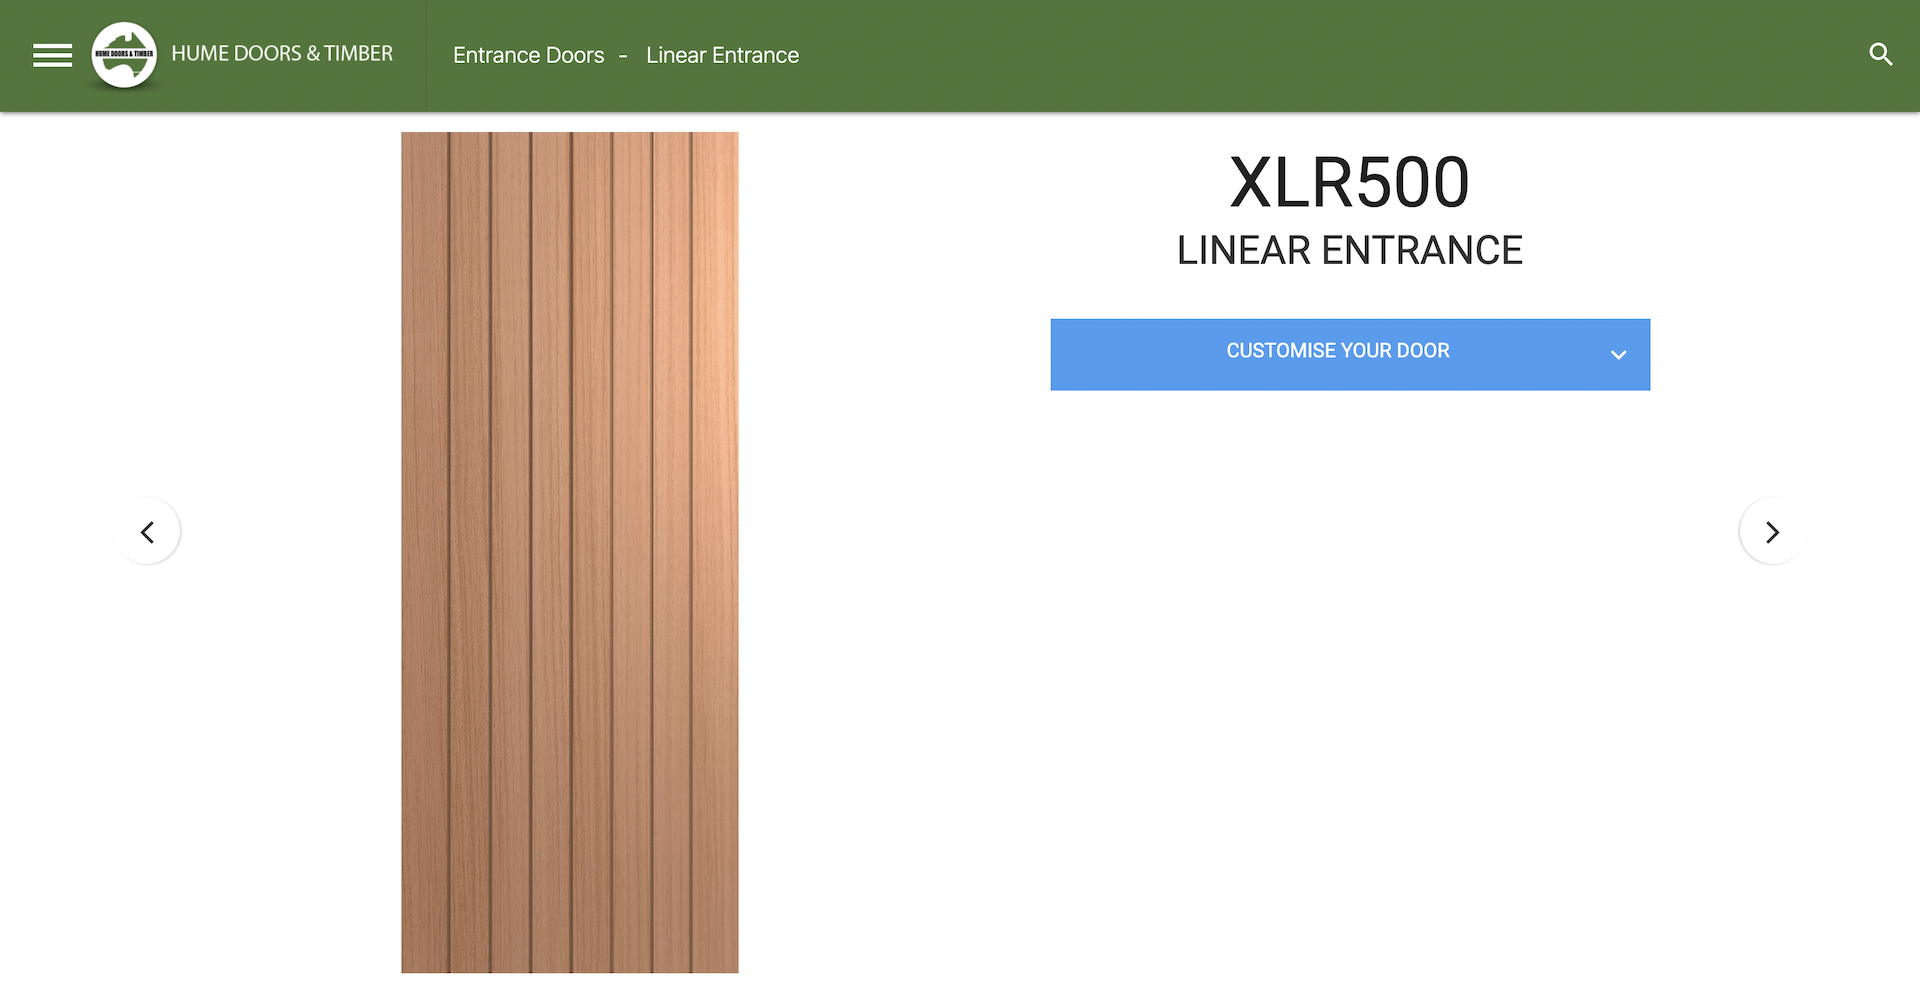
the front door style example.
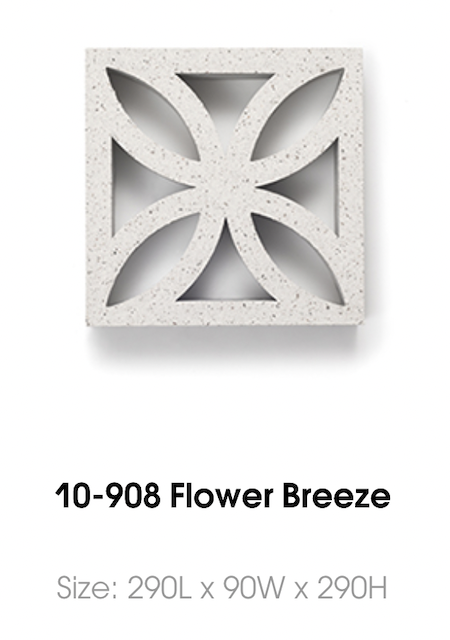
When the 3D artist assigned to this project began studying the references, he noticed that it was difficult to tell what material the wall surrounding the front porch was made of. So, we asked Neel about it. He told us that the wall was made of breeze blocks and sent pictures of the exact design he’d chosen along with a link to the manufacturer’s website.

Also at this point, the client sent us some more visual aid. Namely, he provided landscape design and driveway material specifications.
Now, let us show you what the workflow on the assignment was like.
The Working Process
Overall, the project included three revision rounds. In the course of those, the designer changed several minor aspects of the design to make sure the final image of the concept would look flawless.
And now, let’s see how our CGI specialist recreated the house exterior in 3D.
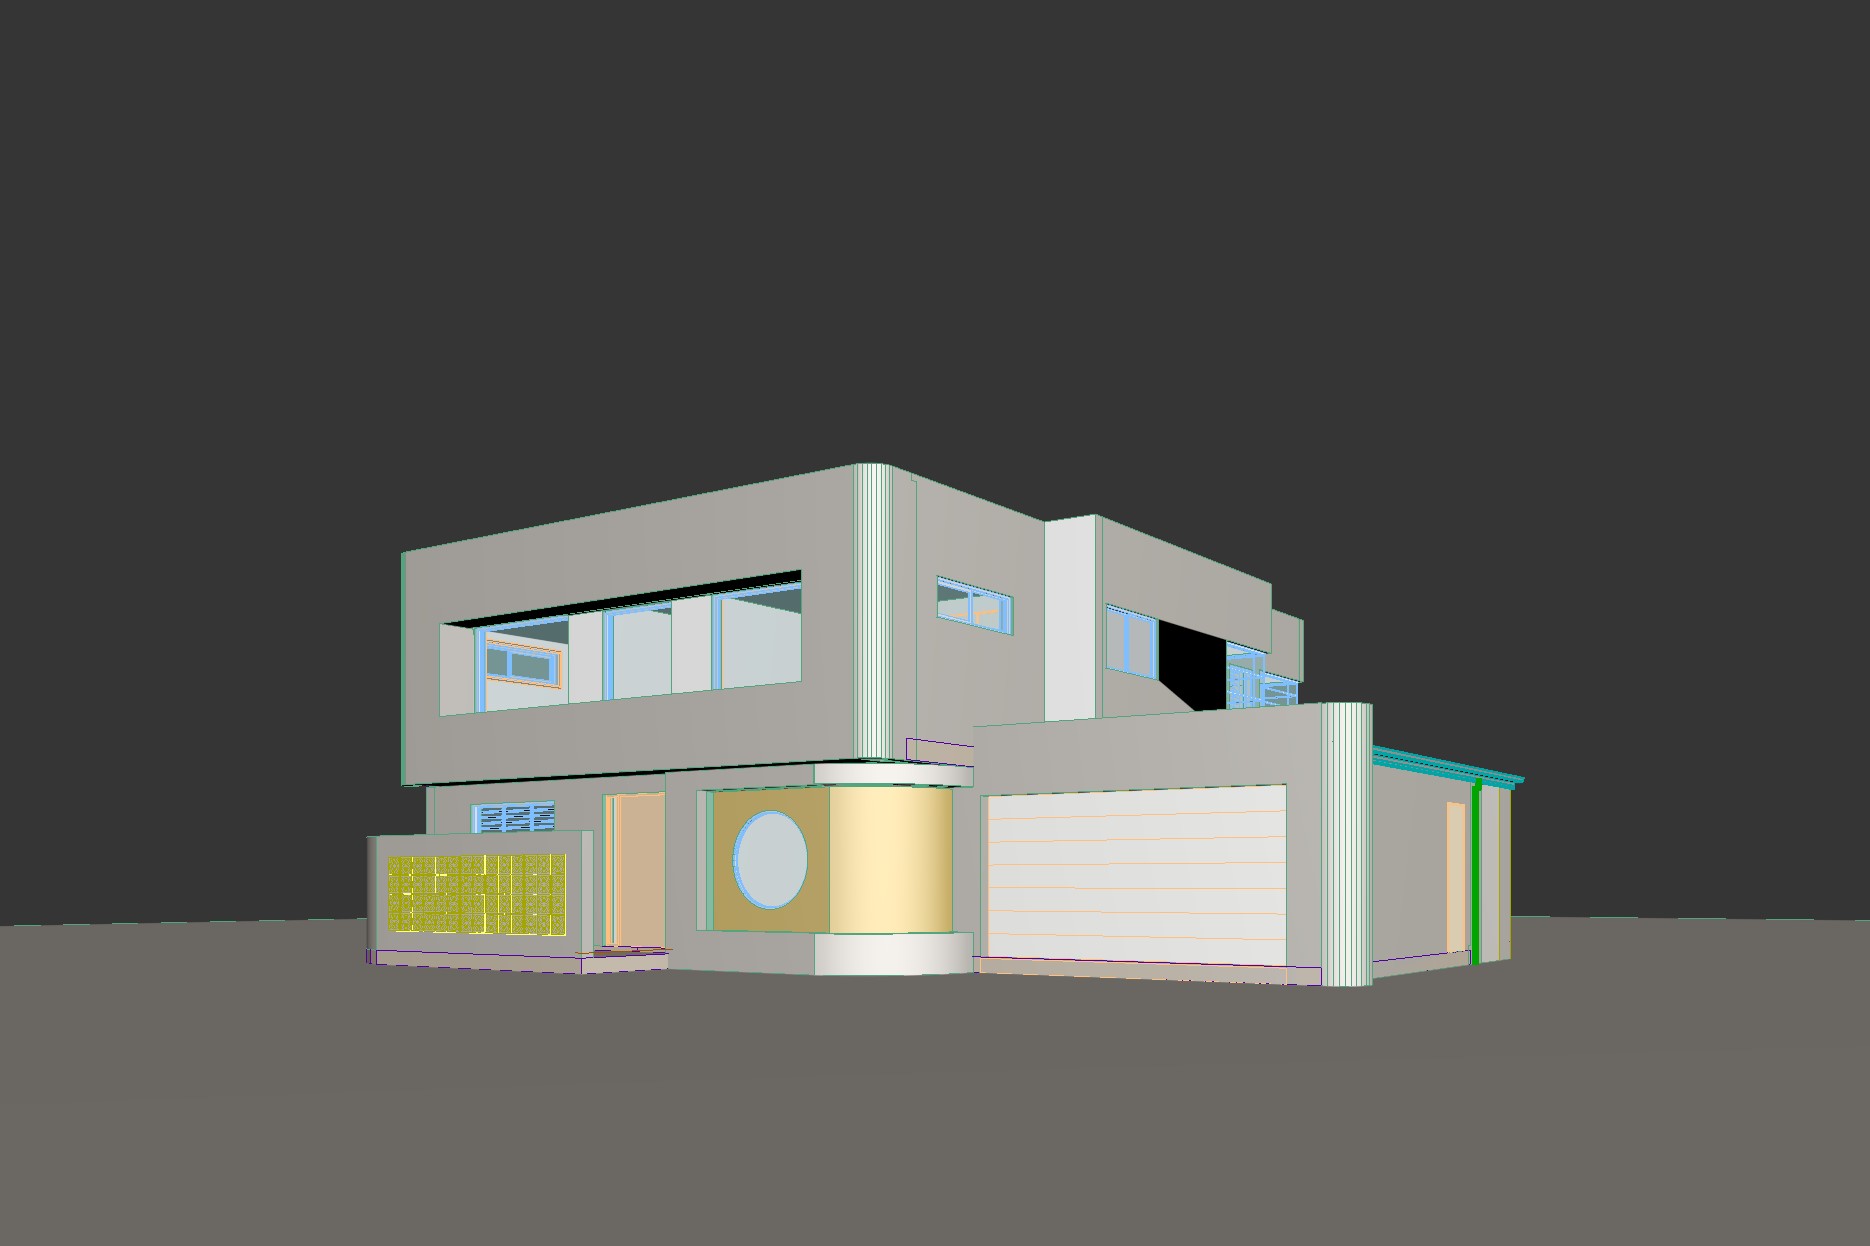
#1. The Making of the 3D Scene and Texturing
The CG artist started by creating a 3D scene of the building and its surroundings. Throughout this process, he used the exterior drawing and the Revit model as a base to accurately reproduce the geometry of the house in 3ds Max. The CG specialist also followed the environment references to pick and add 3D models of the necessary plants.
Elevate your exterior design project with photorealistic 3D visuals that help clients confidently approve your proposals.
At this point, the CG expert didn’t apply any textures or materials to the 3D objects yet. He rendered the greyscale image to coordinate the progress with our project manager.
Below, you can see what the house exterior CGI looked like mid-process.
After the PM checked the result, the CGI specialist added textures and assigned materials to all the 3D models in the scene. Then he rendered the view of the 3D house exterior in 3k resolution and sent it to the client for revision.
The designer reviewed this intermediate render and asked for several corrections.
#2. The First Revision Round
After reviewing the image, the client asked our CGI specialist to:
- remove the car;
- change the garage door pattern to simple horizontal panels;
- change the color of the garage side door, gutter, and downpipe to “Surfmist” from the colors plan;
- change the color of the bricks in the niche of the first floor to “Monument” from the colors plan;
- change the texture of the bricks in the niche to “painted brick” like in the photo reference;
- add more vegetation in the garden bed like in our “Hollywood Villa” project;
- change the front door handle as per newly sent visual reference and make the garage side door handle a simple chrome knob;
- make sure the window frame color was the same as the brick color in the niche. Here, the color itself was right, so the 3D artist just made the material of the frame look more matte. This way, the hue of the painted bricks and the window frames would match perfectly in the render.
To help us make all the new additions, the client provided these visual references.

The 3D artist made all the requested corrections and delivered an updated 3k render of the house exterior.
Having reviewed the image, the client came up with a few updates. In particular, he asked us to:
- change the front door style as per new photo reference;
- change the front door handle as per new reference;
- change the shape of the stepping stones in front of the house from square to round;
- place some blooming cacti in the garden beds on both sides of the house;
- change the mortar color in the niche to “Monument”;
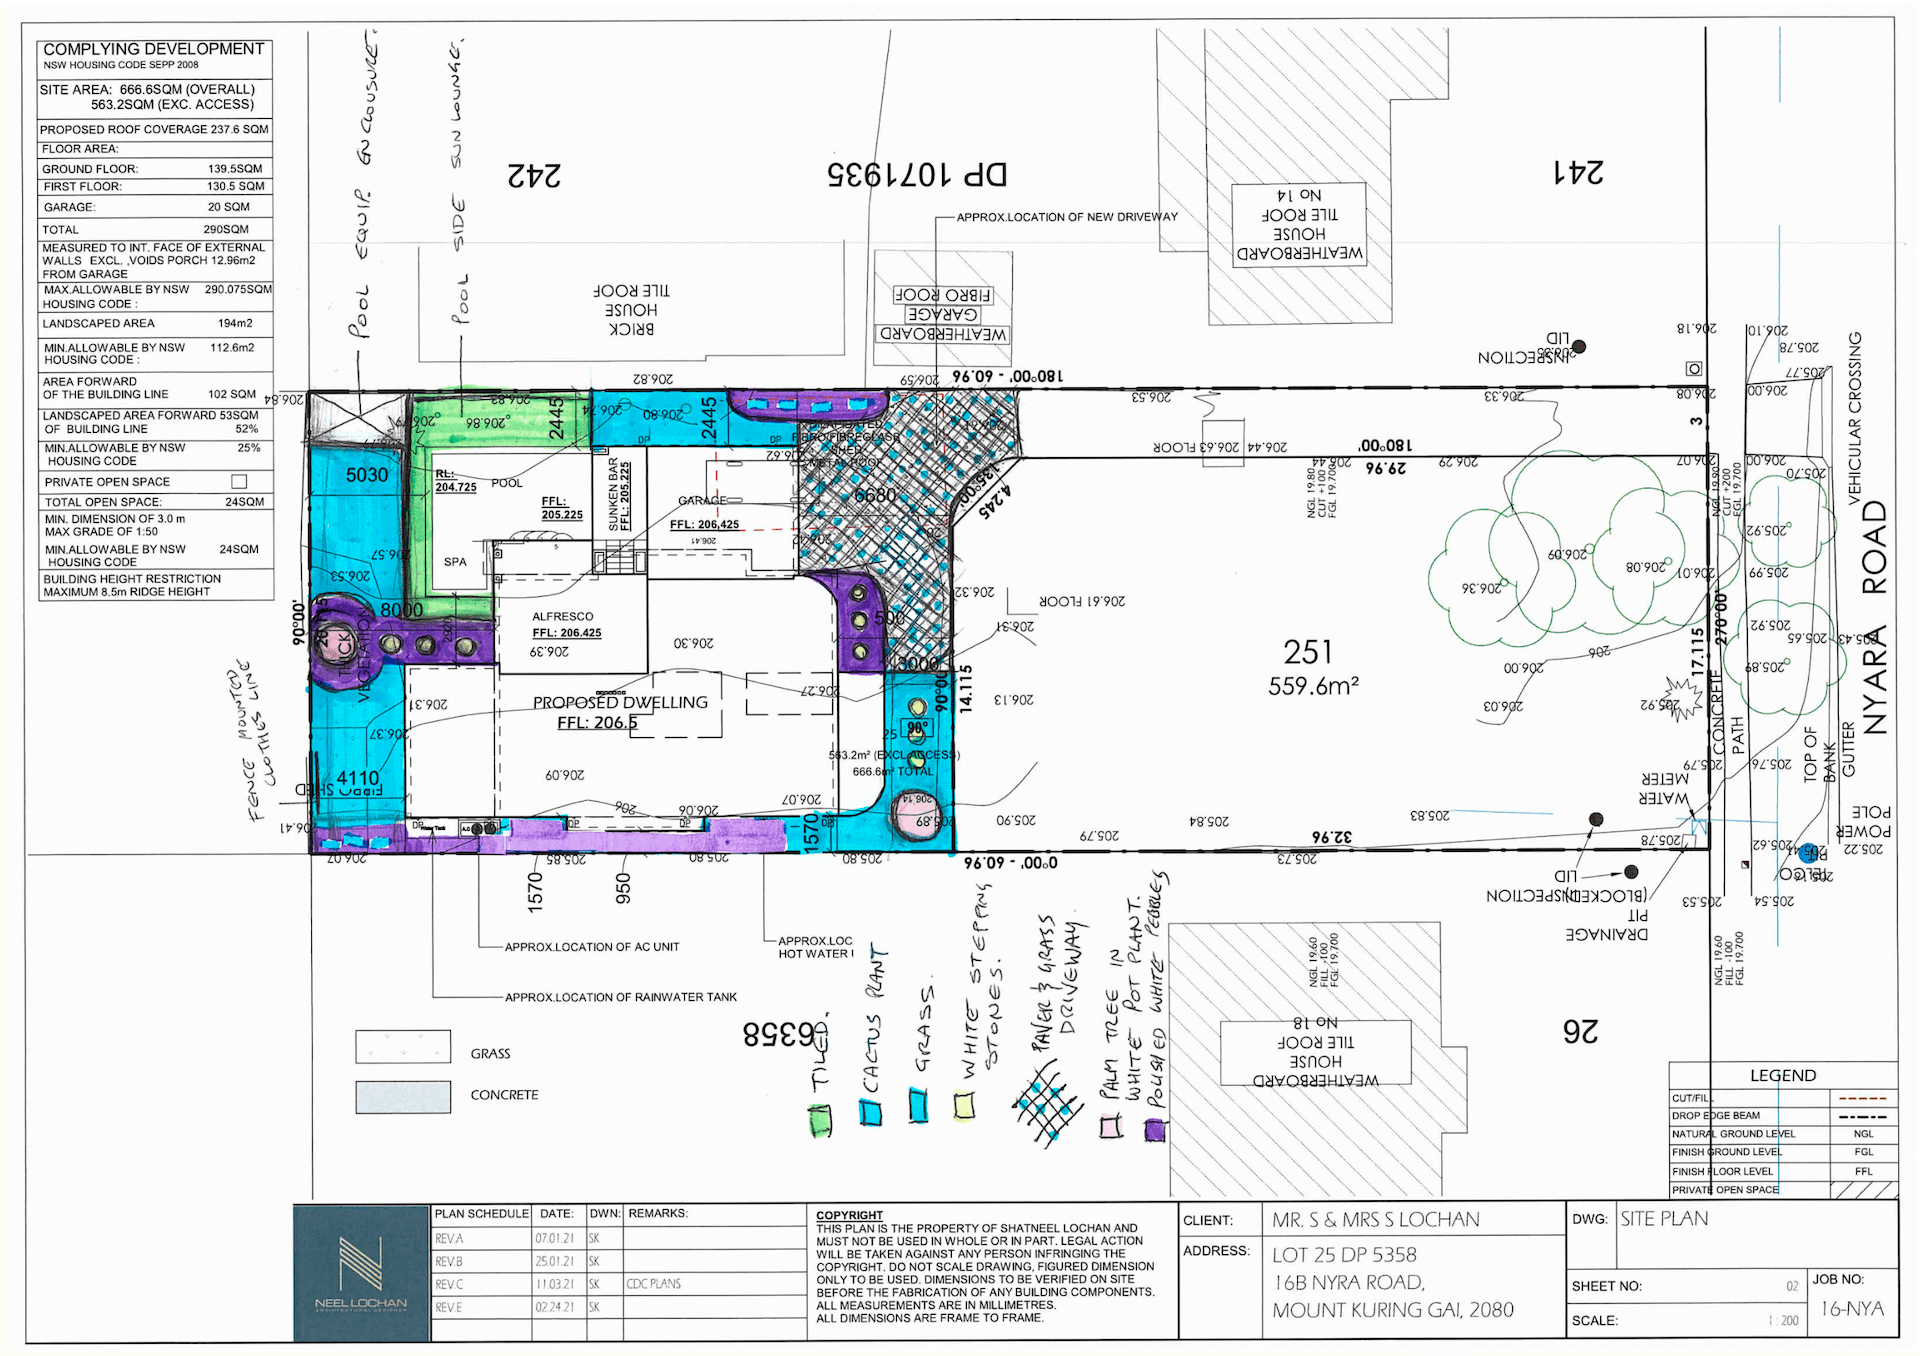
- add a pool in the back according to the newly provided drawings;
- remove some of the window bars;
- add pressed metal capping on the roof in the “Surfmist” color.
These are the visual aids our team received along with the above-mentioned comments.

Using these references, our CG specialist made all the requested tweaks. Below, you can see the corrected 4k image with our studio’s watermark.
We submitted this updated version of the exterior house rendering to Neel and waited for his comments.
#3. The Second Revision Round
To give his notes on the further updates, the client used the built-in annotation tool in our CRM system. This way, he was able to write comments directly on the image without leaving the chat with our team.
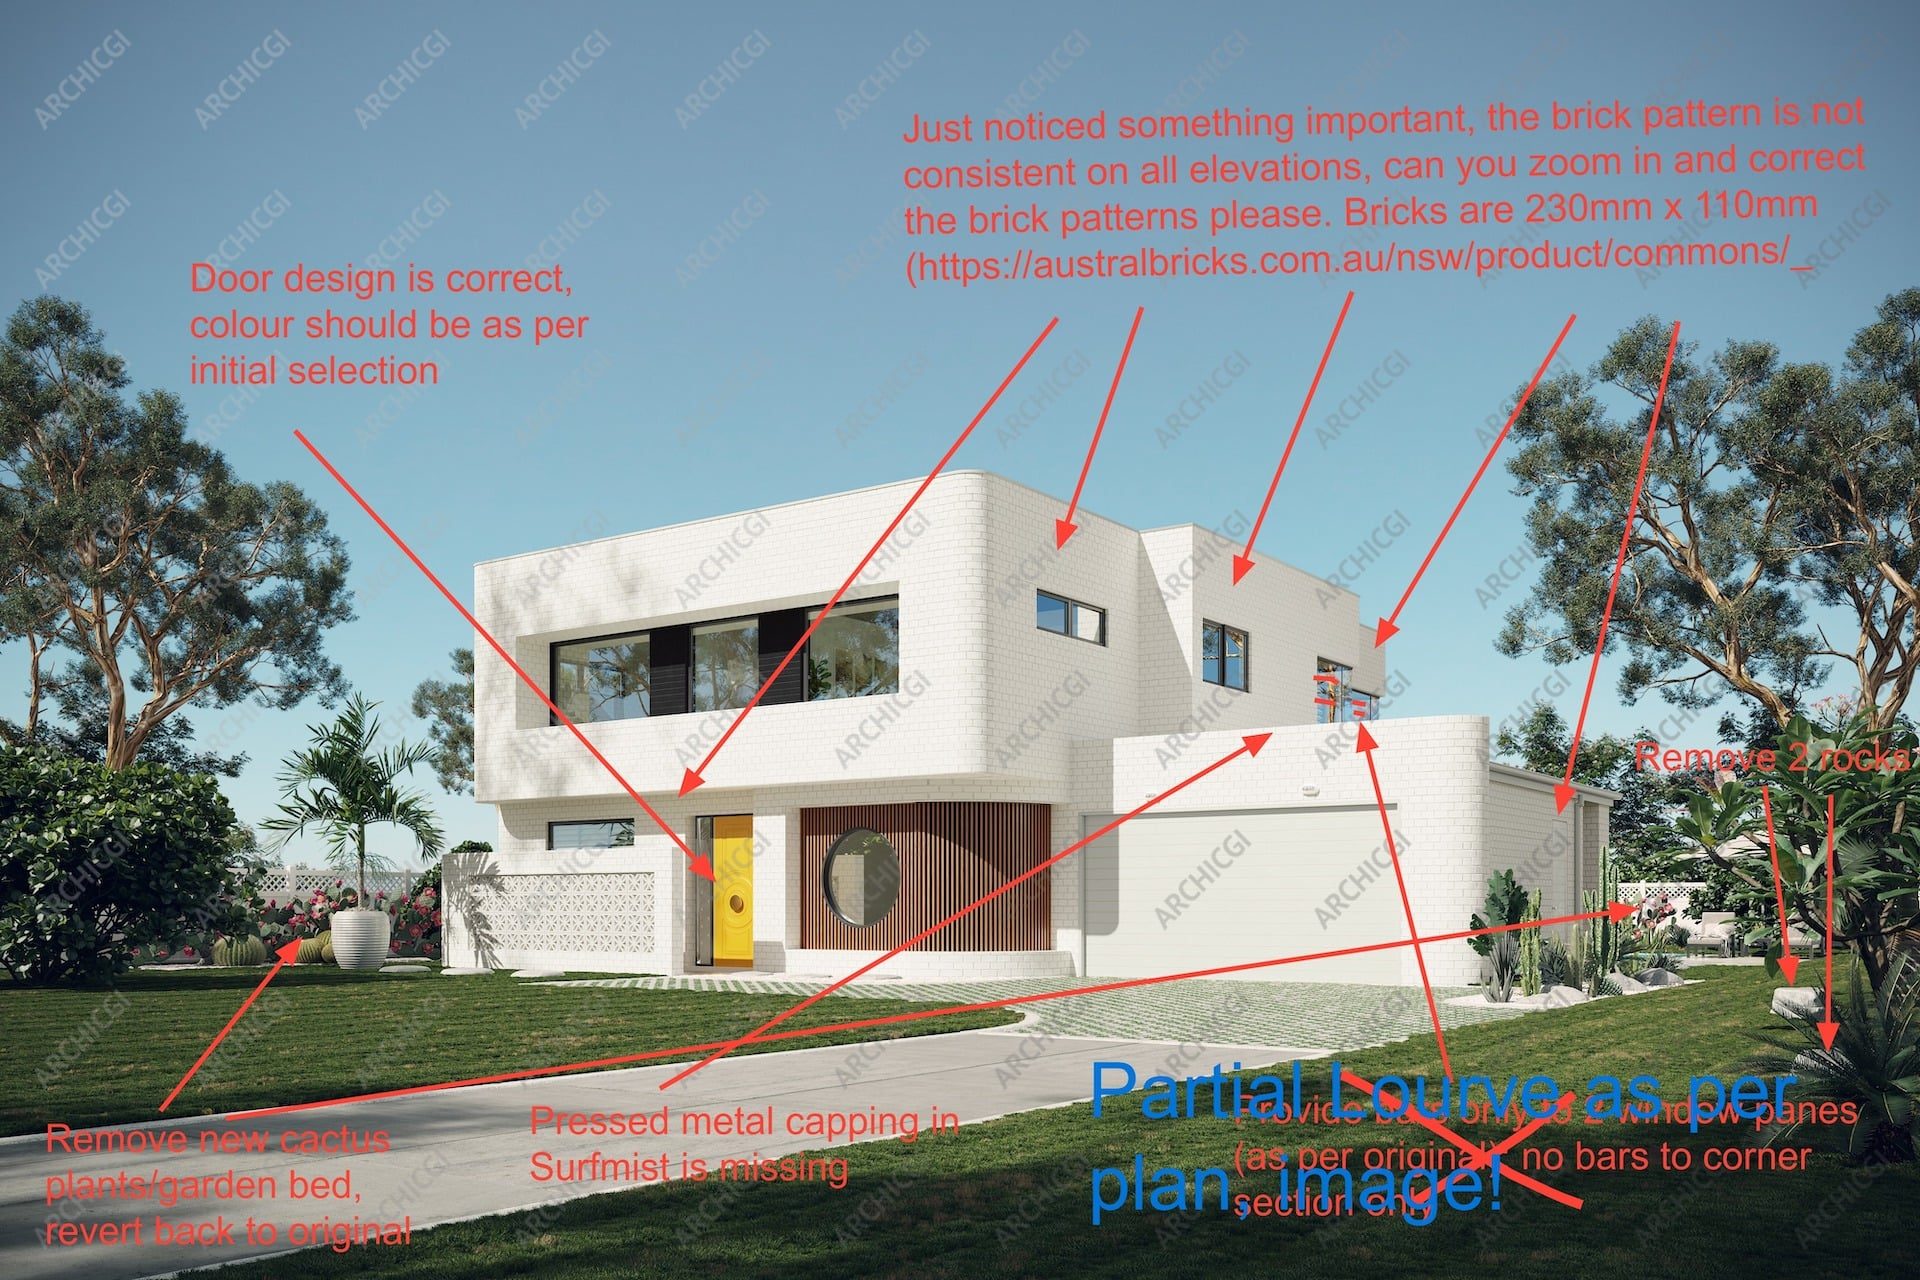
Apart from the comments in the 3D house exterior picture above, Neel also texted us about a few more things we had to do:
- add louver sections to the windows on the first floor, on the right;
- change the front door color to “Pink Lemonade” according to the new references;
- revert the brick texture to the previous version;
- make the size of the bricks 230x110x76 mm and consistent on all elevations;
- add pressed metal capping in “Surfmist” to the roof over the garage;
- remove the two rocks on the right and the vegetation on the left, like it was in the previous iteration.
Below, you can see the visual aid the client provided for us so we could make these changes.
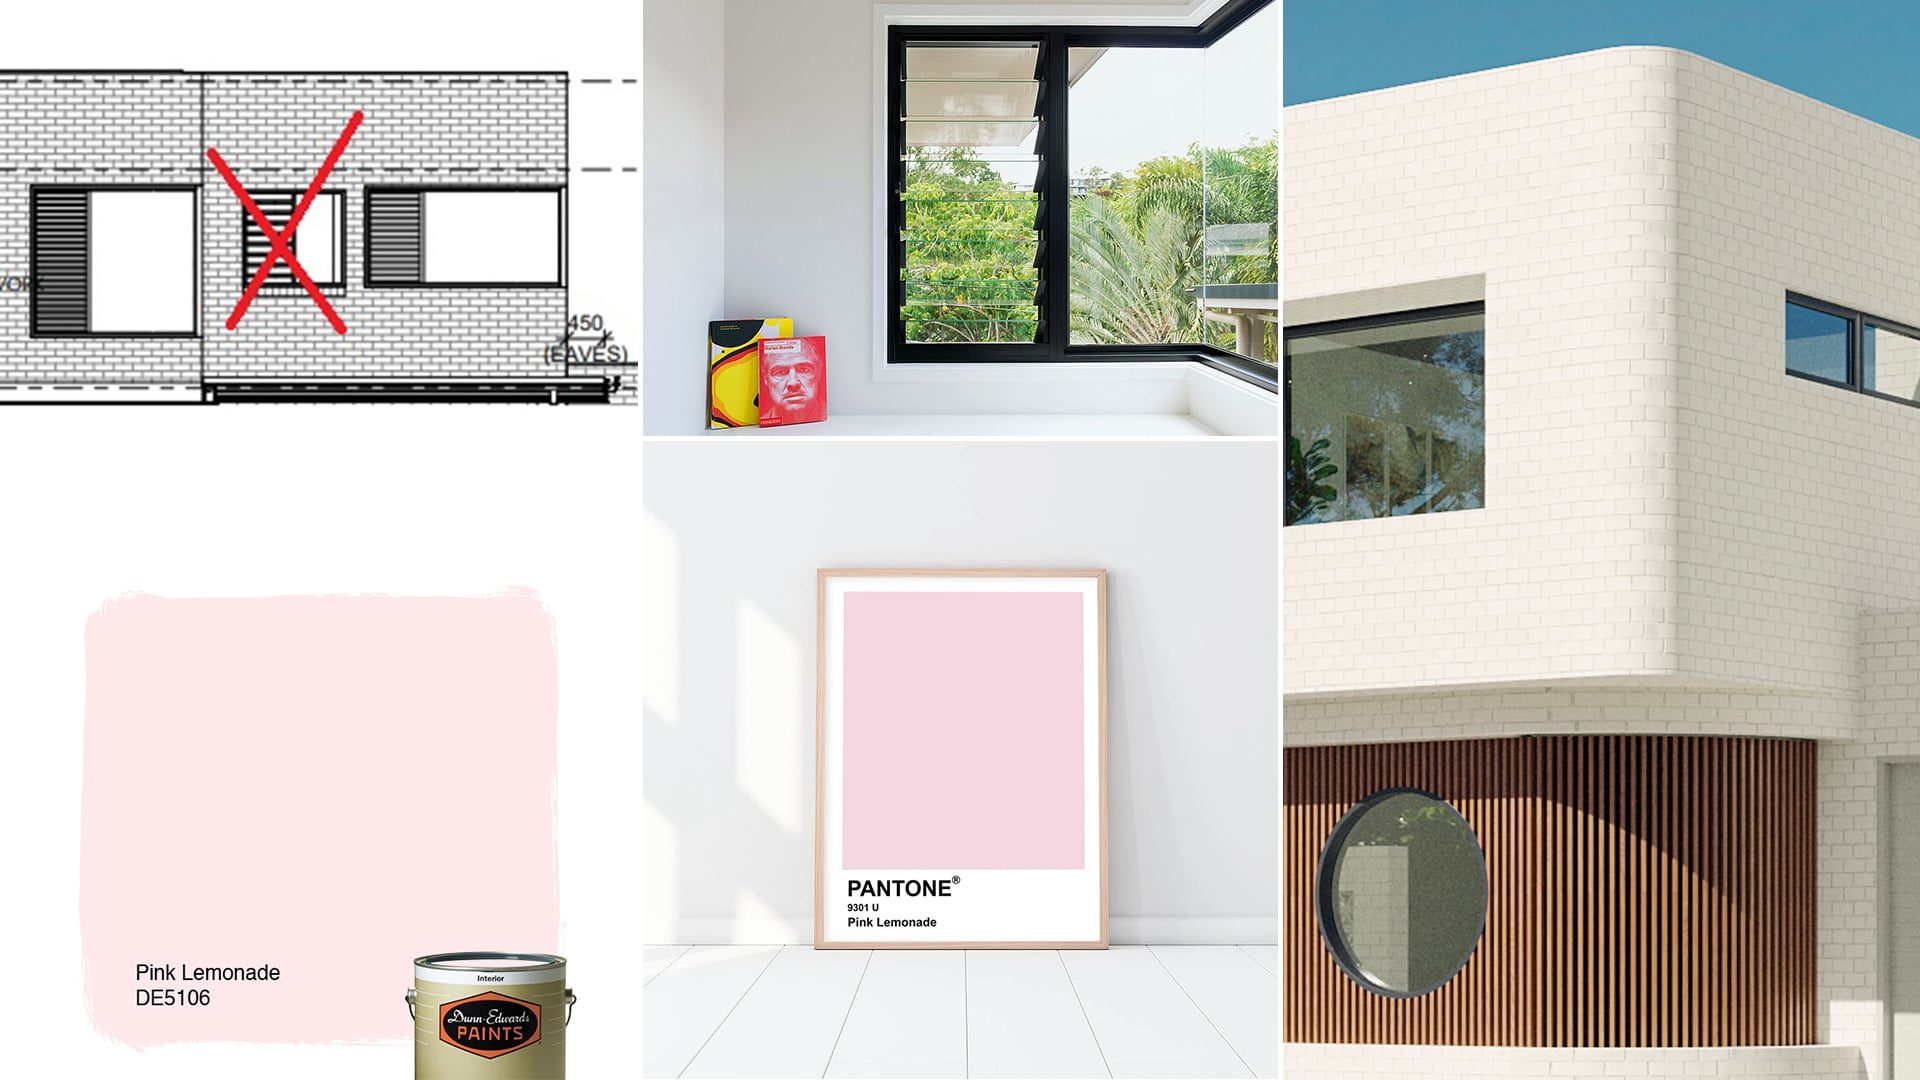
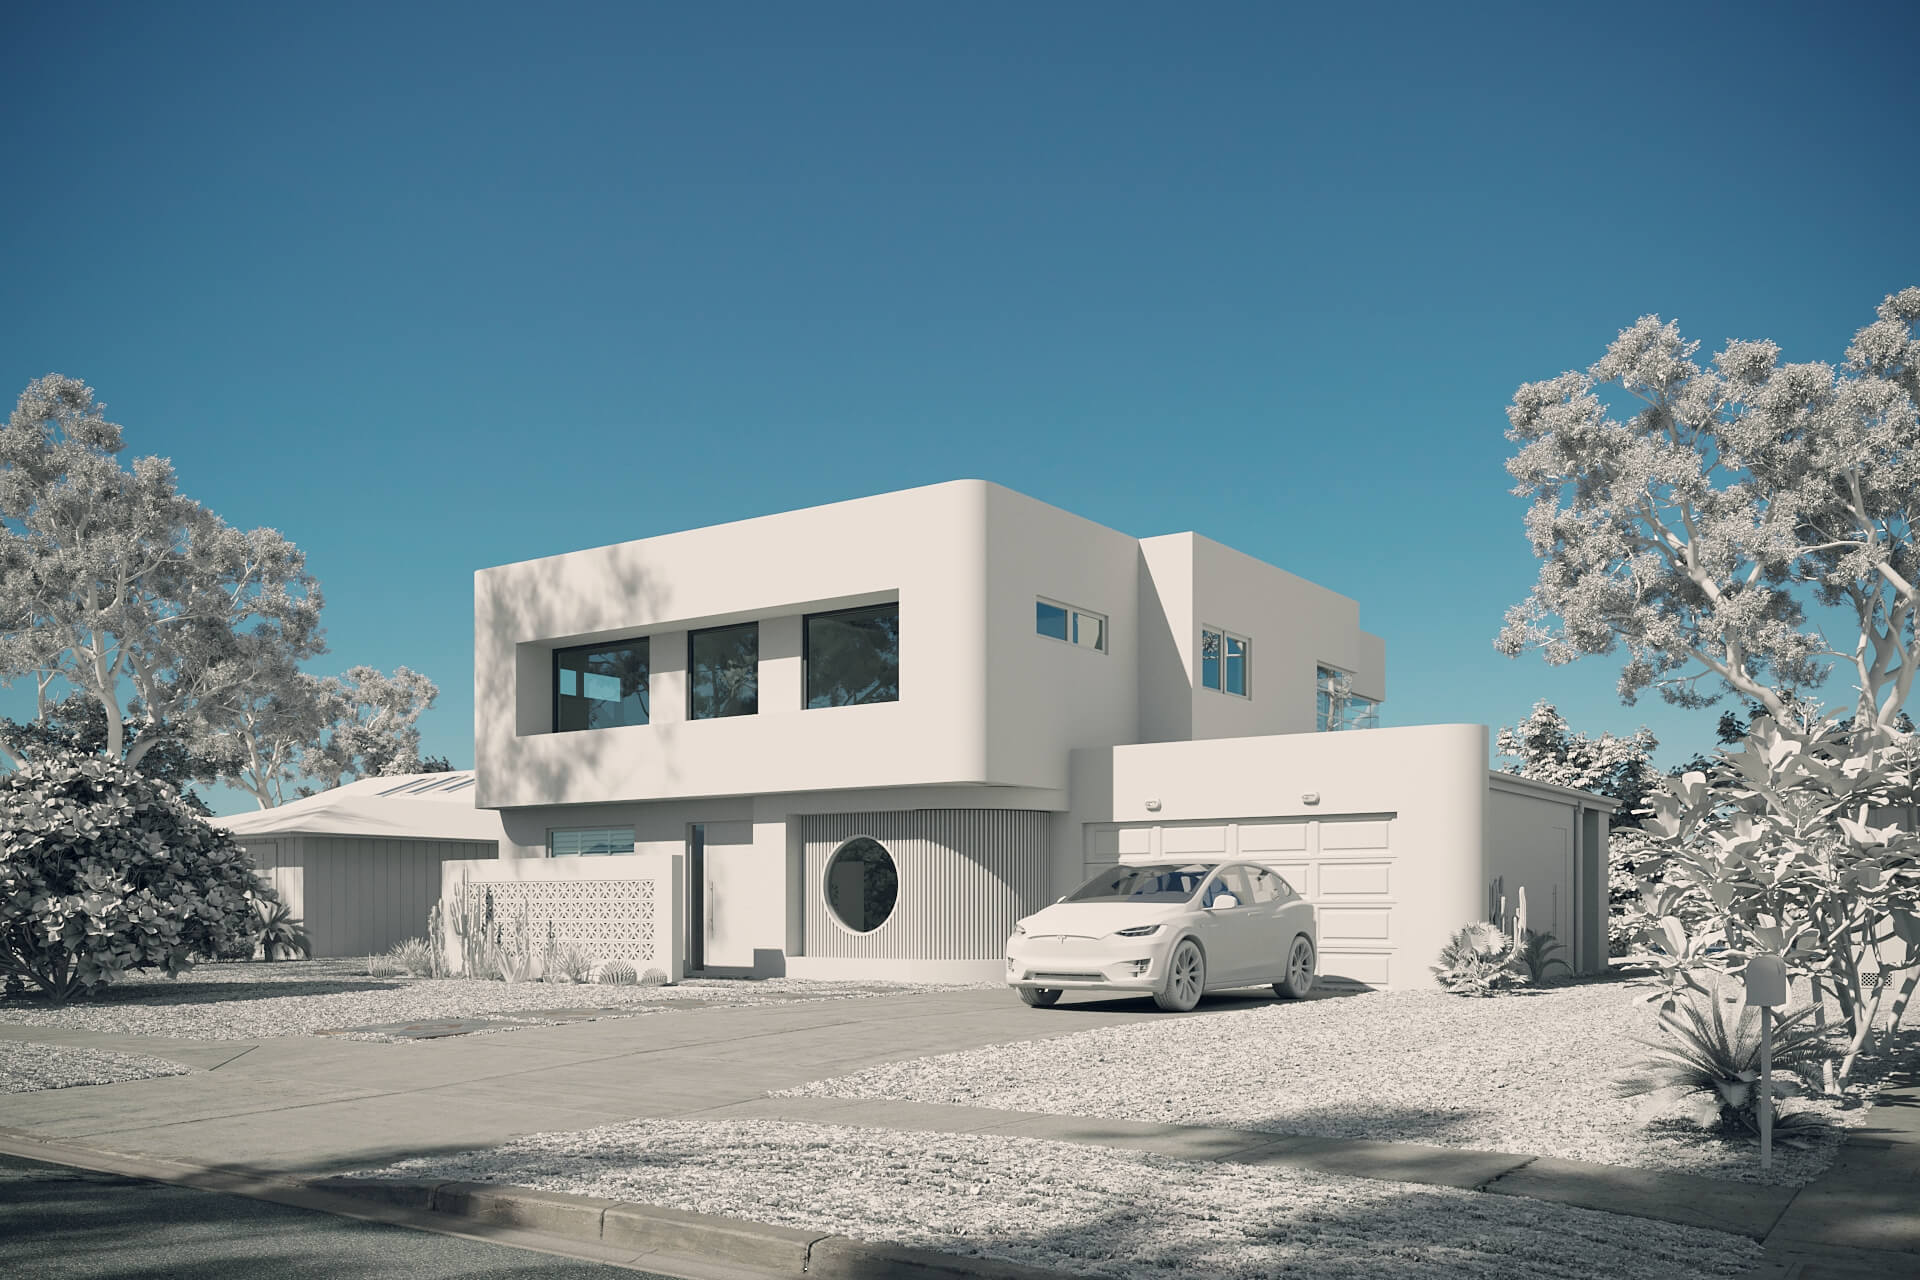
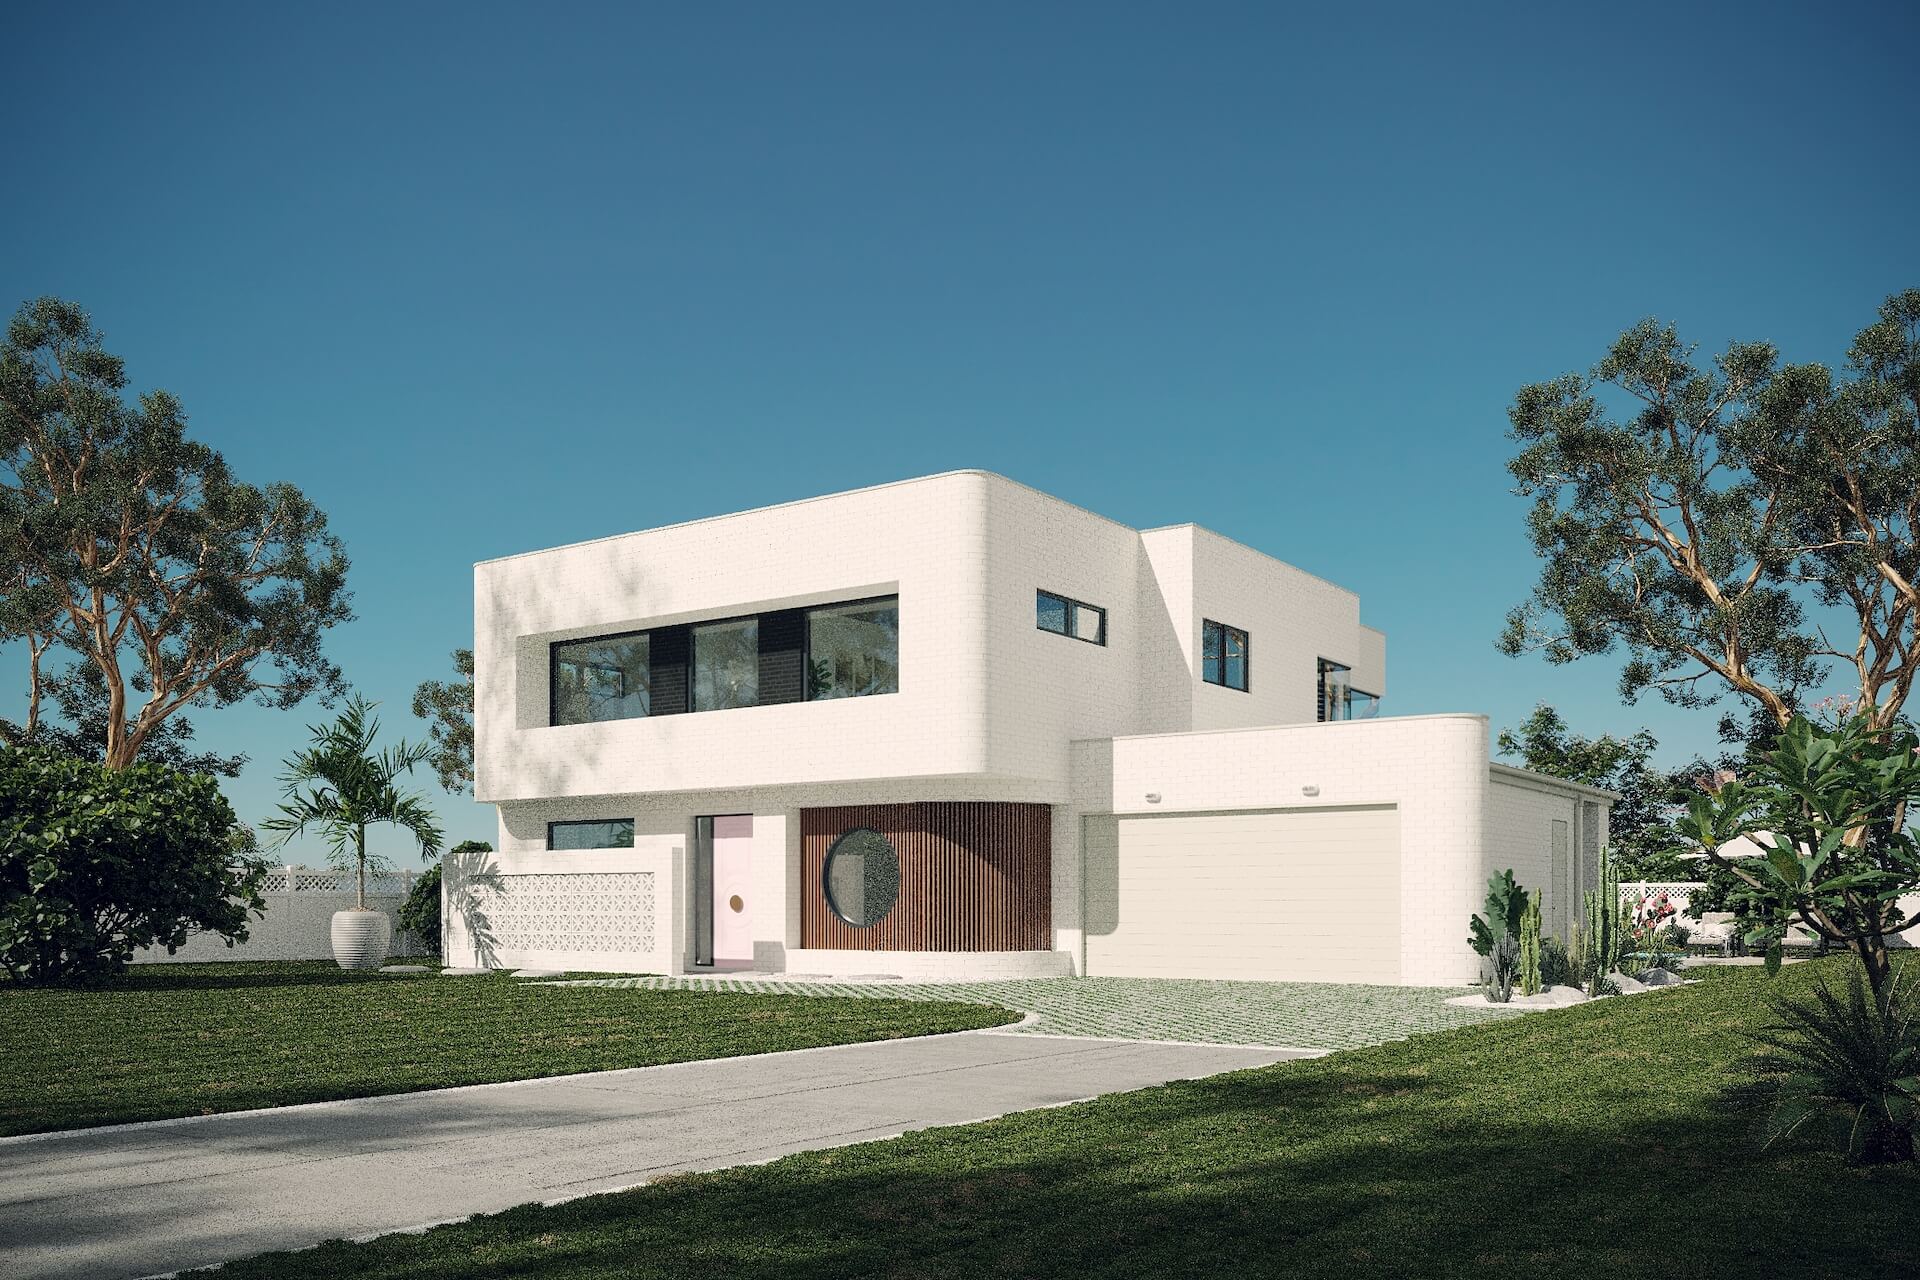
Our 3D artist made all the necessary adjustments. To make sure he got the new type of windows right, he made these two screenshots of the louver sections and sent them to Neel to get his approval.
After the remodeled windows were approved, the CGI specialist made this screenshot of the entire building and its surroundings and showed it to the designer.
Neel liked the updated image of the house exterior and requested only a few minor corrections. Namely, he wanted us to:
- remove the pink flower cactus on the right to give a more minimalist look to the garden;
- bring back the previous texture for the black bricks;
- add a keypad lock to the front door.
For this, the client provided us with additional visual notes and the product listing page as a reference.

We made all the requested changes. Here is the fully updated exterior 3D render in 4k with our studio’s watermark.
At this point, we were almost finished. There was only one more revision round left. Let’s see how it went.
#4. The Third Revision Round
After receiving the 4k image with a watermark, the client had just a couple more minor requests. In particular, he asked us to:
- remove the keypad, as it looked too bulky on the door;
- remove the horizontal line pattern on the garage side door, leave it plain;
- add his and his partner’s logos and copyright statements to the image.
These adjustments were quick and easy to do. To help us with the last one, Neel sent us his and Madison Paige’s logos and copyright statements. So our CG expert just needed to add them to the pictures. Together, there were supposed to be four different versions of the render — one with Neel’s logo, one with Madison Paige logo, one with both of the logos, and one without any logos or text.
Get your project estimated in just 1 hour - fill out this brief!
To get the placement of the logo and copyright statement approved, our CGI specialist made a sample screenshot. You can check it out below.
The client liked both the size and the placement of the logo and text. So, he gave us the green light to proceed with finalizing the images of the house exterior.
And now, it’s time to see the final 3D house exterior renders!
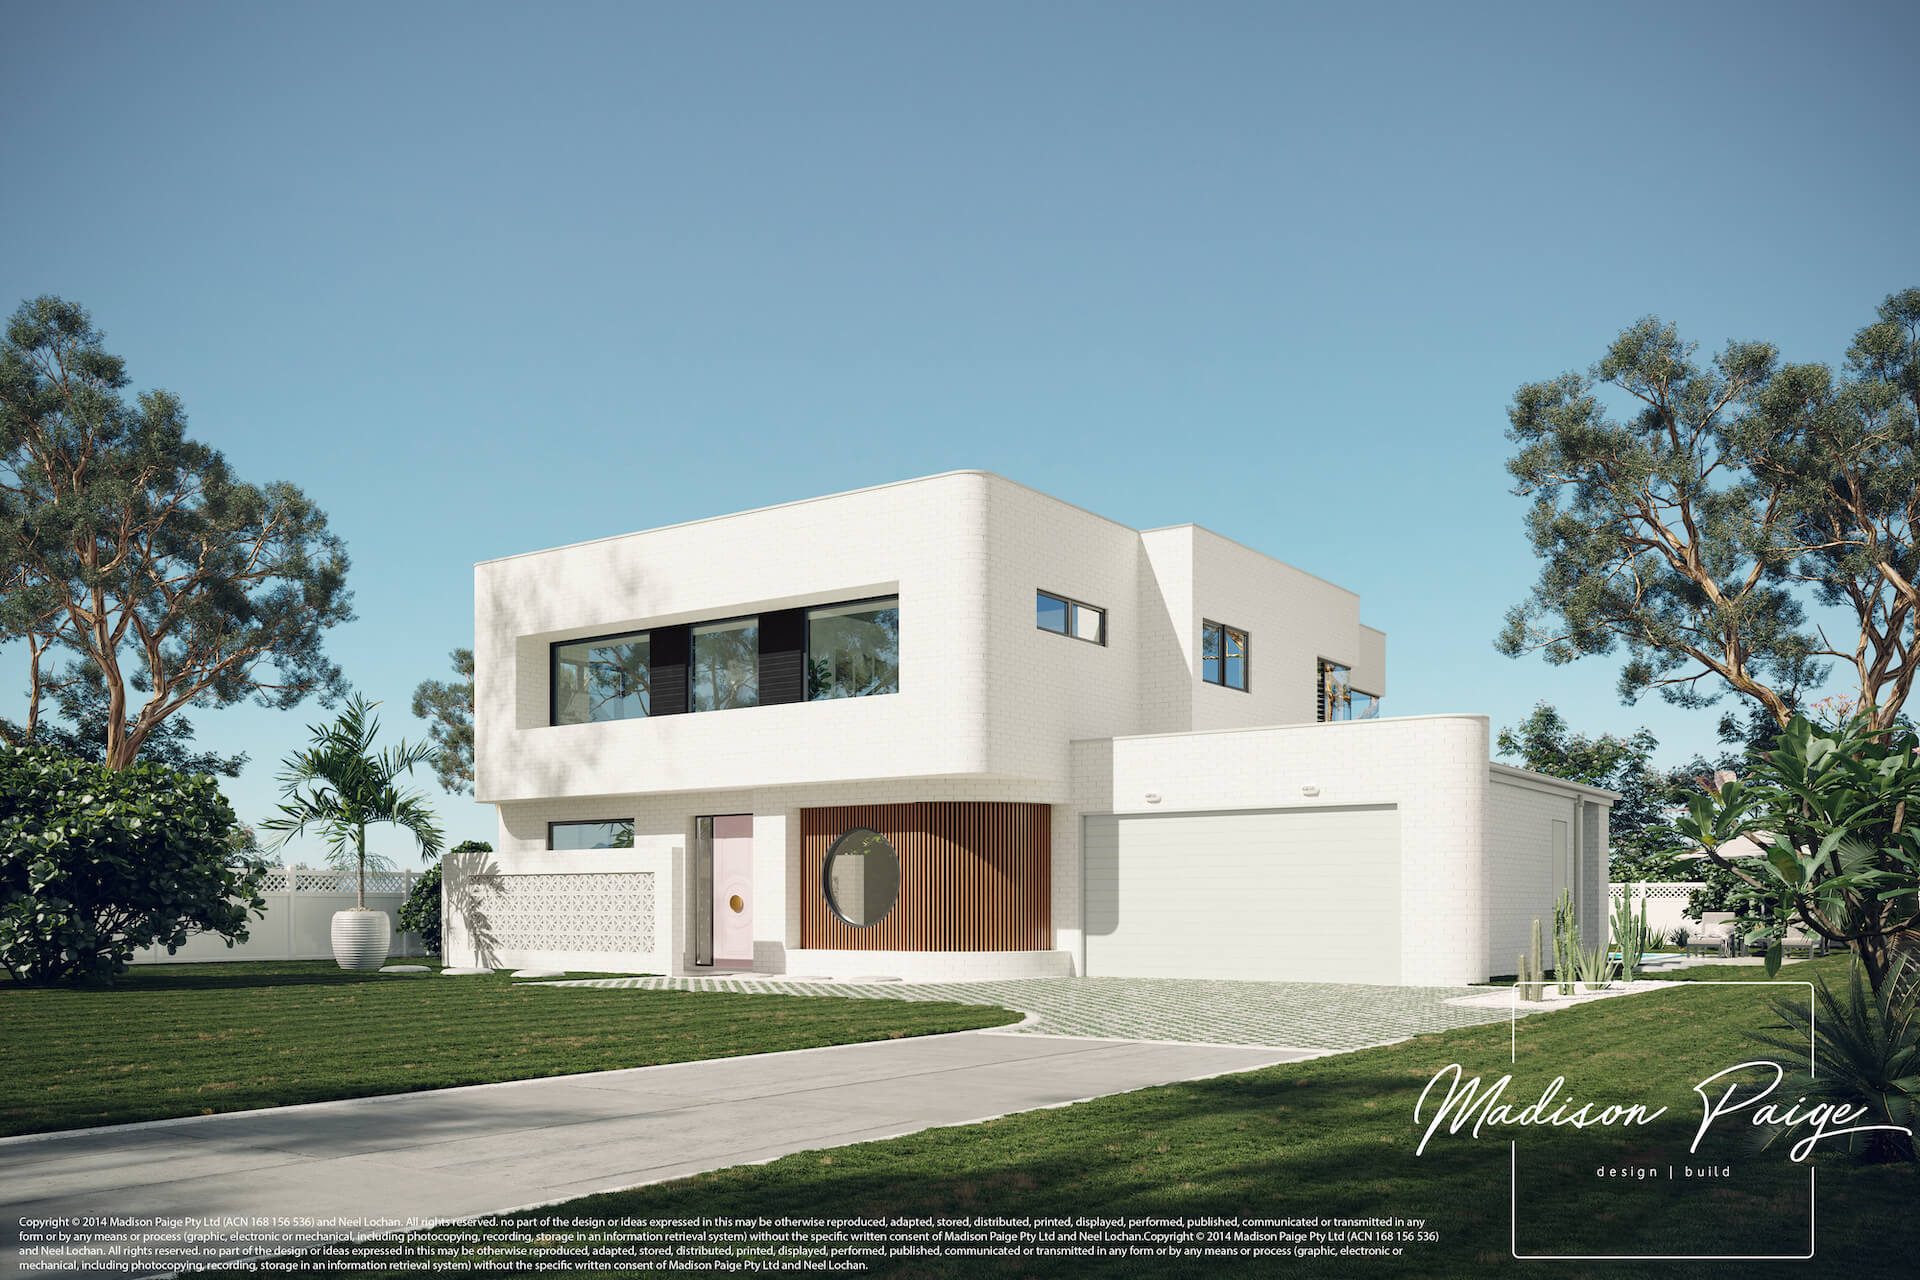
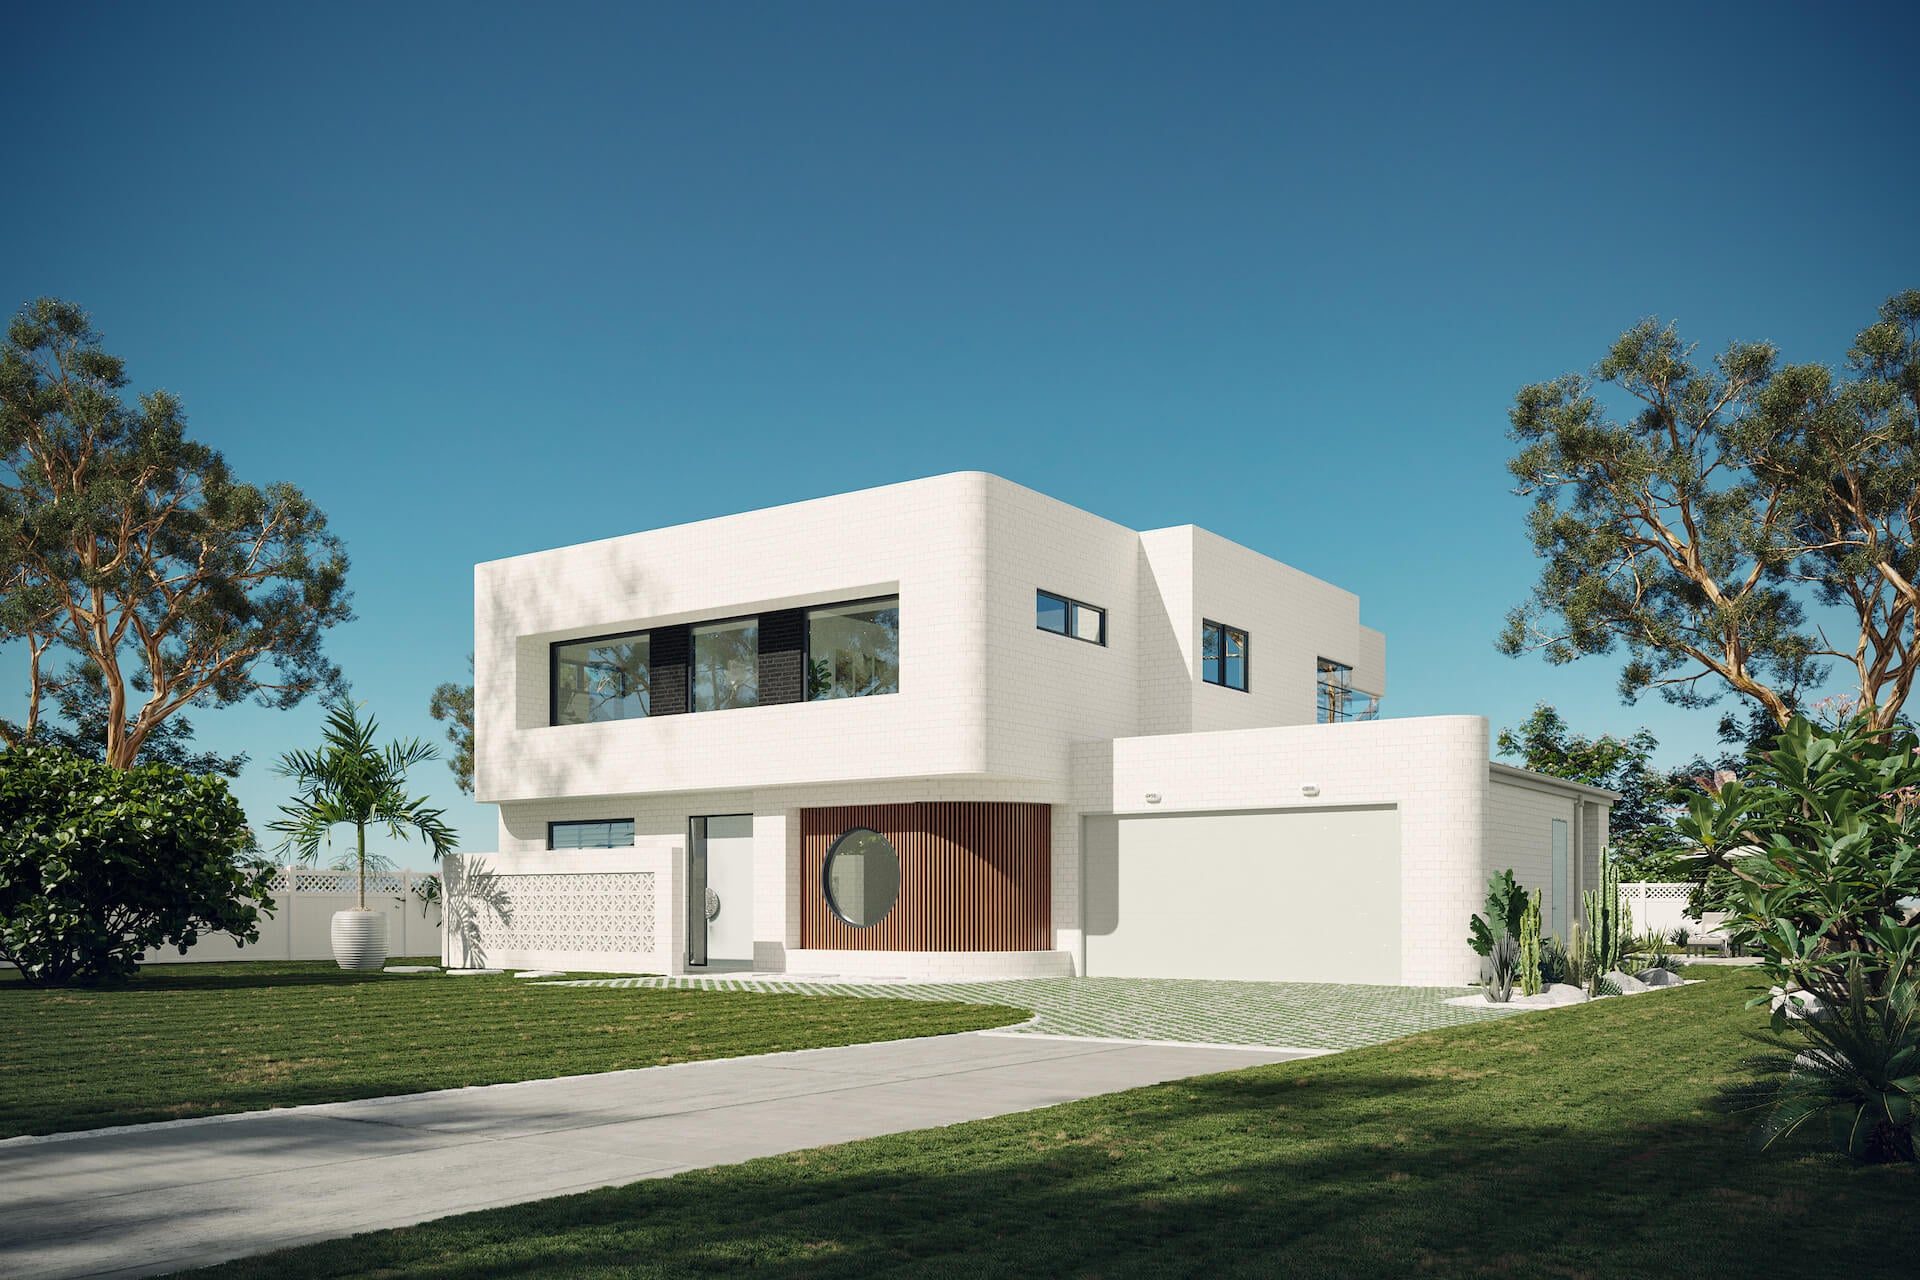
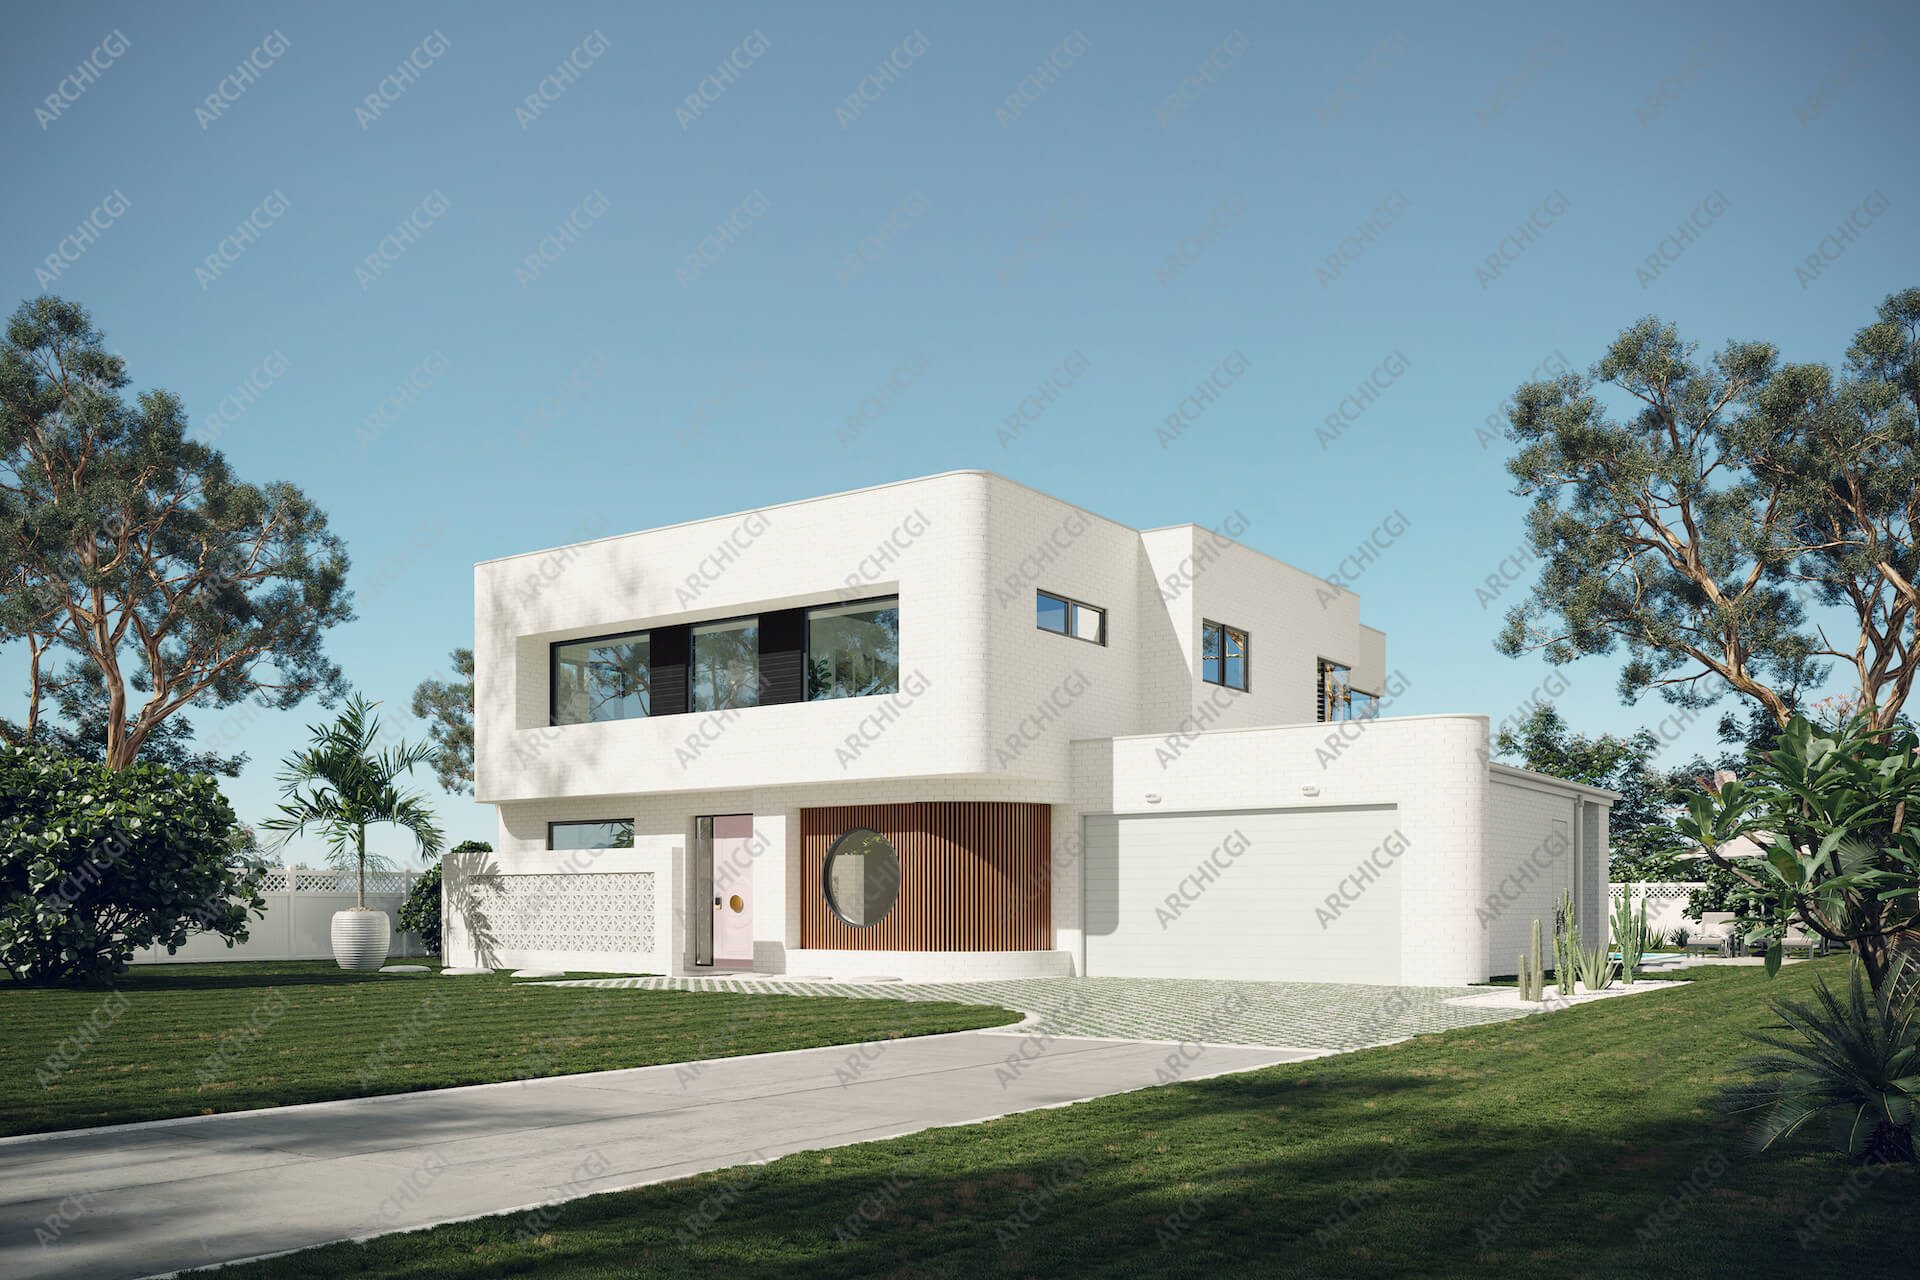
The Results
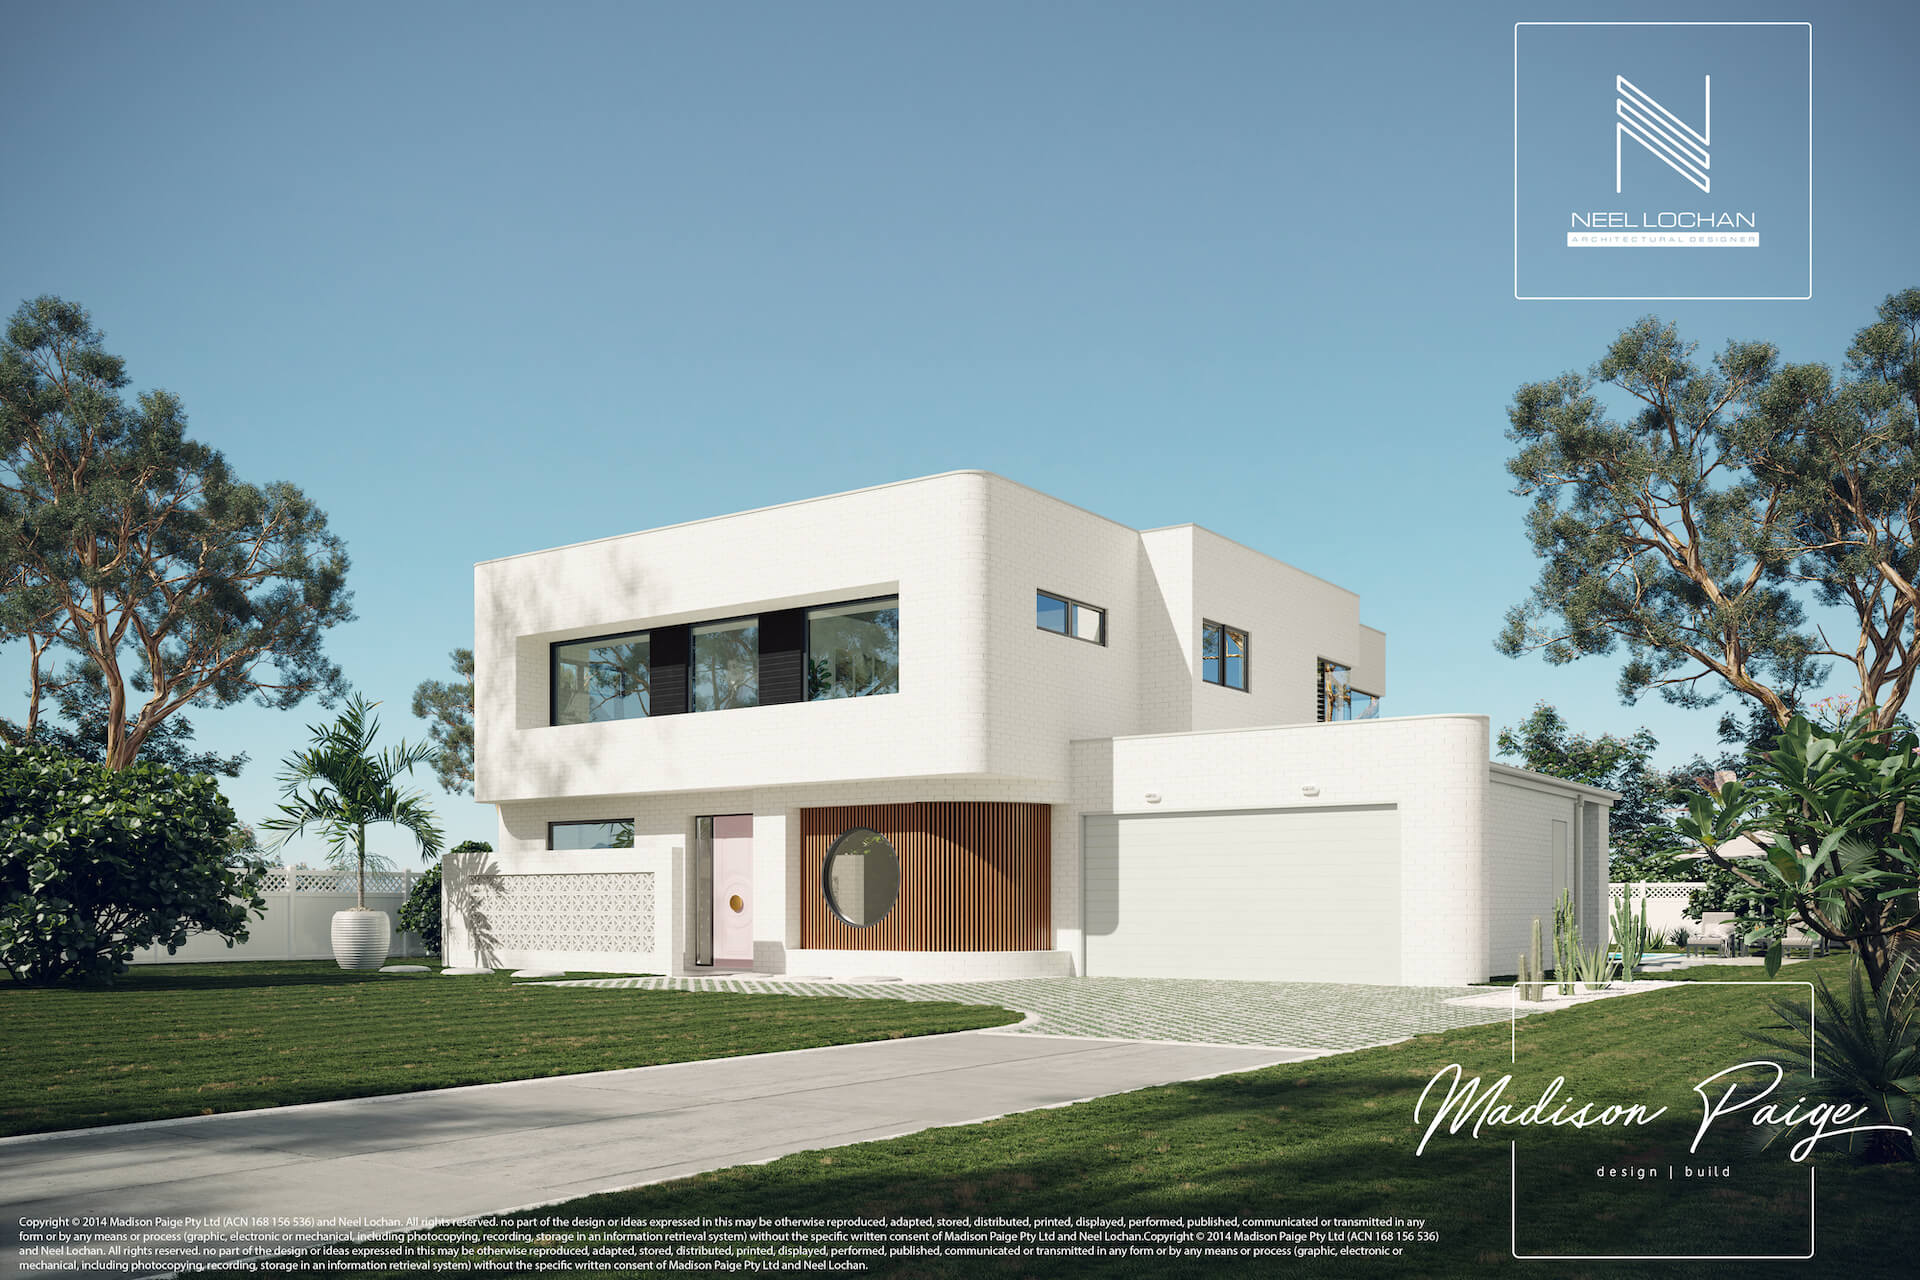
Here, you can see the final rendering in 4k resolution.

Then, here are the three renders with logos and copyright statements of Neel and Madison Paige.
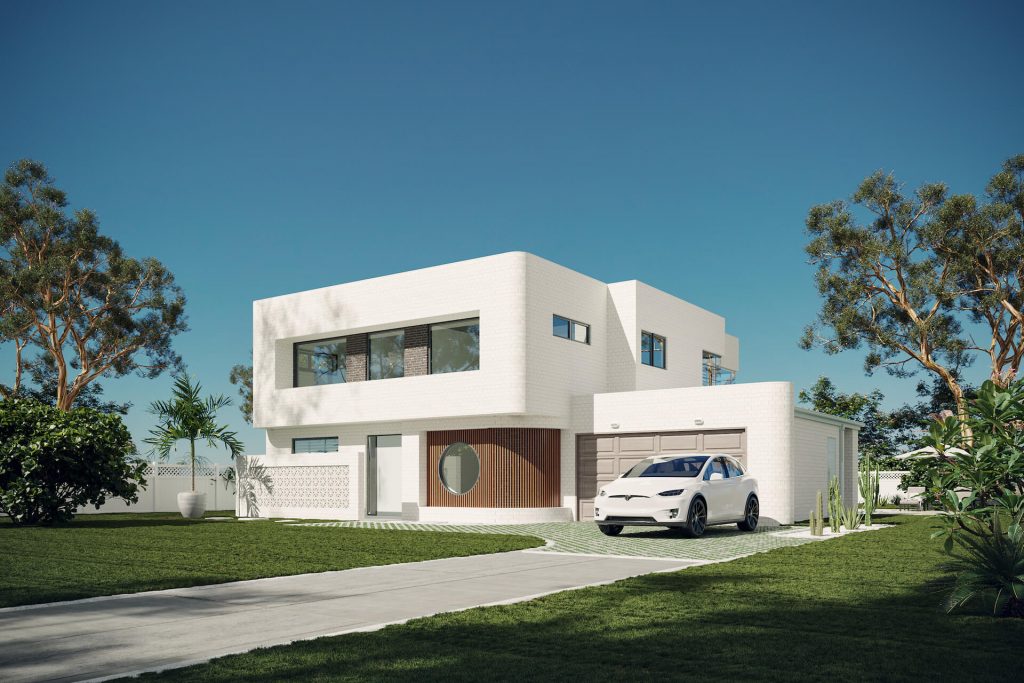
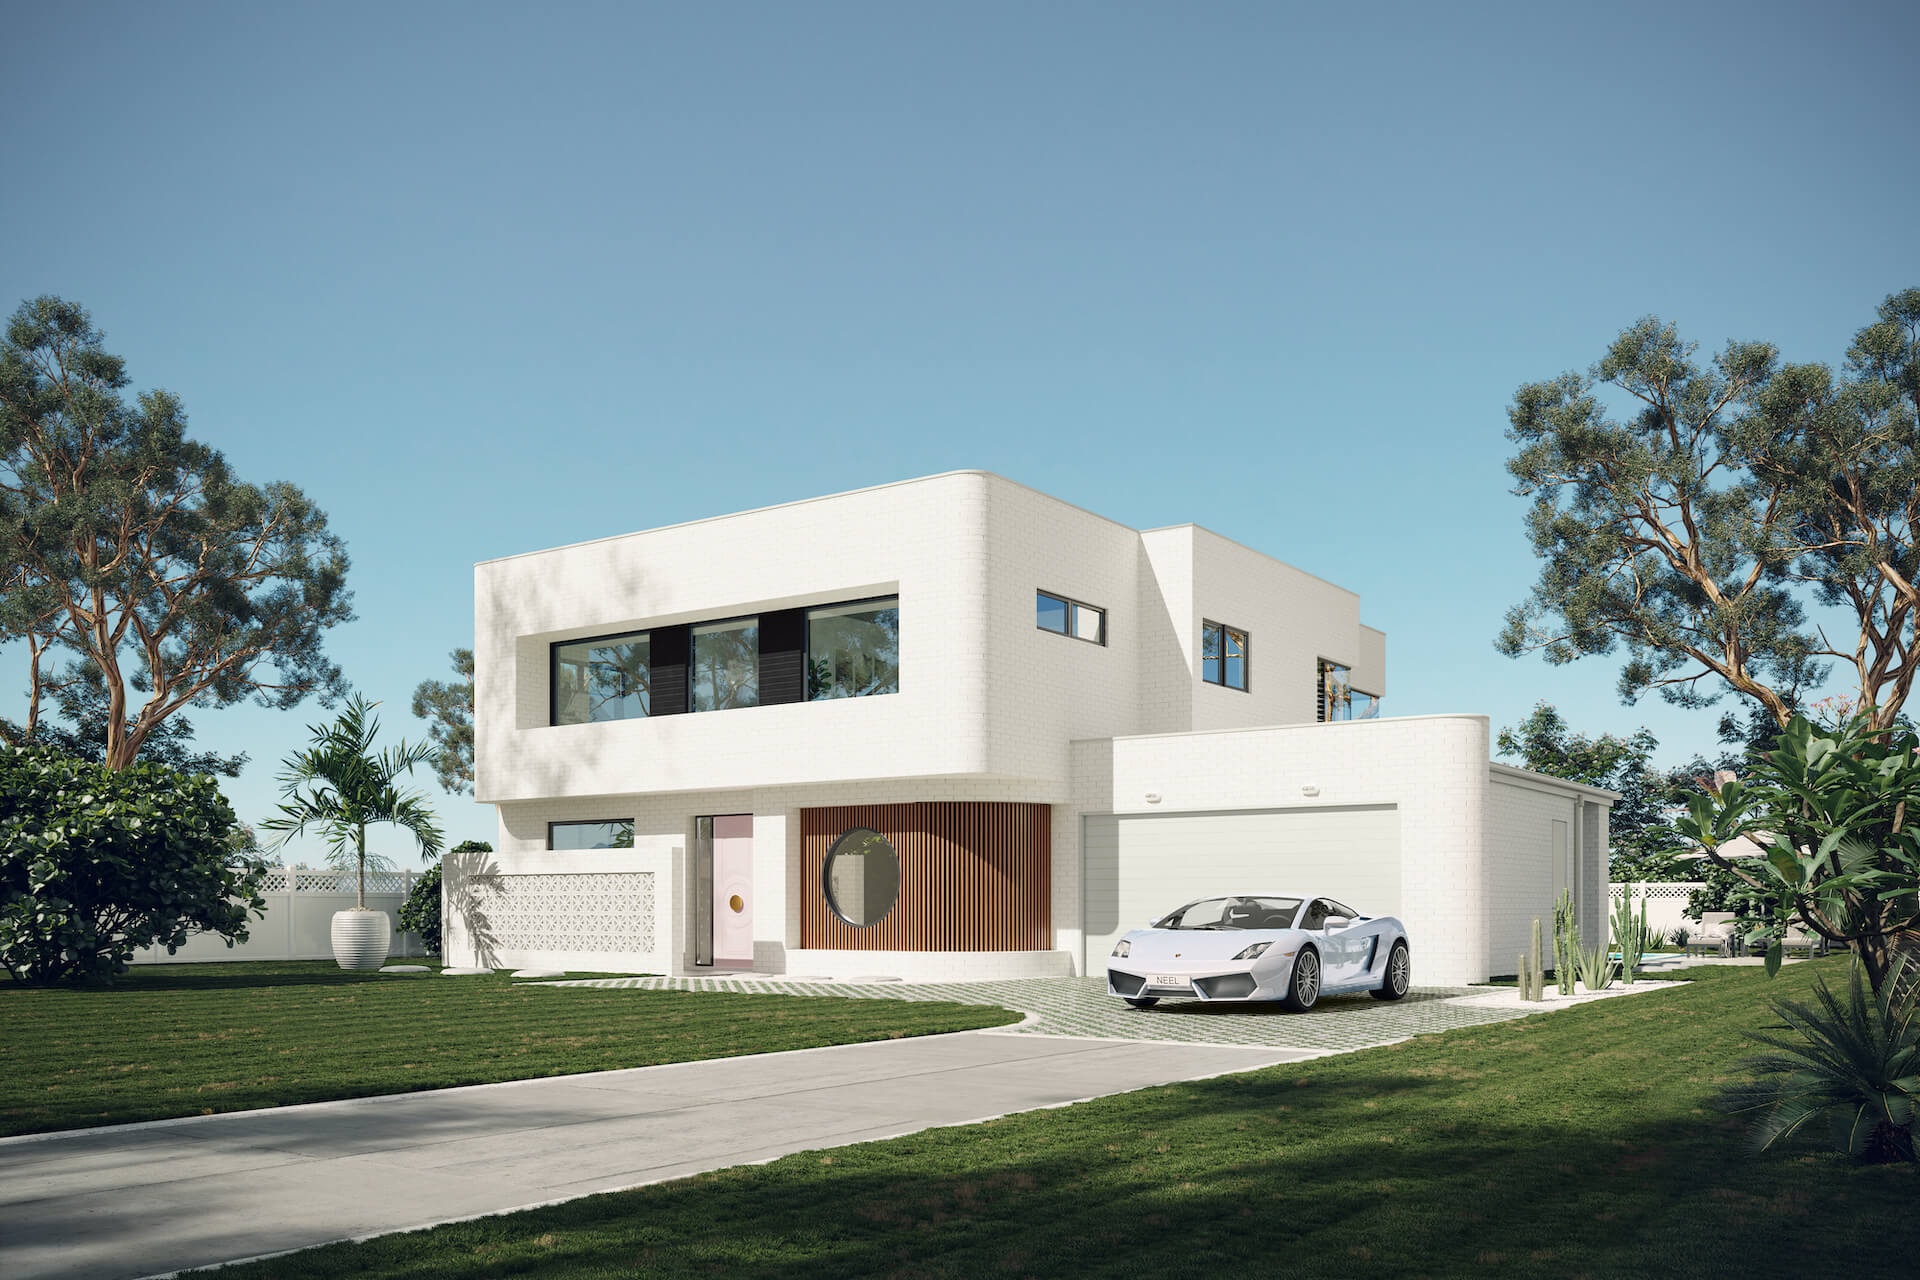
And here’s a bonus image of the house exterior with a sports car in the driveway. Our 3D artist made it as a friendly gesture and even put Neel’s name on the license plate.
Neel responded positively. Here is what he wrote once he received the bonus rendering:

That’s how we completed this 3D house exterior visualization project. Its interactive nature turned out to be truly beneficial for the architectural designer. With photorealistic CGI, our client was able to see his concept in a new way. It allowed him to try out different design and setting options to make the final CG image highly polished. The ArchiCGI team supported the project throughout all stages of design refinement.
We wish Neel and his partner a lot of success with their architectural business. And our team will be happy to visualize their new beautiful designs at any time.
Below you can see Neel’s review of ArchiCGI on completion of the project.
We only work with the best!
At Madison Paige we only work with the best, we searched far and wide and interviewed countless visualization production firms before we engaged ArchiCGI. ArchiCGI delivered:
- Effective communication
- Lightning-speed turnaround times
- On-time delivery
- Next level quality…The end product far surpassed my expectations.
The team that completed the architectural visualization included Dima Pidtilok, Ivan Vasilchenko, Sviatoslav Sukhov, Max Kharchenko, and Igor Tsogla. All deserving of a special mention for their outstanding work and customer service levels, the best in the business!
Looking for professional 3D exterior rendering services? Contact us at ArchiCGI and get hyperrealistic visuals for project presentations and marketing campaigns. Browse our architectural visualization portfolio for more examples of residential CGI projects. See more examples of Australian CGI projects.
Copyright © 2014 Madison Paige Pty Ltd (ACN 168 156 536) and Neel Lochan. All rights reserved. no part of the design or ideas expressed in this may be otherwise reproduced, adapted, stored, distributed, printed, displayed, performed, published, communicated or transmitted in any form or by any means or process (graphic, electronic or mechanical, including photocopying, recording, storage in an information retrieval system) without the specific written consent of Madison Paige Pty Ltd and Neel Lochan.

Ana Wayne
Content Writer, Copywriter
Ana is a content writer for ArchiCGI. She has a passion for design and architecture - and for talking about it. Outside of work, she is a fan of sci-fi movies and a street food connoisseur.
See more ArchiCGI case studies below.
Planning a project in Melbourne? Learn more about our 3D rendering services in Melbourne.

Comments
Michael
Catherine Paul