

Comprehensive CGI Services: Renders and Animation for Westrak
How can architecture businesses that design and manufacture glamping structures get stellar marketing visuals? By ordering comprehensive CGI services. And in this case study, our architectural visualization company will tell you about one of such projects in detail.
Our client here was Westrak Structures — a UK startup that builds accommodation pods for glamping, structures for luxury outdoor living, garden office spaces, stables, and outbuildings. The company has beautiful ready designs but also offers to customize them to fit individual customers’ requirements.
In July 2020, Philip Gibbs of Westrak Structures contacted our studio to get CGI for marketing their accommodation pods. In the course of the project, we created a whole bunch of photorealistic visuals — exterior and interior 3D renders, as well as CG animation.

Want to know what went into the production of each type of CGI? We’ll show you how we approached every task, what the process was like, and how the startup used the results in its promo campaign. Read on!
The Scope of Work
We needed to make CG visuals for four different pod designs that Westrak Structures offers. Those are:
- a 2-berth WestPod 2;
- a 4-berth WestPod 4;
- a 5-berth WestPod 5;
- and WestHouse — a communal hub house.
Our 3D artists were tasked to produce the following types of still CGI for those accommodations:
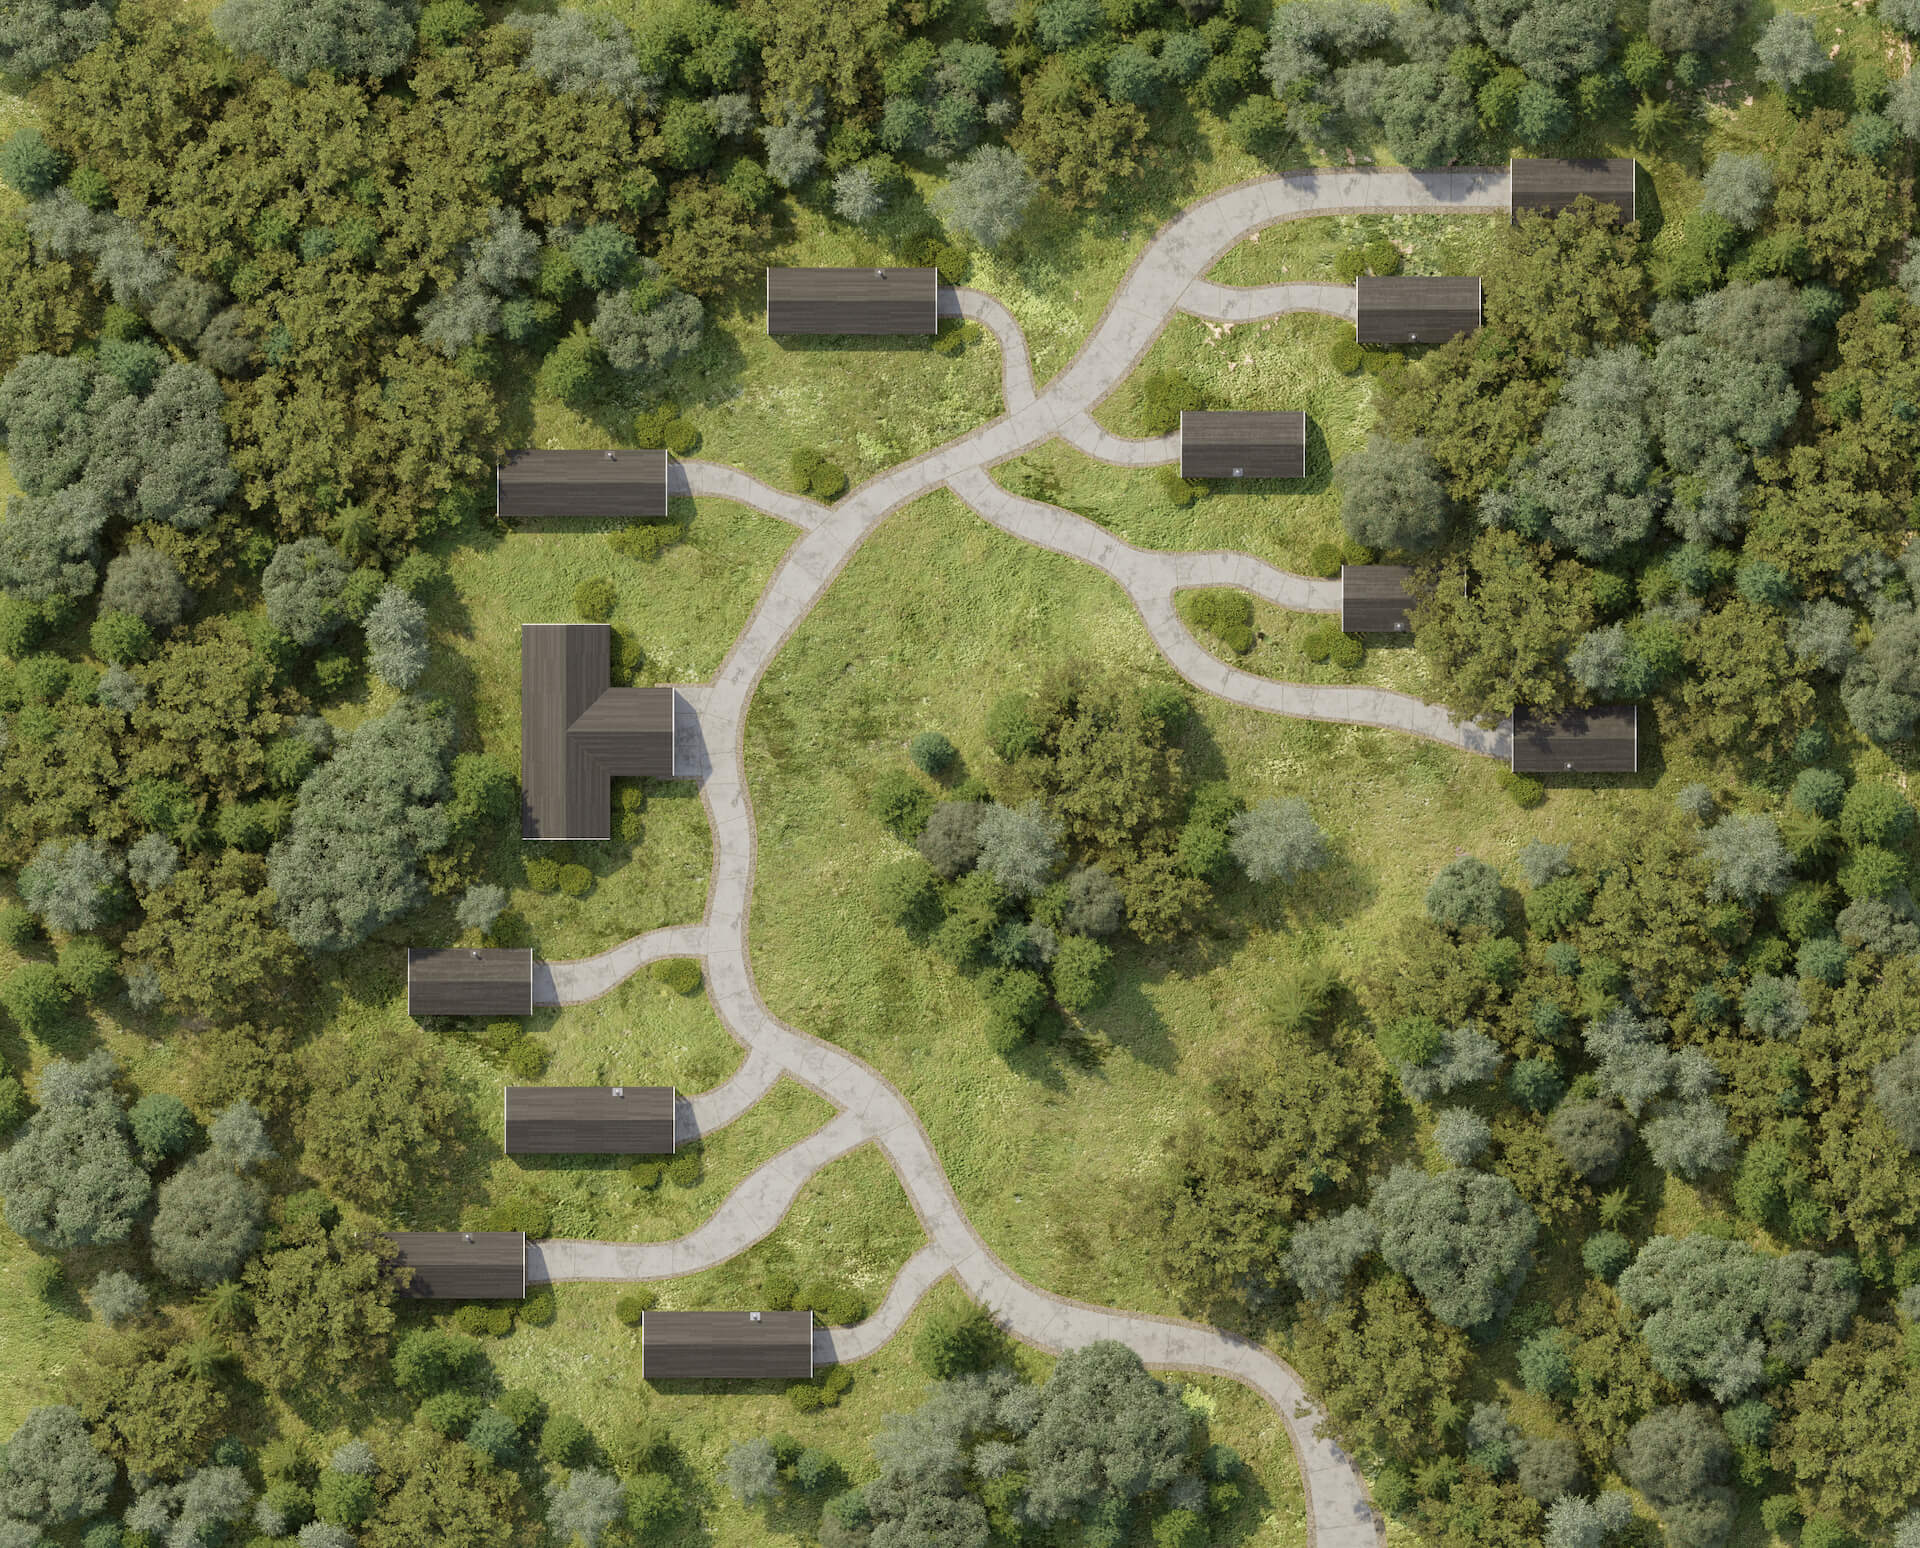
- a comprehensive 3D master site plan showing the infrastructure of a pod community concept with all four types of houses in it;
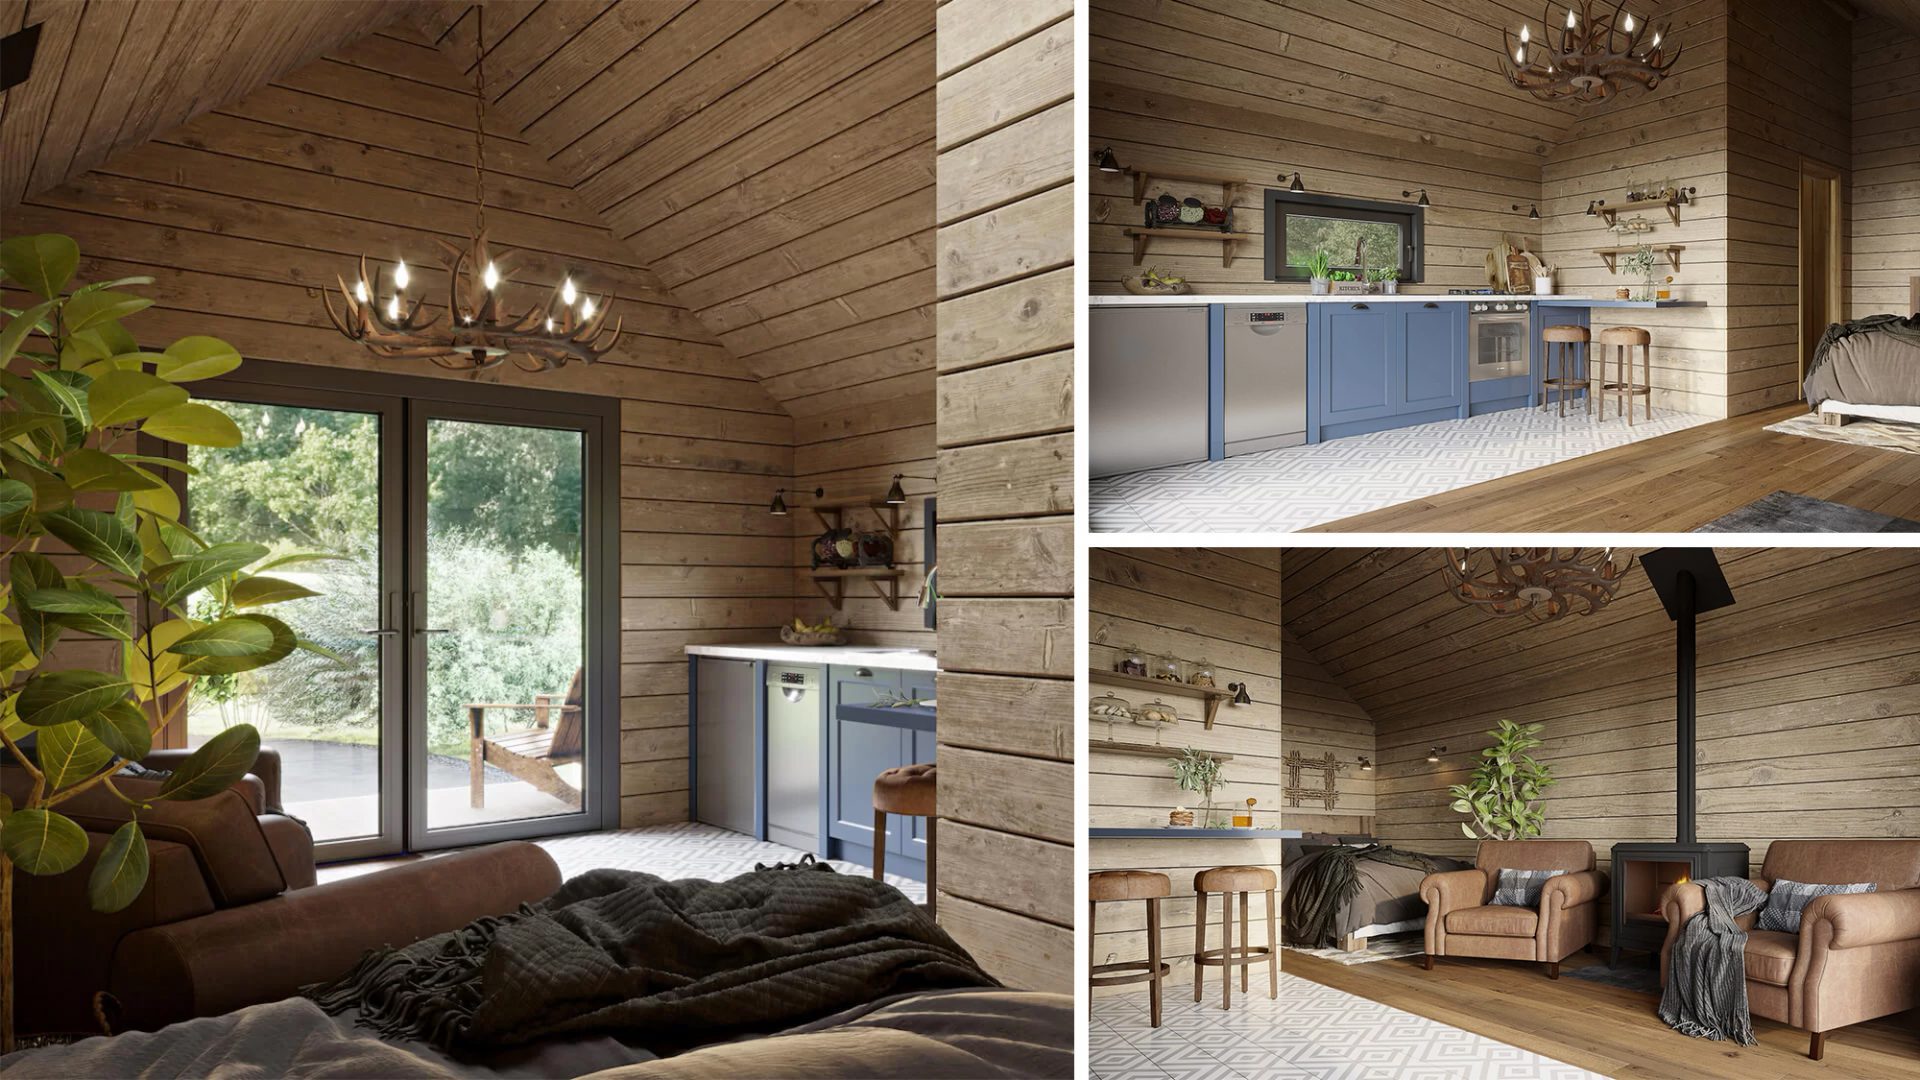
- three interior 3D renders demonstrating the comfortable rooms fully equipped with everything one needs for an unforgettable vacation;
- three exterior 3D renders showcasing the sleek architectural design of the buildings and convey the light glamping vacation atmosphere.
On top of that, we provided architectural animation services. It wasn’t planned initially, but we offered this option in the course of the project, and the guys from Westrak Structures were open to the idea. So, we created a CG video in which a pod community comes to life with dynamic camera movements and a soundtrack — a perfect asset for a digital promo campaign.
The Purpose of the Project
The client needed this package of visuals to carry out a comprehensive content marketing strategy. Namely, the startup used the CGI to promote its products and services through the website and SMM. Plus, the 3D images made great material for both online and printed advertisements.
Here, you can see how the visuals we created are now being used on the company’s website.
Now, let’s take a closer look at the comprehensive CGI services we performed.
Part 1. The Making of the 3D Site Plan & Exterior 3D Renders
The CGI services we needed to do in this part of the project included the creation of:
- one 3D master site plan;
- two CG images of WestPod 2;
- one CG image of WestHouse.
#1.1 The References
For this tasks, the client provided us with a comprehensive set of visual references:
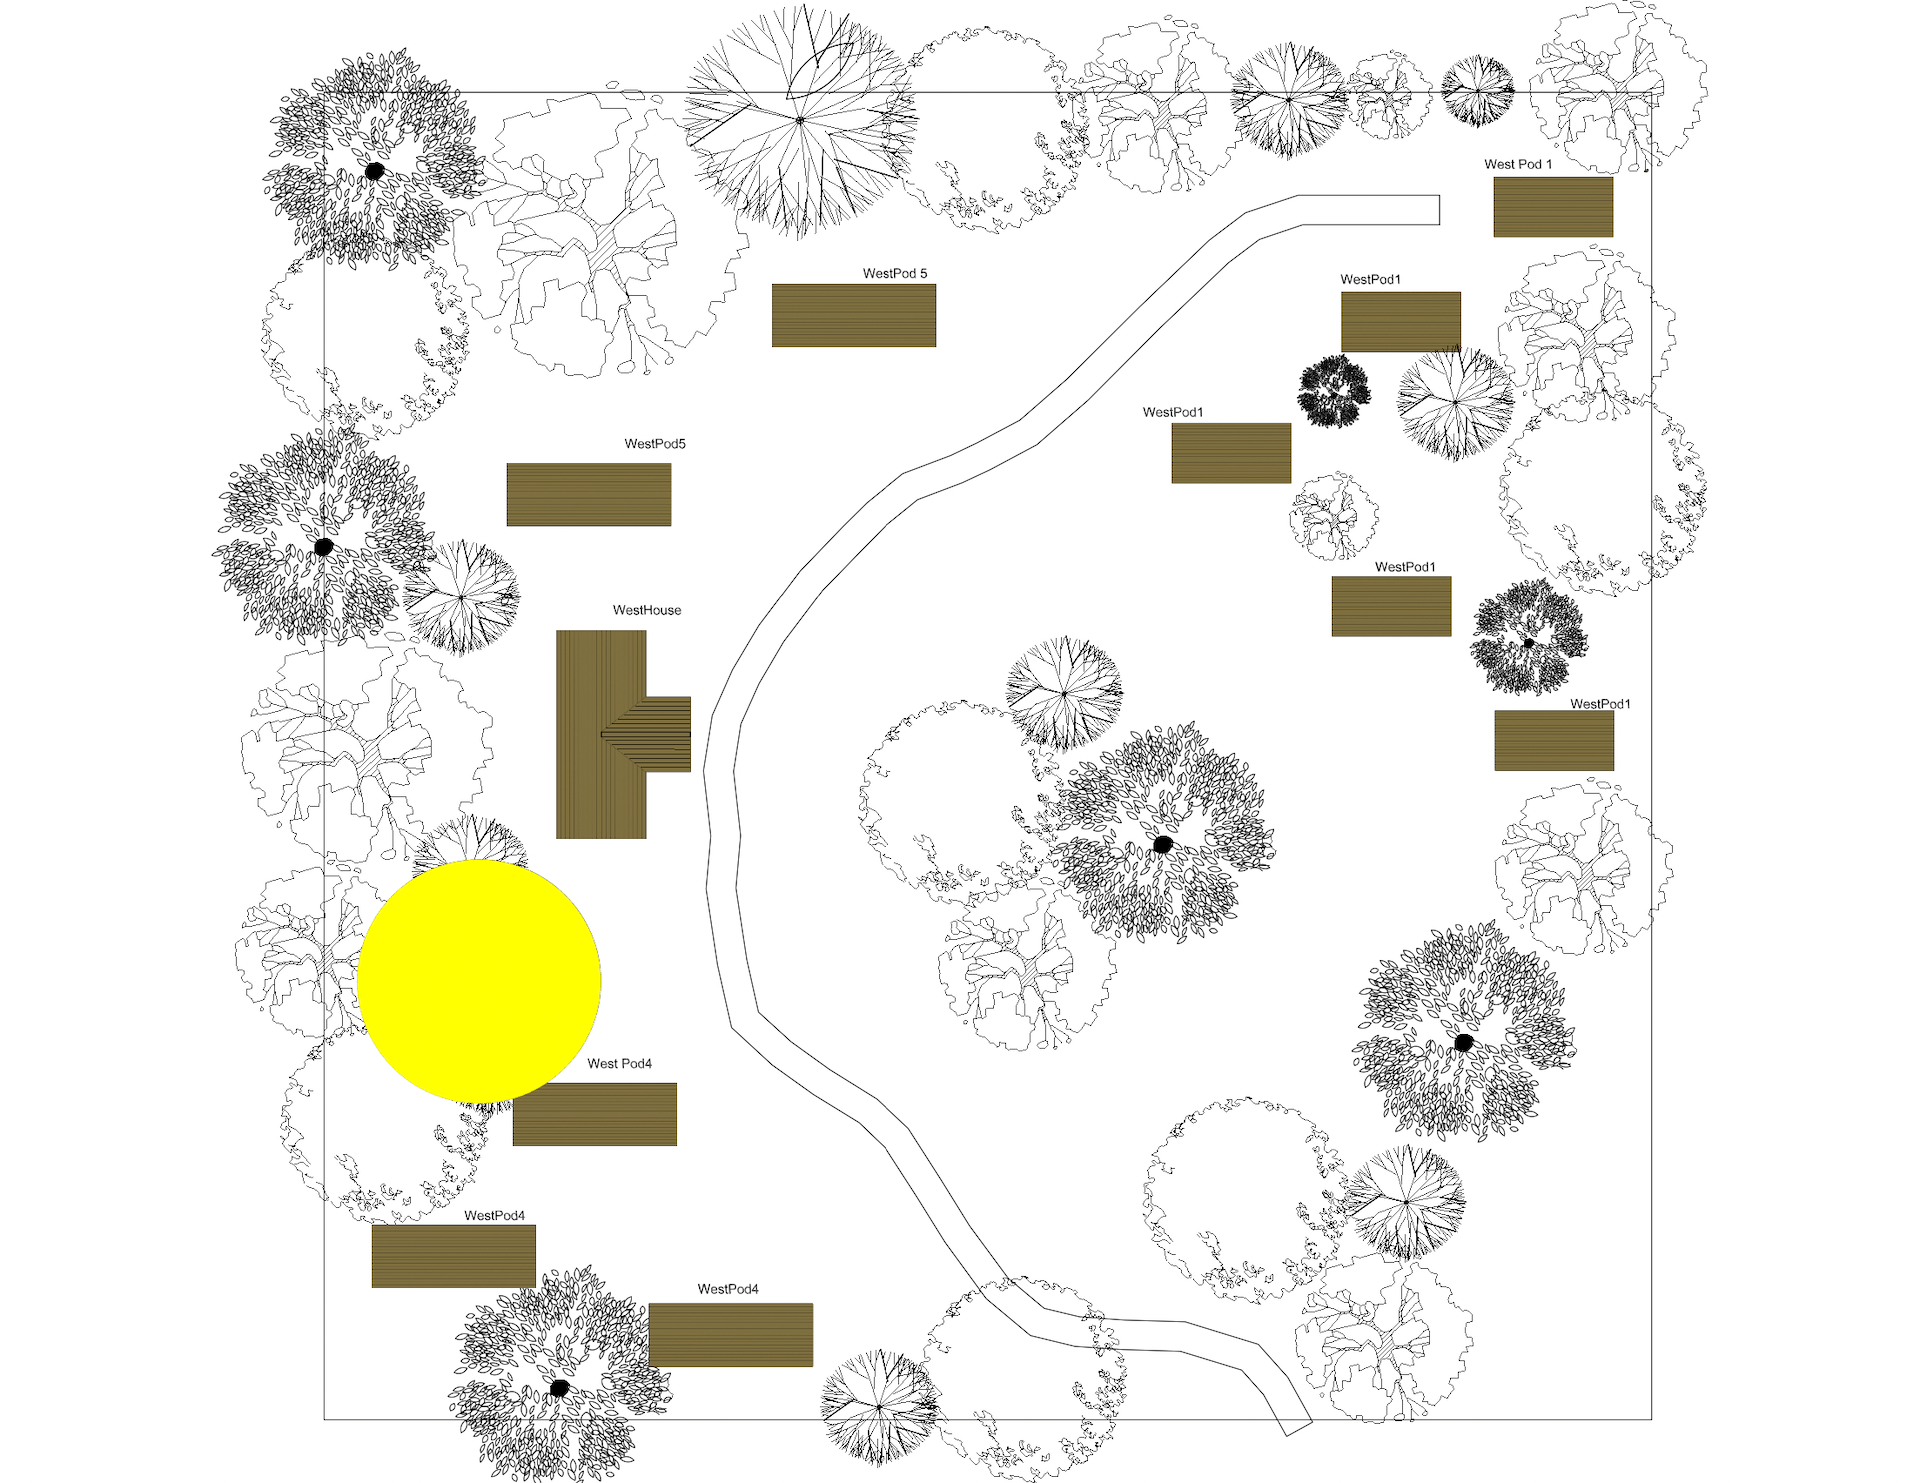
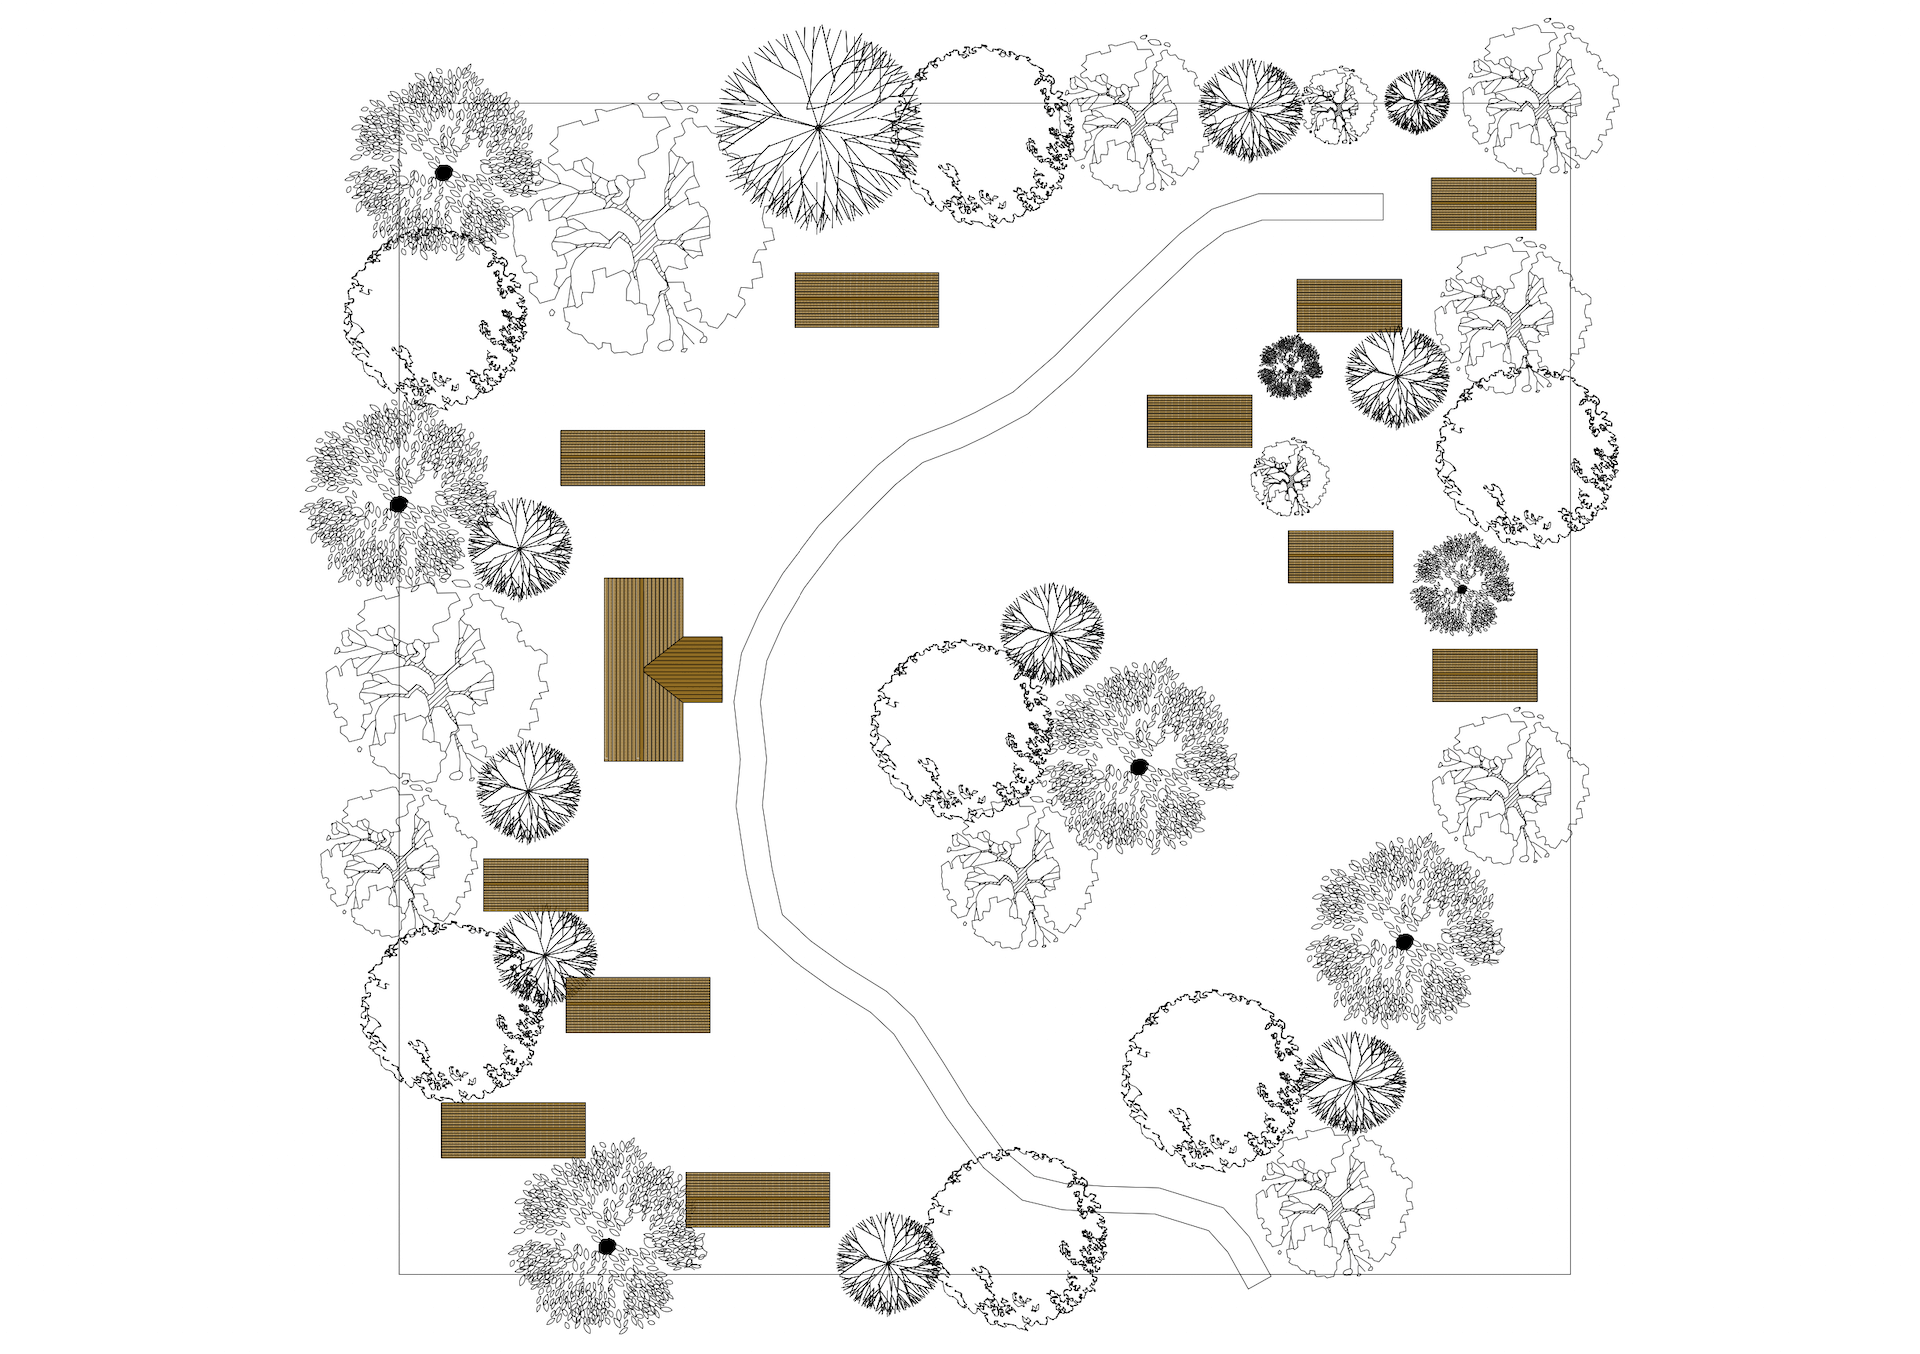
- a schematic 2D site layout of the glamping complex;
- references for the overall visual style of the site plan;
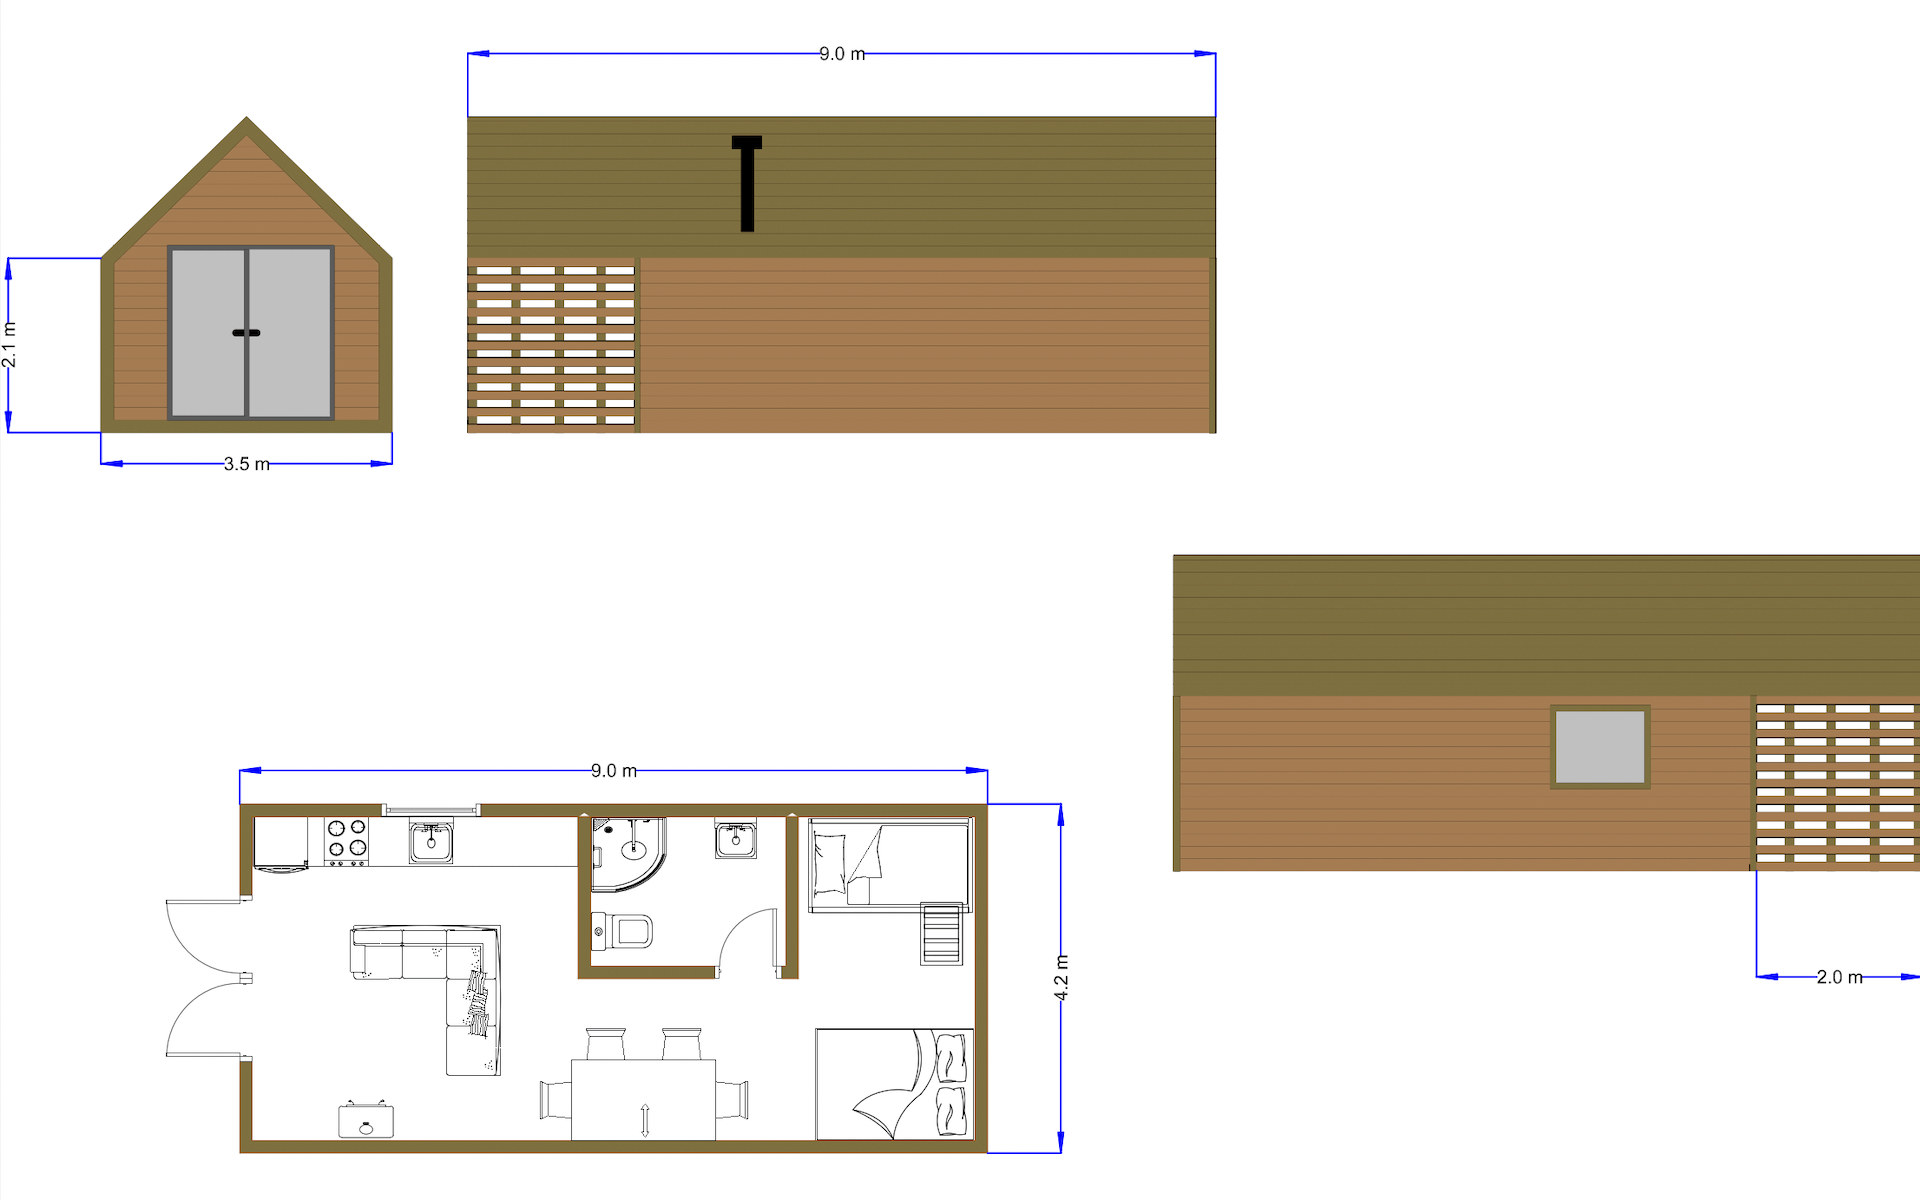
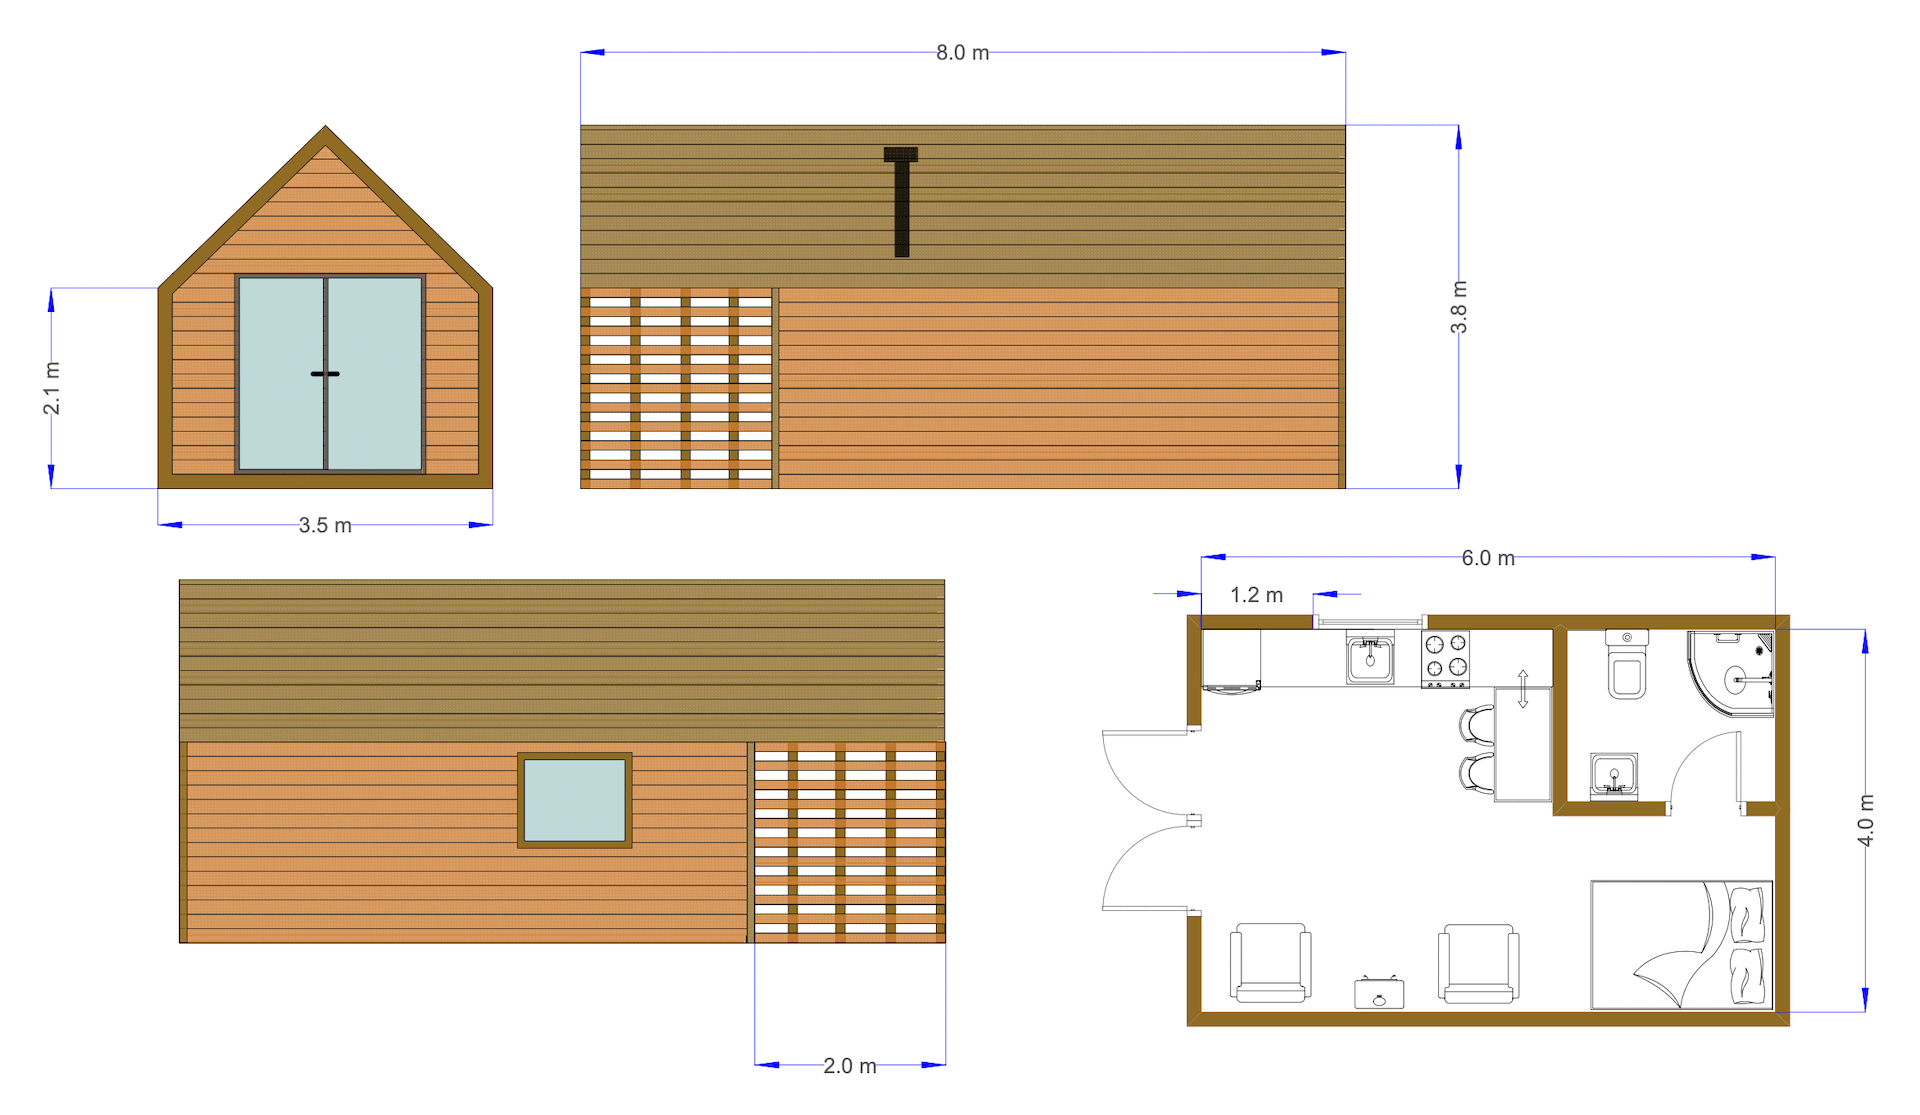
- PDF files with floor plans and exterior elevations of WestPod 2 and WestPod 4;
- a DWG file with a schematic layout of WestHouse in 2D and 3D;
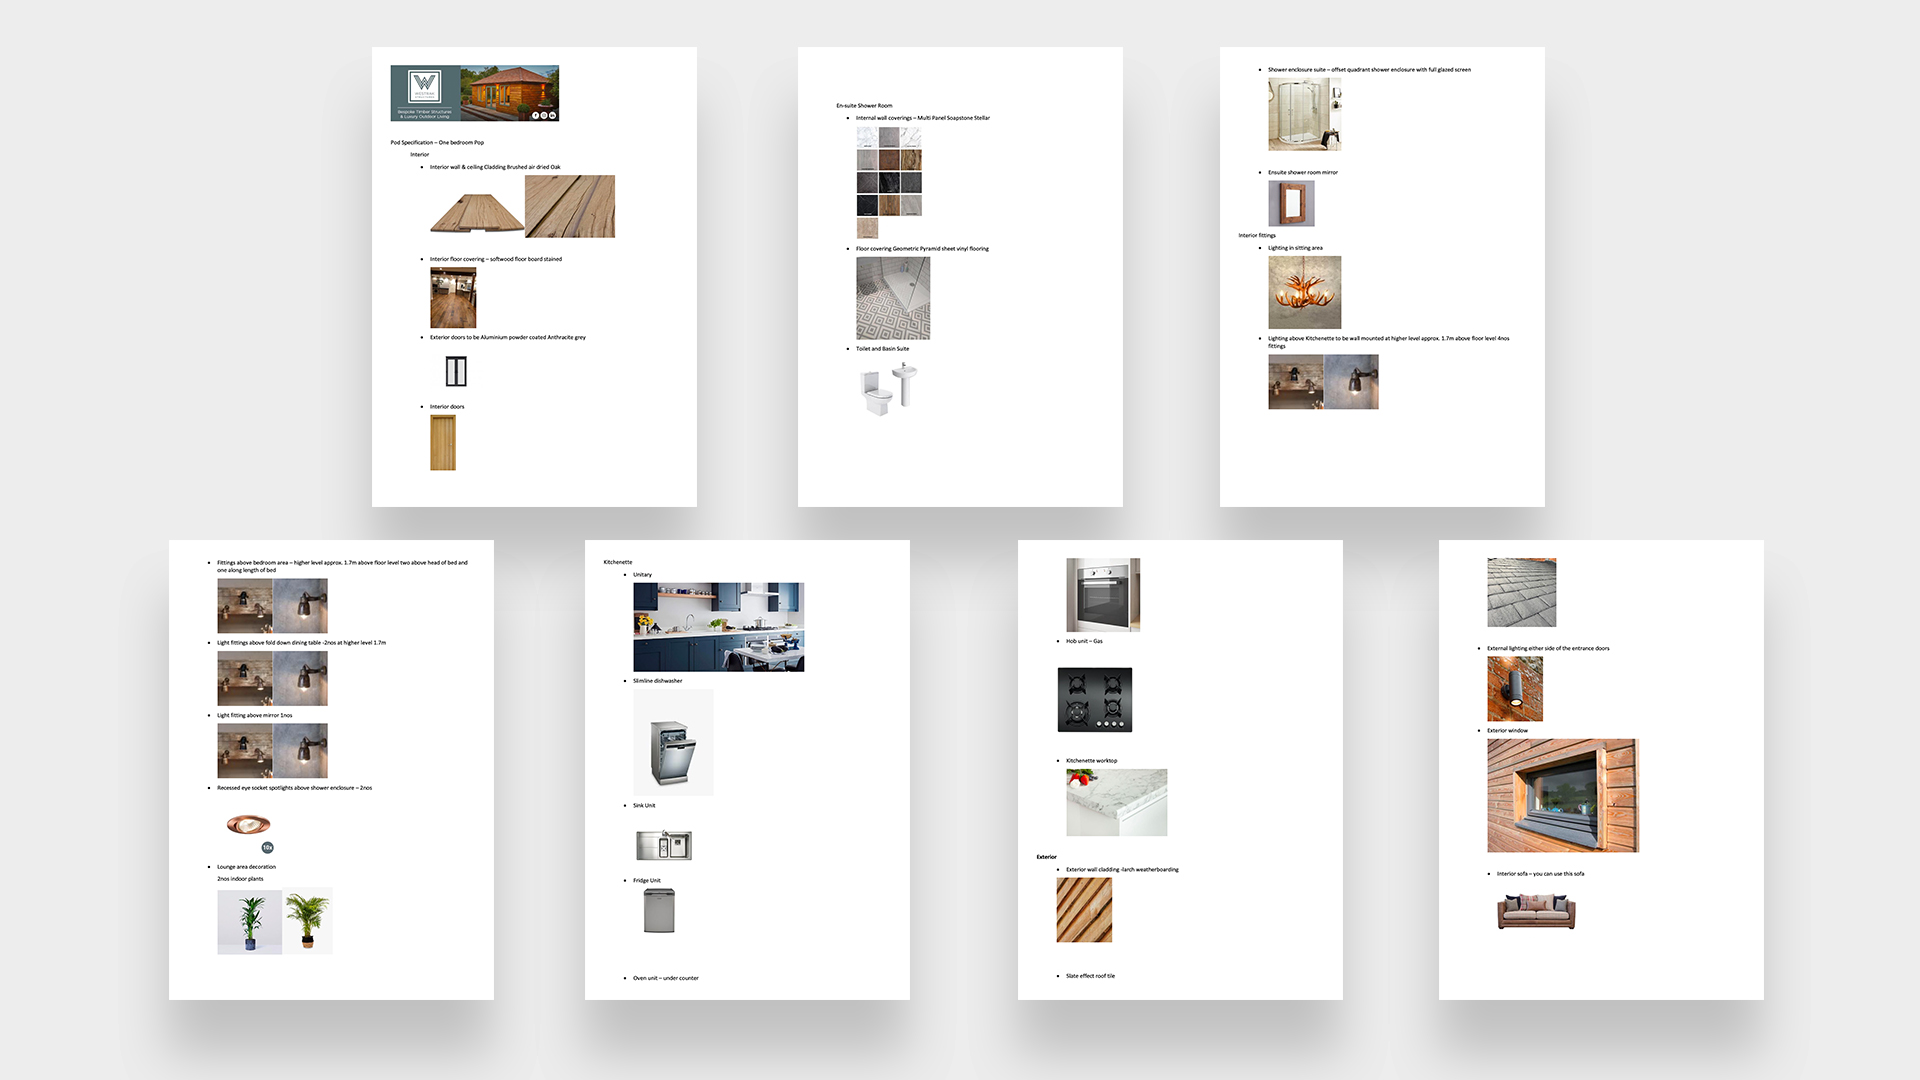
- materials and structure specification;
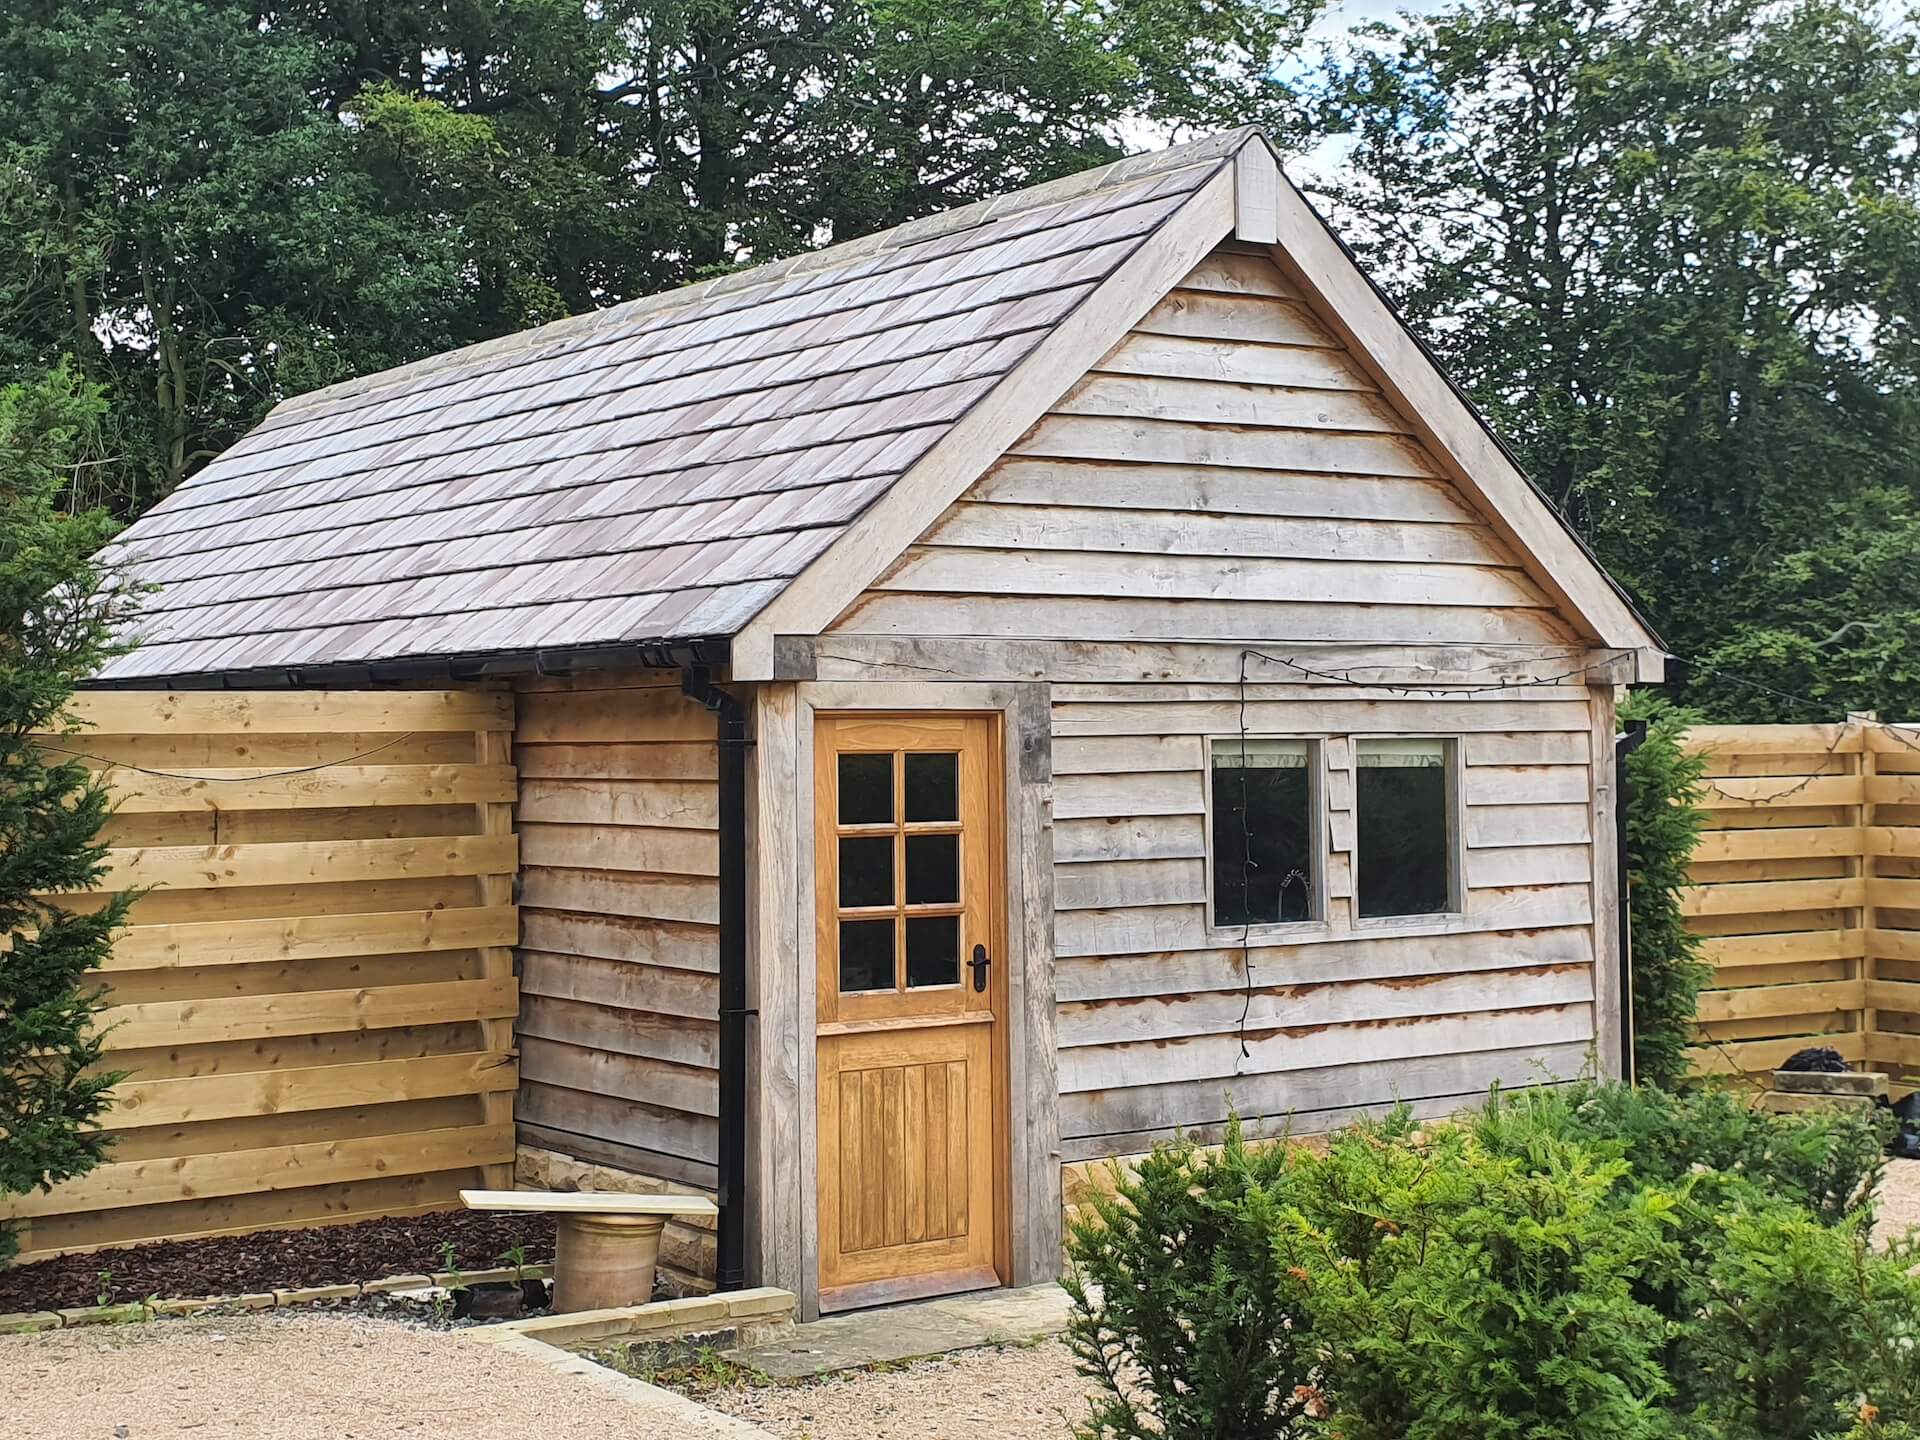
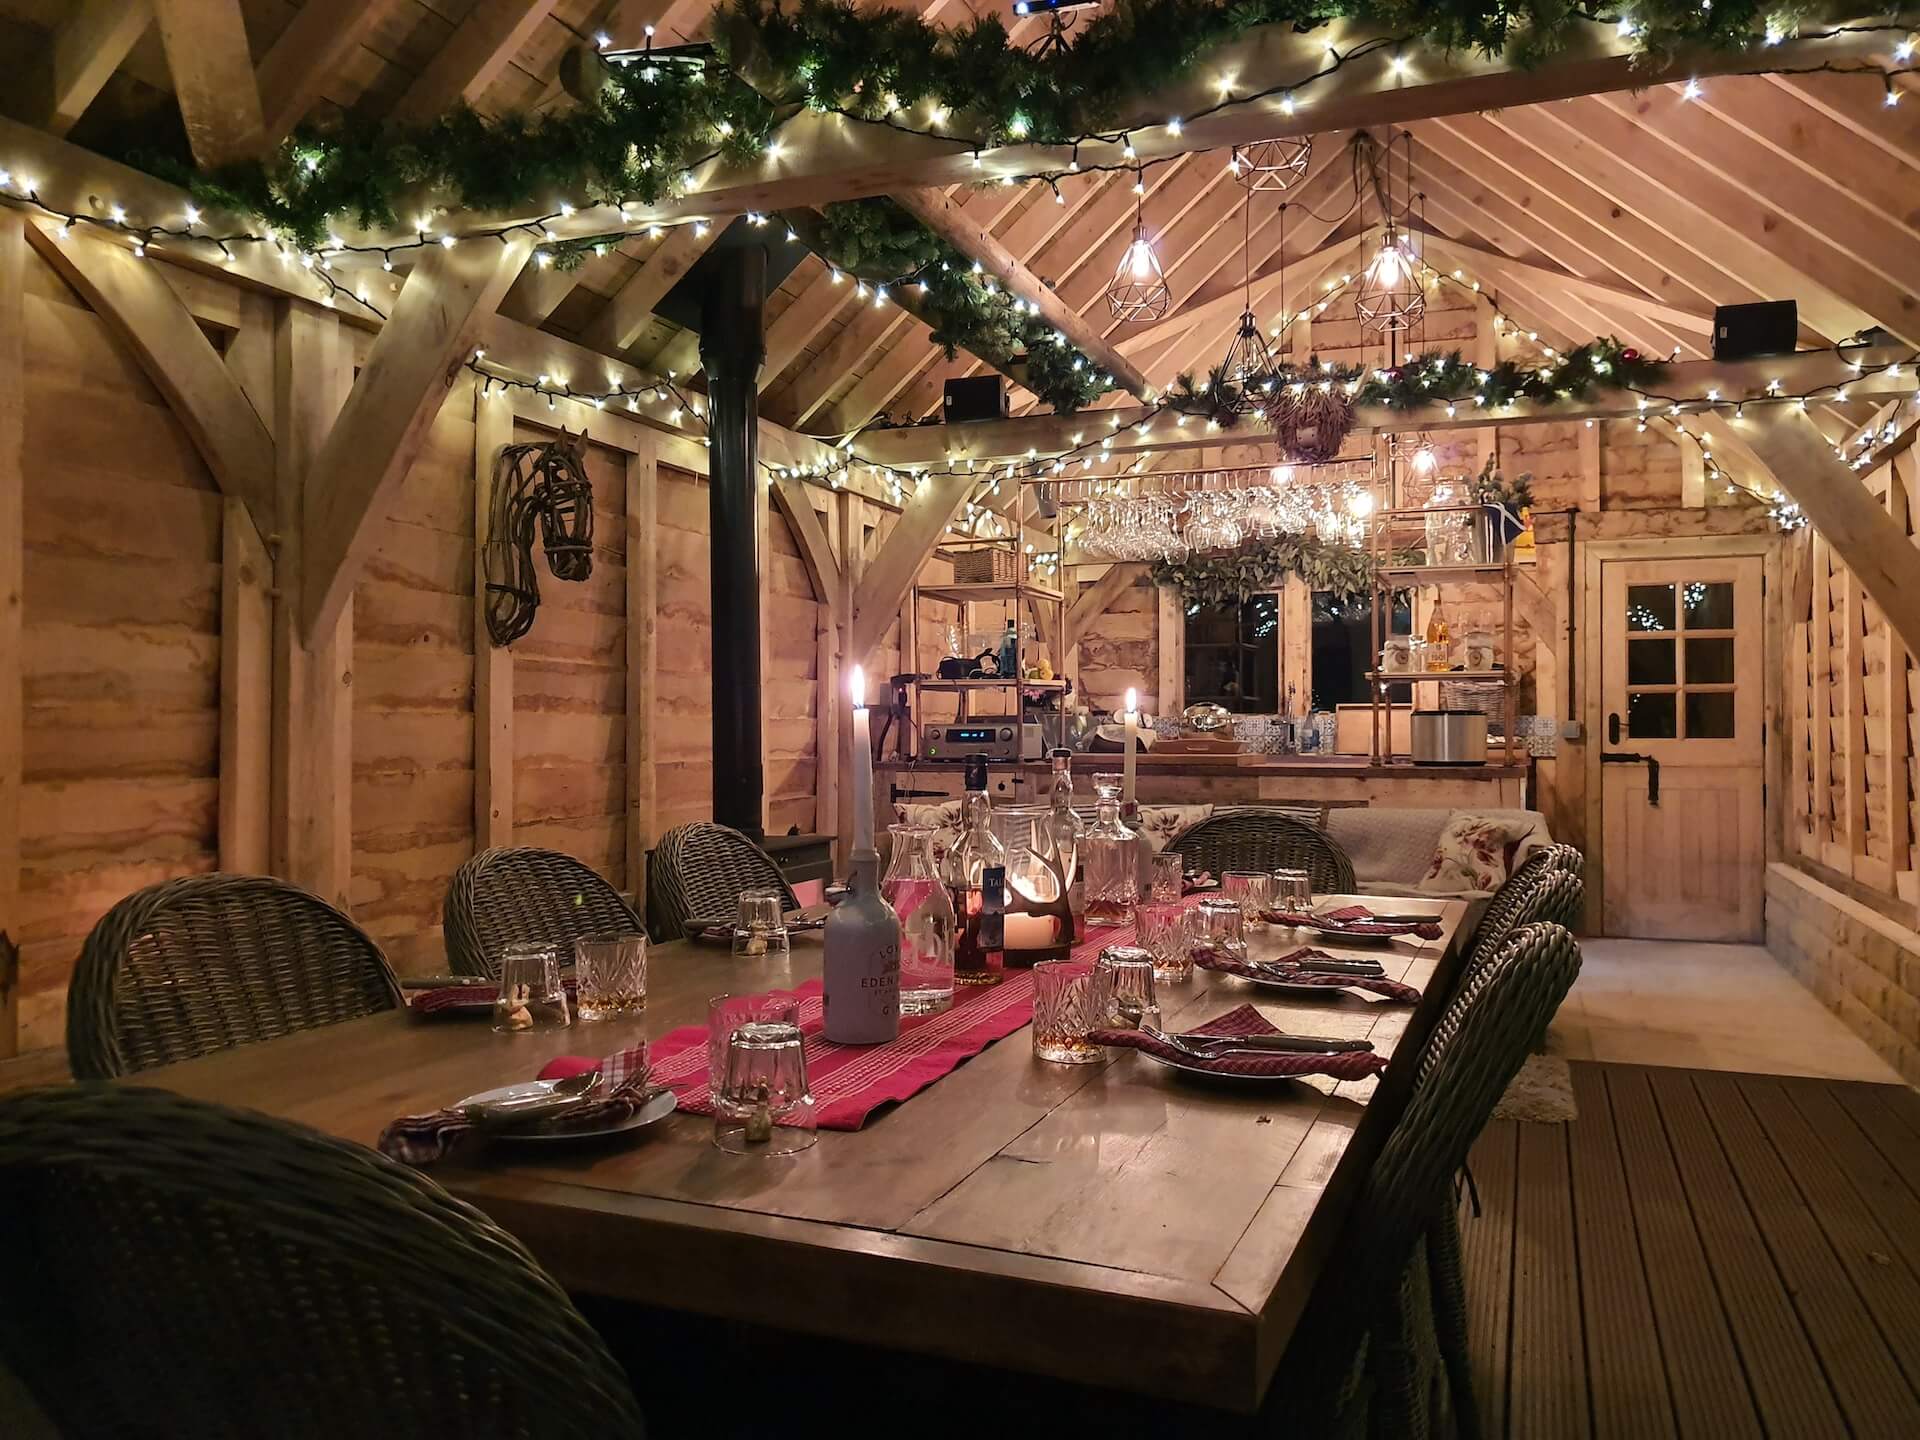
- a photo of an existing Westrak house showing the required exterior wood cladding;
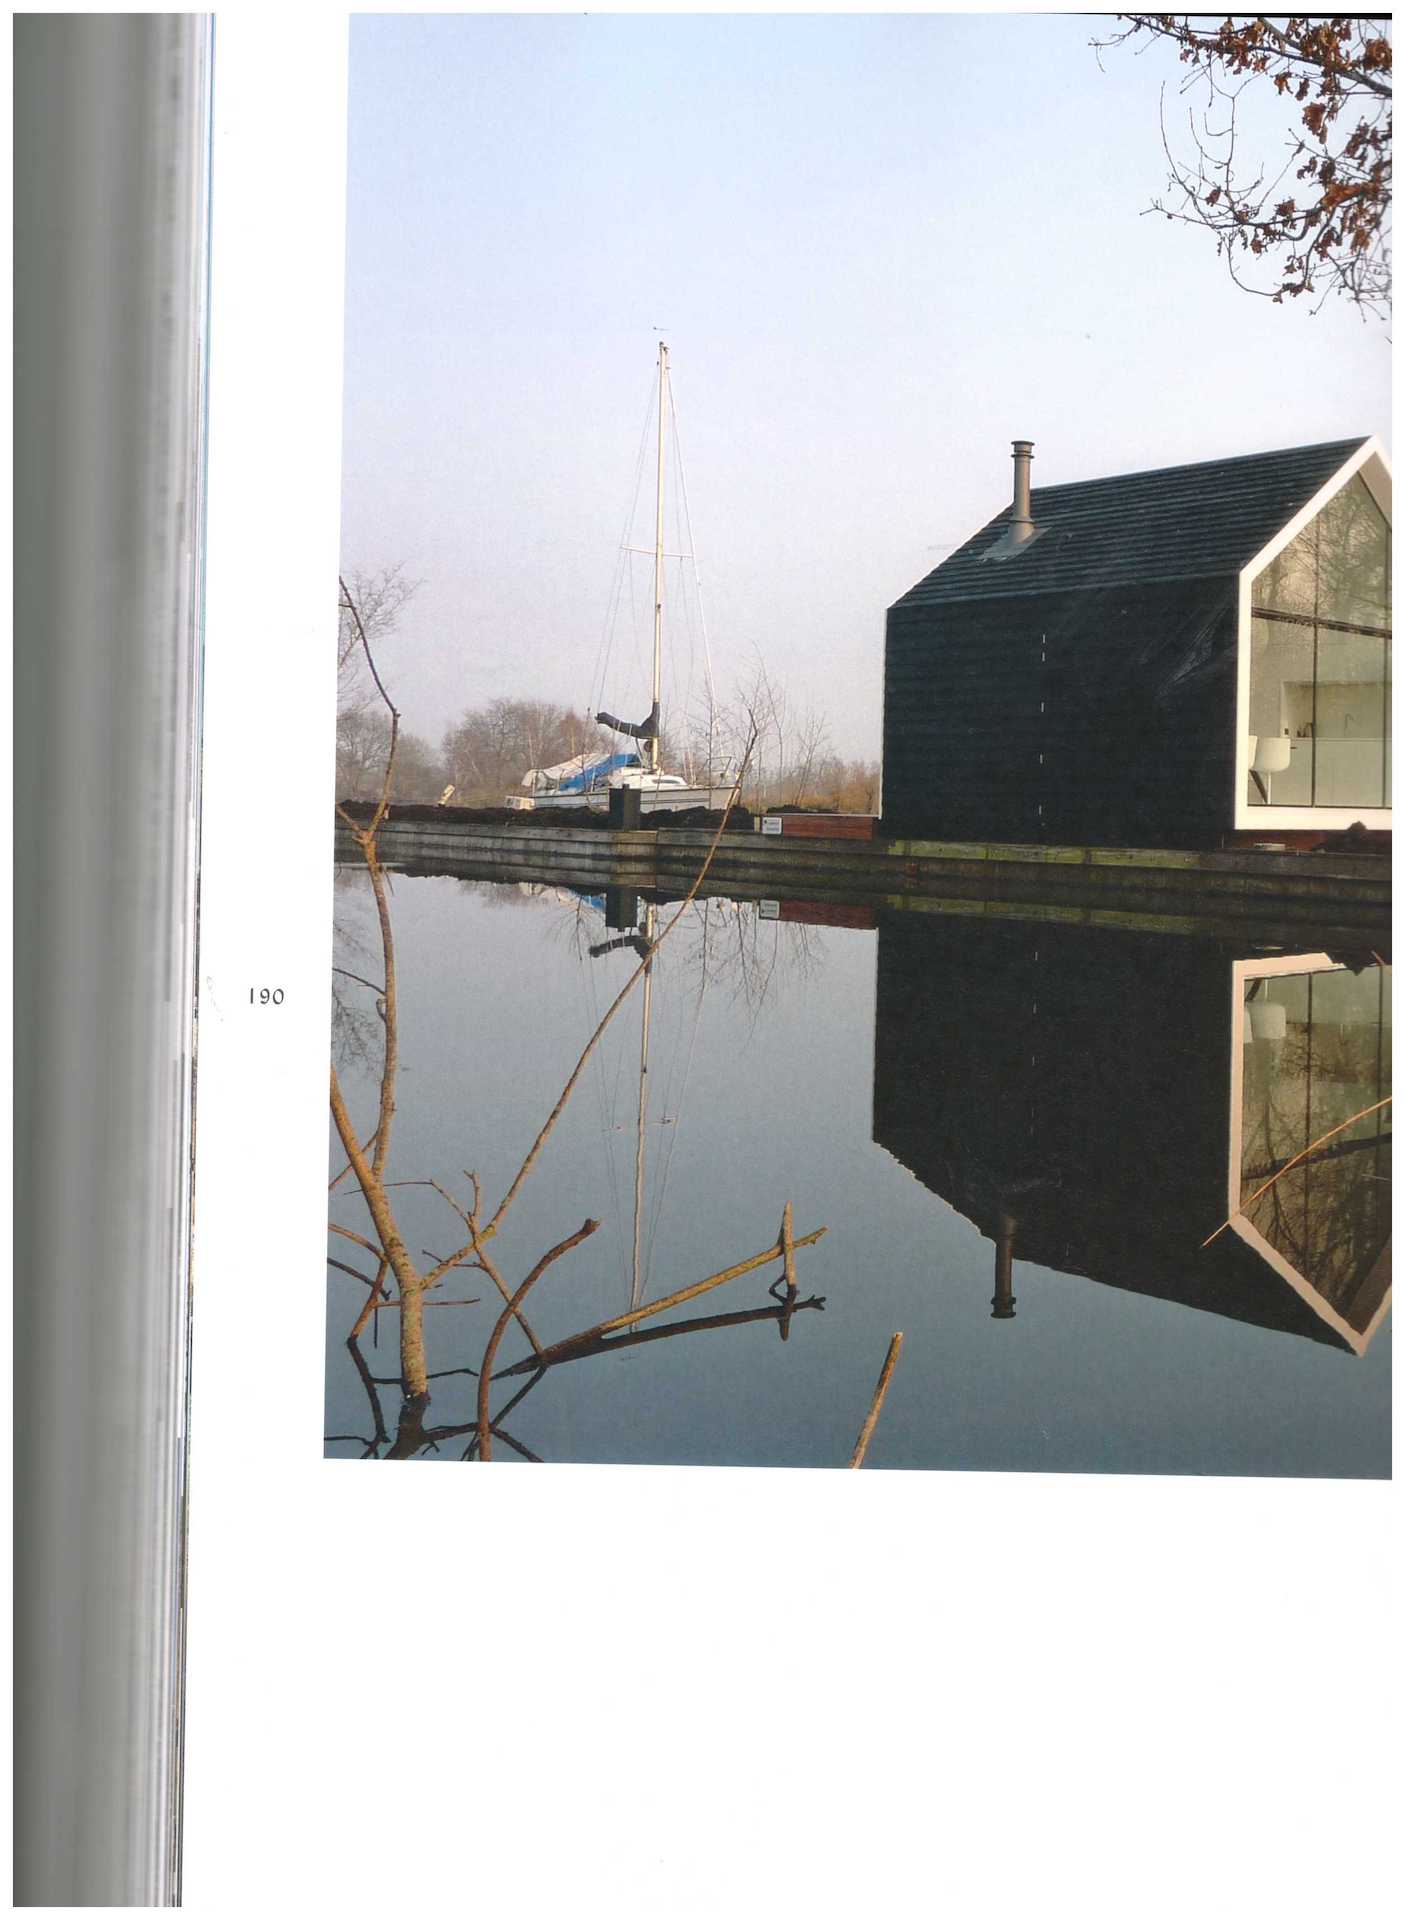
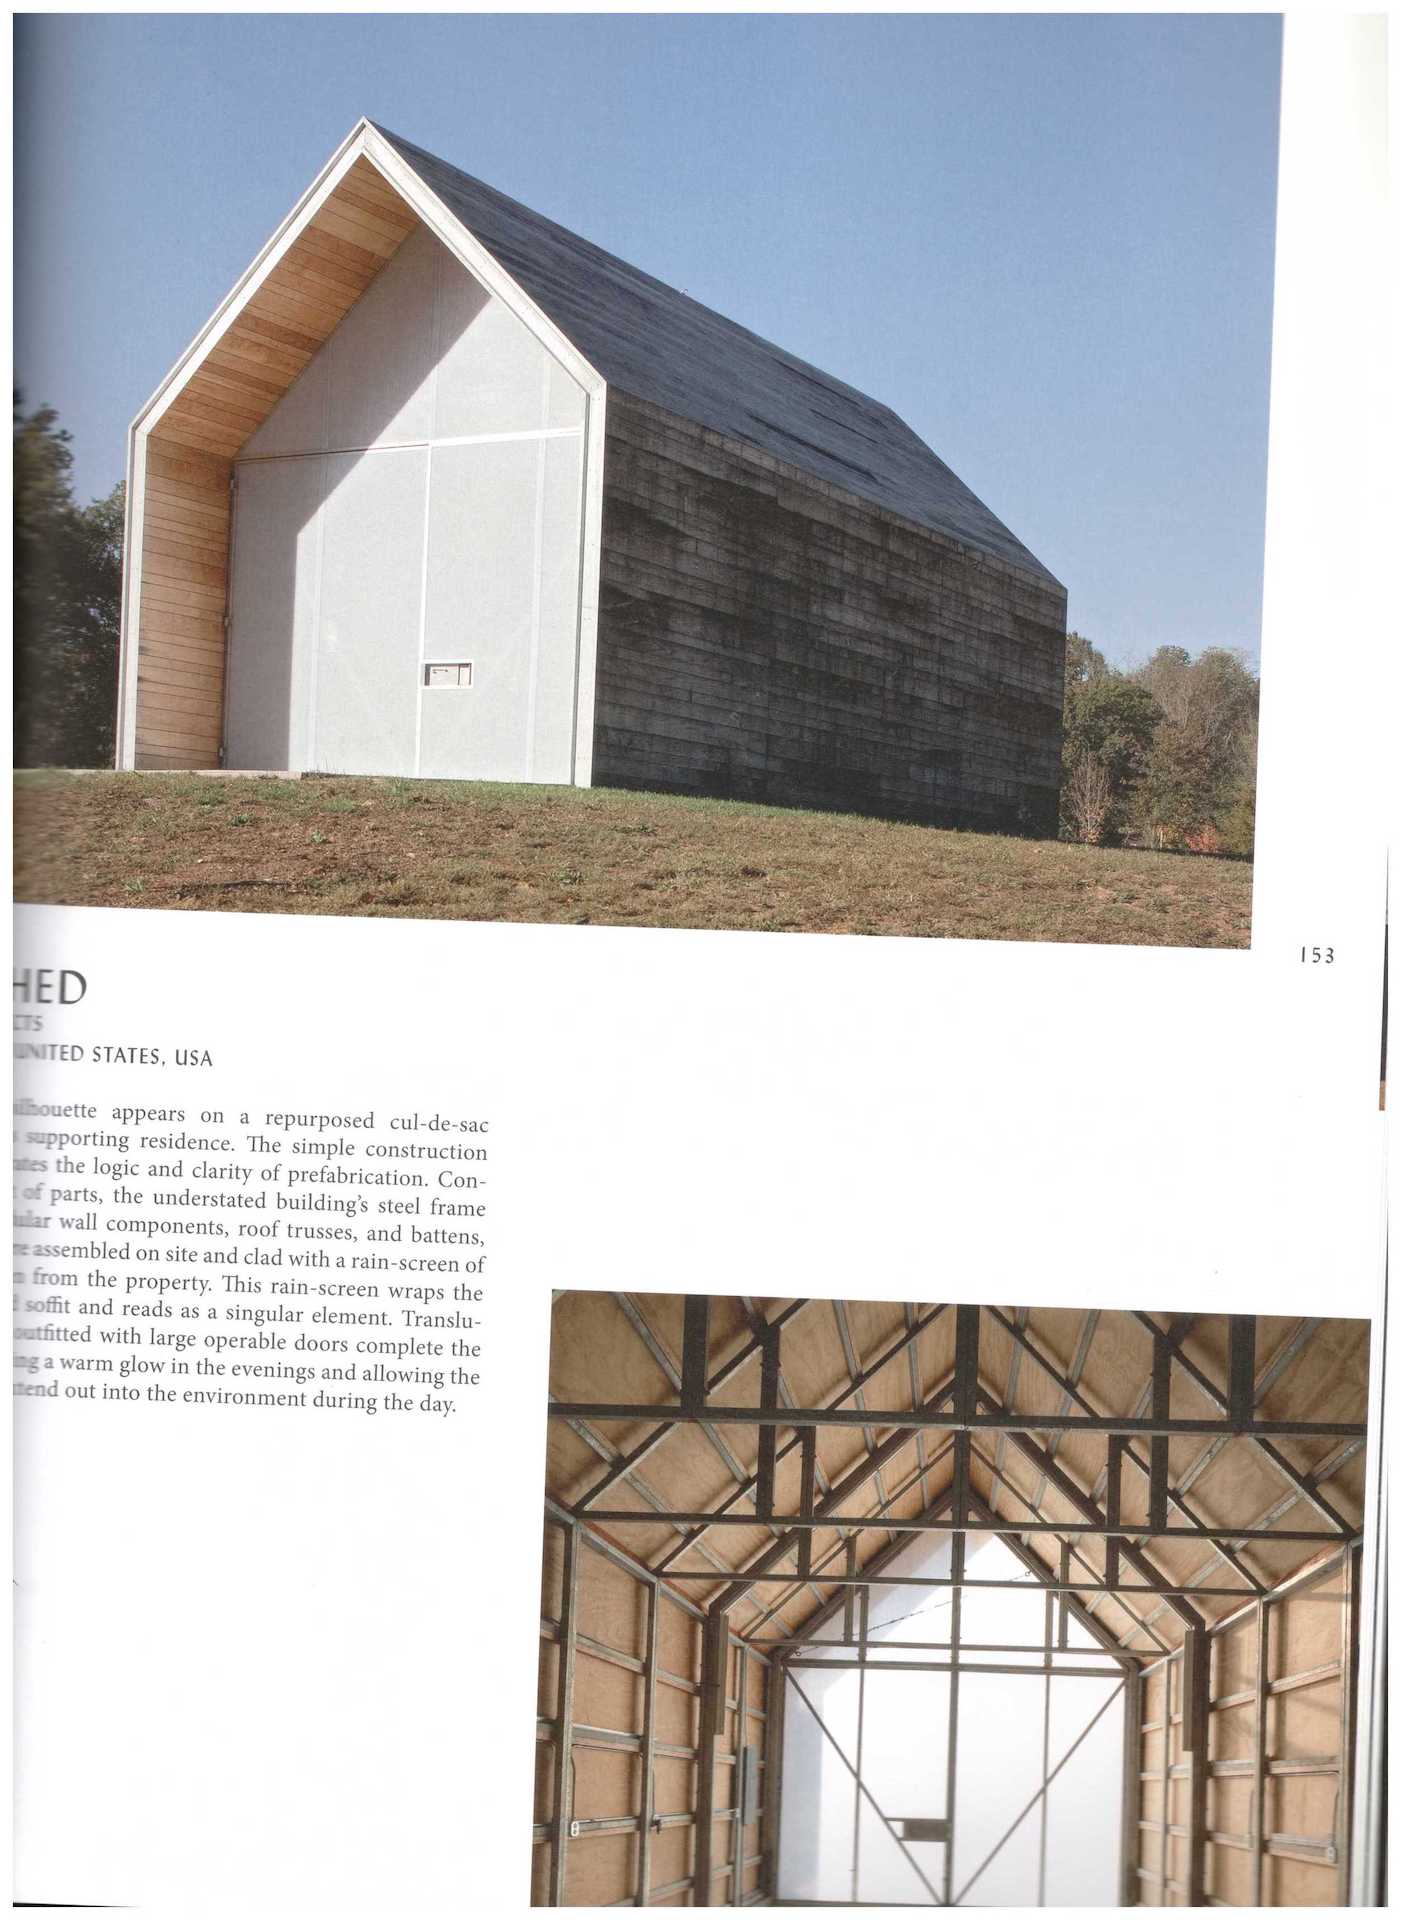
- scans with images showcasing what the roof should look like;
- photos showing the preferred landscape and weather setting.
After studying the references, our project team had a quick call with Philip to clarify the missing details regarding the style of the houses and some geometry elements. This way, we got a comprehensive understanding of the designs that helped us to produce perfectly accurate visuals. And now, let us show you how this process went.
#1.2 The Making of the CG Site Plan
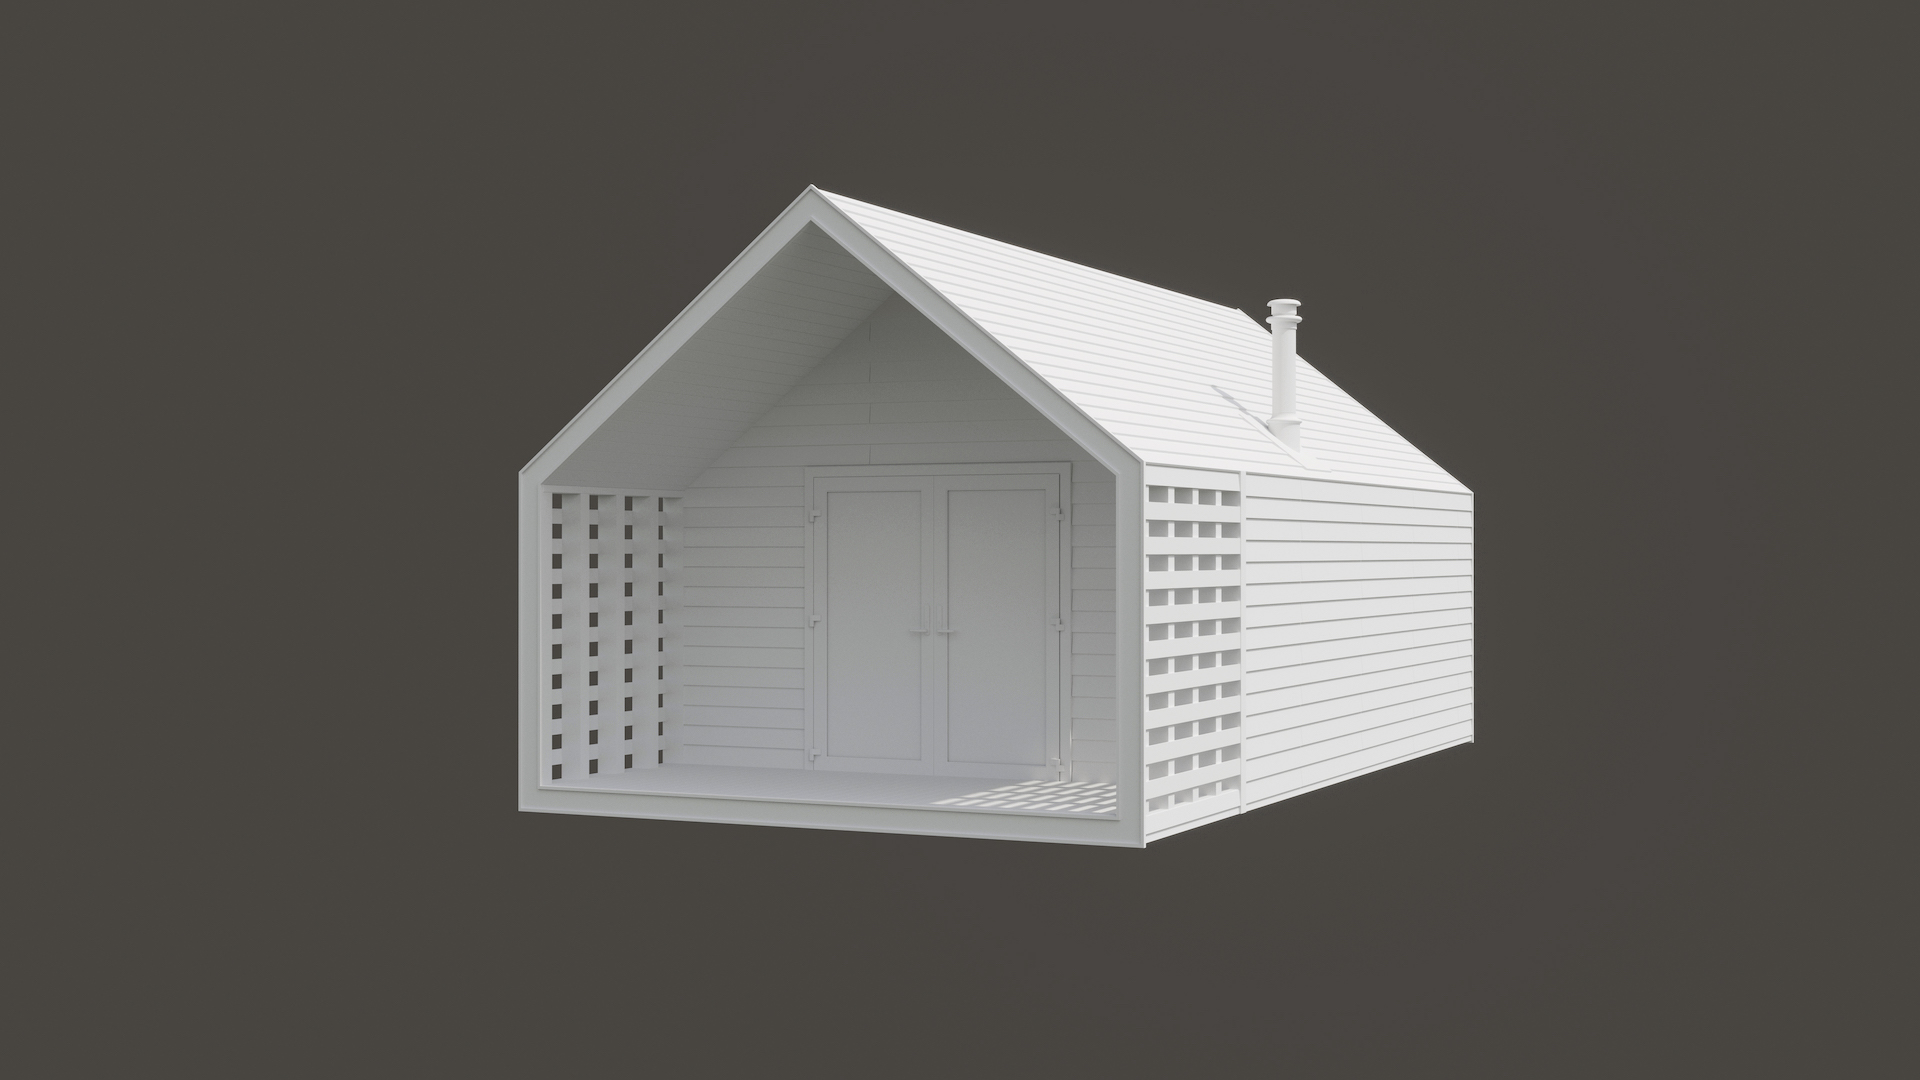
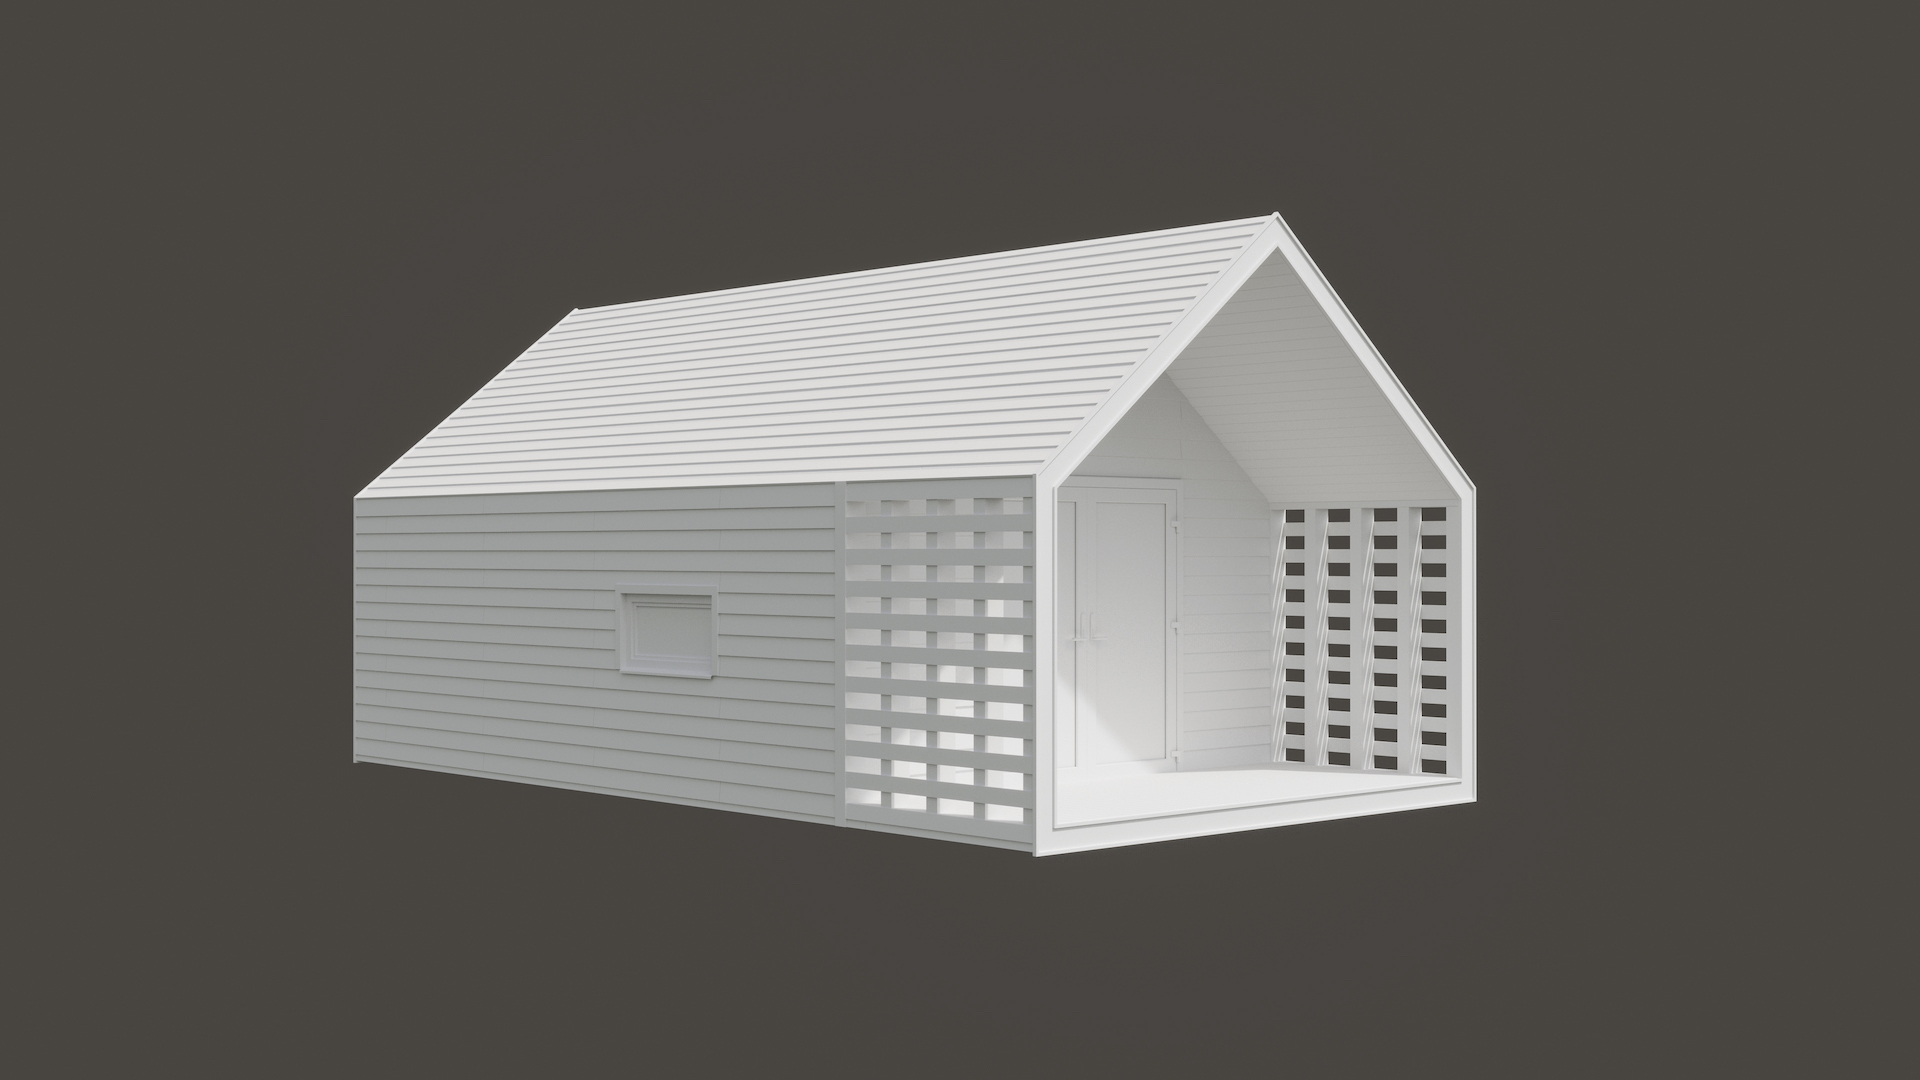
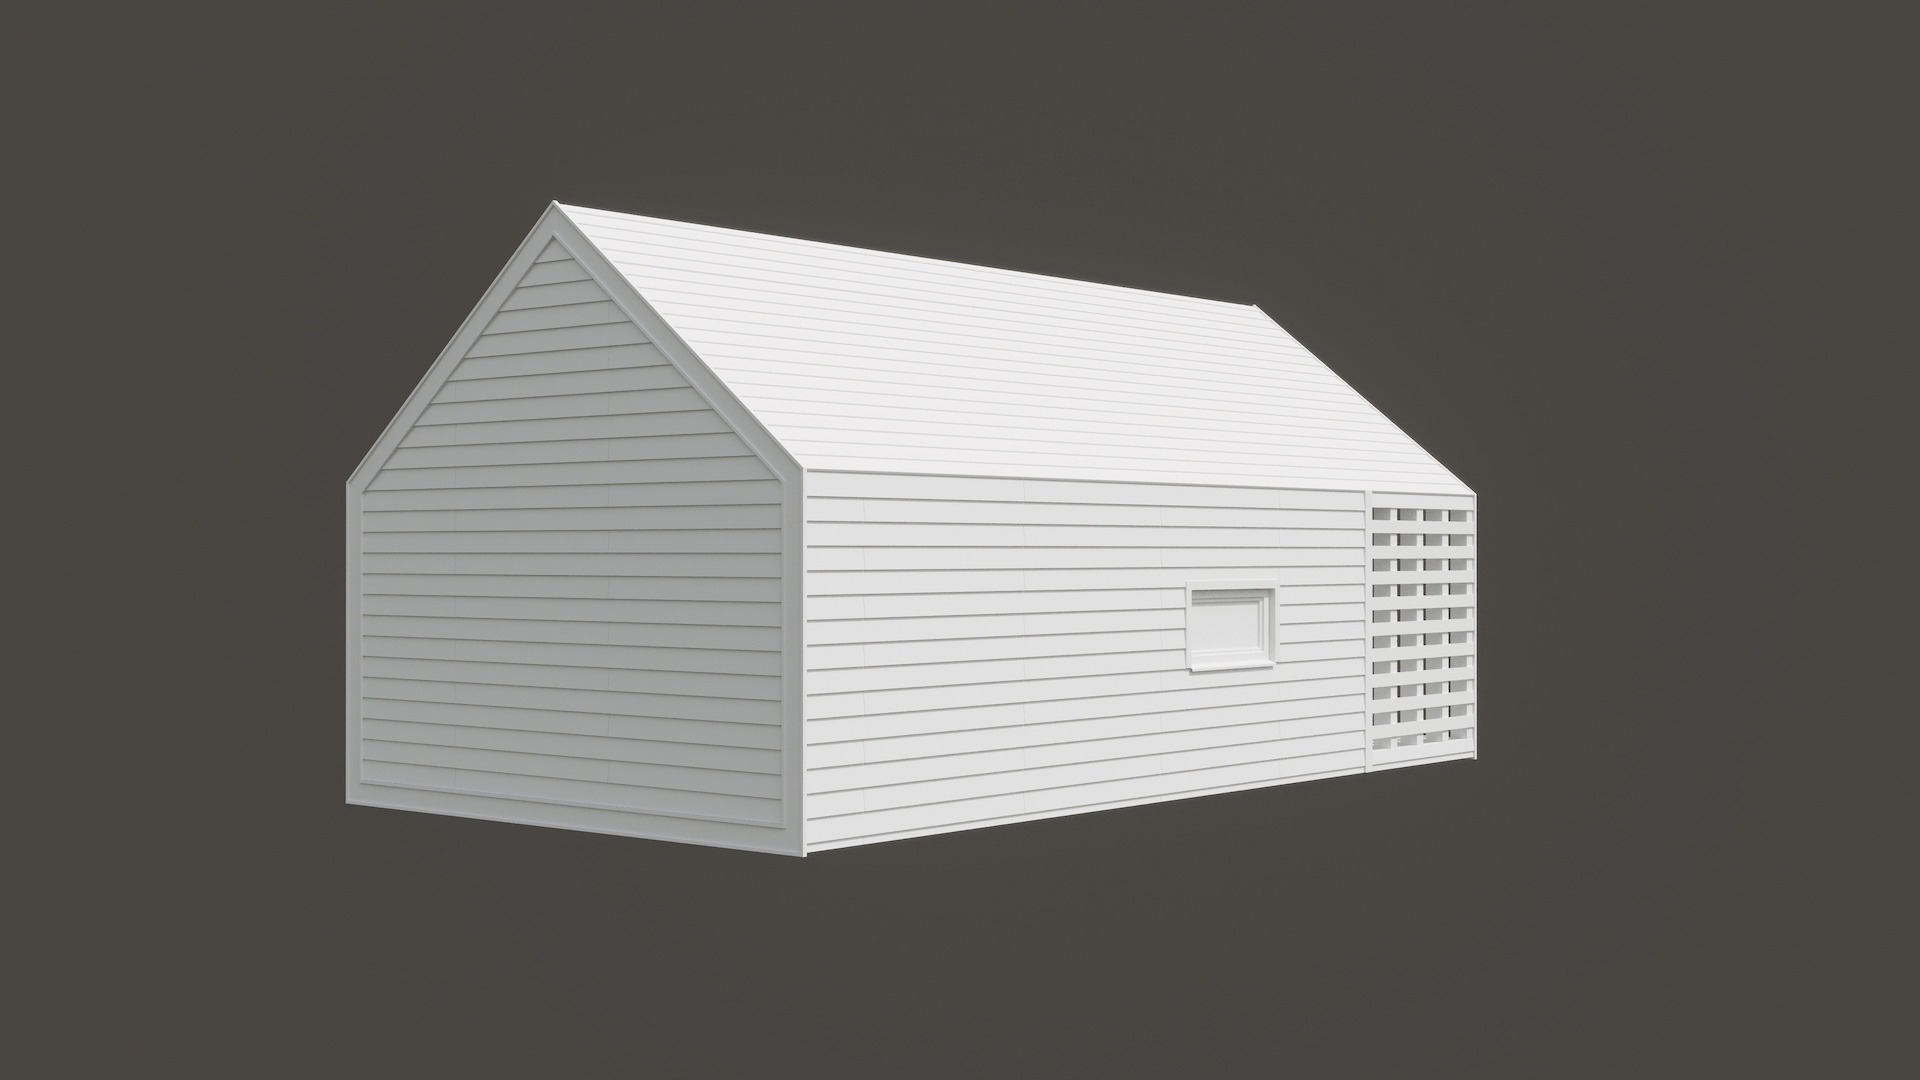
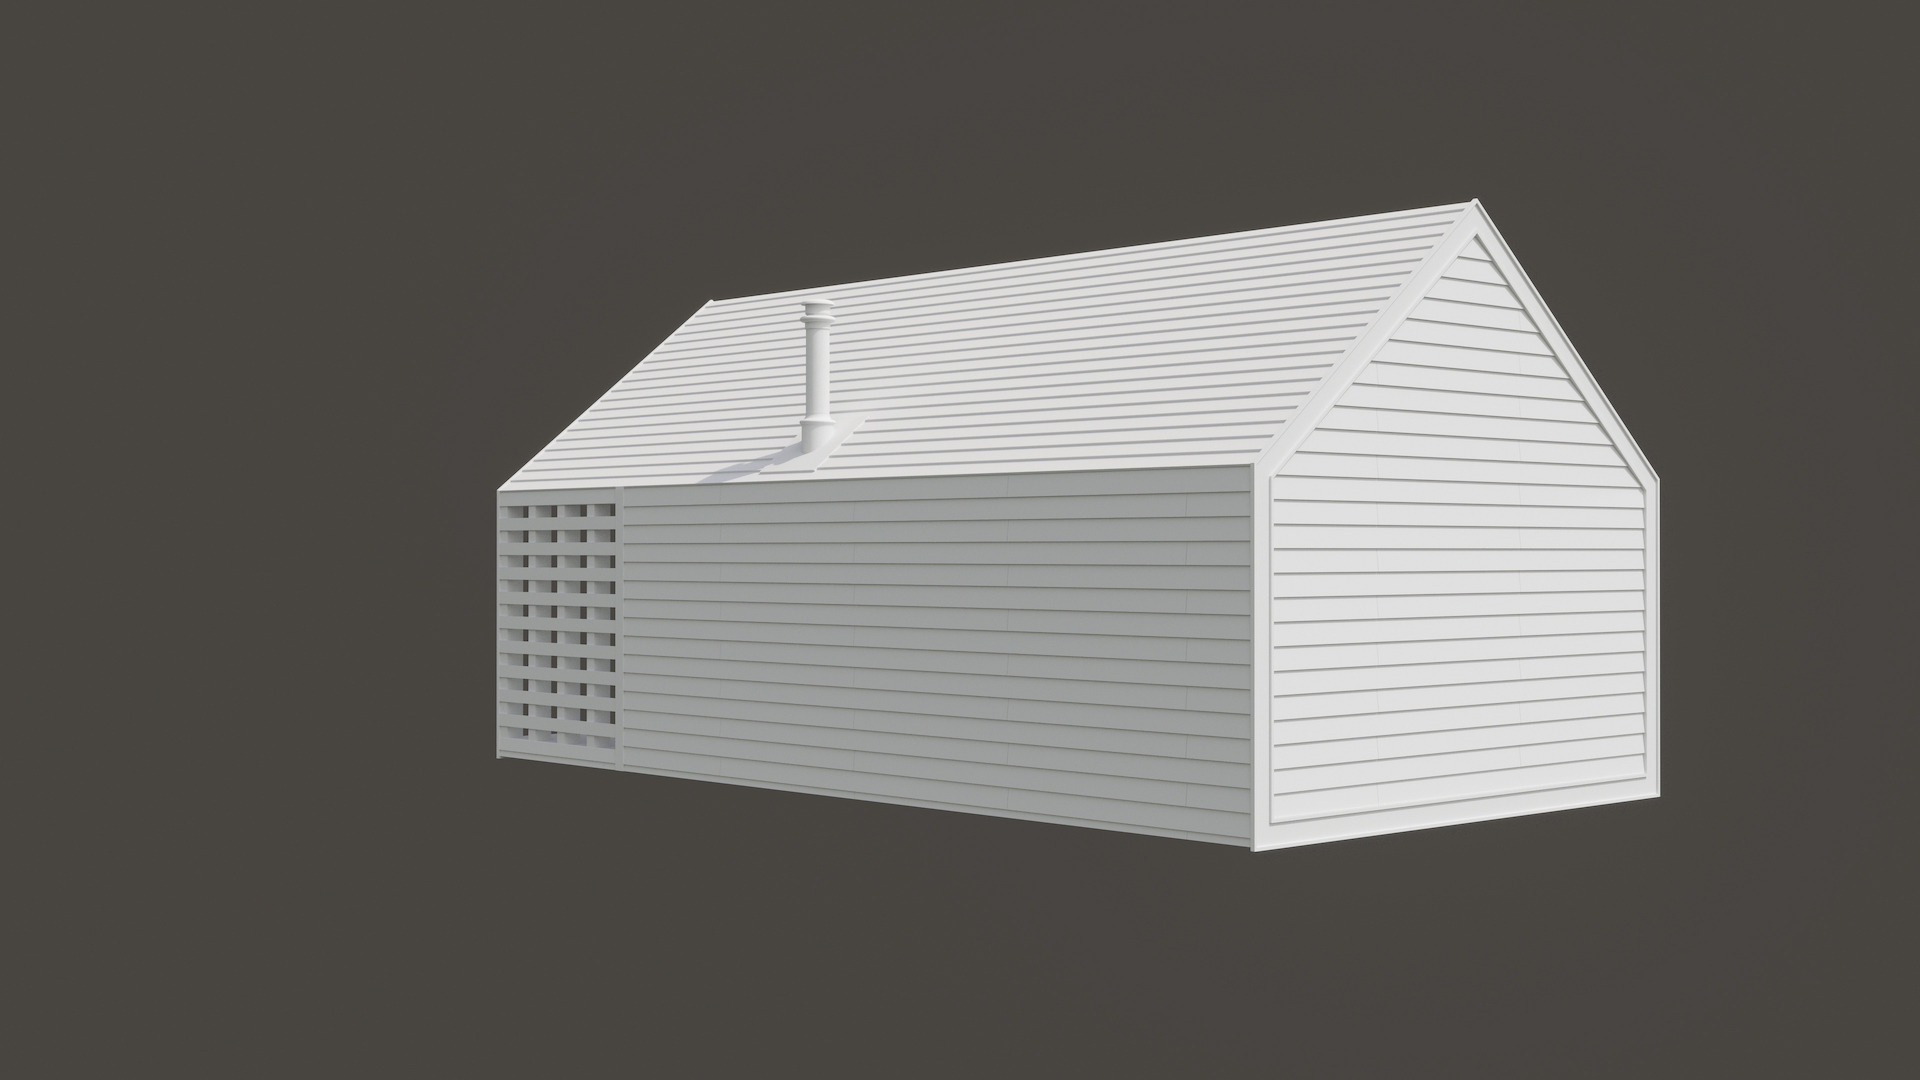
We began the work on this task by modeling all the four pod designs in 3ds Max. Then, our 3D artist made greyscale renders of the WestPod 2 model with no textures. We sent them to the client to get the geometry of the structures approved.
Showing only one greyscale model was enough, since WestPods 4 and 5 — the other structures featured in the plan — had the same style, only with different dimensions. And for the WestHouse model, we had both a 2D and a 3D drawing as a reference, so there was no chance of getting the geometry wrong. The customer was satisfied with the intermediate results, and we moved forward.
Next, our CGI specialist built a 3D environment. Here, he used the landscape references to create the comprehensive top view of the glamping community. Namely, he filled the scene with 3D models of trees that were indicated in the scope of work. Also, the CG specialist adjusted the lighting to match the sunny summer day atmosphere shown in the weather references.
Get your project estimated in just 1 hour - fill out this brief!
Then, the CG expert arranged the 3D modeled pods in the scene according to the 2D layout we received from the customer. After that, the 3D artist added textures to the 3D objects and assigned material properties to them. This way, he made the 3D models look indistinguishable from real-life houses.
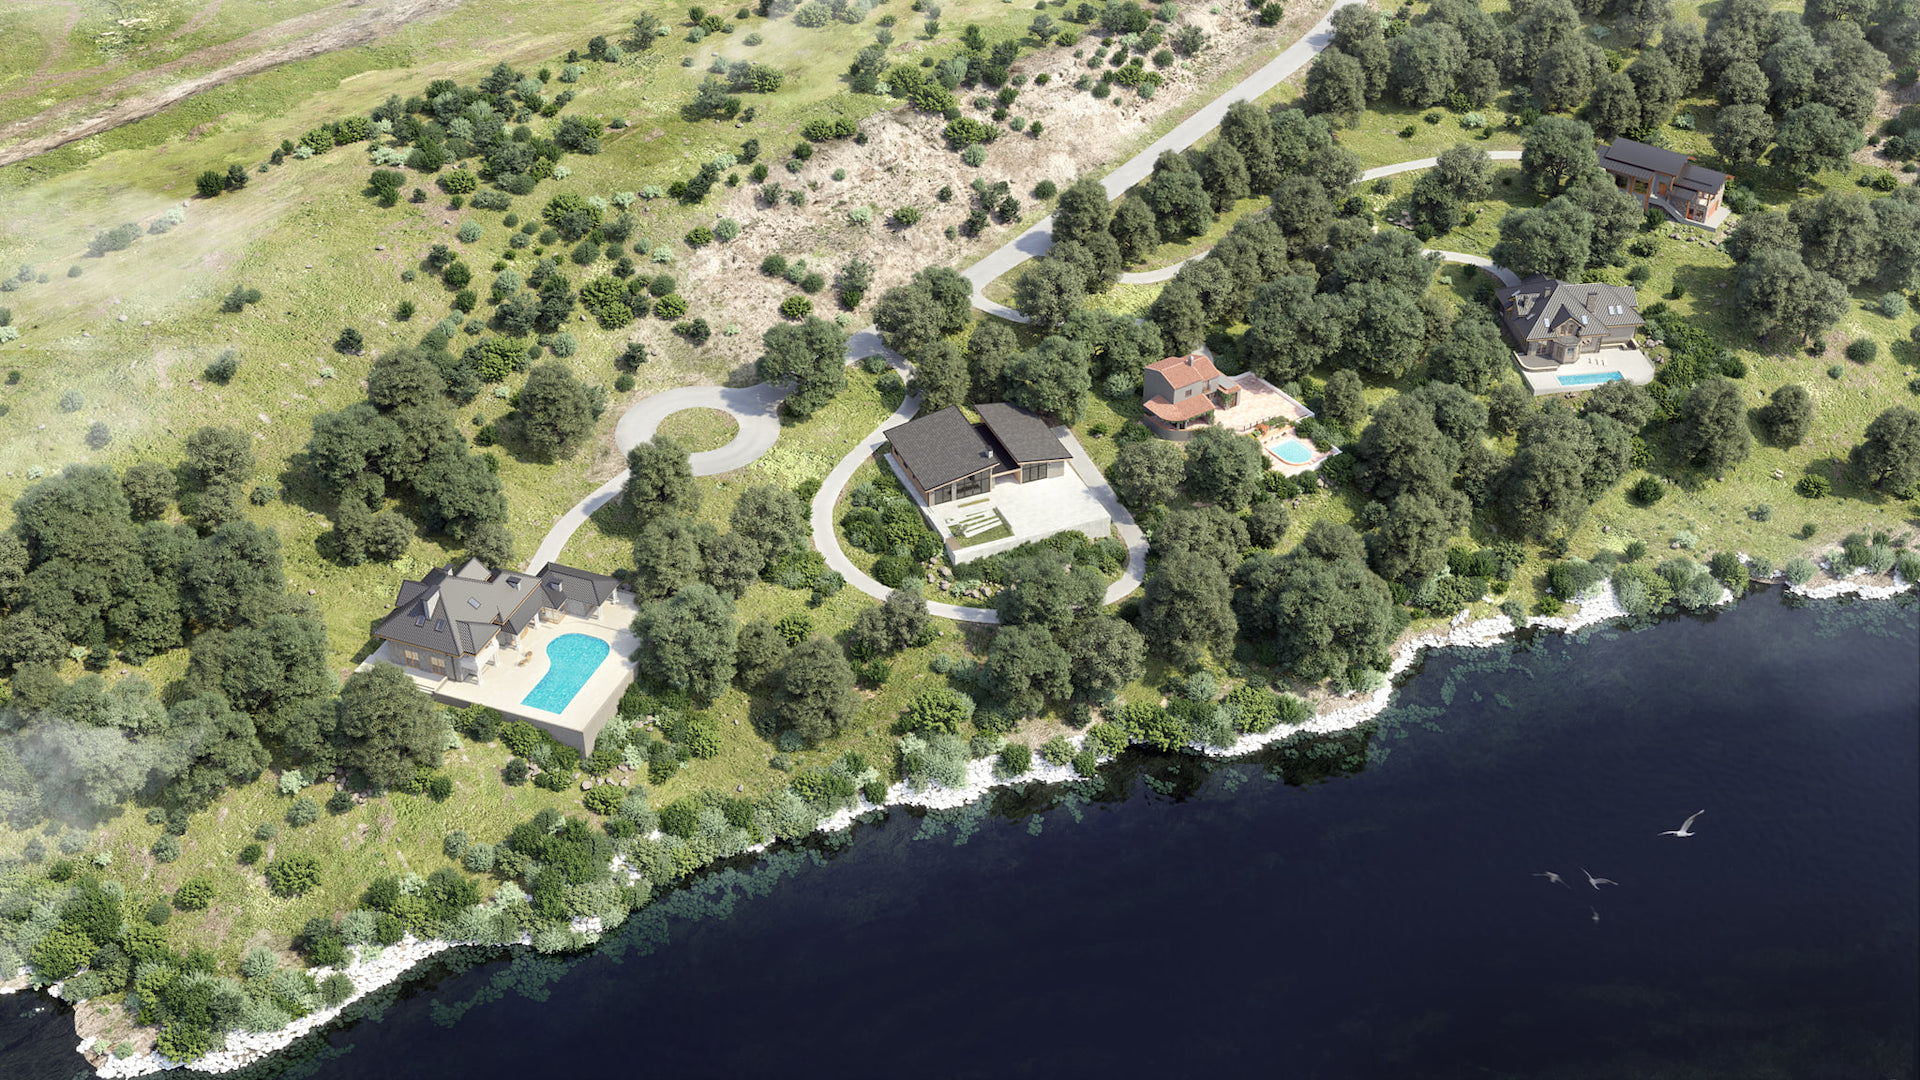
Once the scene was all ready, the specialist rendered the final high-quality aerial CG image using the Corona Renderer plugin. To make the resulting picture look perfectly photorealistic and balanced, he made a few touch-ups on the lighting and colors in Photoshop. Below, you can see the 3D render we sent to the client.
Philip loved the 3D view and only asked to name the houses. To illustrate his requirements, he printed the image, wrote the names of each of the pods on it, and sent the scan to us.
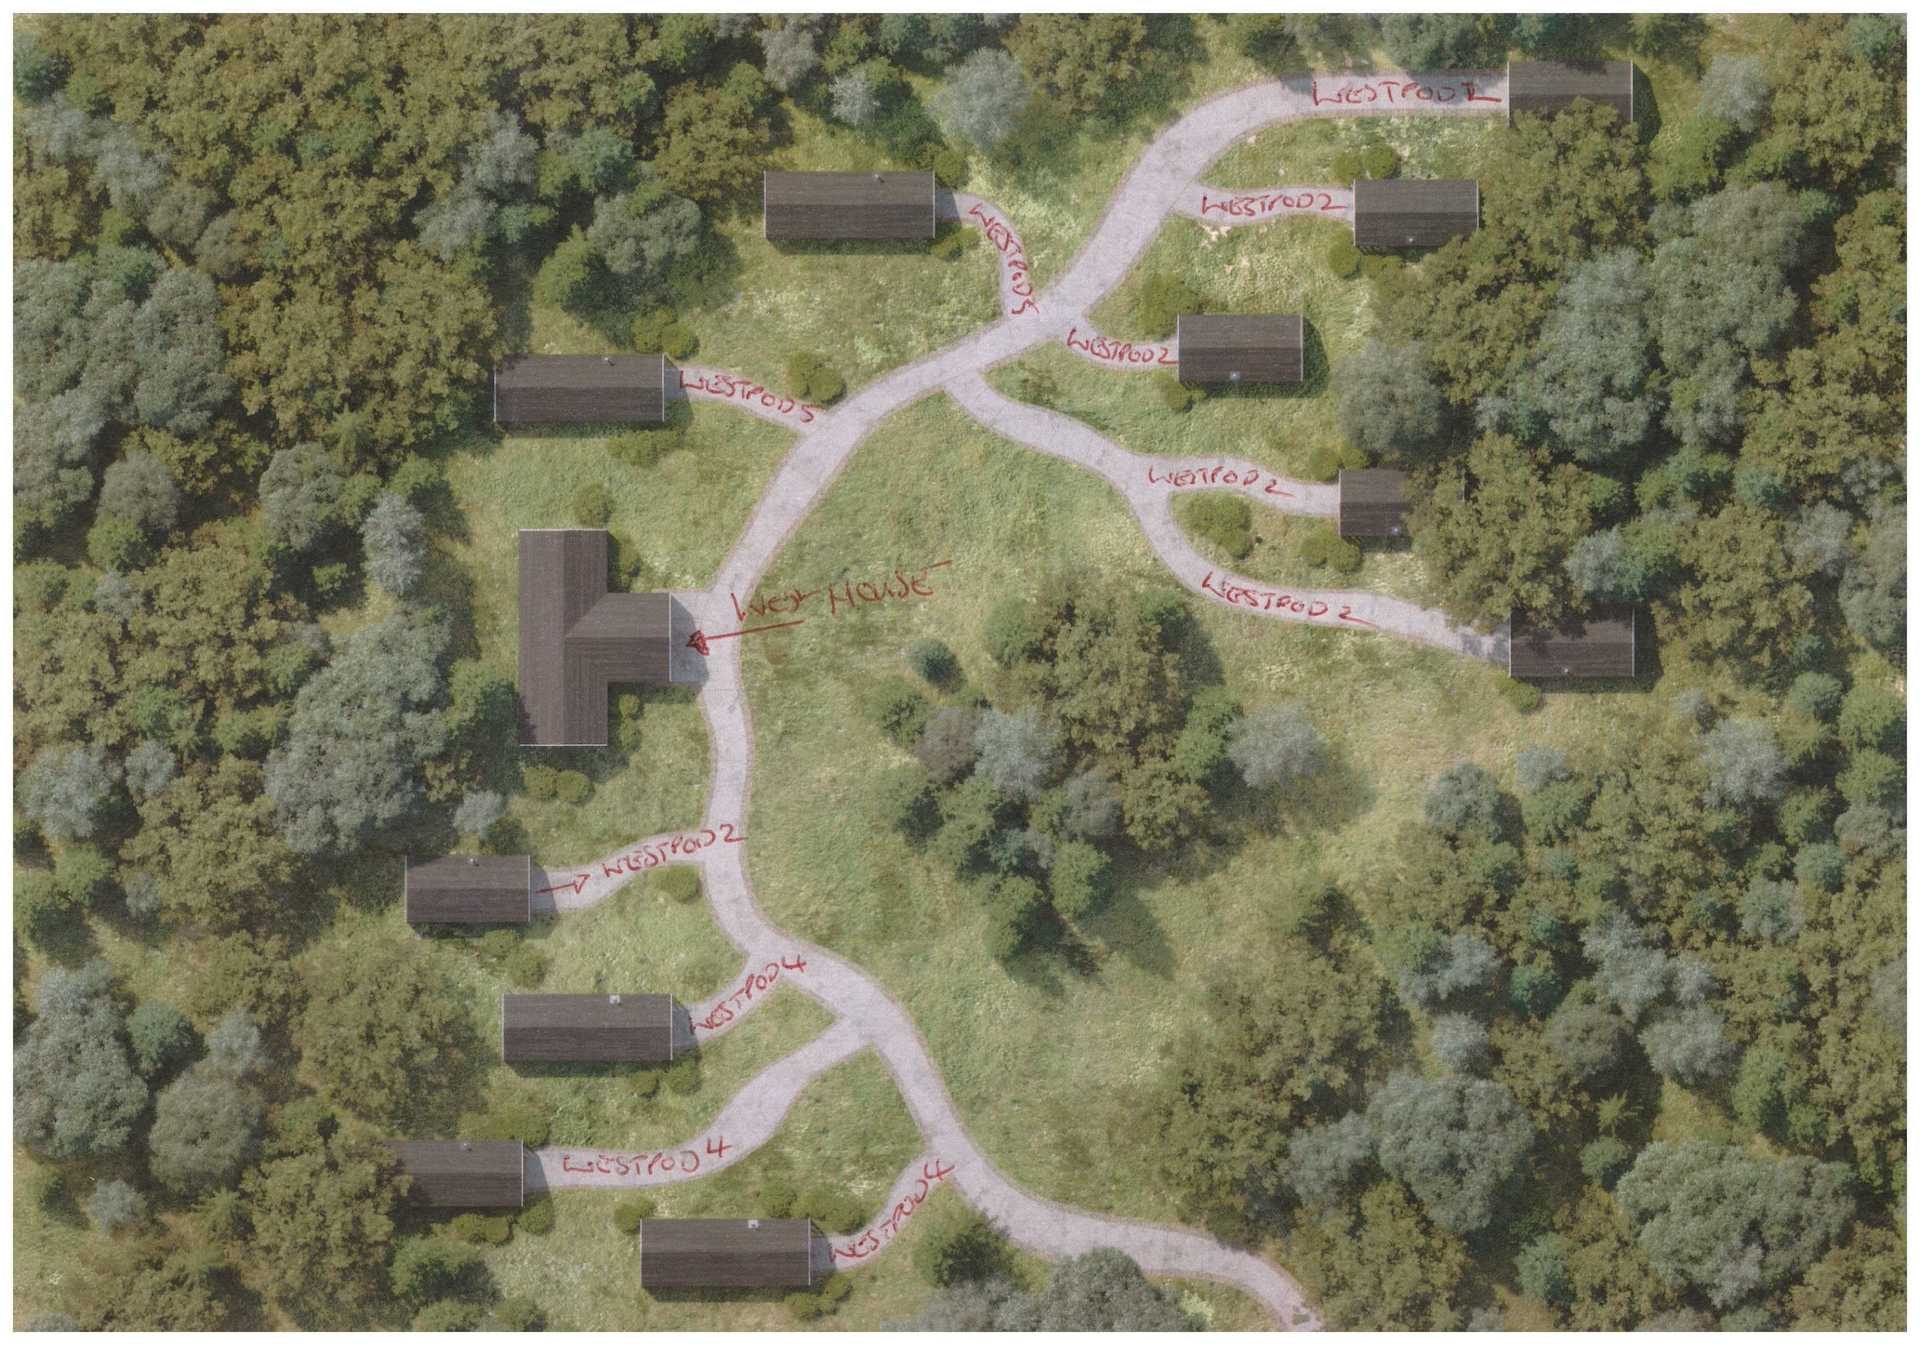
Our specialist added the notes in no time at all, and that was it for this task.
#1.3 The Result
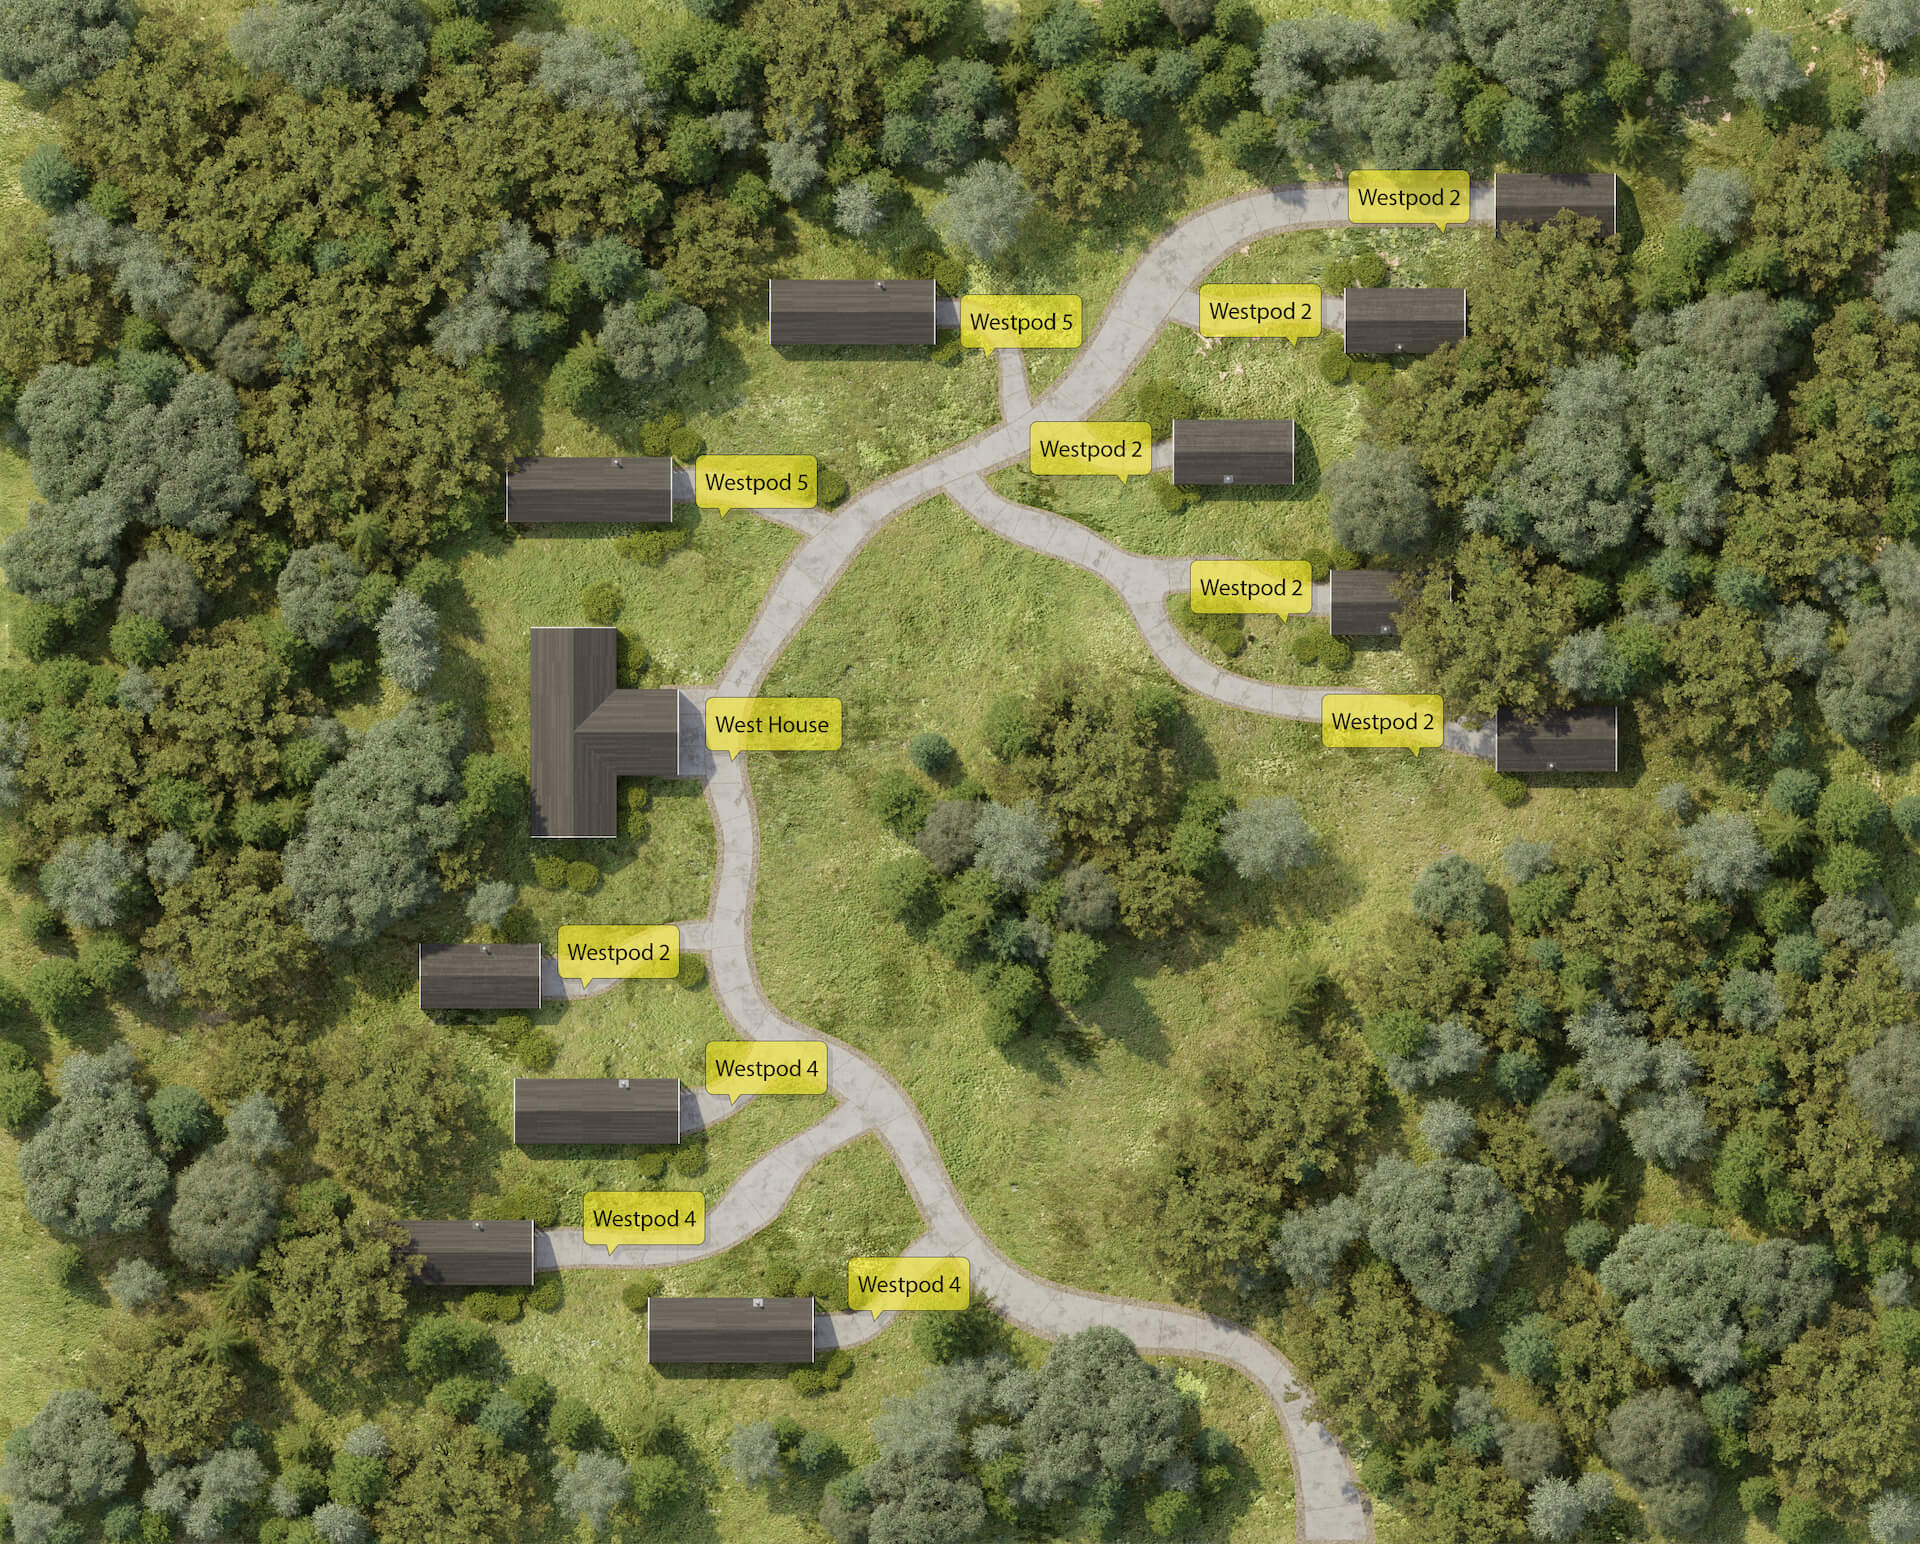
This finalized 3D site plan in 4k resolution went to the Westrak Structures website and social media pages. It helps the company’s potential customers see how they can arrange a pod community and how much land they’ll need for it.
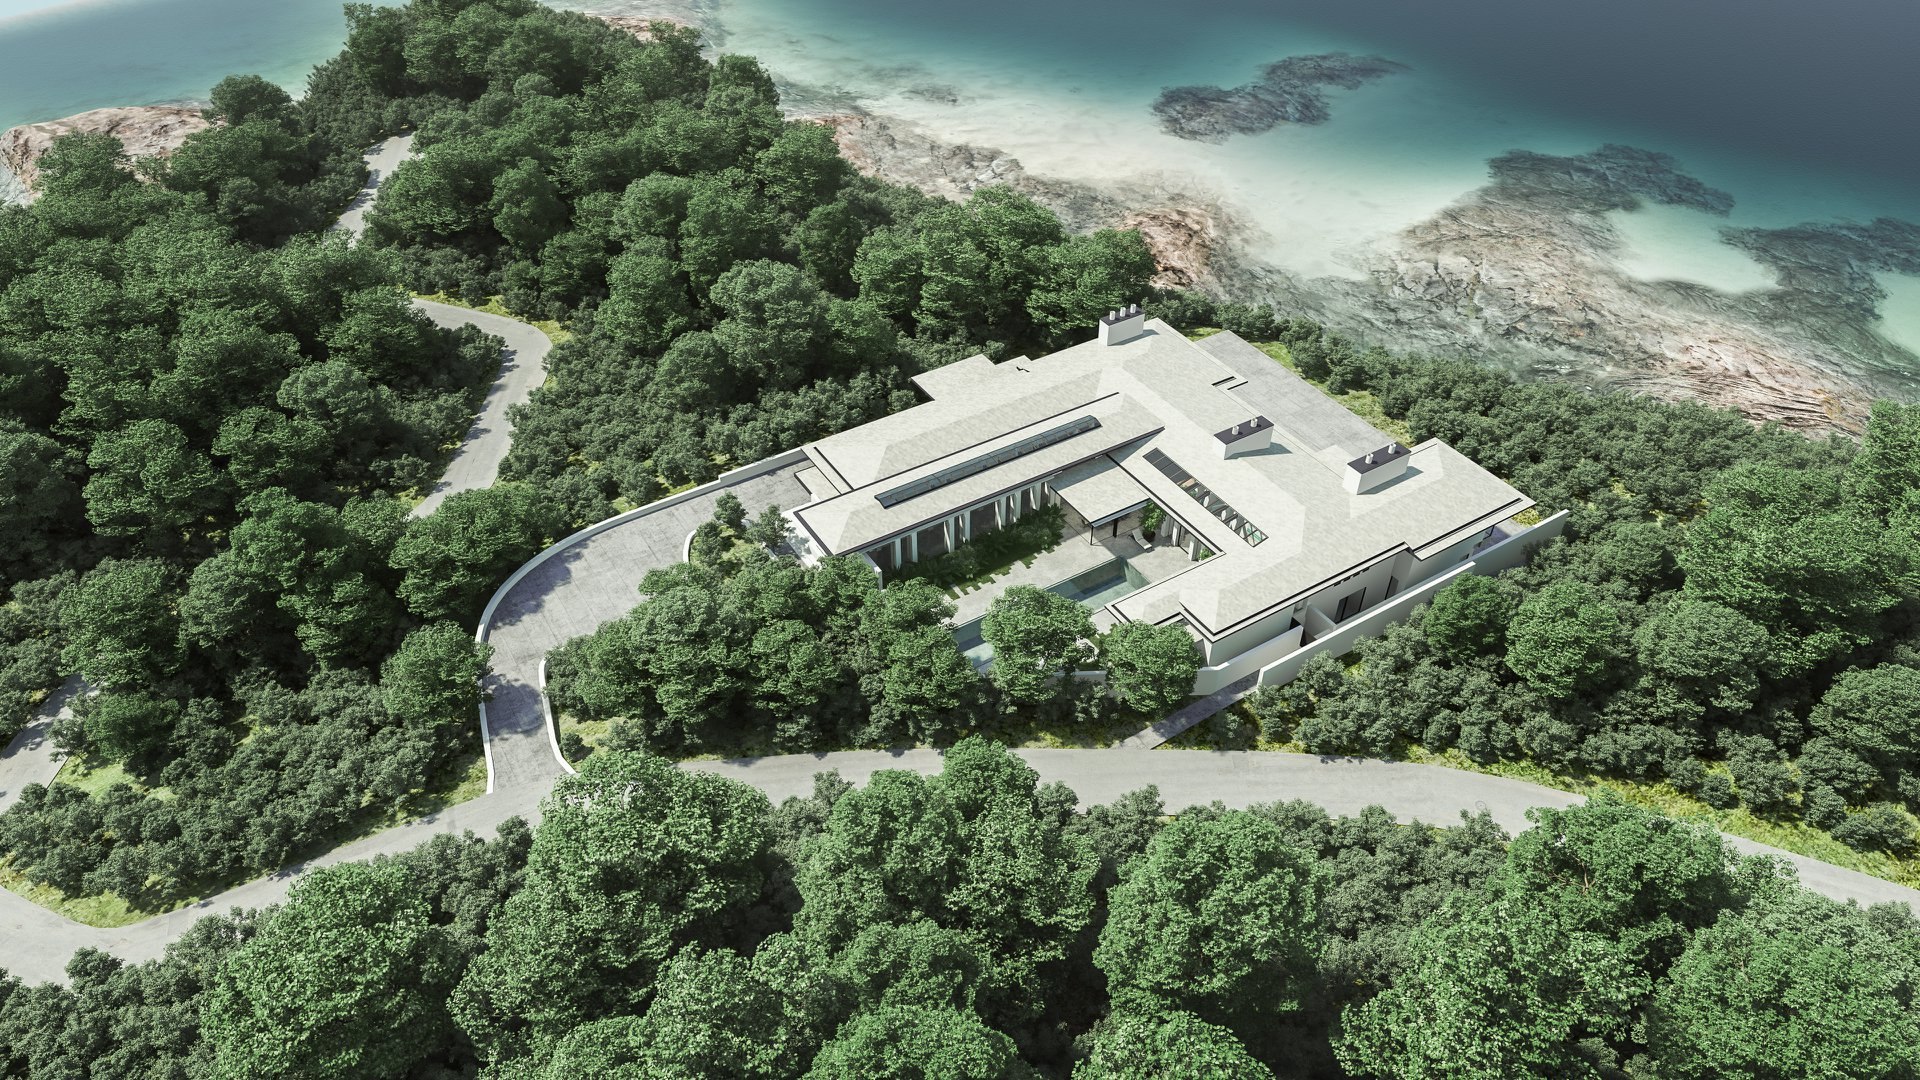
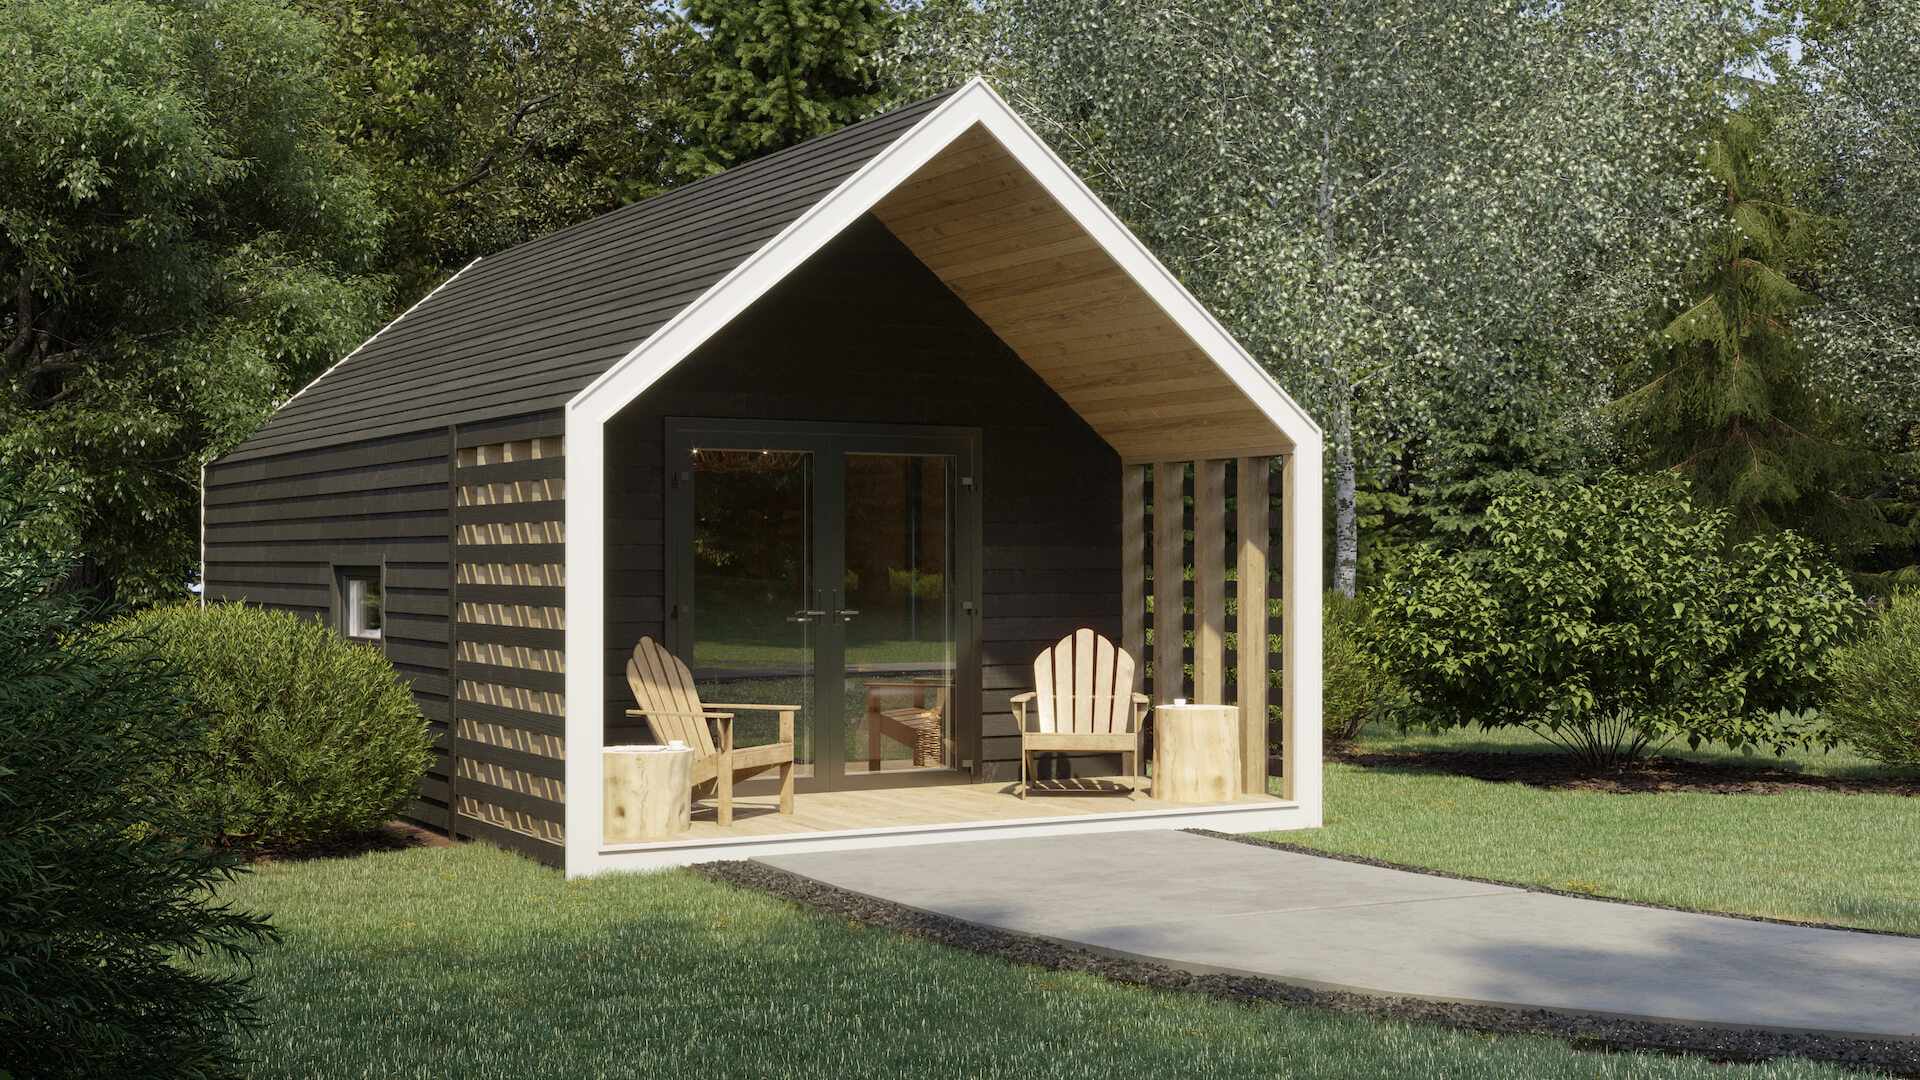
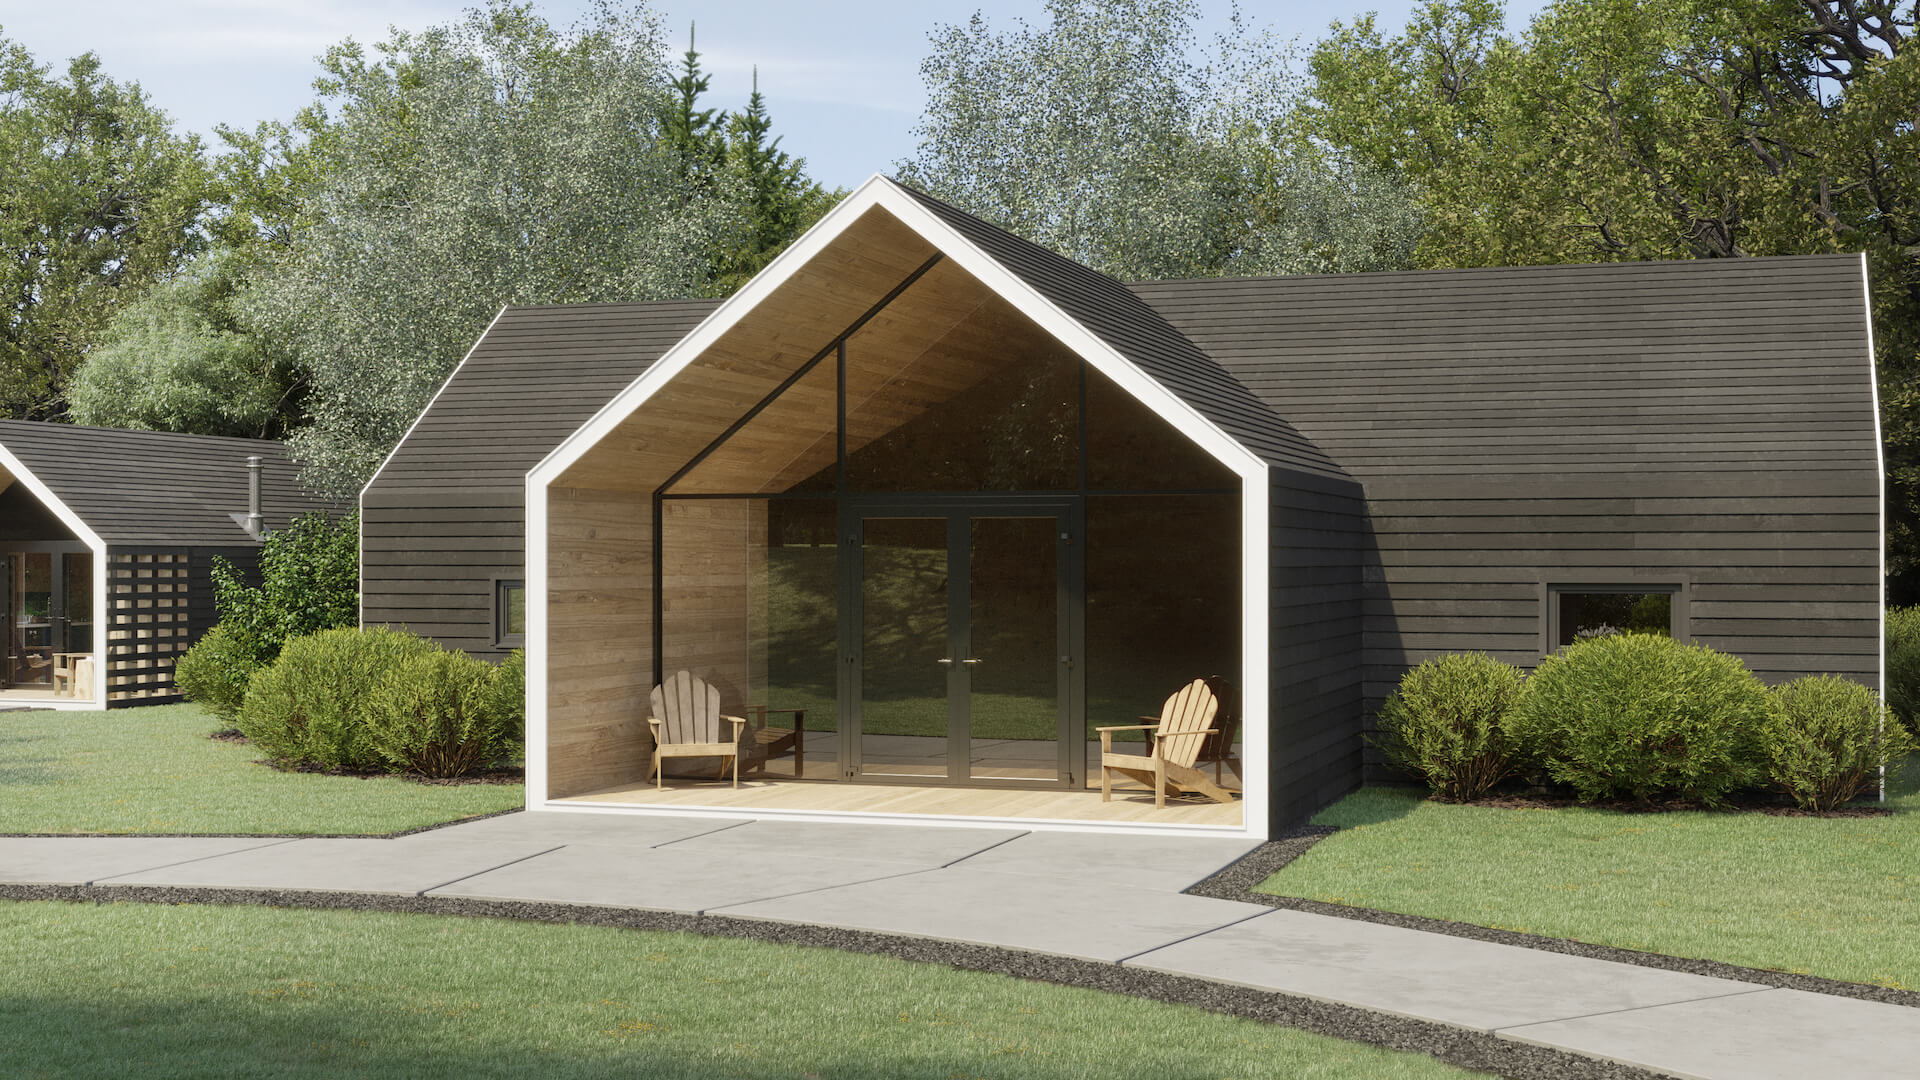
#1.4 The Creation of the Exterior CGI
After the plan was approved, it was time to move on to the second part of this comprehensive CGI services package — 3D exterior rendering. Namely, we had to make one view of the WestHouse and two views of the WestPod 2 that Philip marked on the 2D site layout with yellow color.
For this task, our CGI specialist didn’t have to build a 3D scene from scratch. He used one we had already created while making the CG site plan. All the artist needed to do with that scene was to add some 3D models of outdoor furniture on the front porches of the houses according to the client’s specifications. And to make the WestPod 2 look more lived-in and cozy, he also placed a few cups of coffee on the little tables in front of it.
Elevate your exterior design project with photorealistic 3D visuals that help clients confidently approve your proposals.
After that, the CG expert chose the most flattering camera angles and rendered the imagery in 1920x1080px resolution. They were submitted to Philip for approval, and he loved everything about them. So, our 3D artist rendered the finals in 4k, did some minor light and color correction in Photoshop — and that was it! Later, he also re-rendered two of these exterior images in 6k for print at the client’s request.
#1.5 The Results
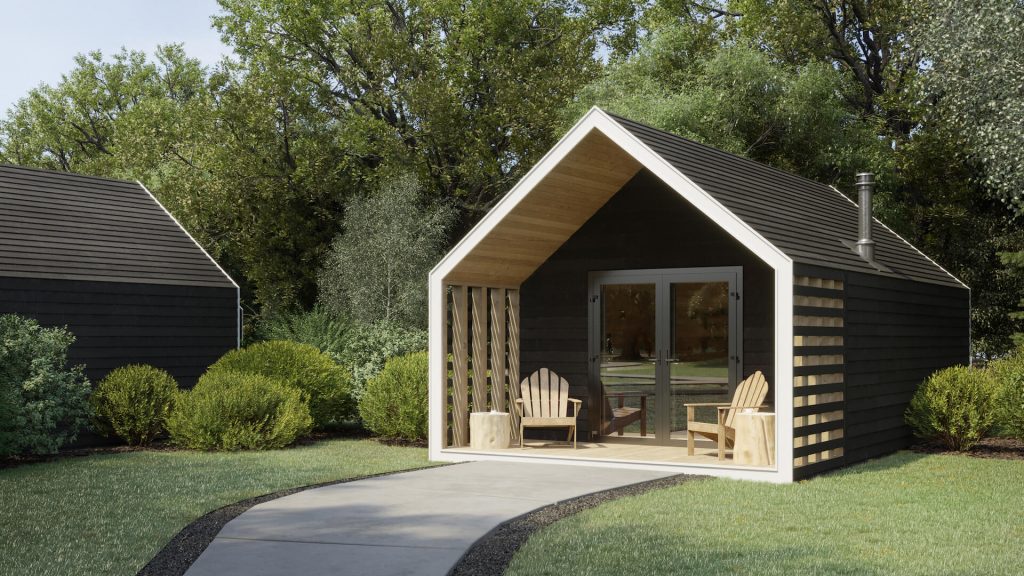


Here they are, the final super realistic exterior renderings! They perfectly convey the glamping retreat atmosphere, which is all about mixing outdoor activities with the comfort of staying at a cozy hotel. But to give the full picture of how convenient the houses are on the inside, it was also needed to show their interiors. Let’s see how we did that.
Part 2. The Creation of Interior 3D Renders
At first, the client requested two views of WestPod 2. And later on, he asked us to do an additional angle of it. So, within this comprehensive CGI services package, our 3D artist created three interior CG images in total.
Now, let’s see what references she had for the task.
#2.1 The References
For this assignment, we were provided with:
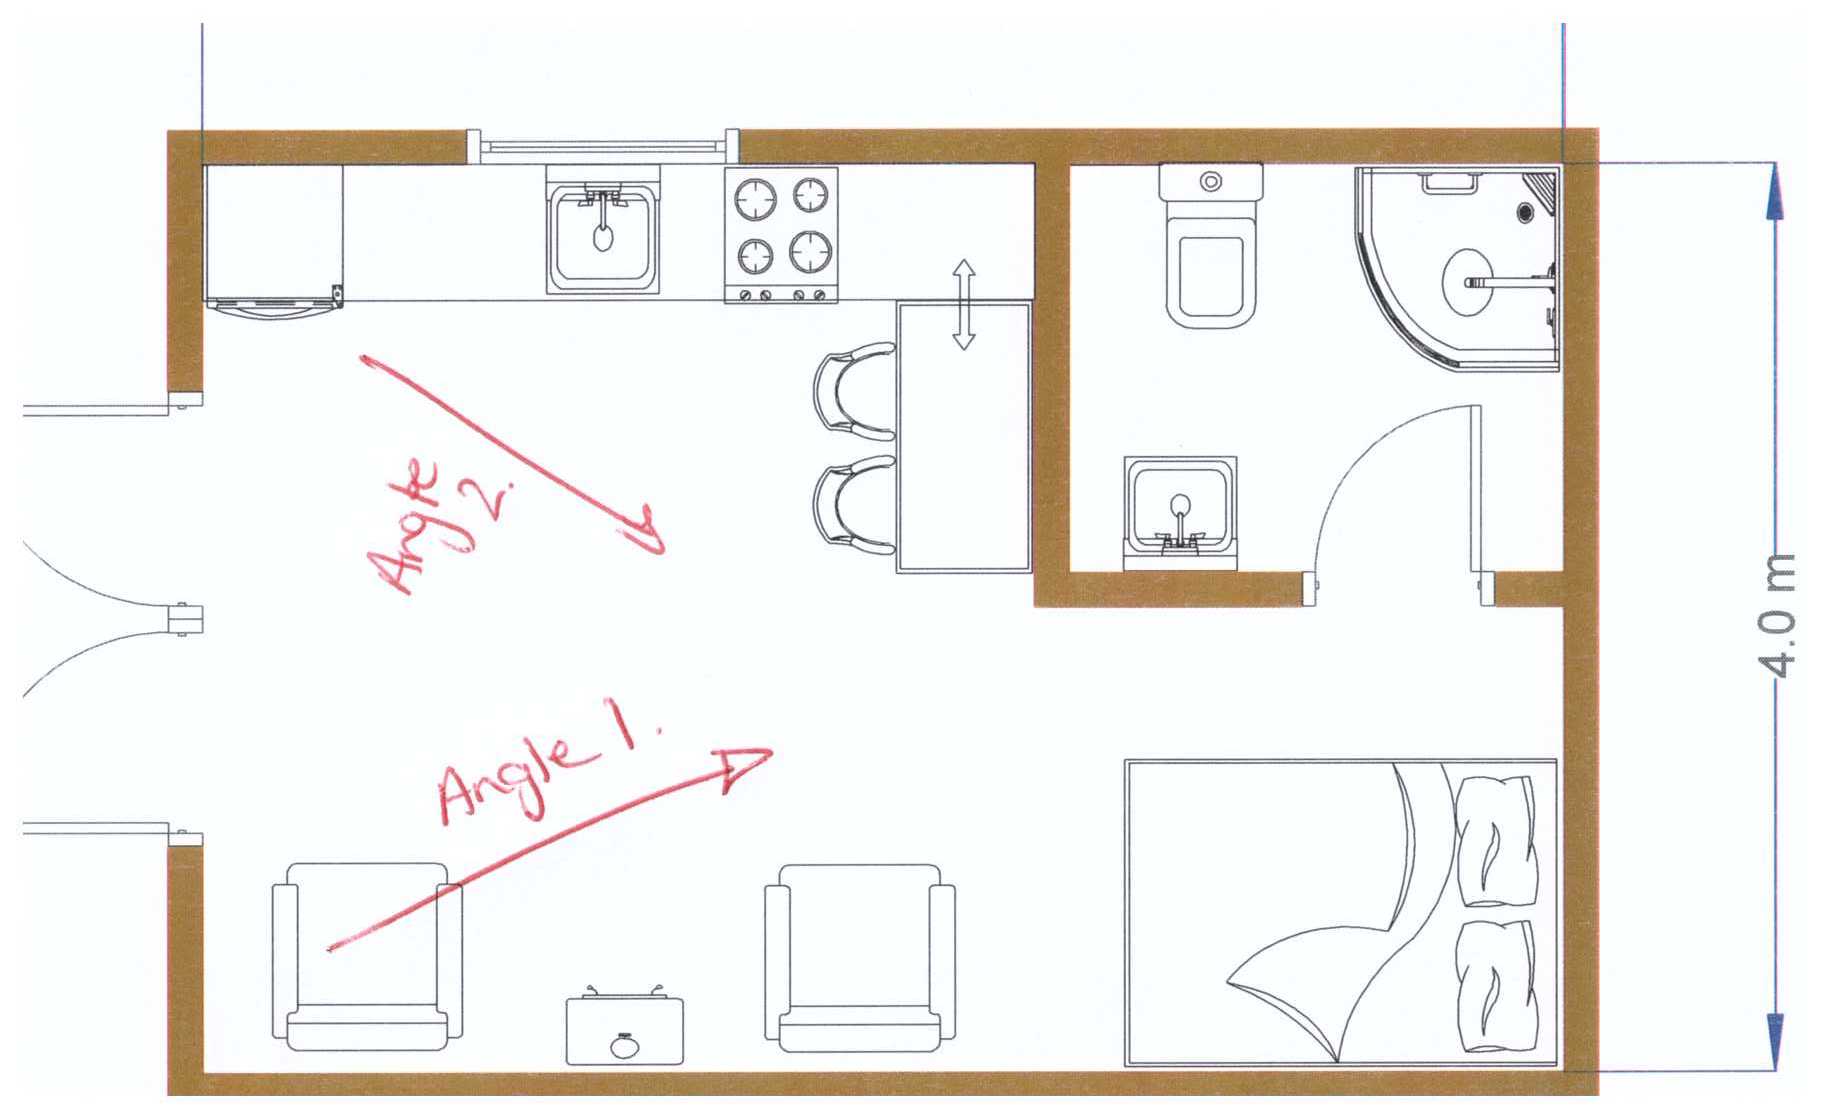
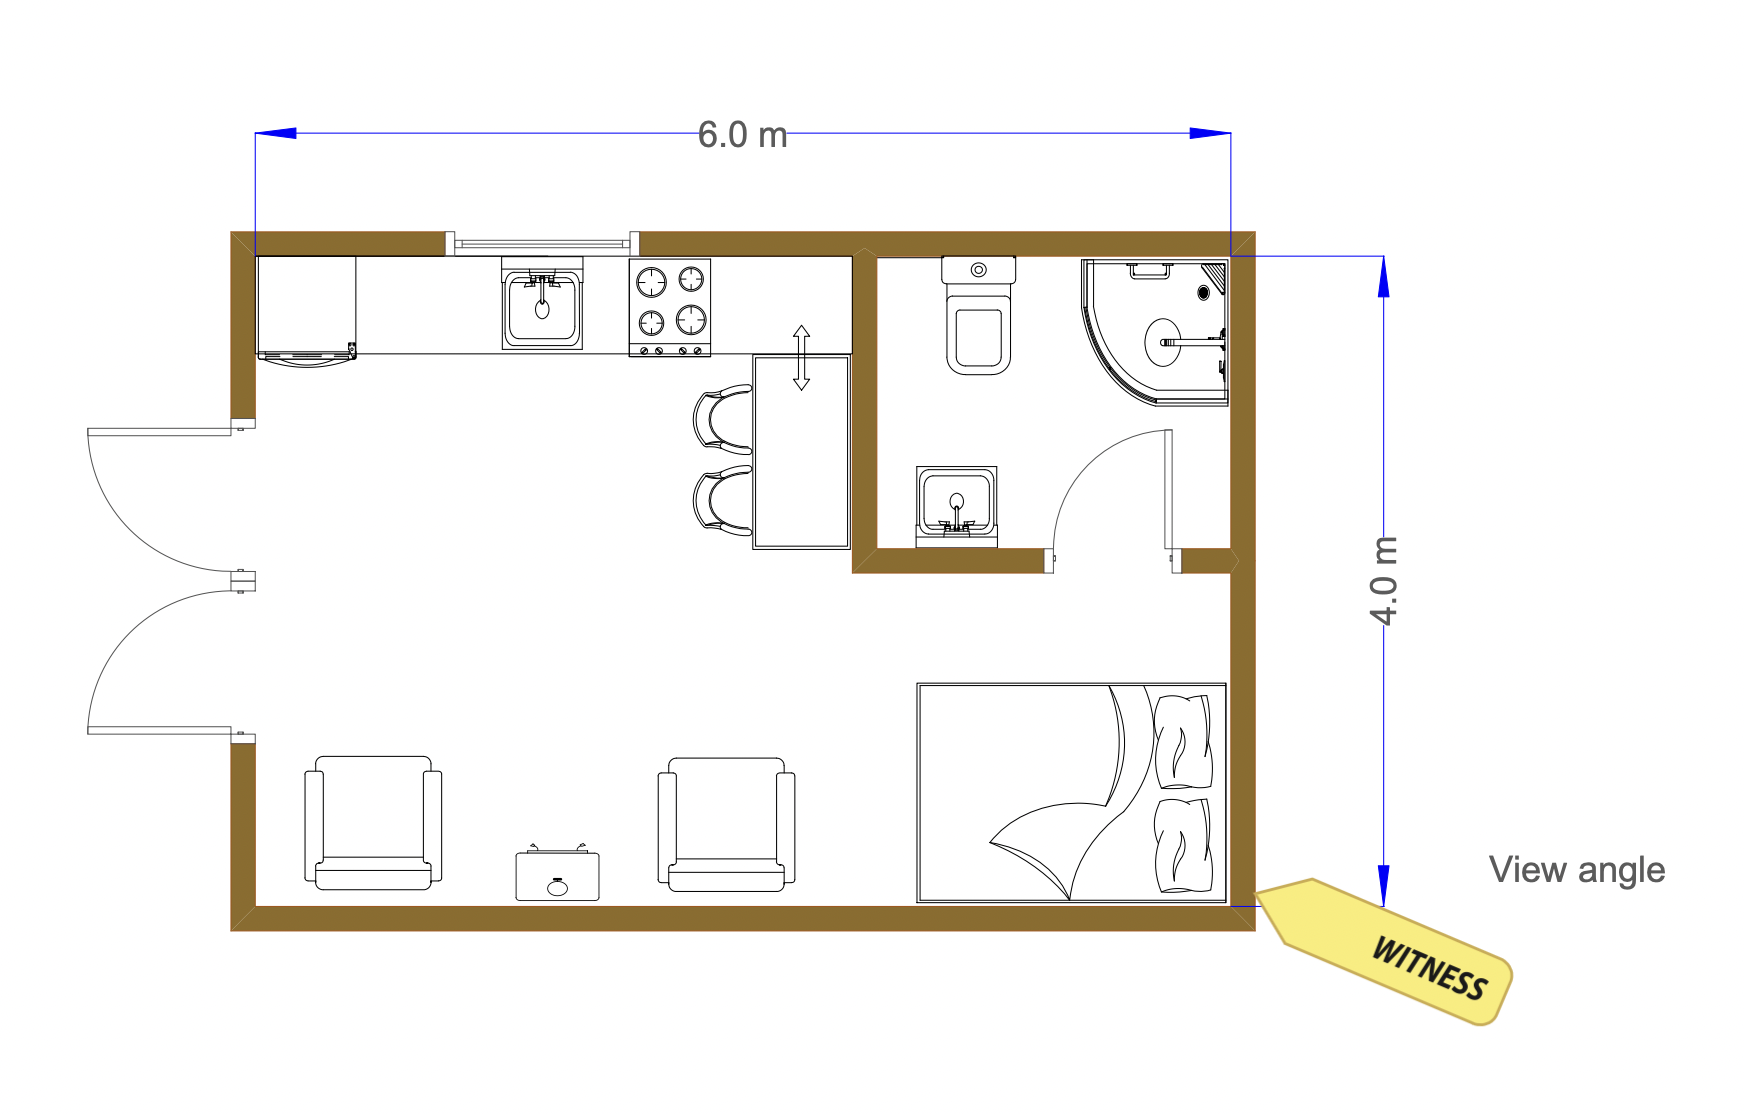
- a furniture layout drawing with the desired camera angles indicated on it. Those were the views showing the bedroom and kitchen areas;
- elevation drawings showing the height of the walls and roof;
- materials, furniture, fixtures, and decor specifications;
- an interior photo of one of the existing houses built by Westrak.
So, we had all the necessary information and visual aid to provide top-notch 3D interior design rendering services.
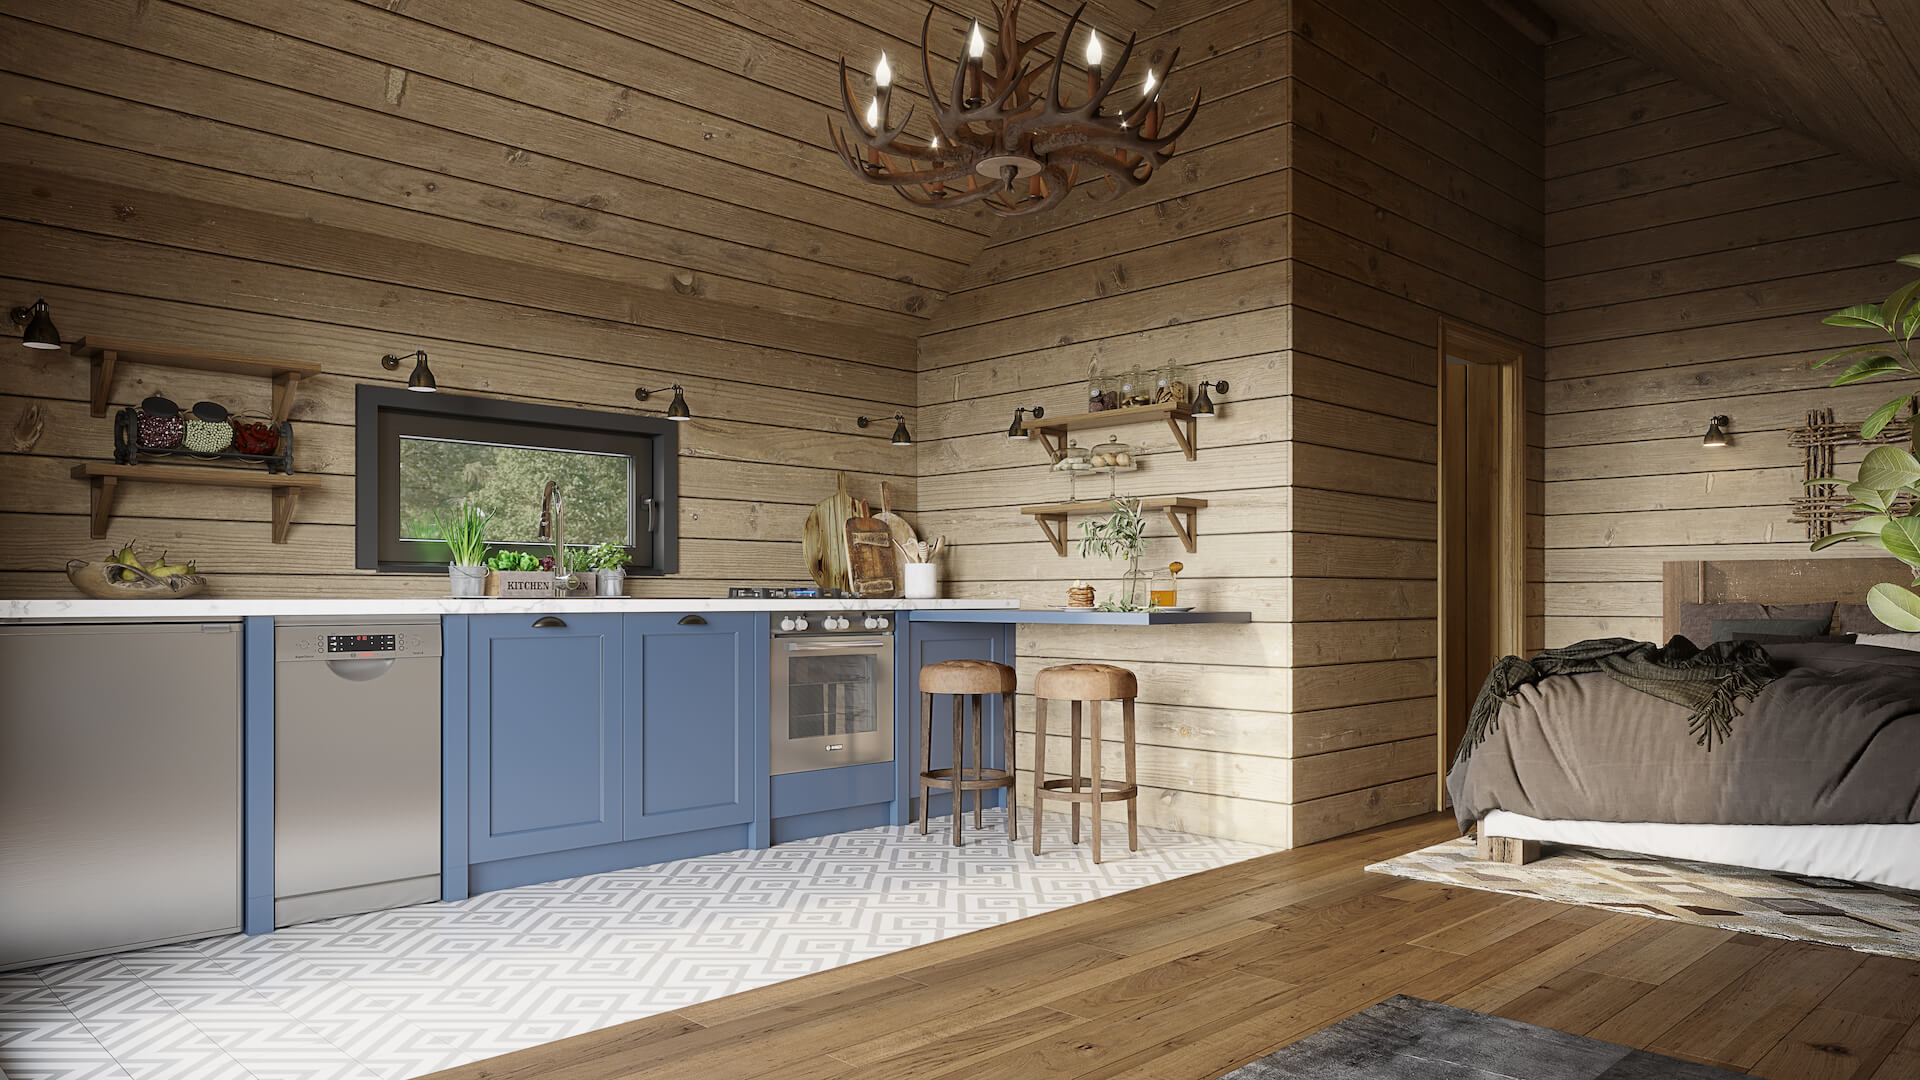
#2.2 The Creation of the Initial CG Views
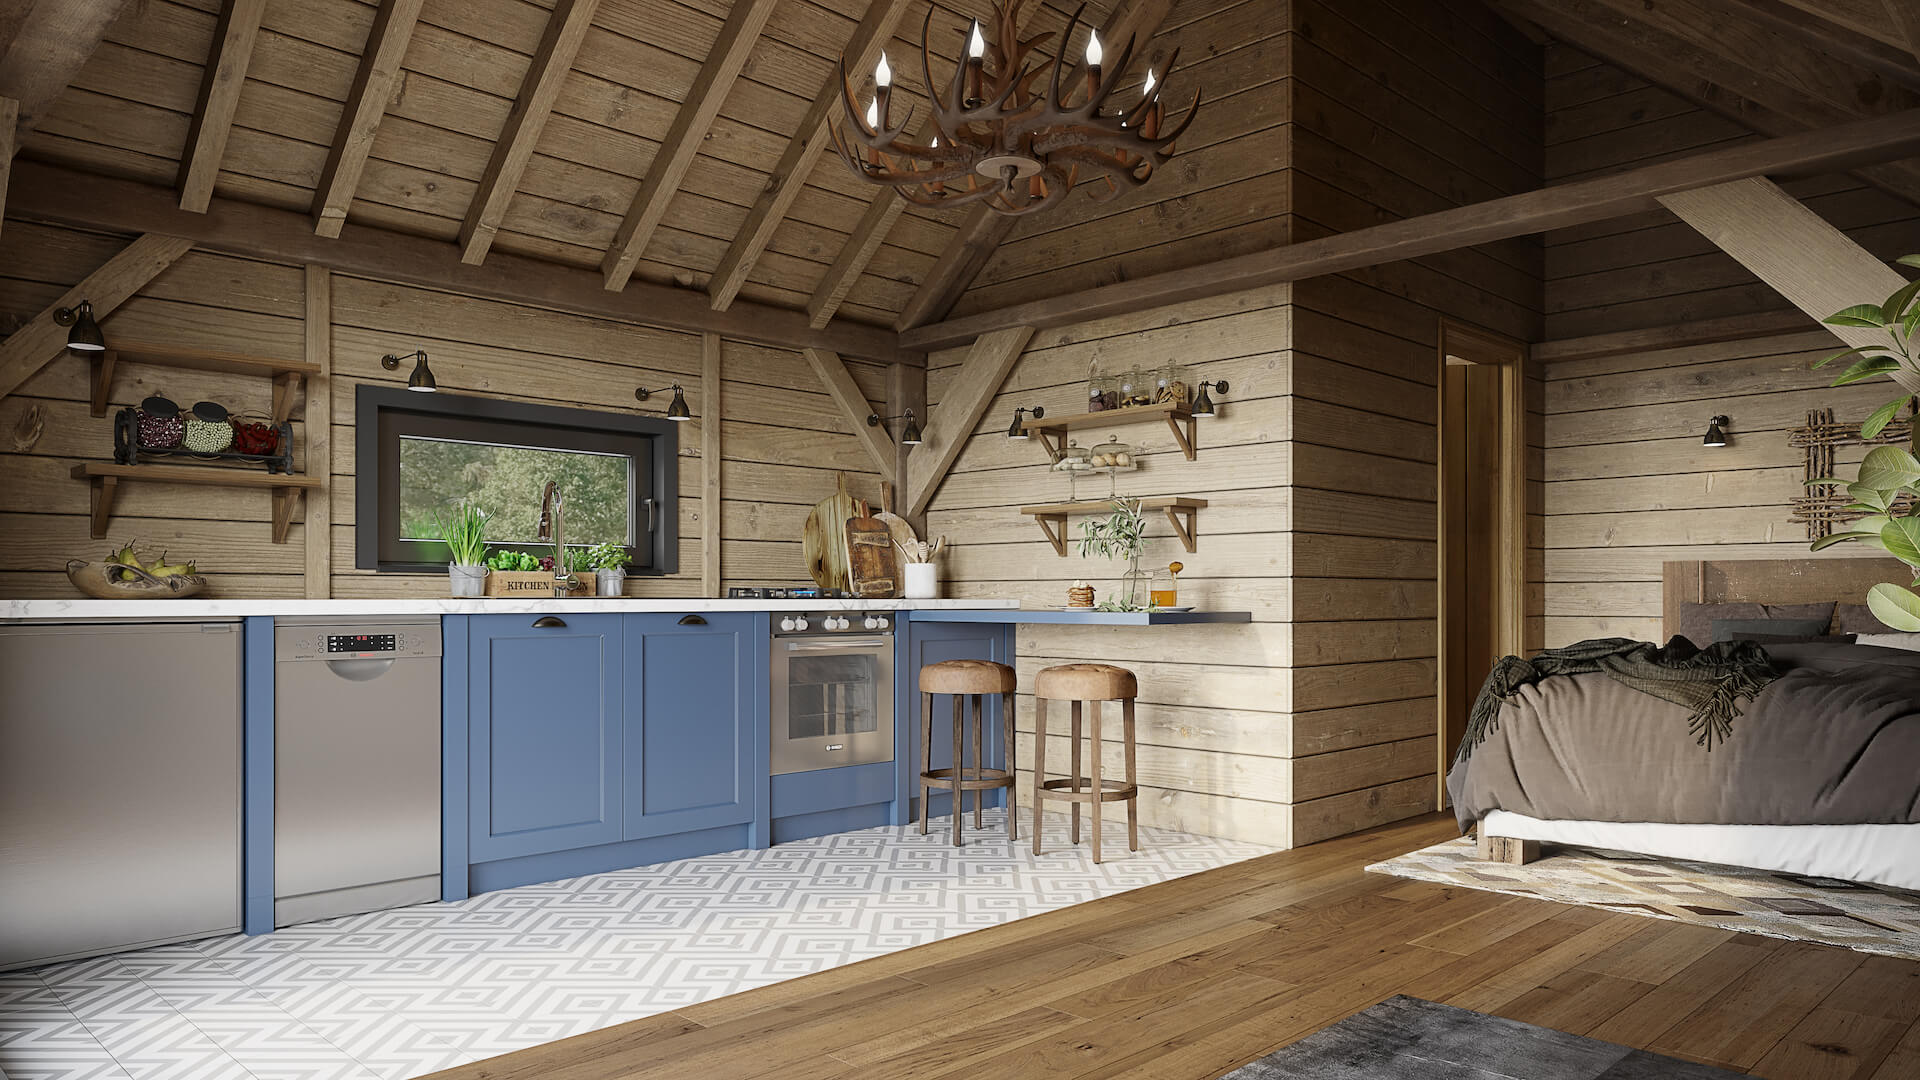
To make an accurate 3D representation of the pod’s interior, our CGI expert used the drawing with the furniture layout. It helped her to recreate the structural elements and proportions of the whole space. Then, she filled the bedroom and kitchen zones with 3D models. She picked the 3D objects from ArchiCGI’s comprehensive library according to the customer’s requirements regarding the furniture, kitchen equipment, lighting fixtures, finishes, and decor.
Once everything was in its place, the CGI artist set the required camera angles and rendered the images. Below, you can see the first two views our 3D artist submitted for the client’s approval.
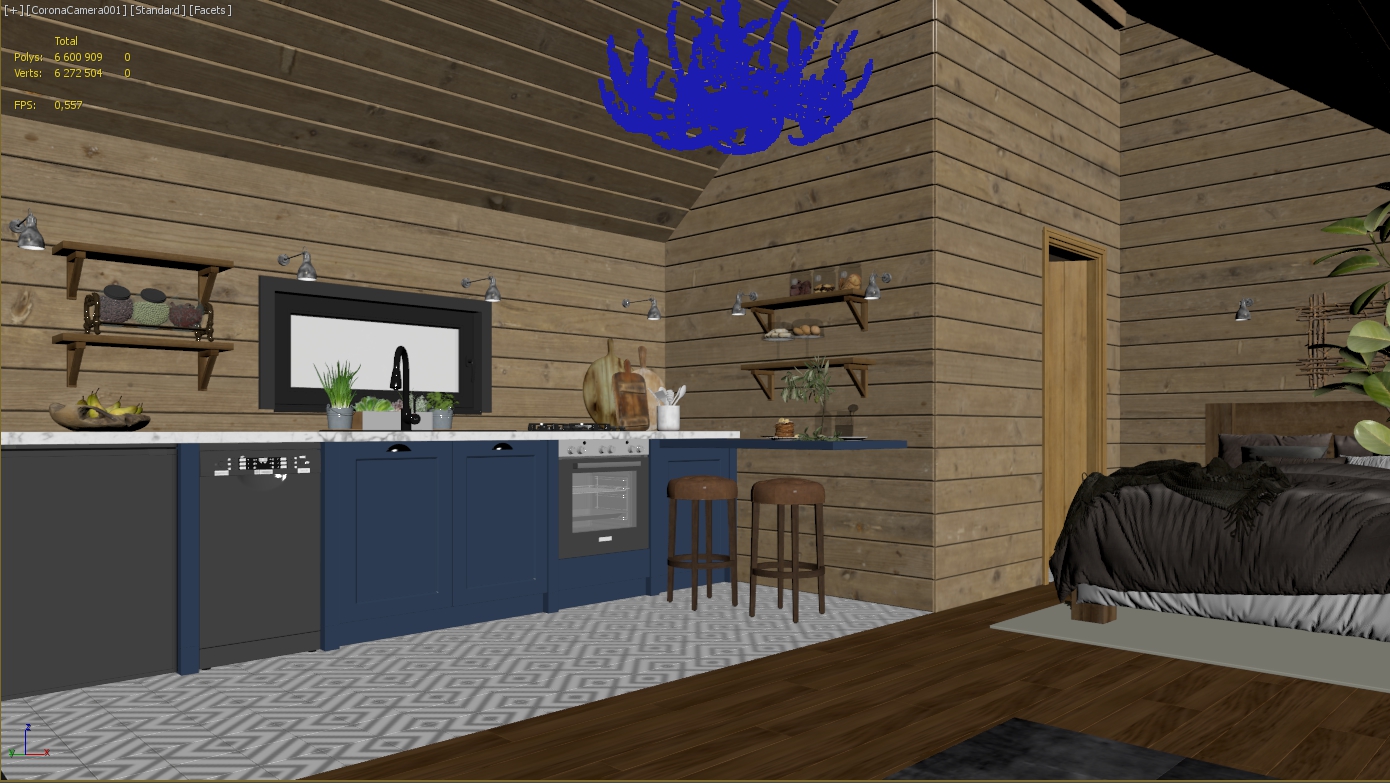
Philip had only one note here. He asked us to hide all the structural framework, such as ring beams, rafters, crossbeams, etc., with solid wood cladding.
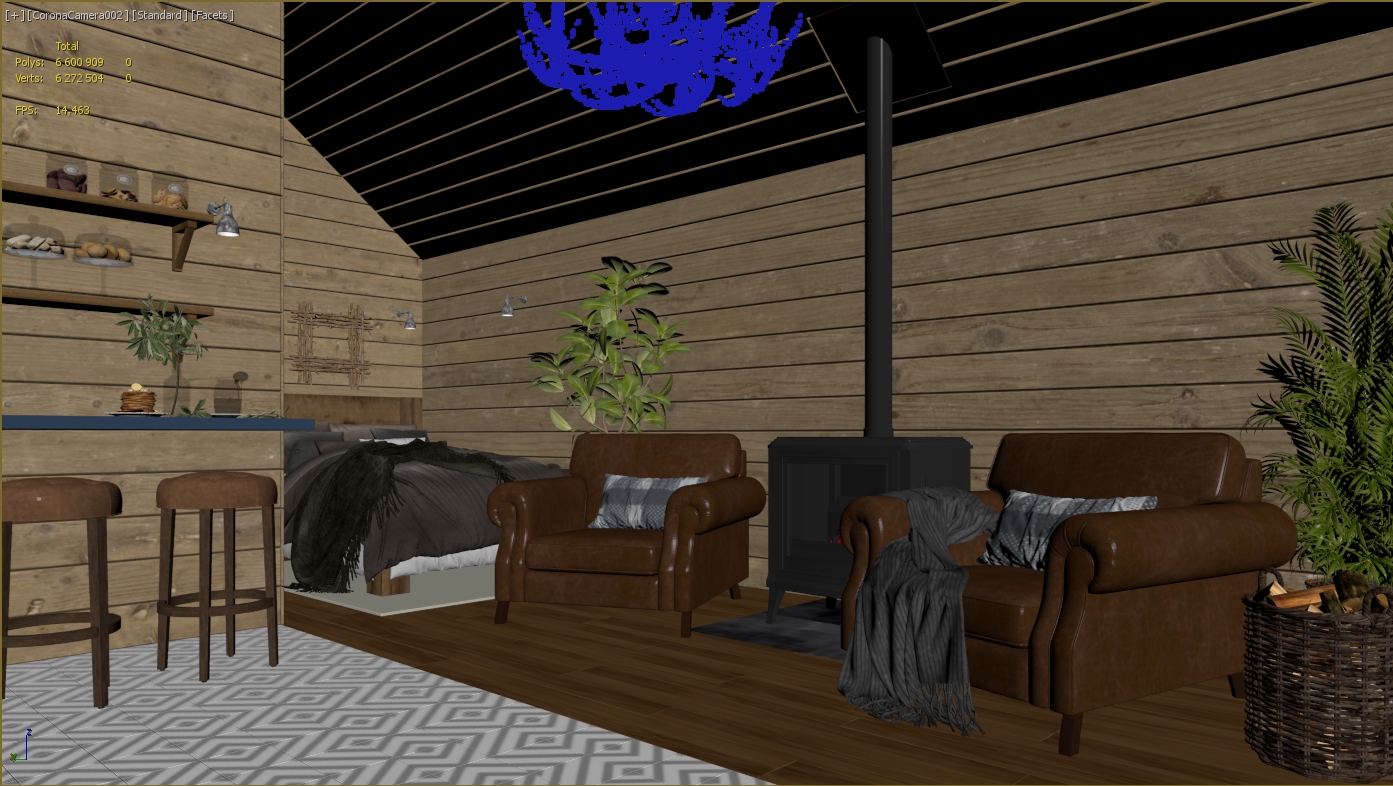
The CGI specialist made the necessary changes. And, to speed up the approval process, she sent screenshots of the updated scene to the client.
He approved the changes and we finalized the images: rendered them in 4k and fine-tuned the outcome in Photoshop.
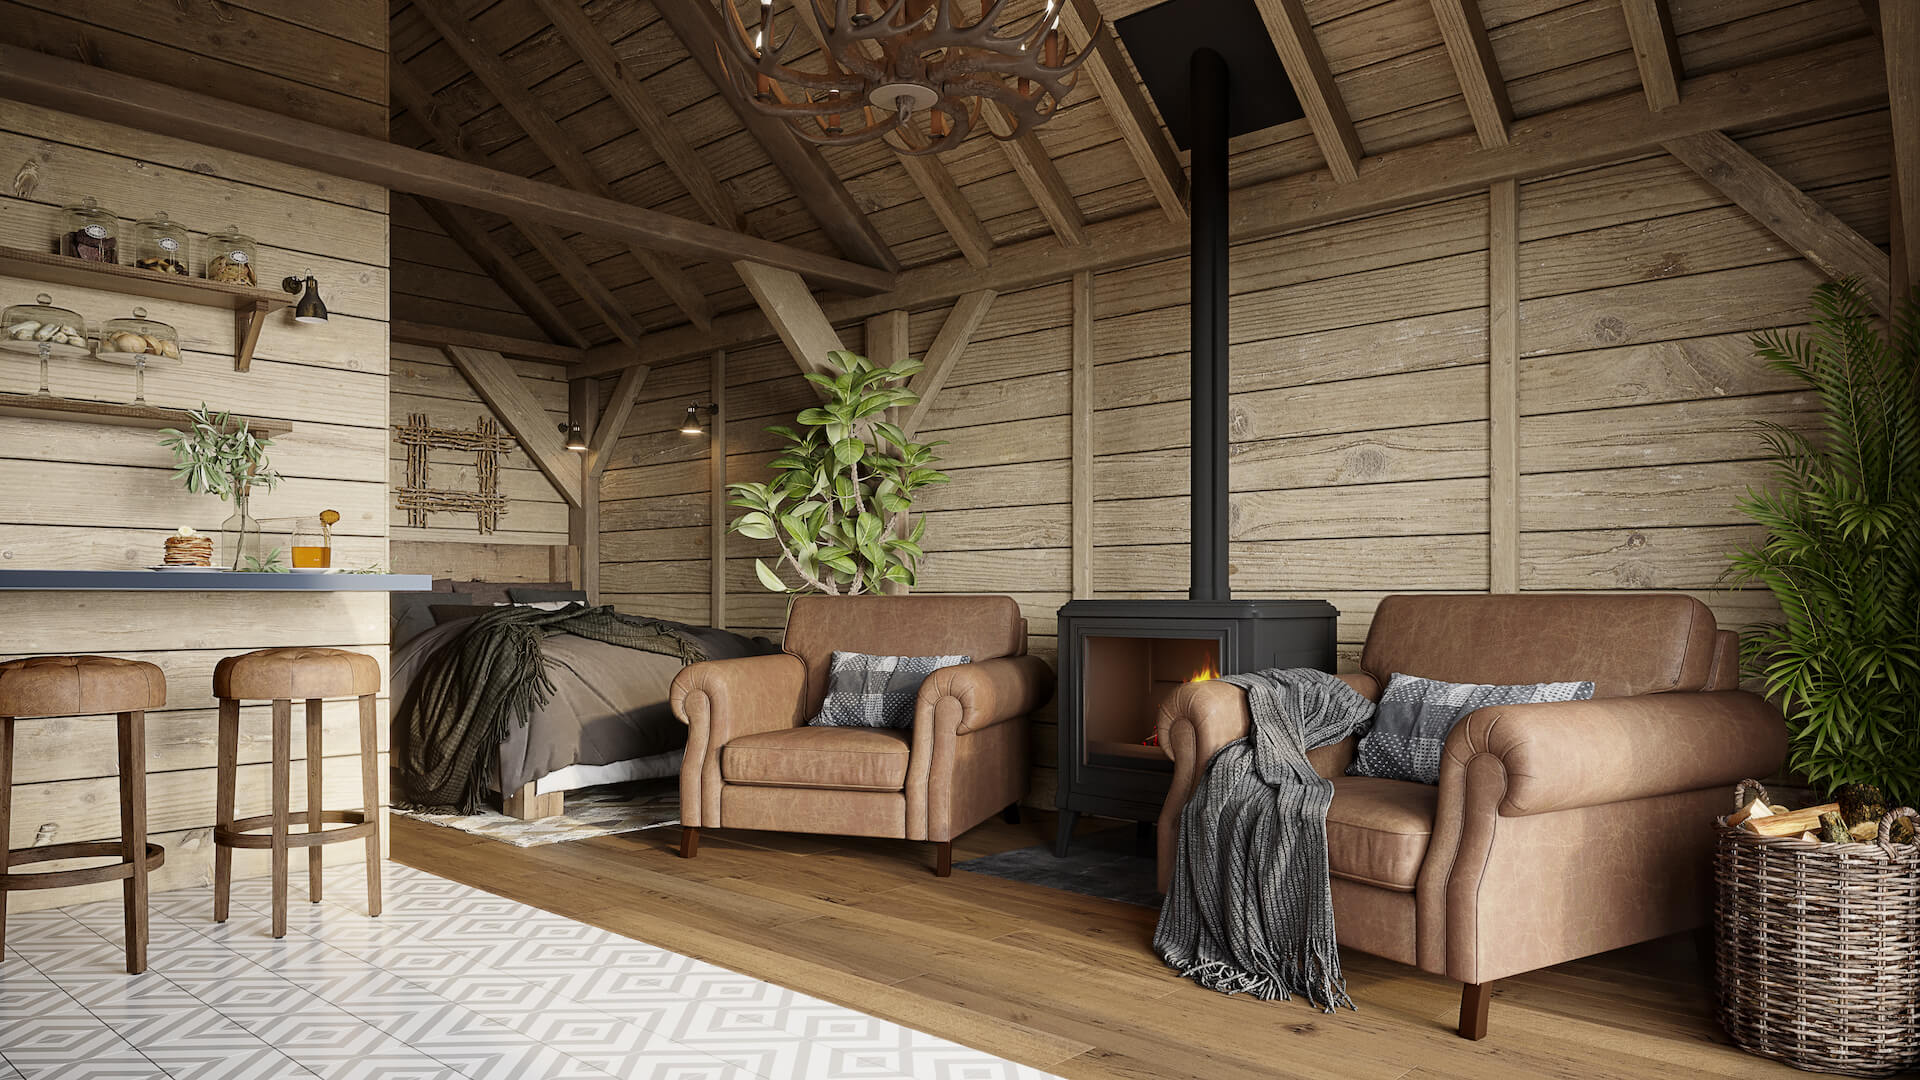
#2.3 The Results
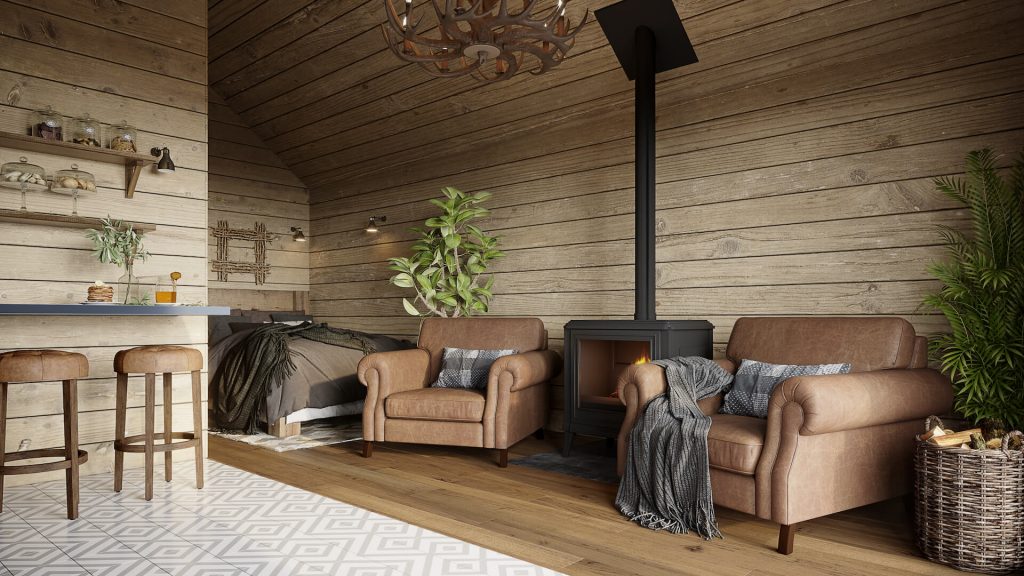
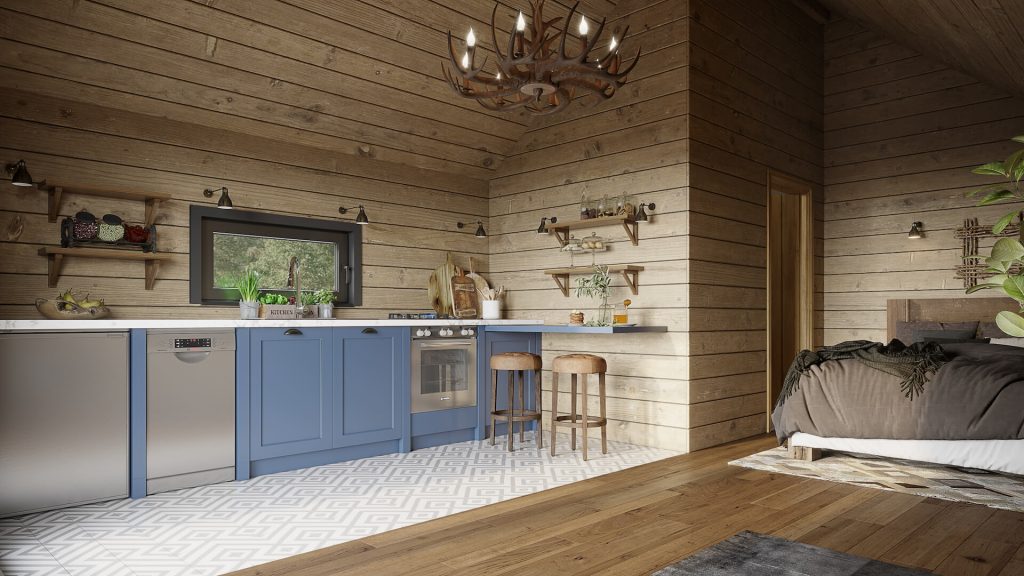
These are the final 3D renders in 4k resolution. Later, we also did them in 6k, suitable for print.
Philip loved the result so much he decided to order another view to provide his prospects with a more comprehensive picture of the house.
#2.4 Making the Additional 3D Render
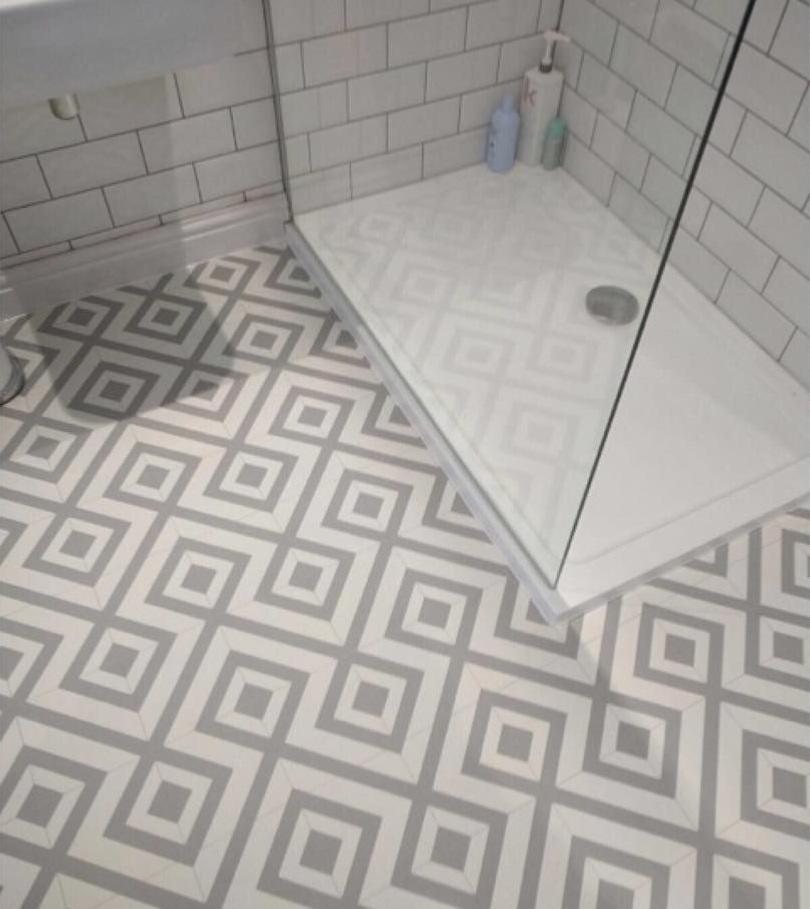
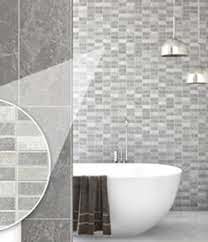
The new angle had to partially reveal the bathroom, which was not initially planned. So, we needed to do a little extra work here. To help us with that, Philip provided the additional references:
- a floor plan with the new camera angle indicated on it;
- and pictures of suitable bathroom fixtures and finishes.
Making this additional render didn’t take long, since we already had the main room ready in 3D. Our CGI expert just had to find and add the right 3D models of the fixtures and the tile texture for the bathroom walls. As for the bathroom floor texture, she already had it, because the same tiles were used in the kitchen.
When the whole 3D bathroom was finished, the artist adjusted the lighting, set the camera angle according to the customer’s request, and rendered the image. With a few final tweaks in Photoshop, it was ready.
#2.5 The Result
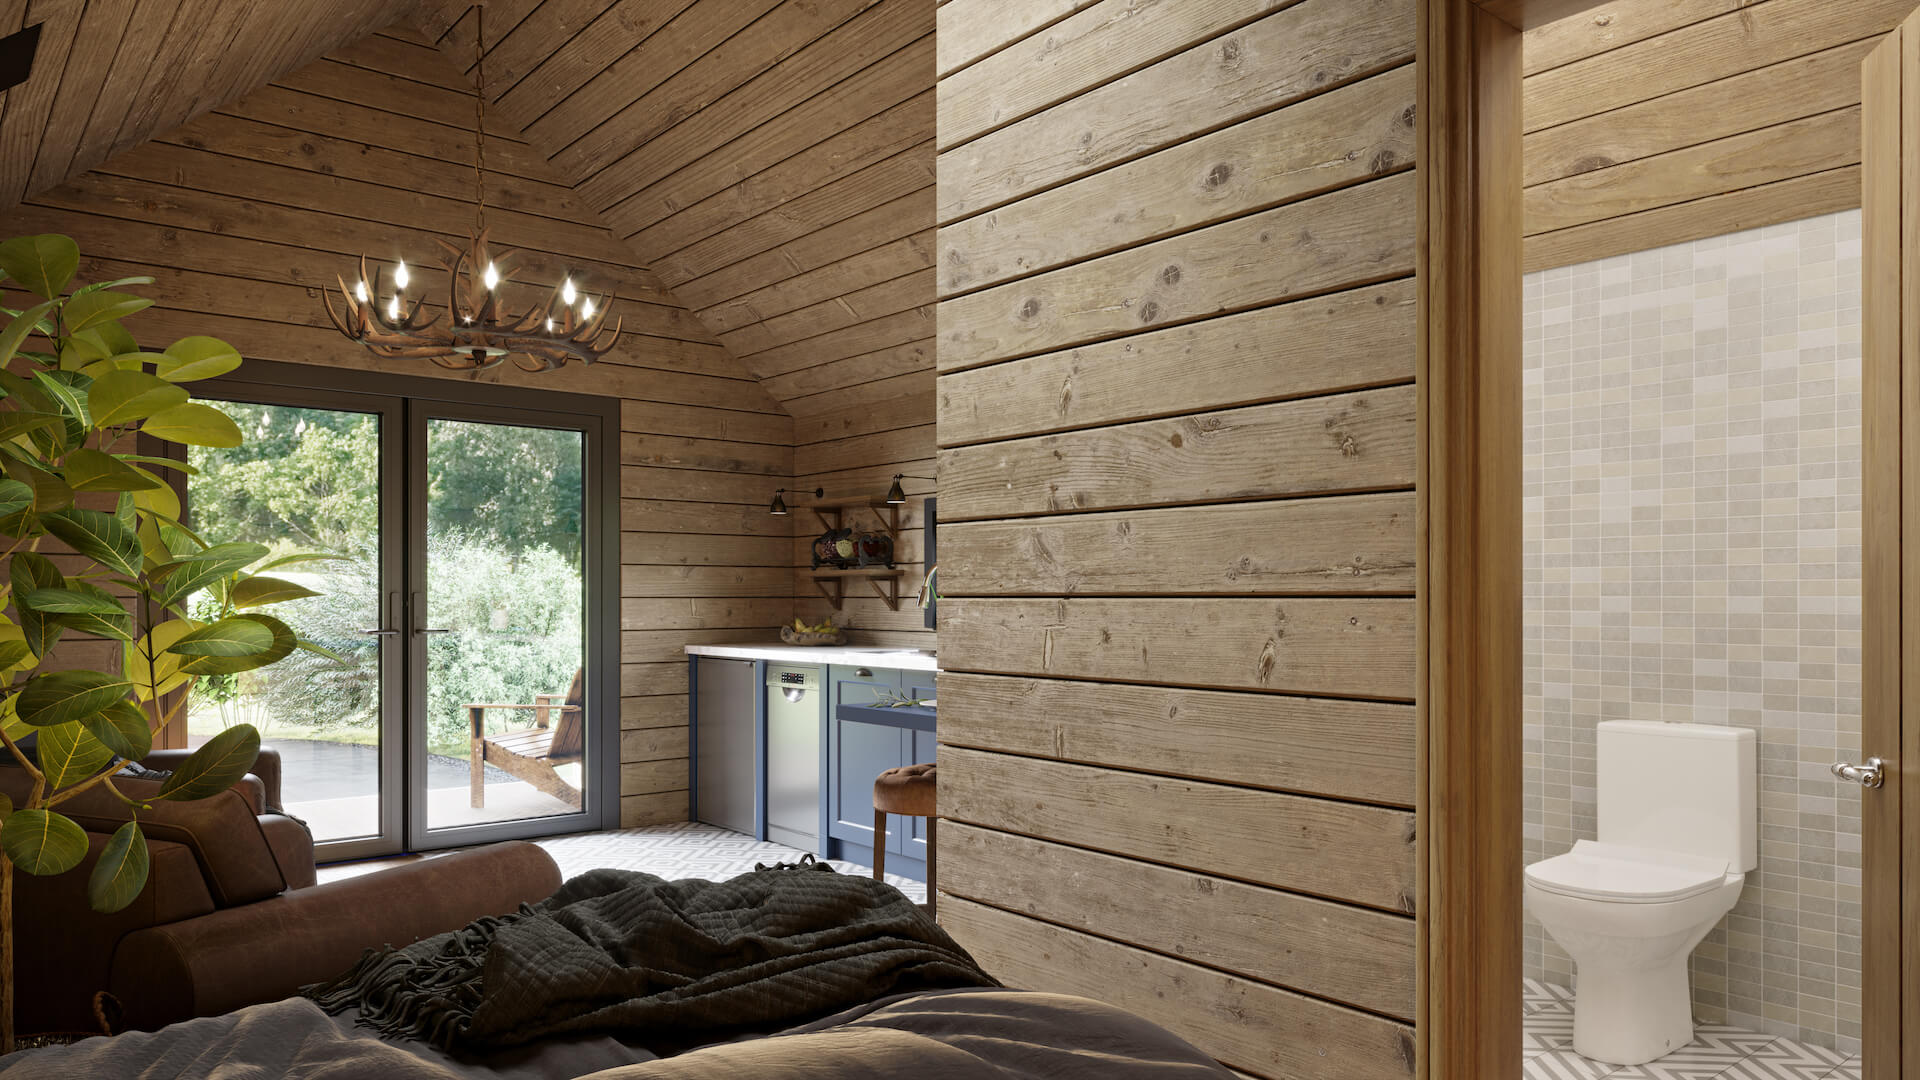
And here’s the outcome! The CG picture perfectly demonstrates the amenities of the pod. And the wonderful outside view, which is visible at this angle, reminds one that the cozy vacation house is to be surrounded by picturesque nature.
Now, do you want to know how CGI services helped to showcase all this beauty in motion? Then continue reading.
Part 3. The Making of a 3D Animation
Of all the comprehensive CGI services we performed in this project, the creation of 3D animation was the final one. The CG video had to show the exterior of all the houses and the interior of WestPod 2 that we had visualized before.
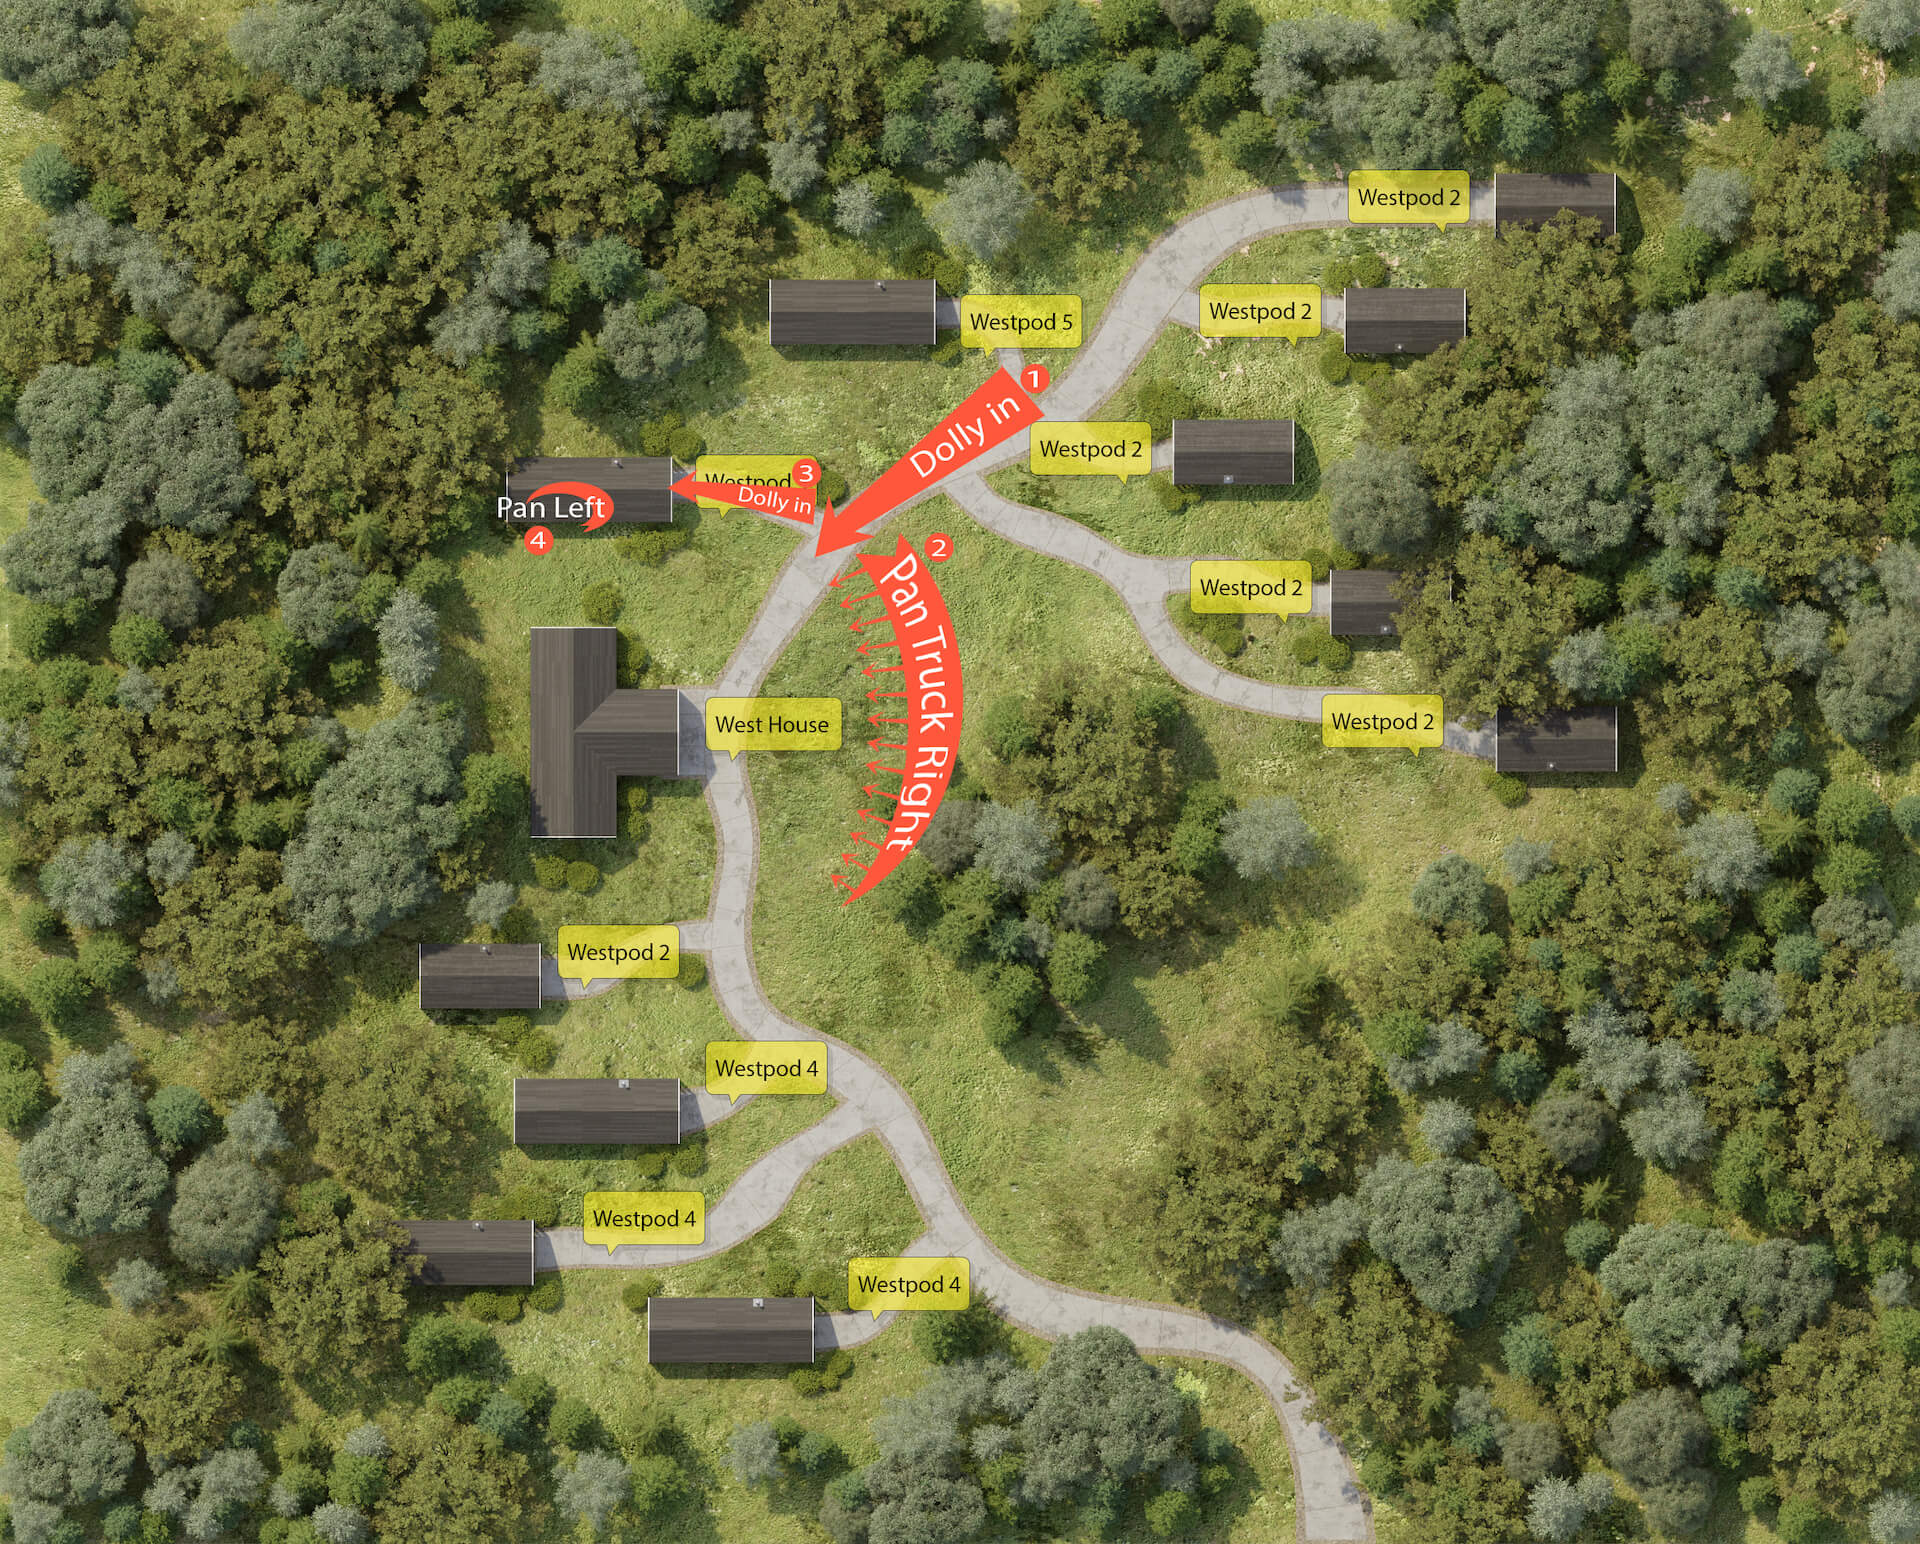
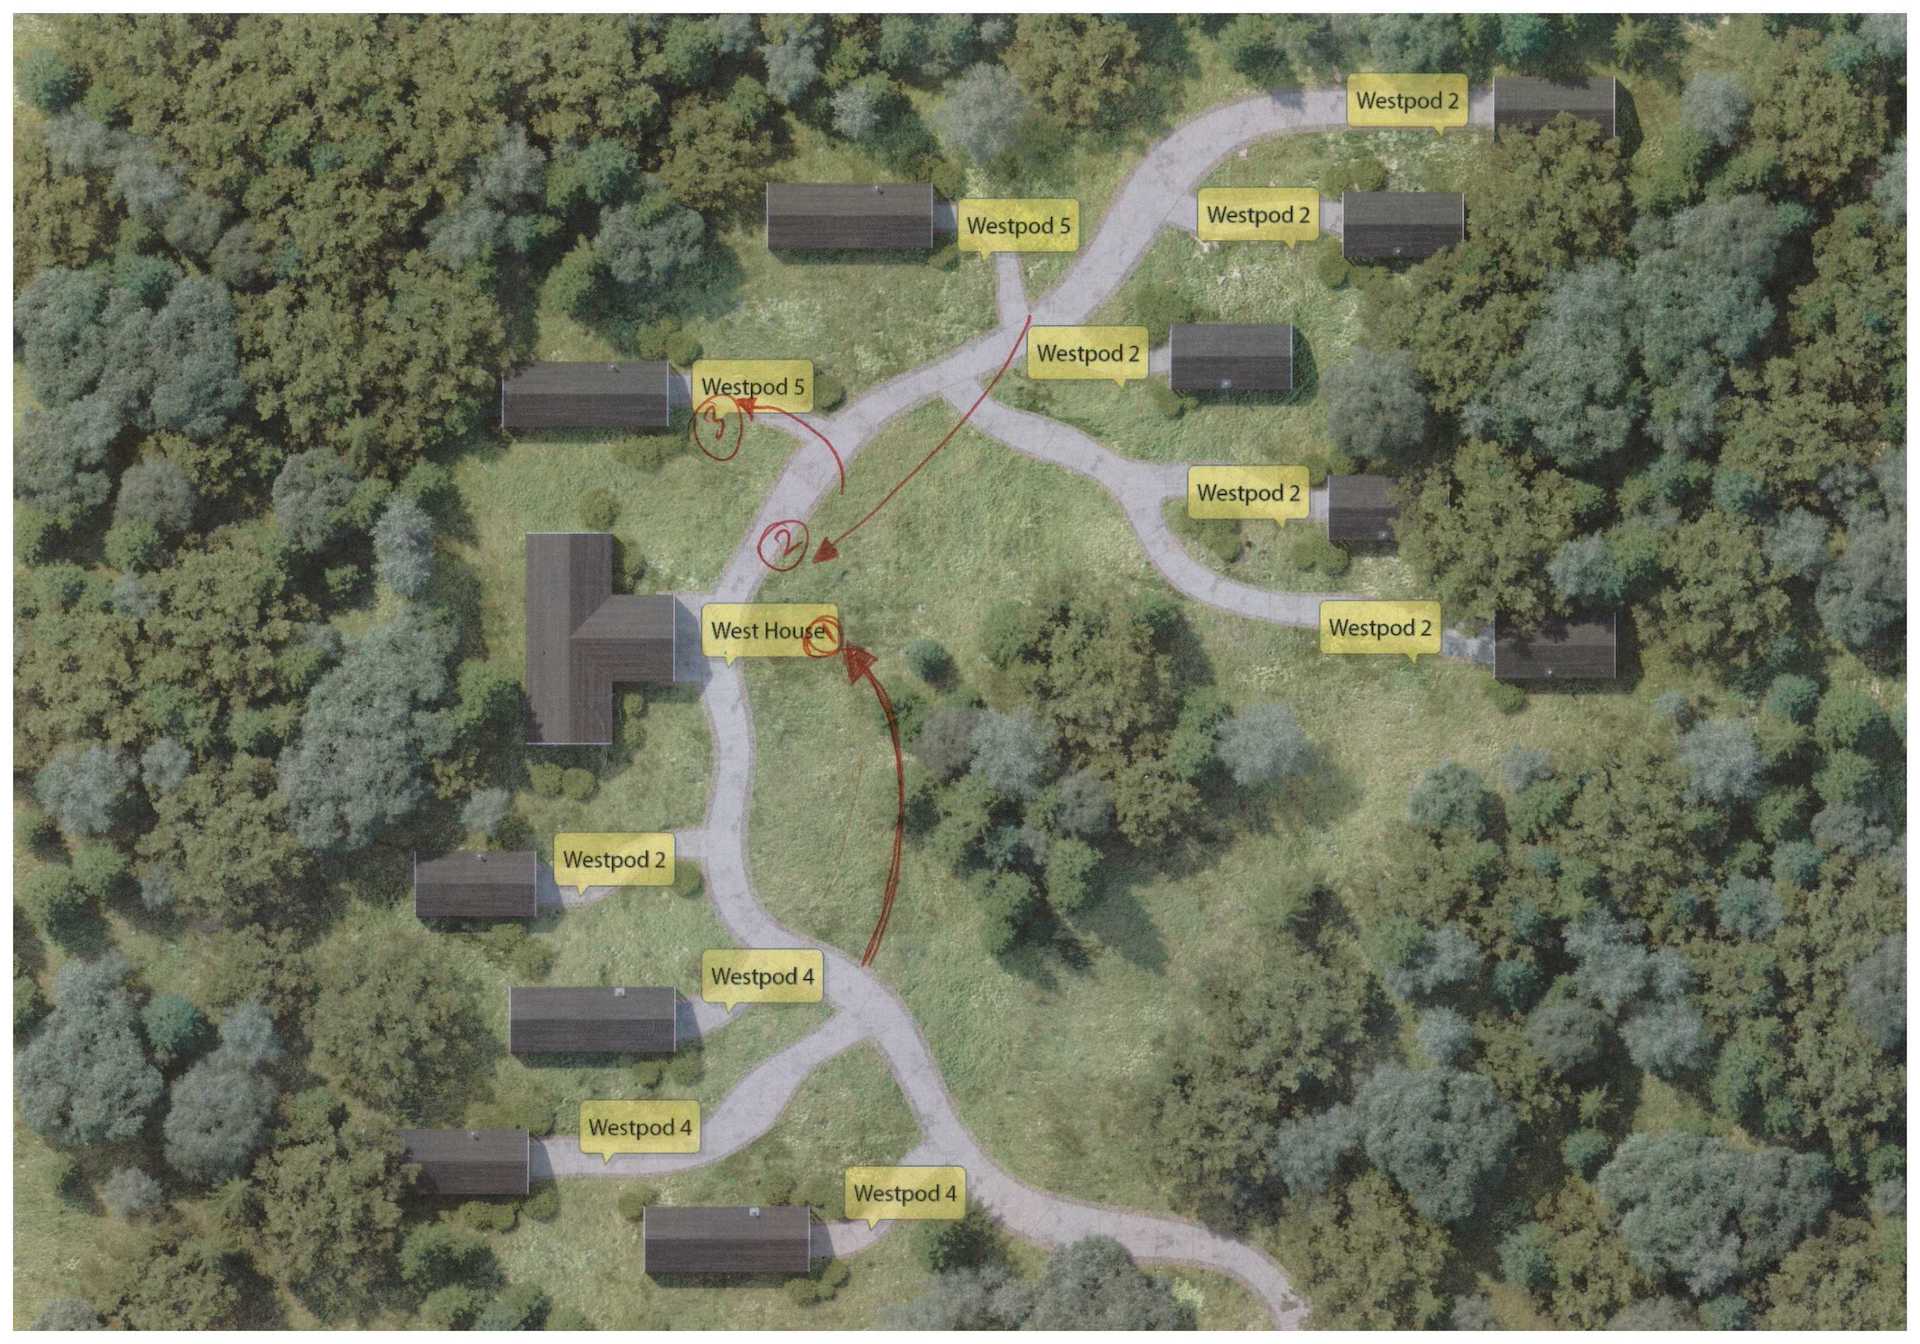
To convey his vision precisely, Philip had a video call with our team. He showed us a drawing and a scan of the site plan with the preferred camera path that he drew by hand. With this information, we made a script for the future CG video and indicated the planned camera movements on the aerial rendering using Photoshop. After that, we were all set to start the work.
#3.1 The References
For this assignment, we had a comprehensive set of materials to work with:
- the 3D environment with CG models of the pods we had made earlier;
- and a detailed script we developed together with the client during the call.
Now, let’s see how our CGI expert used those to create a perfectly photorealistic 3D animation.
#3.2 The Workflow
First, our animation specialist used the site layout with the indicated camera path and the drawings with notes from the customer to get a comprehensive idea of the scenario.
The CG expert took all of the client’s requirements into consideration but suggested some tweaks to lower the number of frames while still preserving the planned storyline. This way, we managed to keep the cost of our CGI services within the startup’s budget, which was crucial in this project.
After discussing the details of the task with Philip, the 3D artist prepared a draft video in 3ds Max. You can see it below. He did it to get approval on the camera path and transitions before going into the production of the final 3D animation.
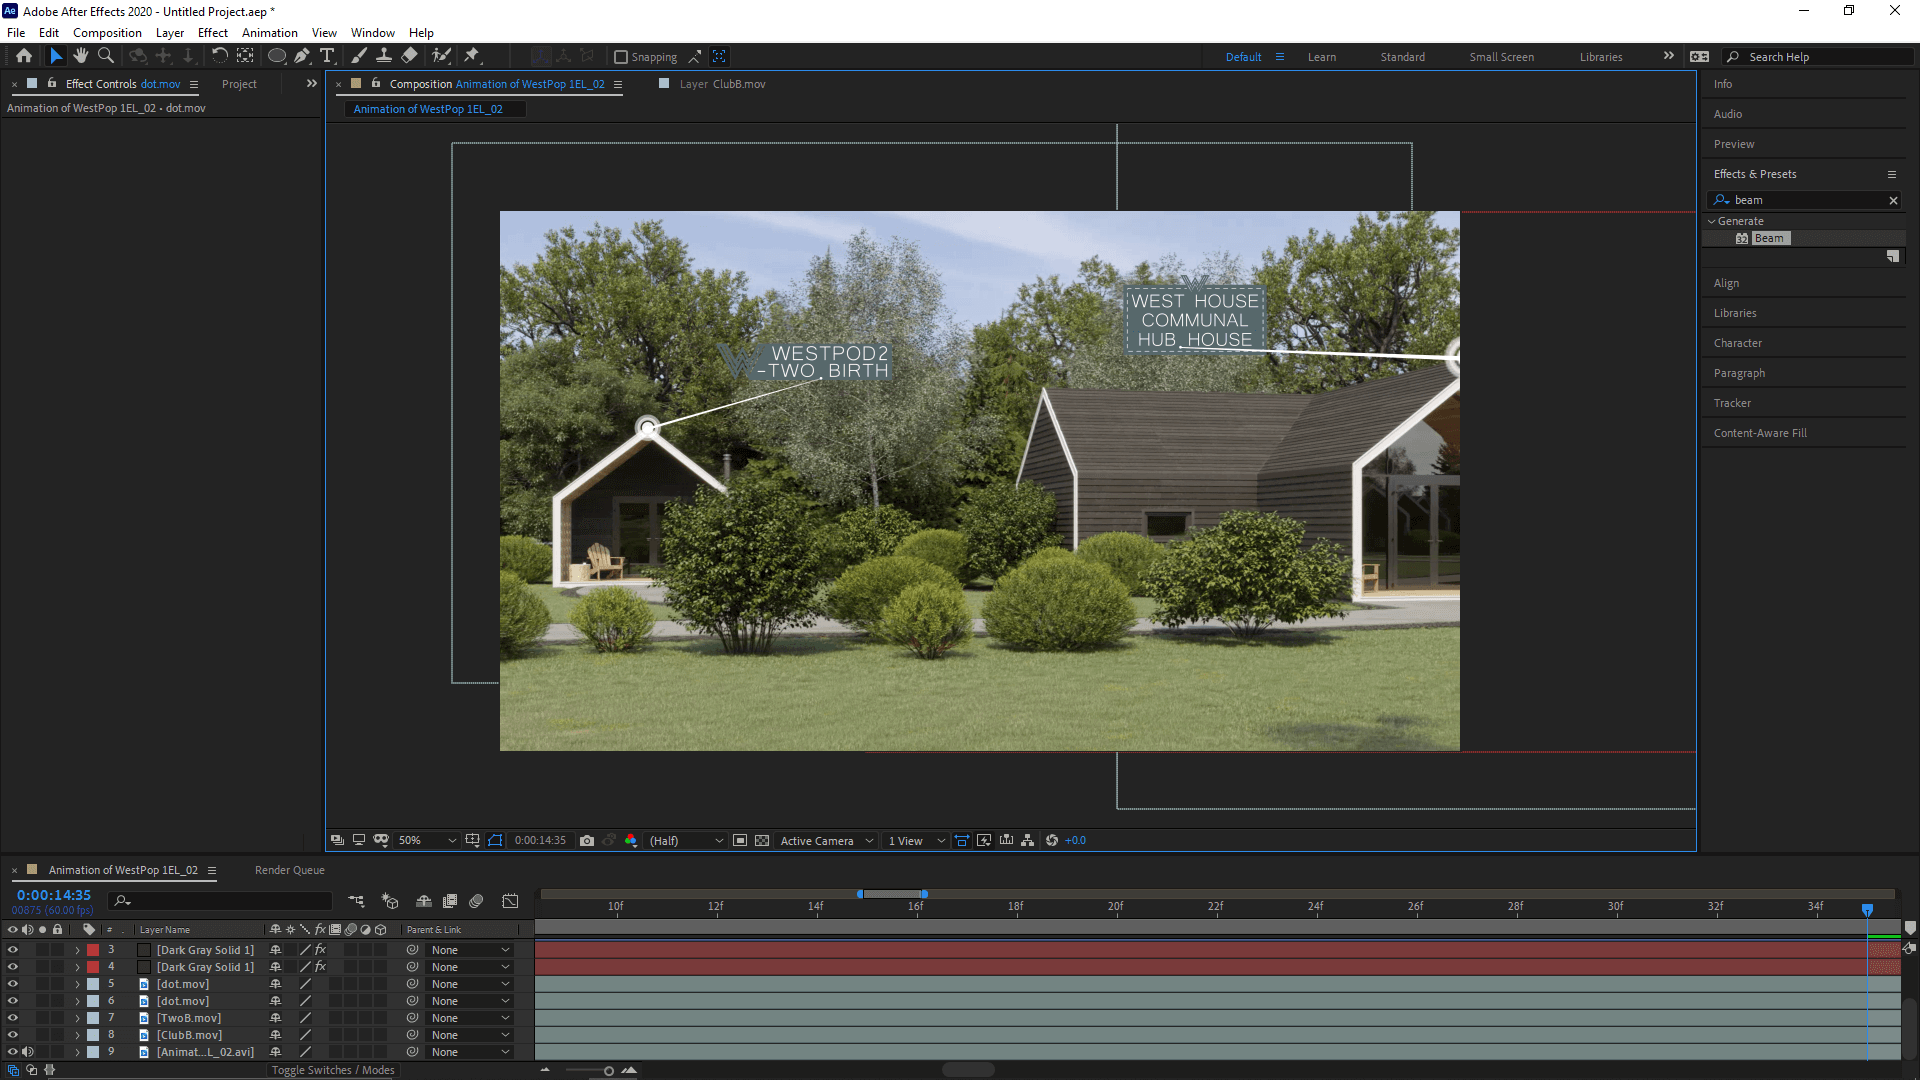
After getting approval on the draft, he proceeded to create the video in the photorealistic quality. In the process, the CGI artist added animated notations using Adobe After Effects: a small intro along with pod names and descriptions. Also, our animation services here included helping to find the right soundtrack. So, our specialist selected several music tracks from our comprehensive library and sent them to Philip to choose from.
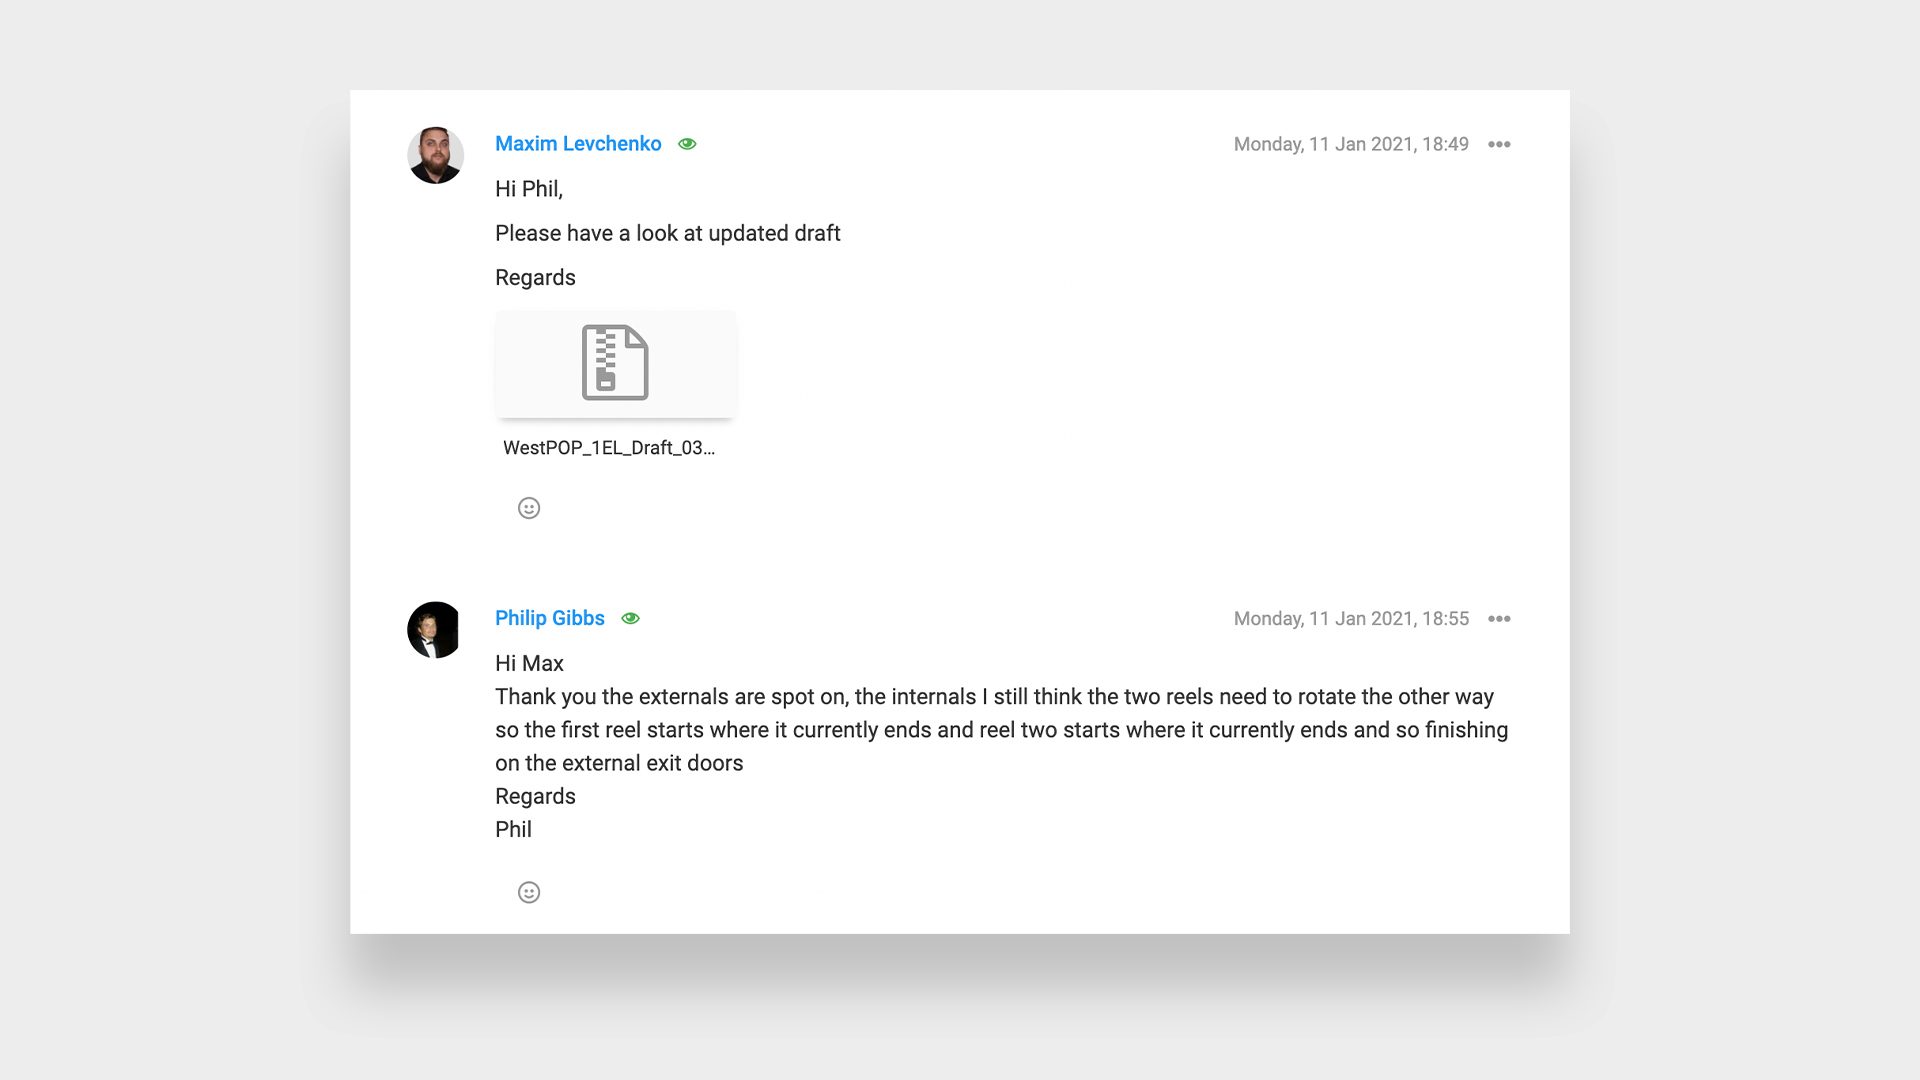
In the further process, we submitted several draft versions of the animation to the client. He gave detailed feedback on each of them, which helped us to align the camera path, transitions, and notations to his vision.
Overall, the making of this 3D animation was a very collaborative effort. Below, you can see how we communicated with Philip in our CRM system throughout the process.
When all the necessary changes were made and the client was totally happy with the result, we rendered the final animation. Take a look!
#3.3 The Result
And here’s the final CG animation! We delivered this CG video for the company’s website in FullHD 1920×1080 resolution and for Instagram in 1080×608 resolution. Also, we made three separate short fragments of the animation for other marketing channels.
And so, the final task of the project was complete. Now, let us show you the results of the assignments together.
The Final Look at the CGI We Produced for Westrak Structures
Here, you can see all the outputs of the comprehensive CGI services we performed.
All in all, it was an amazing project, which required a comprehensive approach and involved several types of CGI services. As a result, we created a full package of promo visuals for all kinds of marketing channels. Our goal here was to deliver renders that don’t just show the beauty of architectural designs but also convey the very essence of the glamping experience, which is camping with comfort. And we hope that the comprehensive CGI services we’ve provided will help the startup attract its target audience — those seeking opportunities to organize a luxurious outdoor vacation space.
We wish Westrak Structures great success with their endeavor. And we are sure looking forward to visualizing their new gorgeous designs!
Looking for comprehensive CGI services? Contact us at ArchiCGI and get unbelievably photorealistic still and animated 3D rendering services for London projects.
for a killer presentation or marketing campaign!

Ana Wayne
Content Writer, Copywriter
Ana is a content writer for ArchiCGI. She has a passion for design and architecture - and for talking about it. Outside of work, she is a fan of sci-fi movies and a street food connoisseur.
Like this project? We’ve got plenty more! Check out these CGI beauties.
