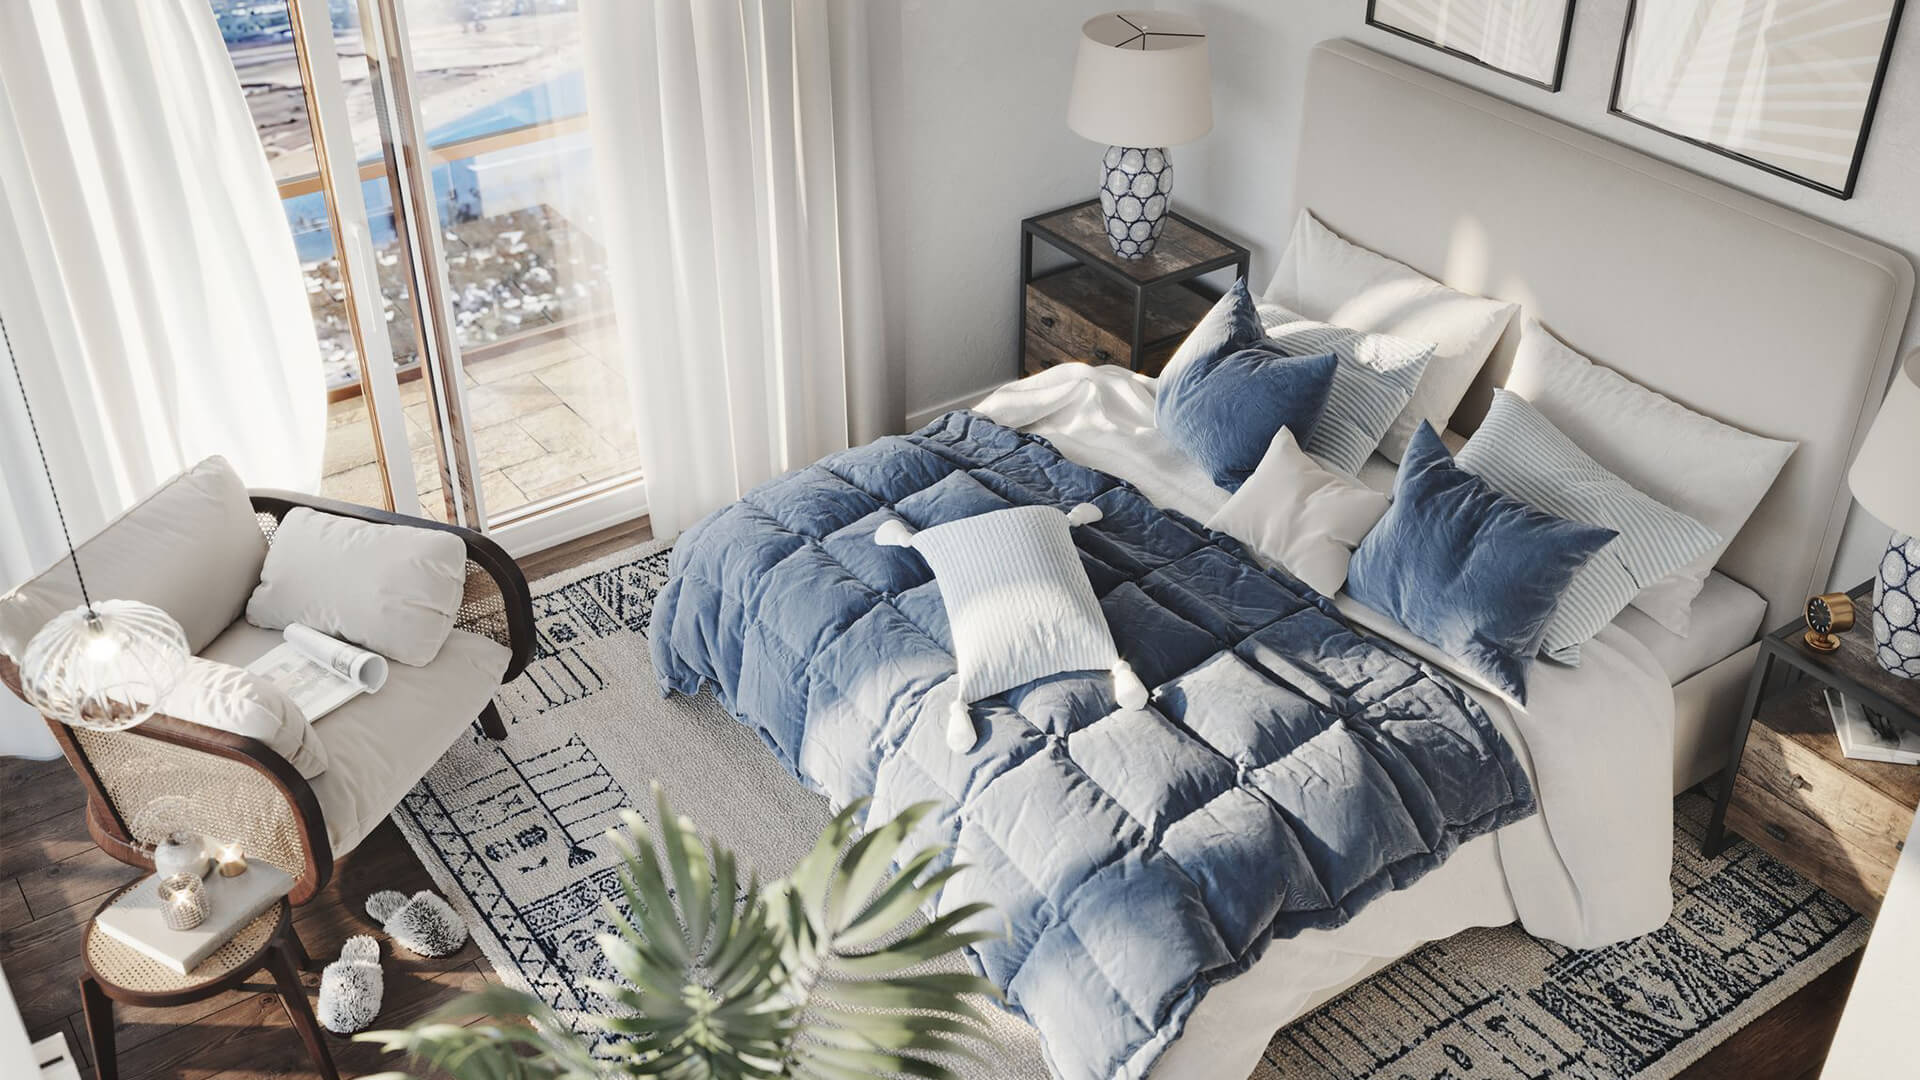
Virtual Tour for Real Estate Complex in San Diego, California for Compass Agency
A virtual tour for real estate is a cutting-edge tool for property marketing. It allows realtors to promote listings with maximum efficiency and customer satisfaction, even in the case of unfinished places. This is why all the top agencies of today are using 3D virtual tours on their websites. It allows them to connect buyers with their dream homes and sell or lease real estate much faster, while also getting the best deals for everyone. And our client in this project wanted exactly that.
Being one of the leading real estate platforms in the US, the Compass agency is always looking for the best ways to promote its clients’ listings. That’s why Alexandra Johnson, their marketing manager and listing coordinator, contacted our architectural visualization company in July 2021. She needed interactive CGI for a townhome complex in San Diego that was under construction at the time. And we at ArchiCGI were happy to help with that by creating a photorealistic virtual tour for each townhome layout. Read on to learn about the process and see the final results!
The Blend is a complex of upscale townhomes for lease in Pacific Beach — one of the most sought out beach communities in San Diego, California. The 3-story units are available in three different layouts, each featuring beautiful finishes, top-of-the-line appliances, and breathtaking bay views. The leasing of the properties began in January 2023.
On The Blend’s website, there is an interactive map of the real estate, where you can view 3D virtual tours that we created for all three house layouts. Each of them has an on-brand, yet unique interior. And in this case study, we will show the making of the virtual tour for real estate that showcases Unit A.
Brief
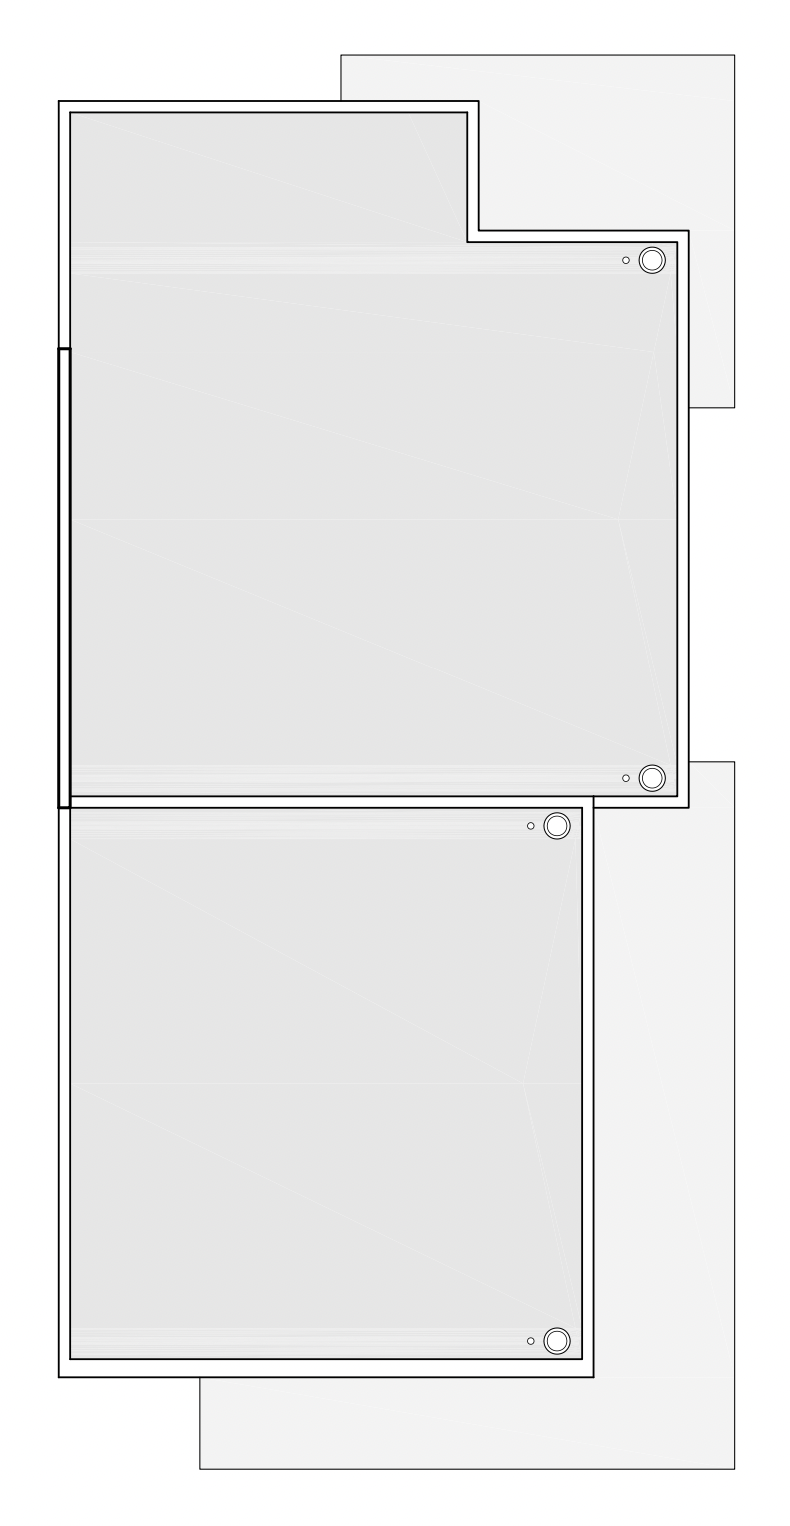
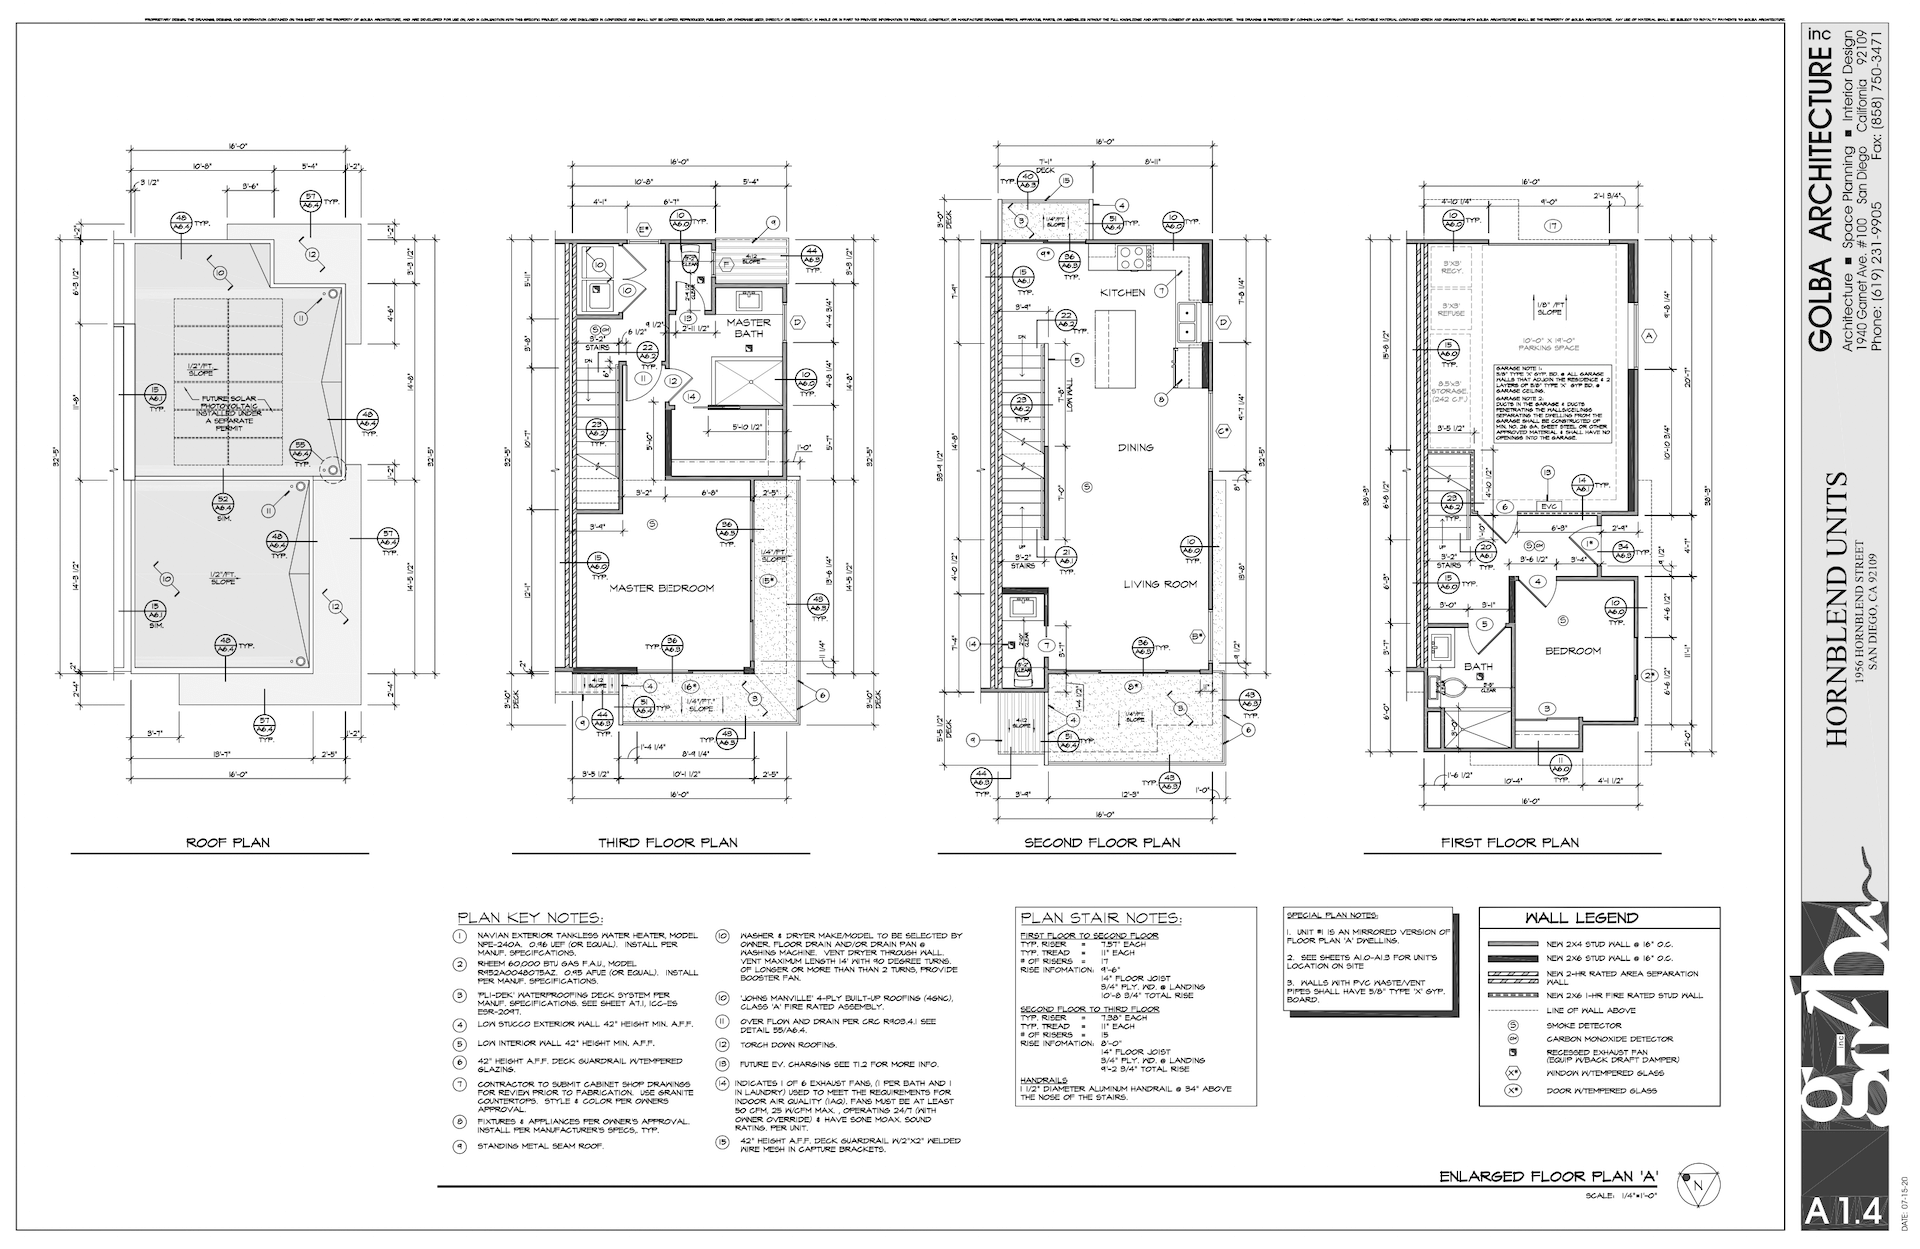
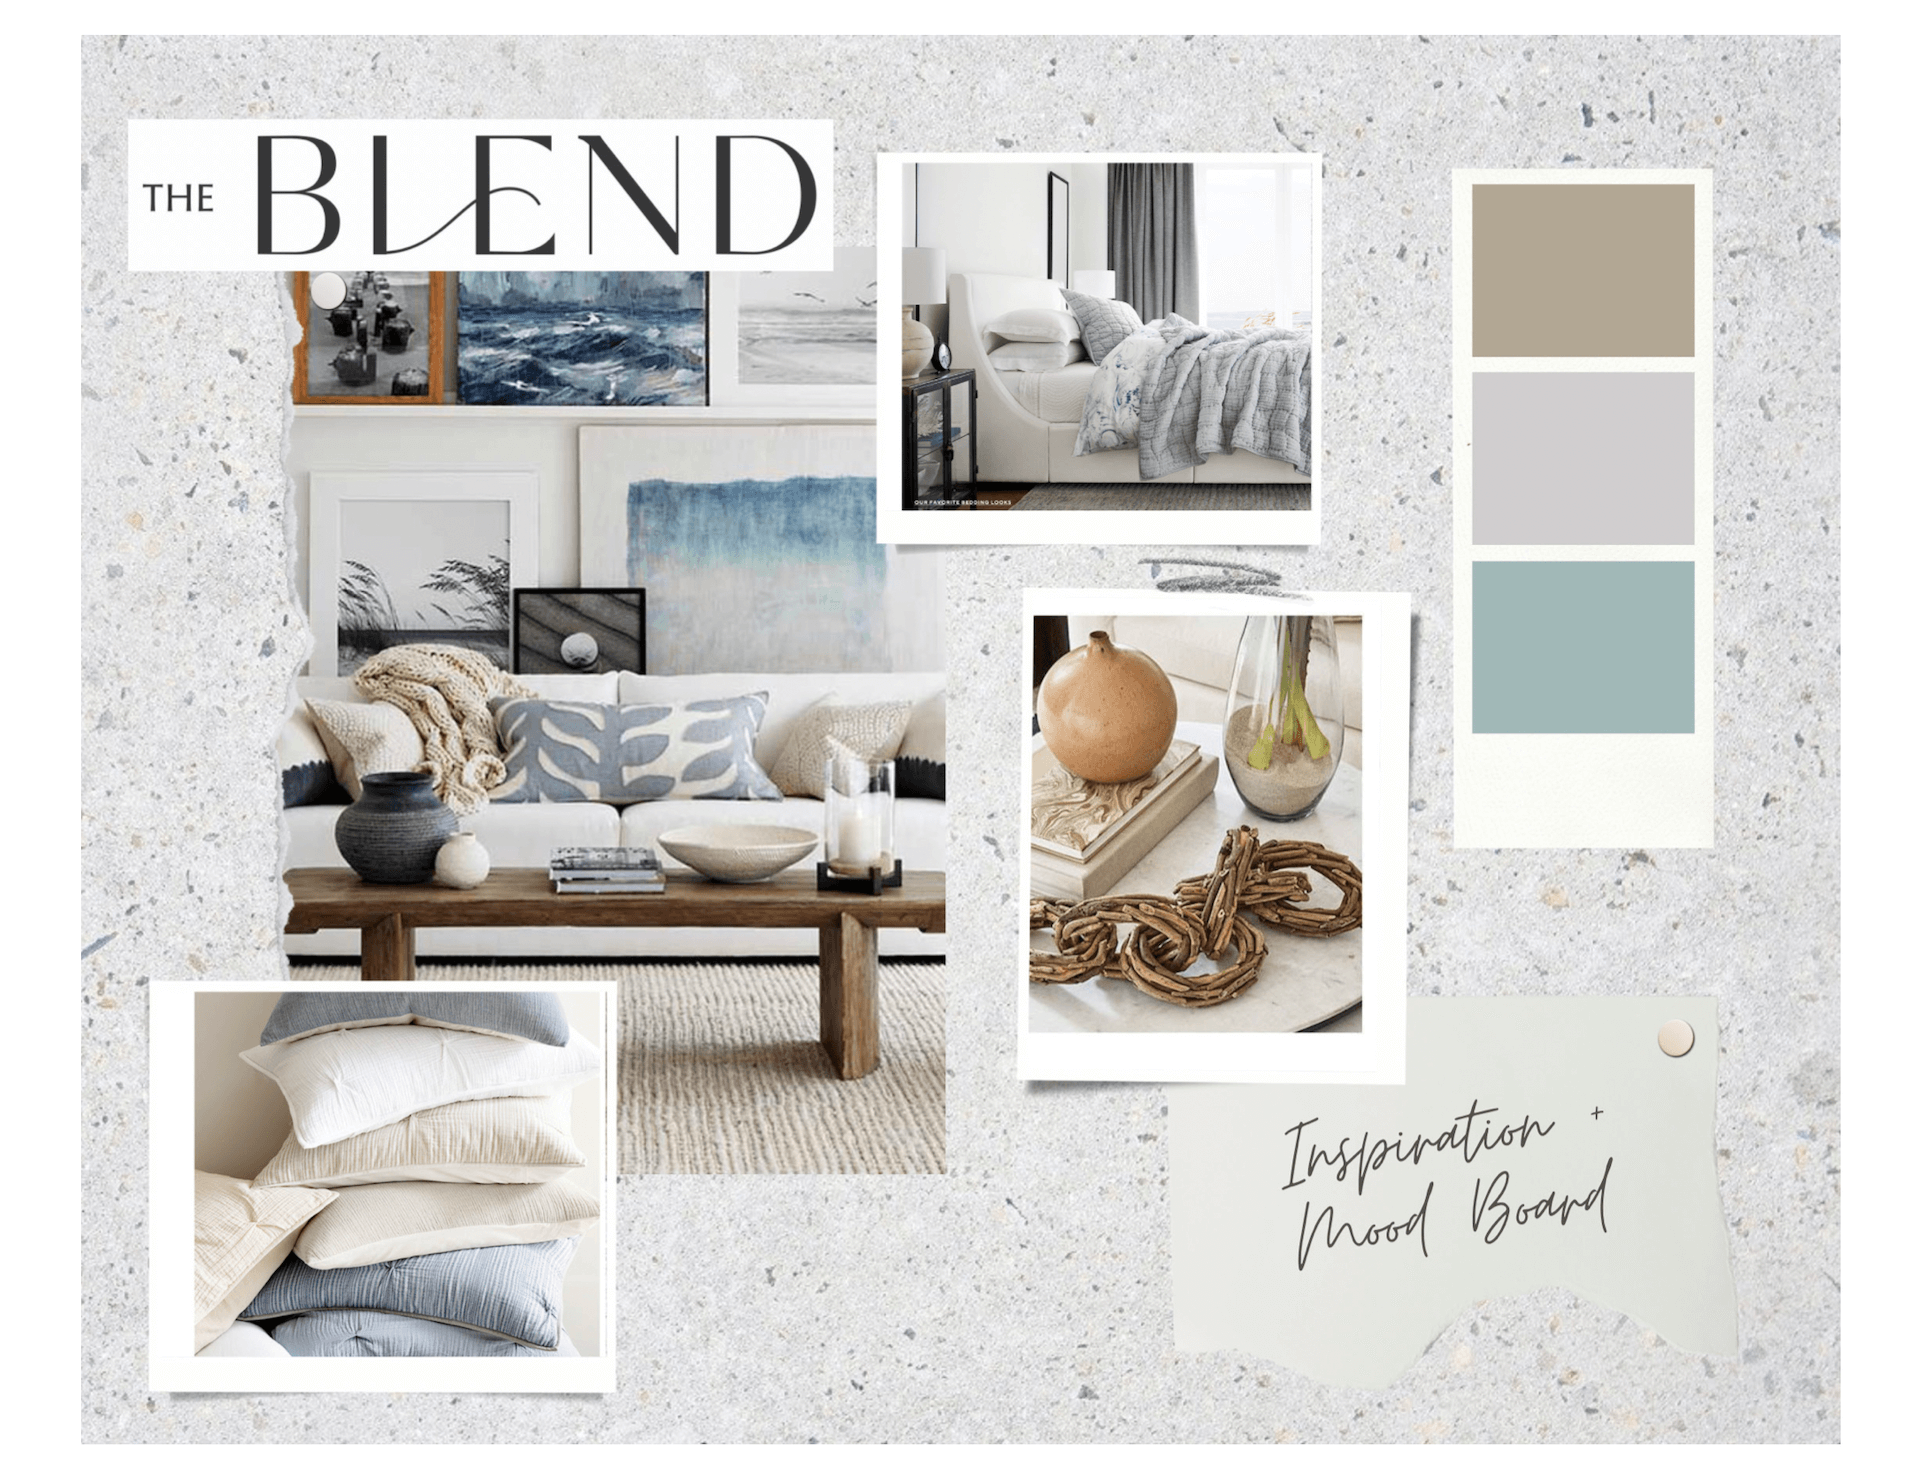
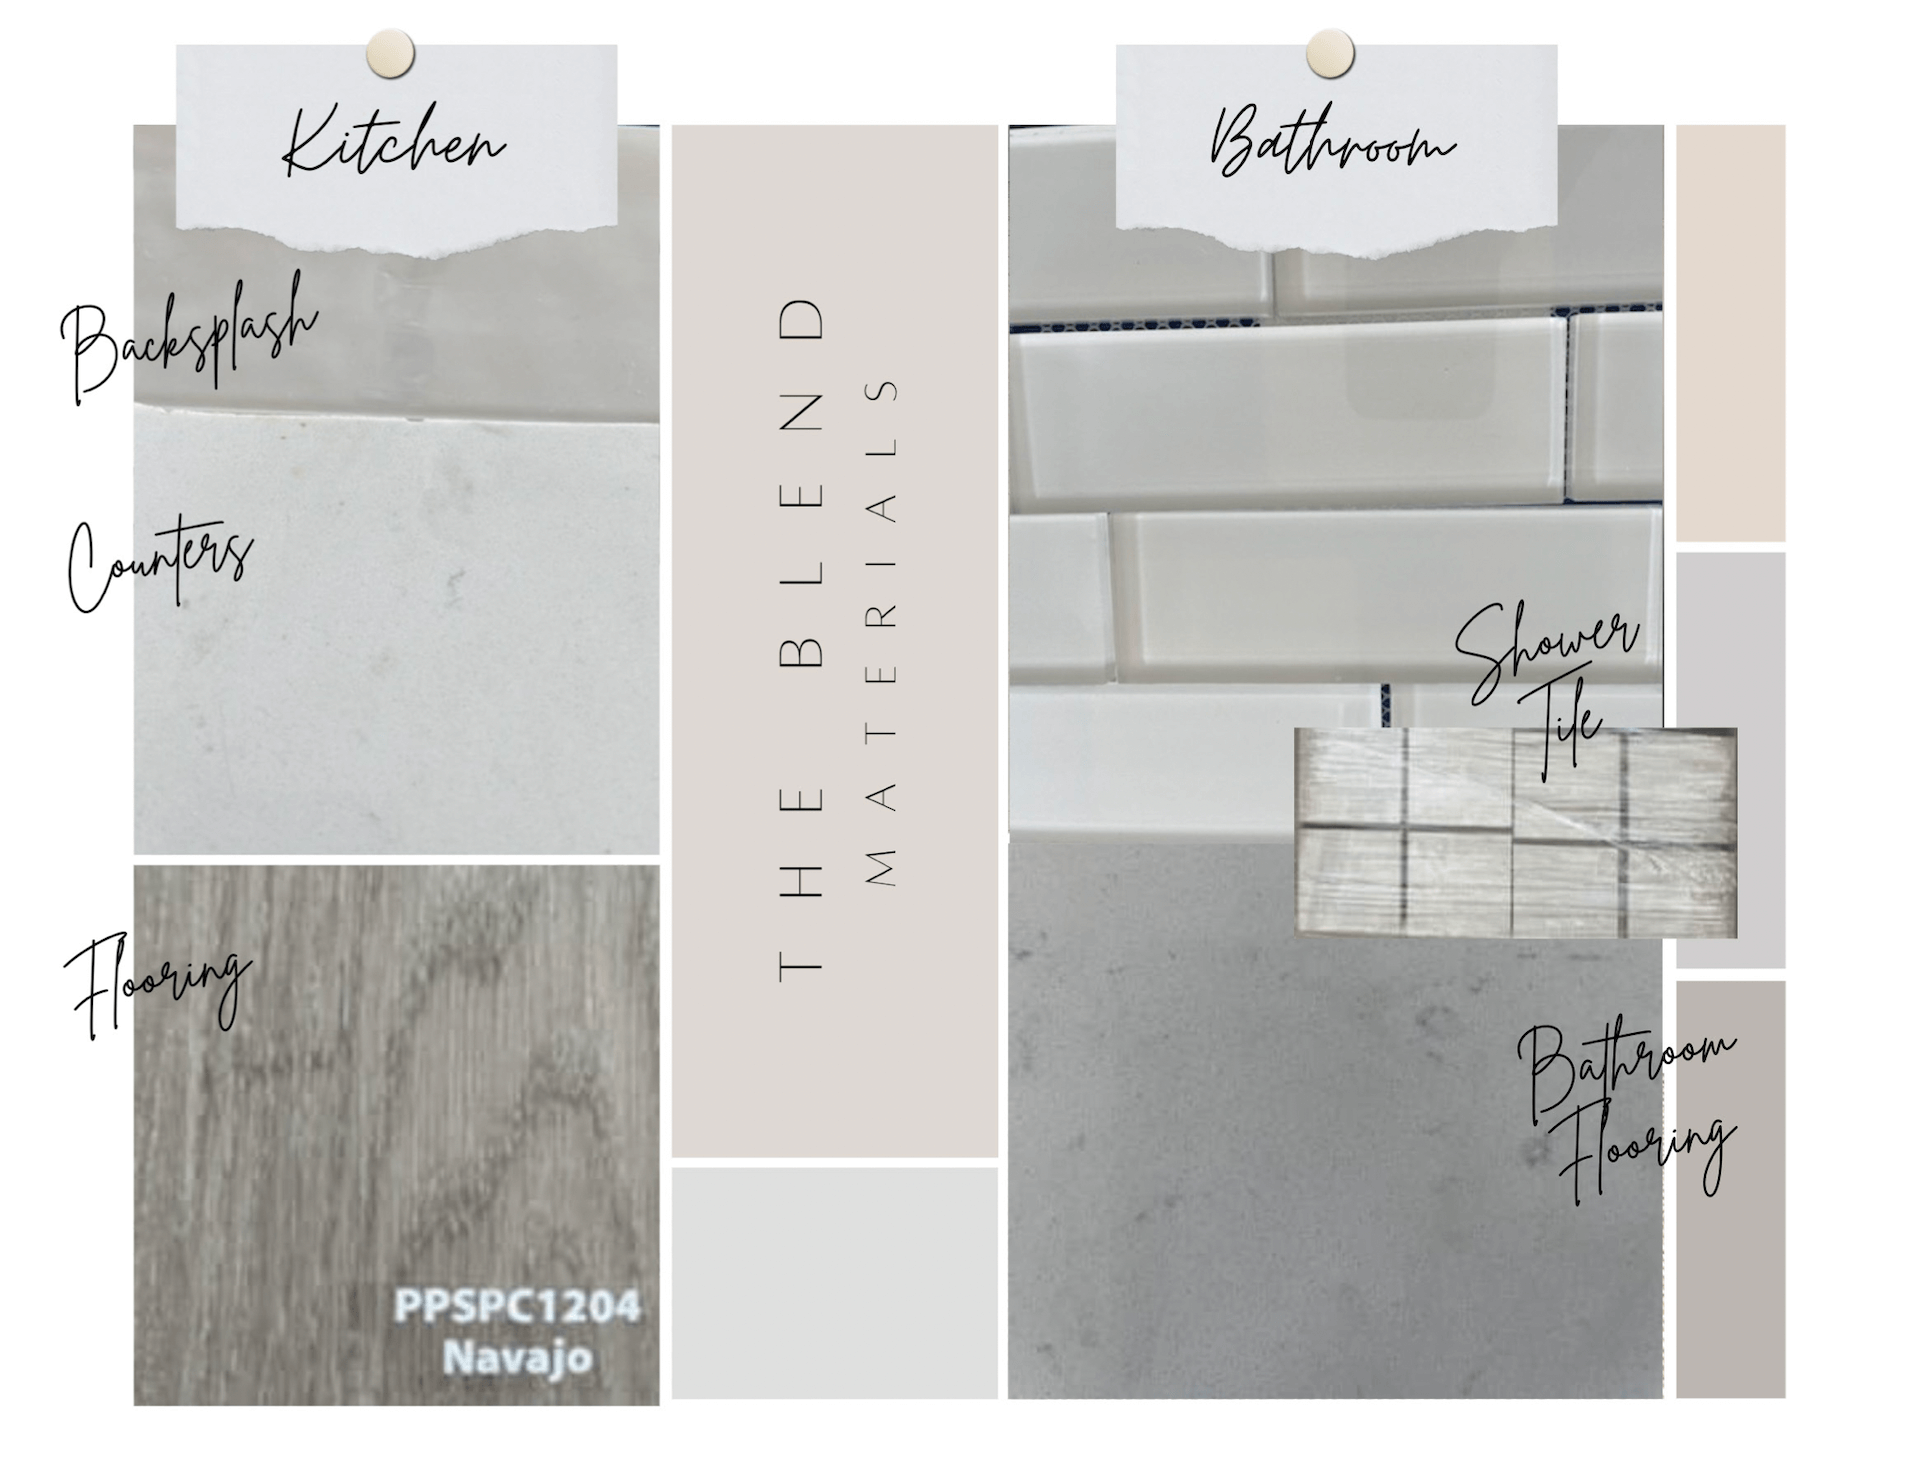
To begin the project, our client Alex sent us the following references:
- basic floor plans;
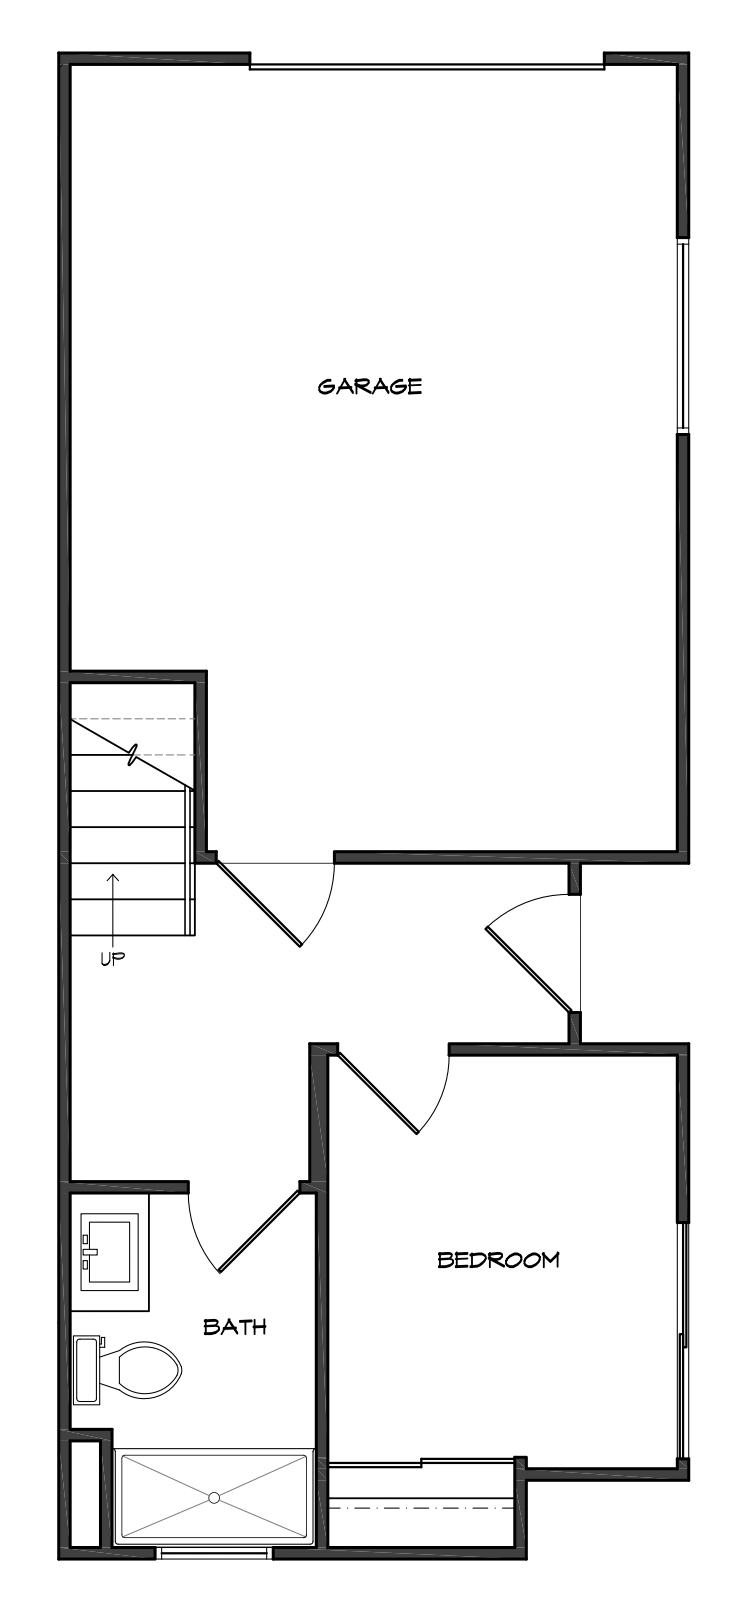
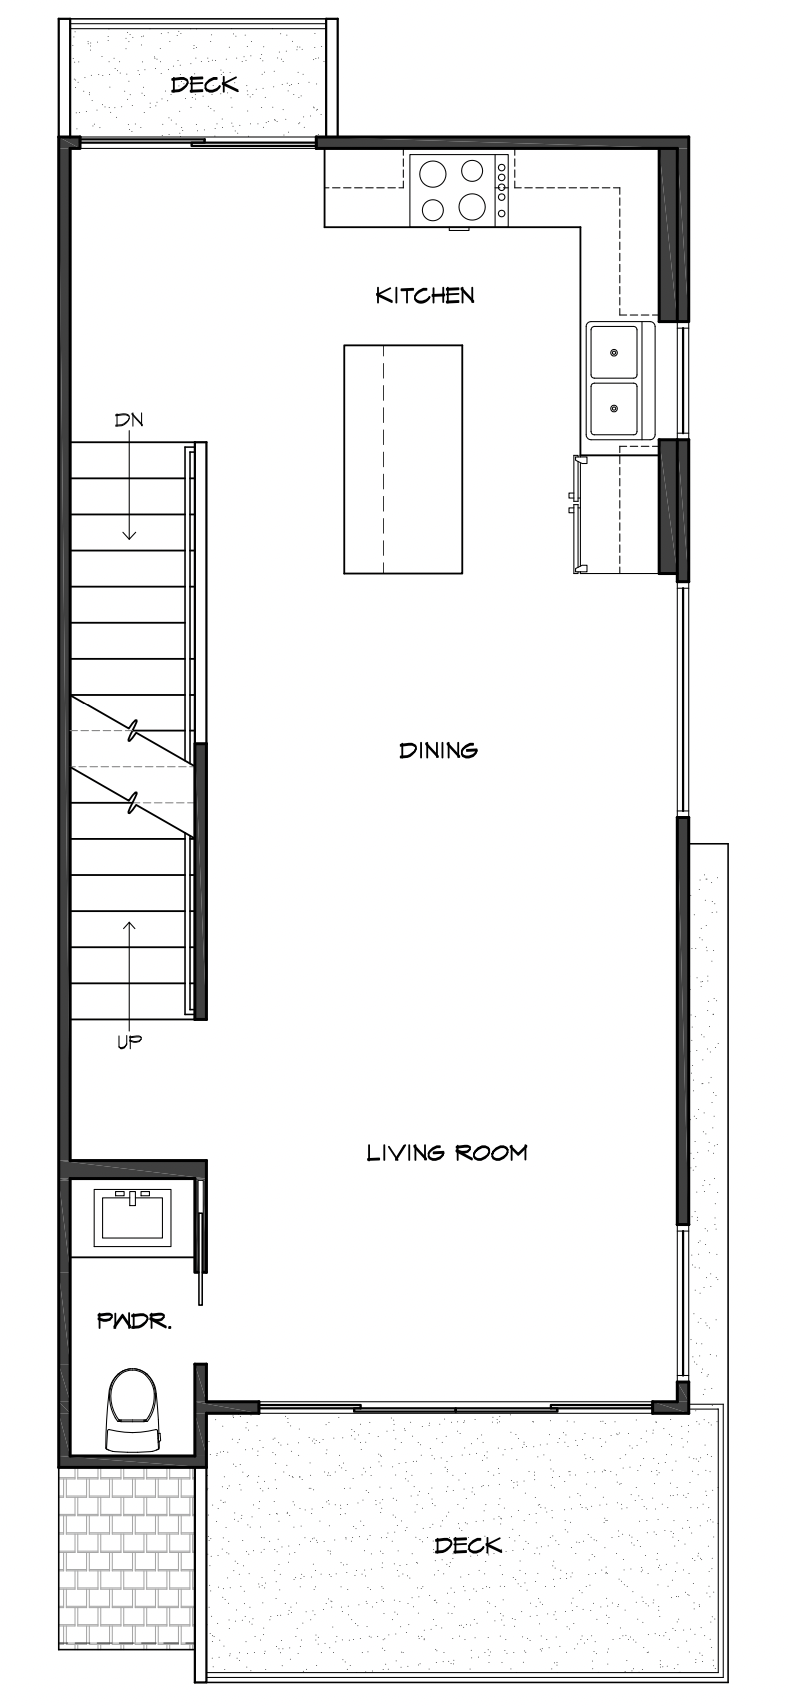
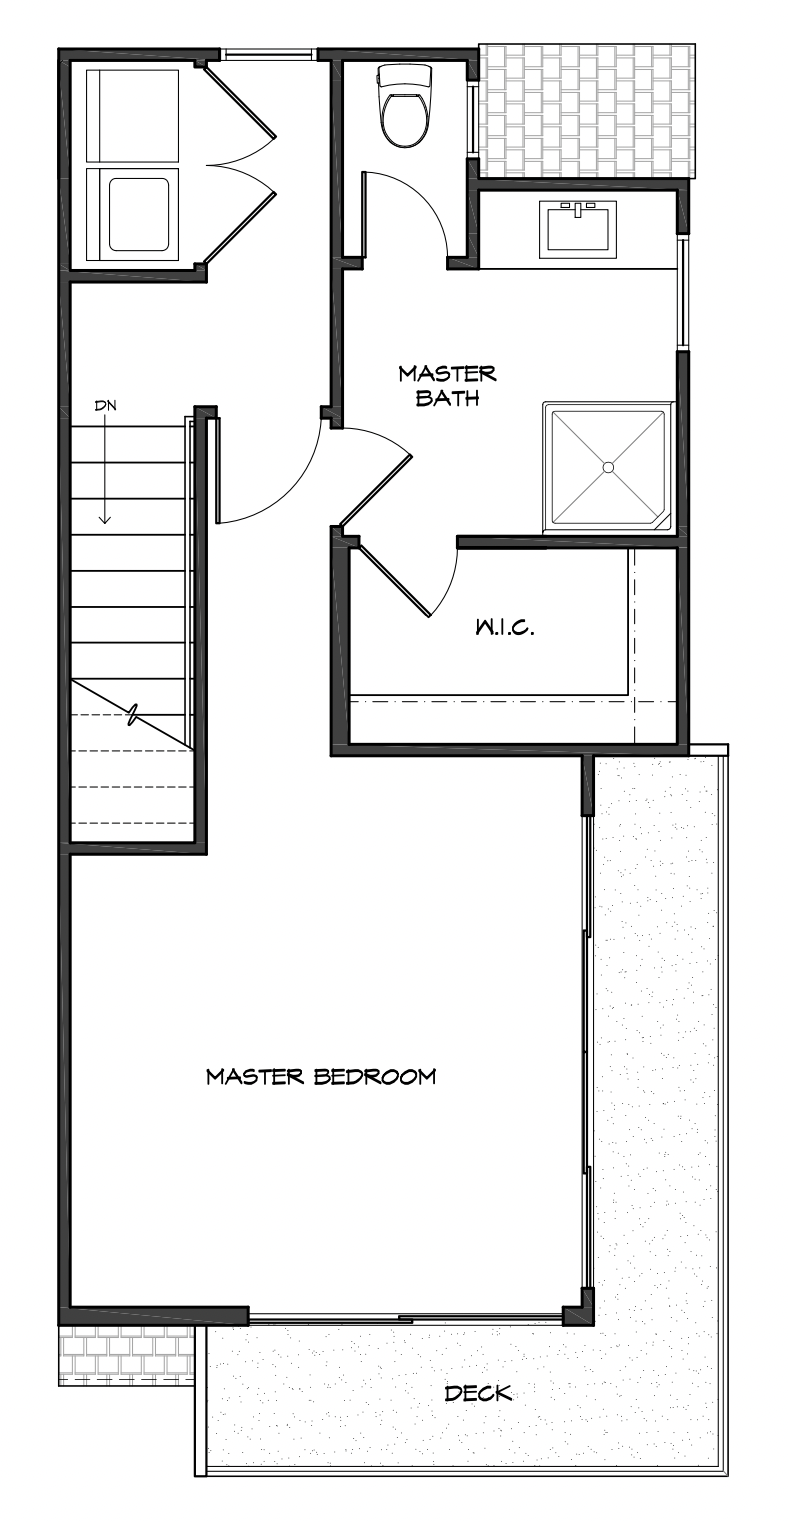
- detailed floor plans with dimensions and specifications;
- a moodboard for interior design.
Now, let’s see how our 3D artists used these references to create a 360o tour.
Workflow Process
The 3D virtual tour rendering project had three main parts:
- Building 3D rooms according to the floor plans of the real estate unit and filling them with furniture and decor based on the moodboard.
- Creating a panoramic render for each room.
- Putting the tour together in the Pano2VR software.
And now, let us walk you through the process in detail and show how exactly we visualized each floor in this virtual tour for real estate marketing.
#1. First Floor
This part of the unit included four spaces:
- hallway;
- guest bedroom;
- guest bathroom;
- garage.
As there was no request for custom modeling of interior elements, we turned to our library of over 50,000 ready-to-use 3D assets. Our team selected the furniture, fixtures, decor, and textures according to the moodboard received from the client.
Below, you can see the first panoramic renders of all four rooms that we sent for revision to Alex.
This stage of the 3D rendering for real estate developers had three revision rounds. We were asked to change some elements of the interiors. The corrections included:
- replacing the chandelier in the hallway;
- removing the brick from the bedroom wall;
- replacing the tub, sink, cabinet, and toilet in the bathroom;
- adding an electric vehicle charger and a spot for trash cans in the garage;
- changing colors and/or finishes of the wood floors, stair rails, and plumbing fixtures.
And here are the final results that Alex approved.
Later, our 3D artists used the above renderings to create the first floor in the virtual tour for real estate listing.
#2. Second Floor
Here, we needed to visualize the following spaces:
- living room;
- kitchen and dining area;
- powder room.
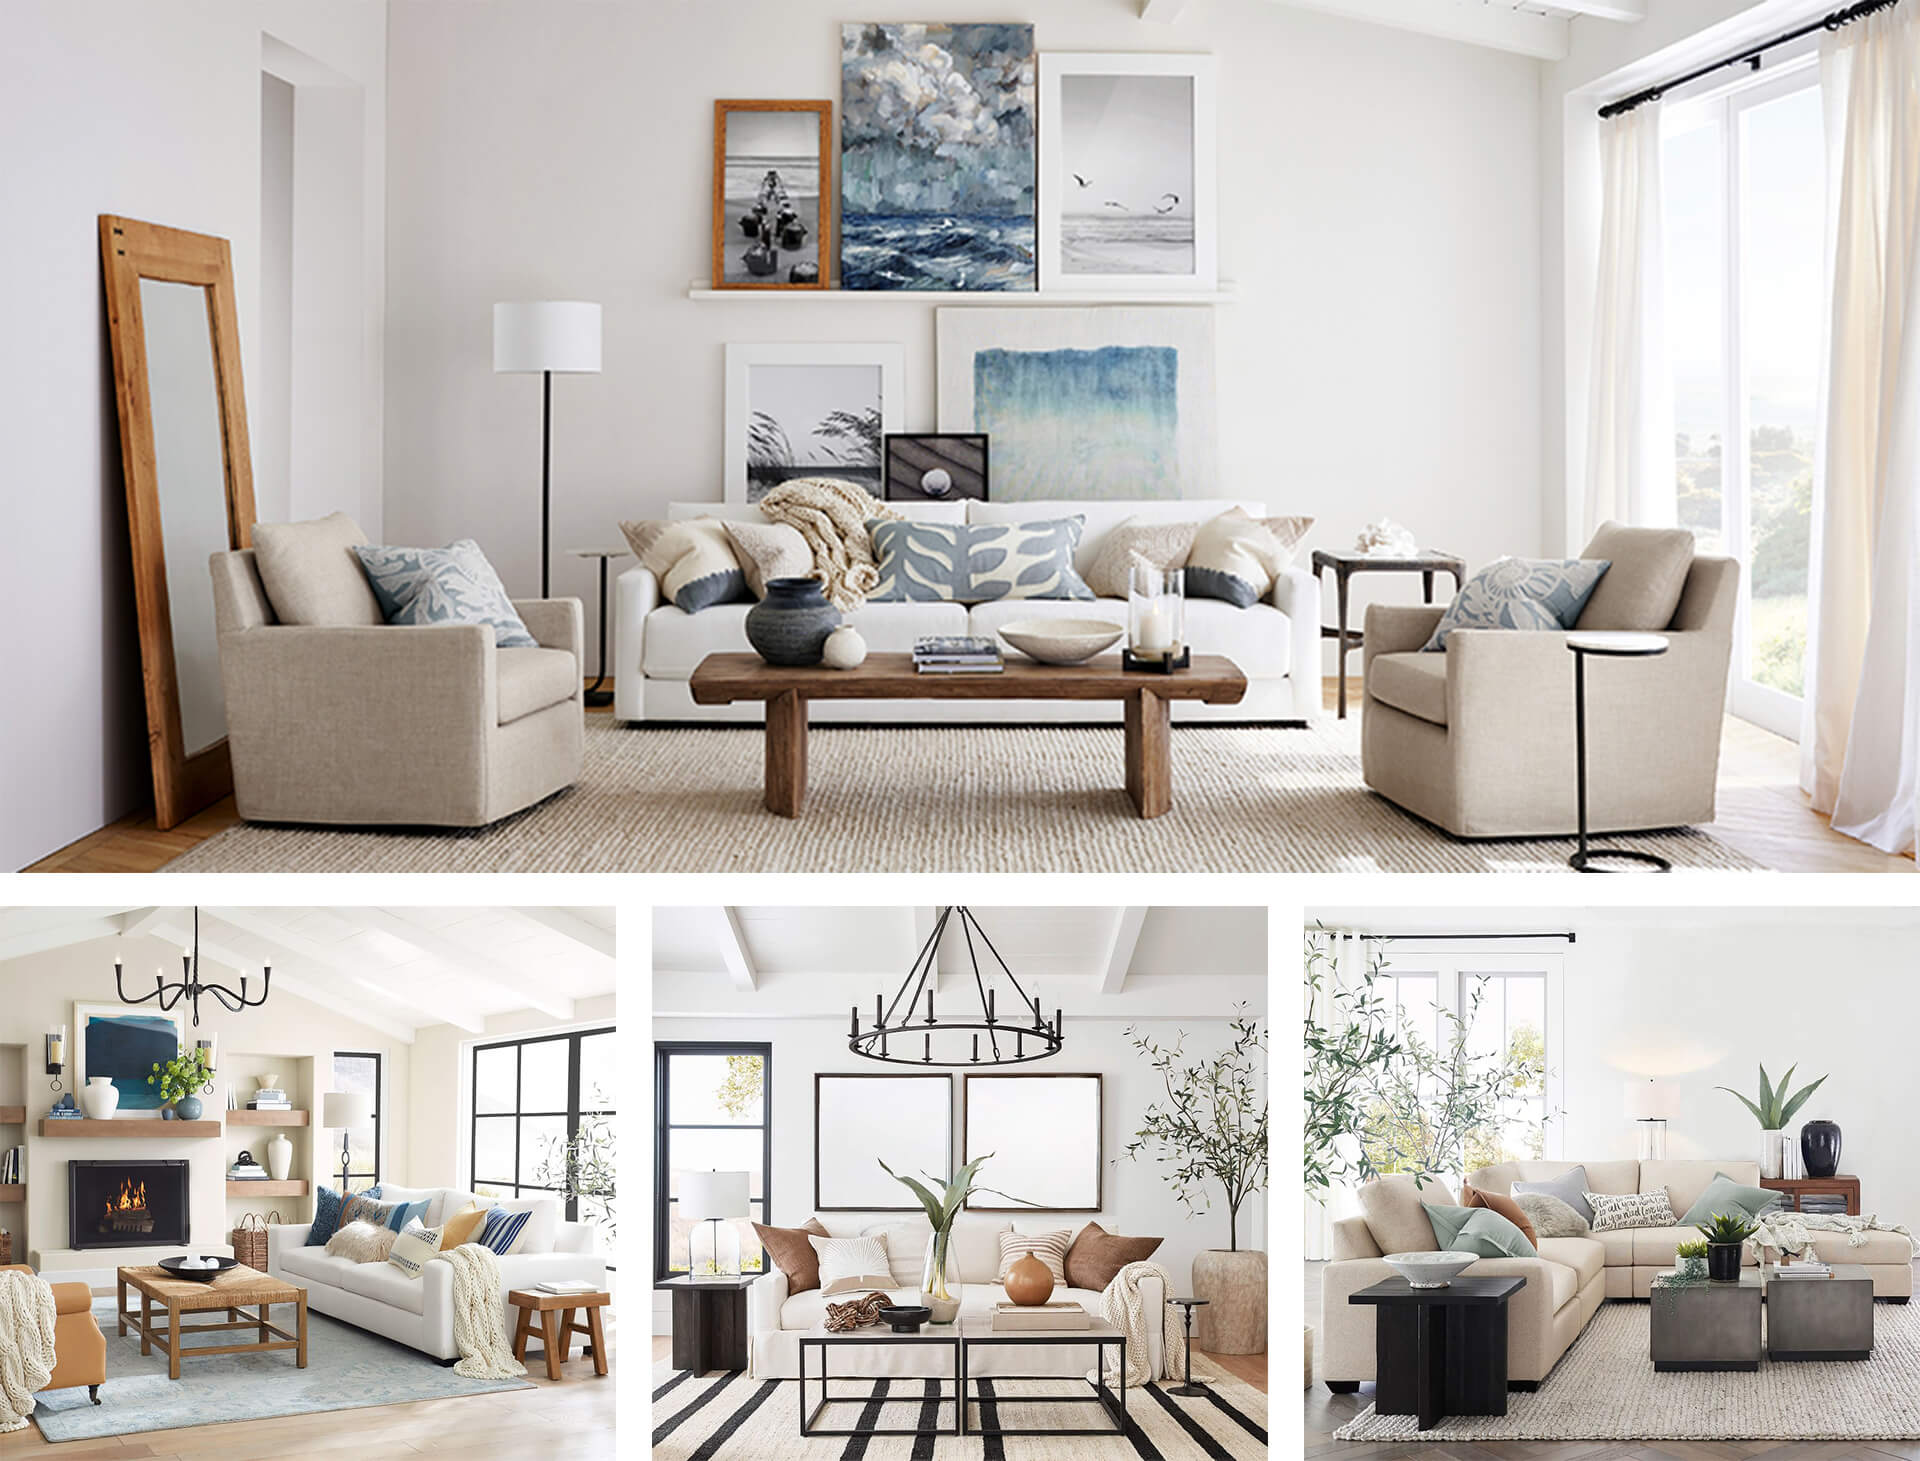
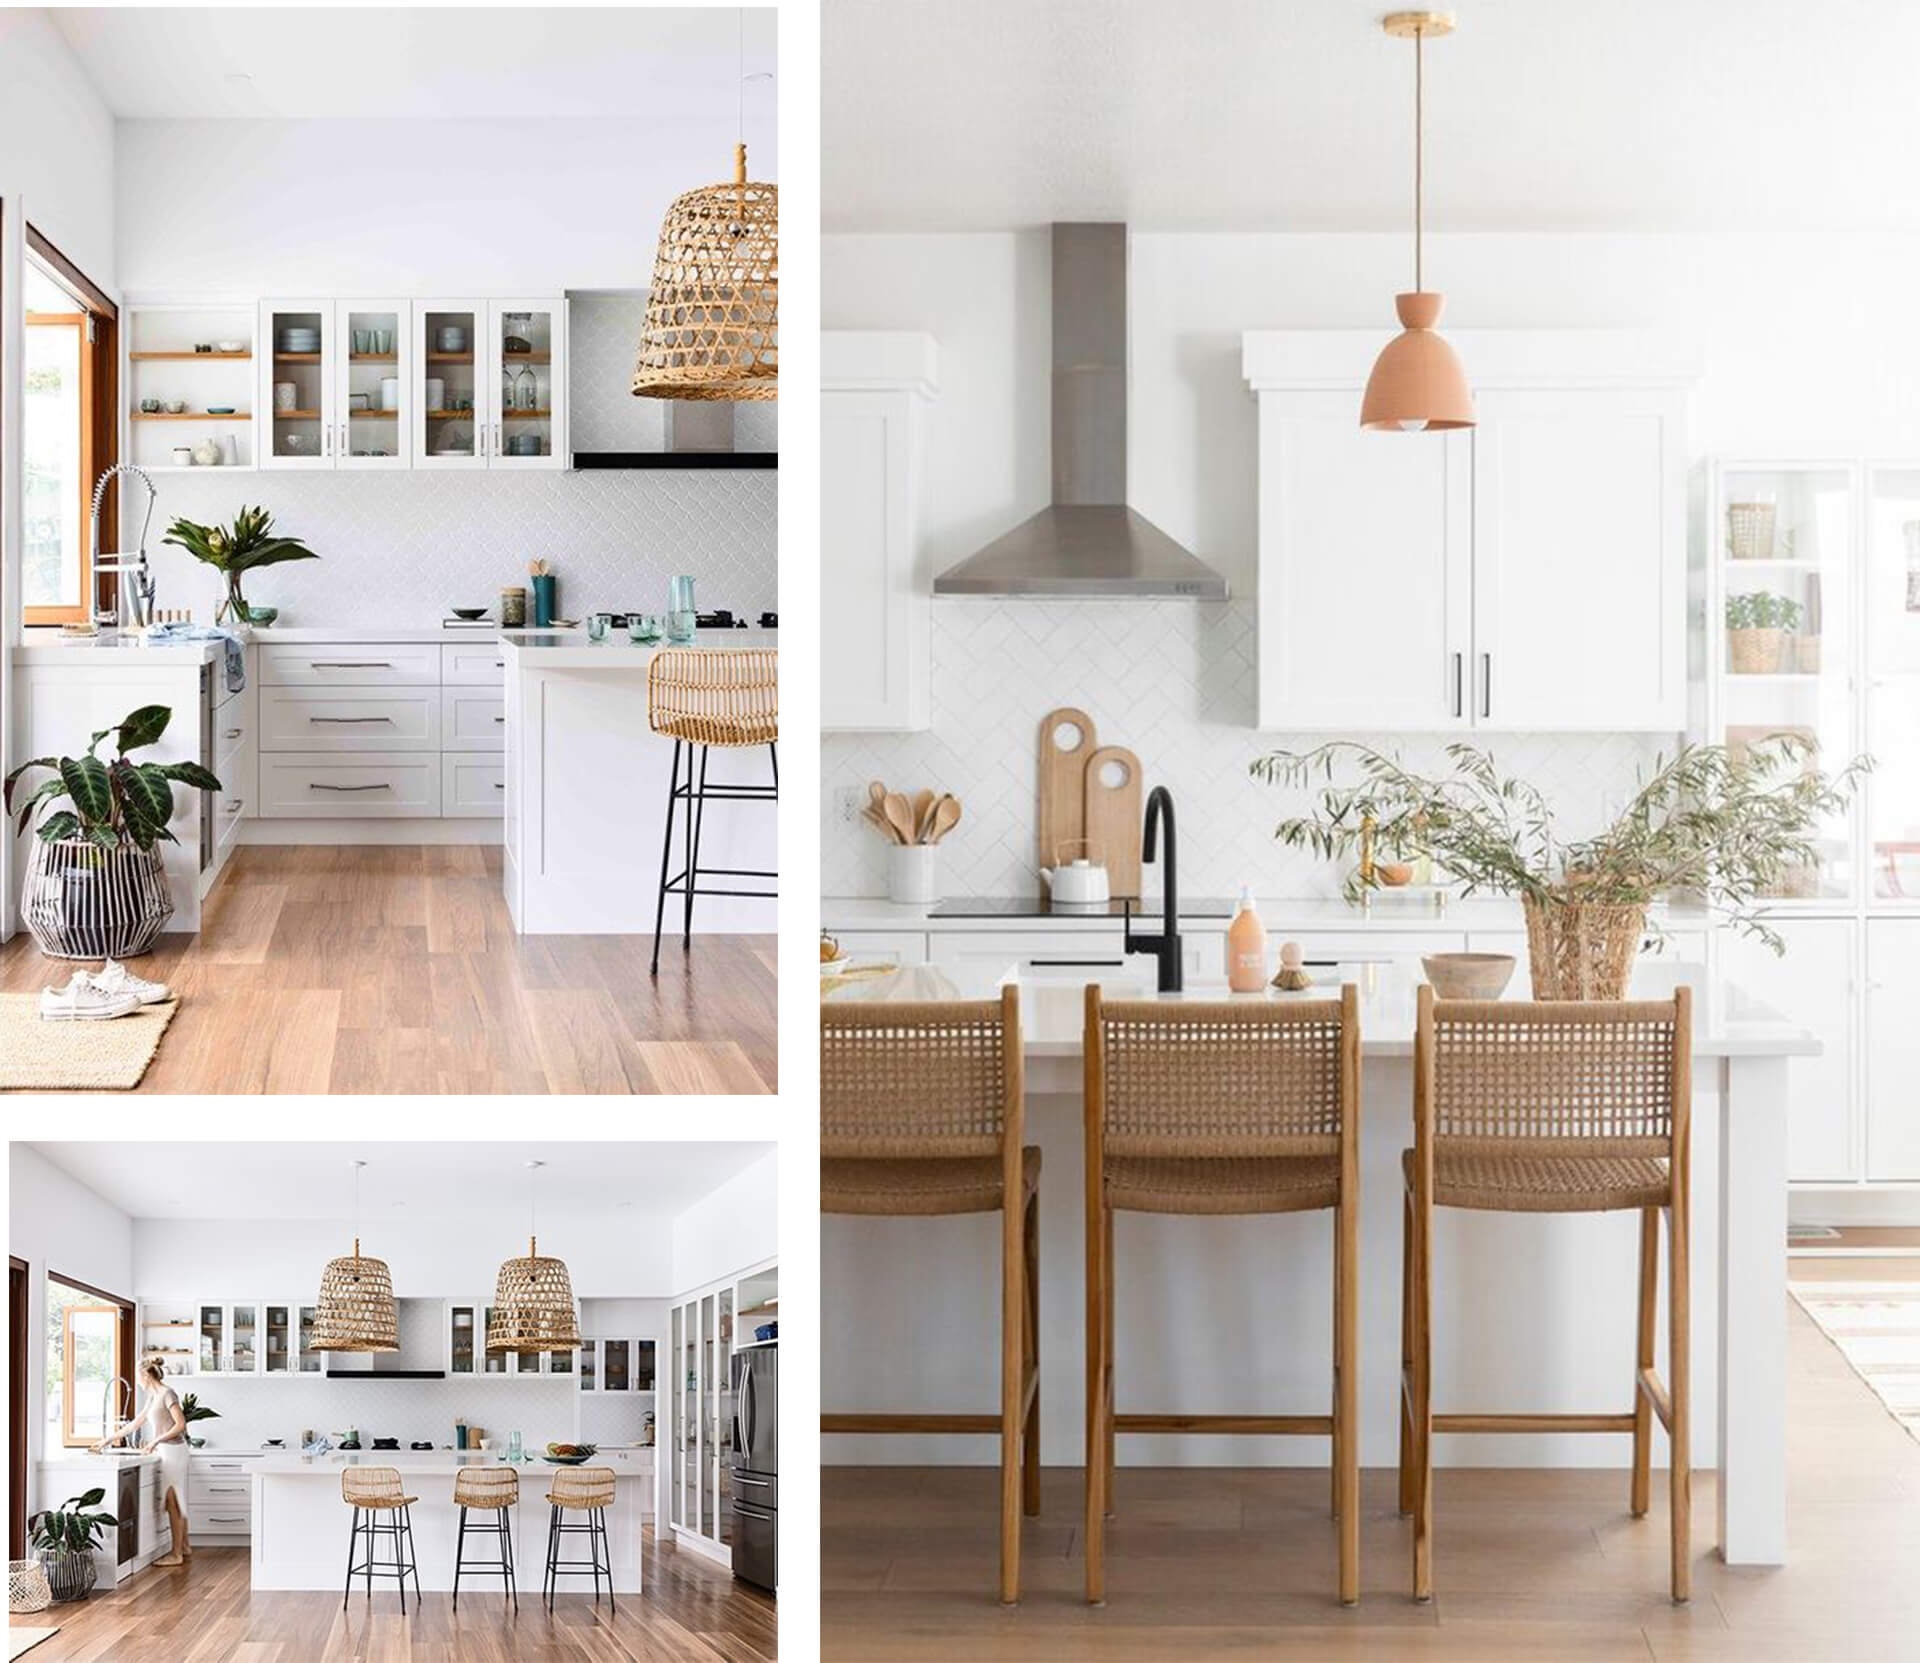
The first thing our CGI specialists did was specify the style direction that they were to take when designing the virtual interiors. For that, they selected over a dozen visual references for the key zones — kitchen and living room — and sent them to the client. Her feedback helped us significantly minimize further corrections.
Take your design presentation to a new level with interior rendering
Below, you can check out the style references Alex approved for the living room.
And here are the images she and her team liked for the kitchen styling.
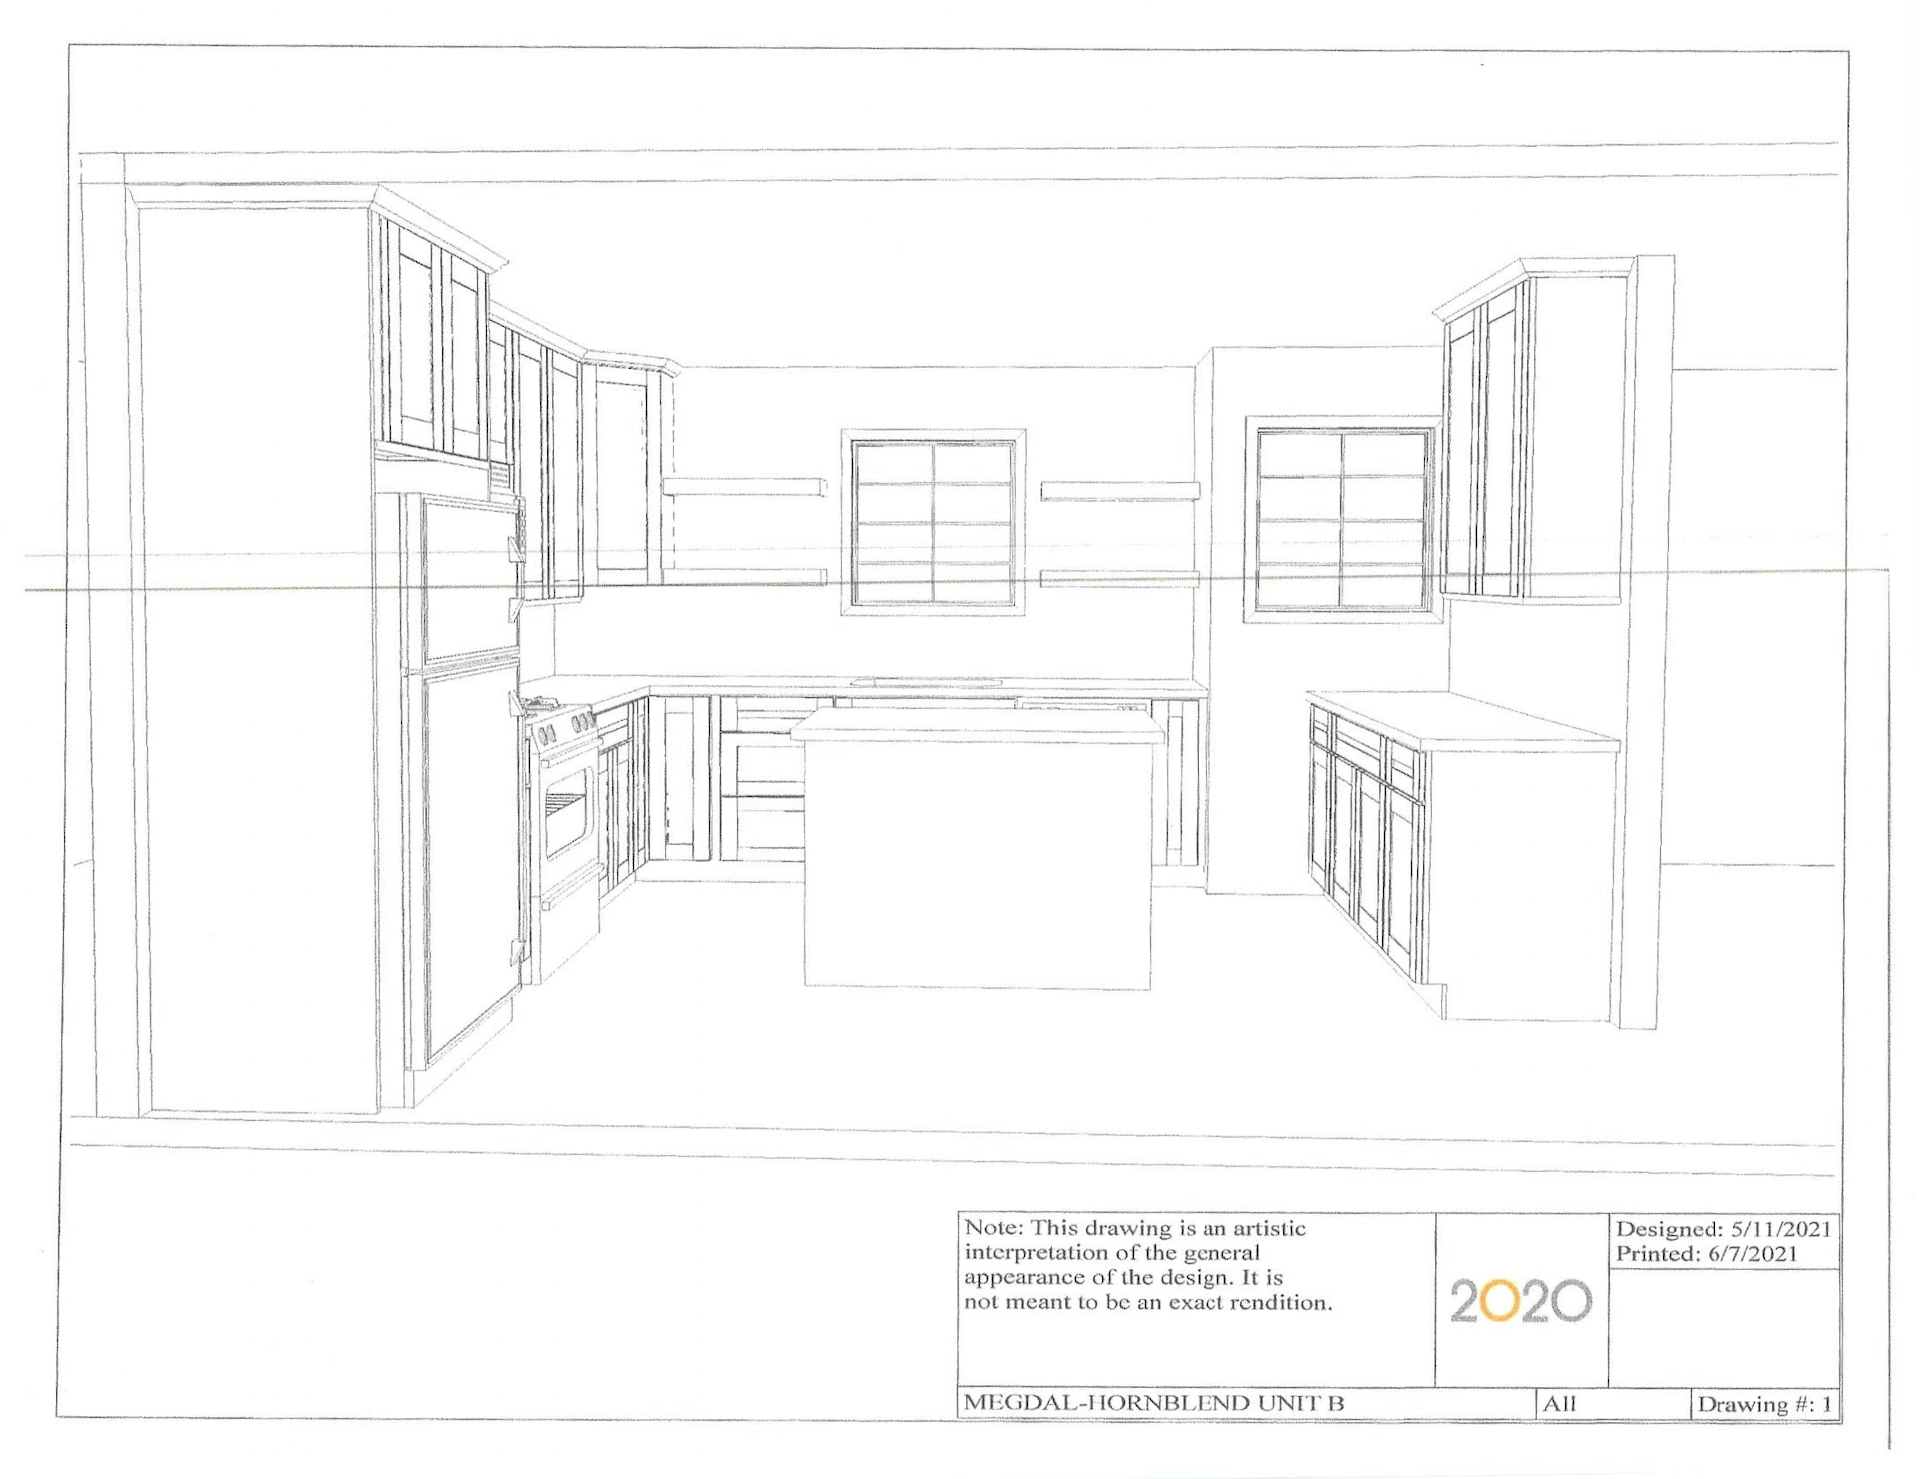
The client also provided us with this approximate design drawing that we used to model the kitchen.
Using the references, our 3D artists made the first panoramic renders of the three rooms on the second floor. You can see them below.
Just like the previous part of the project, this one had three revision rounds. During those, we made the following changes in the interior renderings:
- replaced the chandelier in the living room;
- changed the background for the window views according to the new video reference Alex sent us;
- changed the kitchen island according to the design updates from the client’s team;
- replaced the sink and toilet with wall-mounted options as per the new changes in the design;
- changed the balcony doors and windows to white.
You can check out the approved images below.
Now, let’s move on to the next stage of the production of the virtual tour for the real estate complex.
#3. Third Floor
The top floor had two rooms:
- master bedroom;
- master bathroom.
First, our CGI specialists needed more style references for the master bedroom. The goal was to make sure Alex and her team would love the result of interior 3D rendering services at first sight. For that, our team made a selection of fifteen pictures of stylish interiors. In a nutshell, it was just like what they did for the kitchen and living room. The real estate agents checked the images and chose the four they liked the most. You can see them below.
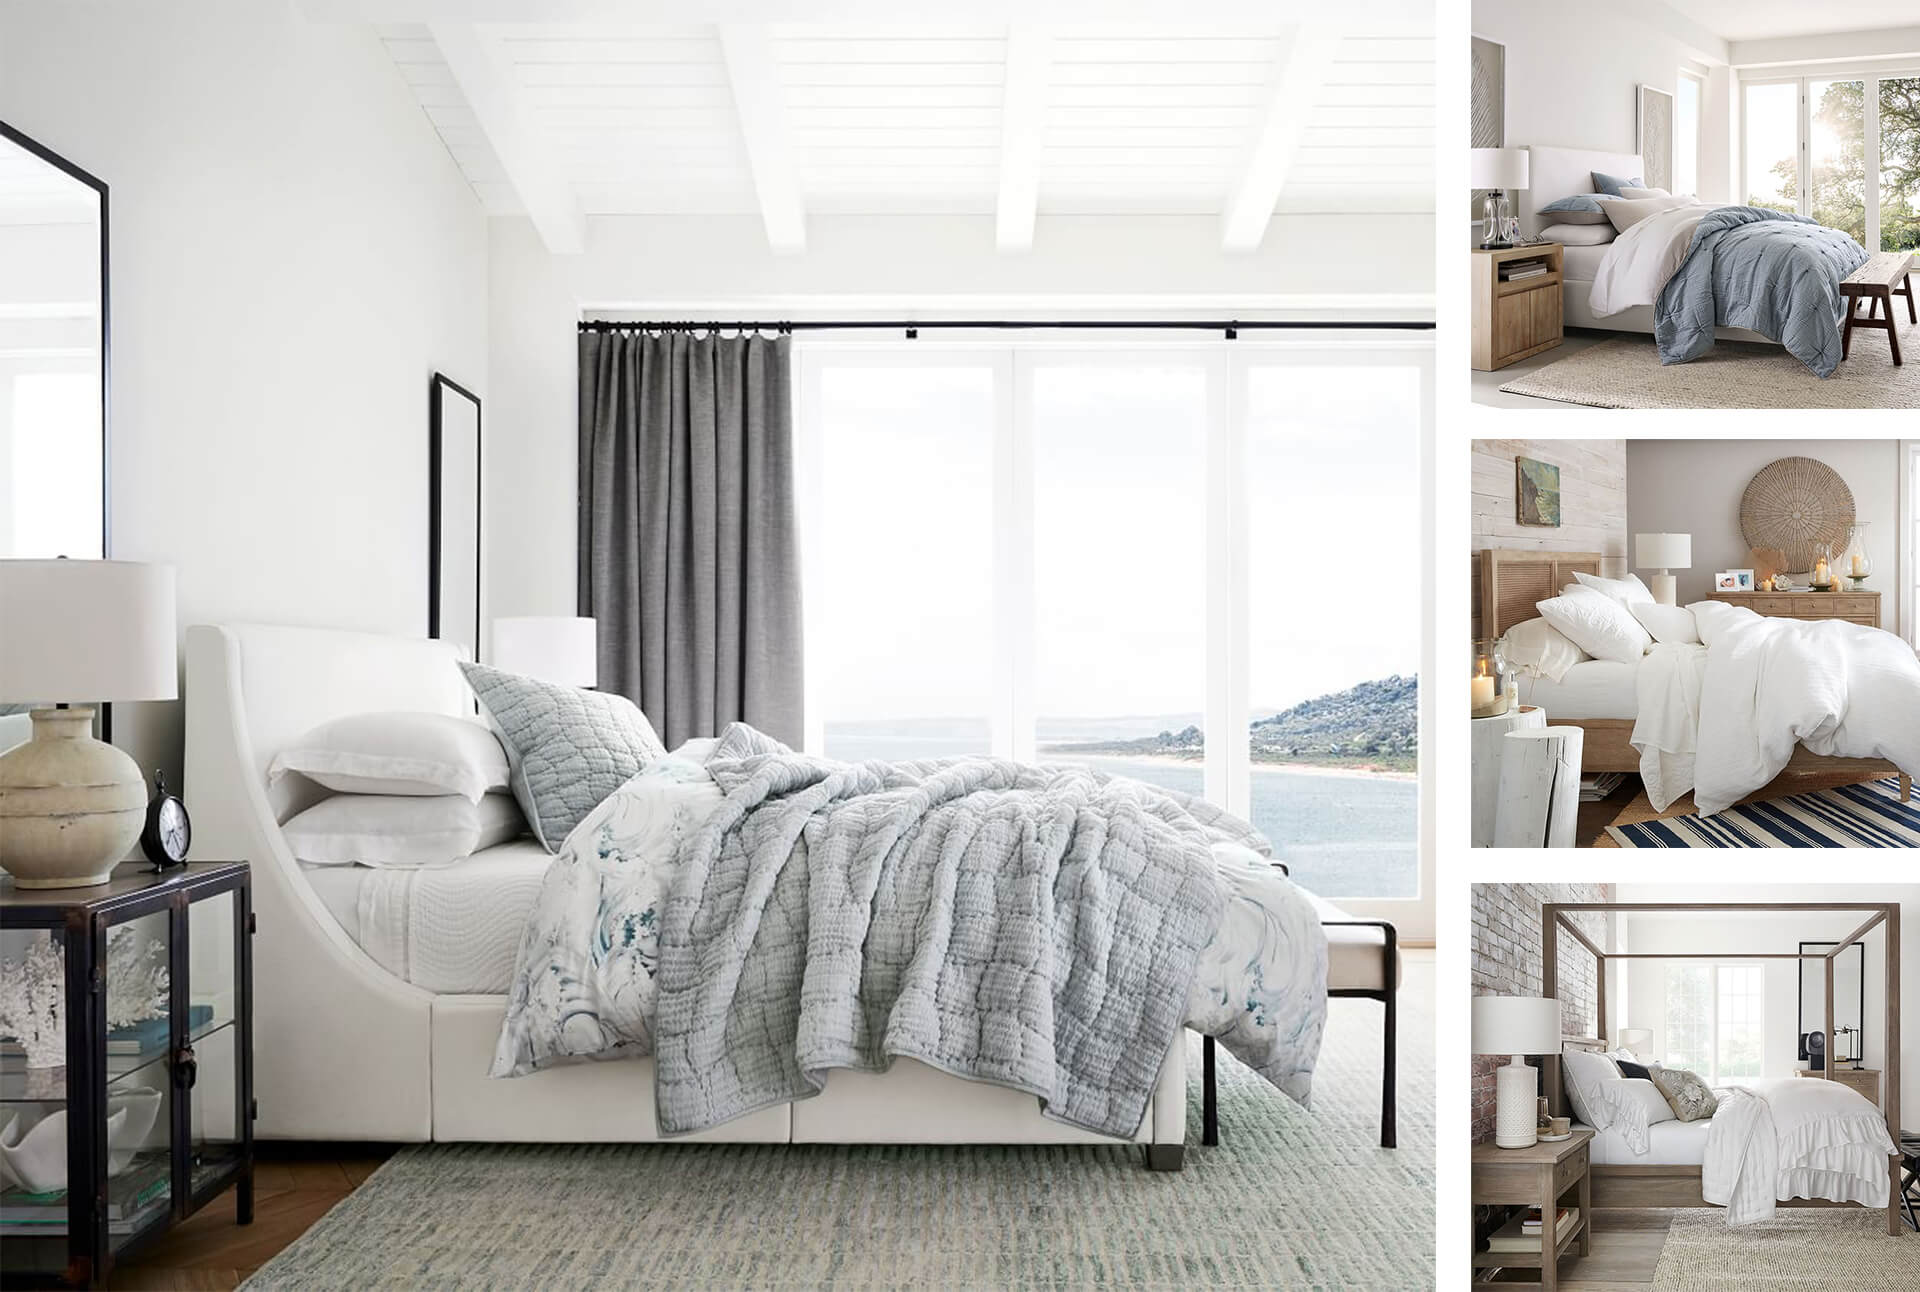
Once the style direction for the master bedroom was clear, we started to work on the final renders for the virtual 3D tour. These are the first visuals we sent for the client’s review.
There were two revision rounds in this stage of 3D rendering for real estate. Alex gave us notes on some minor aspects of the design. Namely, we:
- updated the window view in the bedroom according to the new references;
- replaced the sink and the cabinet in the bathroom;
- changed the size of the shower cabin according to the new design update;
- replaced the tiling in the bathroom with paint everywhere except for the shower area.
Below, you can see the final panoramic renderings of the master bedroom and bathroom.
And now, let’s take a look at the final 360o tour!
The Result
At the final stage of work, our specialists put together the panoramic renders using the Pano2VR program. They also added navigation buttons, and then the 3D tour was ready. Overall, the creation of this virtual tour for the real estate complex took 120 hours. Here is the result!
In the end, the client received from us all the renderings we created and an HTML file with the virtual tour. It was ready for use on the website of the real estate complex.
If you want to see all three CG tours we’ve made within this project, visit The Blend’s website!
Showcase your architectural project like a true work of art, brought to life with cutting-edge AI-powered CGI technology.
We loved working with Alex on this and the other tasks she gave us. Our team hopes that the virtual tours we created will help the real estate agents lease out the townhomes faster and with less effort. And we’ll be happy to do more projects together at any time.
Looking for top-quality CGI services to take your real estate promotion to the next level? Contact us at ArchiCGI and get a free consultation with one of our client managers!

Ana Wayne
Content Writer, Copywriter
Ana is a content writer for ArchiCGI. She has a passion for design and architecture - and for talking about it. Outside of work, she is a fan of sci-fi movies and a street food connoisseur.
Like this project? We’ve got plenty more! Check out these CGI beauties.


