

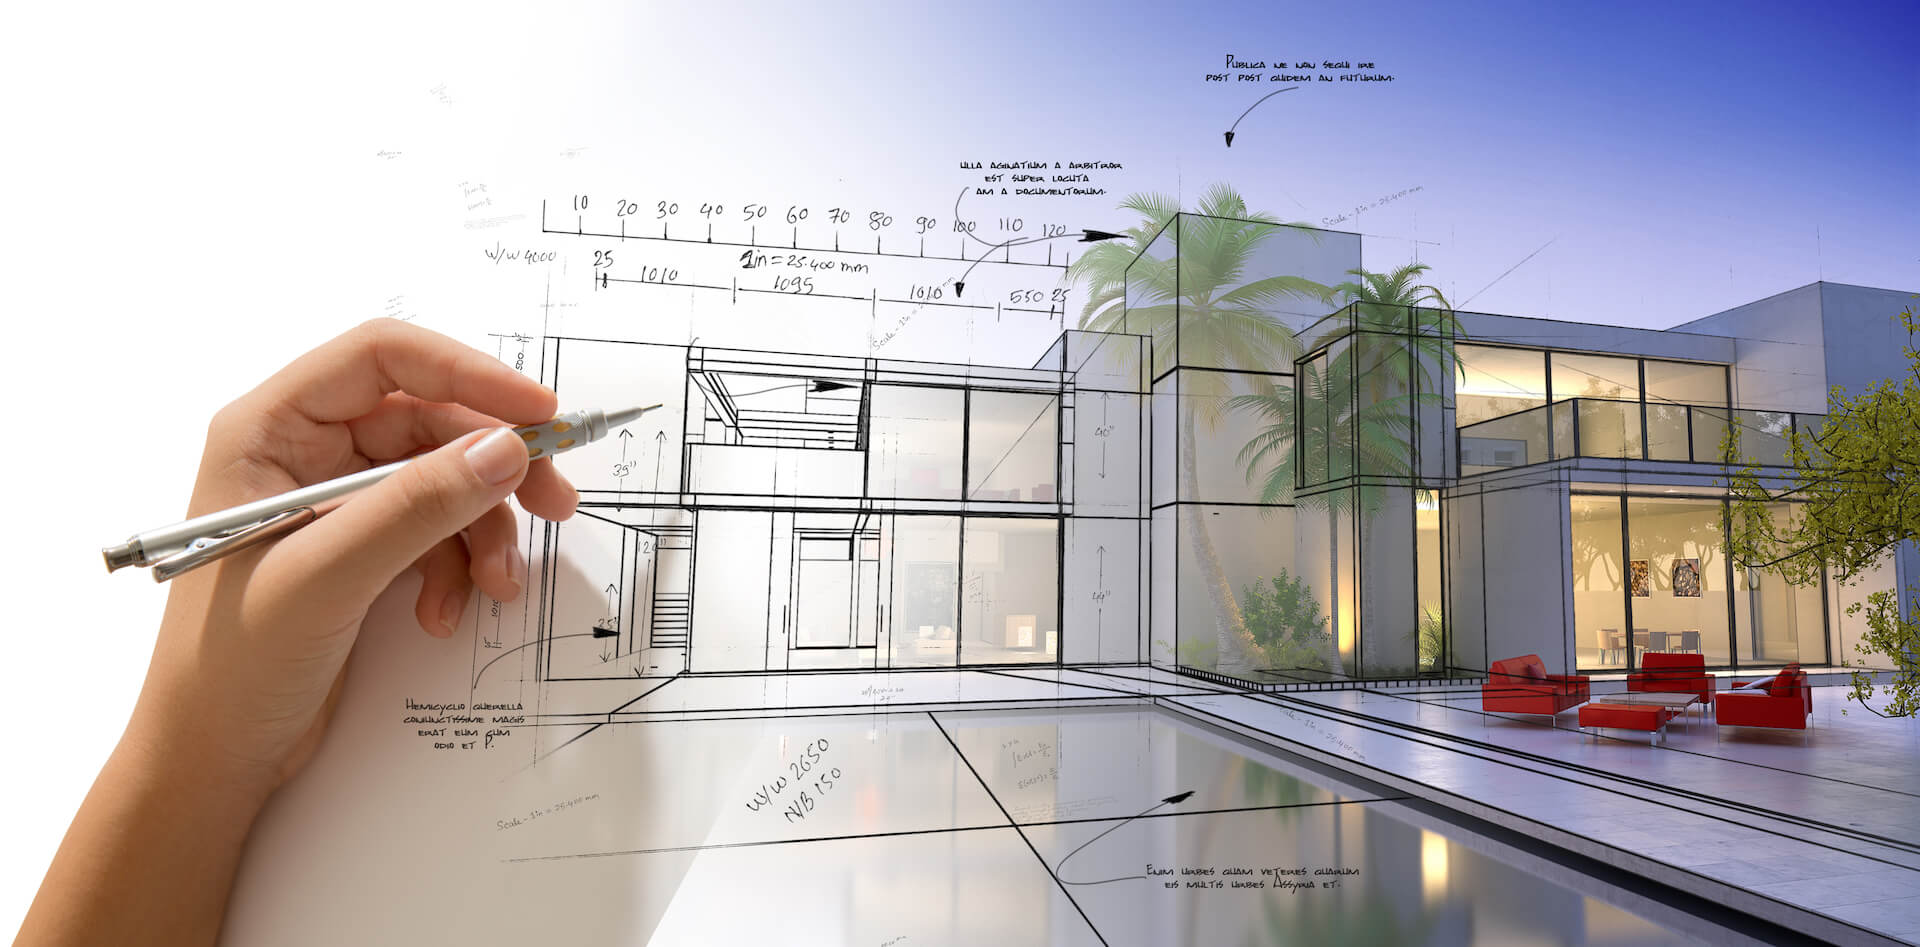
At ArchiCGI, every exterior 3D architectural rendering project follows a structured 4-step workflow designed to give clients full visibility and control at each stage. From brief submission to final 4K delivery, the process is organized through our CRM system — ensuring fast turnarounds, clear communication, and photorealistic results. Here is exactly what happens at each step of cooperation with an architectural visualization company.
#1. Submitting the Brief
Every 3D architectural rendering project begins at the same point: the client submitting a brief. What goes into that document determines almost everything that follows — timelines, revision rounds, and the realism of the final image.
A complete exterior renderings brief covers several distinct layers of information. The foundation is always architectural drawings — floor plans, elevations, and sections that define the geometry of the building. Alongside them, the client should provide lighting and mood references: photos or images that communicate the desired time of day, atmosphere, and emotional tone. Material and texture samples come next — whether as physical swatches, product links, or image references — followed by information about the surrounding context: neighboring buildings, street layout, landscaping, and any site-specific conditions that affect how the structure sits in its environment. When available, Revit 3D models and architectural sketches are a significant addition, as they give the team a spatial understanding that flat drawings alone cannot provide.
The difference between a detailed brief and a weak one is not subtle. A strong brief compresses the discovery phase and allows work to begin with clarity. A vague one — missing references, unspecified materials, or no context about the surroundings — creates a guessing game that costs time and often leads to results the client didn’t expect. This directly affects exterior rendering cost: projects with incomplete briefs tend to require more revision cycles, which adds hours and, consequently, budget.
The brief also shapes quality in a deeper way. When the team understands not just what the building looks like but how it should feel — the mood, the light, the relationship to its environment — the resulting images carry that intent. Good input produces good output. The brief is where that process begins.
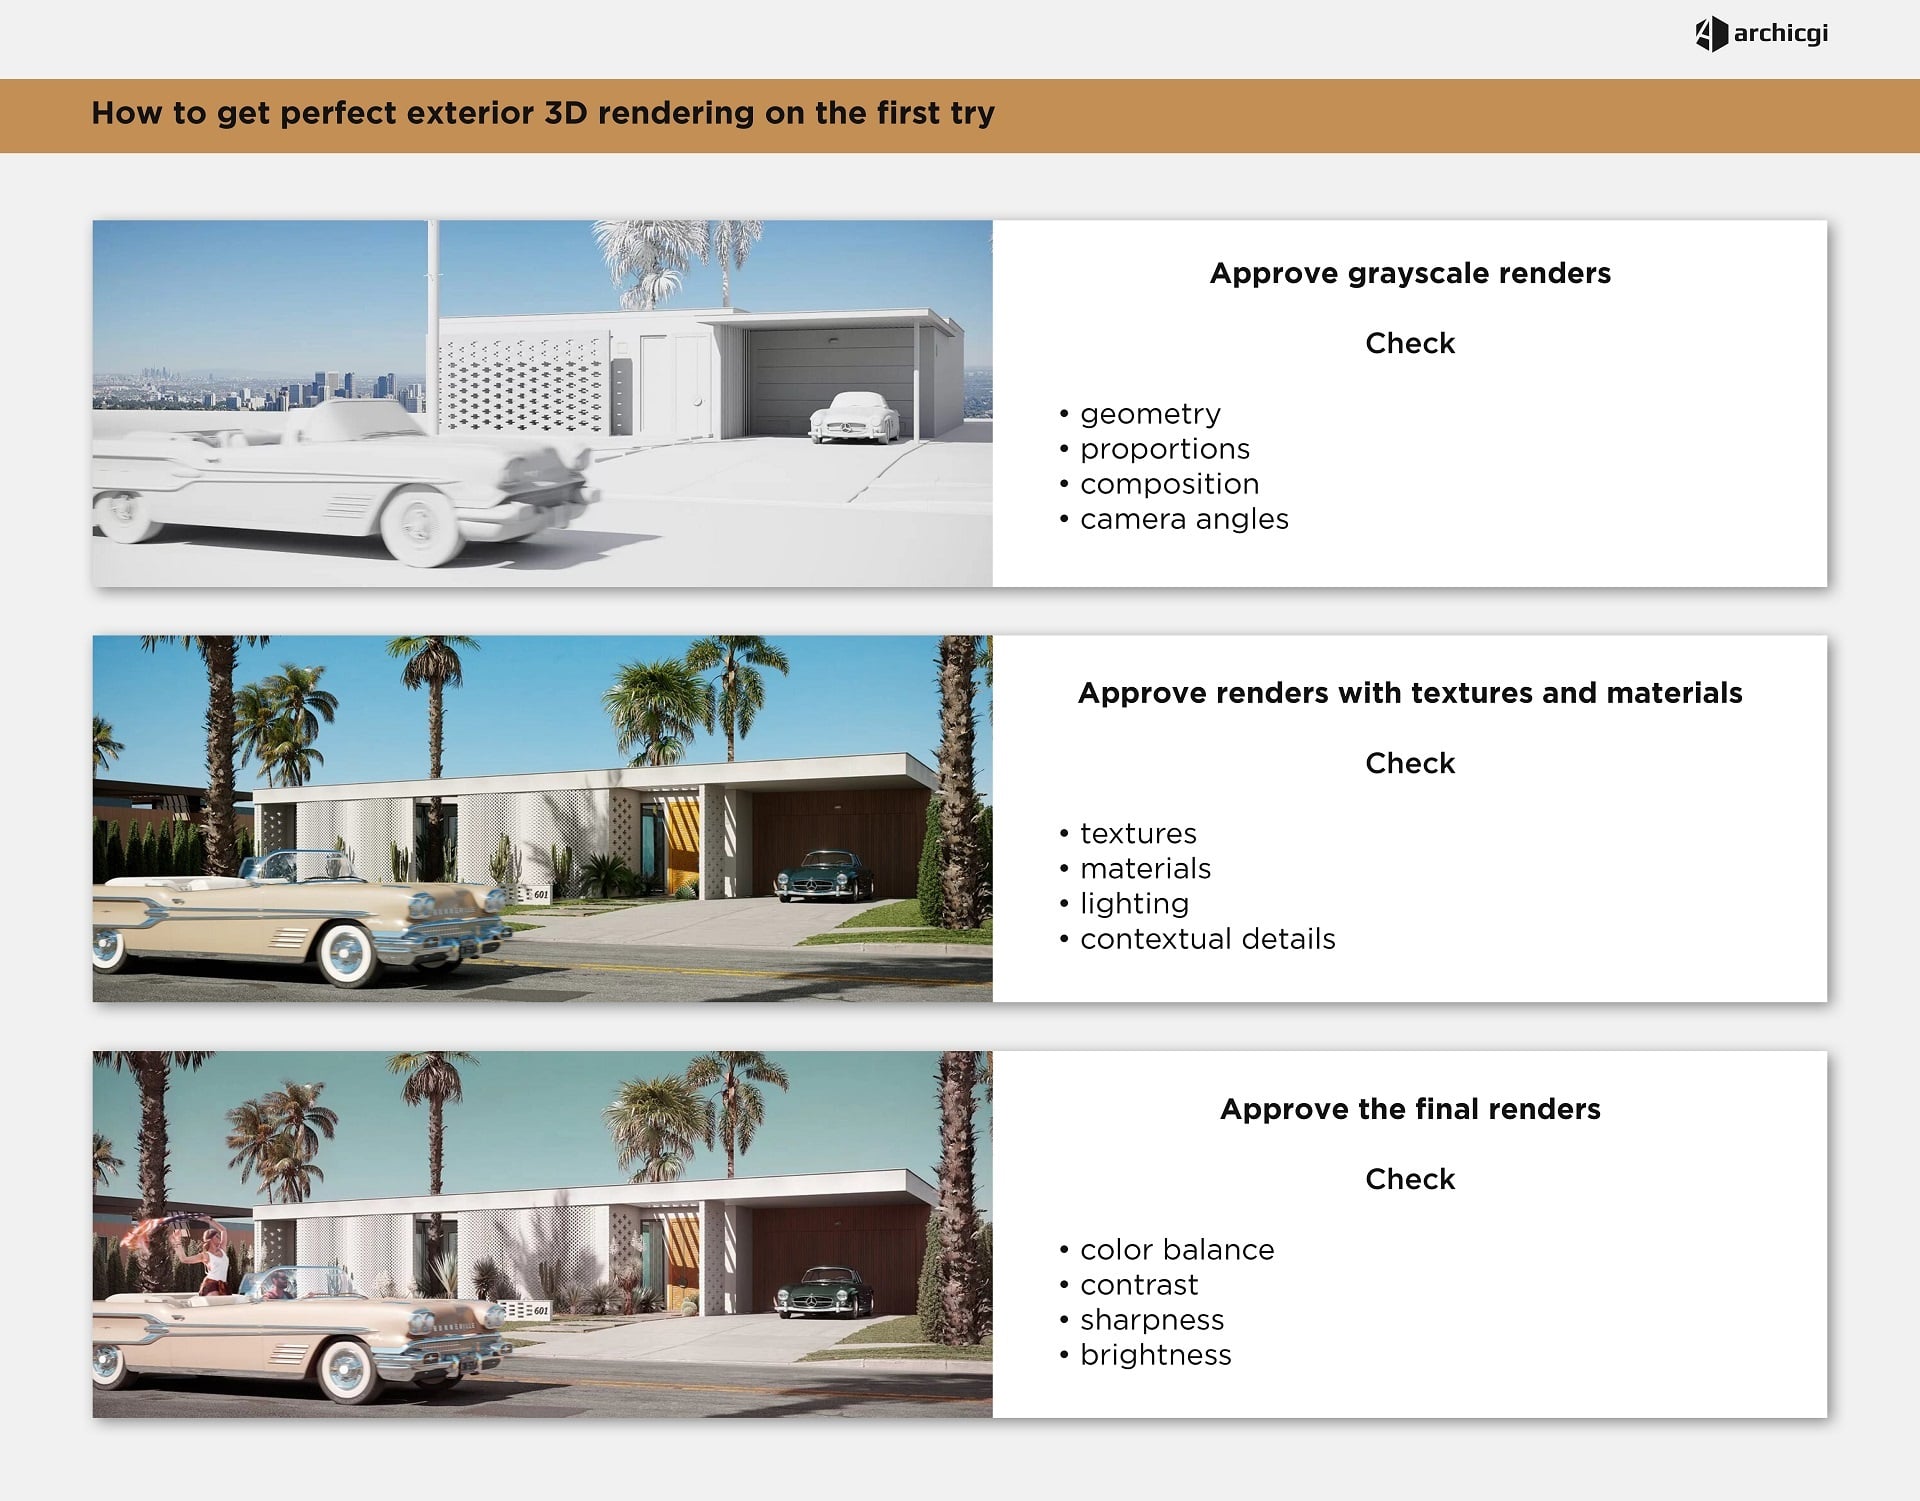
#2. Approving Grayscale Renders
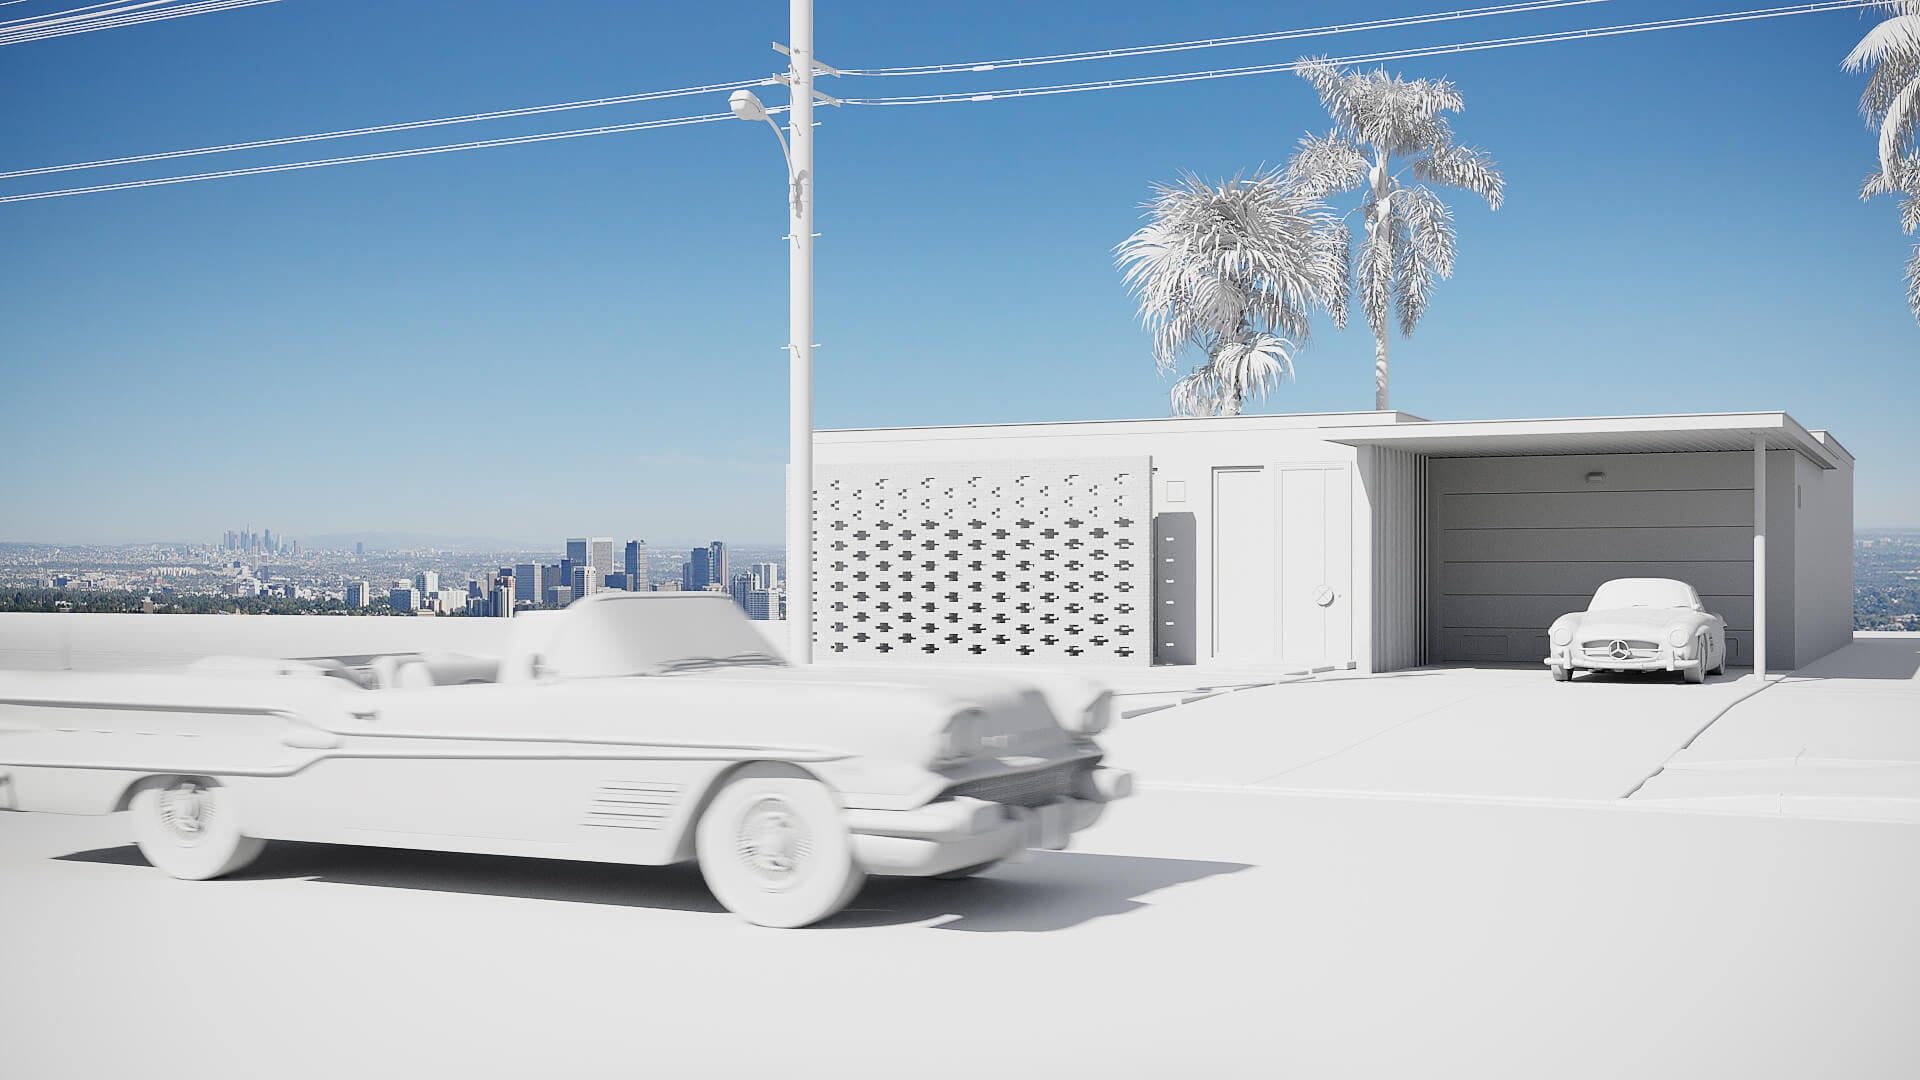
Once the brief is received and the 3D scene is built, the project moves into the grayscale stage — a monochrome render produced intentionally, before any color, texture, or lighting mood is introduced. At this point, the image shows only structure, and that’s exactly the point.
This is where camera angles are locked in. The team presents one or several viewpoints showing the building from the perspectives discussed in the brief, and the client confirms which angles tell the story best. Alongside composition, grayscale review covers the geometry of the building itself — whether volumes read correctly, whether proportions feel true to the drawings, and whether any architectural elements have been misinterpreted during 3D modeling for buildings. A cornice that sits too heavy, a window bay that’s too wide, an entrance that feels out of scale — these are exactly the kinds of issues that grayscale is designed to catch.
Changes at this stage are easy — adjusting a camera angle, correcting a roofline, or reworking a proportion takes minutes compared to the same fix made after textures, lighting, and entourage have been added. The same correction after full shading and material work can mean hours of rework across multiple render passes.
Want to learn how much your project costs? See how we evaluate 3D rendering projects
Typically, the grayscale stage involves one to two rounds of revisions. The first submission usually prompts feedback on camera height or angle — clients often realize they want a slightly lower viewpoint, or a wider frame that captures more of the site. The second round, when needed, addresses any remaining geometry notes. Structural changes at this point are still entirely practical: adjusting floor-to-floor heights, modifying facade divisions, reshaping roof profiles, or repositioning architectural features.
By the time grayscale is approved, the spatial foundation of the image is fixed. Everything that follows — materials, lighting, atmosphere — builds on that confirmed base.
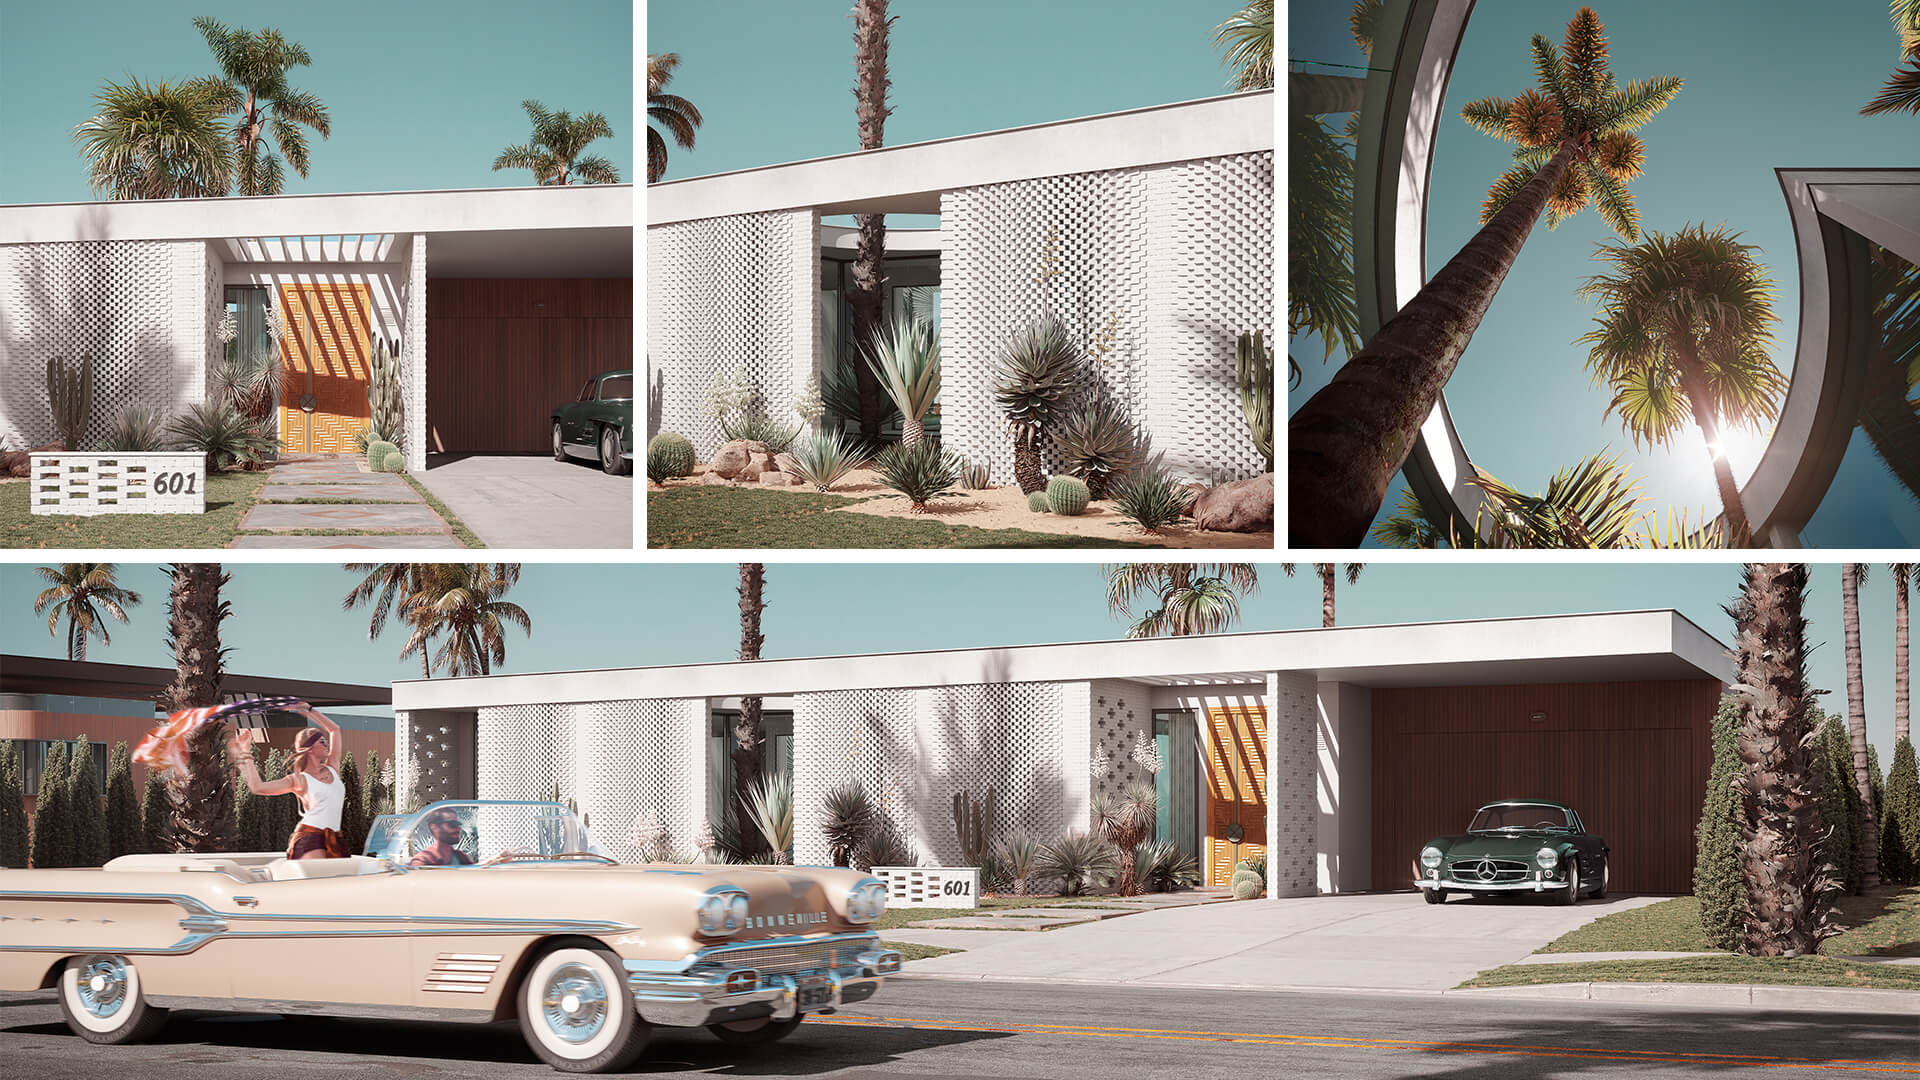
#3. Approving Color Proof 1 — Renders with Materials and Textures
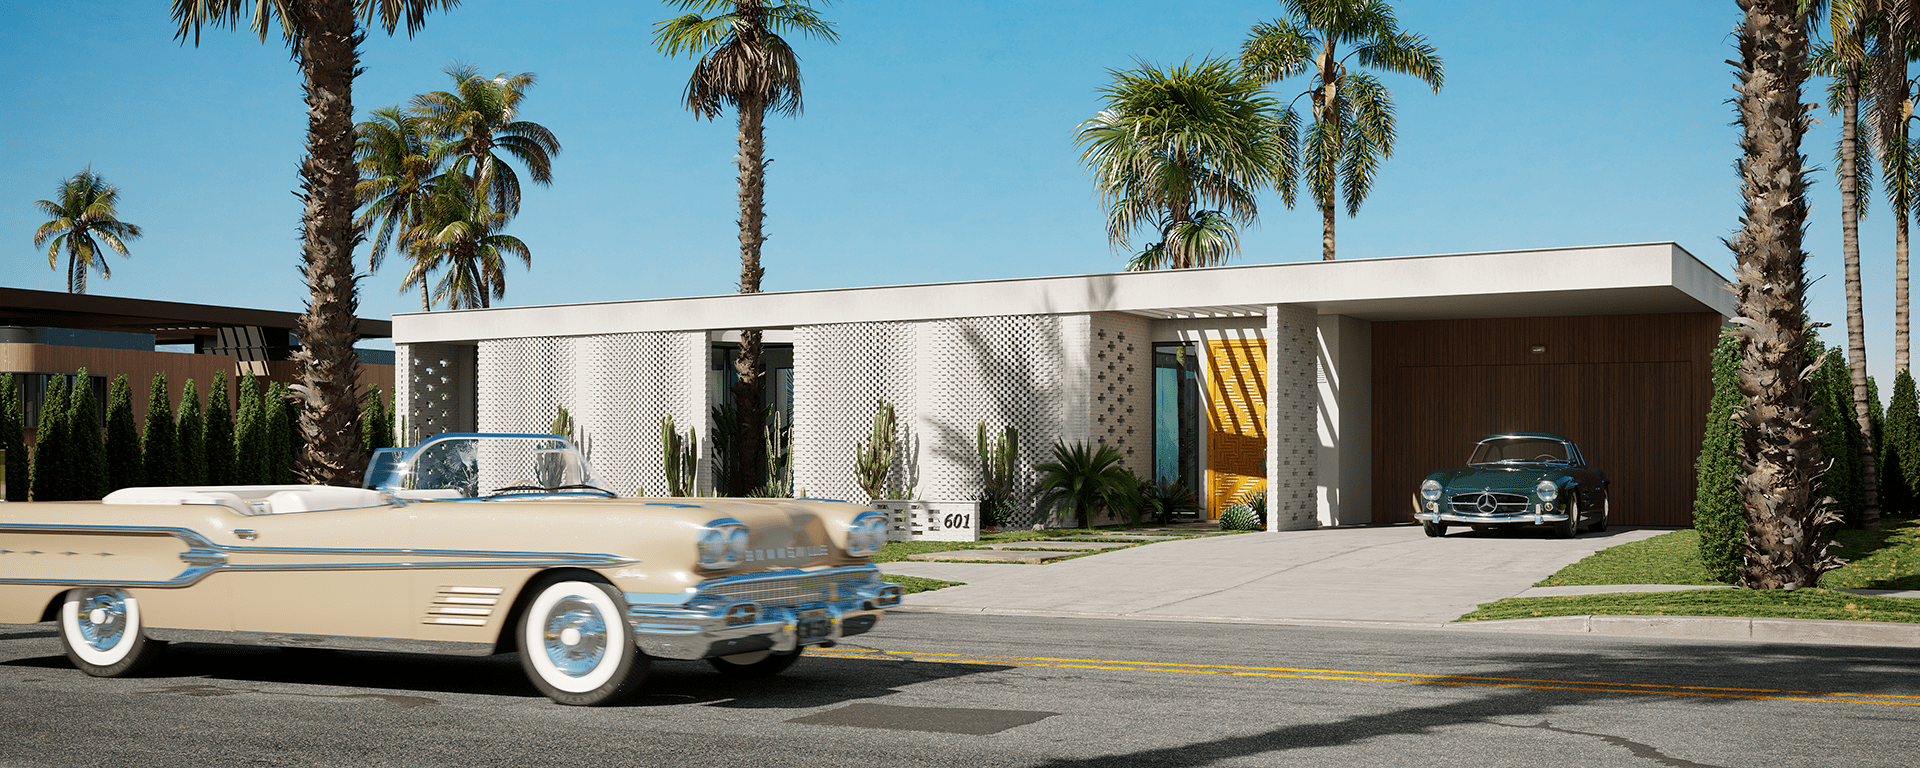
With the geometry confirmed and camera angles locked, the project moves into its first fully realized visual stage. Color Proof 1 is where the building comes to life — materials, textures, lighting, and environment all appear together for the first time in a single image.
At this point, the team applies every surface finish discussed in the brief: facade cladding, glazing, metal elements, stone, concrete, wood — each material mapped and adjusted to reflect how it behaves under the chosen lighting conditions. Alongside the architecture, the 3D scene is populated with entourage: people placed to give the building human scale, cars positioned in parking areas or along the street, and greenery introduced through trees, shrubs, ground cover, and planted beds. Together these elements shift the image from a technical visualization into something that reads as a real place.
All of this is delivered in 2K quality — a resolution for architectural rendering that provides enough detail for thorough review without the processing time of a final-output file. It is sufficient to evaluate how a brick texture reads at distance, whether the glazing reflections feel natural, or whether the tree canopy is blocking too much of the facade.
See how exterior CGI wins client confidence at the idea stage

This is also the stage where atmospheric rendering choices become visible for the first time. The quality of light — its direction, warmth, and how it falls across surfaces — can be assessed and adjusted. Shadows, sky conditions, and ambient tone all come under review here.
The realistic exterior rendering presented at this stage typically goes through up to three rounds of corrections. Clients commonly request material swaps, lighting adjustments, changes to entourage density, or refinements to how the exterior 3D rendering reads as a whole composition. Minor in scope, these rounds ensure the image is fully aligned before moving to final resolution.
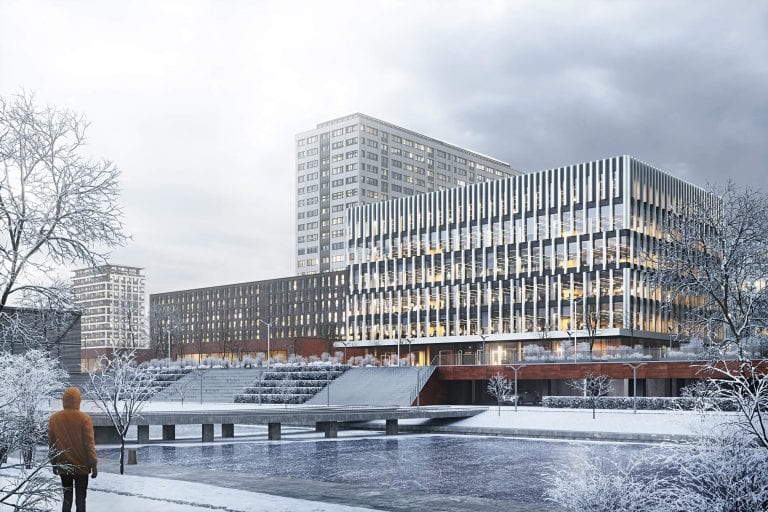
#4. Receiving the Final Renders
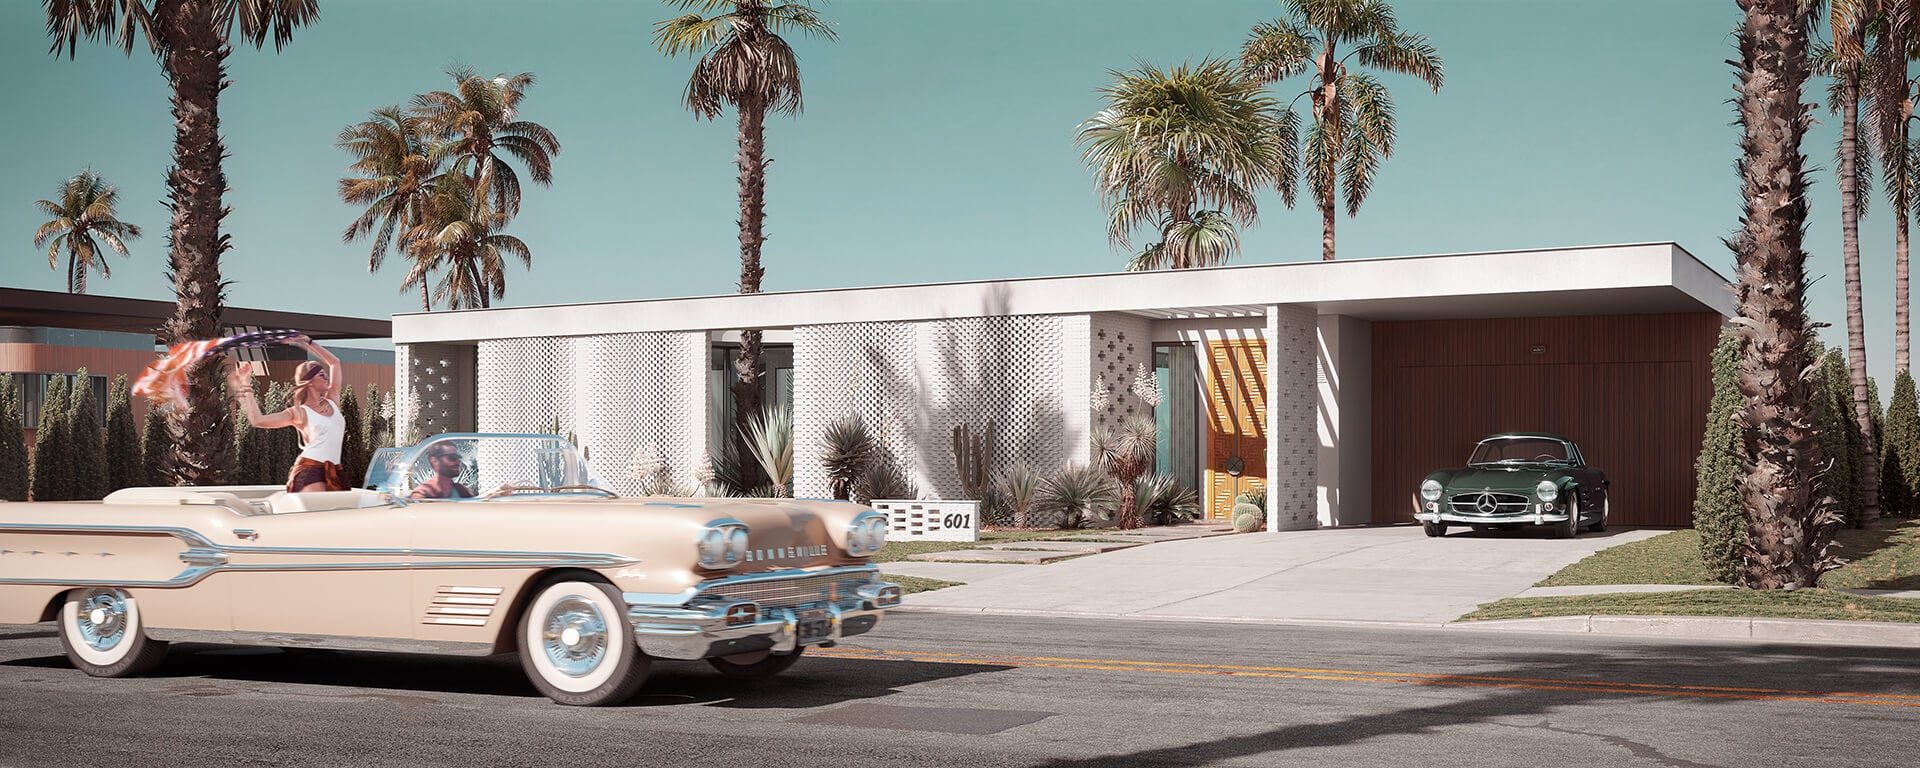
Once Color Proof 1 is approved, the project enters its last stage: the final render. This is where everything confirmed across the previous steps — geometry, materials, lighting, atmosphere, and entourage — is brought together at full output quality and taken through post-production.
The final image is rendered at 4K as standard, though the resolution for specific deliverables can be adjusted depending on how the images will be used. Print materials, large-format displays, and web publications each have different requirements, and the team accommodates those before export. For 3D rendering for real estate developers, who often need the same image across multiple formats and platforms, this flexibility at the delivery stage matters.
After rendering, every image goes through CGI post-production in Photoshop. This is where the image moves from technically accurate to visually compelling. Contrast is refined, color balance is adjusted, highlights and shadows are pushed to feel more natural, and the overall tone is brought into alignment with the mood established in the brief. Sky replacements, additional atmospheric haze, lens effects, and fine-tuning of entourage elements all happen at this point. The difference between a raw render and a finished image after 3D visualization post-production tricks is significant — the same scene can read as flat or cinematic depending on how this stage is handled.
Delivery typically follows within the timeframe agreed at the project’s start. Architectural visualization project time varies depending on the number of views, complexity of the scene, and how many revision rounds were used across earlier stages. At the end of the process, the client receives final image files in the agreed formats, resolution-ready for their intended use.
The final render is what the client presents to investors, planning authorities, or the public — the deliverable that the entire architectural CGI project timing has been building toward.
ArchiCGI’s exterior 3D rendering workflow is built around transparency and predictability. Clear checkpoints at each stage — grayscale, color proof, and final delivery — mean clients always know where the project stands and what comes next. For 3D rendering for architects, the staged approval process supports design development — each round doubles as a checkpoint for catching and resolving issues before they reach construction documentation.
The result is photorealistic 4K imagery that meets the highest professional standards. If you want to go deeper into any aspect of the process — workflow, quality benchmarks, or solution types across interior and exterior projects — our 3D rendering guide covers it in full.
Ready to start your project? Contact ArchiCGI for a quote or fill out a brief to get started.

Chris Kostanets
Senior Project Manager, Mentor
Chris manages the work of 2 CGI teams and teaches Middle PMs. She loves Scottish landscapes, Ancient Greek culture, and Plein-air painting. At home, Chris is a caring parent for 3 cute chickens and a magnificent rooster.

Comments
Sraboni Datta