

Interior designers need to present their projects and services in the best light, and 3D rendering is the perfect tool for that. This advanced technology can provide them with captivating visuals throughout all the interior design project process workflow stages. However, keeping an in-house team of CGI specialists is often impractical for interior design companies. That’s why key industry players often outsource 3D services to an architectural visualization company. One of them is our partners from k.a. murphy interiors — a full-service interior design firm from the state of New York. In this article, using the example of a recent project we completed for them, we will guide you through our interior 3D rendering workflow. You’ll see the process step by step from submitting the brief to receiving the final images. So, let’s dive into it!
#1. Assessing the Scope of Work and References
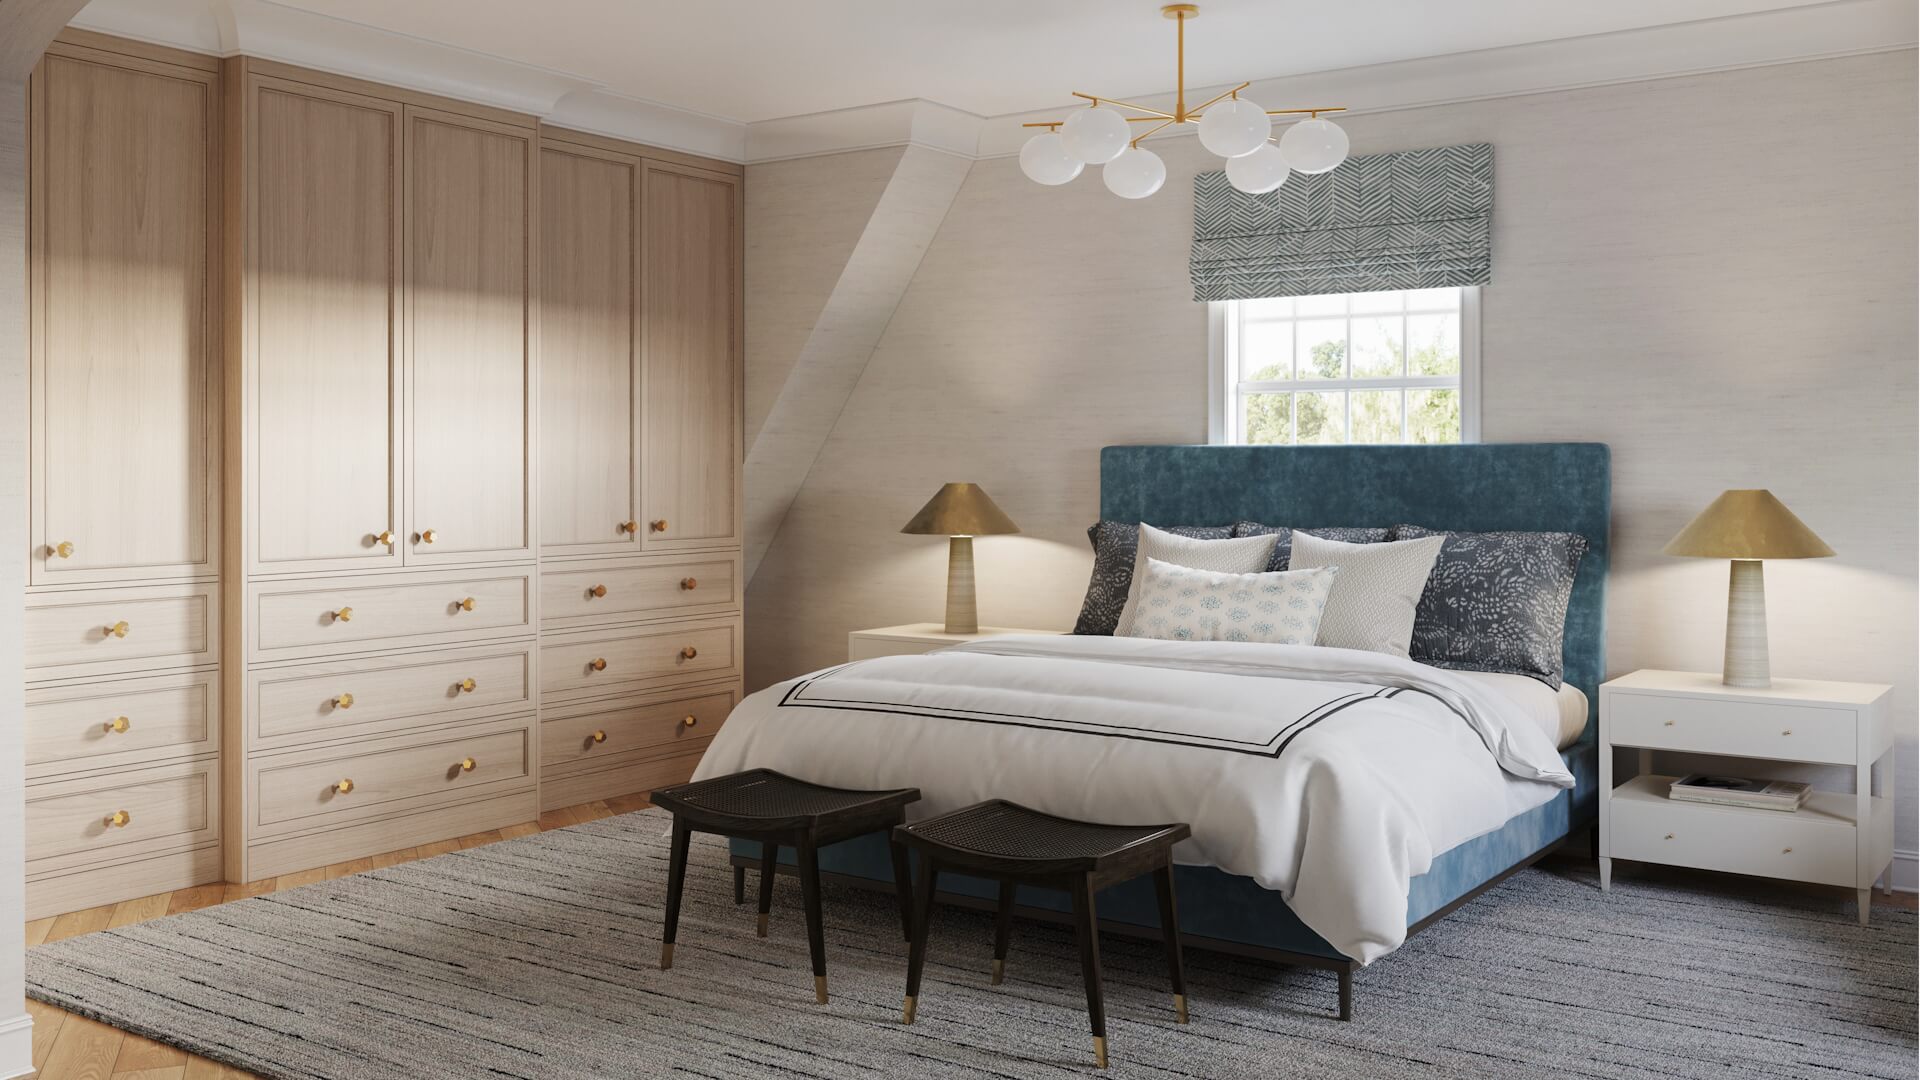
This time, the company’s design director, Liudmila Tapia, contacted us in July 2023 to get a set of renderings for a remodeling project. It required renders for different residential spaces. To understand how our interior 3D rendering workflow is organized, let’s take a closer look at the bedroom visualization task, breaking it down into steps.
Any project at our studio begins with our client submitting the brief. It usually contains the requirements for the visuals and various references. For this task, we had to create two views of the bedroom, both in 4K, 300 dpi quality.
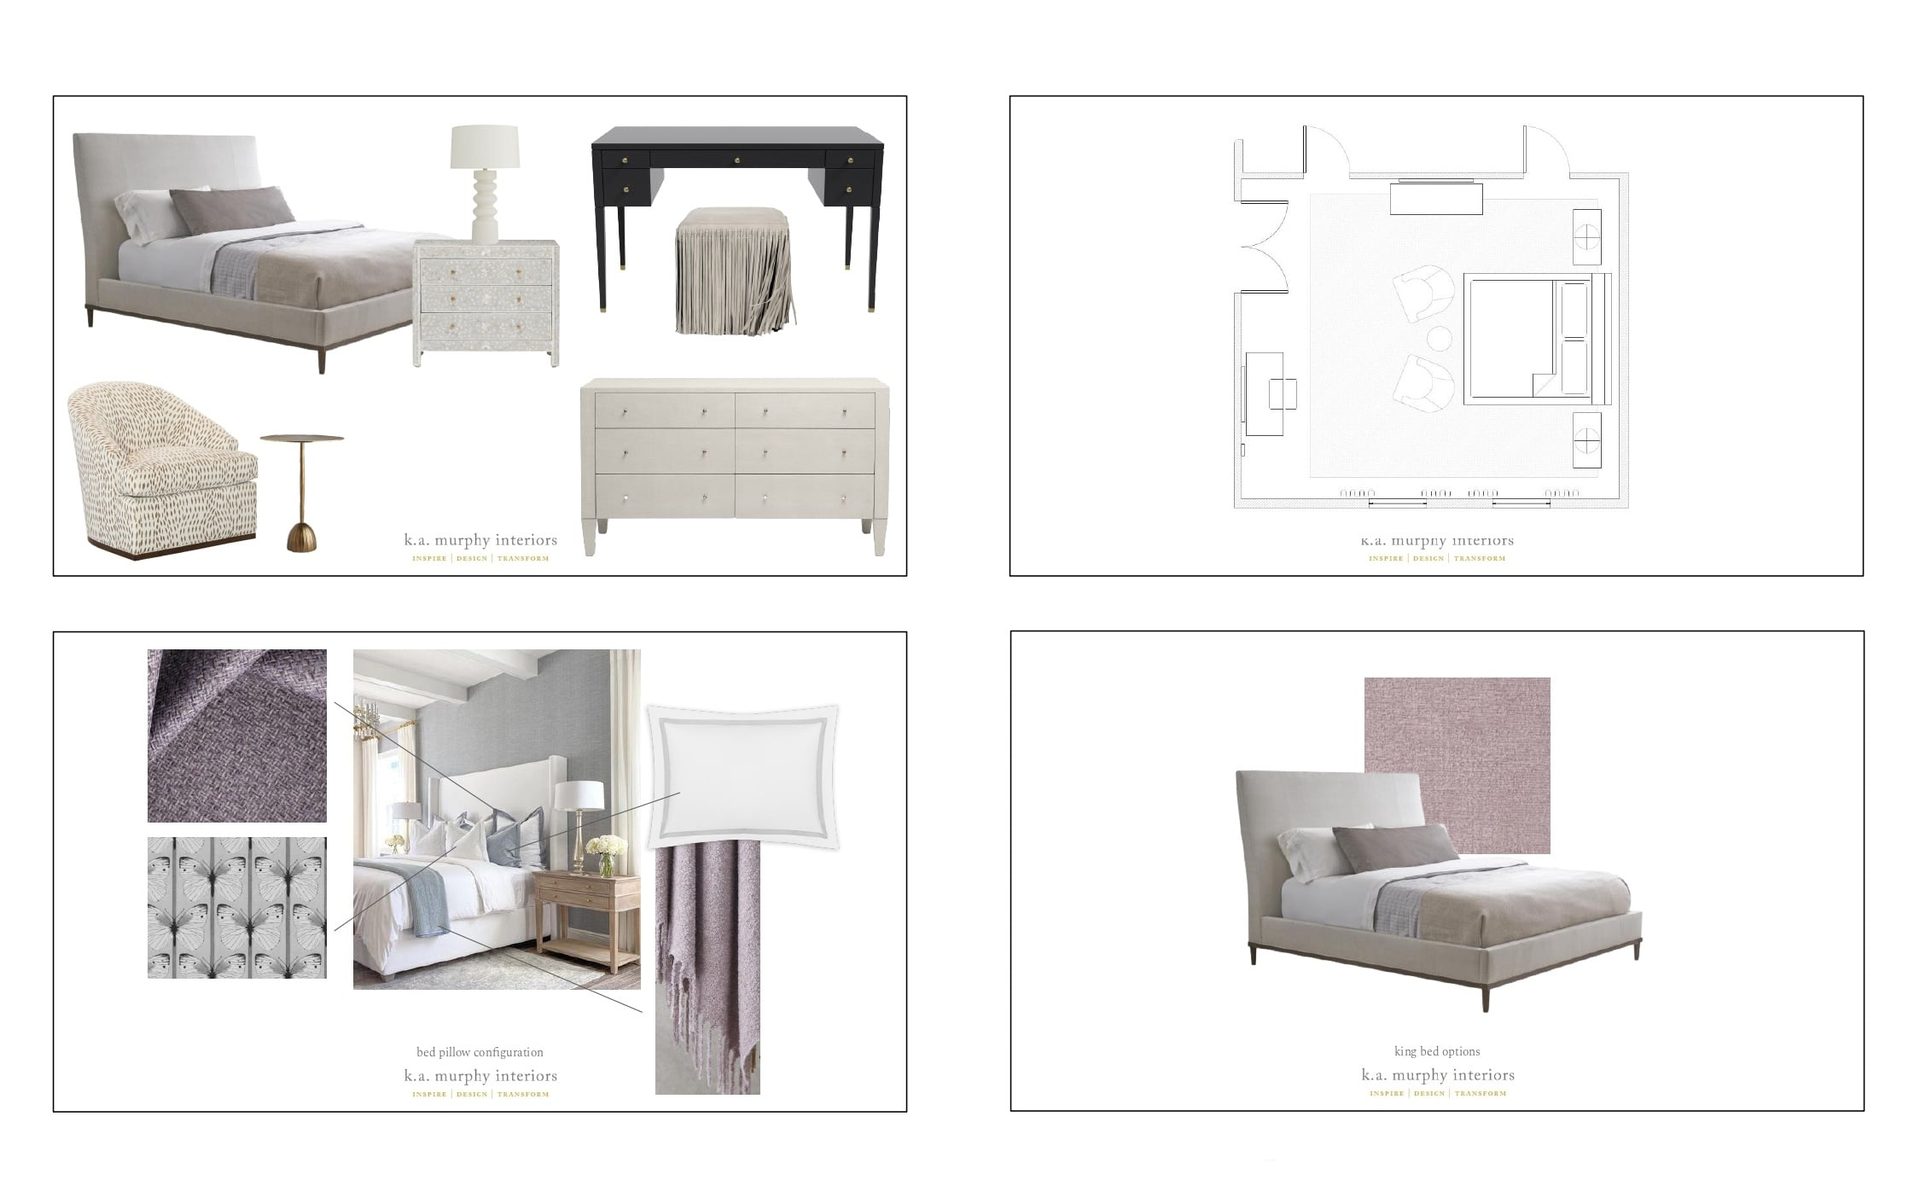
The pack of references, some of which you can see above, included:
- interior drawings in the DWG format;
- a PDF file with elevations;
- a mood board of preferred furniture, decorations, and materials with links to each item.
Our manager approved the cost and the deadline with the client. And then, after thoroughly researching the brief, our CG artist began working on 3D interior visualization.
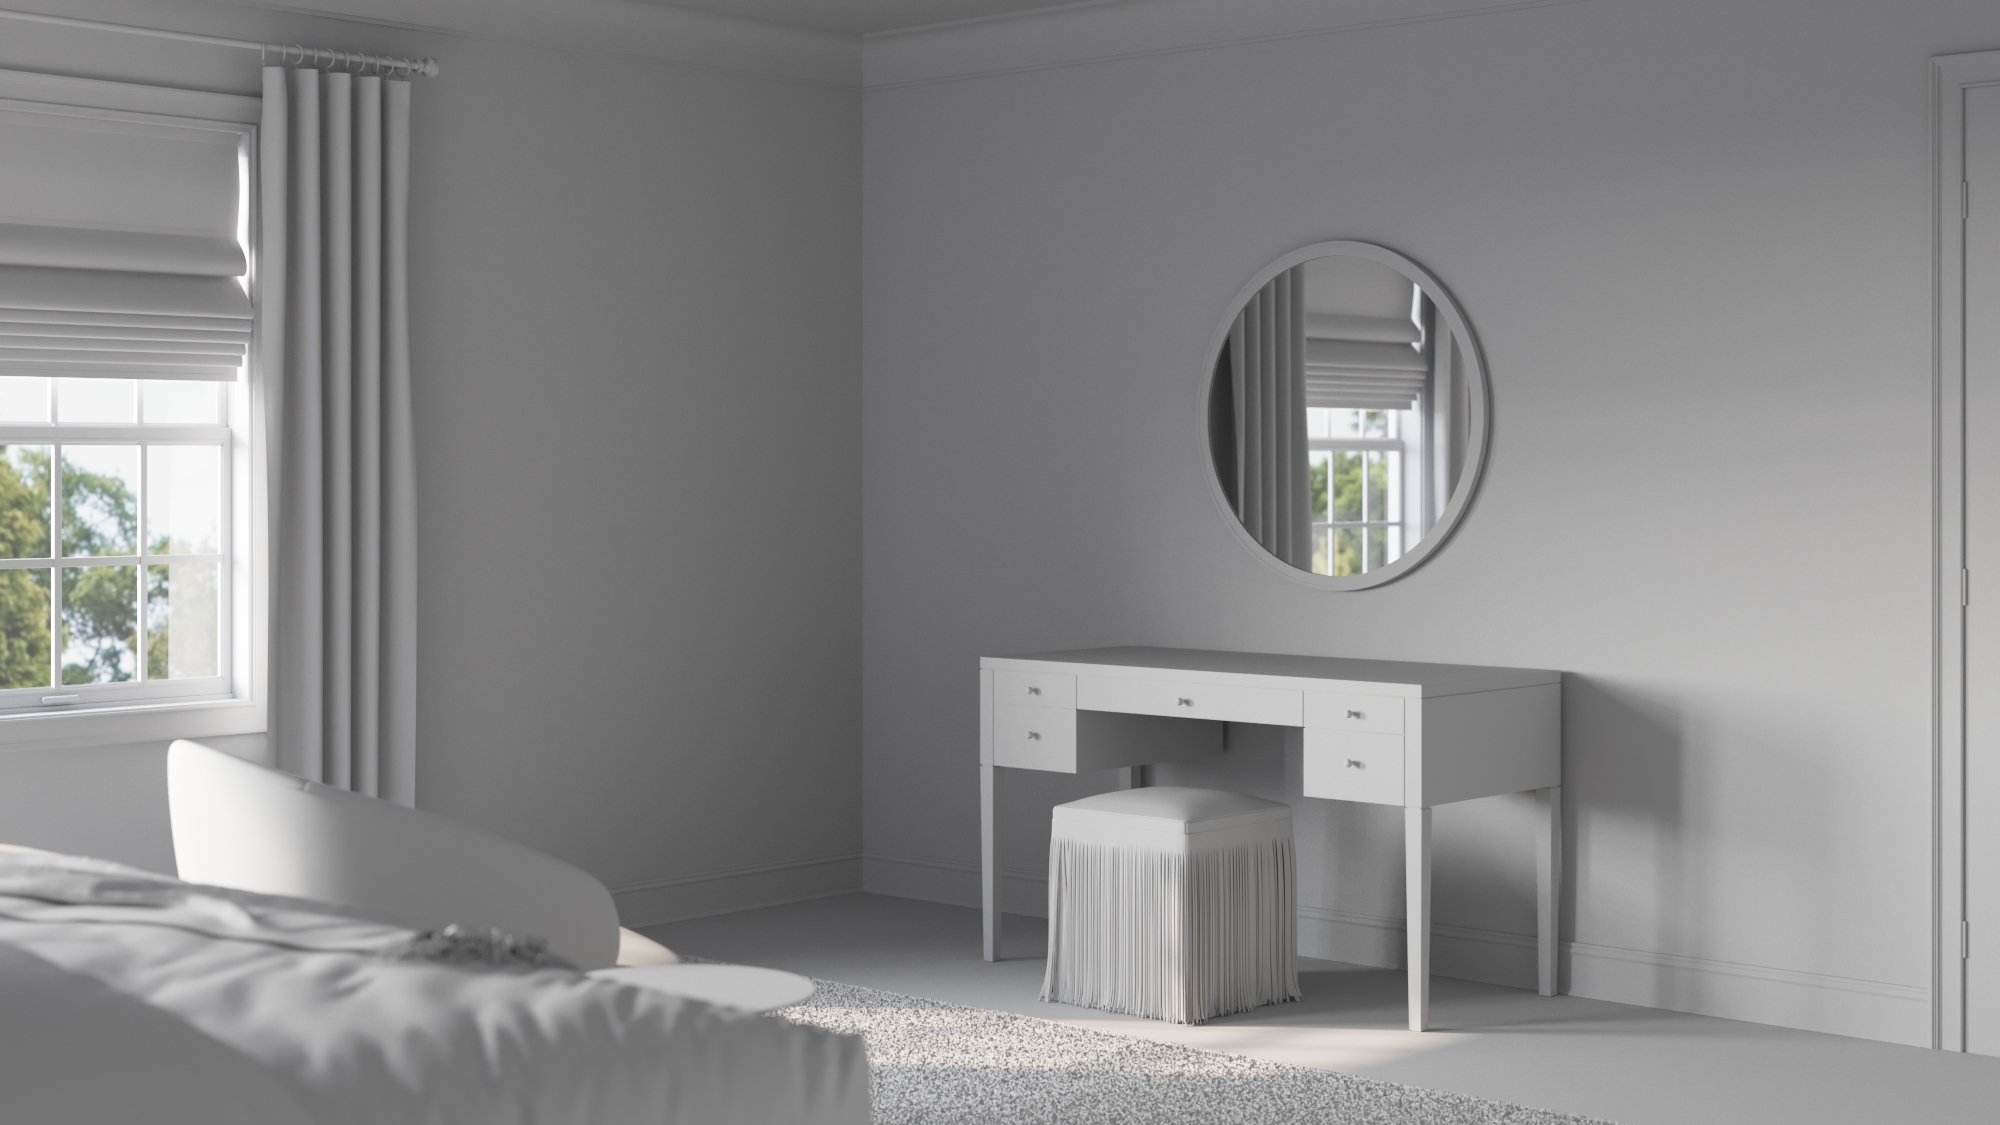
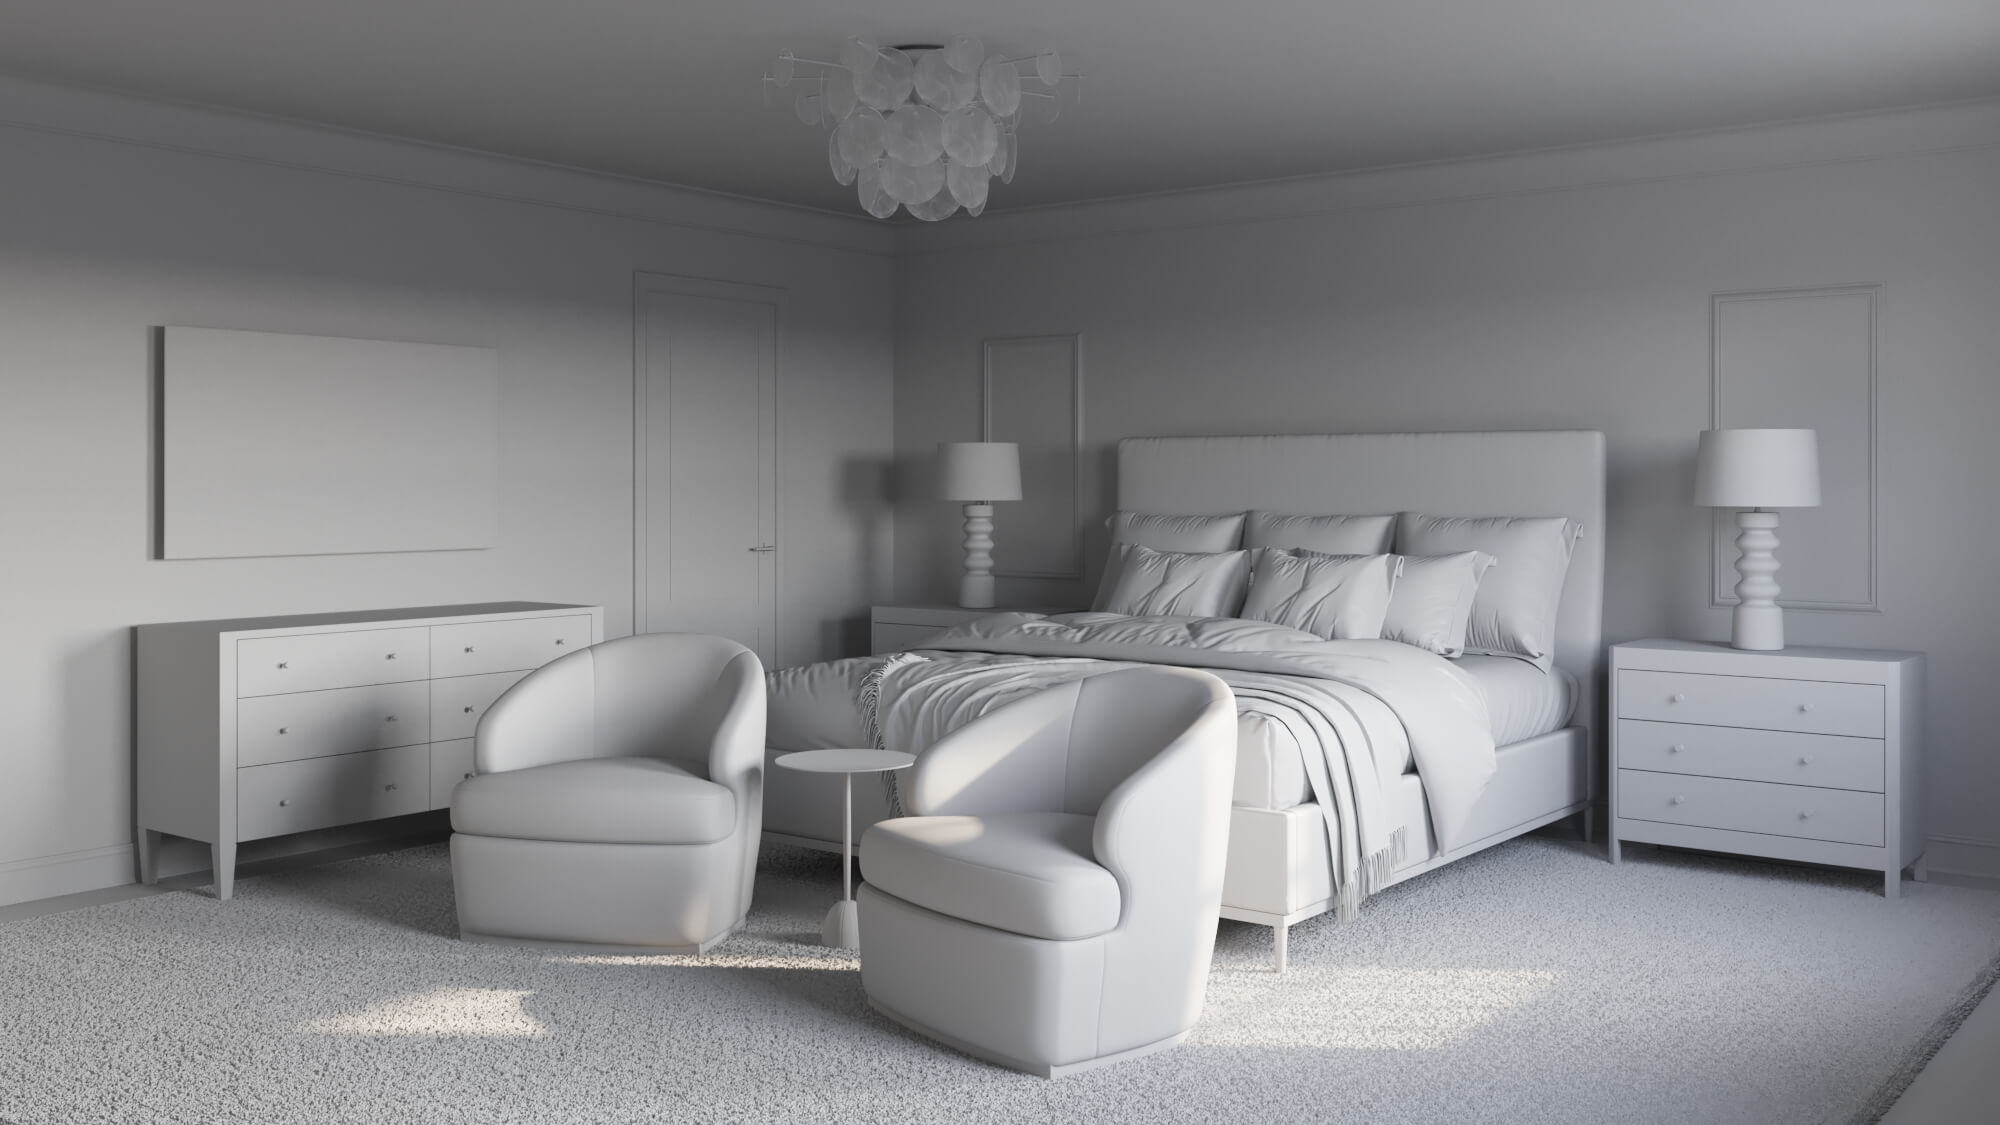
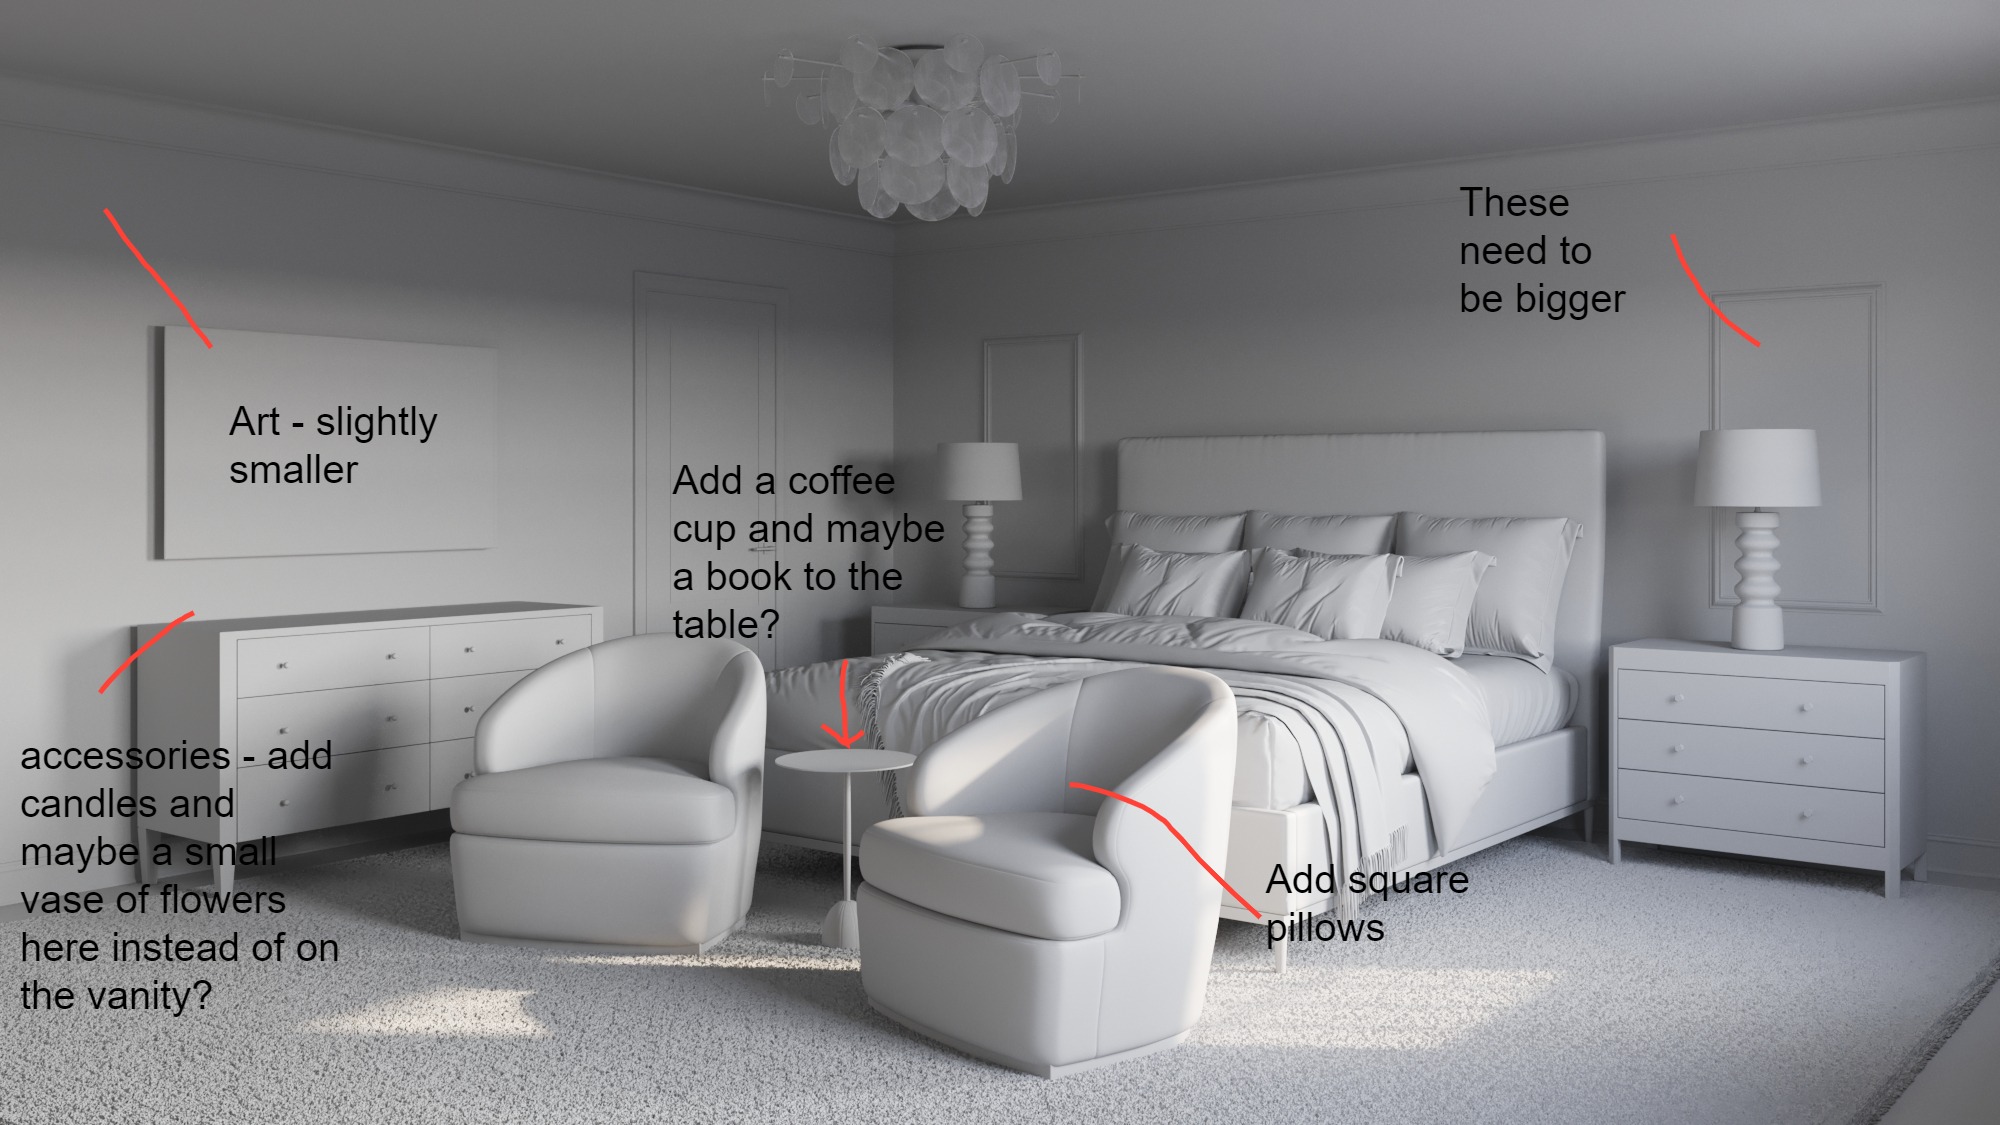
#2. Creating Grayscale Renders
The next step in our workflow is the production of grayscale images (also called clay renders). These are preliminary results that don’t have any textures or colors yet. Their purpose is to approve the dimensions, furniture layouts, and camera perspective with the client. Above you can see the results of this interior 3D rendering workflow stage.
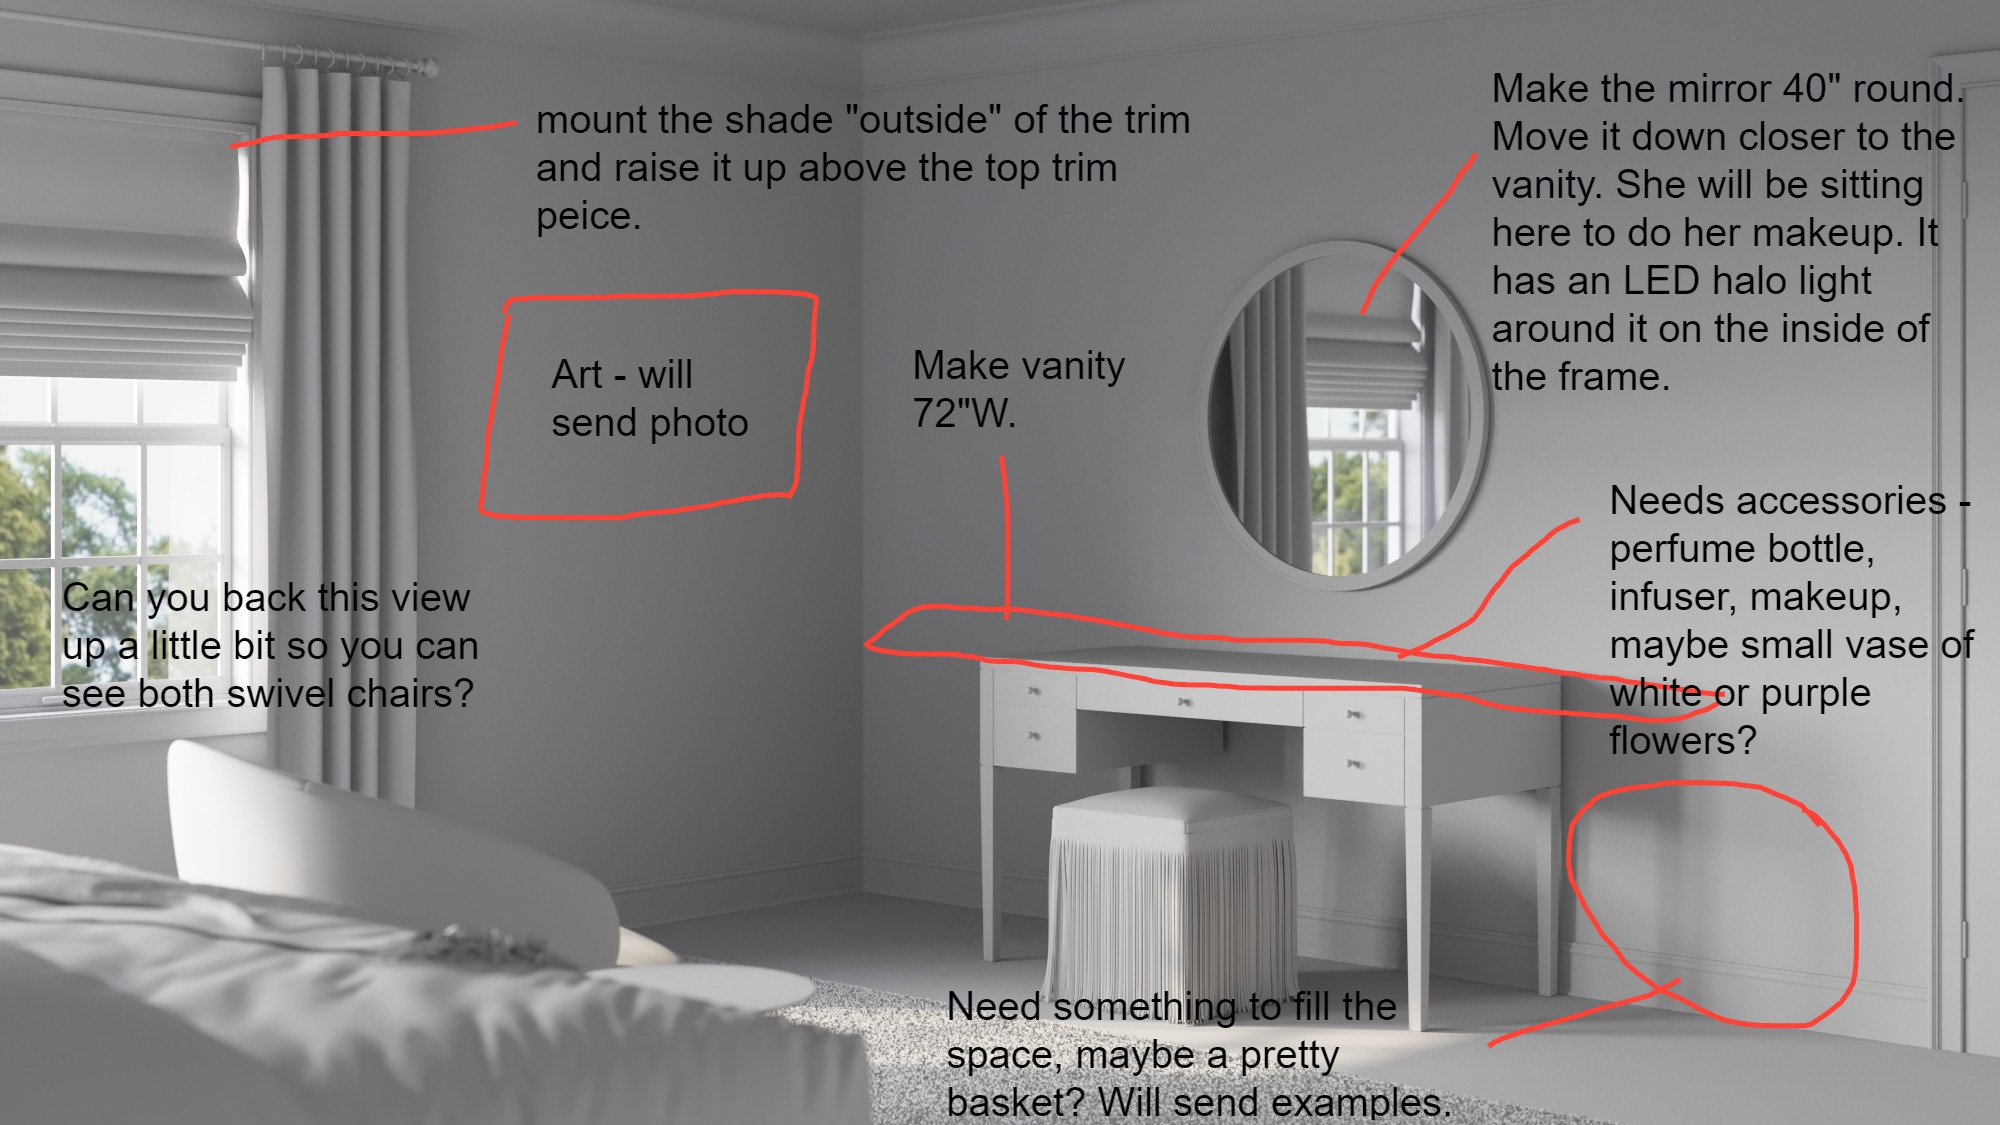
Our client was pleased with the grayscales and just wanted to correct some minor details. First of all, Liudmila asked us to resize some of the 3D models to reflect the real proportions of the items. She also wanted to add extra decorations throughout the interior to make the rendering look more lived-in. Lastly, the client asked us to adjust the perspective in the first 3D interior render to make both chairs visible.
Our CG artist reviewed all the comments and adjusted the grayscale renders accordingly. After confirming that the images met the requirements, the specialist was ready to move on to the next step in our workflow.
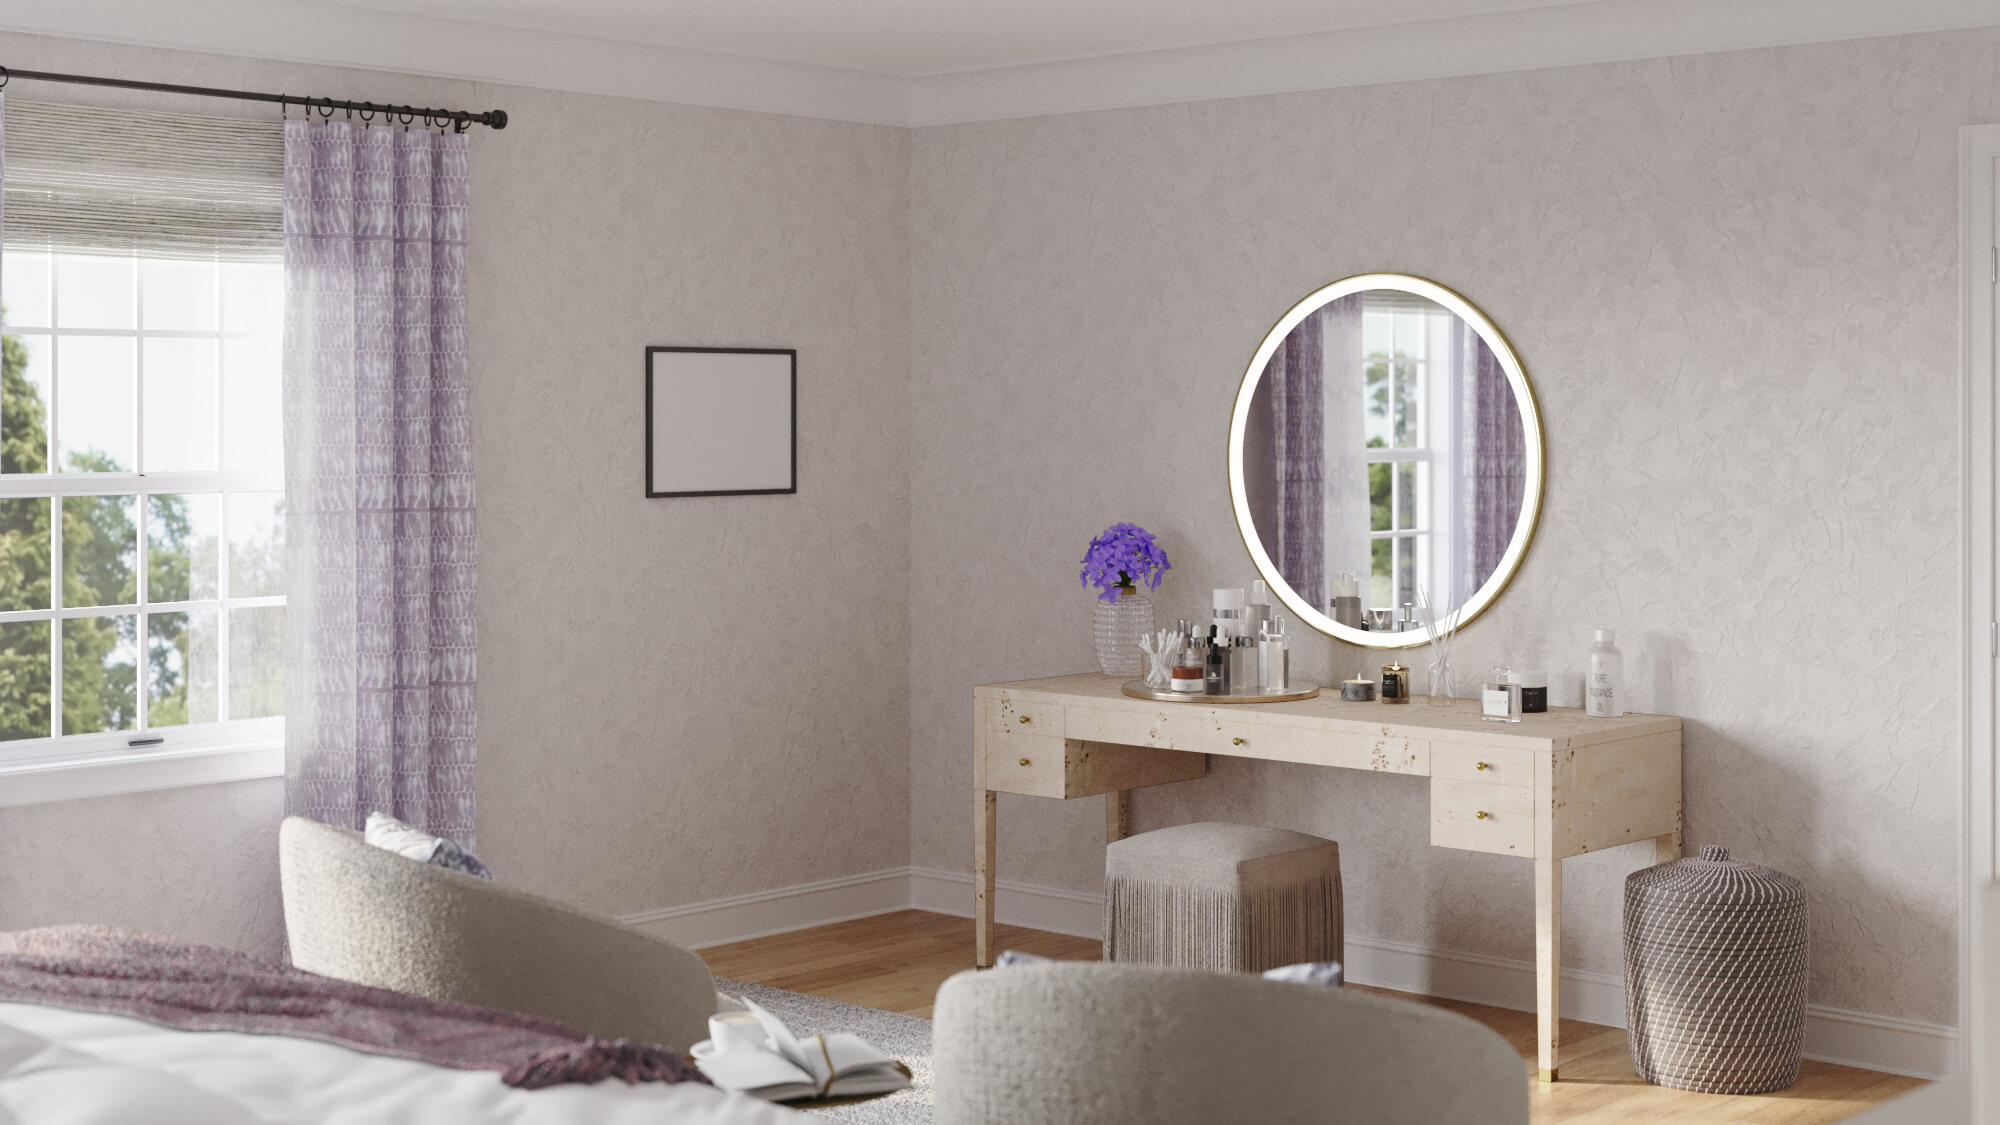
#3. Applying Textures and Materials
Following the approval of the grayscale renders comes the third stage of our interior 3D rendering workflow. Here, our artist applies the textures and colors to the renders. Before the final rendering, the images are typically provided to clients in 2K resolution. Here, we ask if any corrections need to be made and if not — we proceed to render the CGI in final quality.
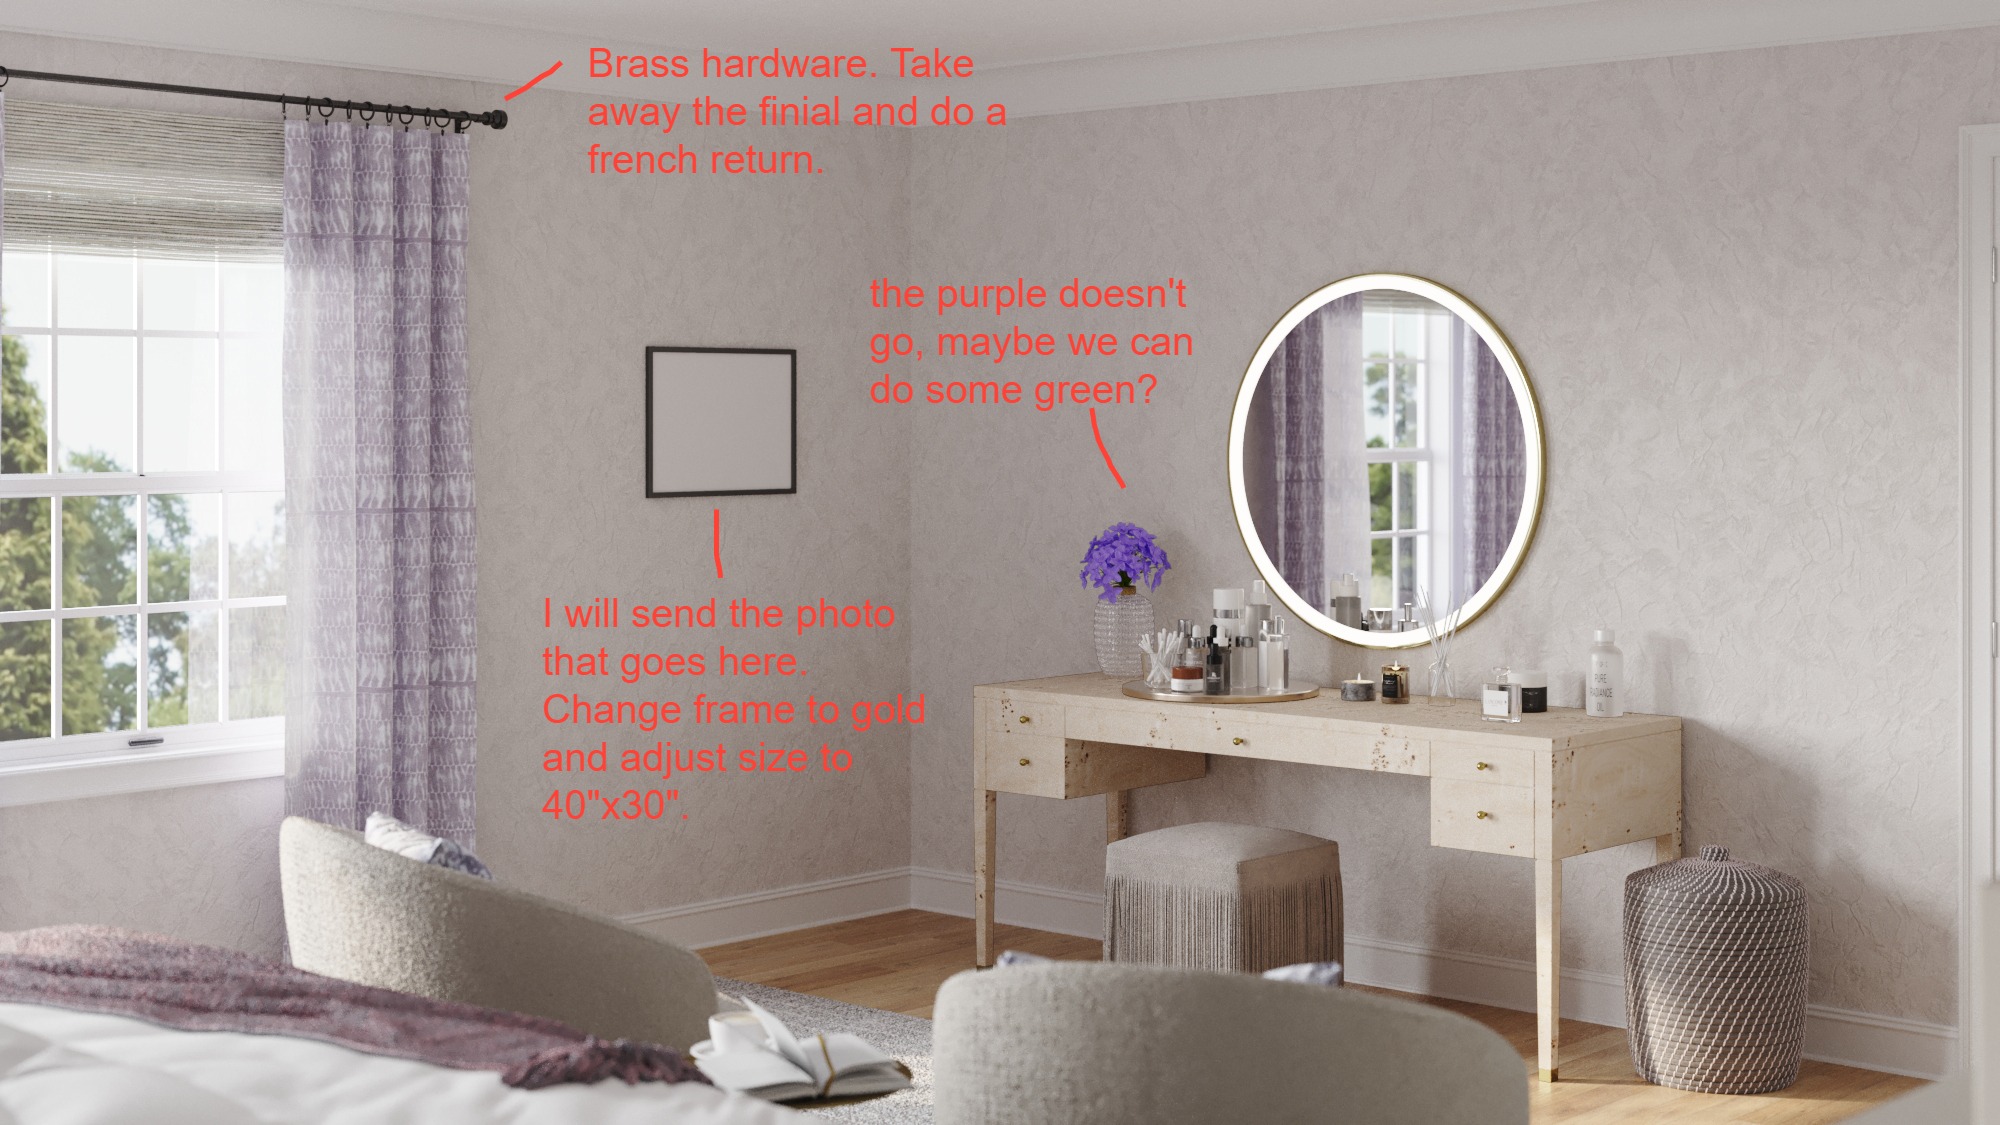
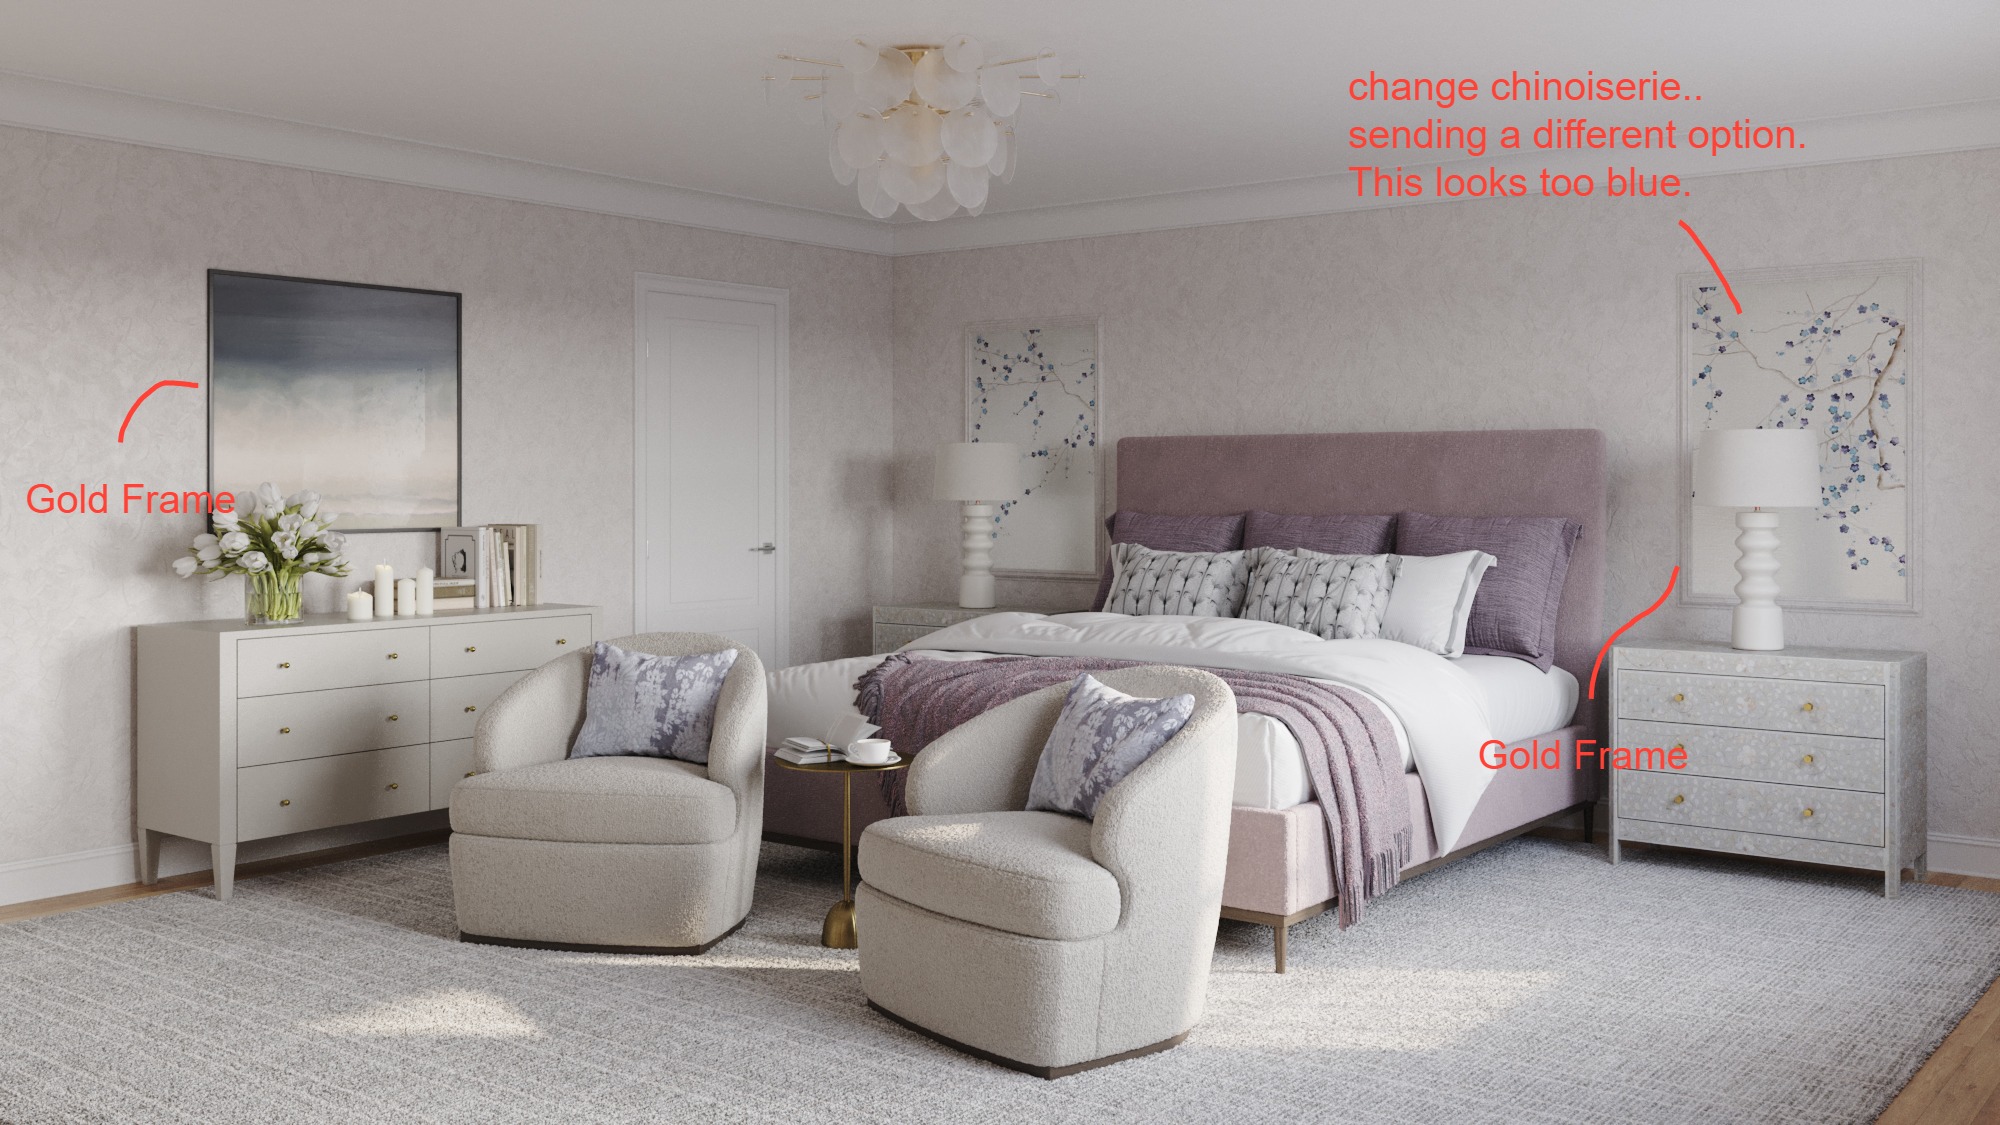
After receiving the colored images, Liudmila had some minor comments for us. Namely, there were some adjustments to the decor and materials that you can see below.
Our 3D artist did a fantastic job adjusting all the details, so the client had no further comments after this round of corrections. Now, it was time for the last stage of the workflow — creating the final 3D interior renderings.
Strengthen your design presentations with professional interior rendering
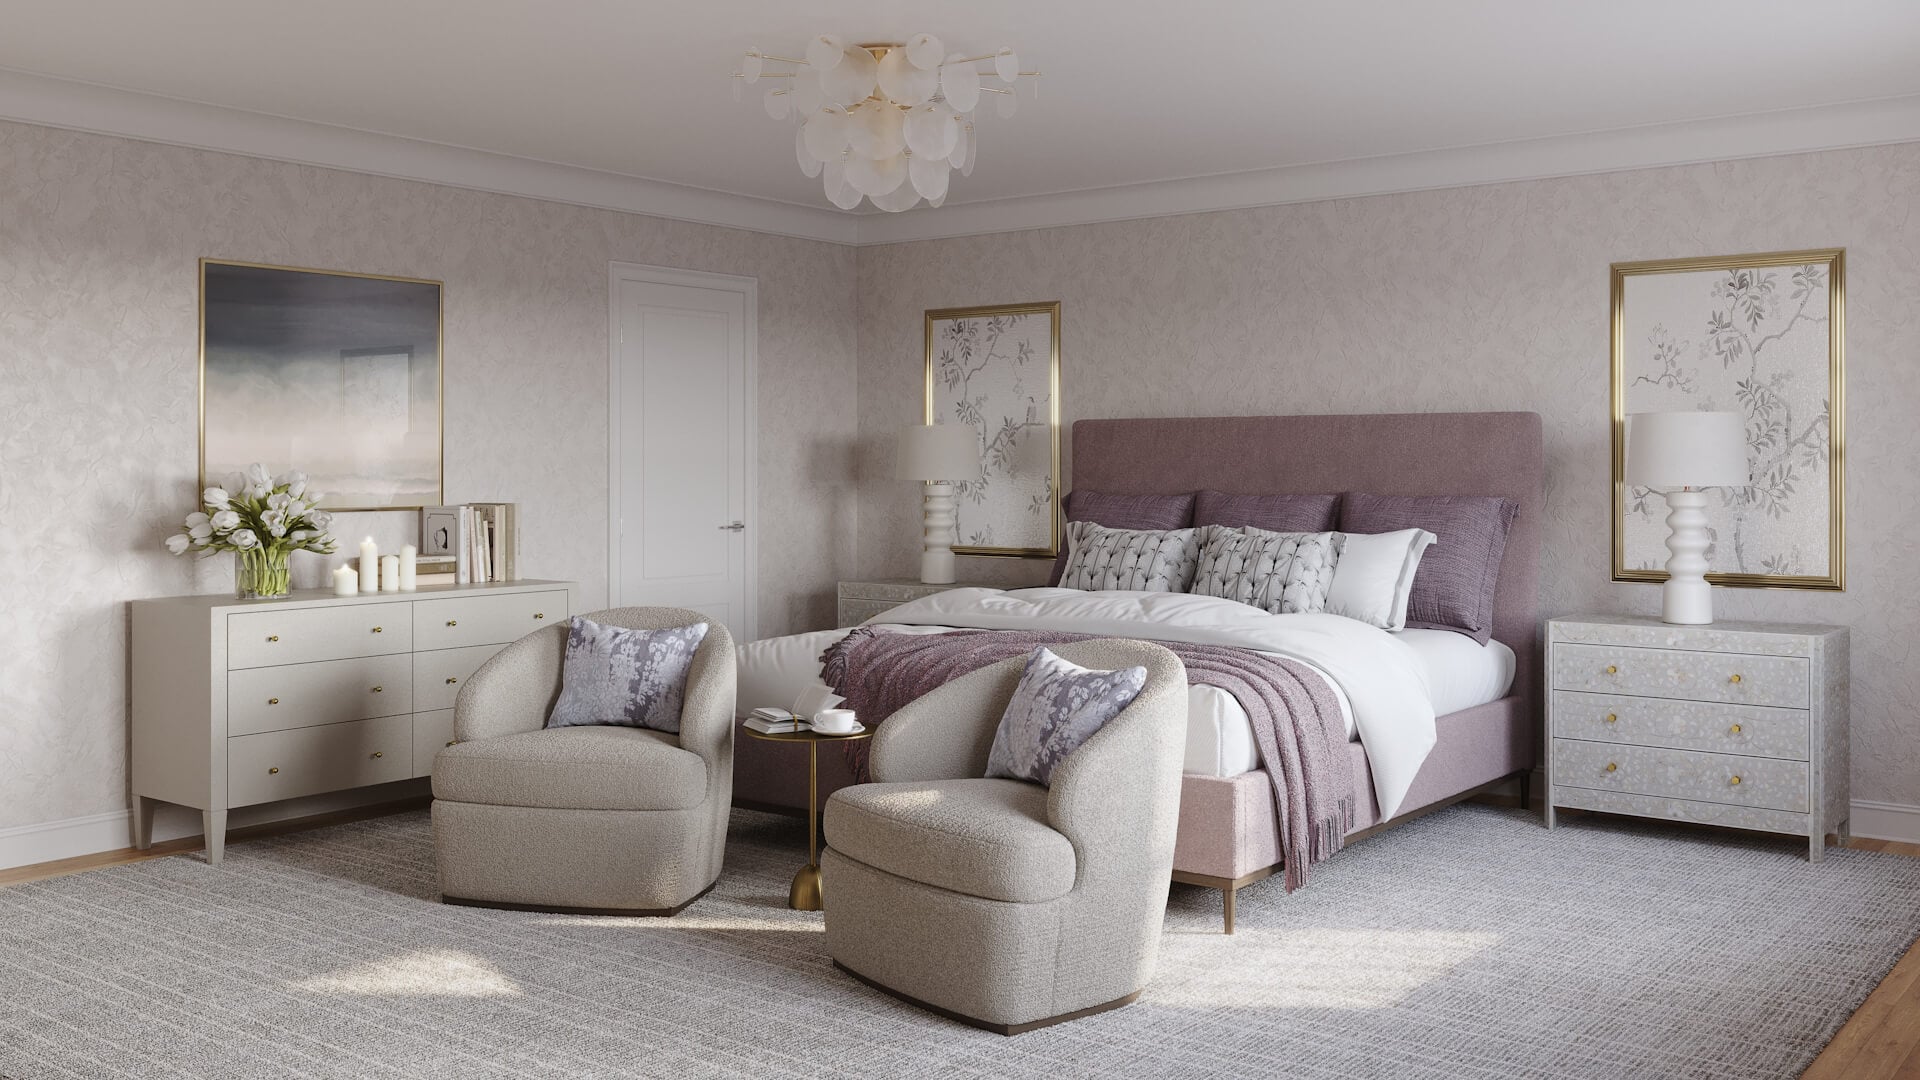
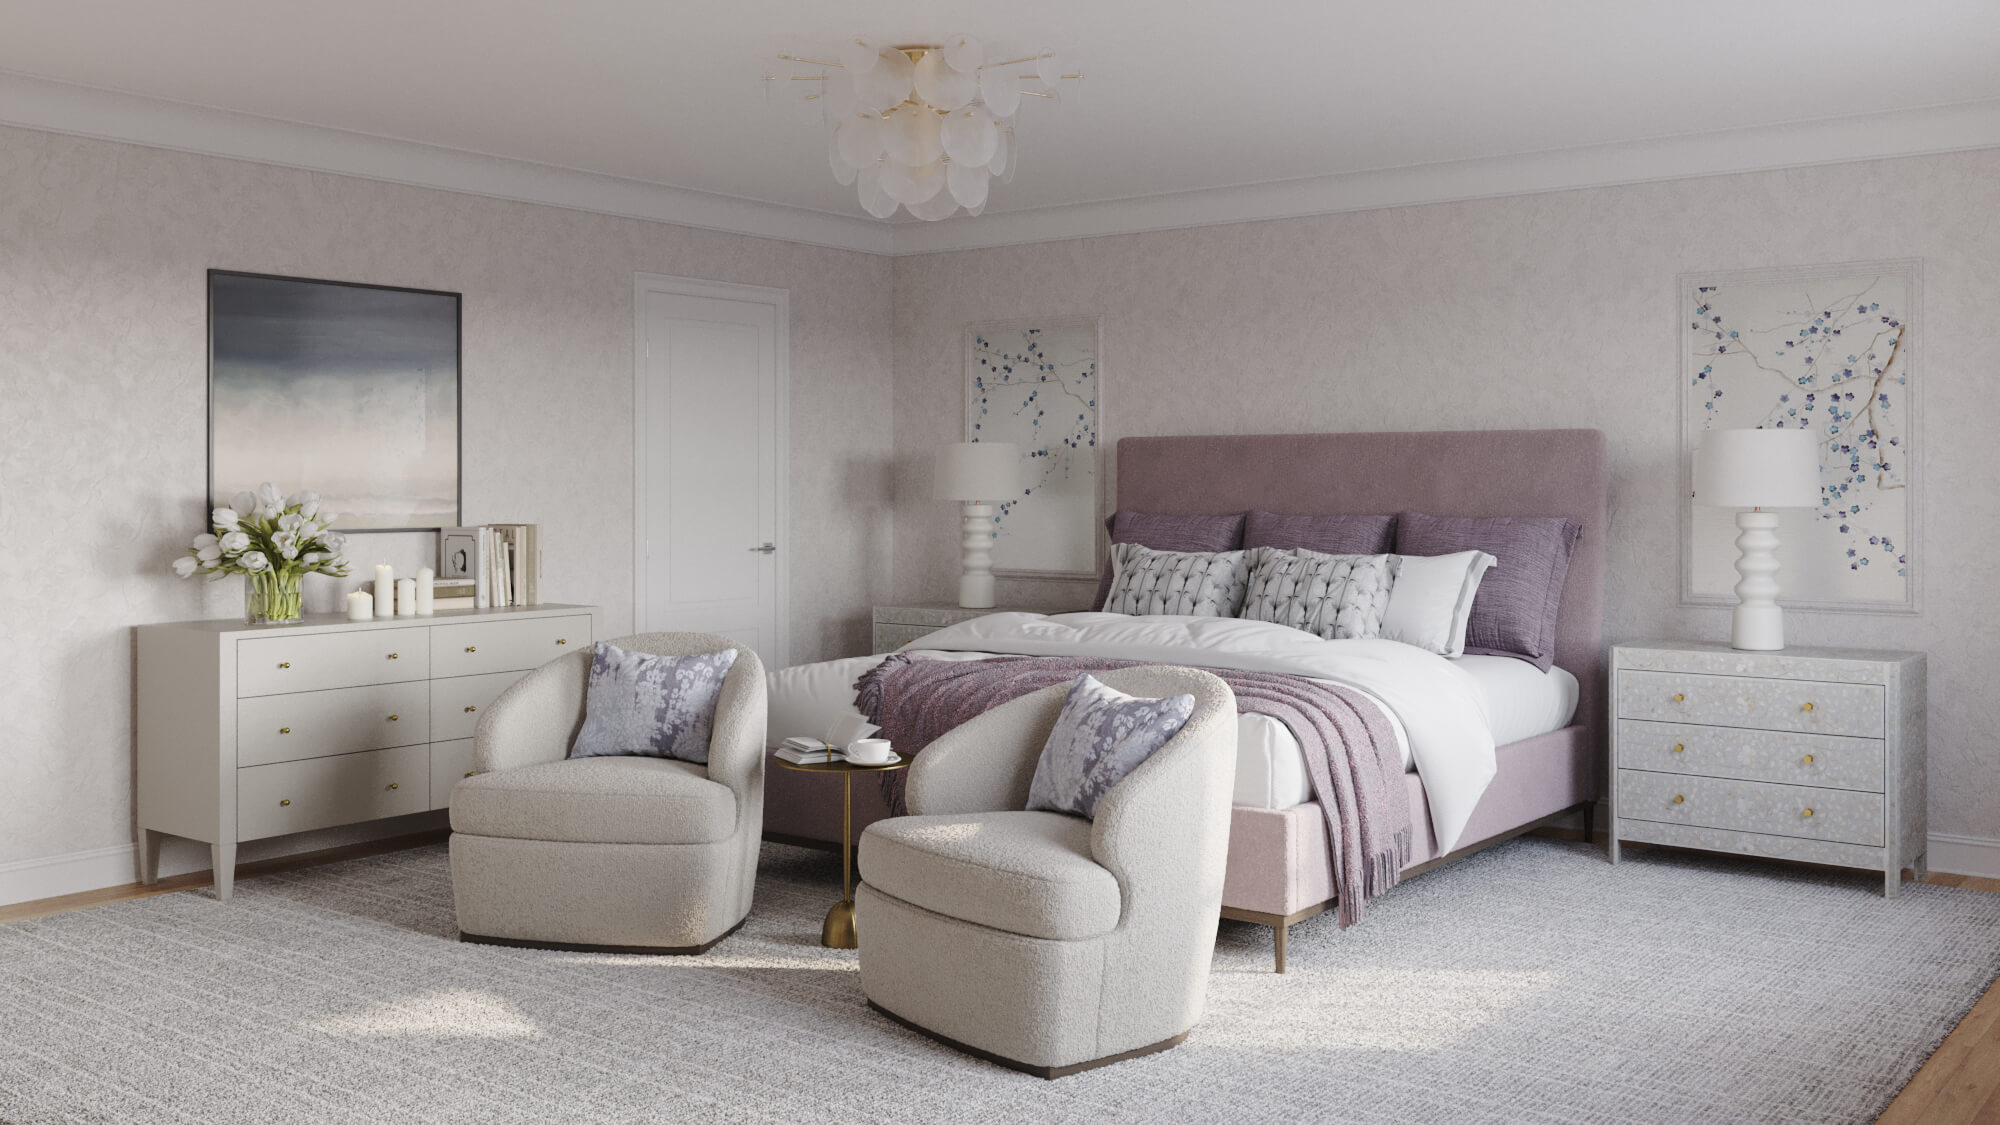
#4. Delivering Final 4K Images
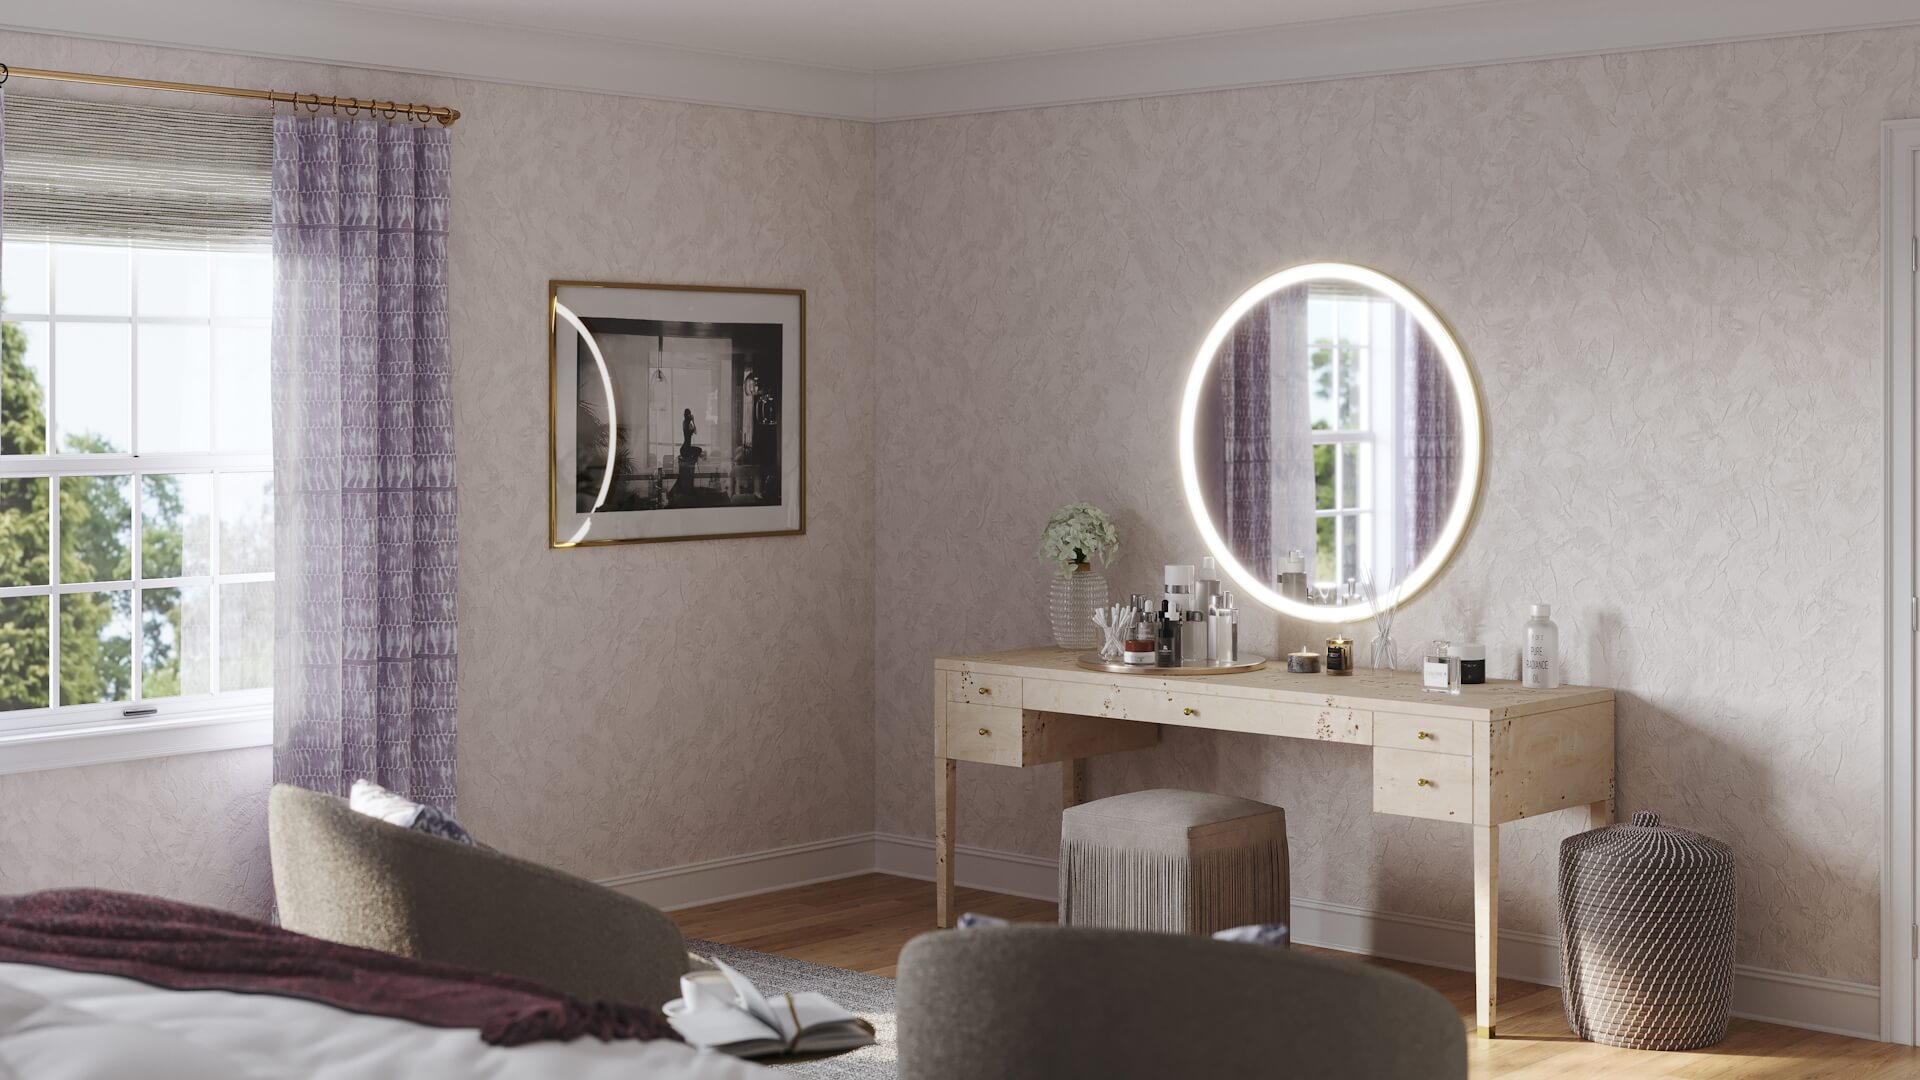
The artist rendered the visuals in high resolution and then fine-tuned them by adjusting the contrast, color balance, and lighting. As it was stated in the requirements, these CGI for interior design results had to come in 4K. However, a client can always choose a lower or higher resolution according to their needs.
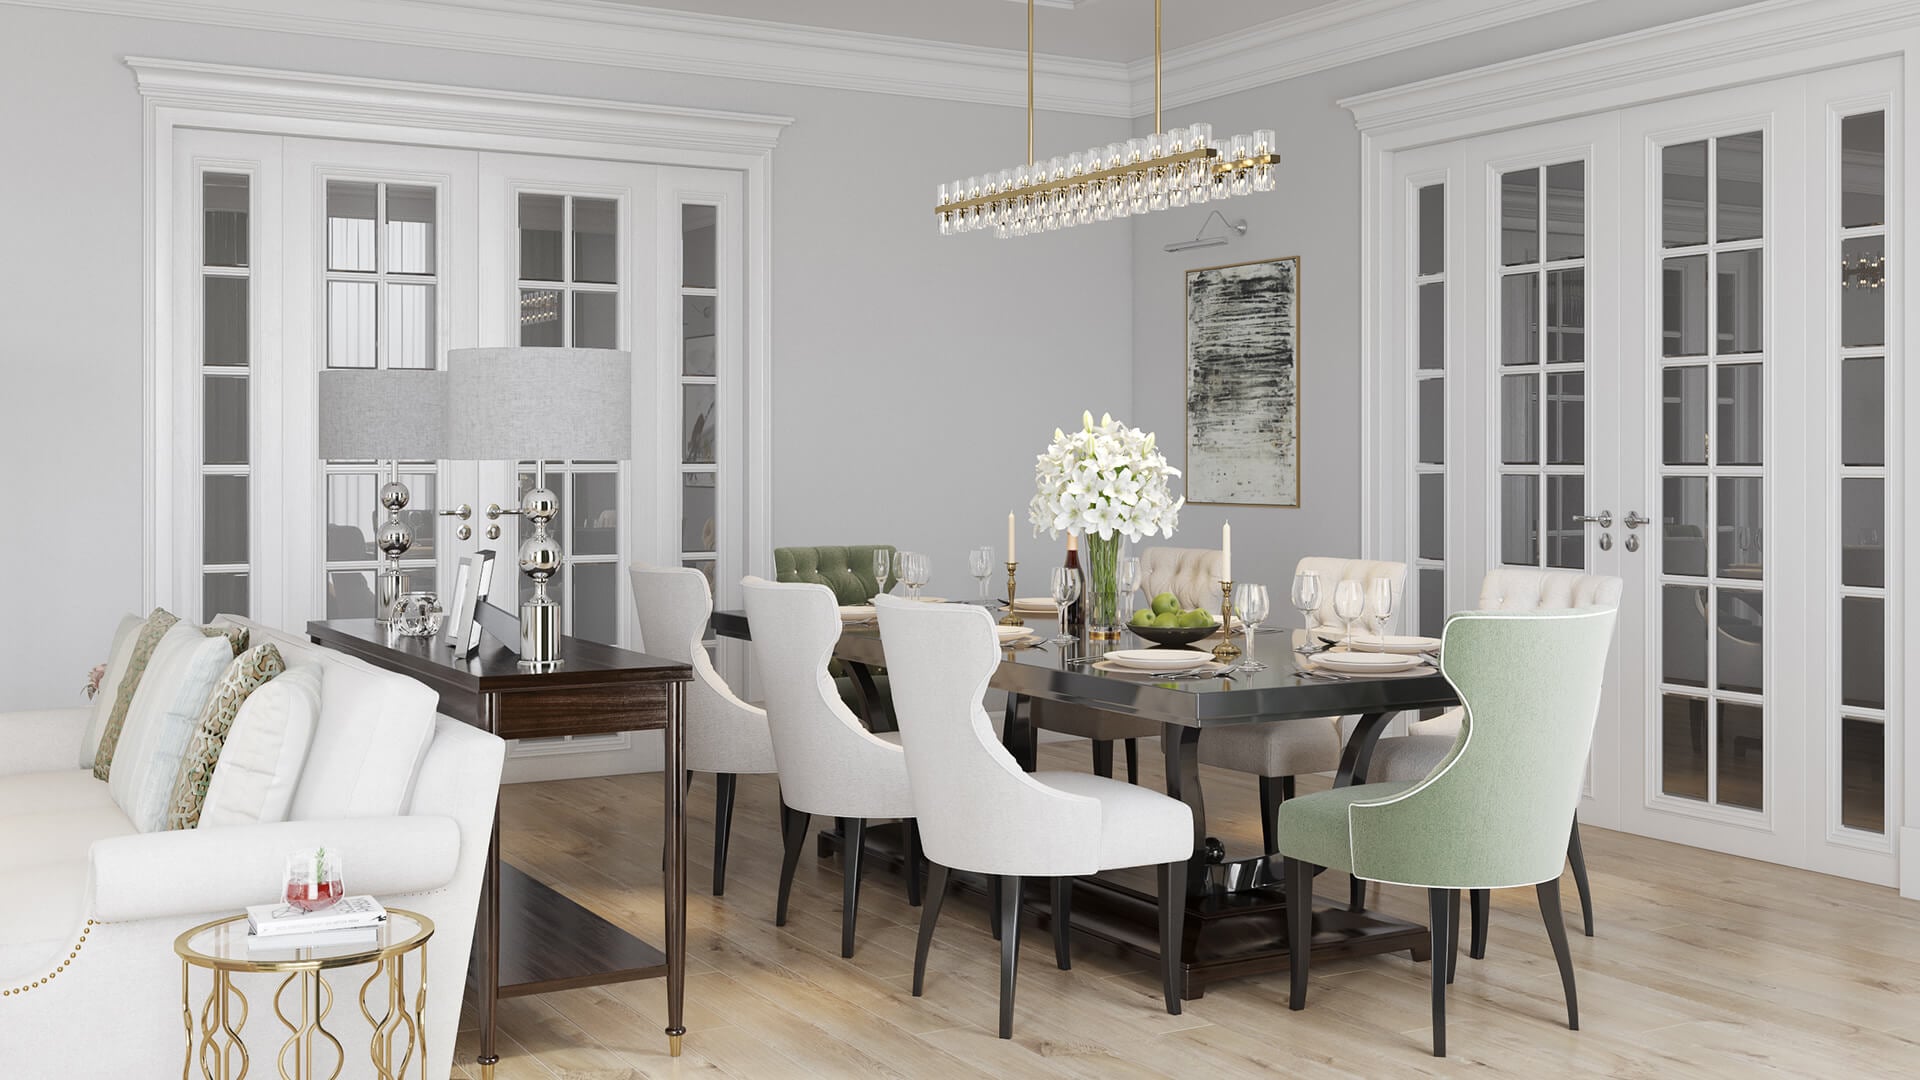
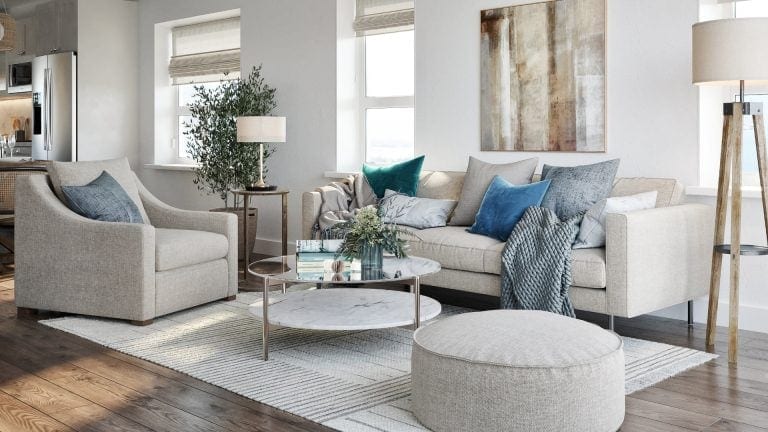
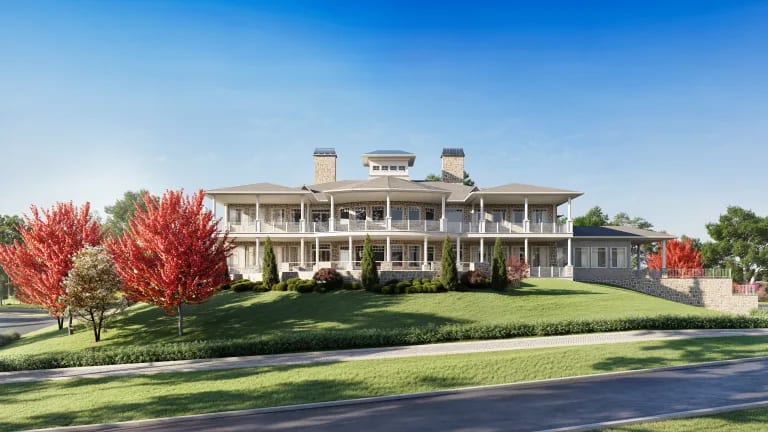
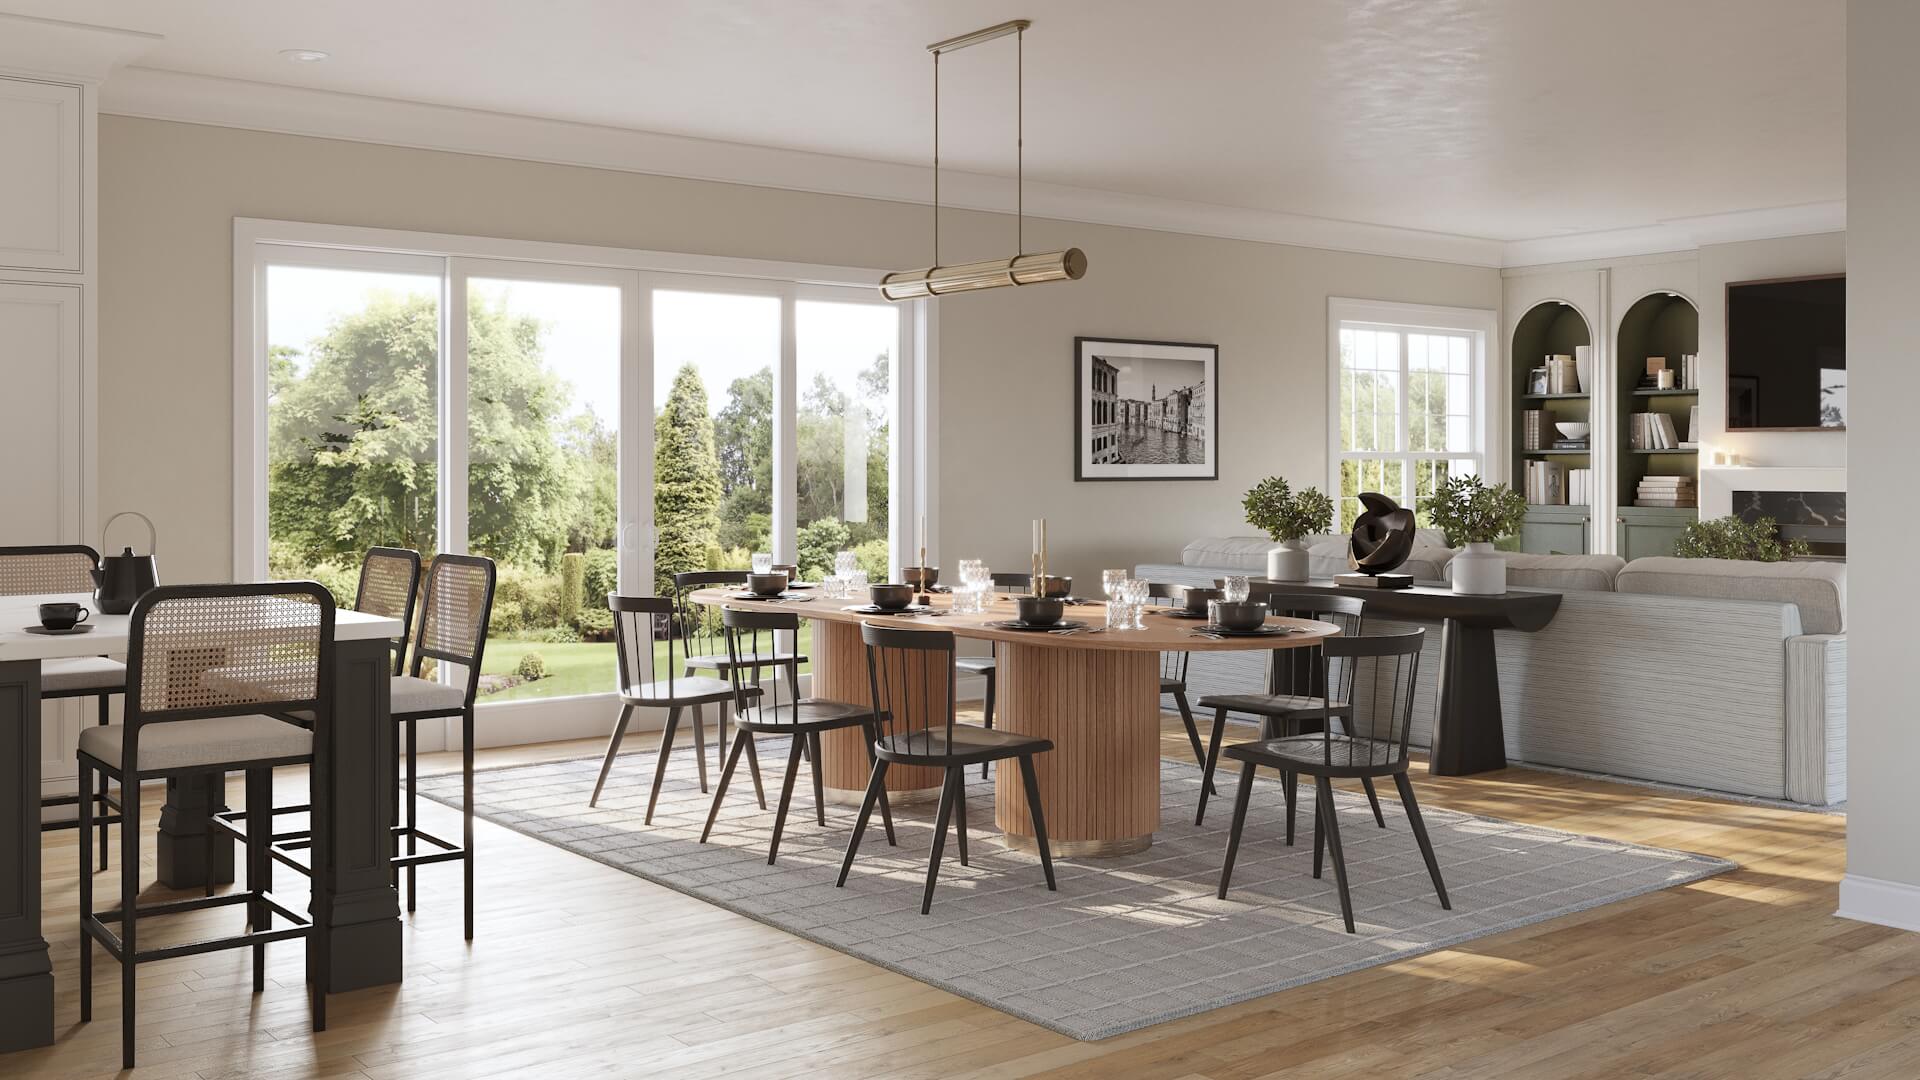
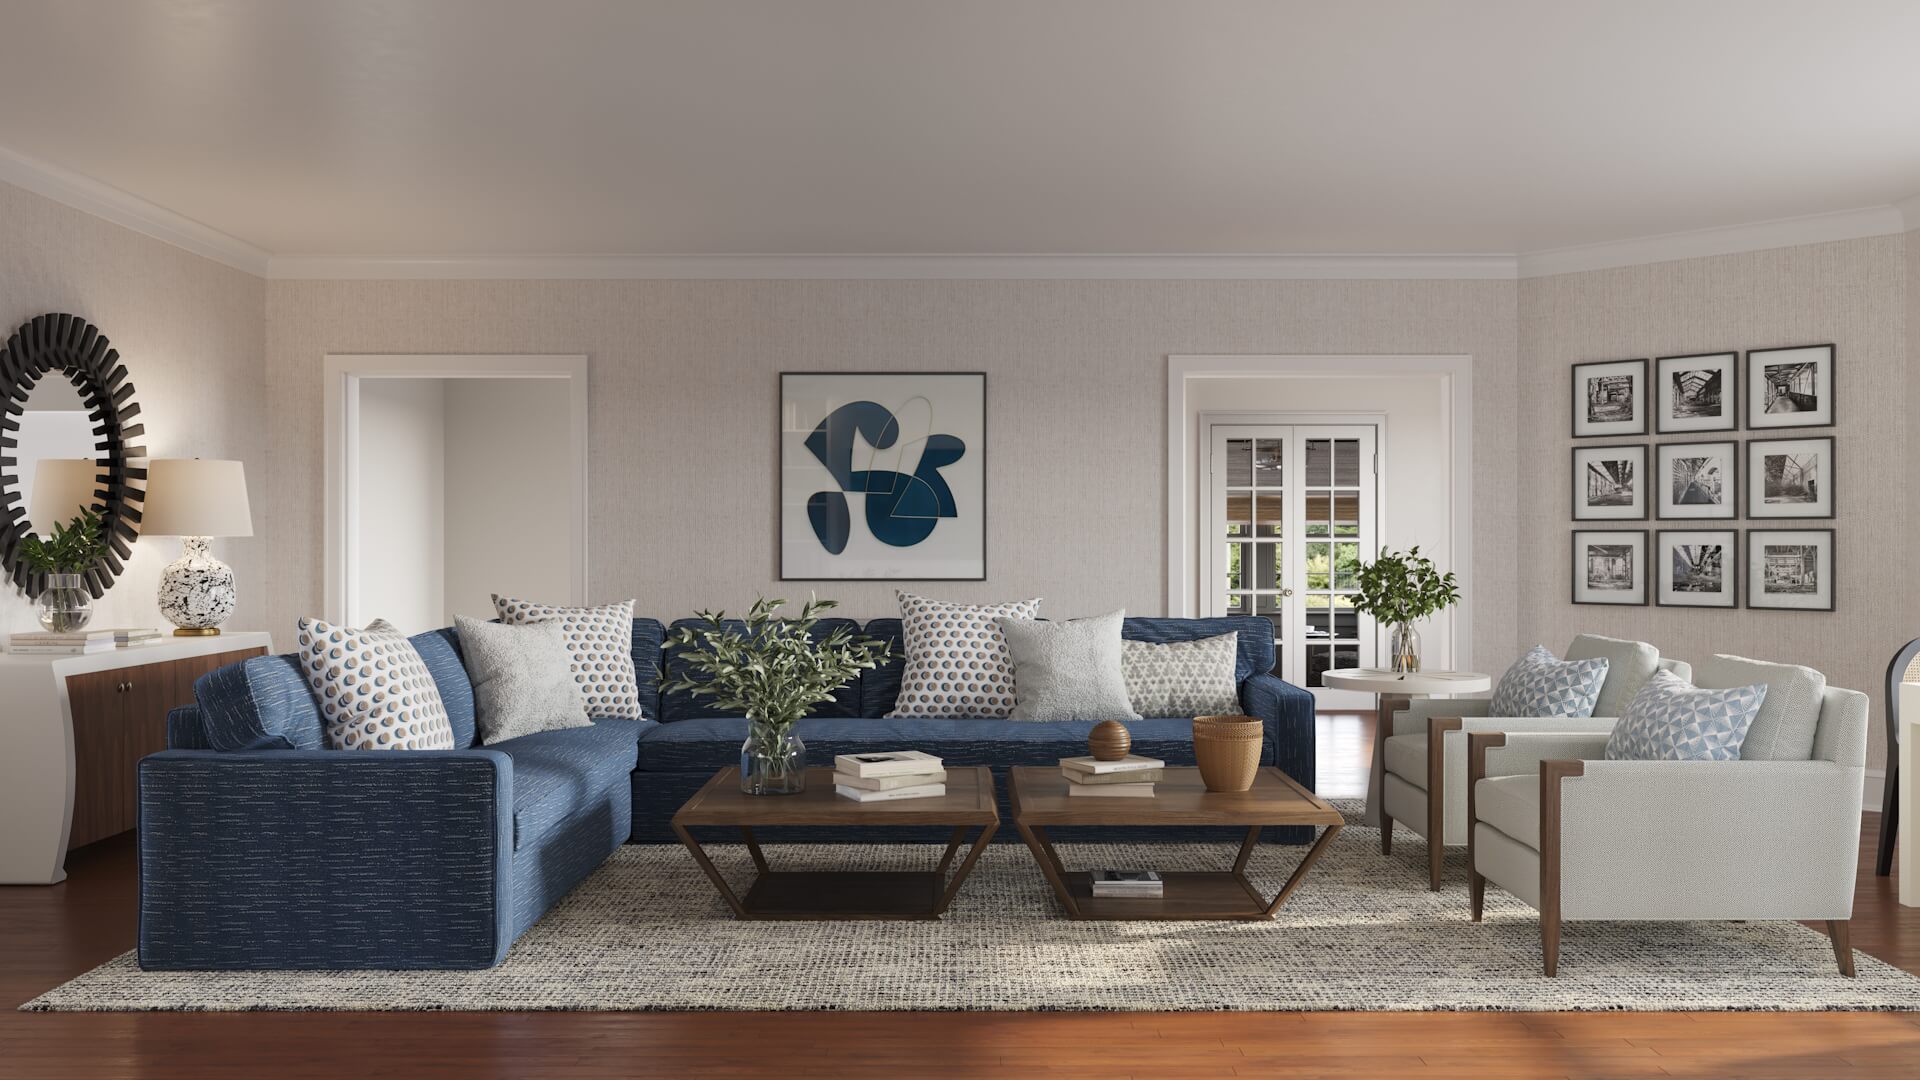
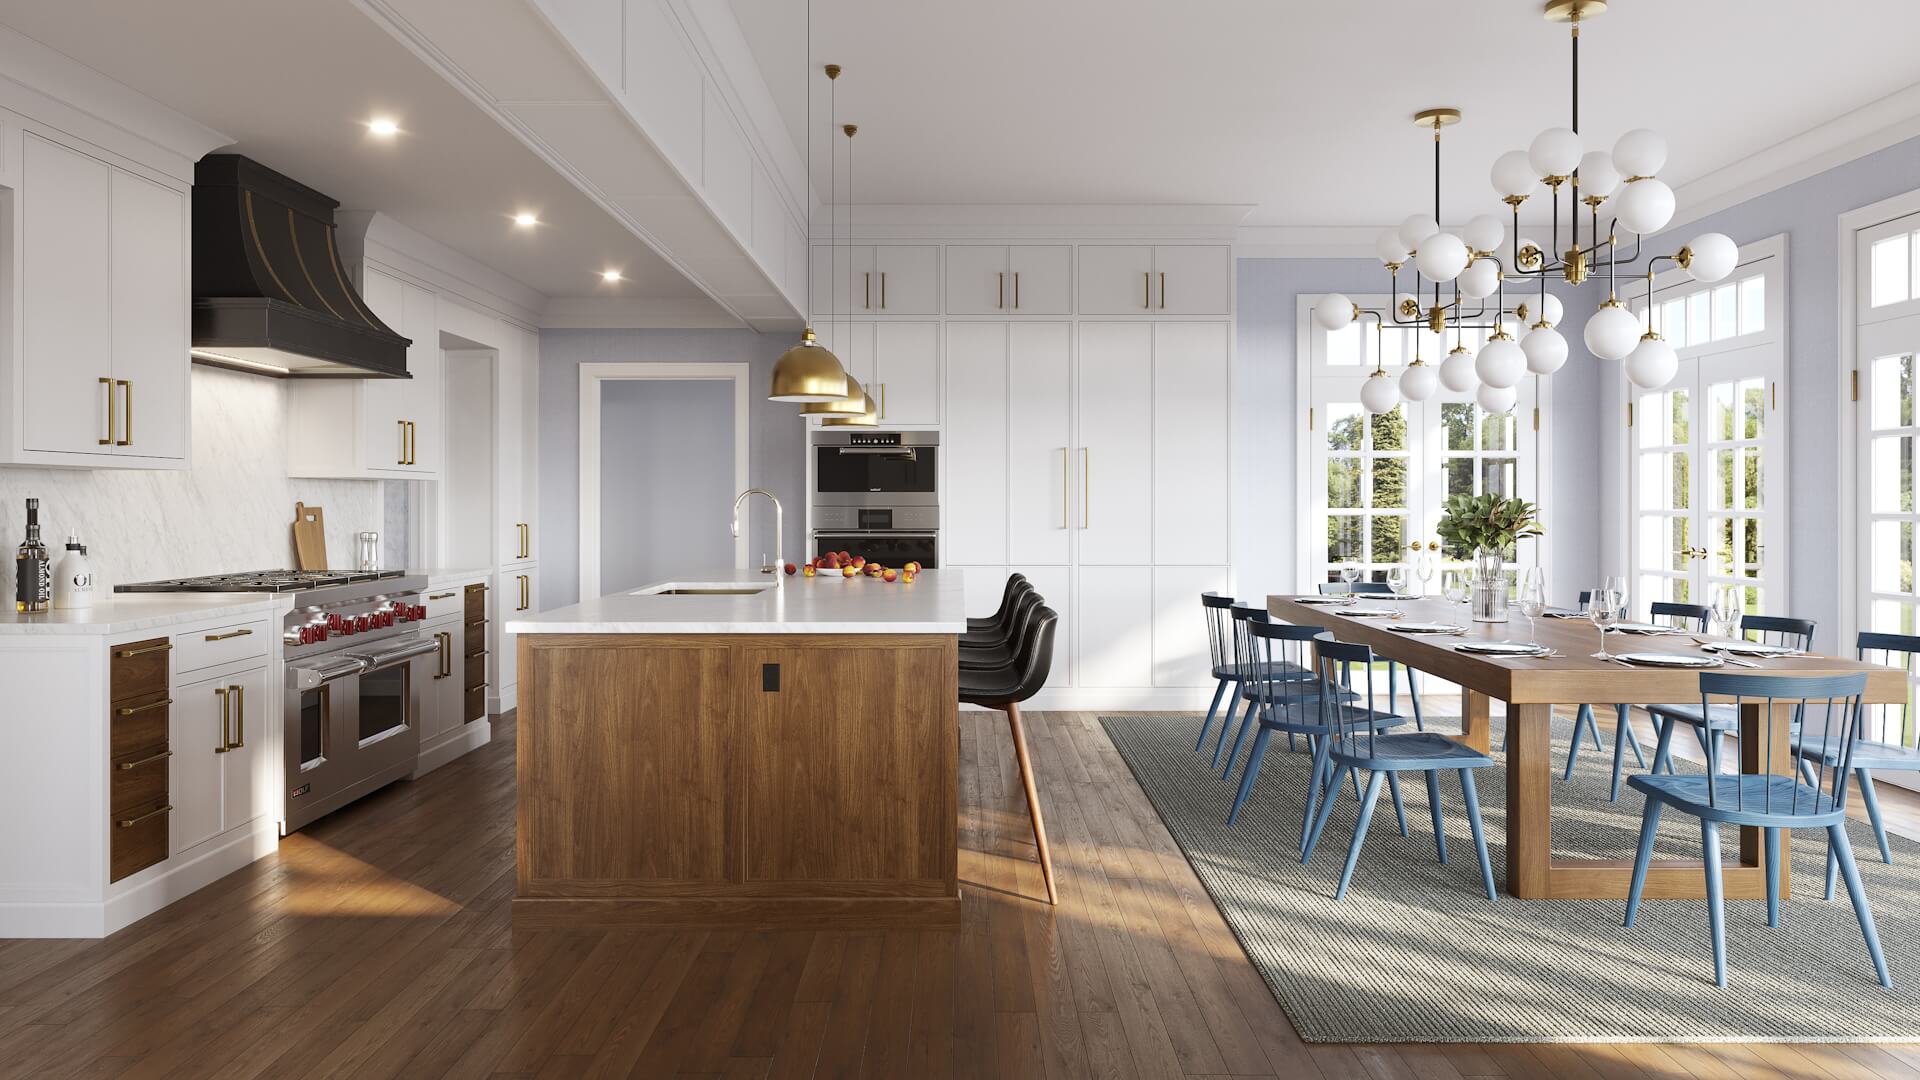
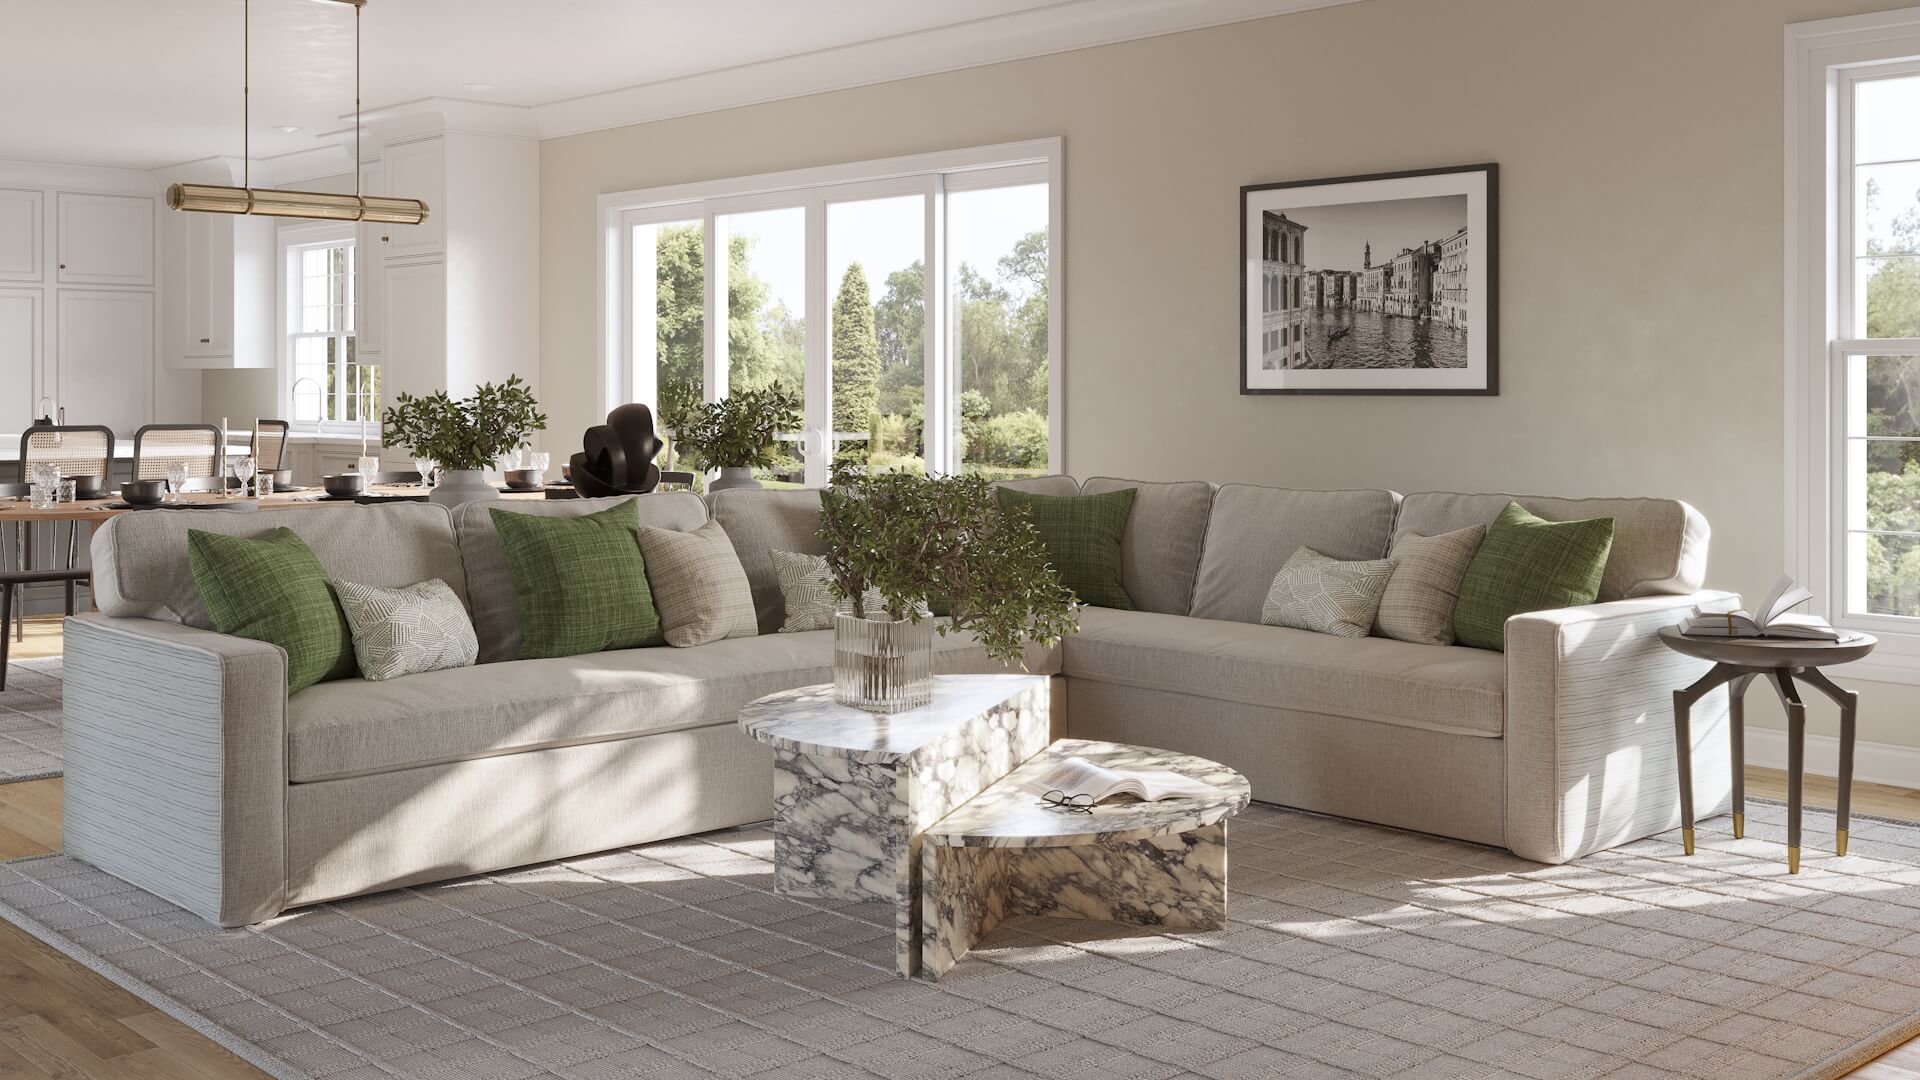
Results of Other Projects We Completed for k.a. murphy interiors
We’ve been working with Liudmila for a while now and created plenty of 3D visuals for her team’s projects. Above you can see some of the results of our collaboration.
And now, let’s check out what our client had to say about our interior 3D rendering workflow.
A Talk with the Design Director of k.a. murphy interiors

We took a chance to talk to Liudmila and asked her a couple of questions about her company and her impression of our interior 3D rendering workflow. Here is what she said.
Liudmila, what kinds of projects does the k.a. murphy interiors team usually work on? What does your role as a Design Director encompass?
We mostly work on residential interior design remodeling. My role, as a Design Director, is to guide the team to success and contribute to the business development. I interact with clients, manage the team, and oversee the projects from concept to completion. Besides that, I maintain quality standards and collaborate with internal and external stakeholders to ensure the project’s success.
Does your company often use 3D visualization? What are the main challenges CGI helps you solve?
Yes, 3D renderings are a standard practice in our presentations. They help the clients fully visualize all the details of our interior designs.
Do you have an in-house team of 3D artists or do you outsource all your CGI tasks?
We outsource all our 3D work. It’s a time-consuming job and our company is not big enough to have an in-house CGI specialist for this purpose.
Why did you choose ArchiCGI?
A colleague of mine recommended it.
Why do you prefer working with our studio?
The team at ArchiCGI is amazing! They are open to any challenge and always deliver the results on time.
We are grateful for the opportunity to chat with Liudmila and for her warm feedback. Our team was delighted to work with k.a. murphy interiors and is looking forward to continuing our fruitful cooperation.
Showcase your architectural project with photorealistic CGI powered by modern AI-assisted workflows
That’s it! Now you know all the steps of our standard interior 3D rendering workflow. This easy step-by-step process allows us to produce high-quality results for you in a very short time. Hopefully, this article clarified the 3D rendering process for you, and you won’t hesitate to contact us for CGI services when you need them. We are ready to take on any task you have in mind and to ensure a smooth workflow.
Details on the exterior CGI creation process, costs, workflows, and quality assessment rules can be found in our architectural rendering guide.
Looking for a way to get breathtaking CG images for your interior concepts? Use our professional interior 3D rendering services to get captivating photorealistic visuals for presentations and marketing materials!

Ian Diev
Content Writer, Editor at ArchiCGI
Ian loves writing about innovative 3D technologies and their impact on architecture and design. In his spare time, he makes indie music, watches obscure movies, and cooks culinary masterpieces for friends.

Comments
John