

Office Building Rendering with Photo-Matching
Office building rendering is a valuable asset for real estate marketing and sales. It allows developers and realty agents to successfully pitch projects to investors and sell out offices way before the construction is over.
Now marketing-savvy developers are familiar with traditional 3D visualization services. But do they know about the power of photo-matching? This technology produces outstanding imagery faster and at a lower cost than full CGI.
How’s that? Well, traditional exterior rendering requires digital recreation of both the building and the environment. Which produces real CGI marvels – just take a look at our portfolio, you’ll see.
Obviously, such an amount of work takes time. Of course, we do 3D rendering projects of any scale in 1 week only. That’s because we’ve got state-of-the-art technology and expertise. But normally, digital recreation of a building’s surroundings needs a lot of time.
Photo-matching is a way faster alternative. For it implies the creation of a 3D model of a building and incorporating it into a photo of the surroundings. Another plus – photo-matching allows showing how the design will fit in a specific landscape. How to get the background? One can just hire a photograph or arrange for an aerial photoshoot.
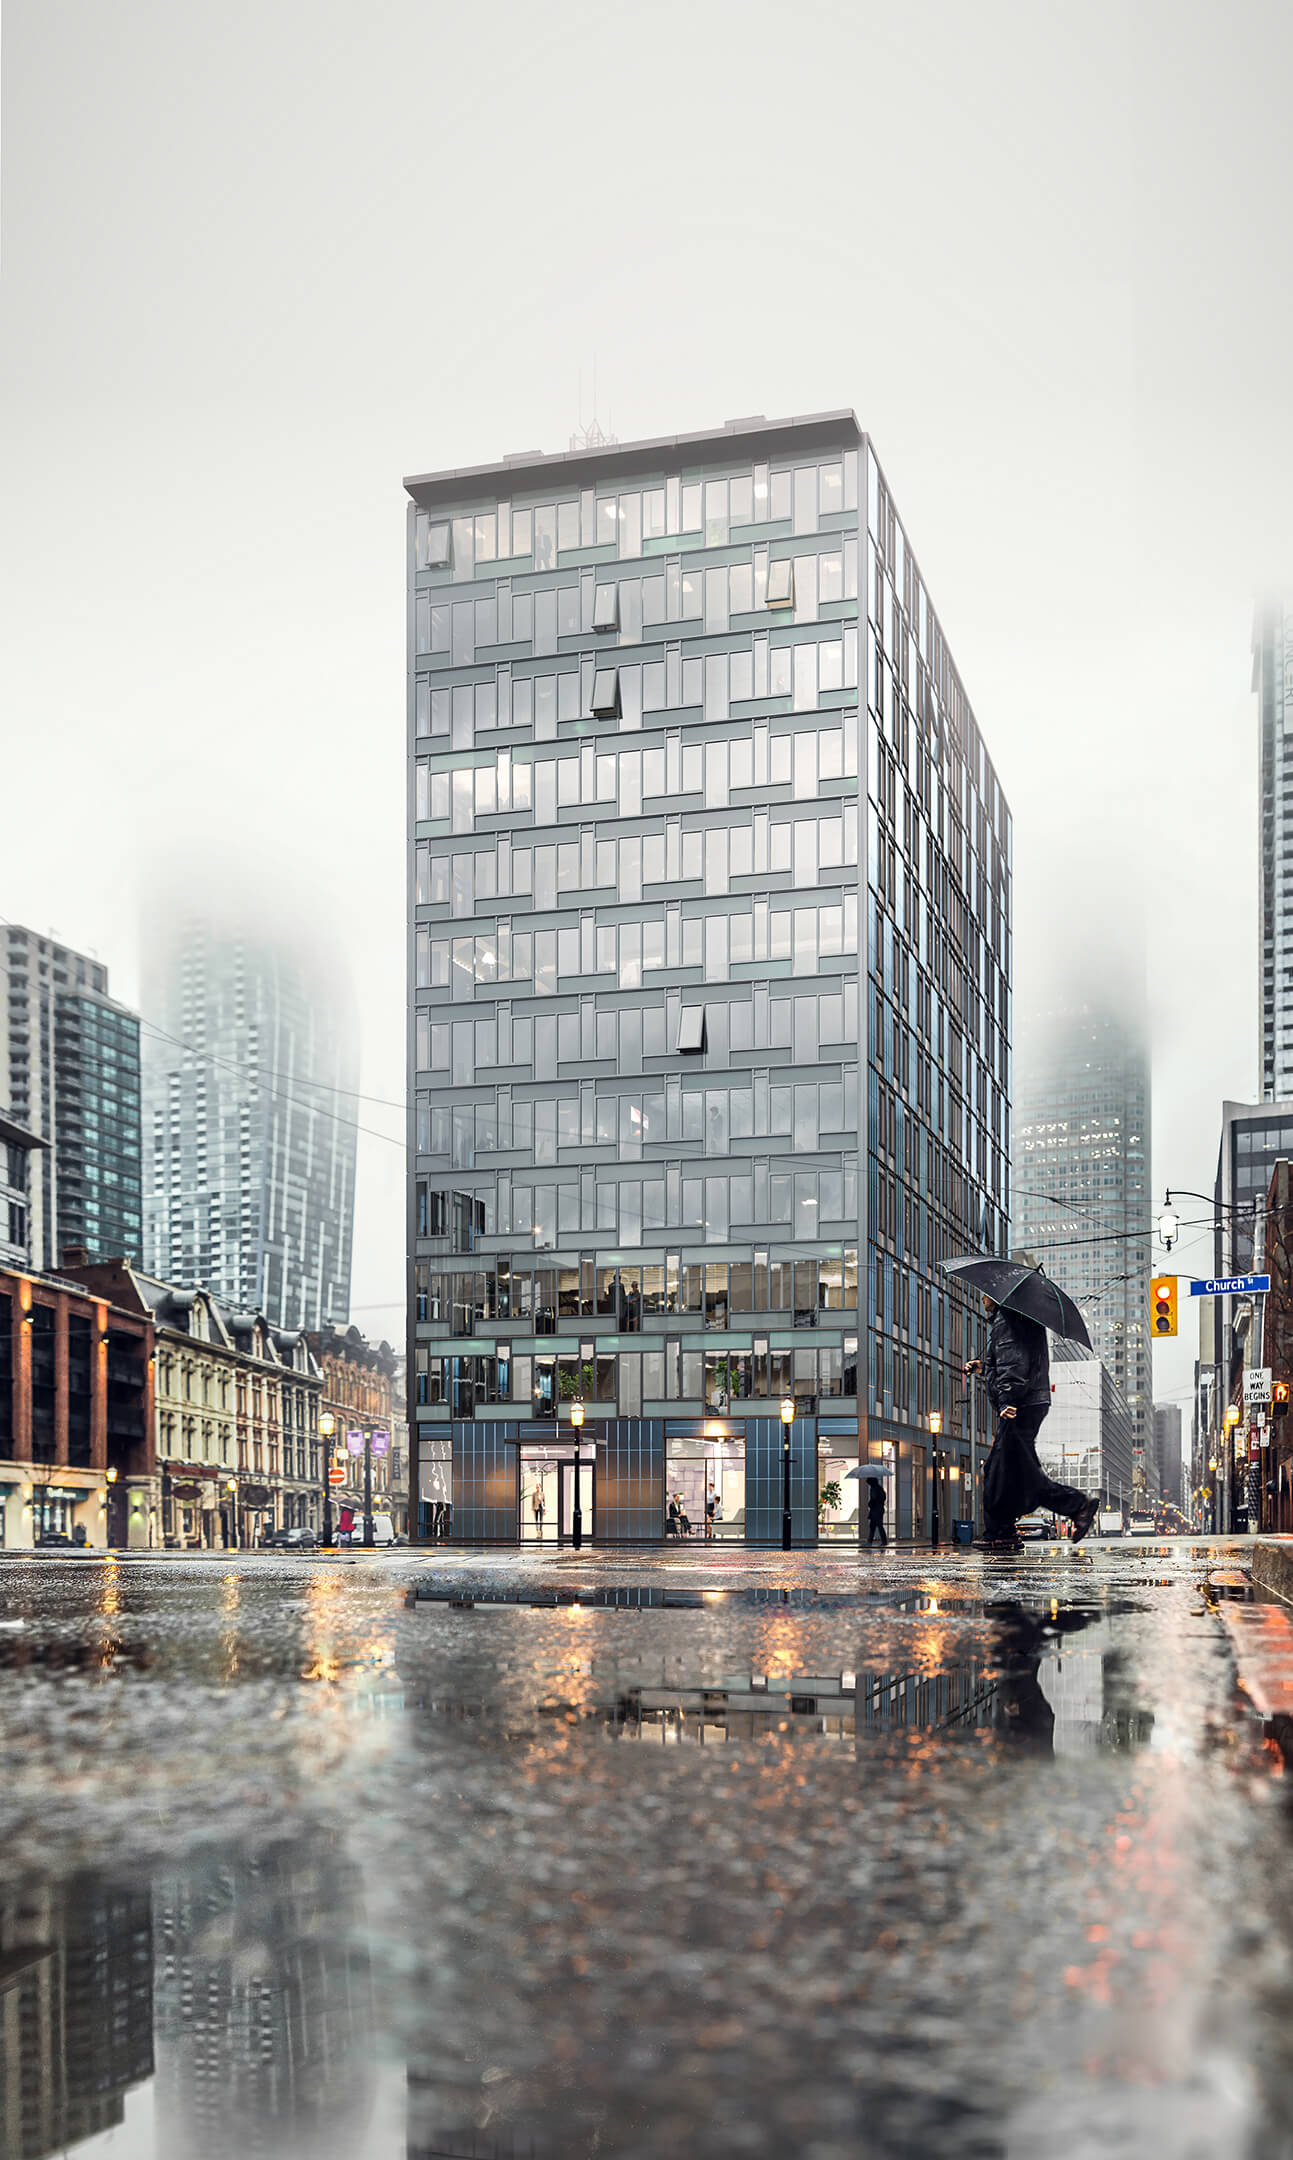
The author of this office building rendering is Nykolai Stepanov, a Senior 3D Visualizer with ArchiCGI. With this project, he intended to showcase realtors and developers how photo-matching can get them perfect imagery for pitching and advertising.
CG Rendering Concept Development
1. The Object of the Image
Nykolai wanted to show how it’s easier to pitch for a commercial object construction armed with a professional 3D rendering. So he opted for showcasing an office exterior.
Investors trust numbers and facts. Above all, they want to be sure that the building will attract long-term tenants or well-paying buyers in no time. And what a better way to prove it than by showing? A seasoned 3D rendering artist will paint a picture so vivid investors will understand everything at a glance.
They will see how this building can be full of life. People will have meetings there, discuss important deals, and write messages to customer support about a software bug. They will talk about the last vacations over colorful cups of fragrant coffee and enjoy each other’s company. These offices will provide them with all the necessary comfort.
2. Finding a Perfect Photo
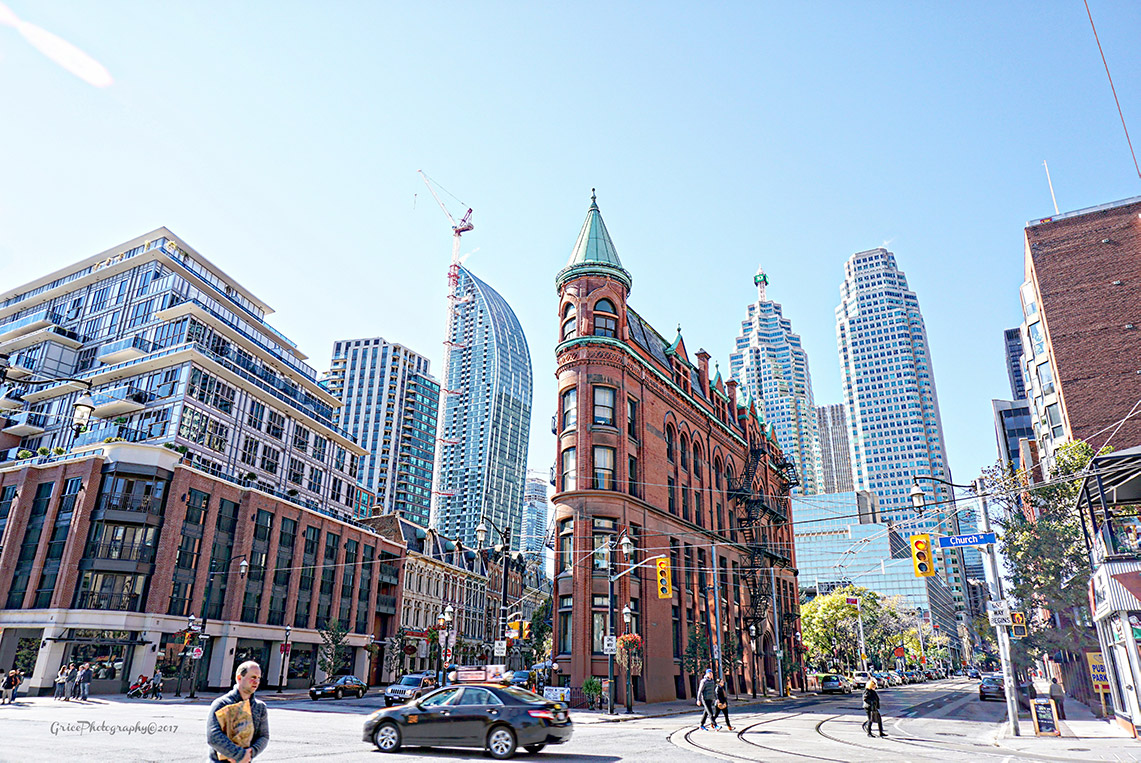
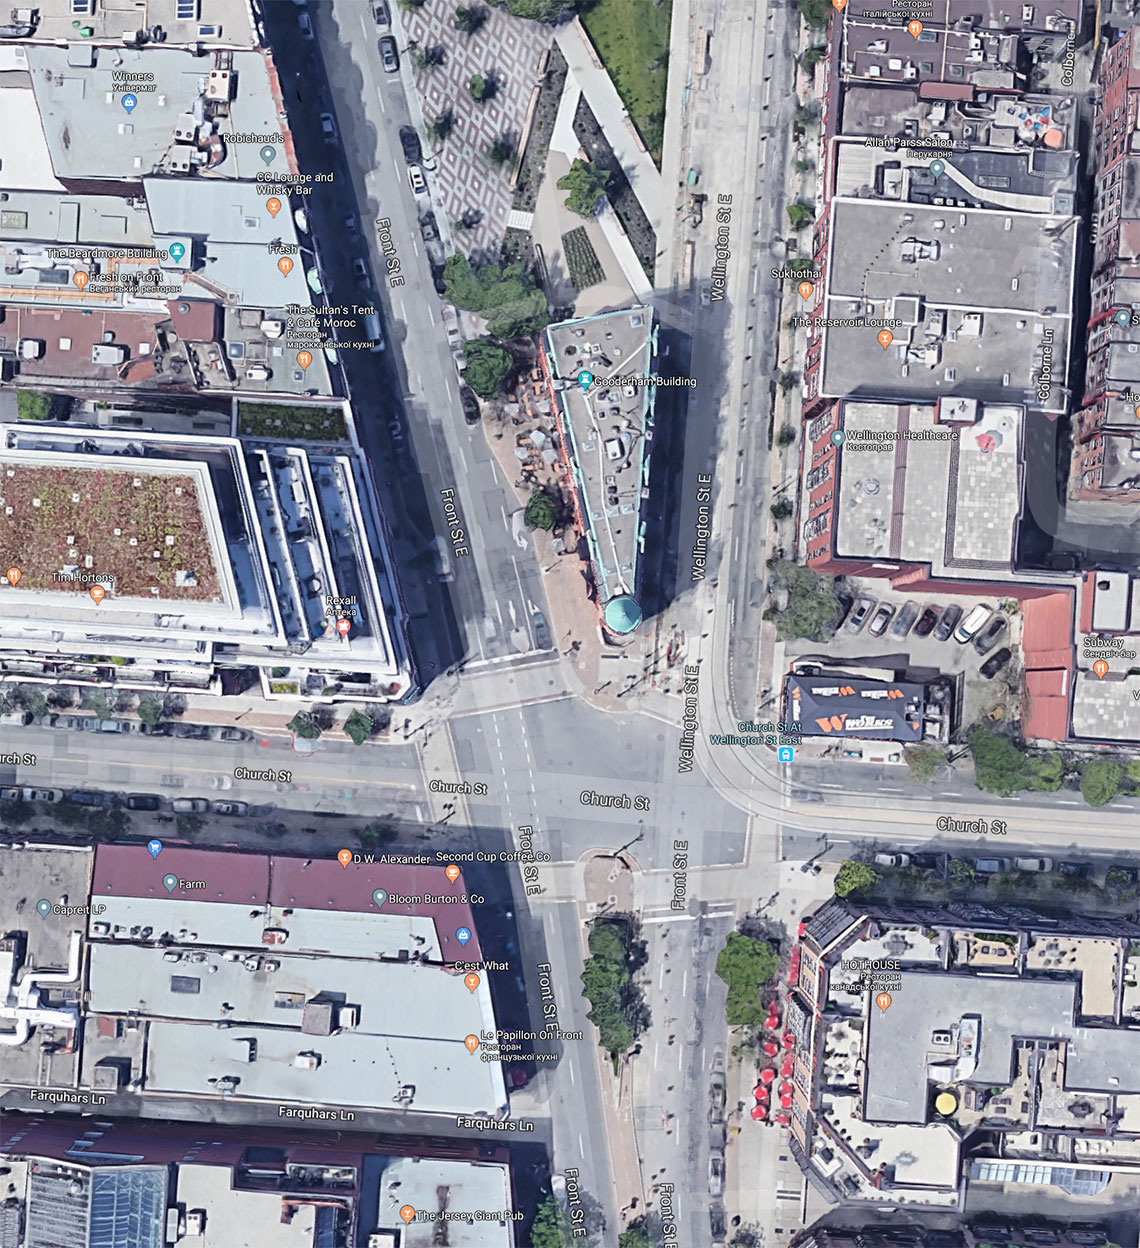
To begin with, the 3D visualizer needed to find the setting. First, Nykolai chose a few photos with show-stopping landscapes that would increase the visual appeal of the building. Next, he selected only the pictures where he could fit the entire building, which he planned tall. Finally, he went for a pic of a beautiful place in Toronto. The office center was to be put in place of the iconic Gooderham building, situated between Front Street and Wellington Street. You can see this elegant gothic structure in the picture above.
3. Developing the building concept
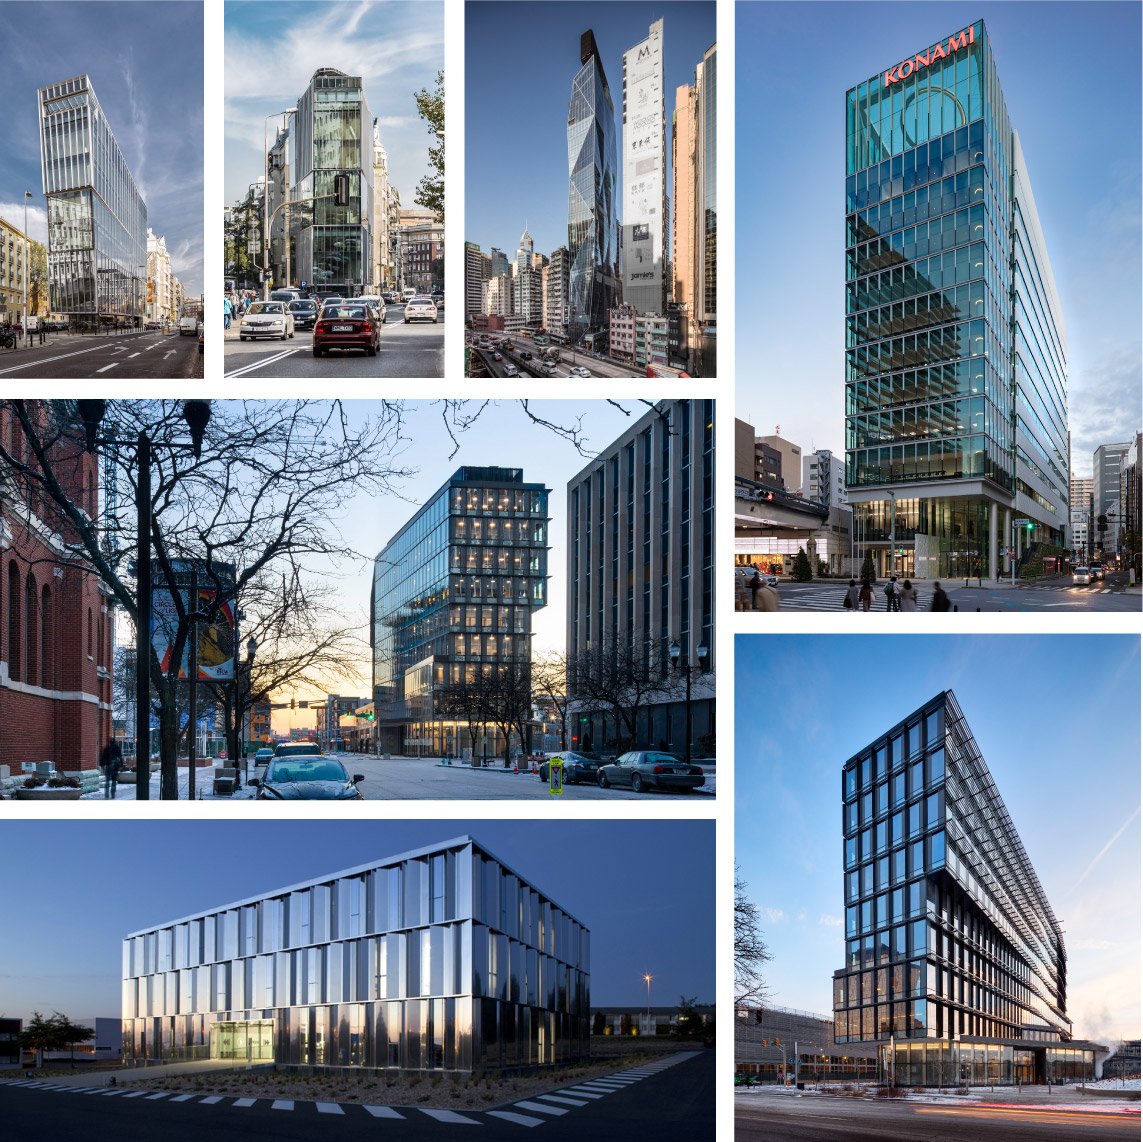
Nykolai created the concept of the office himself. He drew inspiration from a series of amazing projects on Archdaily, Dezeen and Wikipedia. For instance, The Nest office building by Grupa 5 Architekci, V POINT by ARK, the Cummins Indy Distribution Headquarters by Deborah Berke Partners, Konami Creative Center Ginza by Sakurai Architecture Design Studio and Ethnos, and FITECO by Colboc Franzen & Associes.
As a result, the 3D Visualizer created a new look – simple, clean, and timeless. Above you can see some of the office designs that had inspired him. Then, Nykolai drew a sketch of the architectural design and went on to model it in 3Ds Max.
4. The process of 3D modeling
1) The Geometry
Nykolai went from general to specific. First, he created a 3D model of the box – the shape that would become the office building. He needed it to understand how exactly the object would look in the scene. This helped to define dimensions, the number of floors, parts that’d be seen, and the ones that’d stay hidden. This approach saves a lot of time. For when there’s only 1 view, the 3D visualizer may not need to model the entire building.
Next, Nykolai divided the box into 12 floors, 2,5 meters high each. As the building had a modular structure, he could copy the same module to other floors and then furnish them.
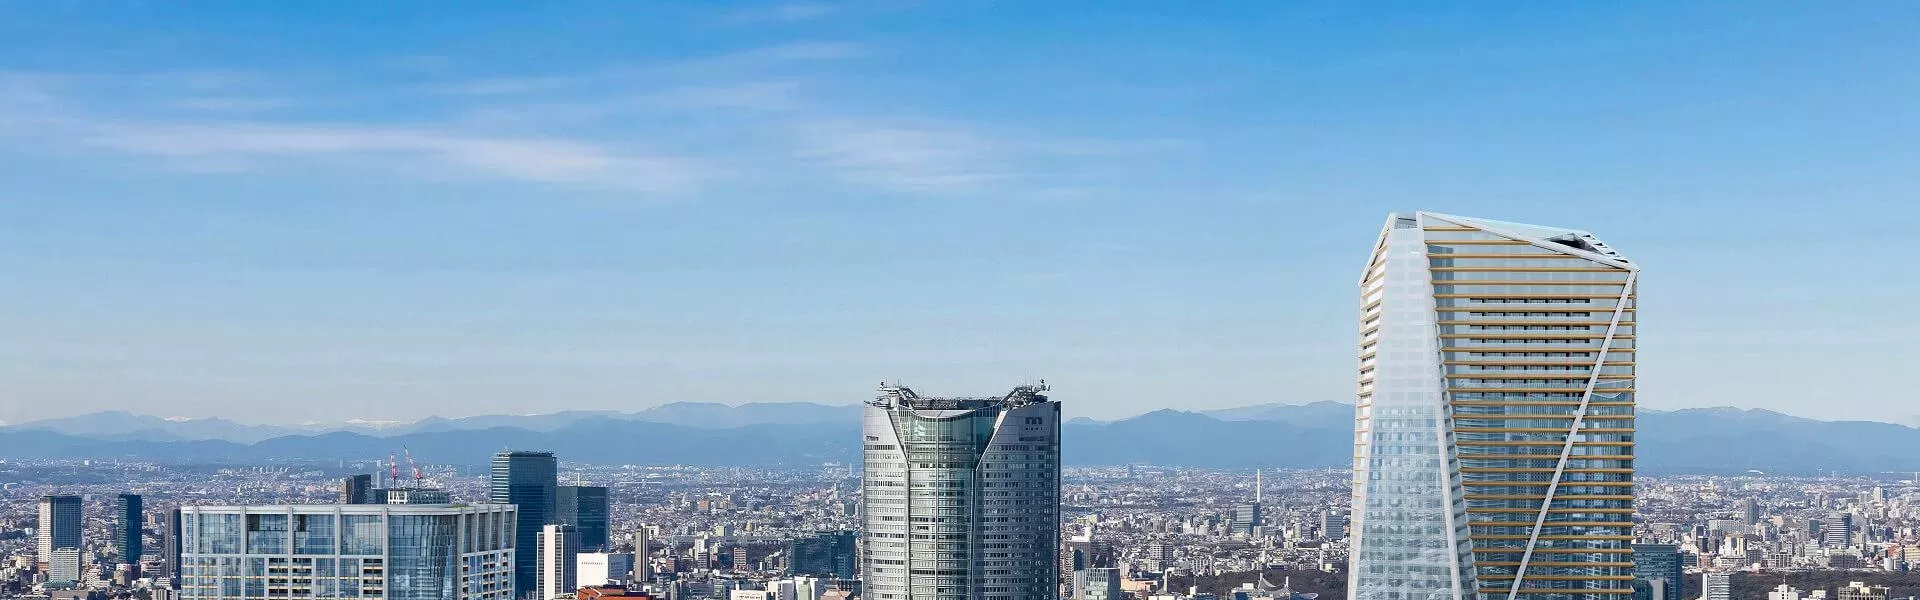
The 3D artist started with the ground floor because it looked different from the rest. Next, he went on to model the first floor, which he then cloned to the rest of the building. Finally, Nykolai added communications to the roof – a transformer and a cell tower. They are hidden by a thick fog, but you can clearly see them when zooming on the rendering. Voila! The exterior was ready. It was time to start working on the office building interior.
2) Space design
To begin with, the 3D visualizer established that the building would contain open space offices, a restaurant, and a hall. Then, he built the lobby, furnished the second floor, and copied the furnishings to every other floor.
To add diversity, Nykolai adjusted the interior of each space so as to make them look unique. He moved furniture around, switched on different lamps, changed decor.
3) Preparation of an individual scene
Every room was crucial for the realism of the commercial project rendering. Creating every space included the following stages.
-
- Setting walls.
- Filling the scene with furniture, decor, and plants, adding vents and air
conditioners. - Lighting the office. As the rendering showed the building on a workday, most of the rooms
needed to be lit. So the 3D Visualizer put daylight lamps on the ceiling. For a diverse and organic
look, Nykolai left some spaces in the dark, and “switched on” the TV in the conference room. The
general light was off, as there was but one employee talking on the phone. - Adding details for storytelling. To fill the place with life, the 3D artist “populated”
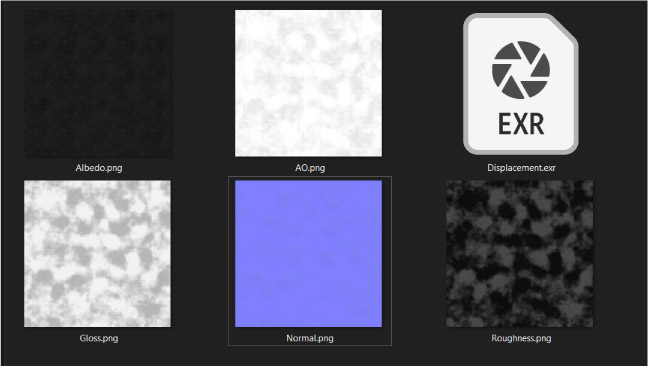
it with people. He also added a bit of asymmetry – opened some windows, and curtained some. - Texturing. As Nykolai used the 3D models of real furniture, he didn’t need to texture every piece. He only adjusted the colors sometimes. The materials he worked on were concrete, metal, and glass. The 3D artist determined the best color for the metal, established whether it’d be painted, shiny or anodized.
4) CG Modeling of the Exterior
When the geometry was ready, and spaces furnished, the 3D artist created and textured the 3D model of the facade. Then, he worked on creating a more nuanced a natural look for the building. For instance, he made some lights shine brighter, and some – dimmer.
When the exterior and interior were ready, and the lighting worked, came the time for working on the environment and reflections.
5) Building Surroundings
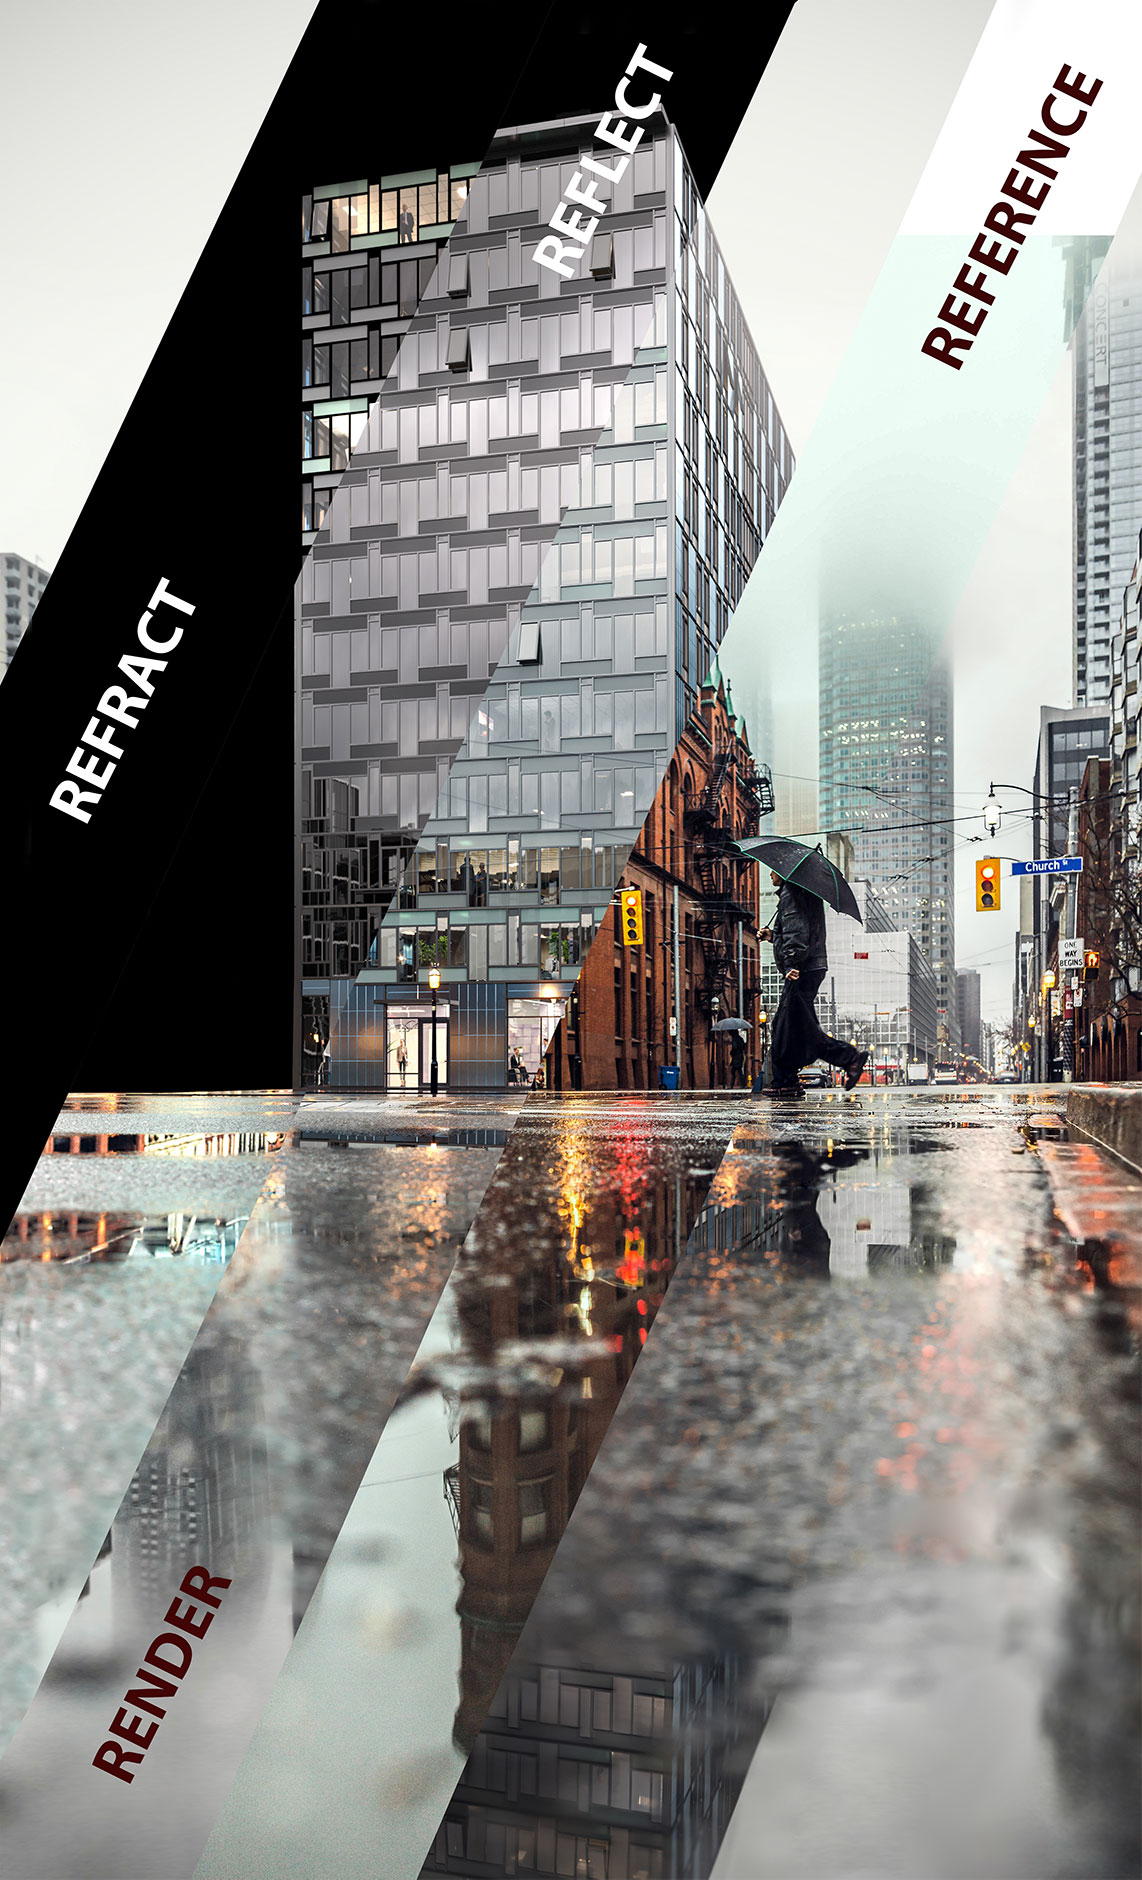
As the facade was glossy, it had to reflect the surrounding objects, like trees, street lights, cables, utility poles, cars. The 3D artist created their 3D models, so he could put them in the scene at the 3D rendering stage. And as a result, get those true-to-life reflections.
Such nuances have a lot of impact. If there were even a small discrepancy, the viewers would notice. They might not even realize this, but the scene would feel artificial, and they would see the boundaries between a photo and a rendering. For a seamless photo matching, the 3D artist must take care of every single detail.
Moreover, Nykolai couldn’t use the asphalt from the photo. The puddles reflected the building that was to be replaced, which wouldn’t do. The 3D artist needed to create a 3D model of new asphalt, so he could place it in the rendering scene and get the right reflections.
6) Asphalt 3D Modeling
To begin with, the 3D artist searched for a new asphalt texture. He needed to seamlessly combine it with some asphalt areas from the picture, so the patterns had to match. Next, Nykolai edited the texture. He combined there both surfaces, chose the shape and position of the puddles, defined just how much water they would contain and how wet the ground would be.
7) Setting the Light
Once the geometry and reflective surfaces were ready, it was time to set the light in the office building rendering. So the 3D artist chose the HDRI map with a cloudy sky and recreated the lighting model from the original picture. For instance, the street lights had to glow from the same side, the cloud had to overcast the sun in exactly the same way.
8) Setting the Scene for the Rendering
If we were talking about a traditional architectural visualization project, the next step would be 3D rendering. However, that’s not our case. As we are combining a photo with CGI, we need to remember about those reflective surfaces.
What about them? Well, since the building was to be included in the photo, the 3D artist wasn’t supposed to construct the surroundings around it. He needed to render the 3D model of the building with no background and put it in the photo.
But in our case, the facade had to reflect the surrounding objects, and be reflected in the puddles. In the isolated scene that would be impossible, so the 3D artist needed to recreate the environment from the photo.
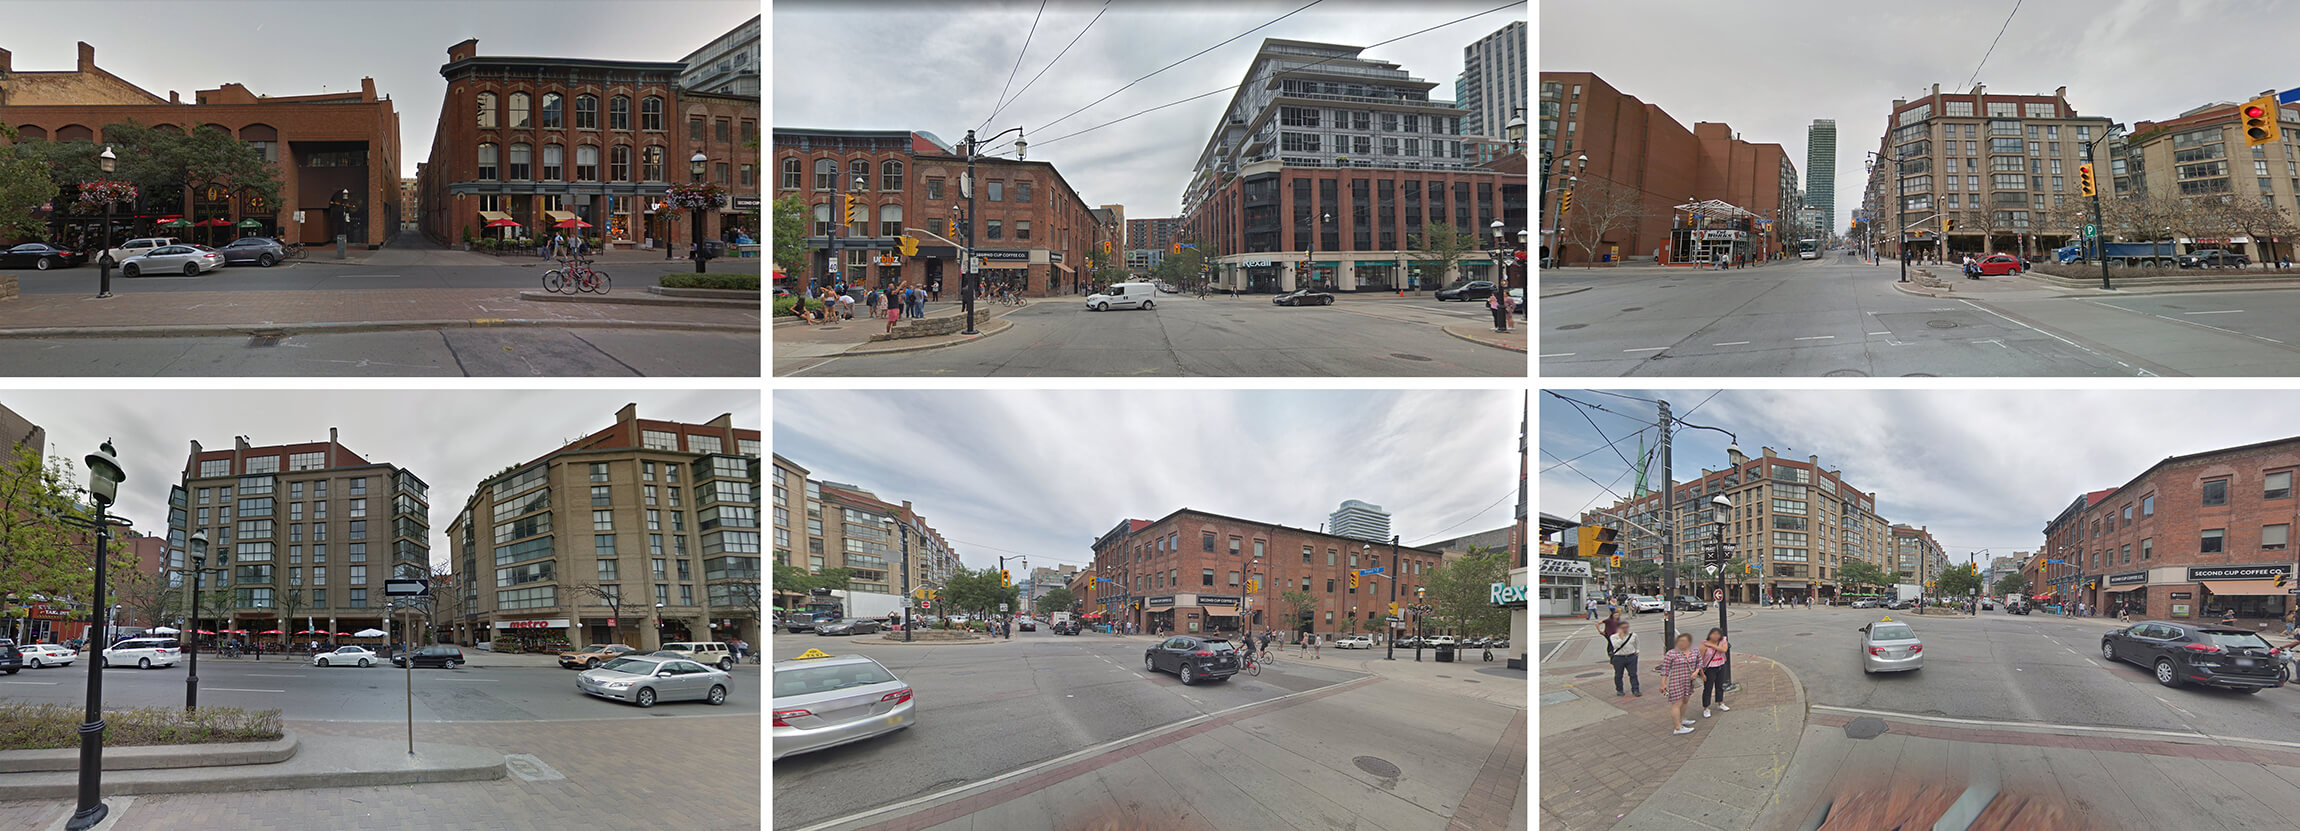
Nykolai used Google maps for that purpose. He chose the weather and time of day and made screenshots of the place pictured in the photo. Then, he basically put the screenshots around the office building. That is, he placed huge boards around the office 3D model and placed on them the textures of these screenshots. As a result, he reproduced the scene from photography. It looked like the object really stood in the exact same environment he needed for the office building rendering. Which meant the glossy surfaces would have the right reflections!
9) Rendering Process
At this stage, the 3D artist took the HDRI map with a cloudy sky, incorporated the new scene and the 3D model there, and started the rendering process.
10) Merging the Photo with CGI
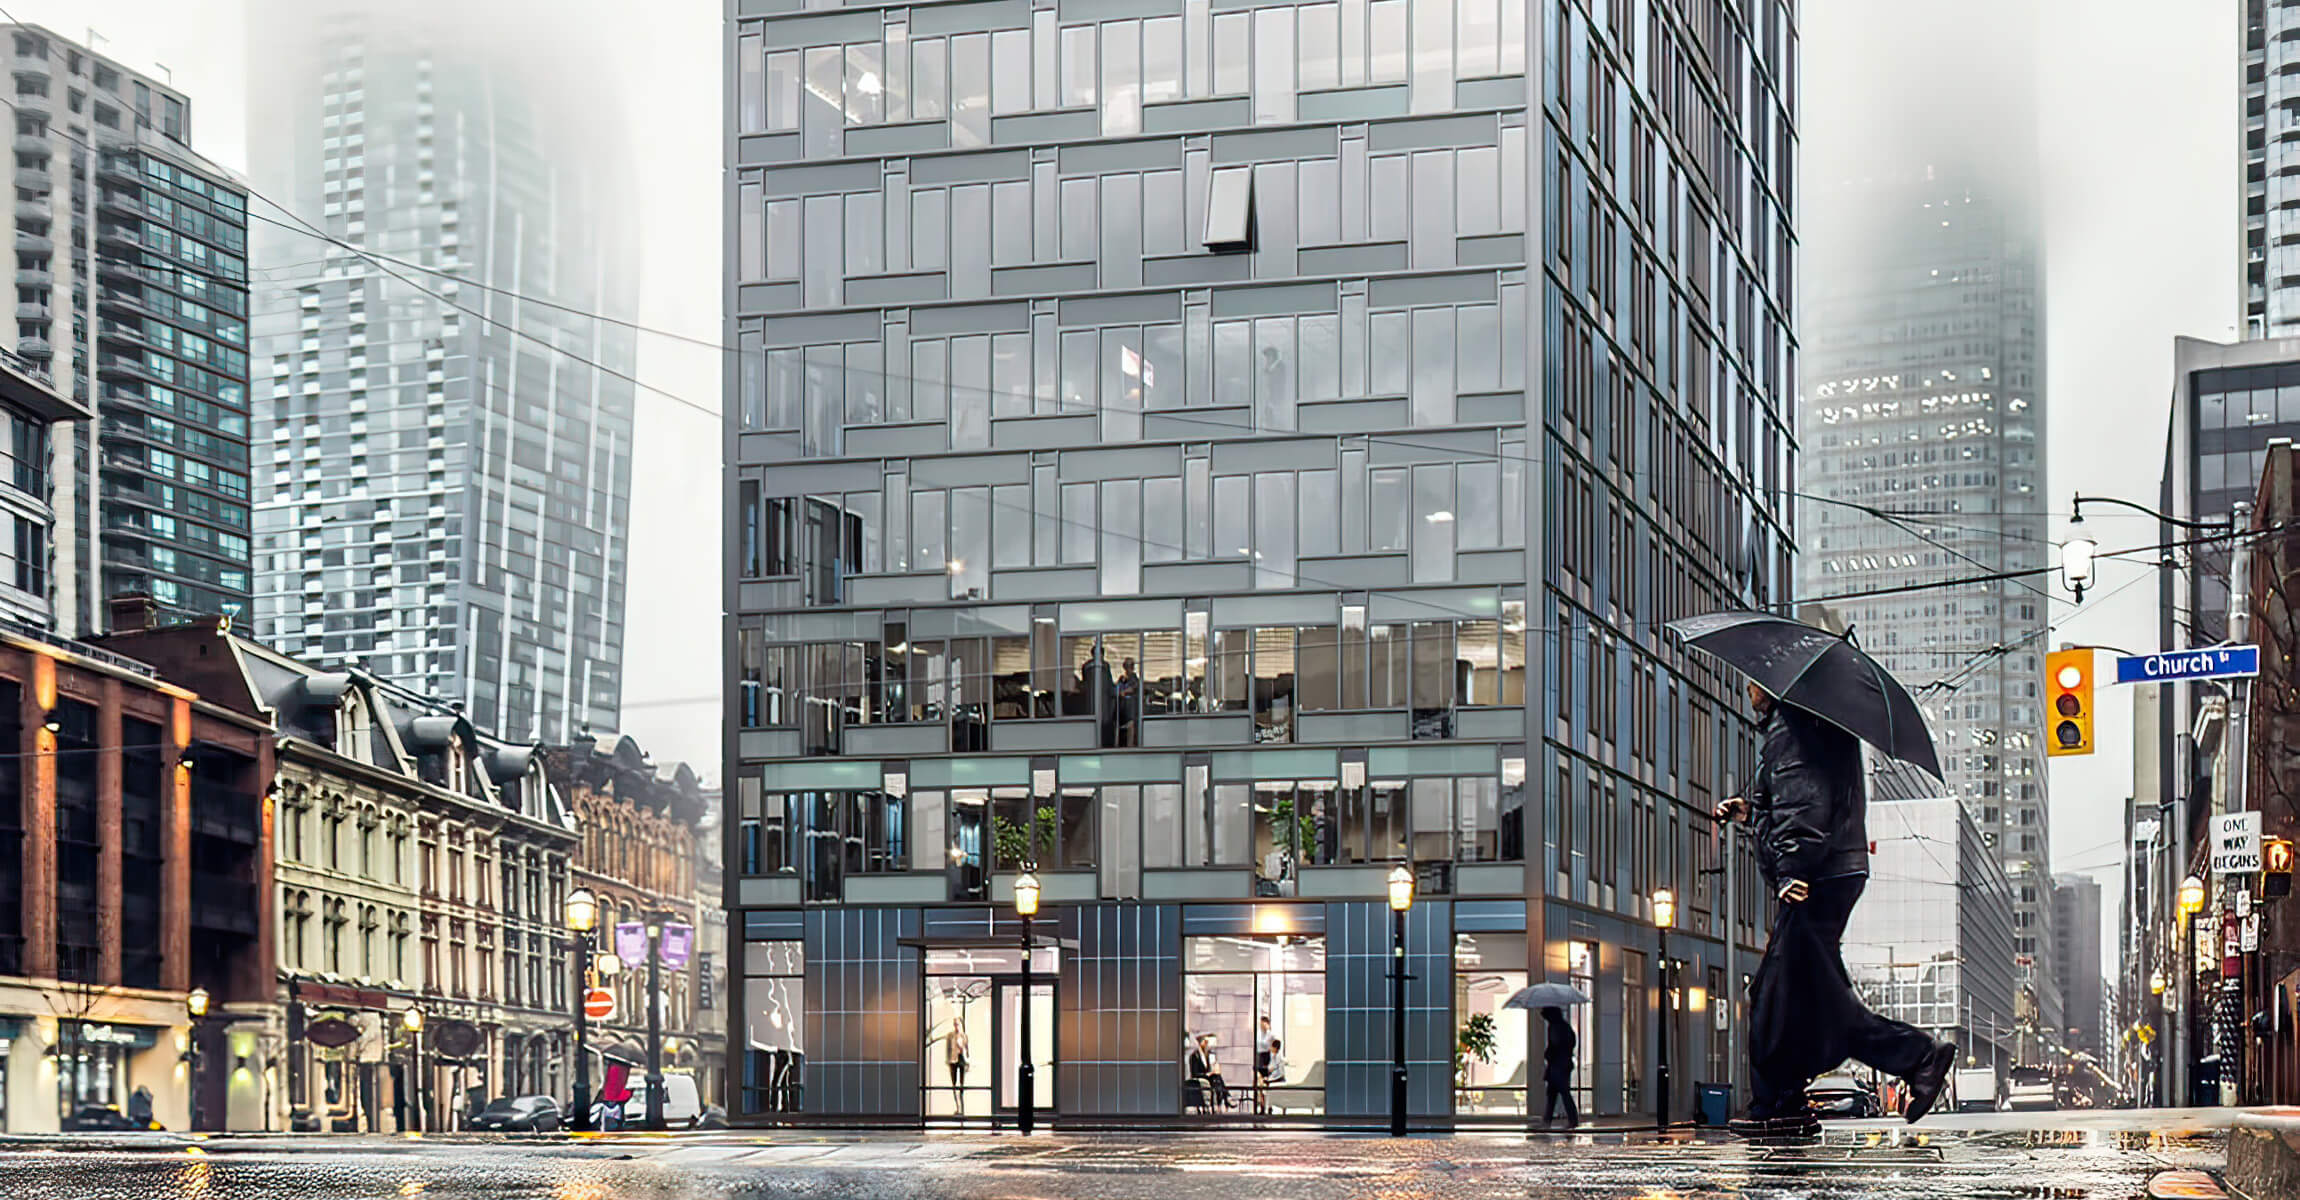
When all the elements were ready, it was time to combine them. First, Nykolai cut the building out in the original photo using Photoshop. He then opened the new rendering in Photoshop too and started to merge the two images after highlighting what he needed from both layers. From the 3D rendering, he took the office building, asphalt, and some more separate elements. The rest is photography!
11) Post Production
For a hyper-realistic look and seamless merging, the 3D artist made some final touches to the office building rendering. Using Photoshop, he worked on some color correction and intensified reflections in the windows. The latter are usually more pronounced during the daytime, so that detail added realism too.
As beautiful as the landscape was, the rendering needed to be about the office building. So, Nykolai toned down the background a bit to deemphasize it. For the same purpose, the 3D artist intensified the aerial perspective as well. The masterpiece was ready!
By merging photography with CGI, a skilled 3D artist can create a showstopping office building rendering. It’s faster than full CGI and produces just as much impact. Need spectacular 3D architectural visualization to impress your clients? Then contact us. We will deliver the masterpieces full of emotional power and telling a story of your design!
Want to learn how much your project costs? See how we evaluate 3D rendering projects

Irma Prus
Content Writer, Copywriter
Irma writes articles and marketing copy for ArchiCGI. Her dream is that more people discover the power of CGI for architecture. Irma is into neuromarketing, ruby chocolate and Doctor Who series.