


Professional Exterior Rendering of a Prairie Home in California
The ArchiCGI’s client David Kuoppamaki is a co-owner of a KUOP Designs, a building design firm based in California. He contacted us on the advice of his colleague in November of 2020. Initially, he wanted our team to do one professional exterior visualization of a Contemporary ranch designed by him. Pleased with the results of our work, he decided to go for long-term cooperation with ArchiCGI. Now, we’ve completed five 3D architectural visualization projects for David and are looking forward to more.
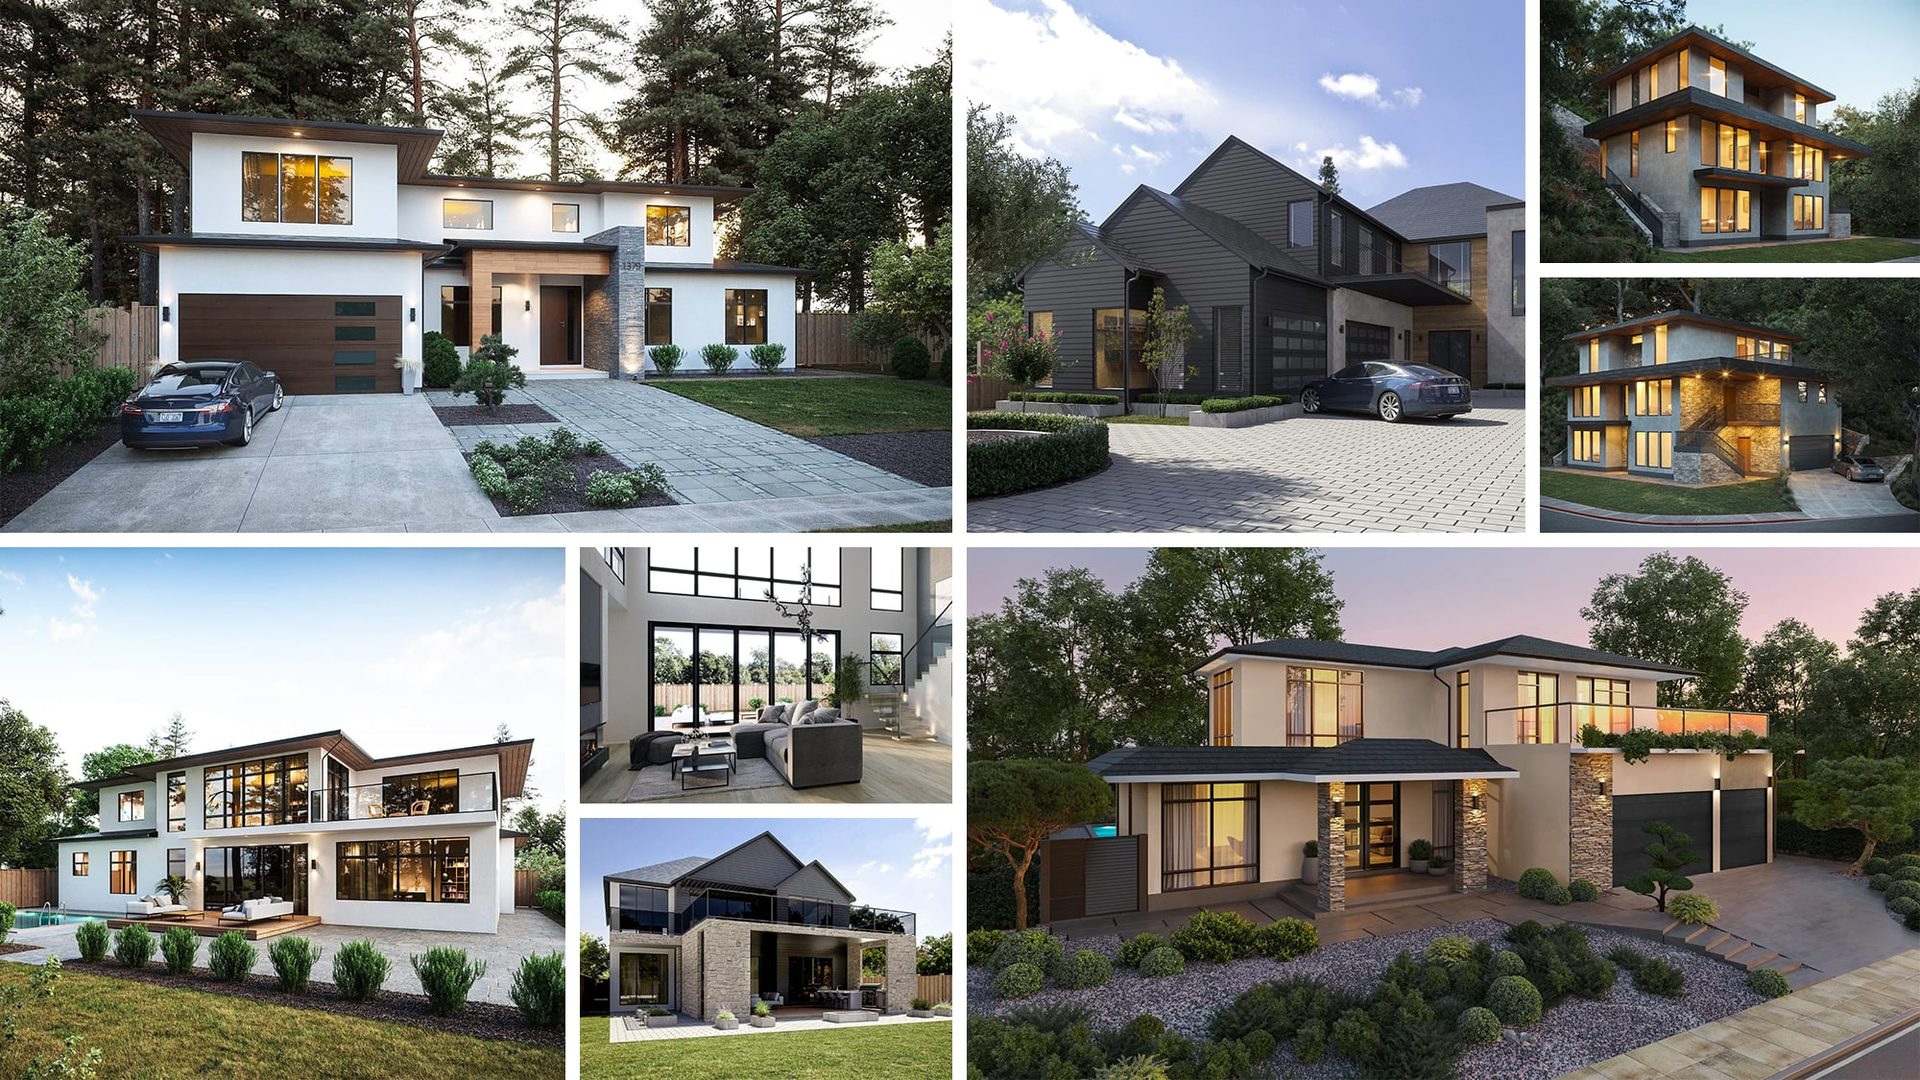
In this article, we would like to show you how our workflow with David looks on the example of the Prairie residence exterior visualization project. You’ll learn what references the client sent us, what intermediate results we showed to him, and what corrections he requested along the way. Also, you’ll find out how long the whole project took. Plus, we’ll show you the final result of this and other residential CGI projects we’ve done for KUOP Designs. And finally, you’ll see how 3D house rendering was used for the firm’s digital marketing activities. Below you can see the preview of all project results.
Ready to discover what happens behind the scenes of professional exterior visualization projects? Read on to find out!
The Scope of Work
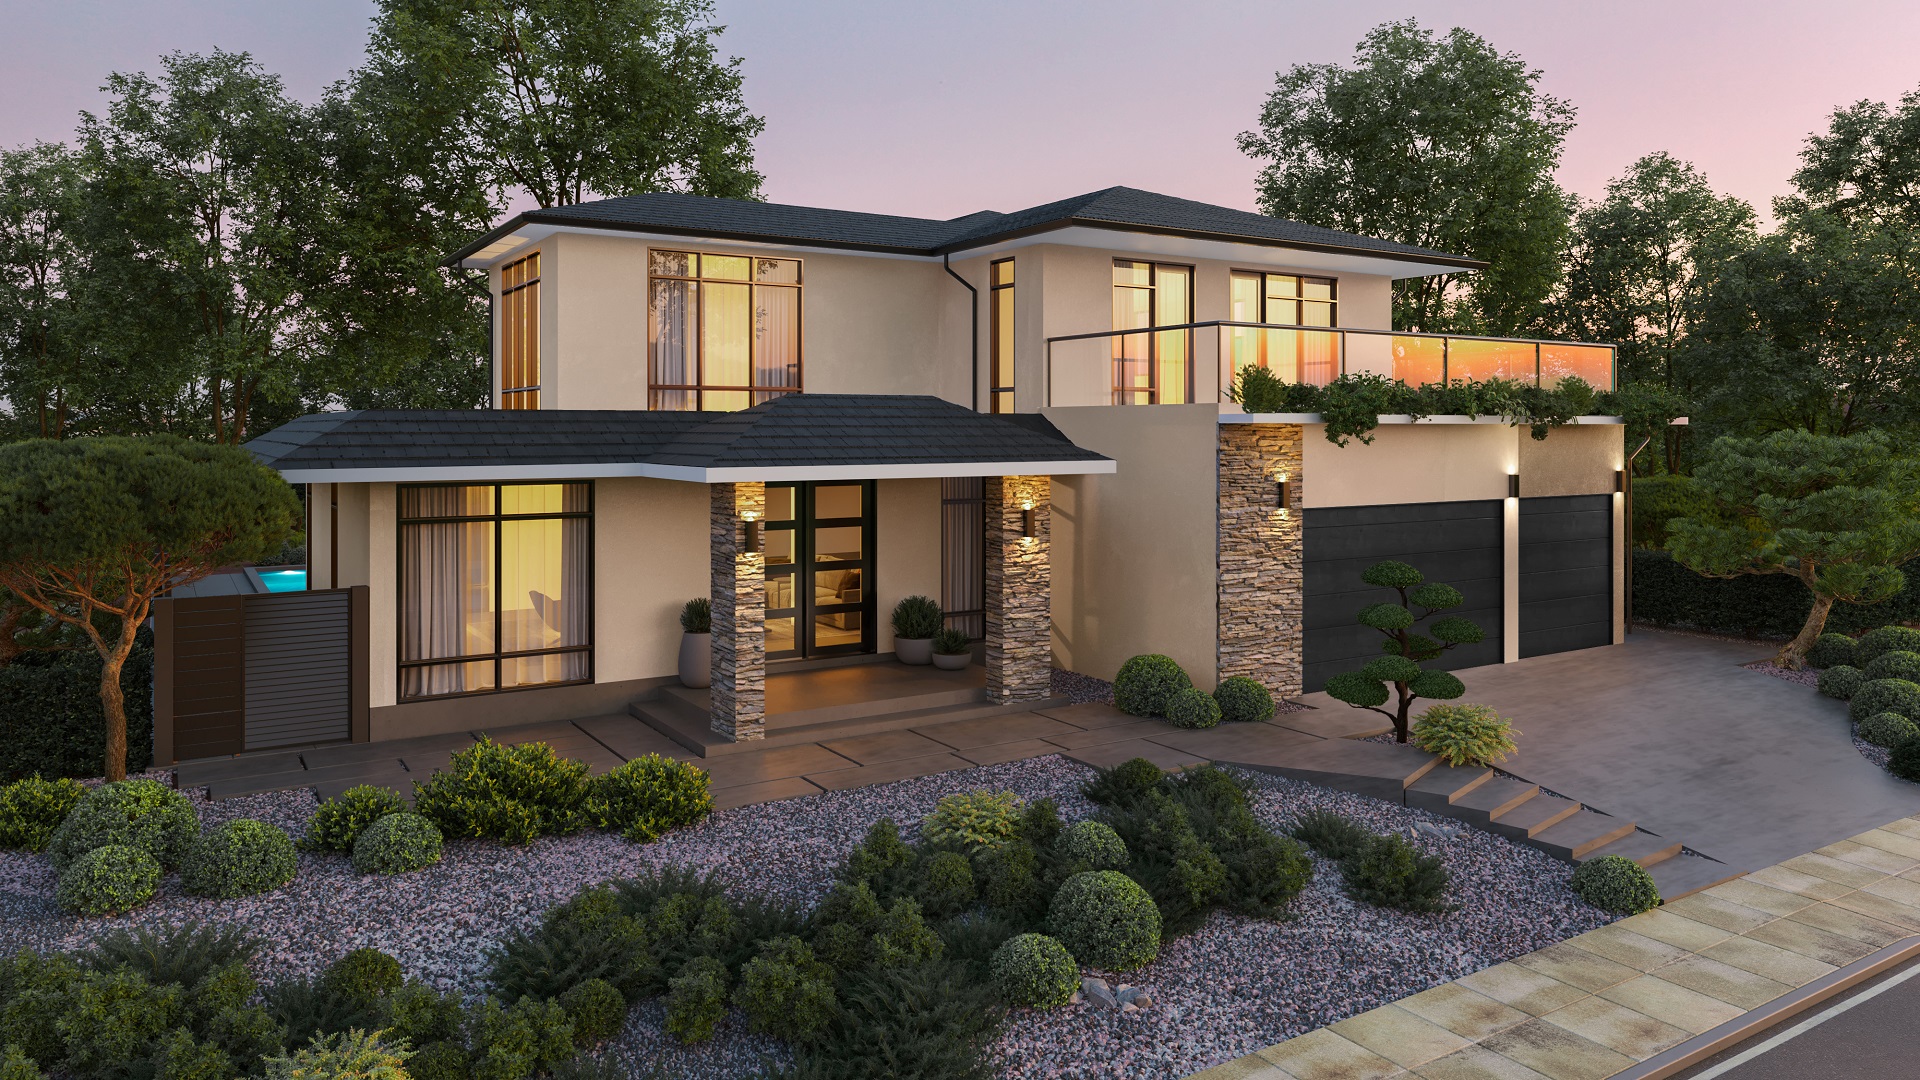
David needed 3D exterior renderings service for the 2-story home in Contemporary/Prairie style that would be located in San Jose, California. He was going to use CG visuals to show his client the modern exterior design, landscaping, and amenities around the building.
Particularly, he asked us to make two renderings in 4k:
- the first view giving a detailed picture of the house facade, garage, and surrounding area;
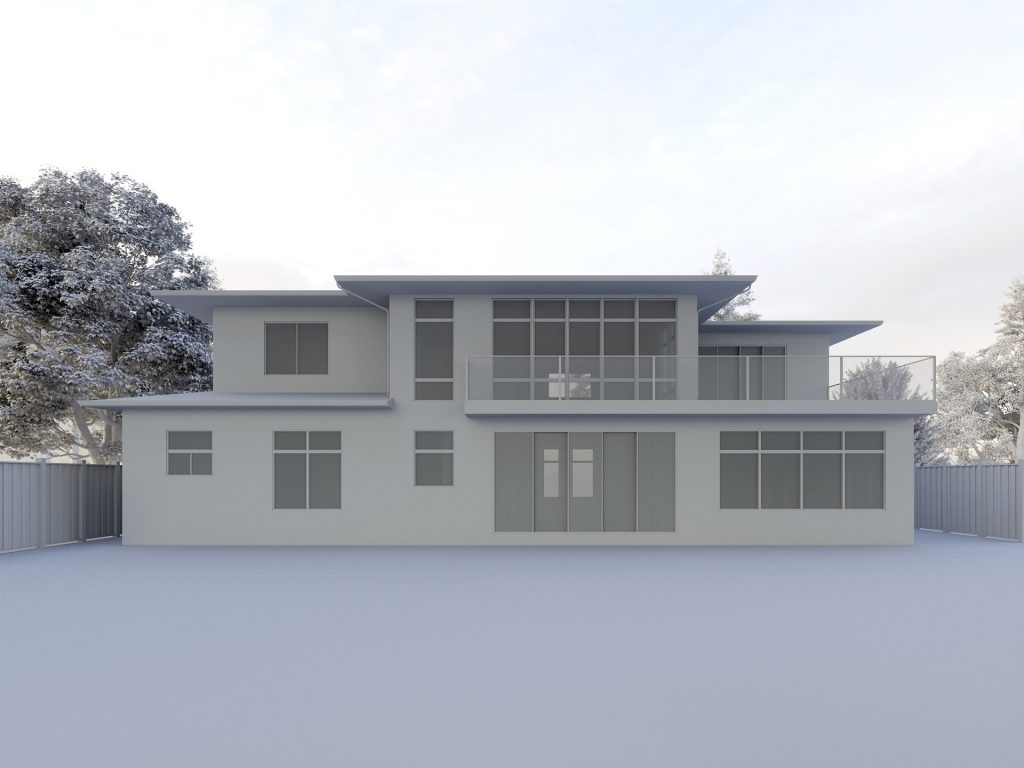
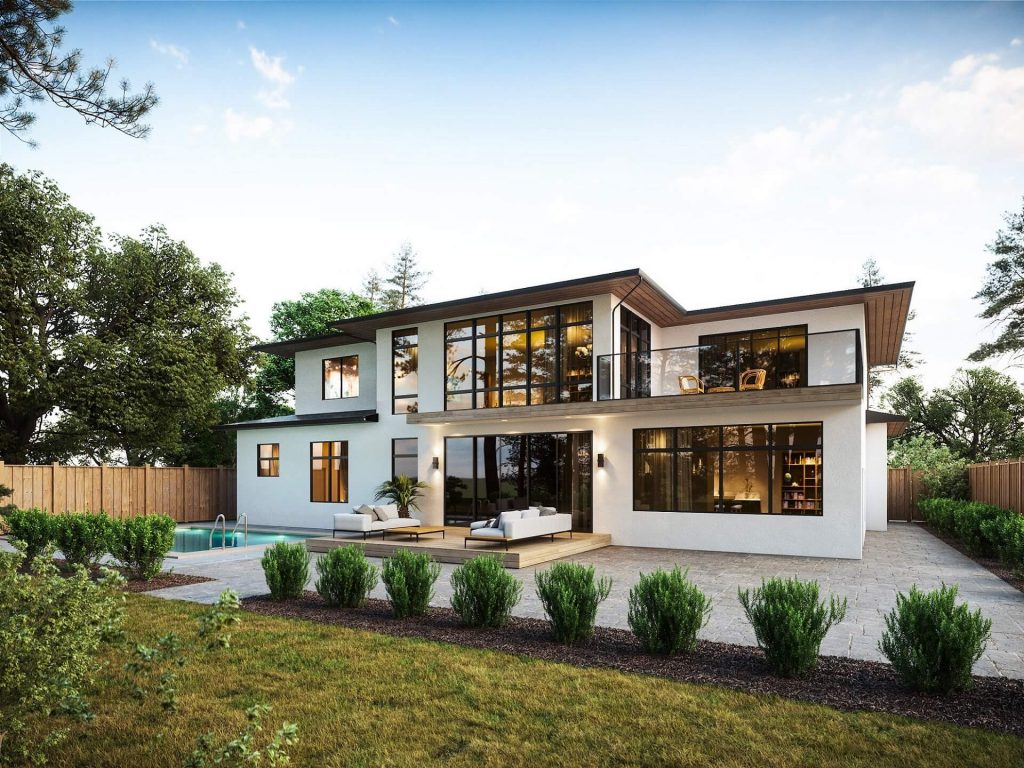
- and the second view showing the rear side of the house, terrace, swimming pool, and a cozy green courtyard.
The References
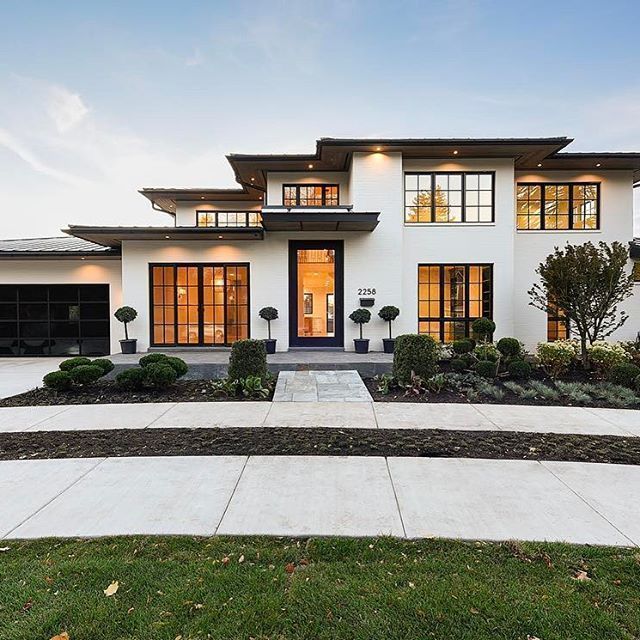
To help our artists recreate the future home in 3D with 100% accuracy, the client provided many visual references. Namely, we received:
- The drawings in dwg and pdf formats. They helped us understand the structure and proportions of the building as well as details of the landscaping.
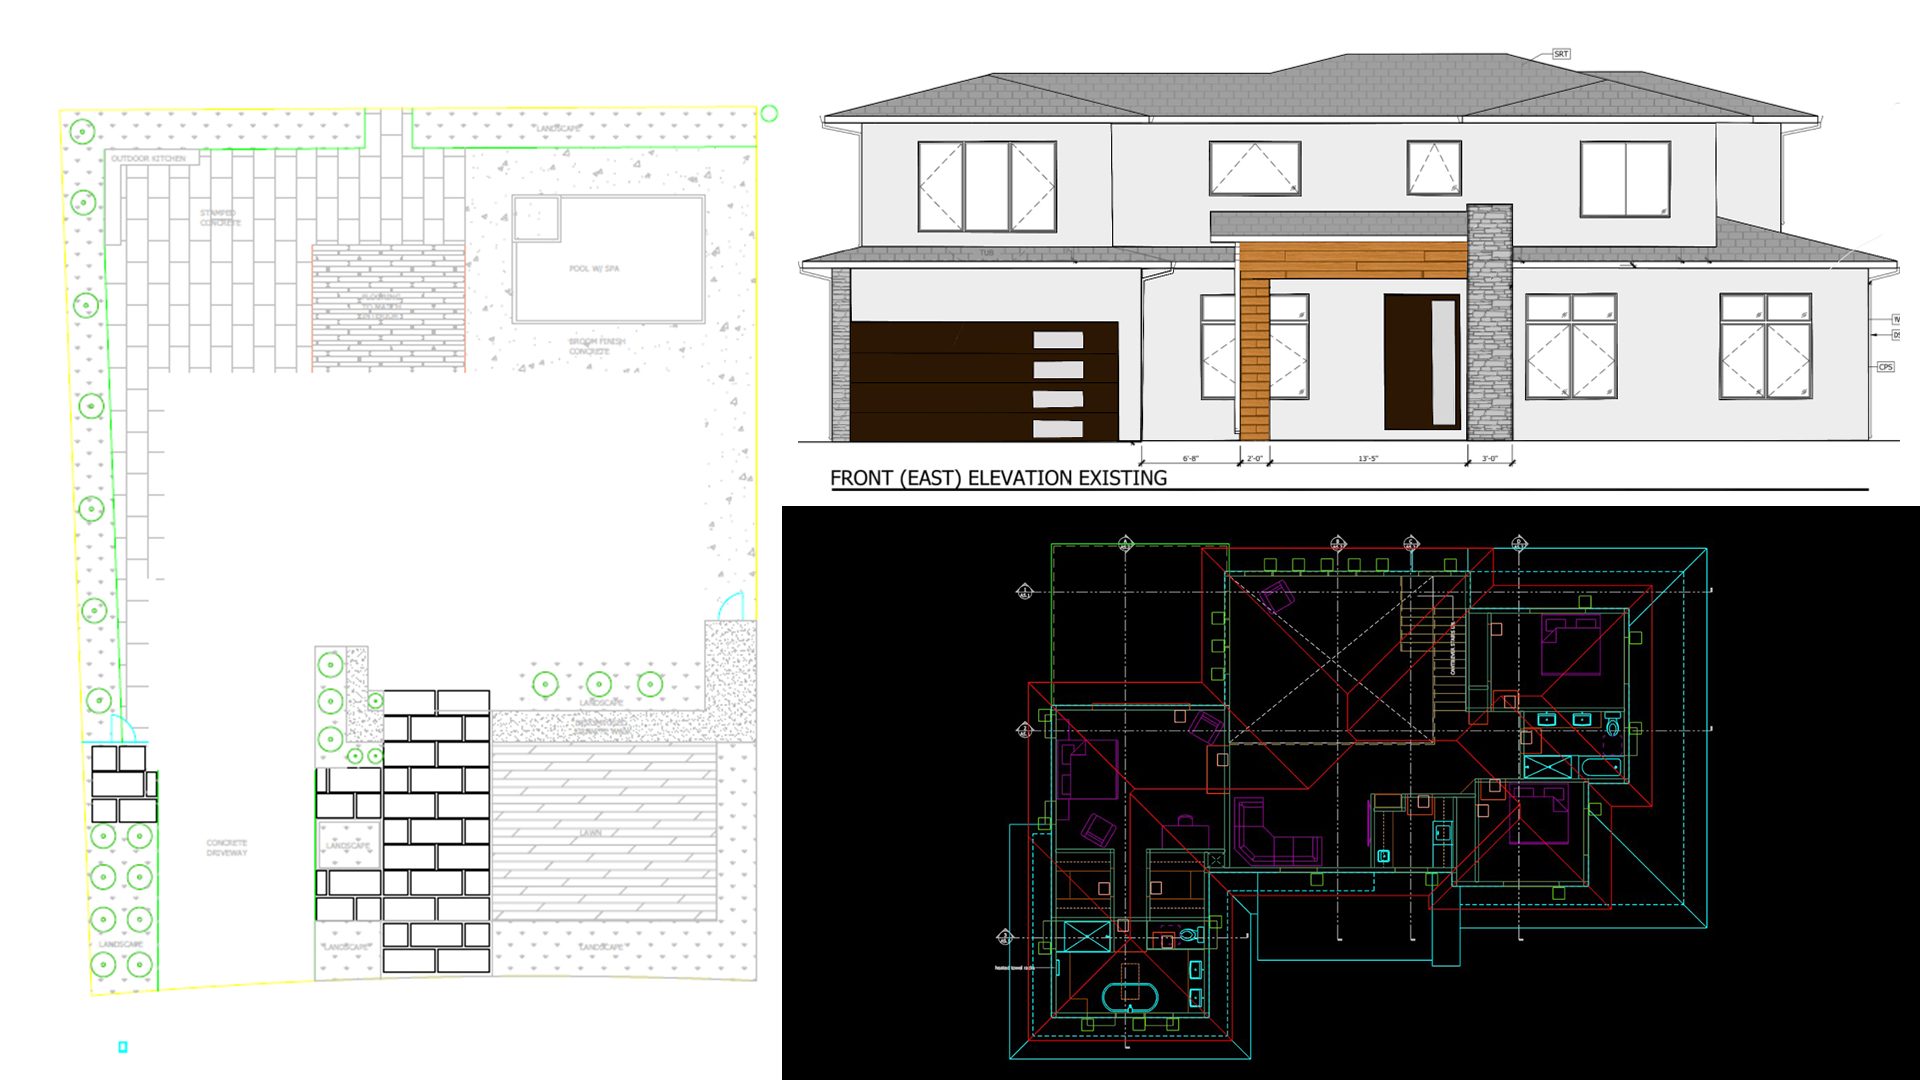
- The material references. Those were photos showing the timber panels chosen for the front porch and brickwork for front wall finishings.
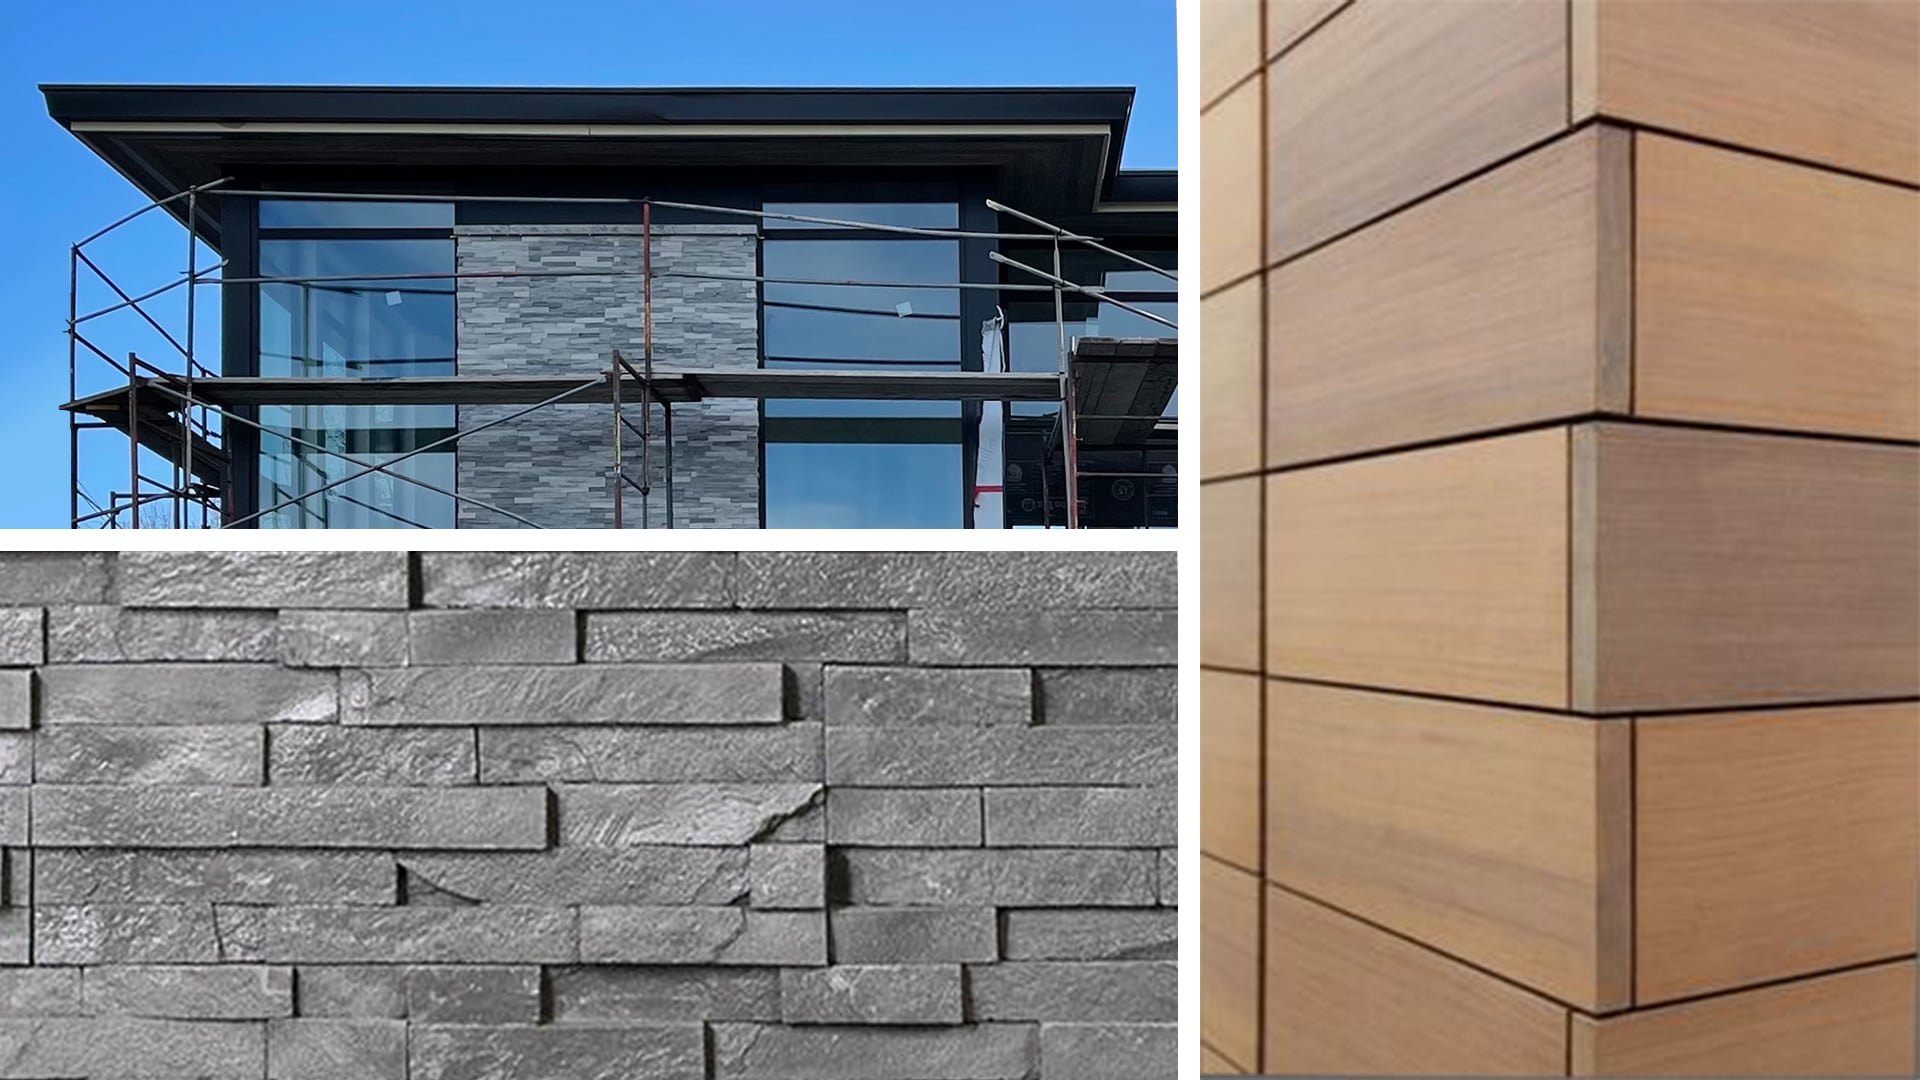
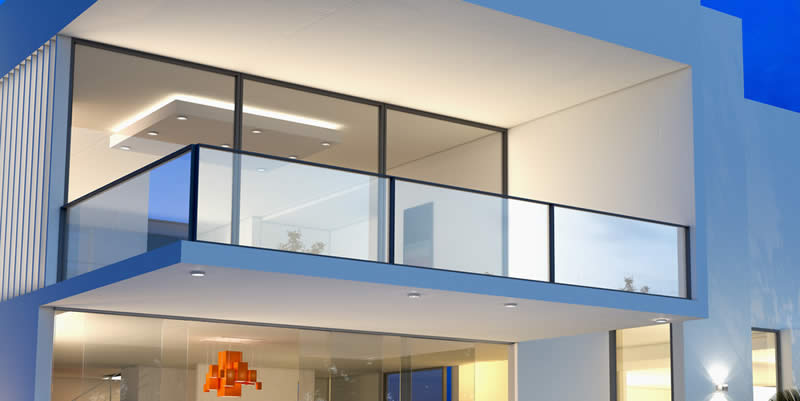
- The reference for the glass rear deck balcony. It helped us understand the required design of this element.
- The reference for lighting and atmosphere. This visual showed the preferred lighting and overall mood for the exterior visualization. It had to be a summer evening when it’s still not too dark outside but the warm inviting lights inside the house are already on.
- A Google maps location of the future house. With it, we could get an understanding of the landscape and vegetation of the site.
- Finally, the client specified that we needed to show Tesla solar tiles on the roof.
After getting all the above-mentioned references, we were all set to start creating exterior CGI. Let us show you how it went.
The Working Process
Following our standard exterior 3D rendering workflow process, our artist first prepared grayscale versions of CG visuals. Those are renders that do not feature any colors or textures yet. They are used to get approval of geometry and proportions of the objects as well as chosen camera angles.
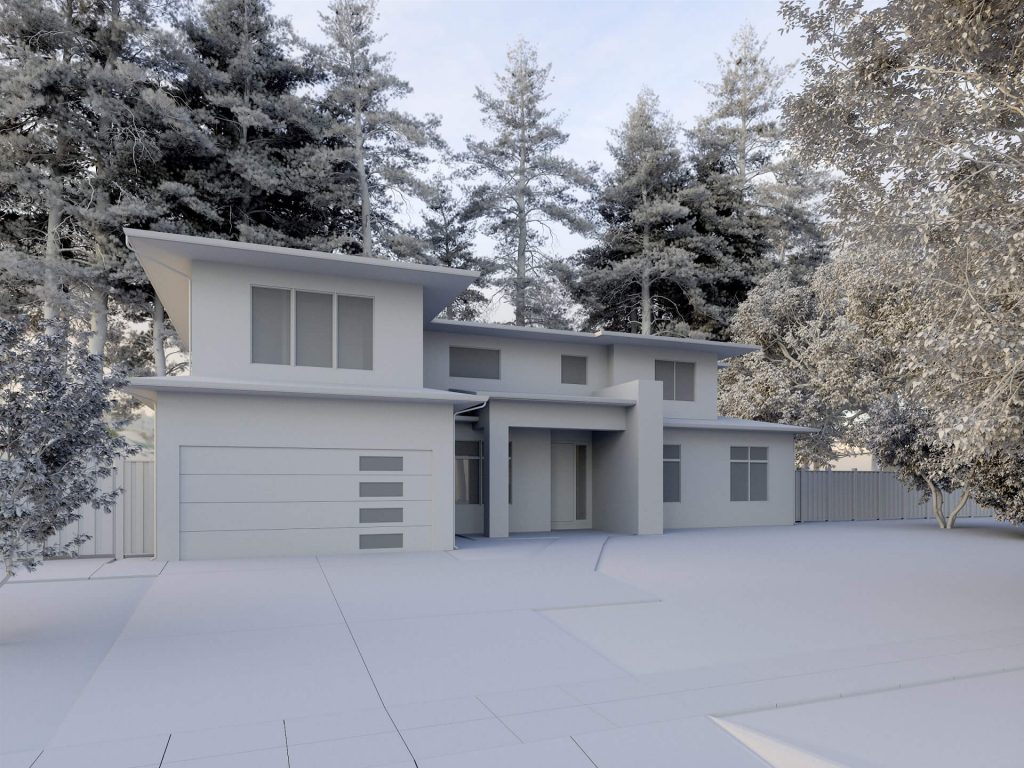
We showed these intermediate results to David. He asked us to make the following corrections:
- move the front view angle a little to the right, just enough to showcase the window past the vertical column;
- move the rear view angle to the right to let one see the tall windows off the porch;
- fix the length of the balcony on the second floor in the rear view. The balcony must not go over the first story door because there had to be a roof overhang.
Elevate your exterior design project with photorealistic 3D visuals that help clients confidently approve your proposals.
Also, in this revision round, the client gave us directions on exterior lighting fixtures. He said that there would be sconces on either side of the garage door and entry. The entry would also have recessed lighting at the covered area. And in the rear exterior house rendering view, there had to be the same sconces on either side of the exterior door along with recessed lighting below the deck above.
Our CGI professional made the needed amendments. Then he added the porch area with outdoor couches in the courtyard, chairs on the balcony, walkways, lawns, pool, car by the garage, bushes in front of the house. After that, he textured the objects in the 3D scene, set the required camera angles, and rendered the images. Here are the results we presented to David.

David liked the outcome of the professional exterior visualization process and had only a few additional comments. Namely, he asked us to:
- add a step down at the porch to the front courtyard to position these areas at different levels in relation to the house;
- make the material of the wooden porch in the rear view match the front porch material;
- use a lighter version of stone veneer by the entry door;
- add a floor light on the front side of the stone veneer;
- add house number 1379 in a black finish to stone veneer; position it at the same level as horizontal wood;
- add soffit lights on the second floor.
Our CGI professional made all the requested corrections in no time, and the final renderings were ready. Now, let’s take a look at them.
3D Visualization Results
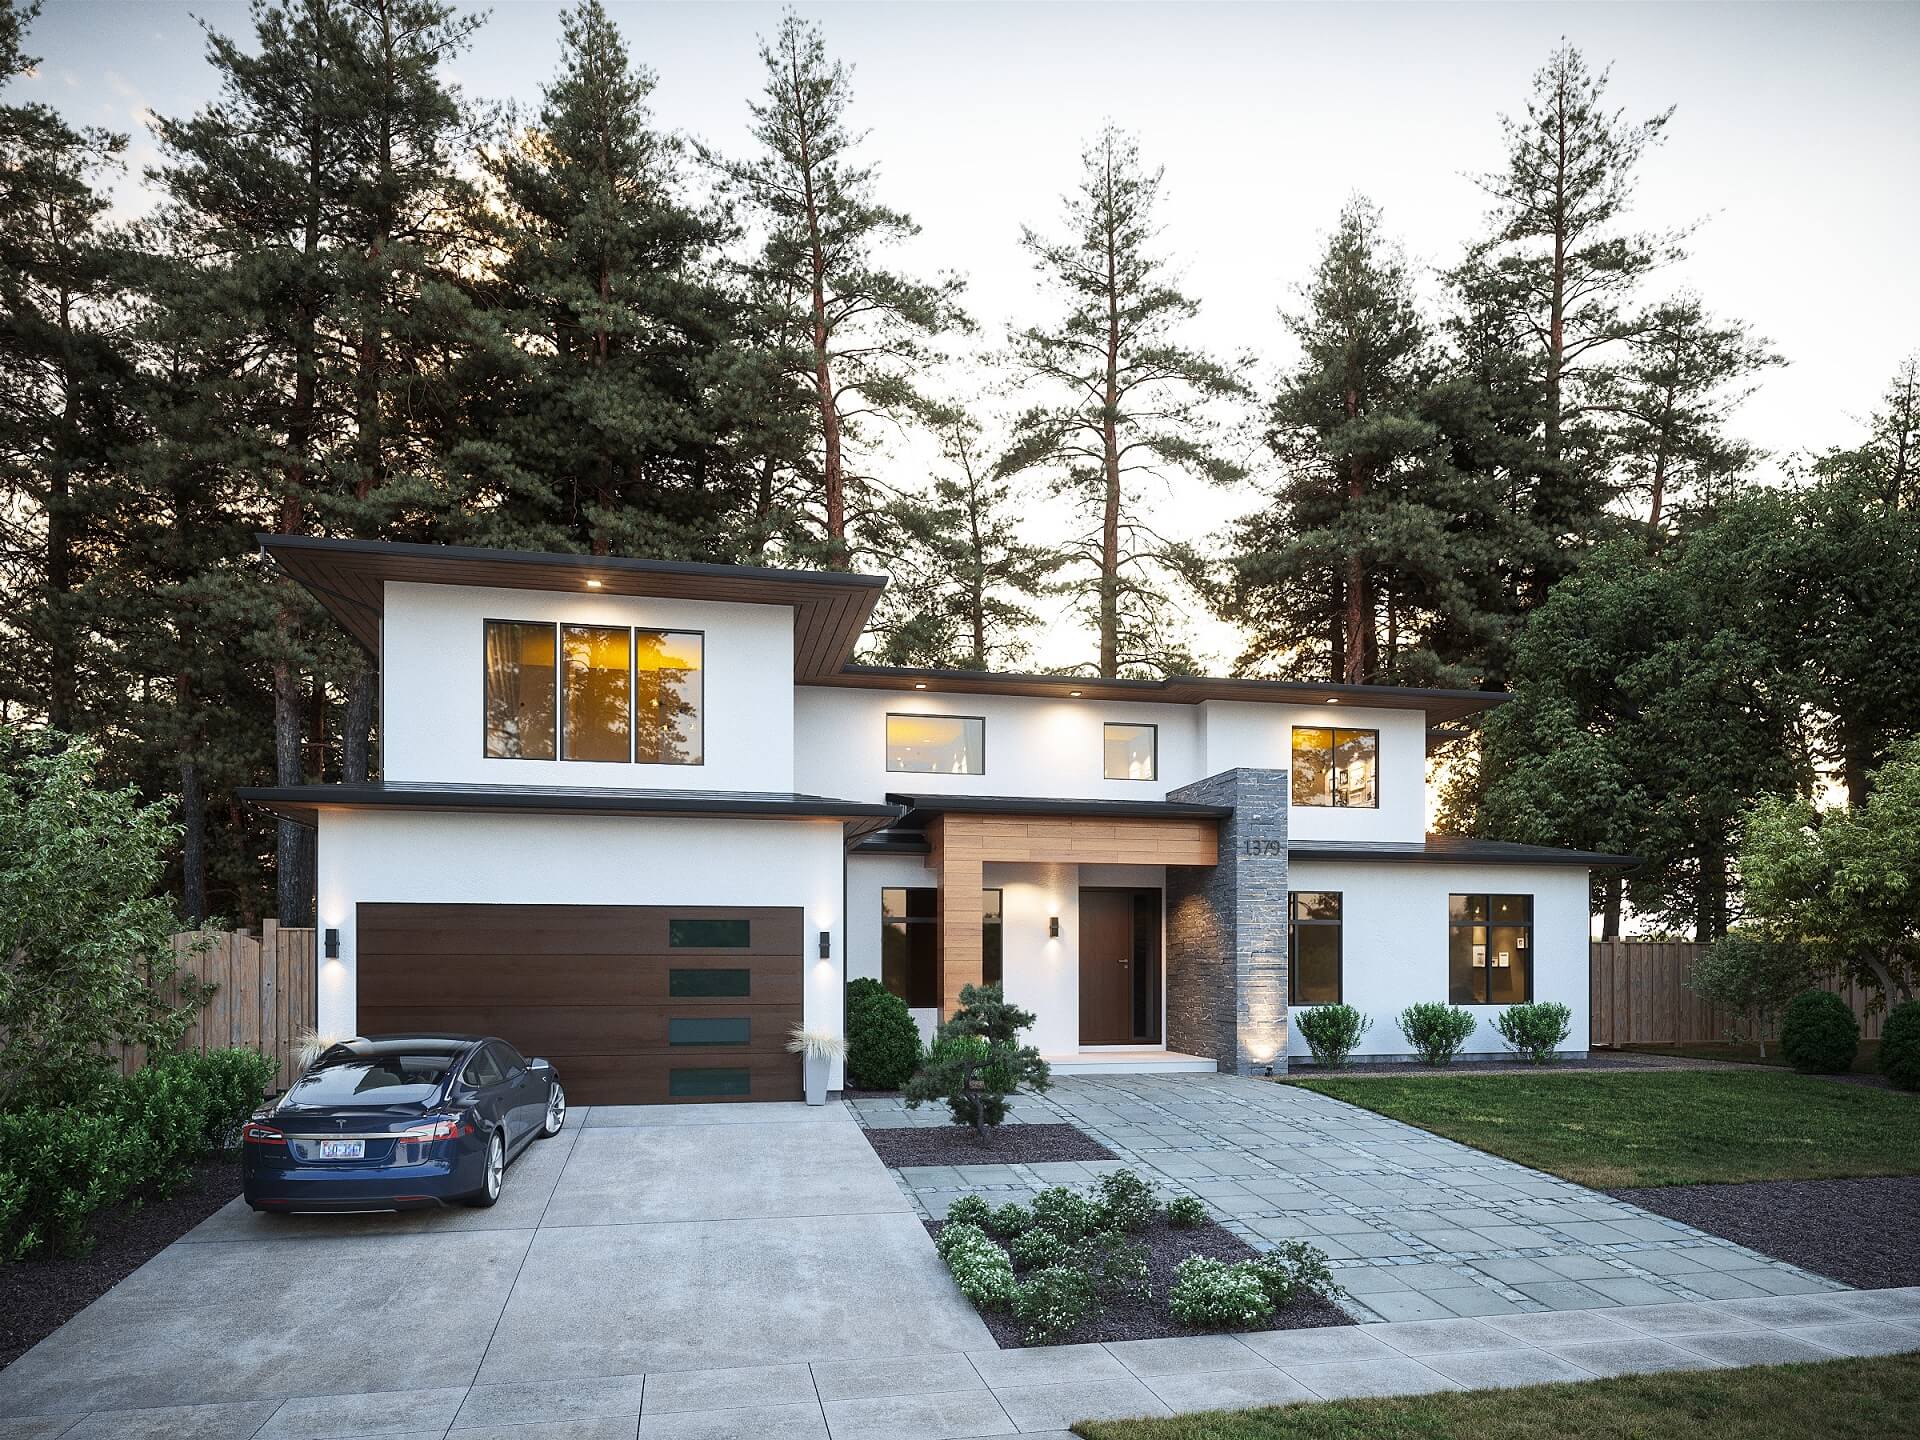
Here are the finalized 4k exterior renderings of the Prairie-style home.
Making these exterior home renderings took 16 hours of our CGI professional’s work.
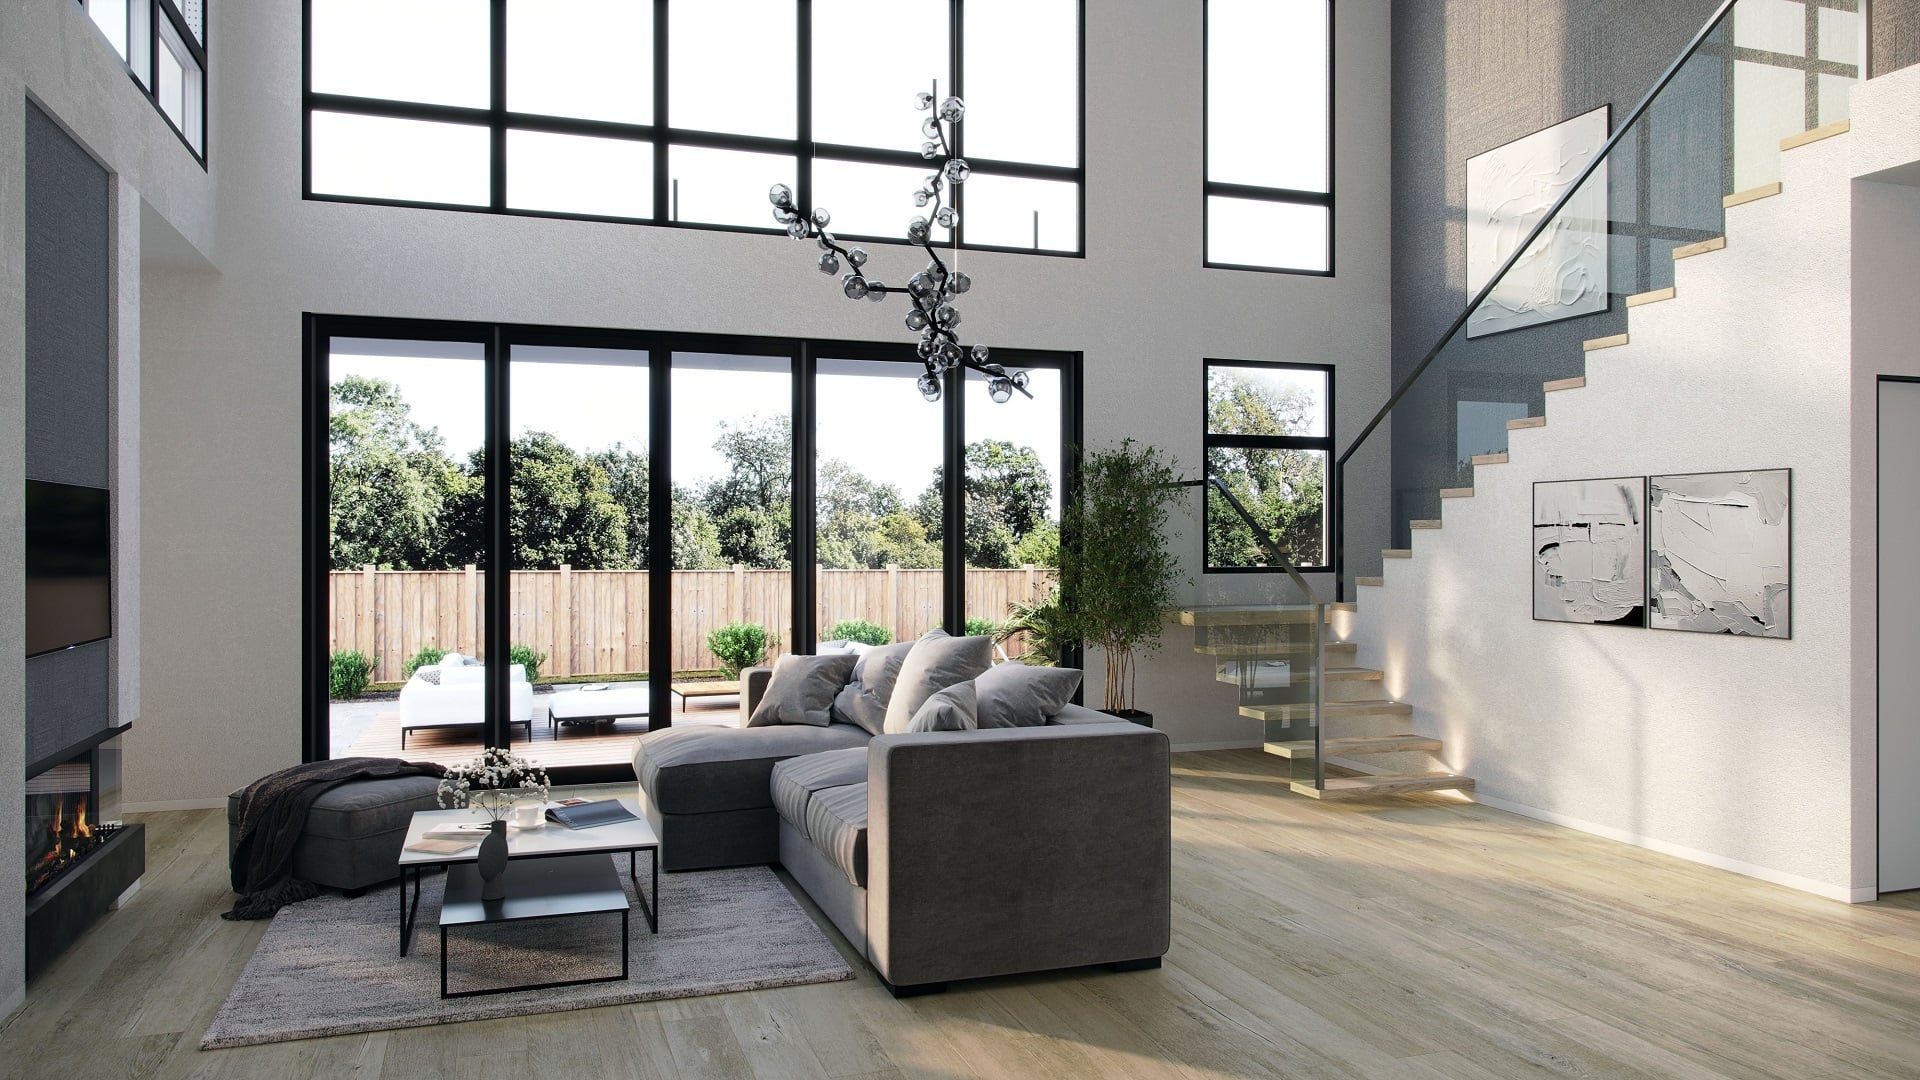
Later on, David also asked us to provide interior visualisation services for this cozy residence. So, if you wonder how the stylish home looks on the inside, the image below will give you an answer.
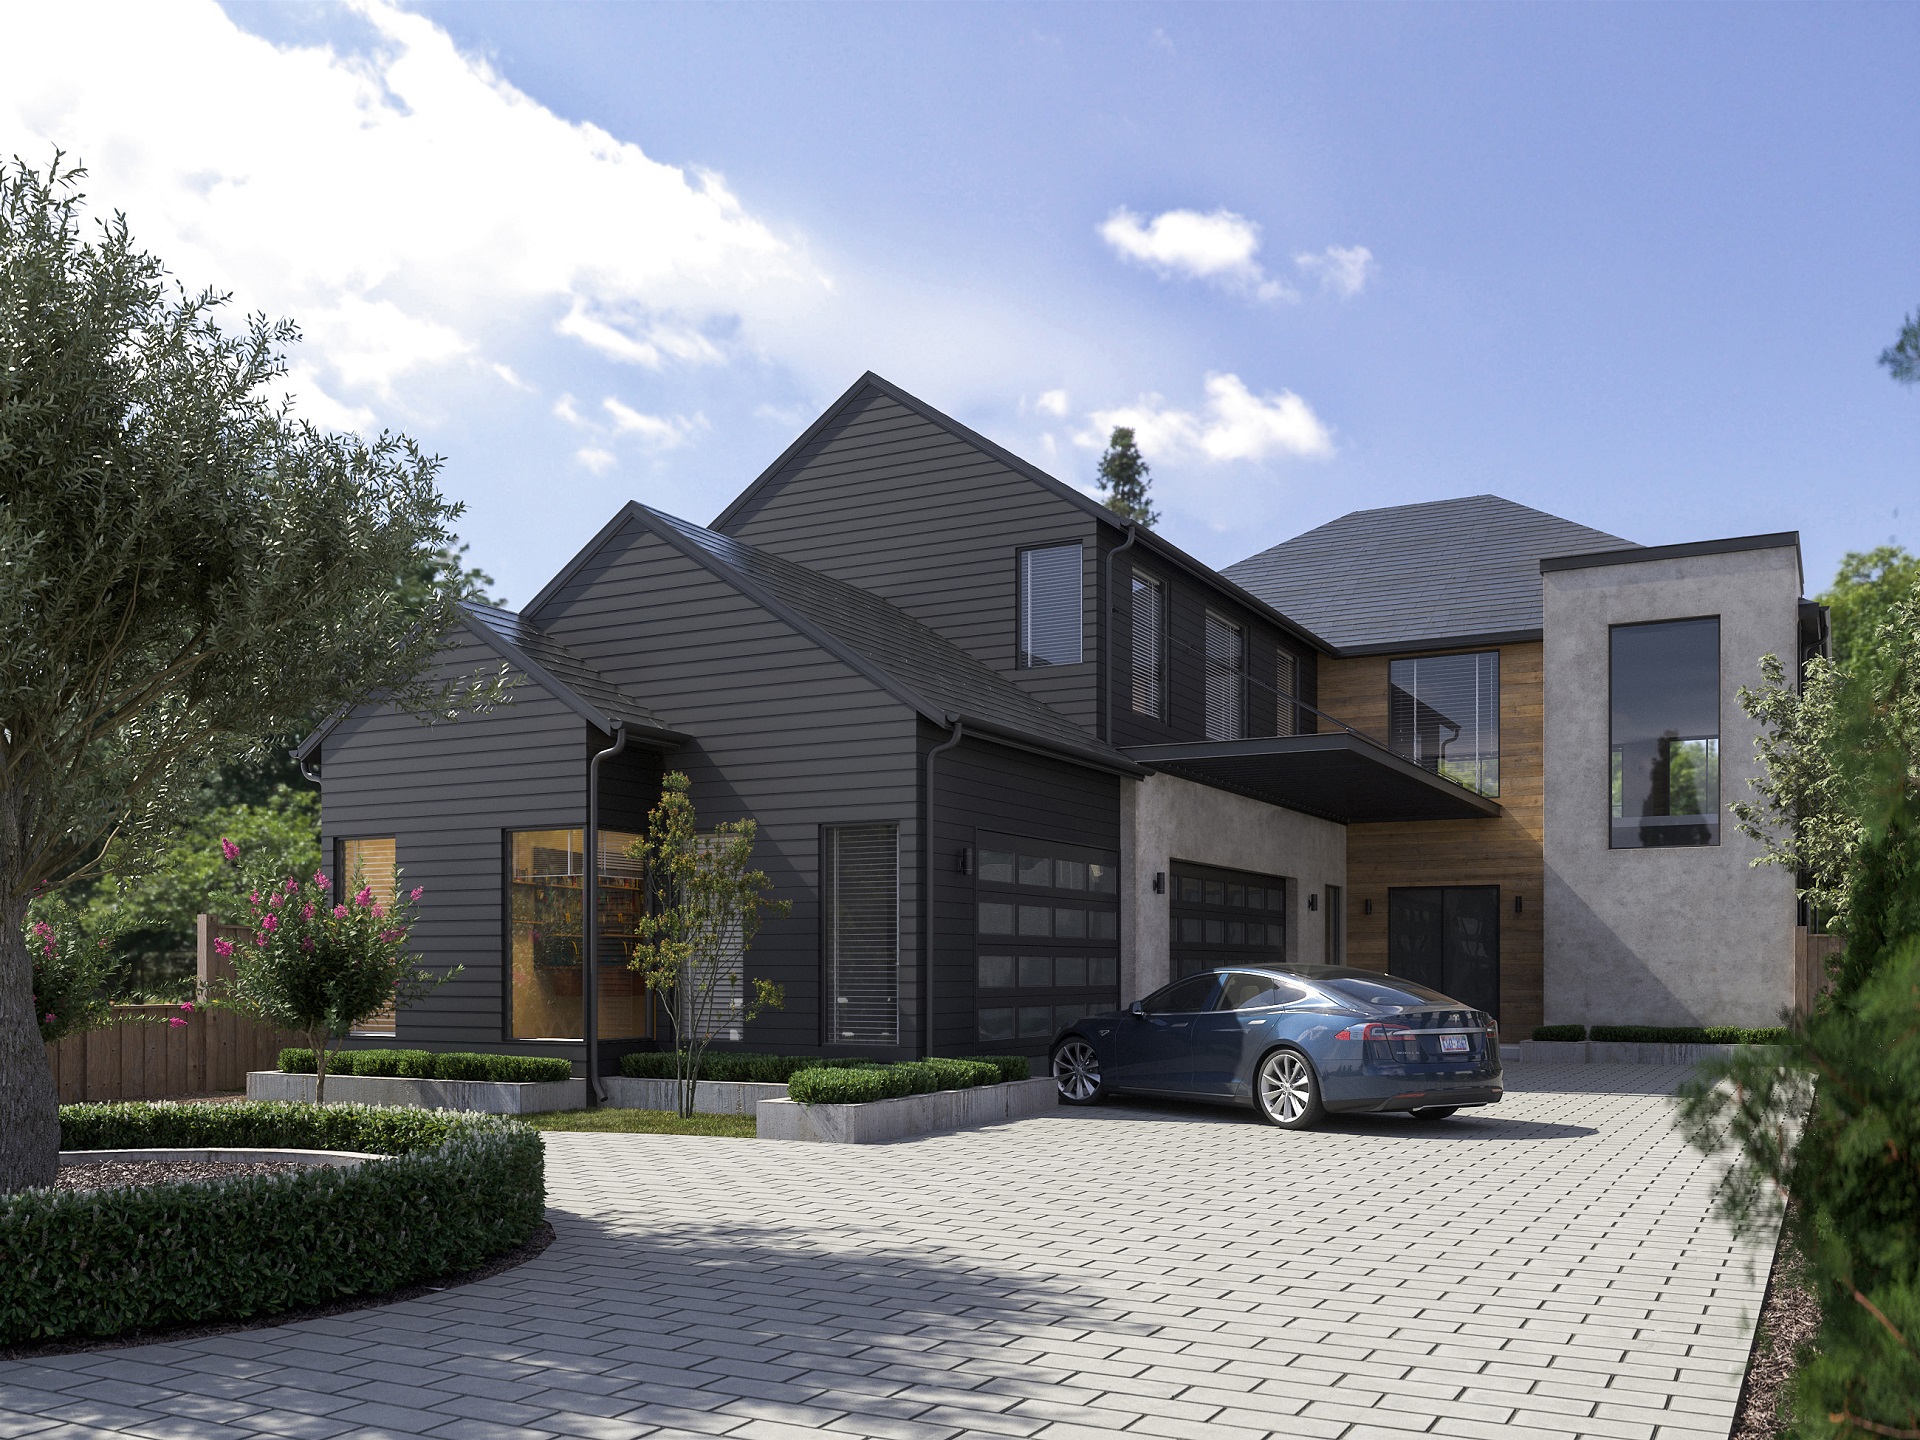
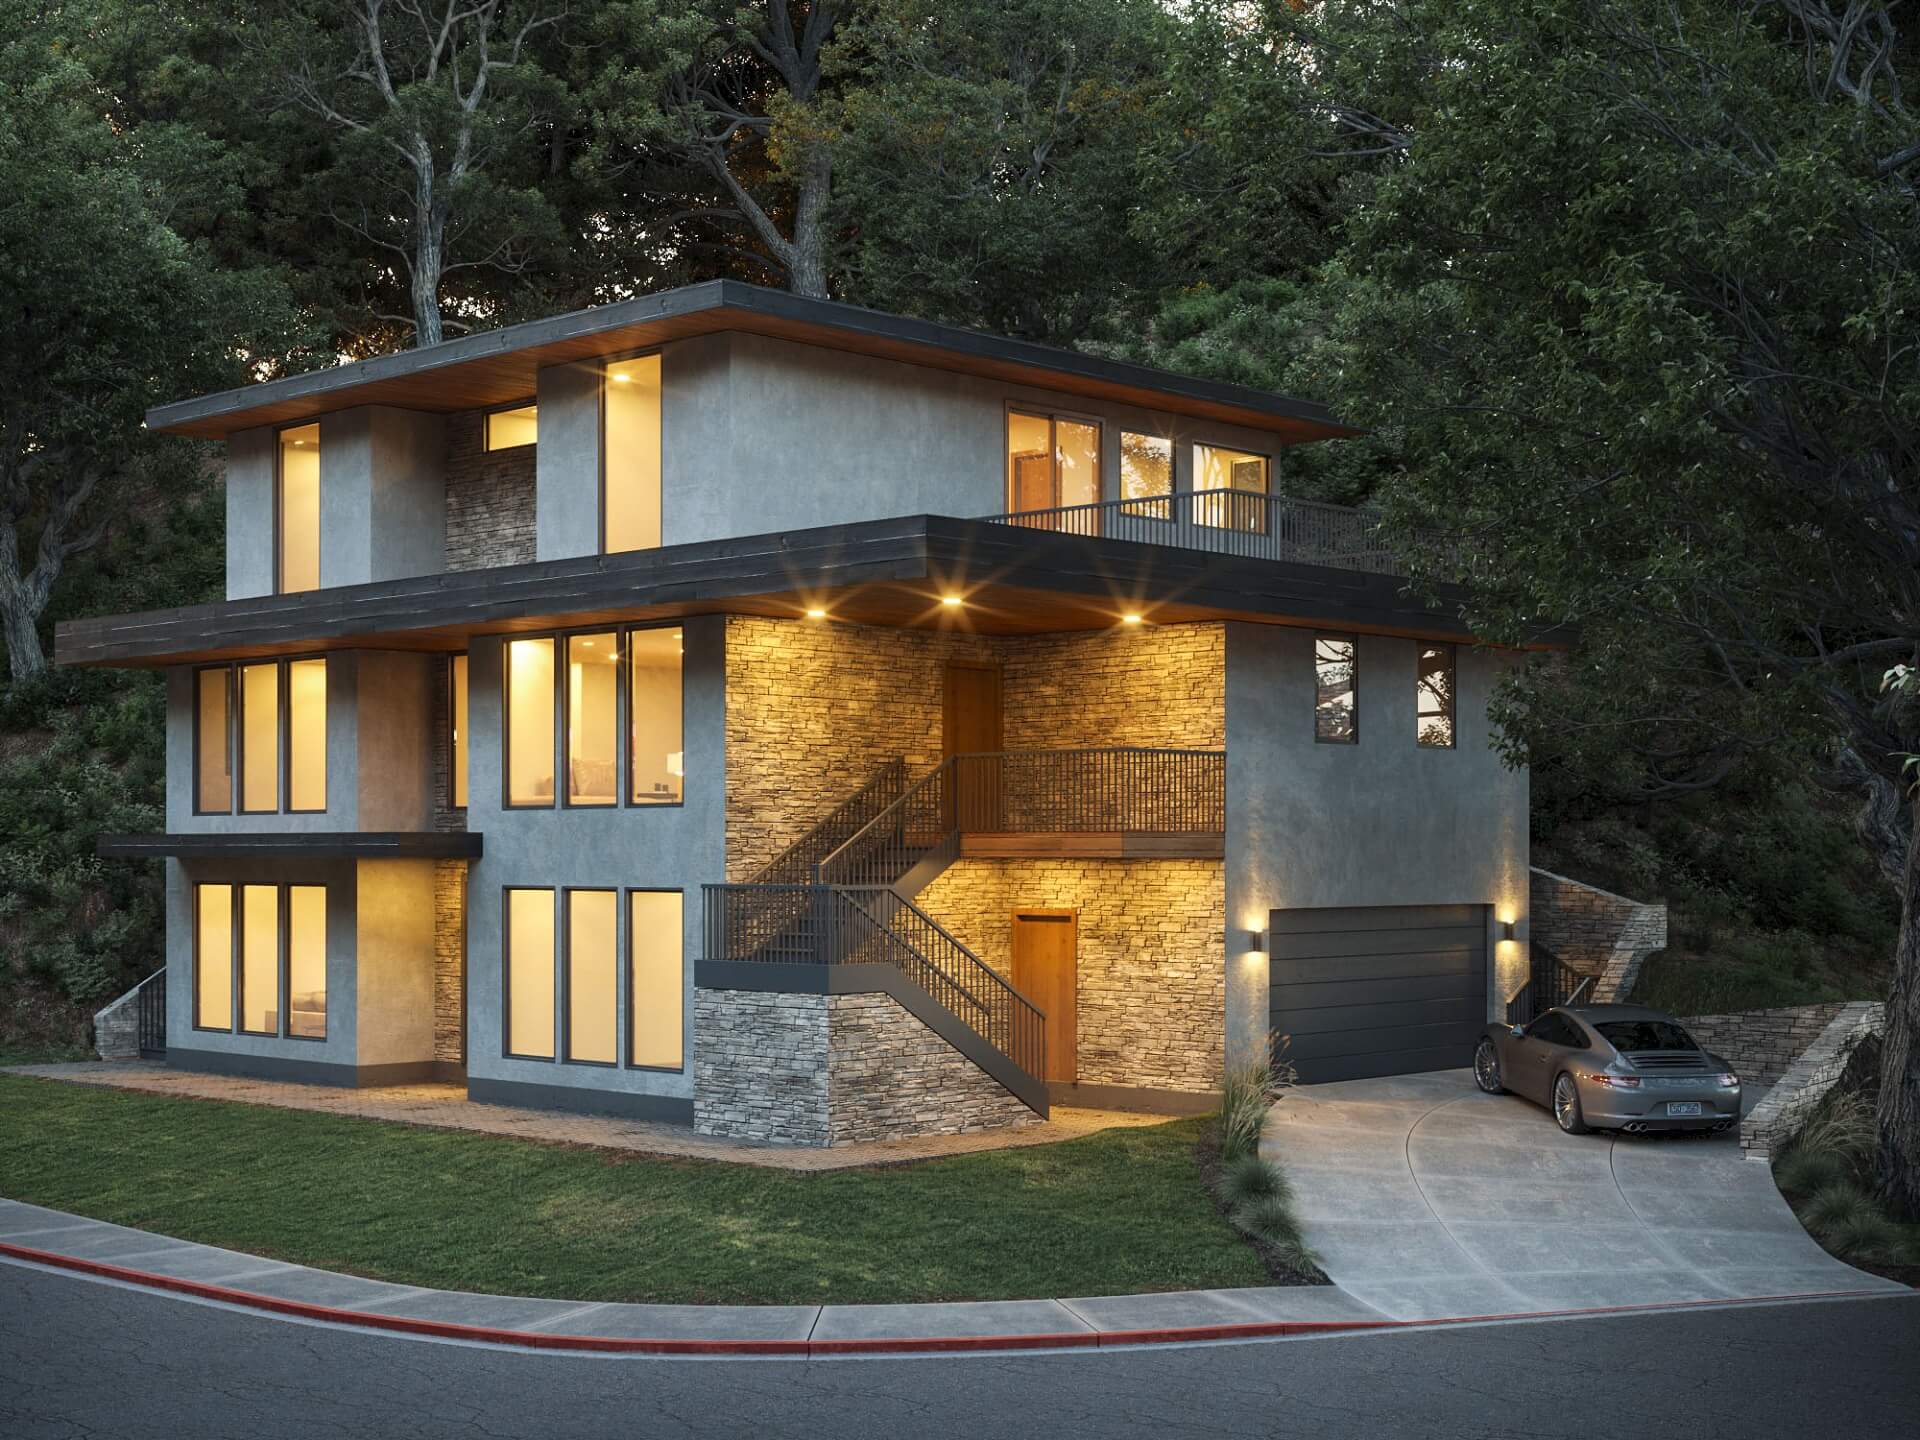
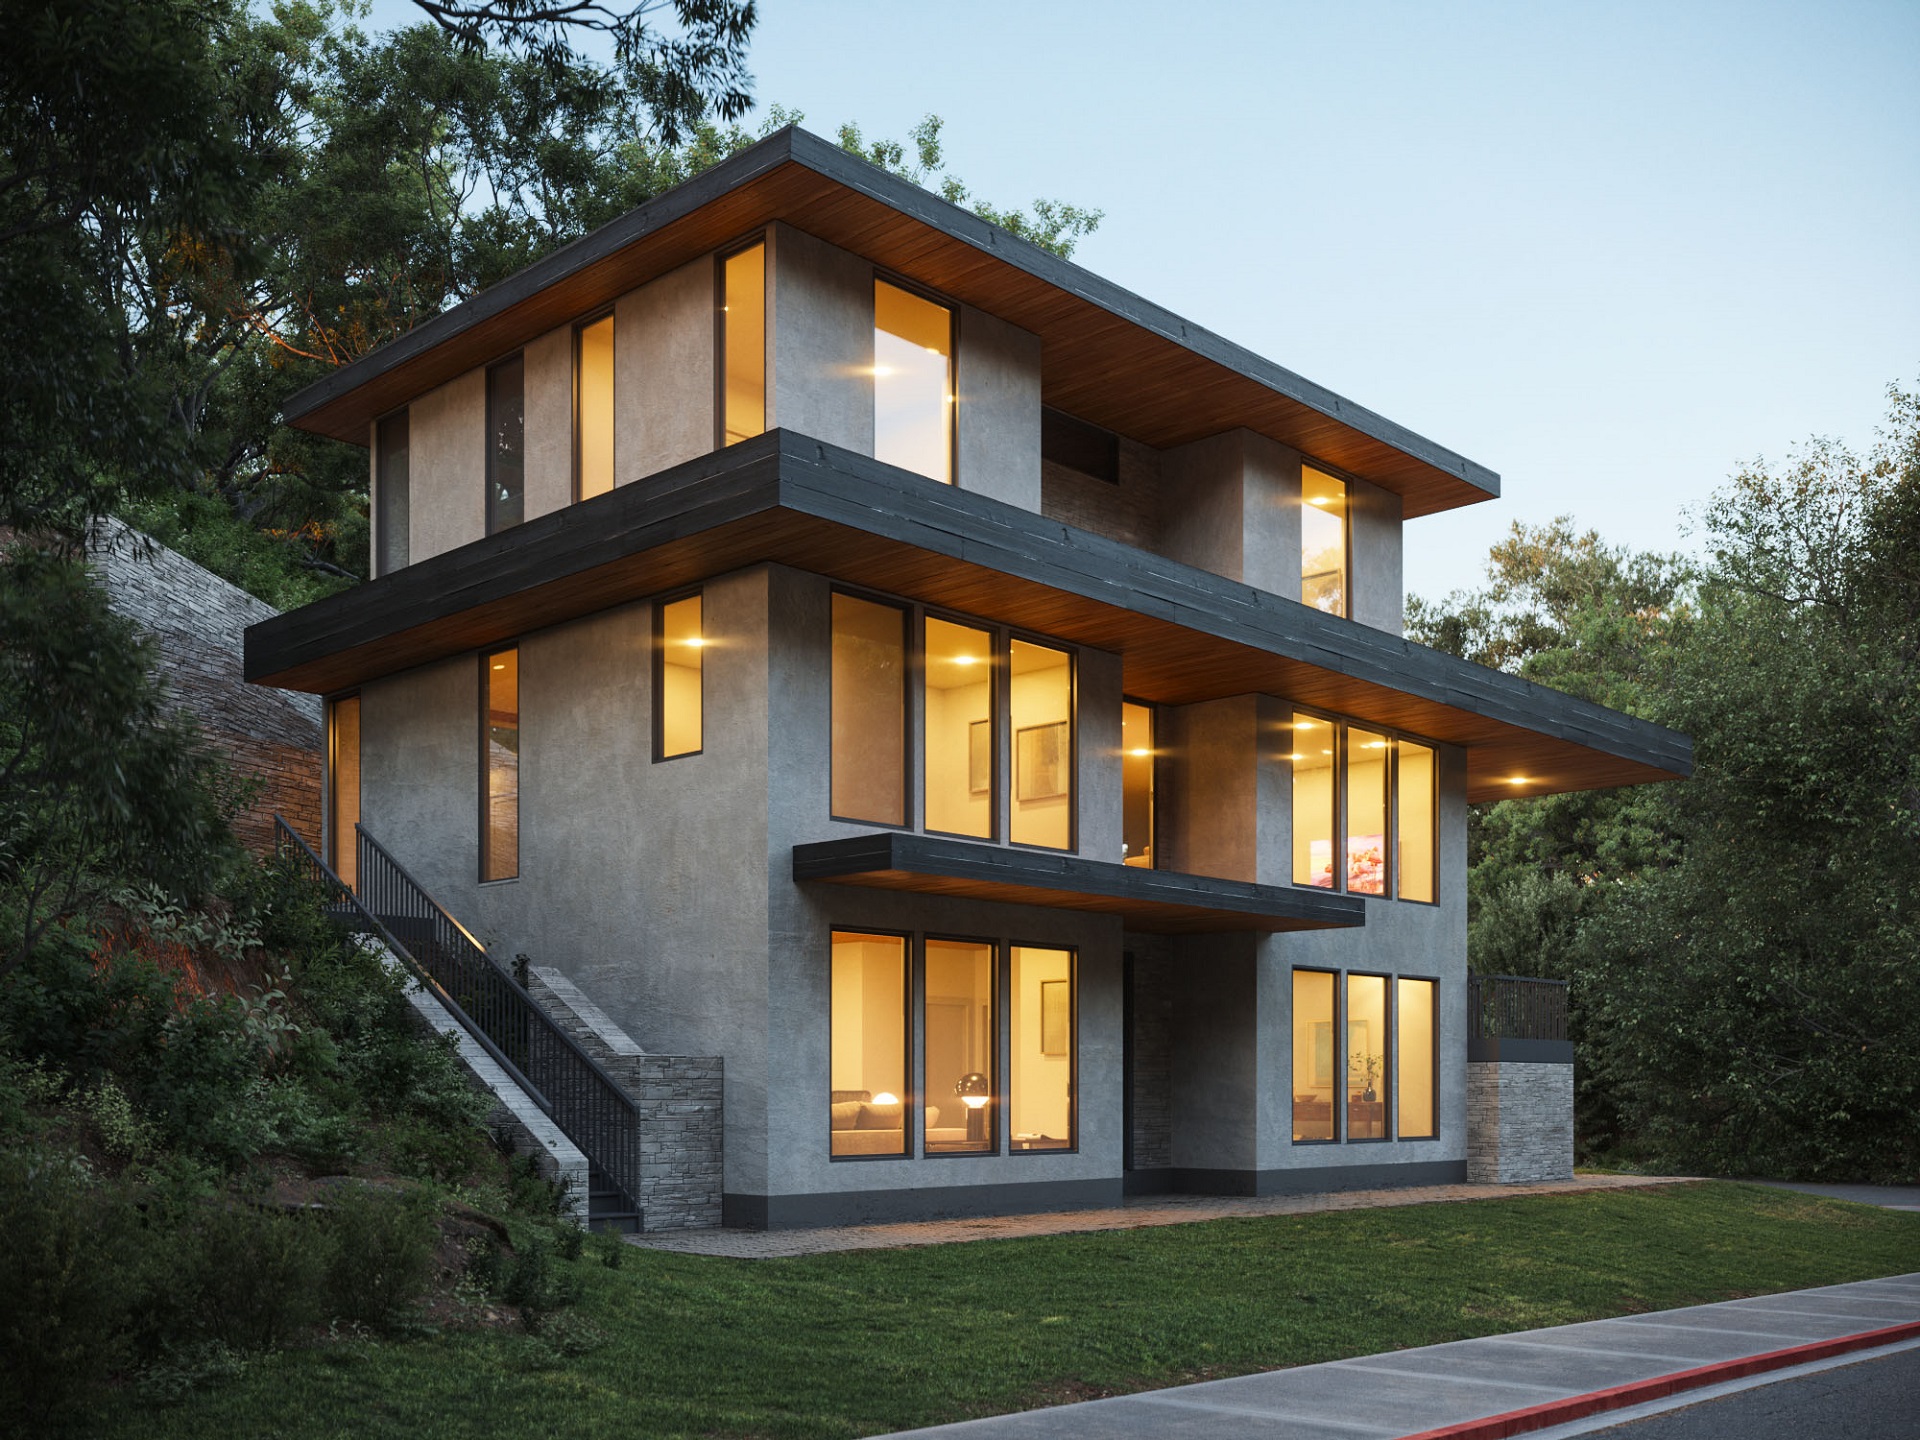
As a result of our work, we delivered a comprehensive, detailed, photorealistic presentation of the Prairie home design for the end client. So, David did not hesitate to use our services in other projects. Let us see more renderings we’ve created for him.
To make the most out of these photorealistic 3D renders, the company used them not just for presentations but also on digital marketing channels. You will see examples of such usage in the paragraph below.
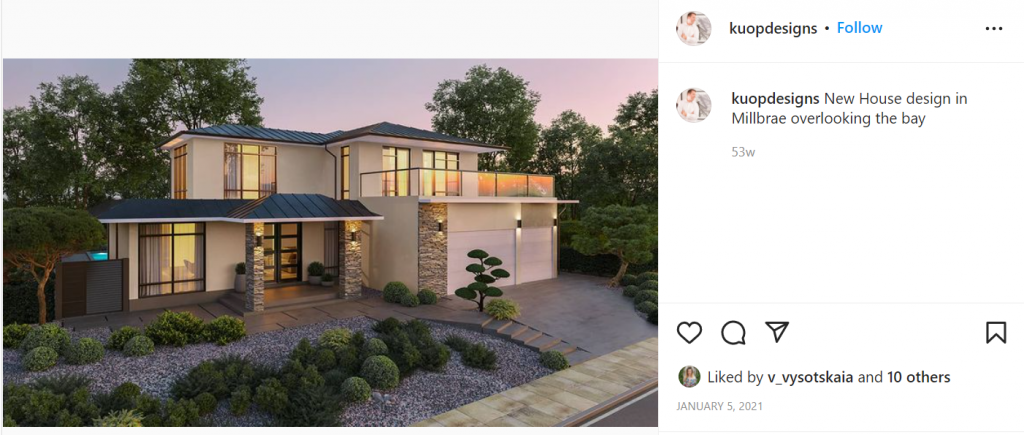
How KUOP Designs Used Professional Exterior Visualization
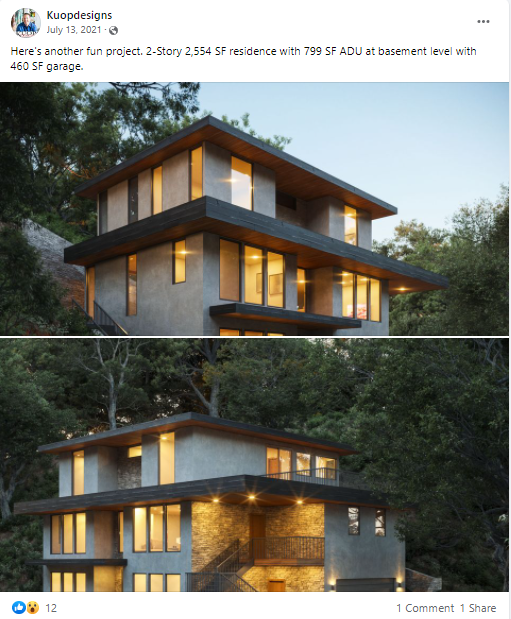
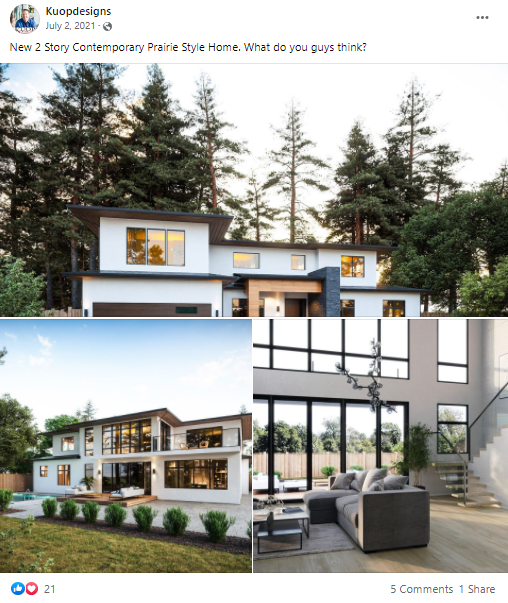
To attract potential clients, KUOP Designs shared photorealistic 3D visualizations on their Instagram and Facebook accounts.


They also added one of the CG visuals to the firm’s website to show the before and after picture of their project.
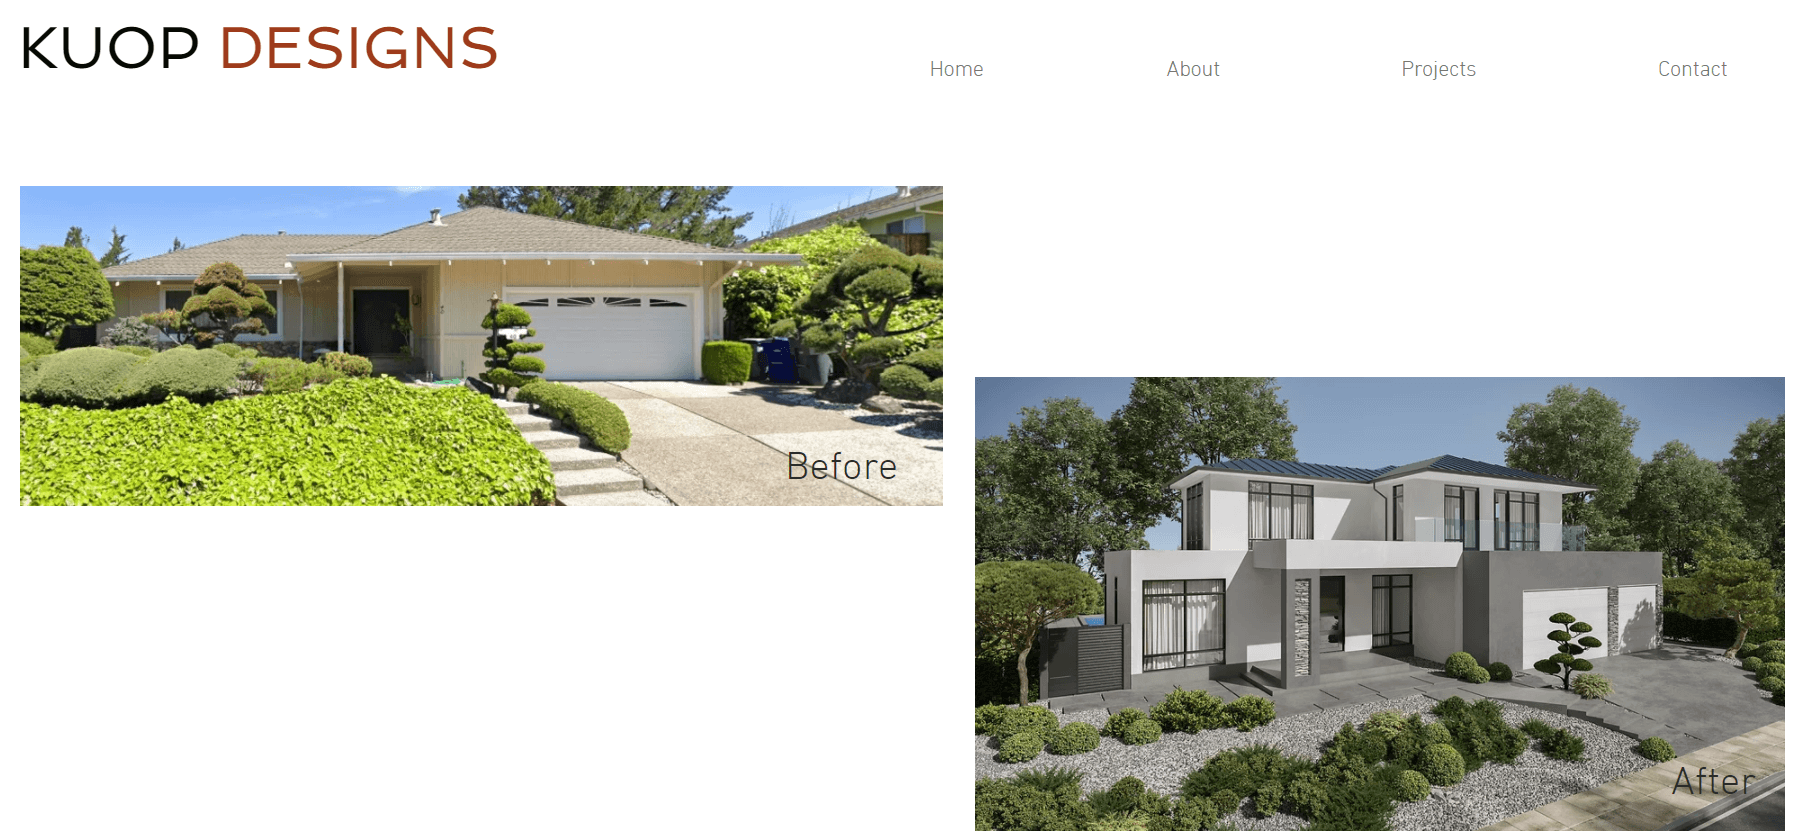
As you see, professional home visualization is highly effective both as a presentation material and as a marketing asset. It helps to show yet-to-be-constructed buildings in full detail and photorealistic quality, impressing the existing and prospective clients.
The ArchiCGI team thanks David Kuoppamaki for the pleasure of visualizing his amazing designs and for letting us show them in this case study. We wish him a lot of exciting projects and grateful clients. And we look forward to working with him again in the near future.
Need professional 3D rendering services for your architectural projects? Contact us and get irresistible 3D visuals for presentations and marketing campaigns! And if you want to learn more about how 3D visualization works in architecture, check out our architectural rendering guide for a full overview of formats and techniques.
Catherine Paul Catherine is a content writer and editor. In her articles, she explains how CGI is transforming the world of architecture and design. Outside of office, she enjoys yoga, travelling, and watching horrors.

Content Writer, Editor at ArchiCGI
Like this project? We’ve got plenty more! Check out these CGI beauties.
Planning a project in Los Angeles? Learn more about our 3D rendering services in Los Angeles.
