

3D Renderings for Real Estate in Florida: $5M Luxury Home CGI
Stan Jones, the owner of Wahoo Realty agency, needed promo imagery to market a splendid residence in Fort Lauderdale, Florida. The home boasted a gorgeous location, sophisticated design, and all the comforts of a luxurious life. But its construction was not 100% finished yet. To get top-notch marketing imagery for realty platforms, Stan opted for 3D rendering for real estate. He chose this option because photoreal CGI can show the future look of the building even if it is still in the construction or design stage. So, Stan contacted our architectural visualization company for such CG imagery. As a result of our cooperation, he got 3D rendering for the property in Florida that eventually helped him find buyers.

Wondering how 3D renderings for real estate can help sell a property before construction is complete? This Fort Lauderdale case study walks through the full workflow, from modeling to photo-matching, and shows how 3D rendering services in Florida help developers market and pre-sell projects before construction is complete. Read on to find out.
The Purpose of the Project
Stan needed exterior rendering services to showcase the future look of the house to potential buyers. The broker was going to use CGI on large realty online marketplaces, such as Zillow, Trulia, Floridaluxrealestate, and others.
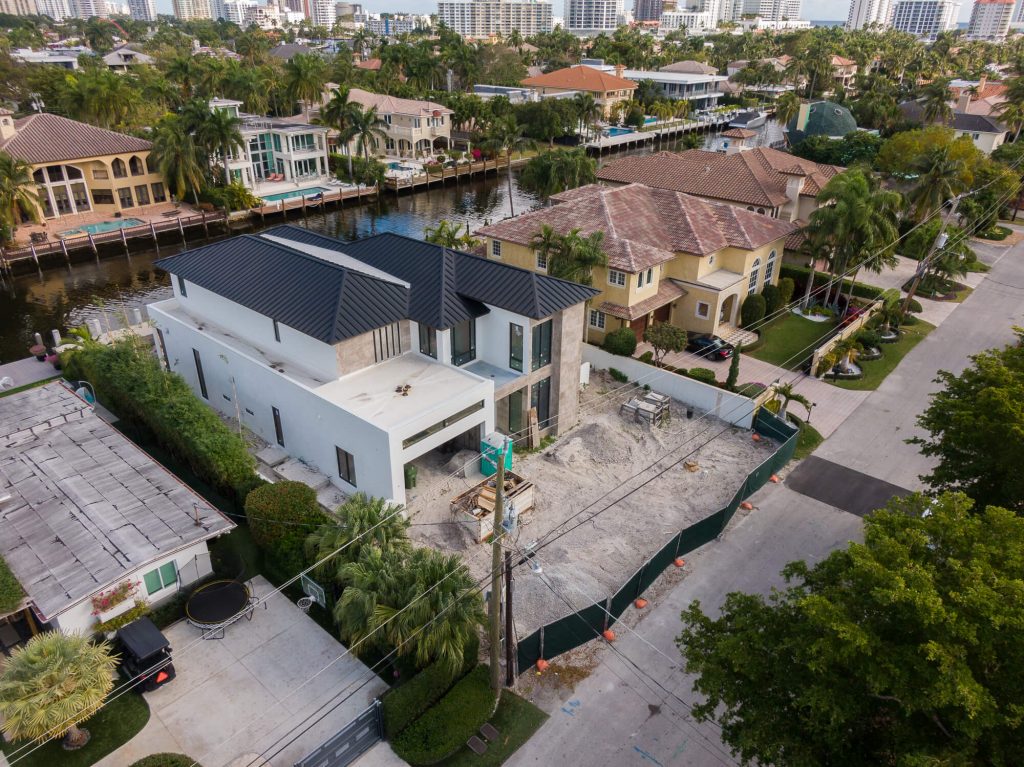
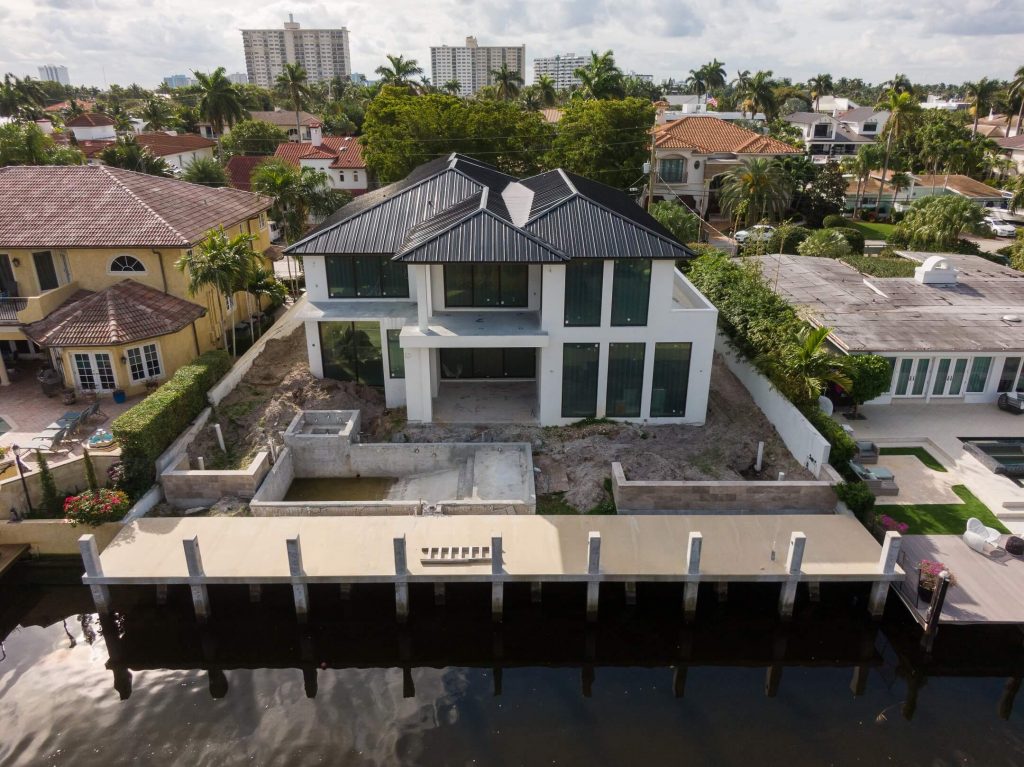
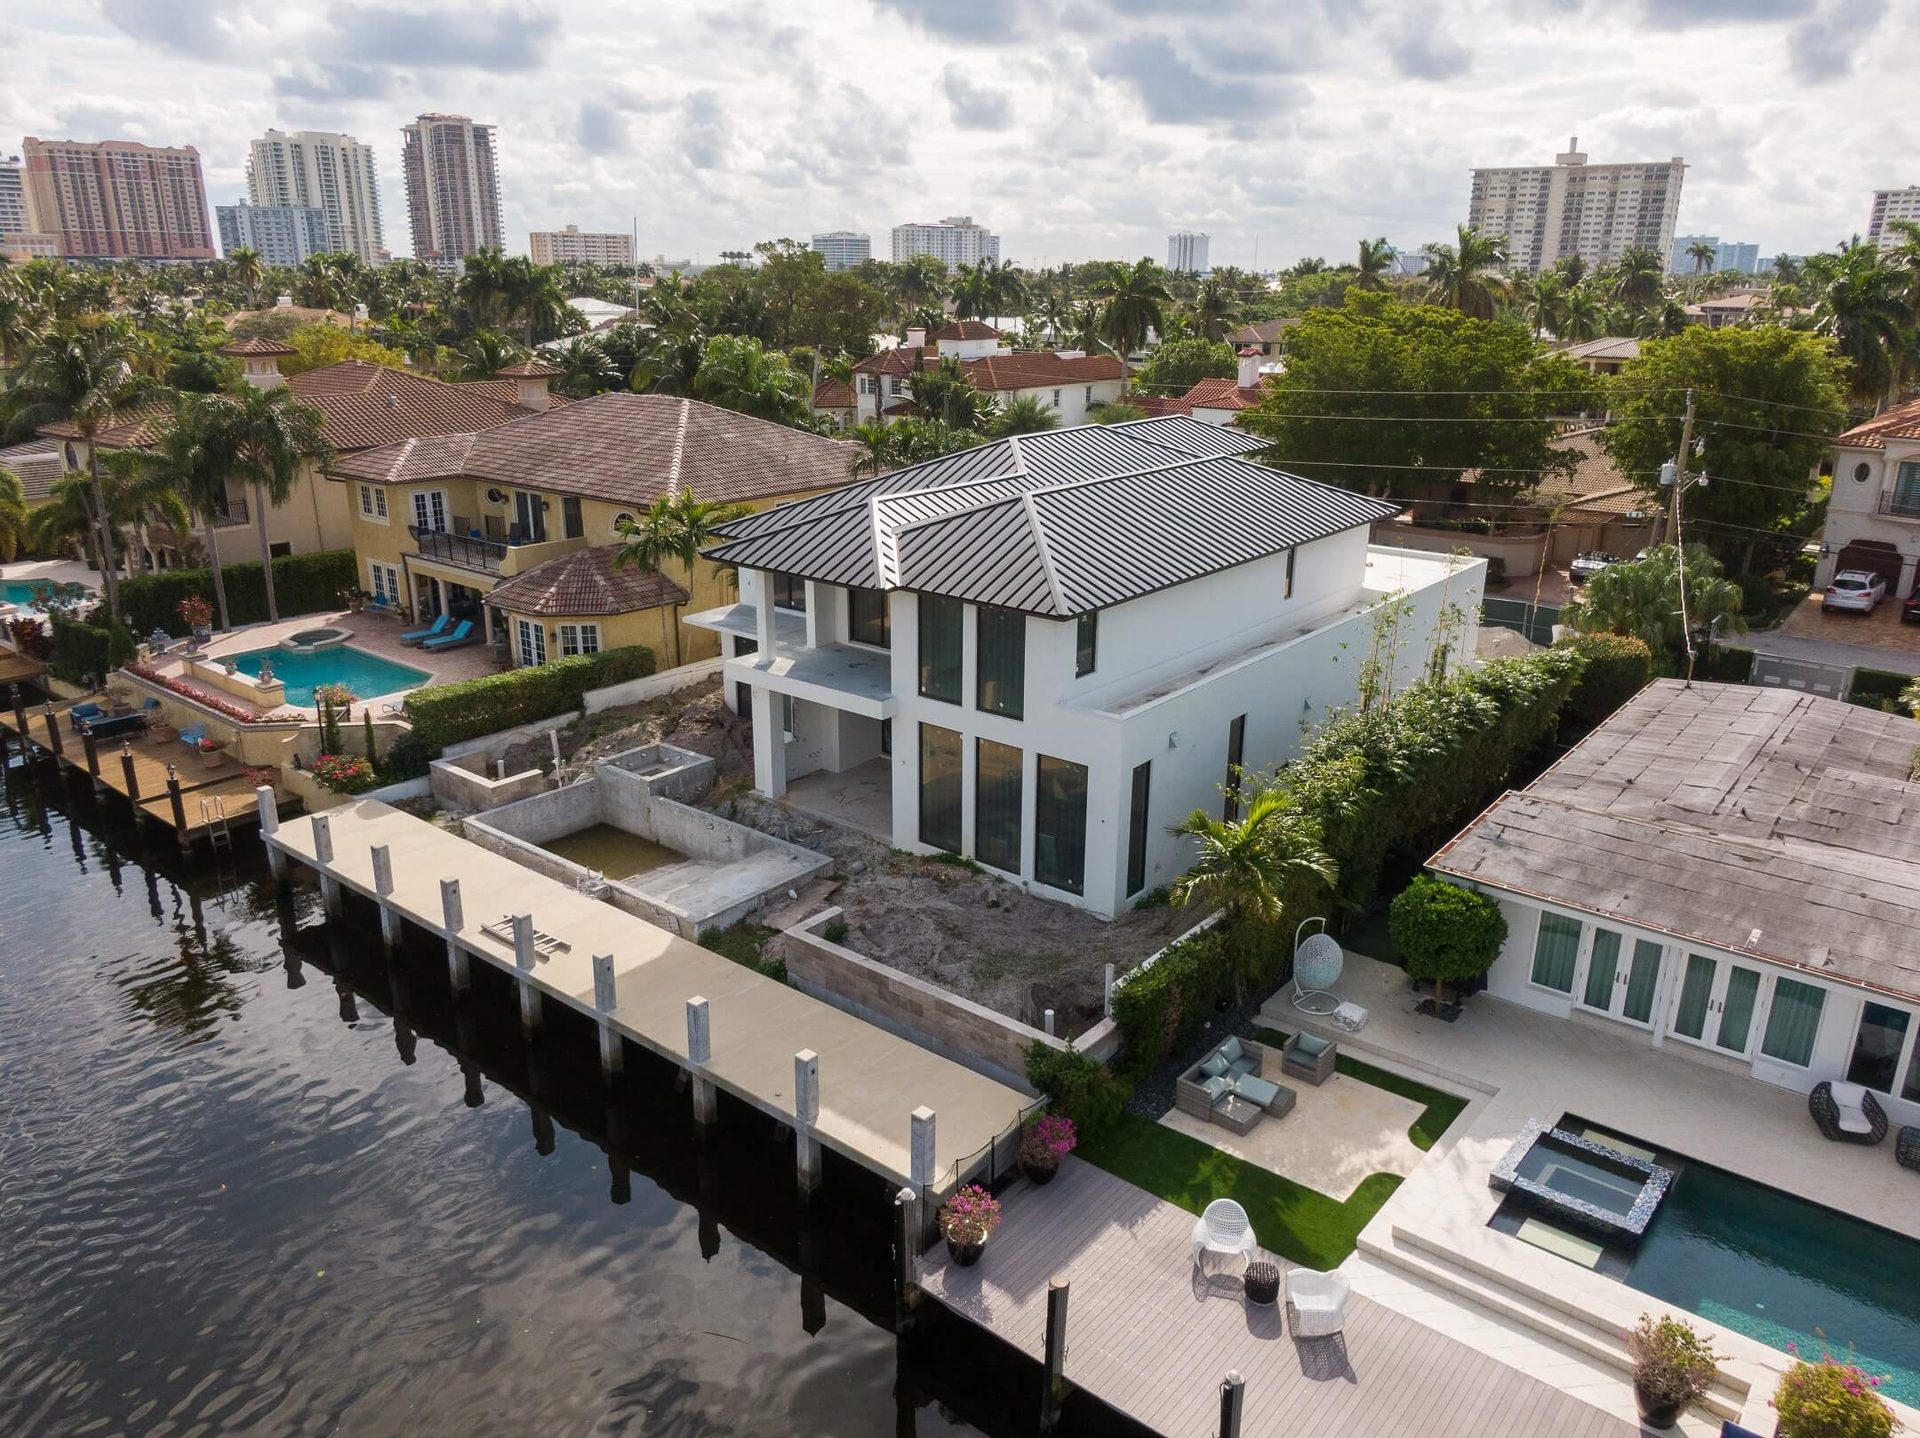
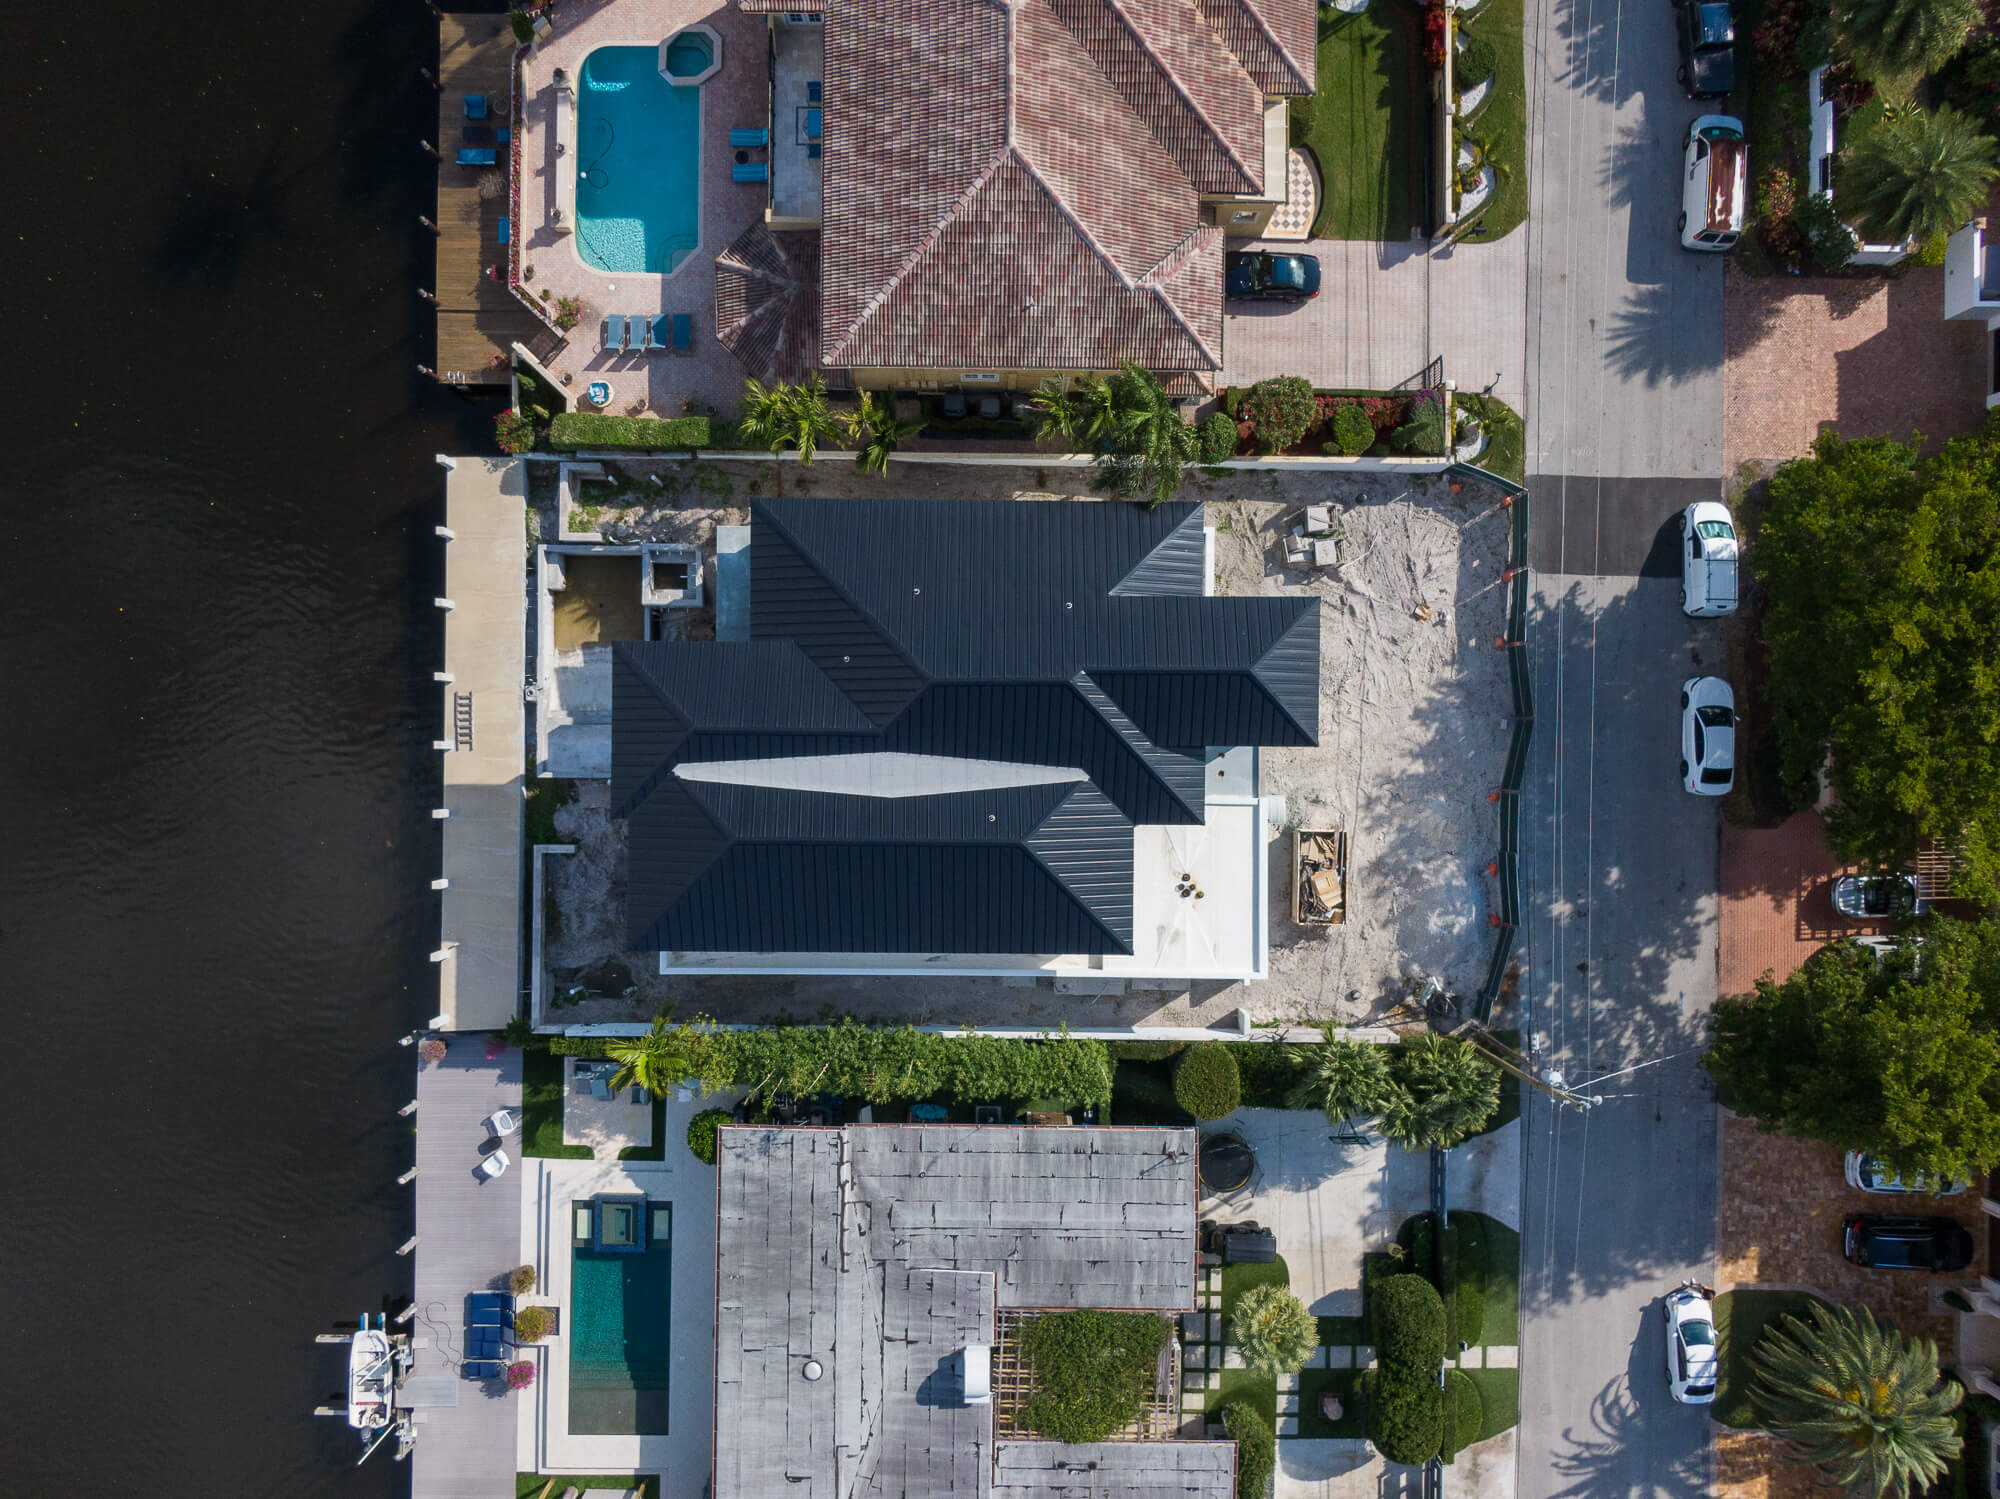
At the time Stan contacted us, the construction of the house was close to the final stage. The main structural elements were already in place, including the frame, walls, roof, doors, windows, fences, and even a pool in the yard. But at the same time, a lot of works were yet to be completed:
- building exterior had no finishes;
- garage, balcony, and pool were incomplete;
- pavements and stairs in the yard were not installed;
- landscape design existed only on drawings thus far.
Stan asked us to create 3 CG renders:
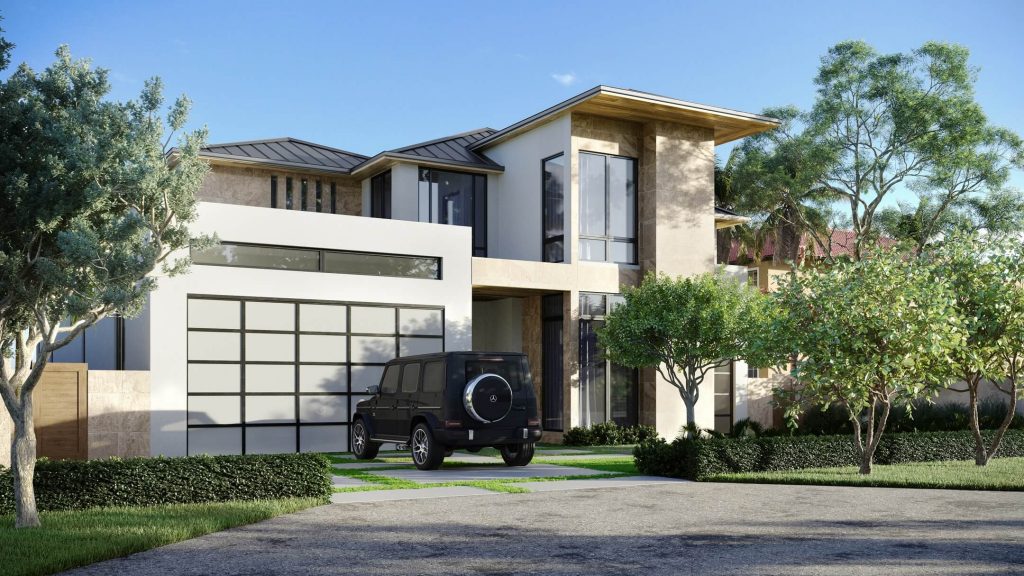
- a 3D rendering for the real estate front view. It would show the facade, 3-car garage, and landscape design in detail;
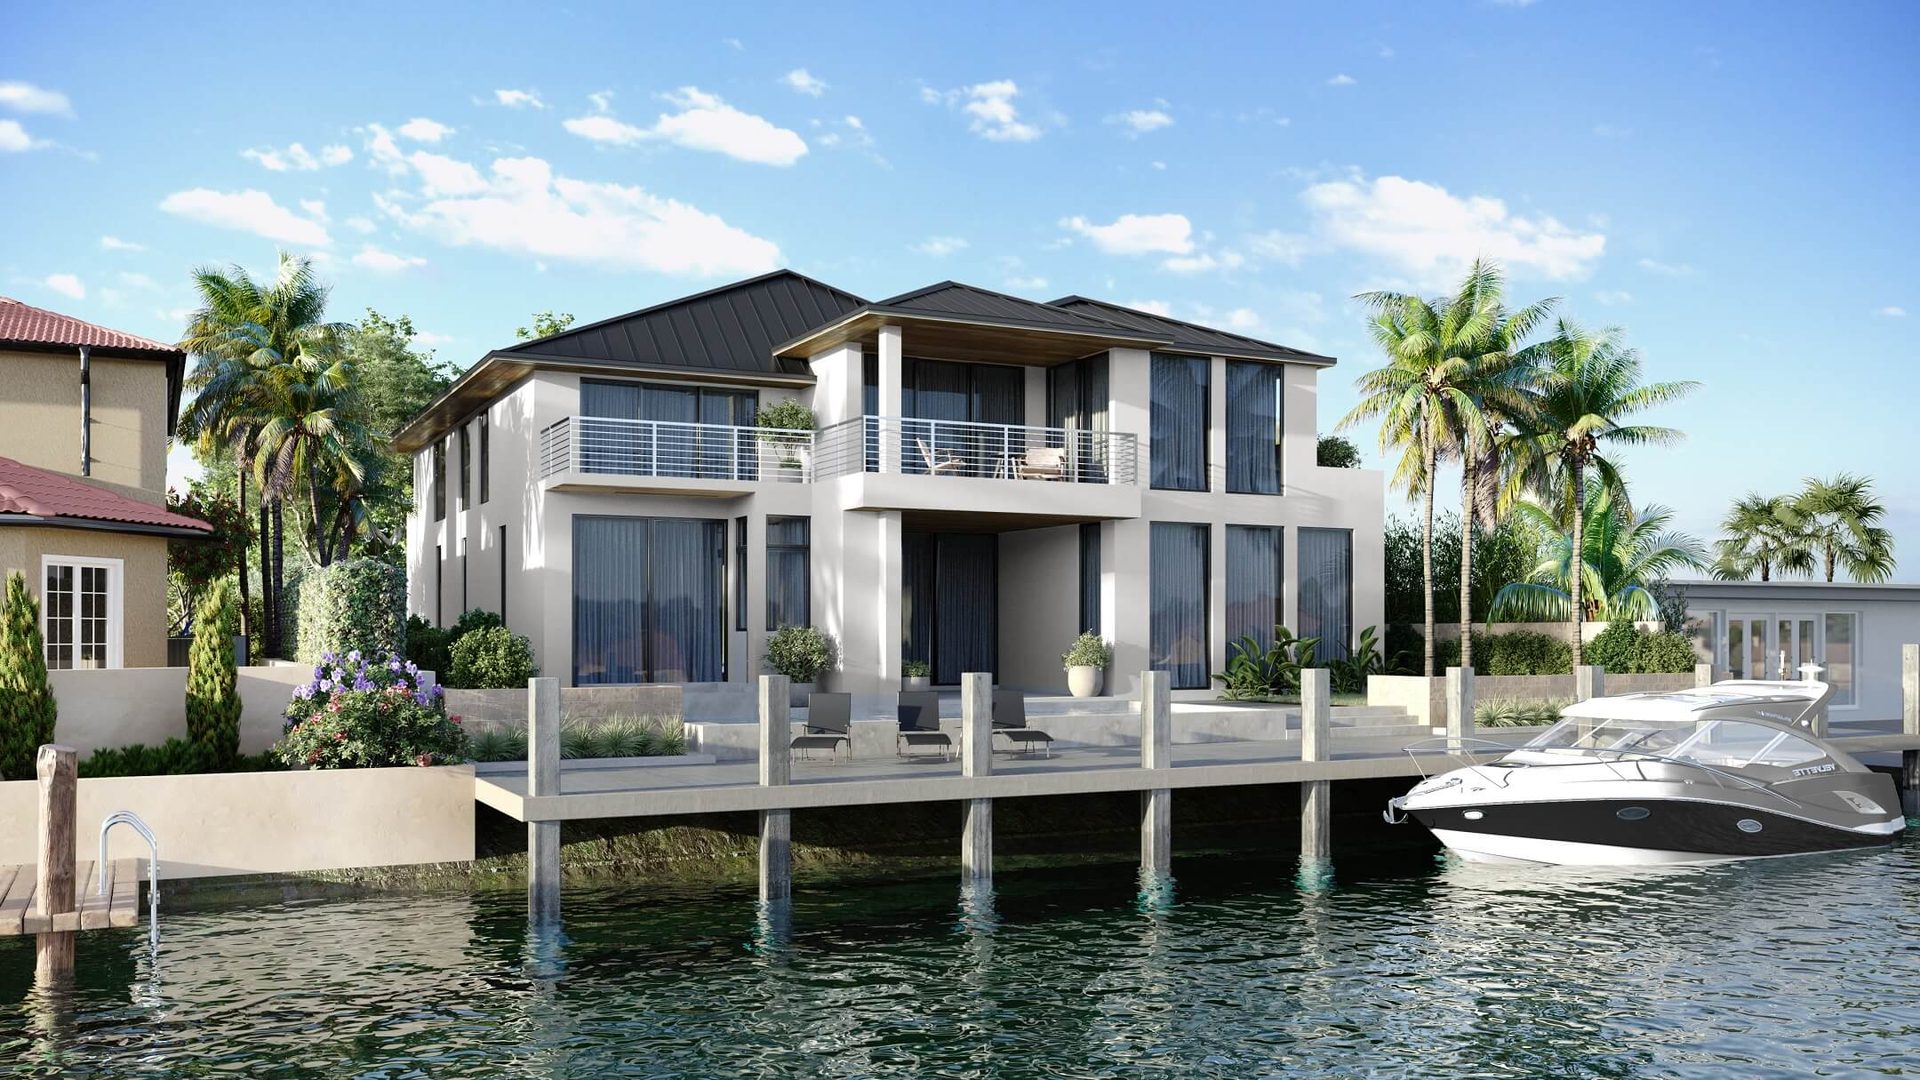
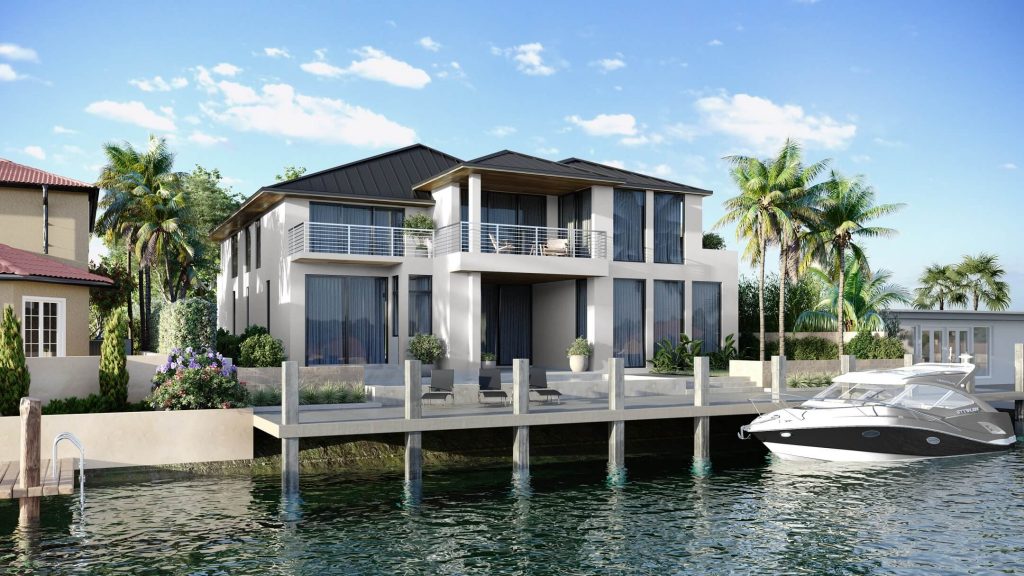
- a 3D rendering with a rear view of the building. It would highlight the balcony, a patio with a pool, and a spacious private dock;
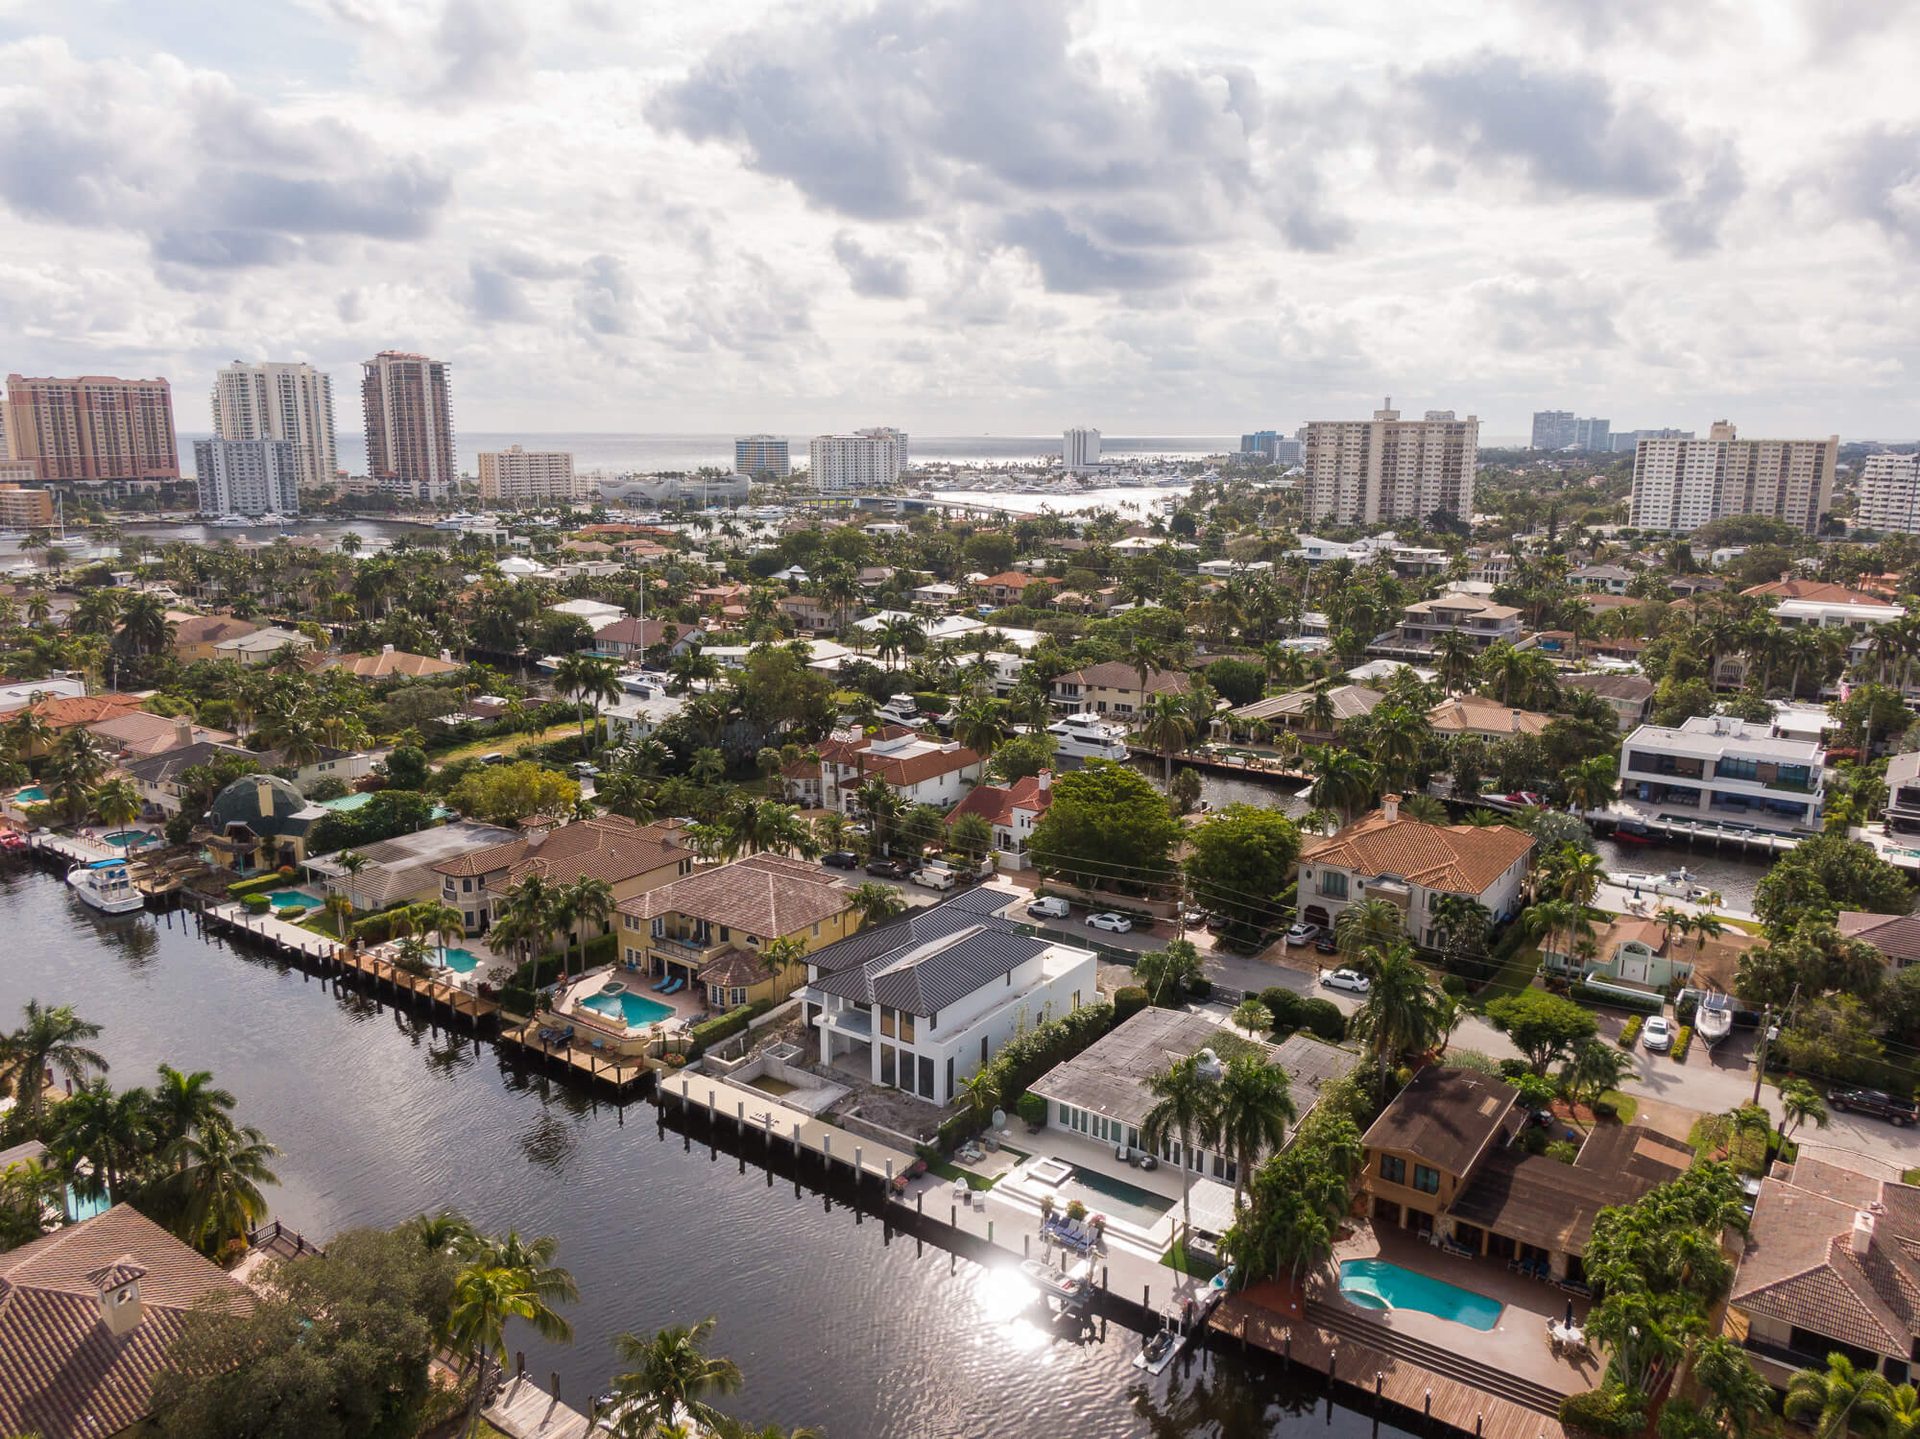
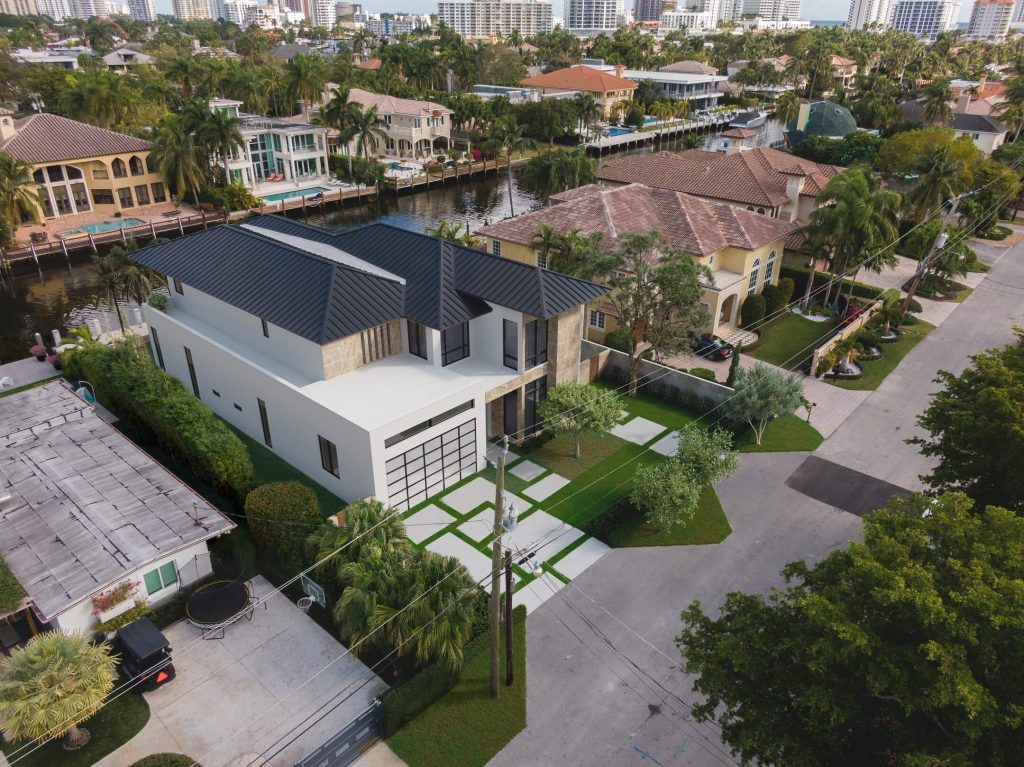
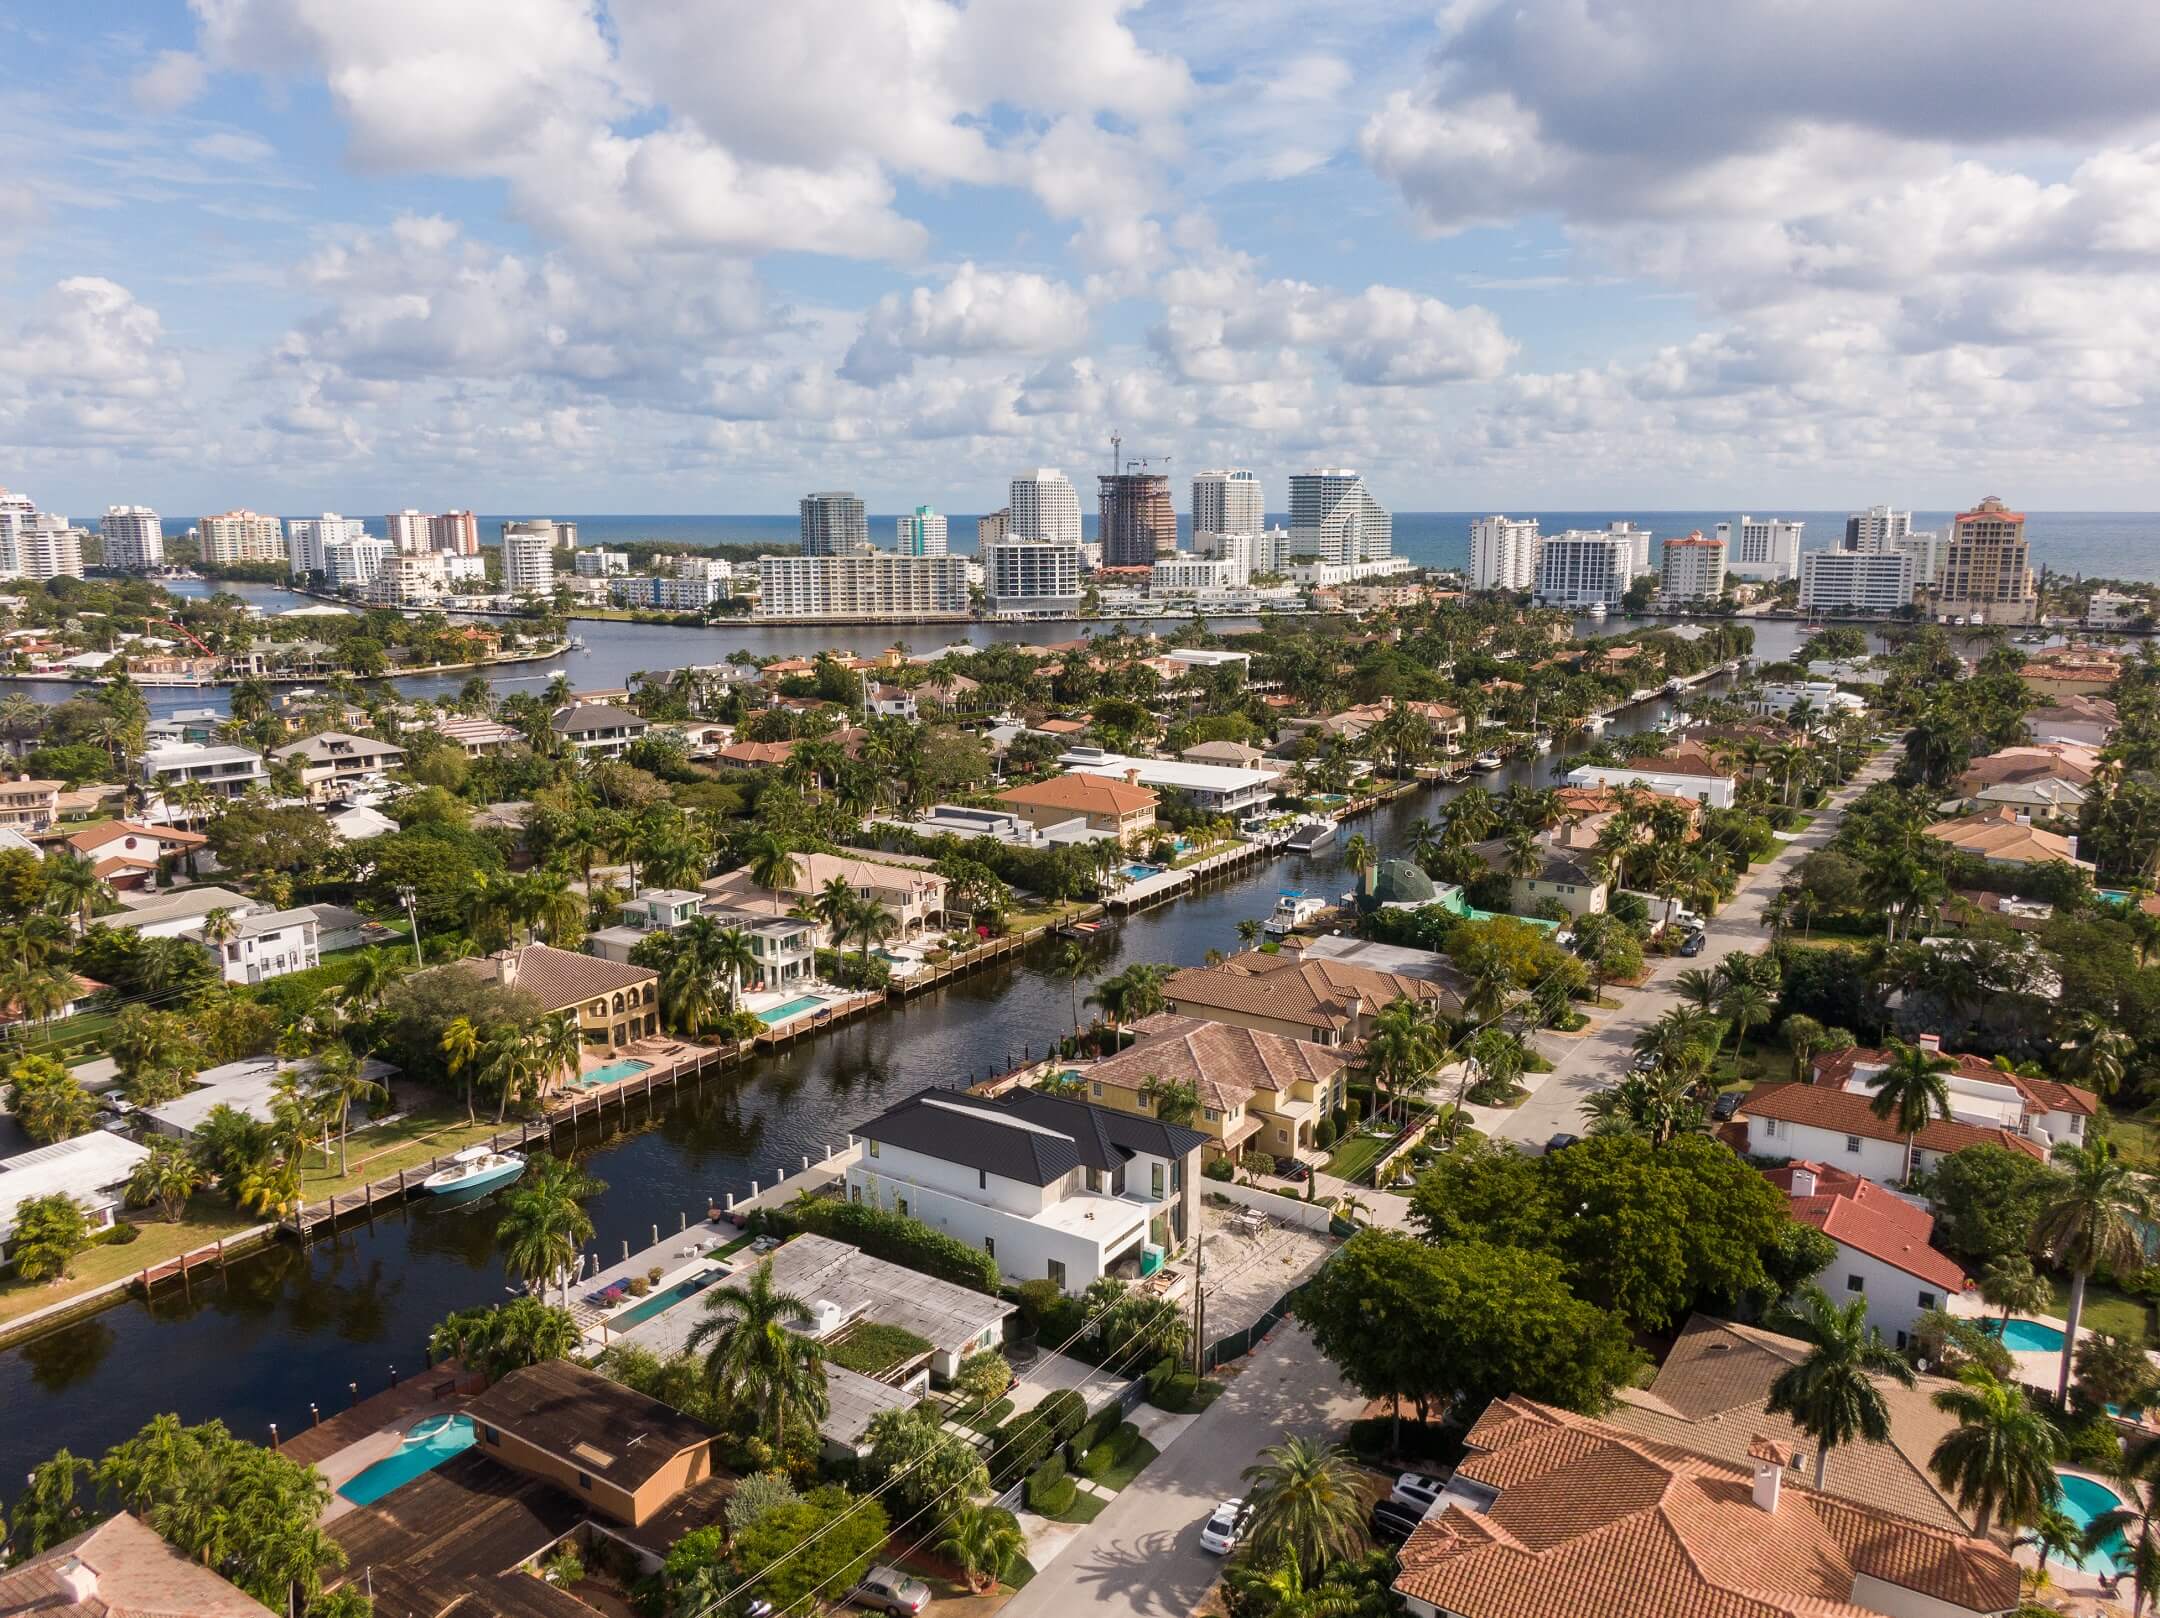
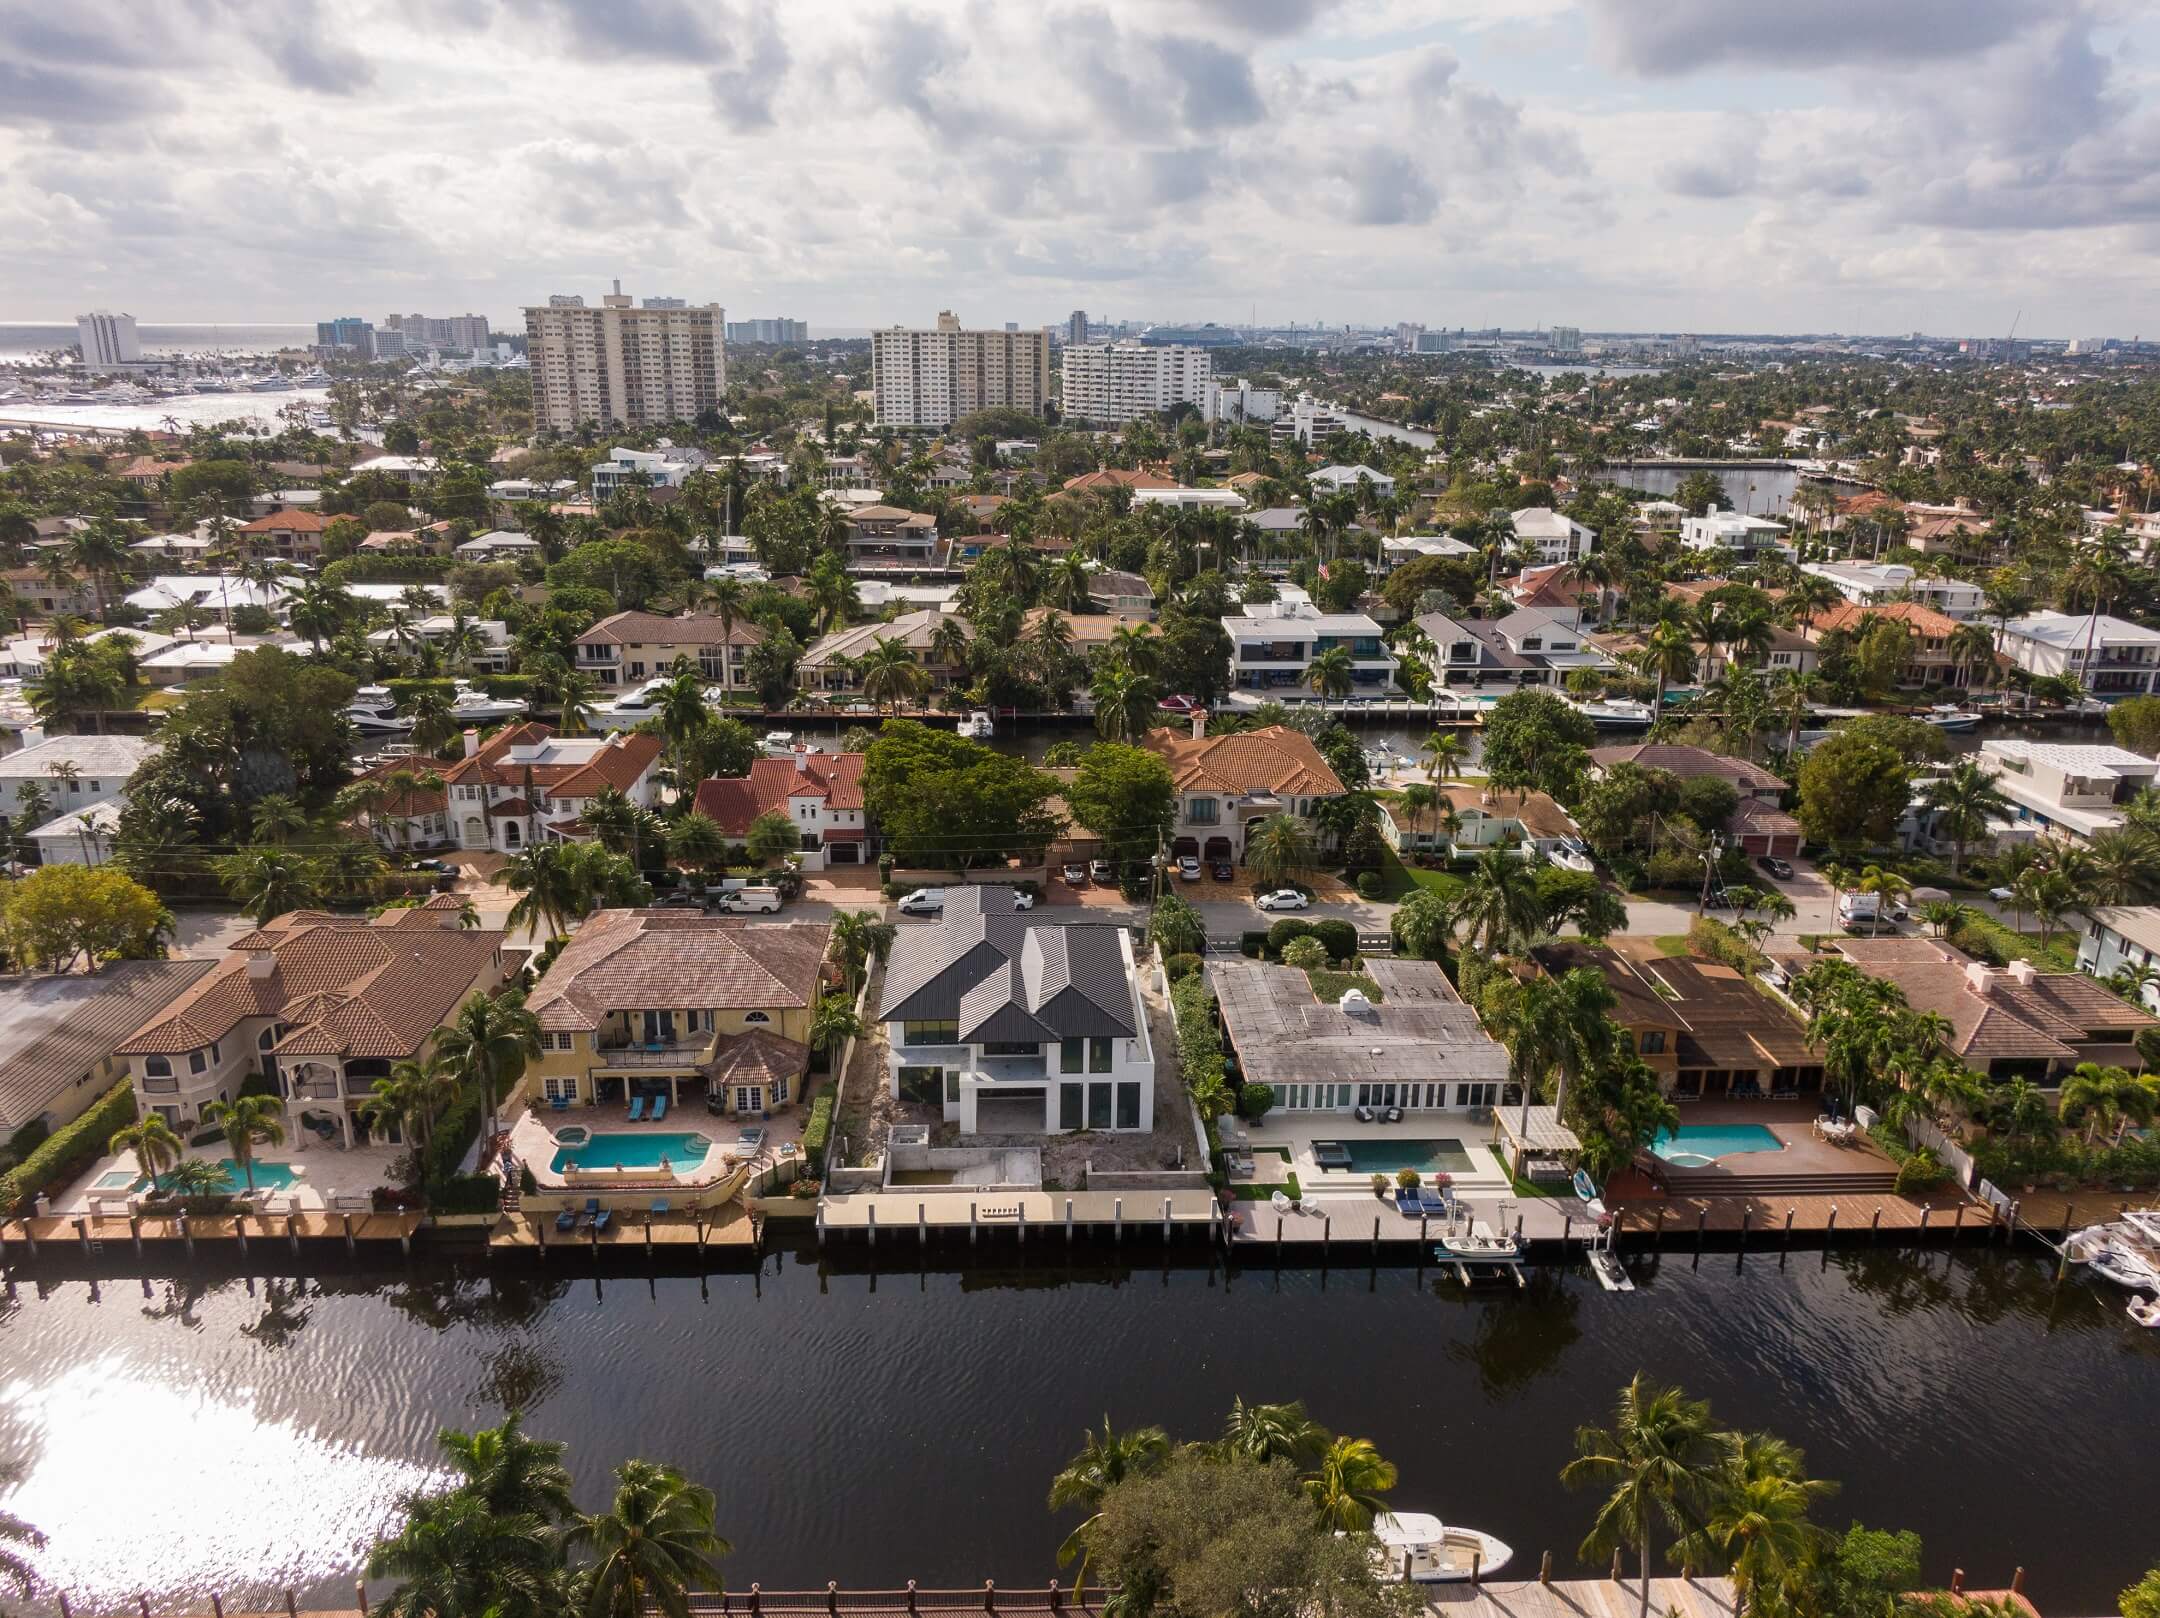
- a bird’s-eye view of the real estate property. It would allow the audience to see how well the house fits into its charming oceanside neighborhood.
The residence cost 5 million dollars, and the 3D rendering for this real estate jewel needed to show that it was worth every penny. For this, the imagery had to showcase the lifestyle the property offered: the promise of amazing views, breezes from the ocean, the murmur of palm trees, sailing on a yacht. And the beautiful home — as a key to this dream life.
What Real Estate Renderings for Property Were to Capture
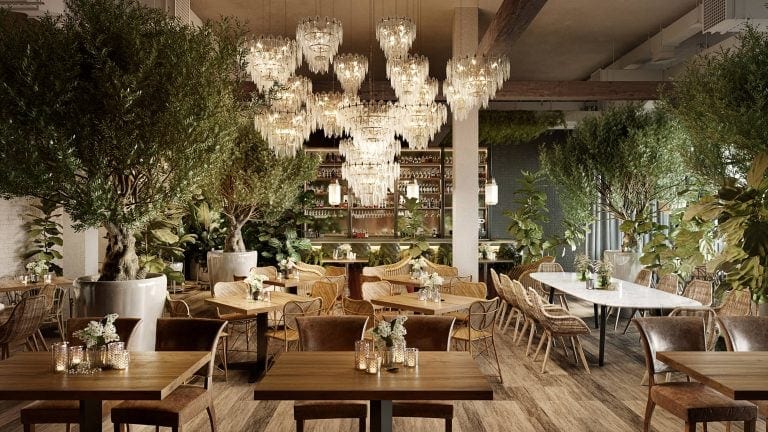
The contemporary family residence designed by Randall Stofft fits harmoniously into its picturesque location on Sea Island – a part of the Seven Isles neighborhood in Fort Lauderdale, Florida. Built right by one of the city waterways, the two-story real estate property has 75 feet of water frontage with a large dock, which is a perfect place to moor a private boat.
In the yard, there is a patio, a big pool with a SPA, and a place for barbecue. Which makes the outdoor area ultra-comfortable for relaxing in the family circle or throwing parties. What’s more, the yard pleases the eye with lively landscape design: a variety of palm trees and colorful flowers create an experience of a tropical garden. All that beauty is bathed in the warm Florida sun and located right next to the Atlantic ocean. What a paradise!
That was exactly the feeling we needed to convey through CGI. How did we do this? Let’s start from the very beginning – with studying the assignment.
The Scope of Work
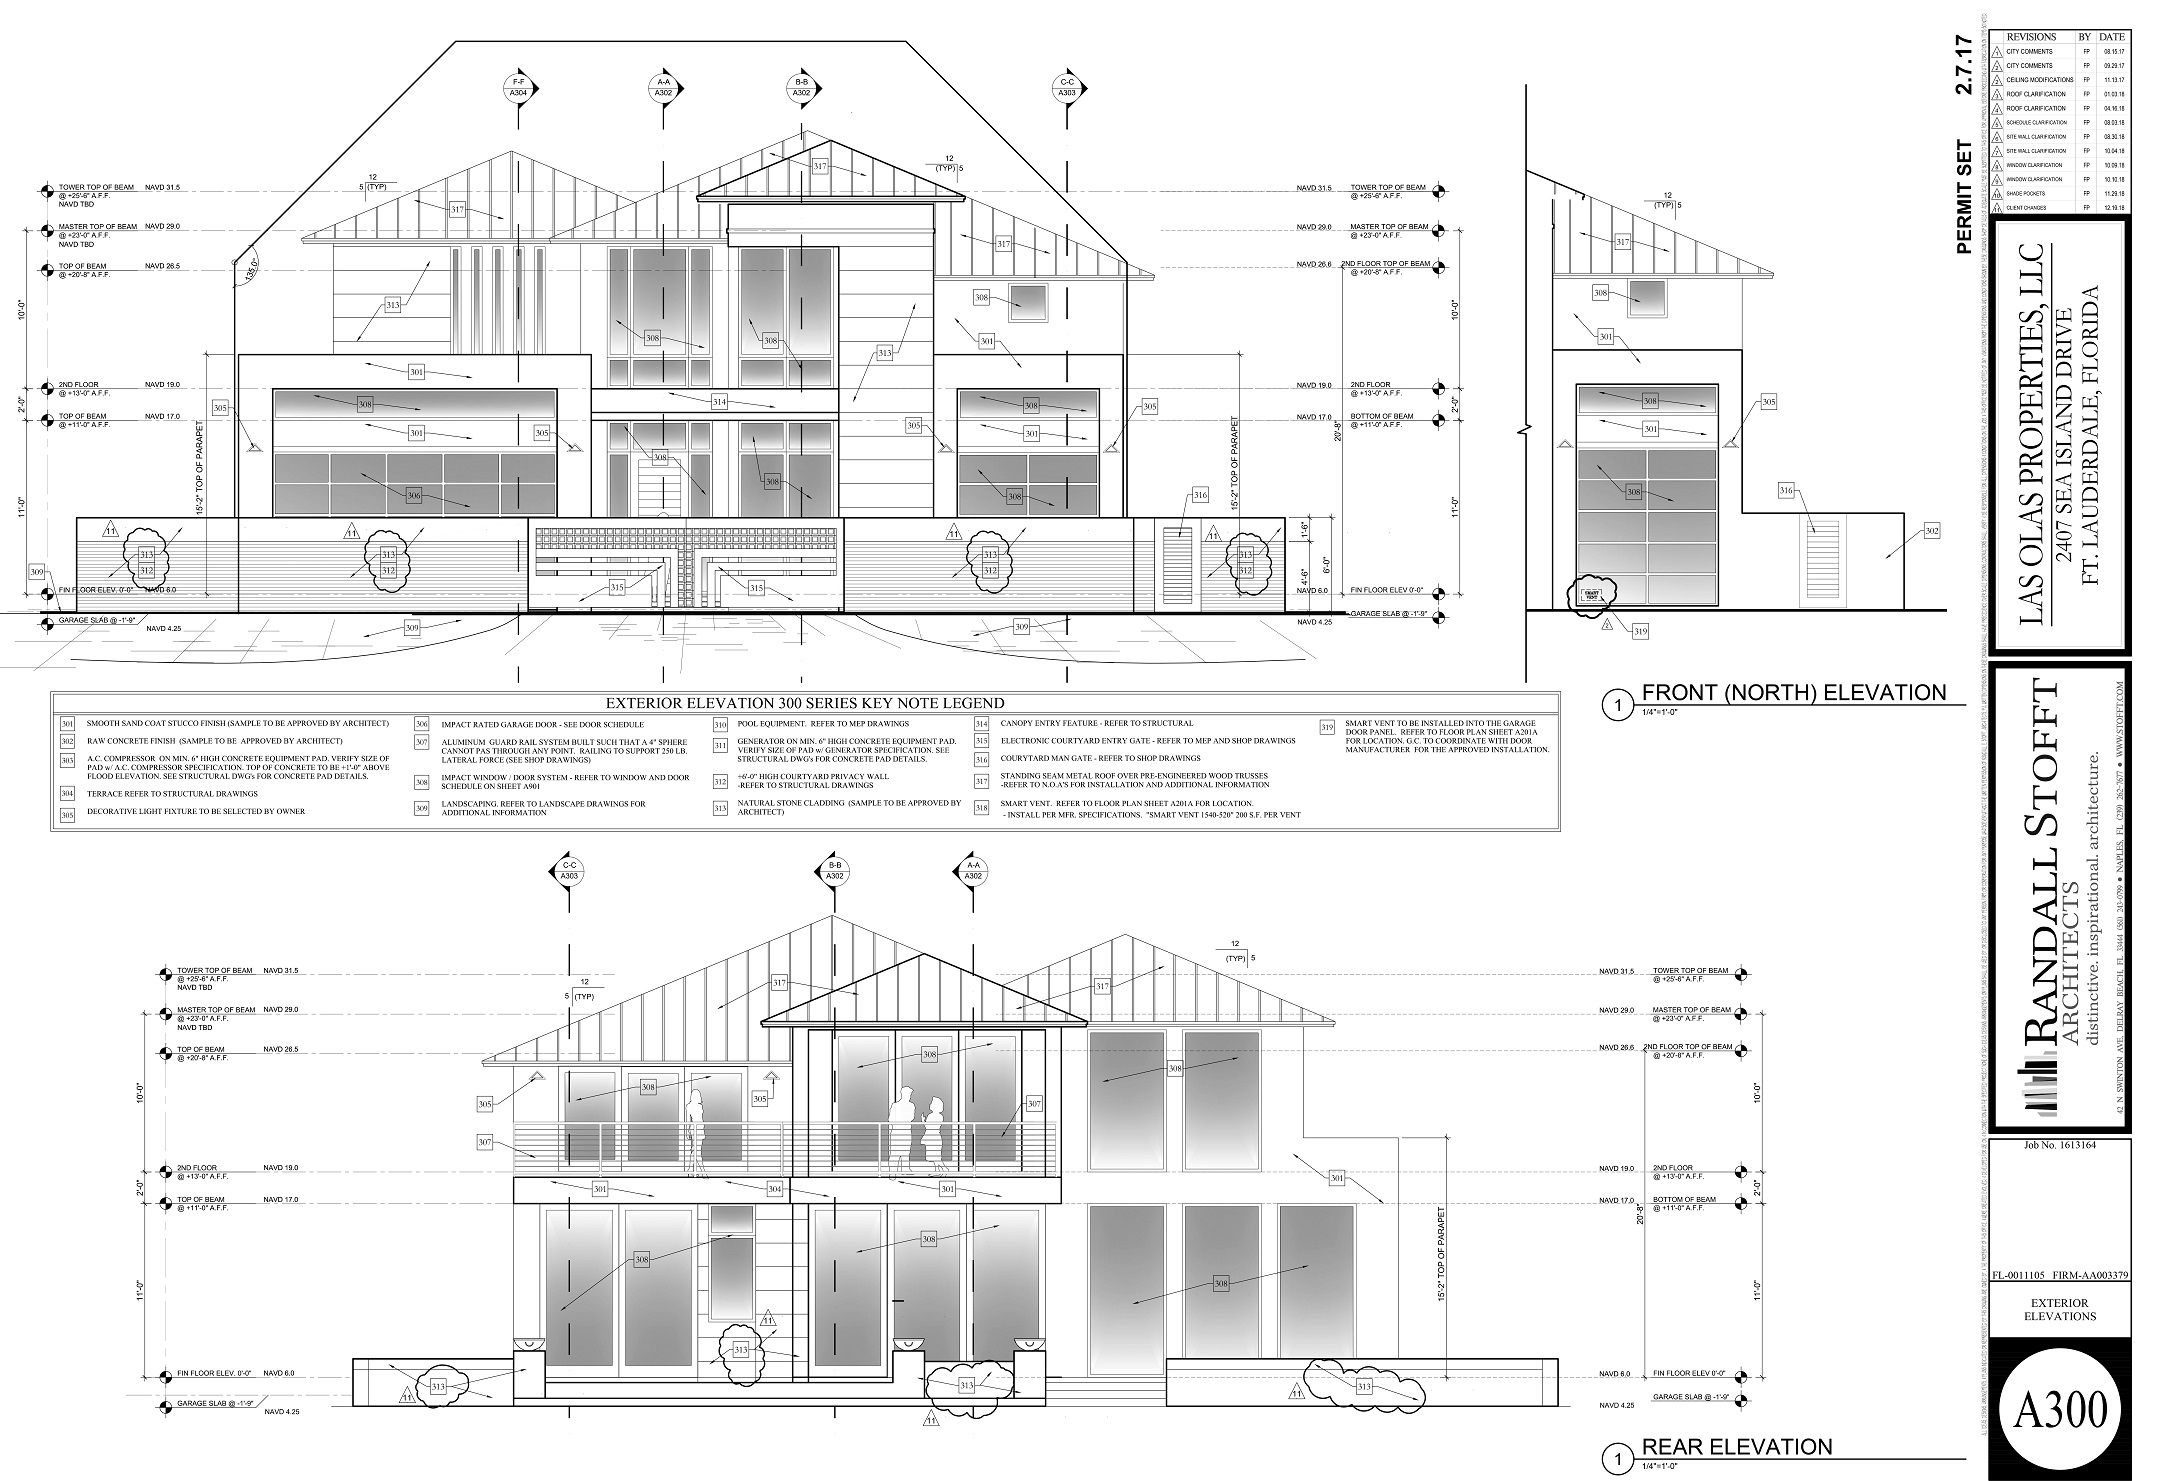
Stan sent us all the materials needed to create 3D rendering for real estate marketing. The SoW included:
- exterior elevation;
- the first floor dimension plan;
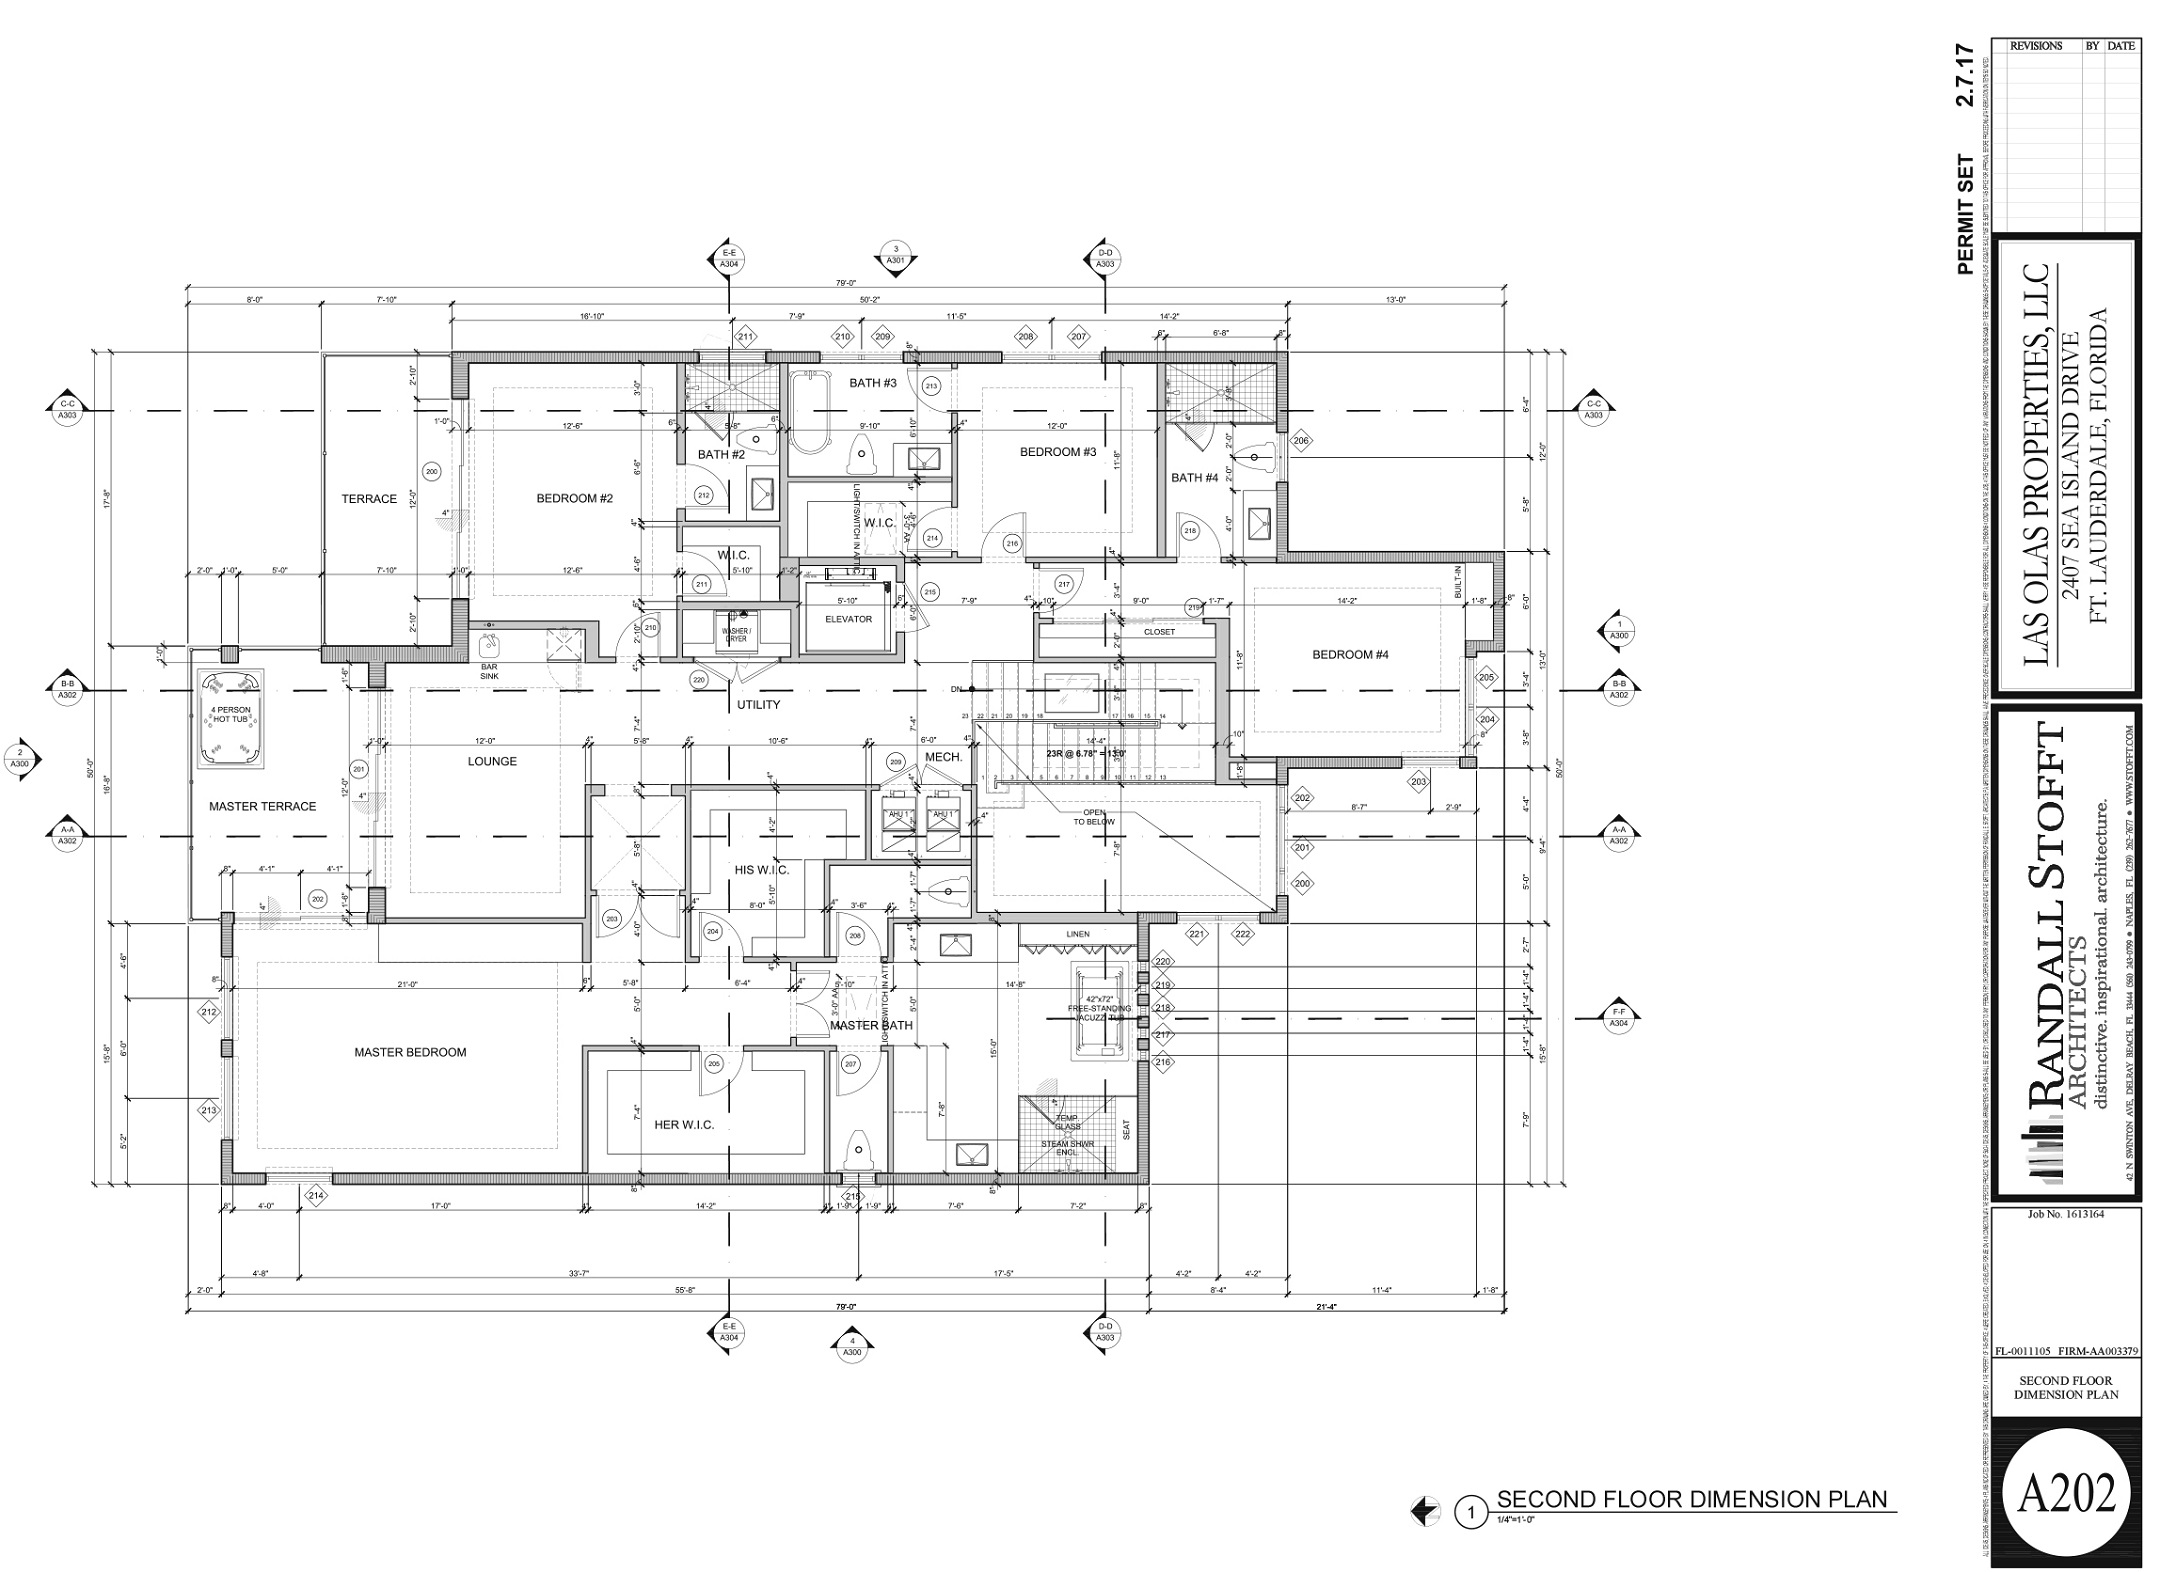
- the second floor dimension plan;
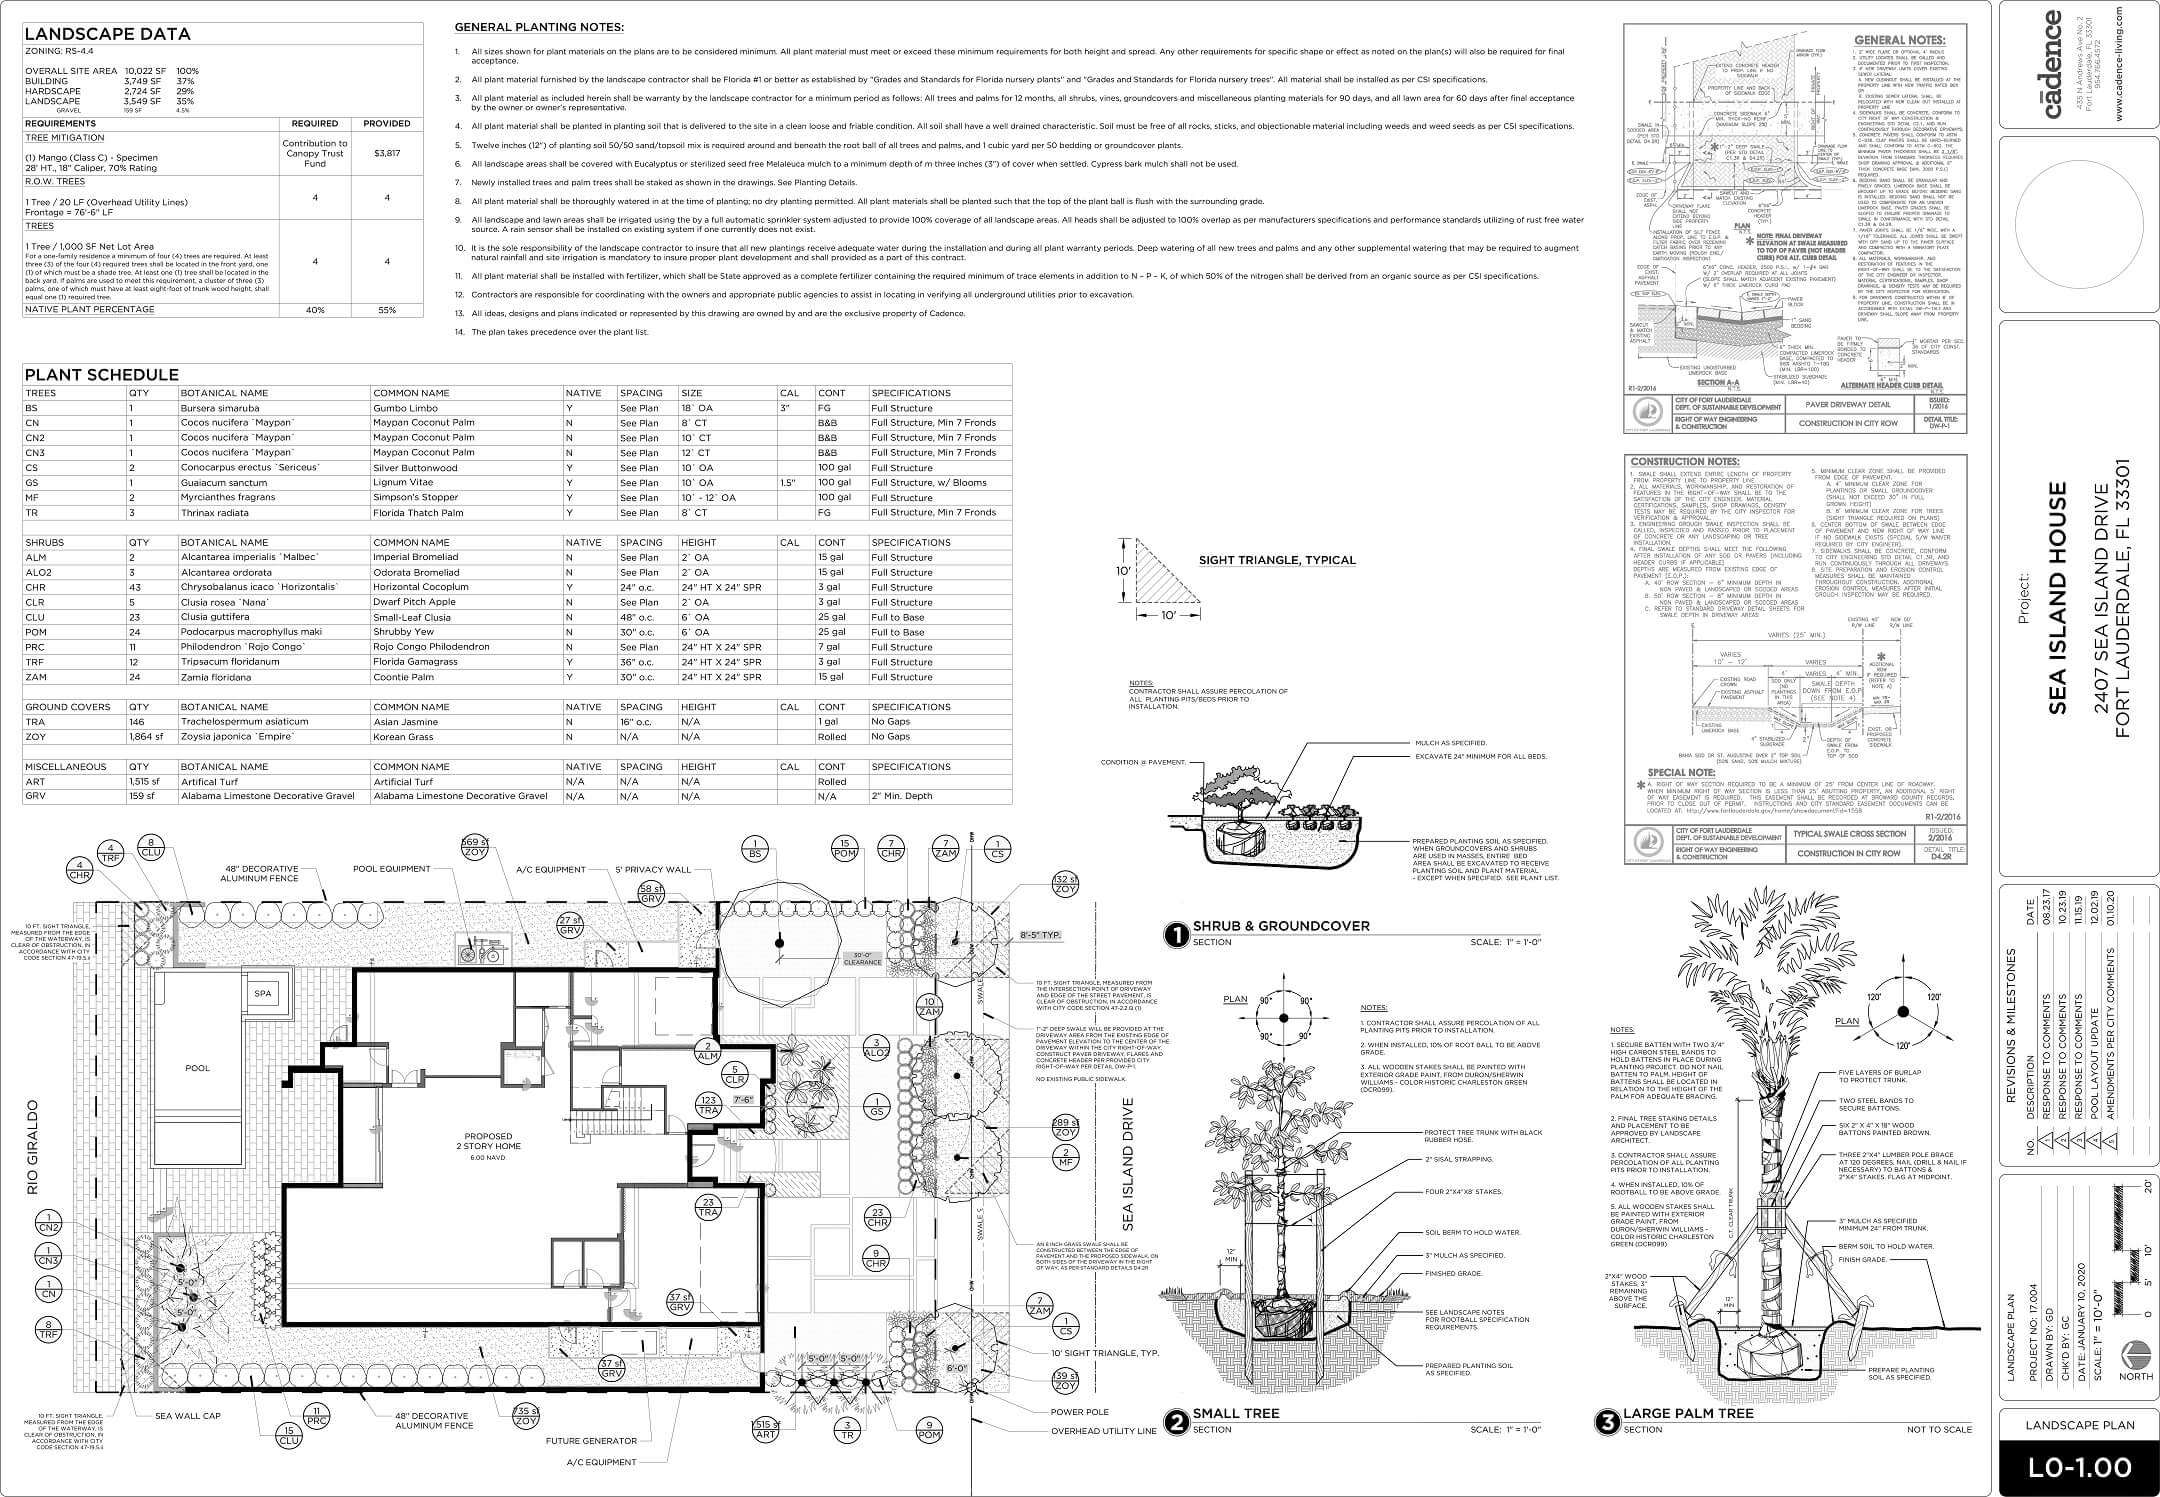
- landscape plan;
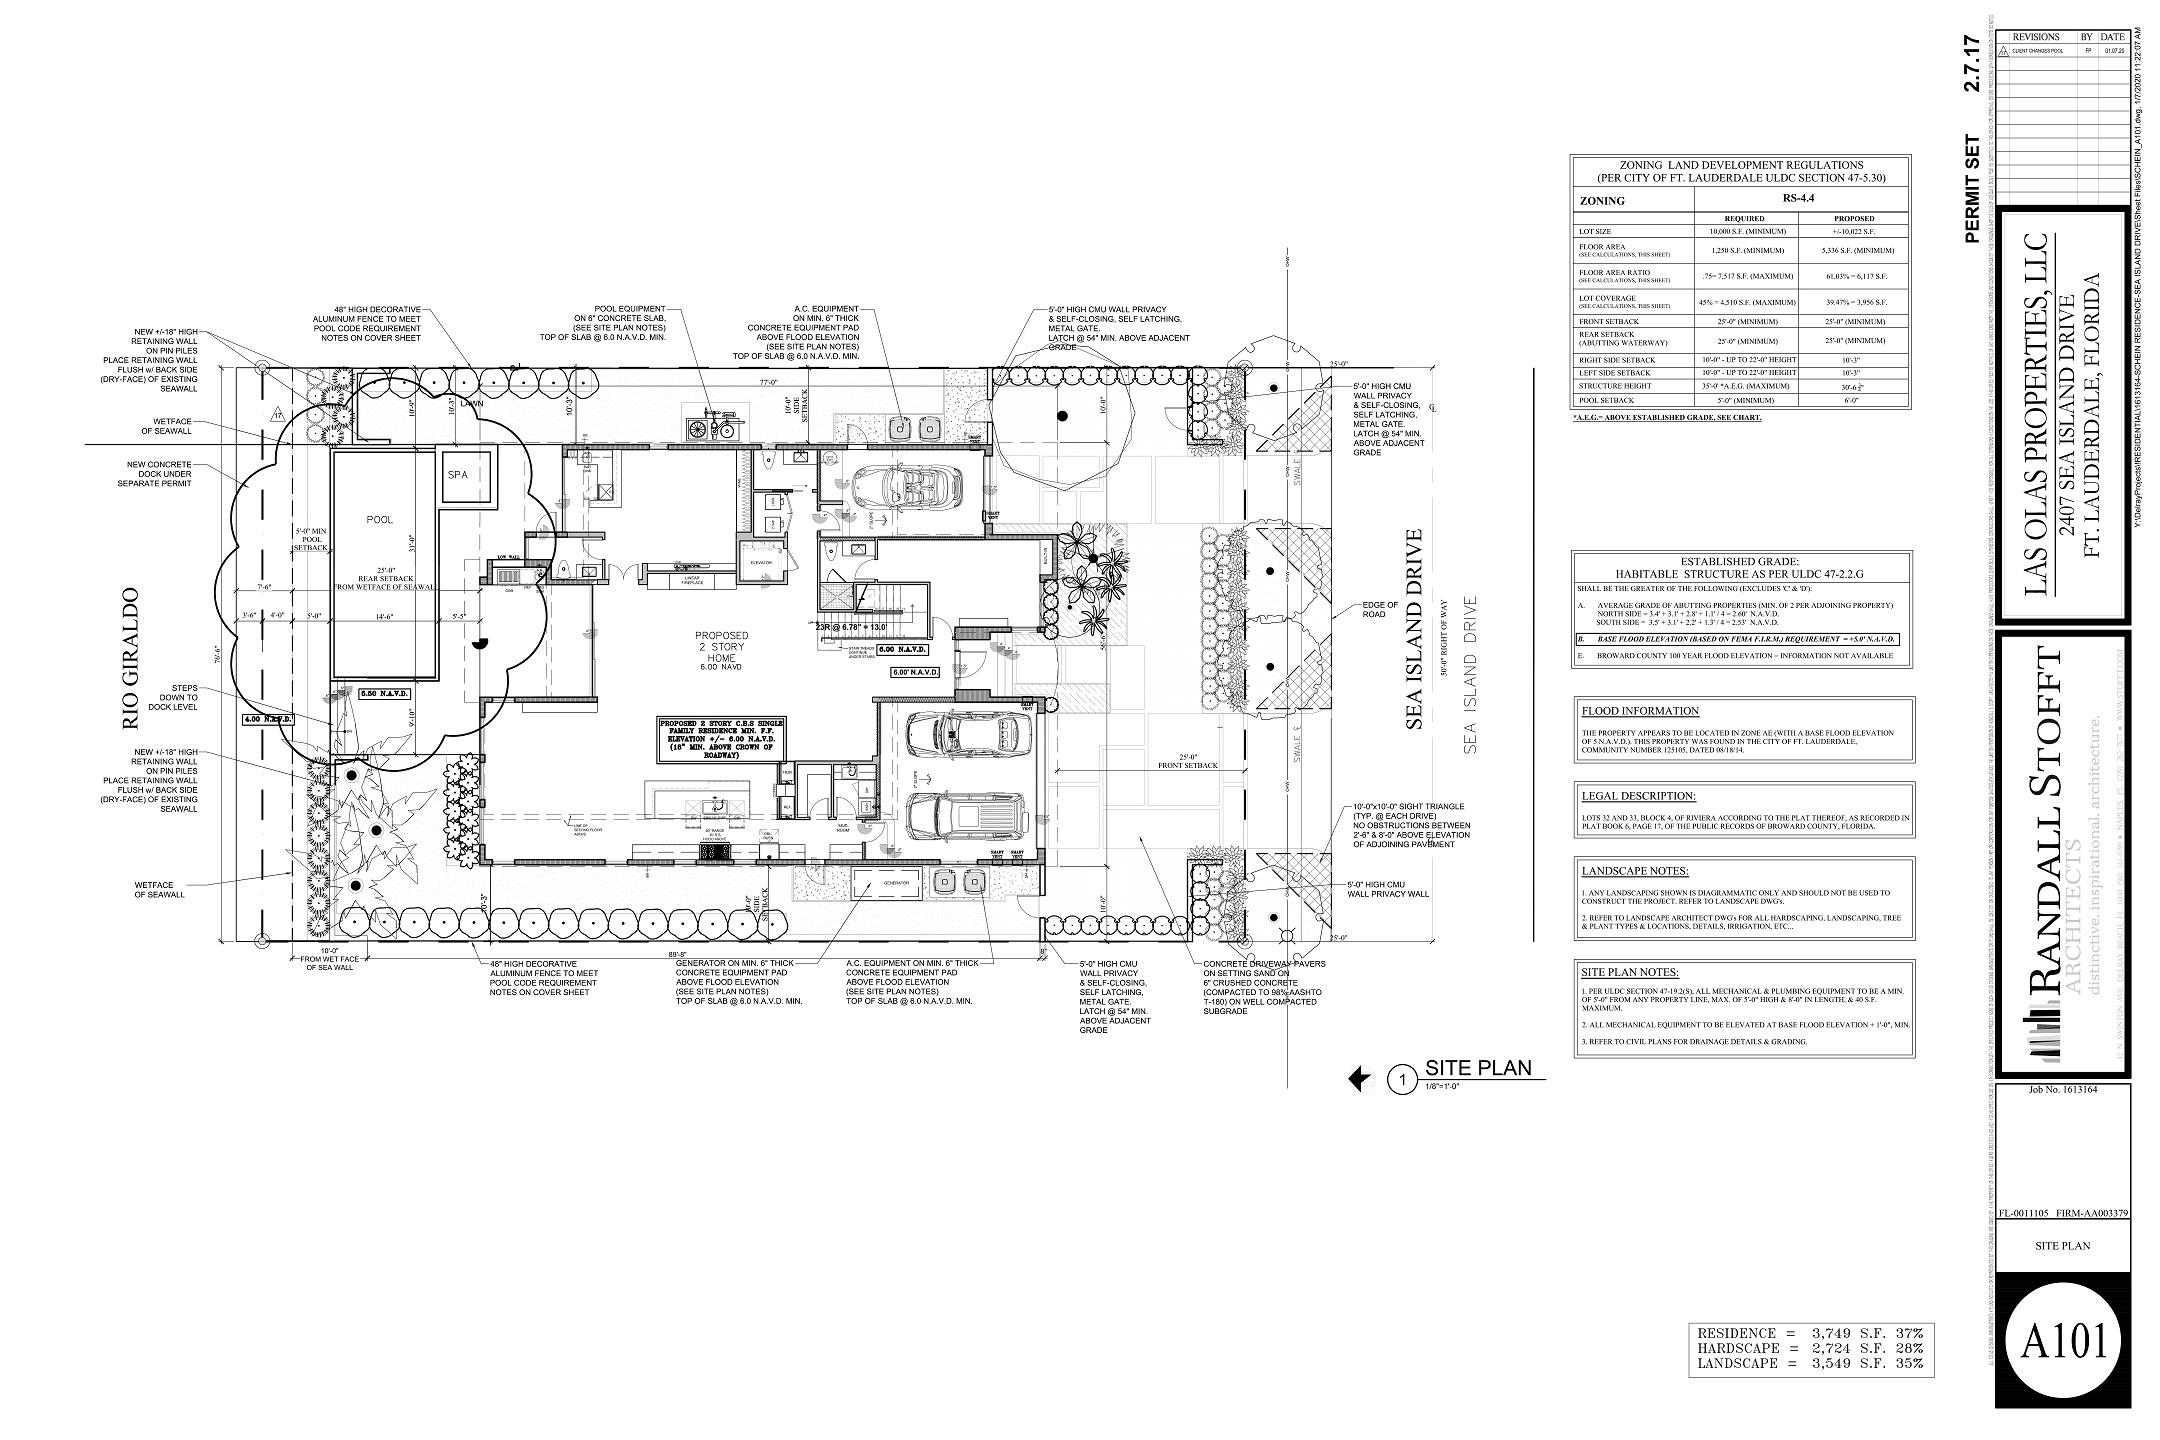
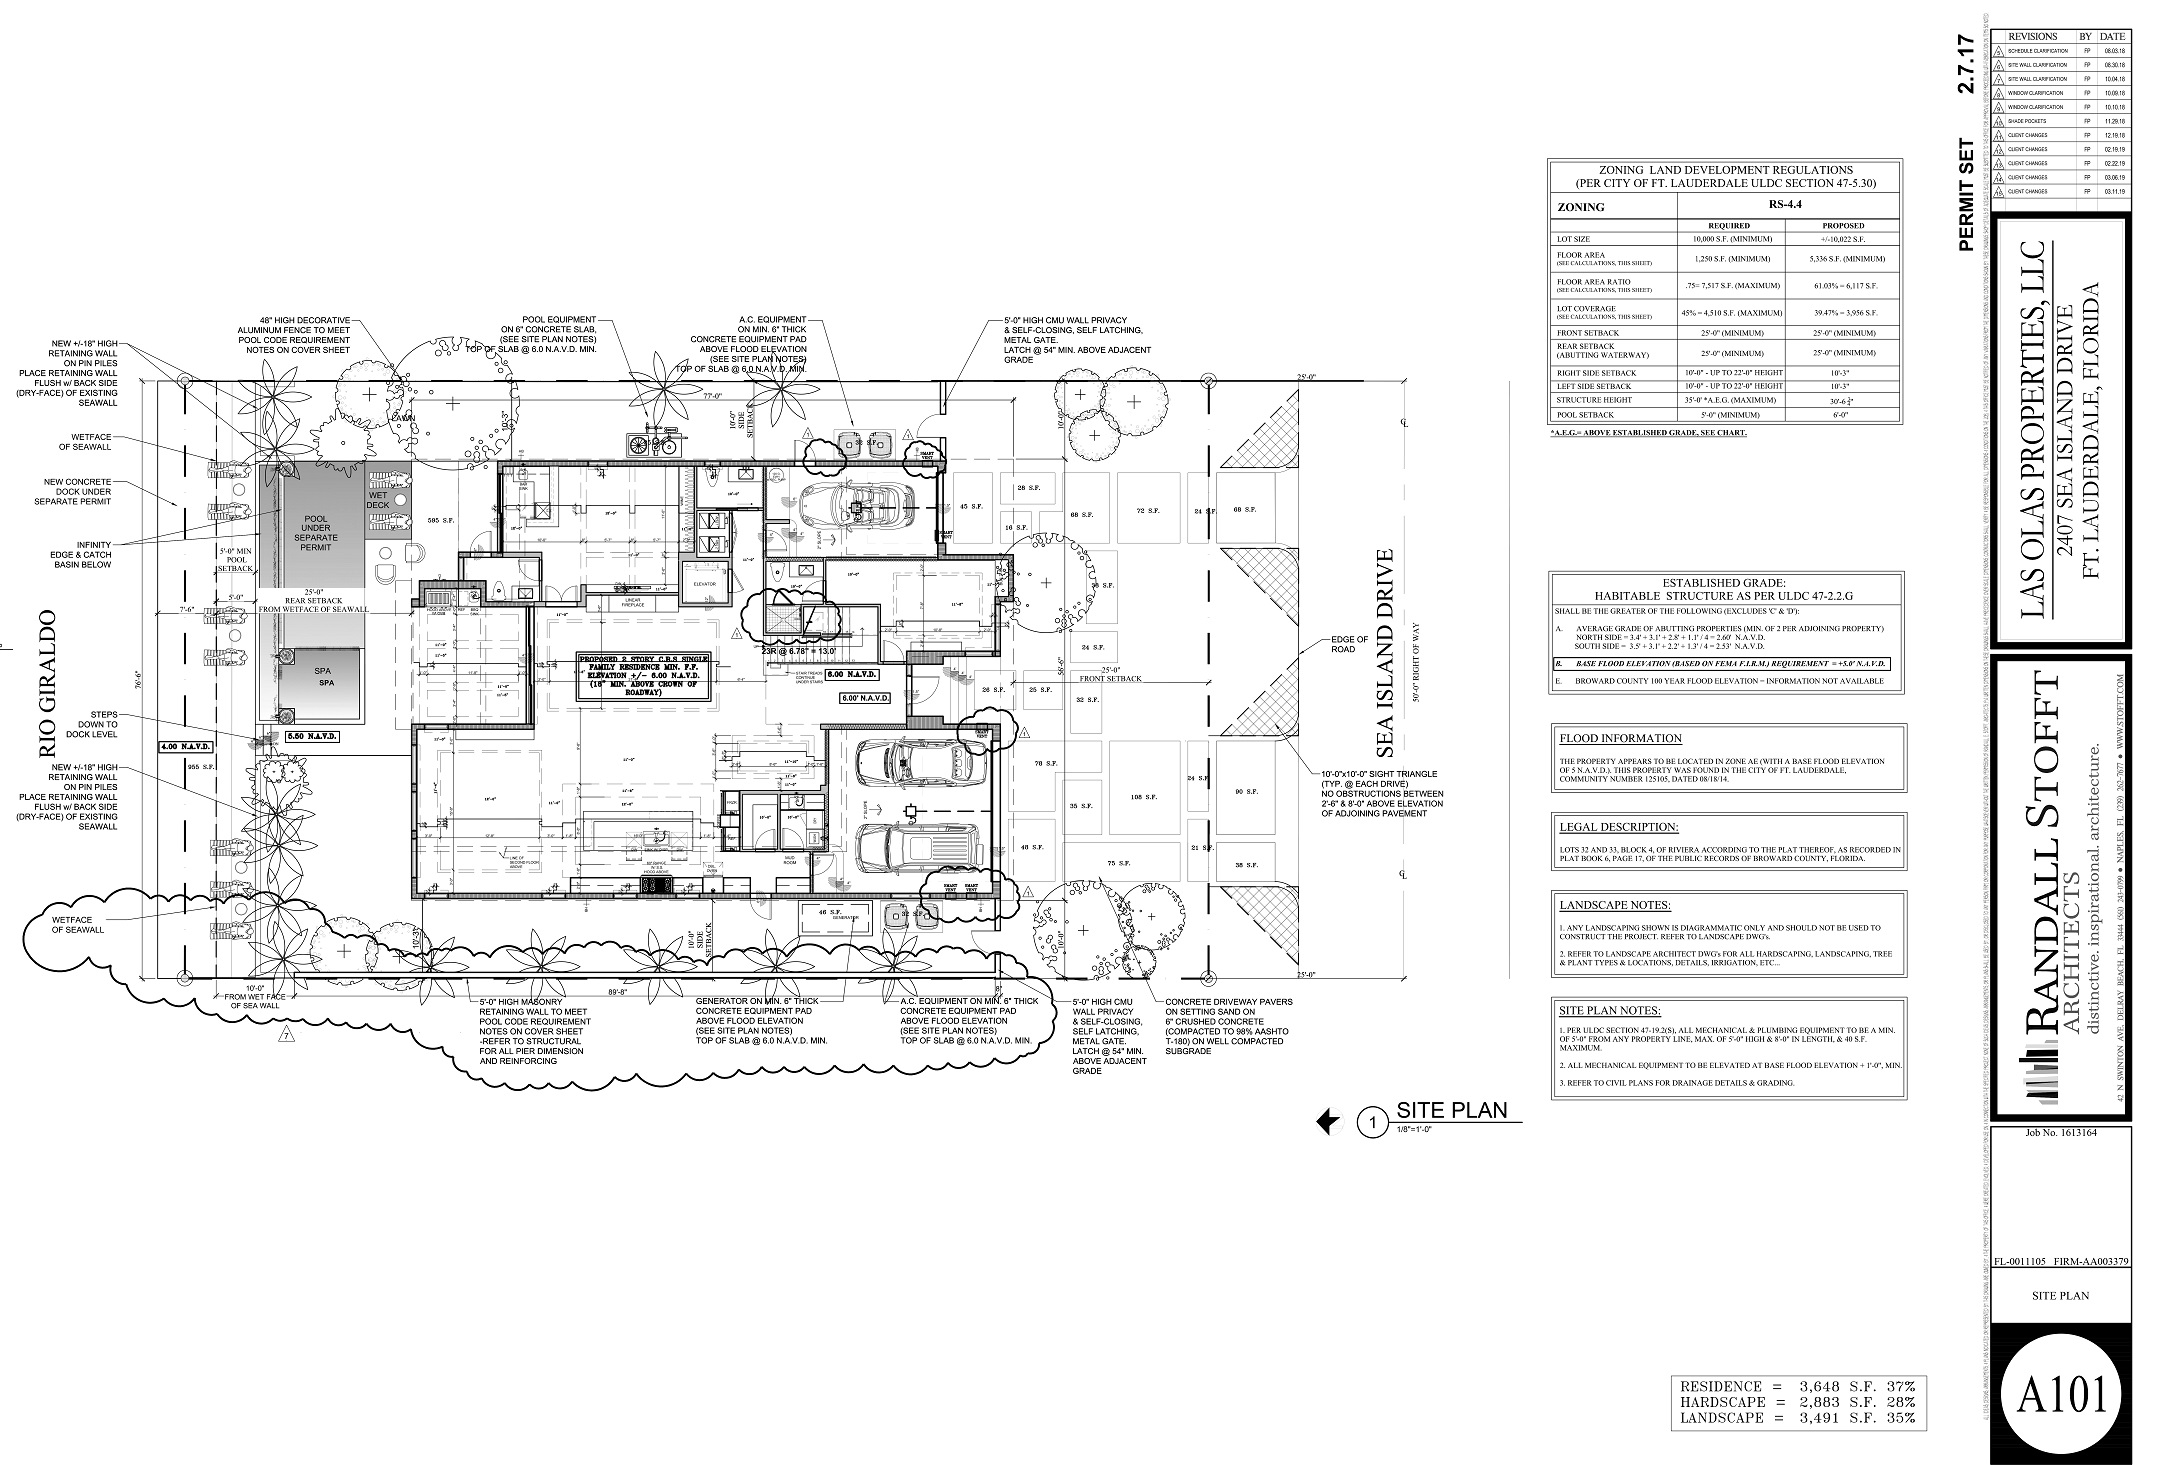
- site plan;
- pool plan.
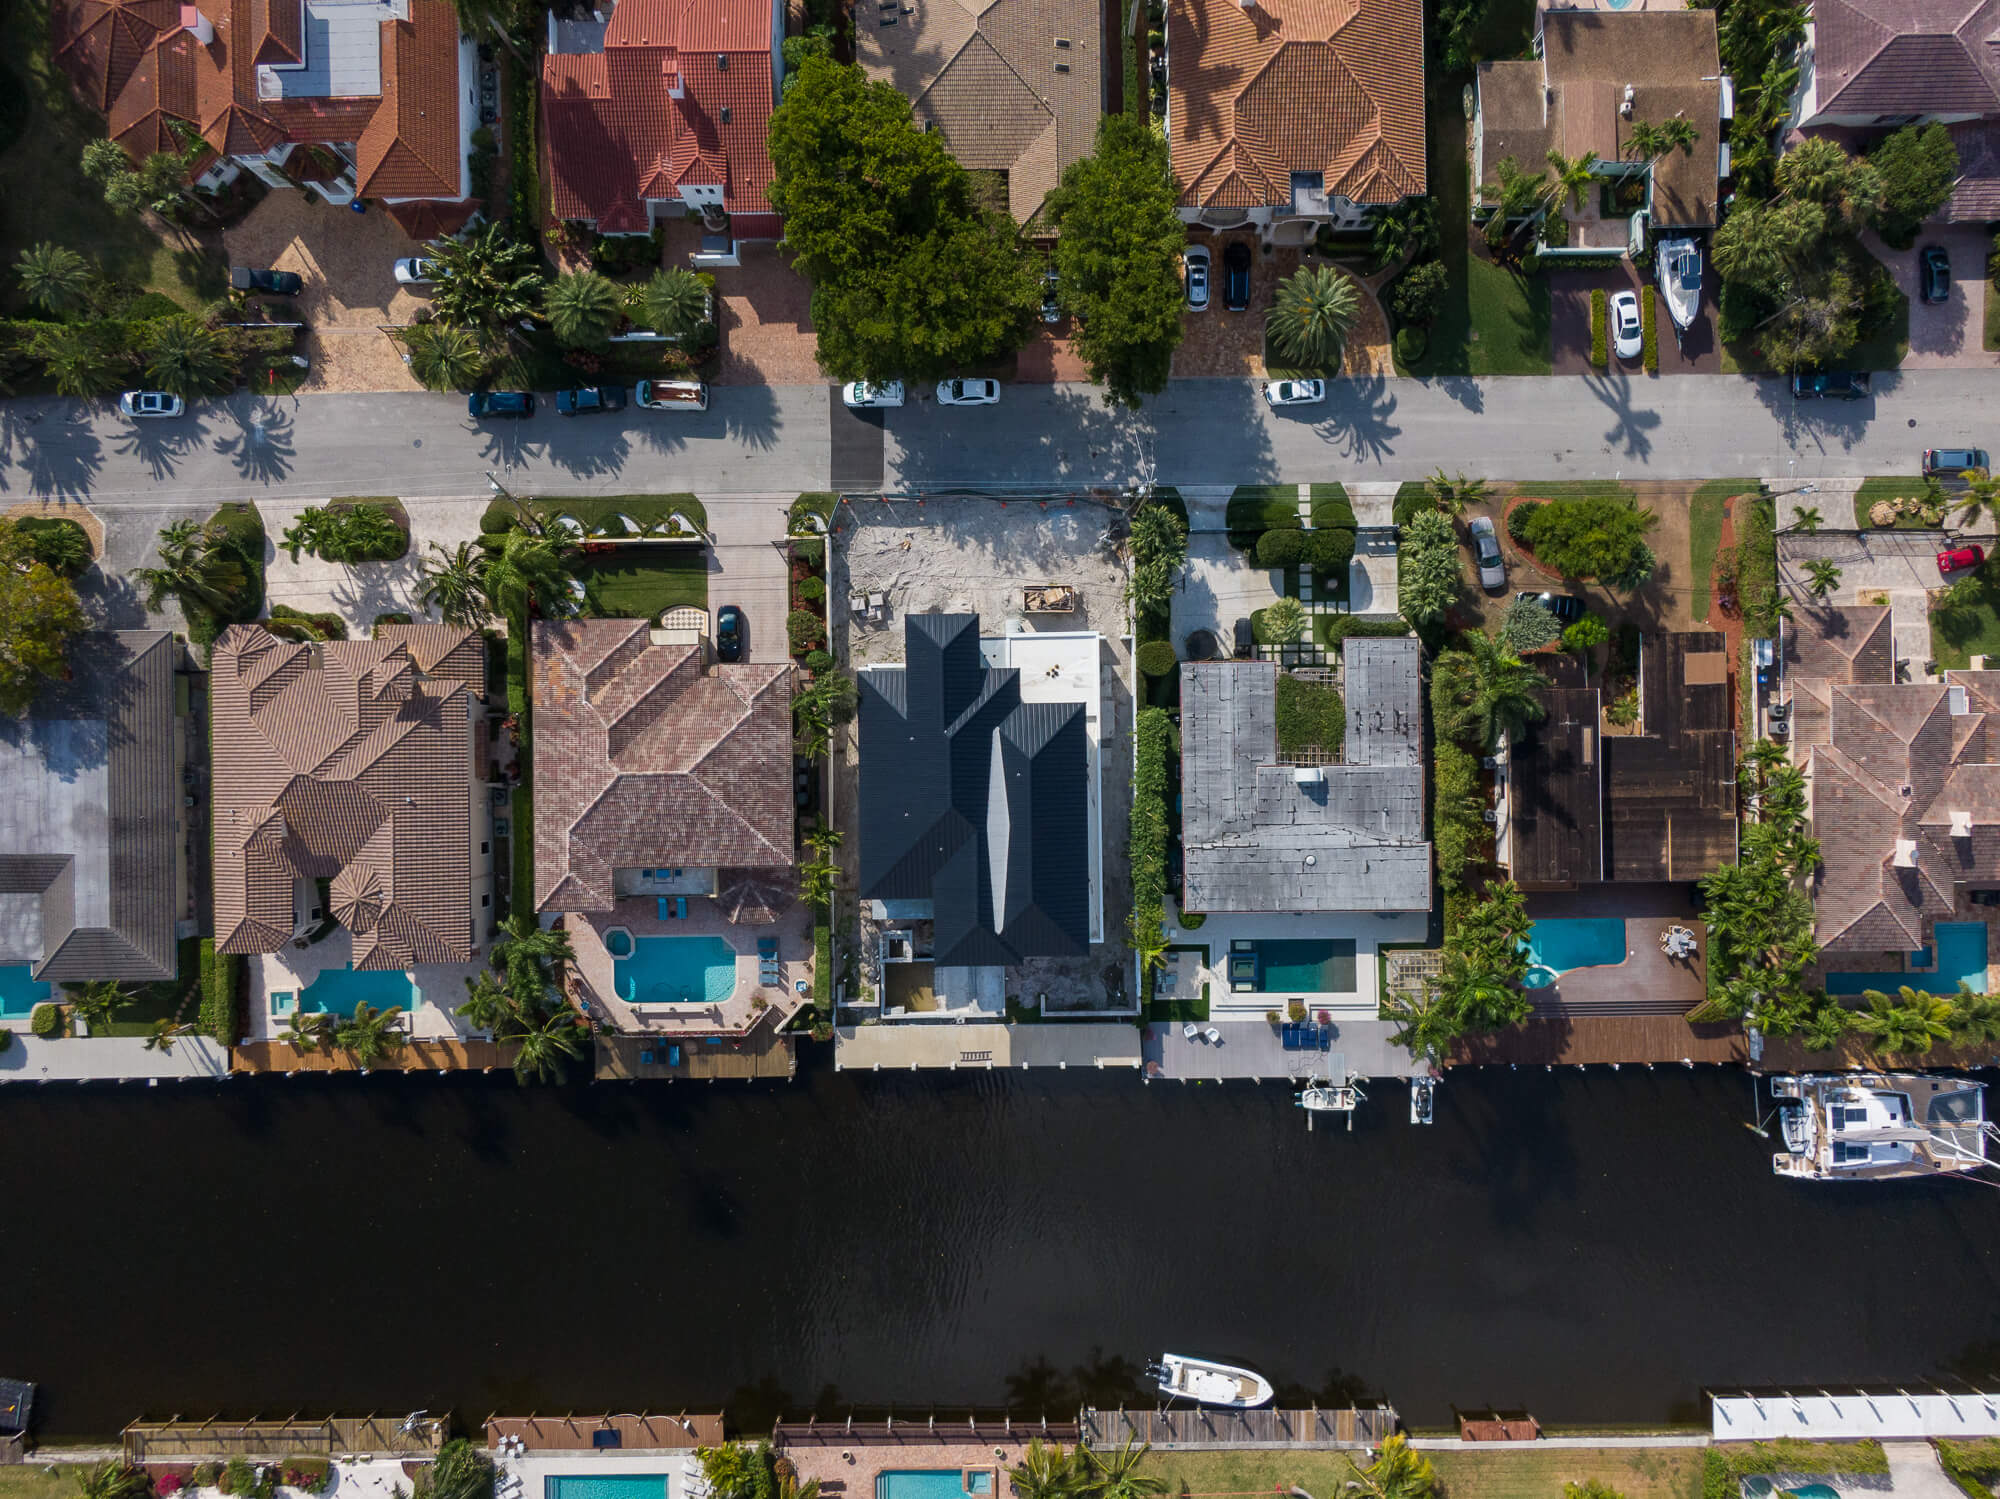
- 22 drone photos showing the property from different angles and heights.
The drawings helped us understand the structure, dimensions, shapes, and proportions of all the elements of the building and outdoor amenities. Also, the drawings included information on some finishing materials, as well as types of plants to be used in the landscape design.
As for photos, they let us accurately picture the exterior of the building as well as its neighborhood and recreate those in 3D rendering for real estate.
Also, two of the photographs were used for creating renders with bird’s-eye views of the property.
The 3D Rendering Workflow
After having thoroughly studied all the materials, our team got to work. We started with creating the 3D model of the real estate.
#1. CG Modeling of the Building and Environment
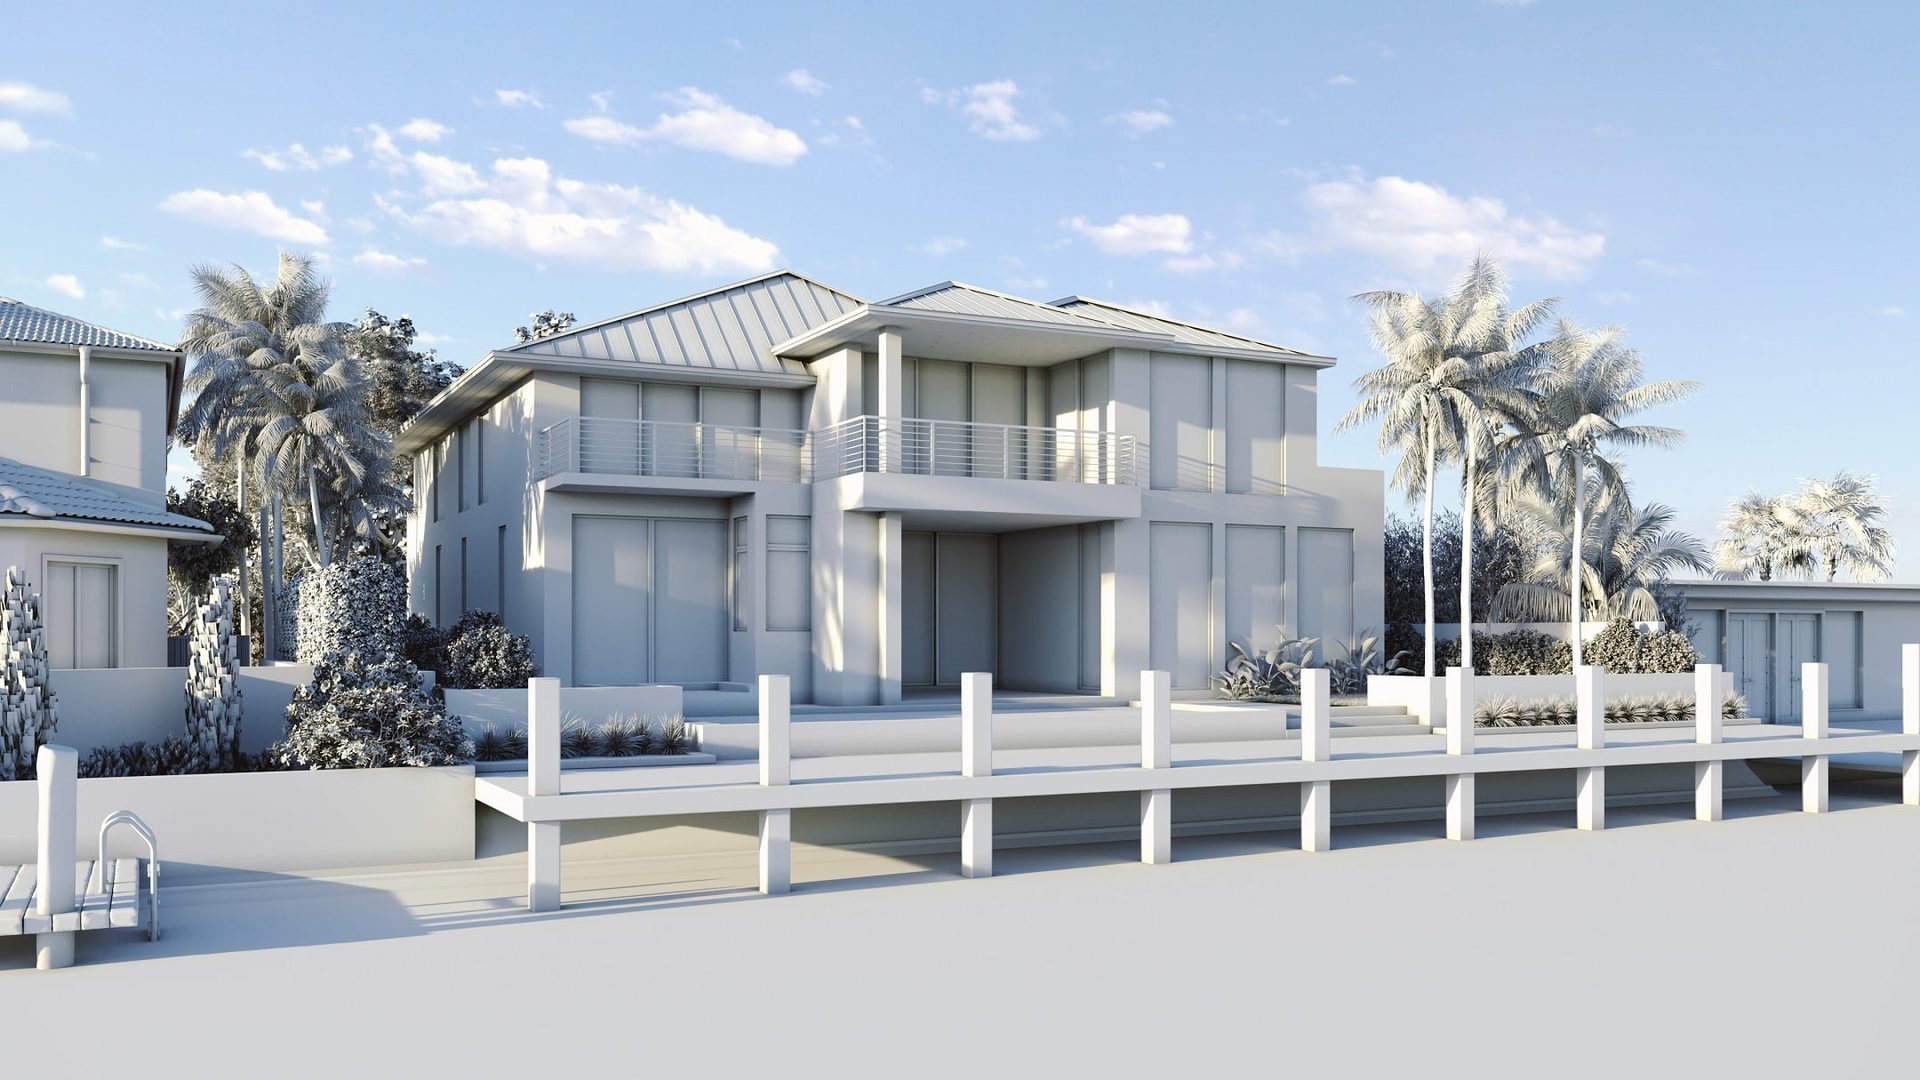
Our CG artist imported the drawings to 3Ds Max and started to build the geometry of the residence and the surrounding area in 3D. Basically, what he needed to do here was to draw contours over the lines indicated in the 2D plans to shape the three-dimensional objects. This way, the artist sequentially modeled all the parts of the property.
The CG specialist created everything from scratch according to the drawings. Except for plants, for which he used ready 3D models from our virtual library. The specialist looked through the landscape plan, found names and positions of the required plants, then selected and placed them accordingly in the 3D scene.
After that, the artist proceeded with modeling neighbouring houses. Using drone photos as references, he made the 3D buildings look absolutely similar to real-life ones.
This way, all the architecture and surroundings in the 3D scene were ready. Then, the artist added secondary elements: a yacht by the dock, a car by the garage, furniture on the balcony and by the pool. He found references for these items on Google maps in the photos of the Sea Island neighborhood. The artist looked specifically for vehicles and furniture used by residents of the area and then selected CG models of items in a similar style from our virtual library.
Elevate your exterior design project with photorealistic 3D visuals that help clients confidently approve your proposals.
#2. Texturing
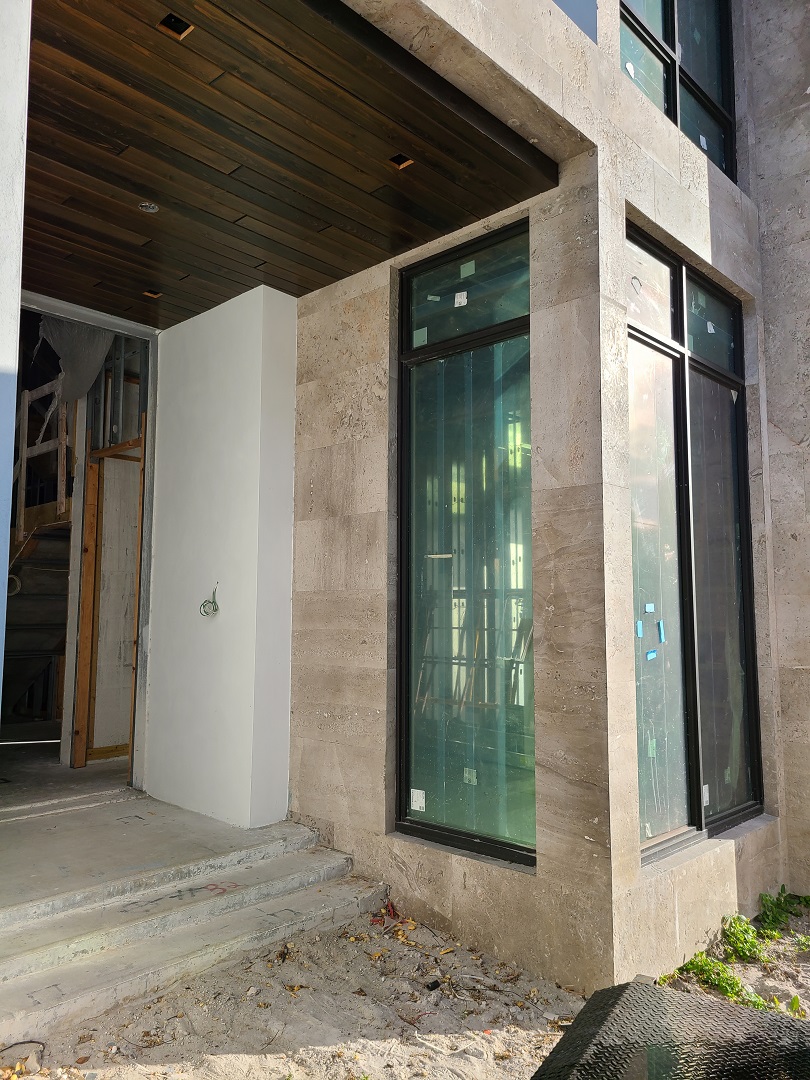
Once all the primary and secondary objects in the 3D scene were in place, it was time to texture them. To find out which exact textures to use, our artist looked through the drawings. There, he found the information on materials required for the roof and fence.
But the drawings did not mention materials for the wall, garage door, and pool deck. So, we asked Stan for clarifications on those. The broker was very helpful and provided all the needed information. He wrote on our CGI CRM system and described the materials to use for walls, dock, and pool deck.
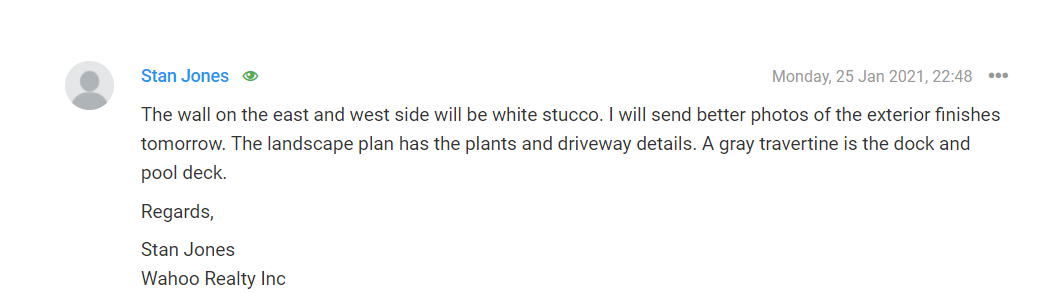
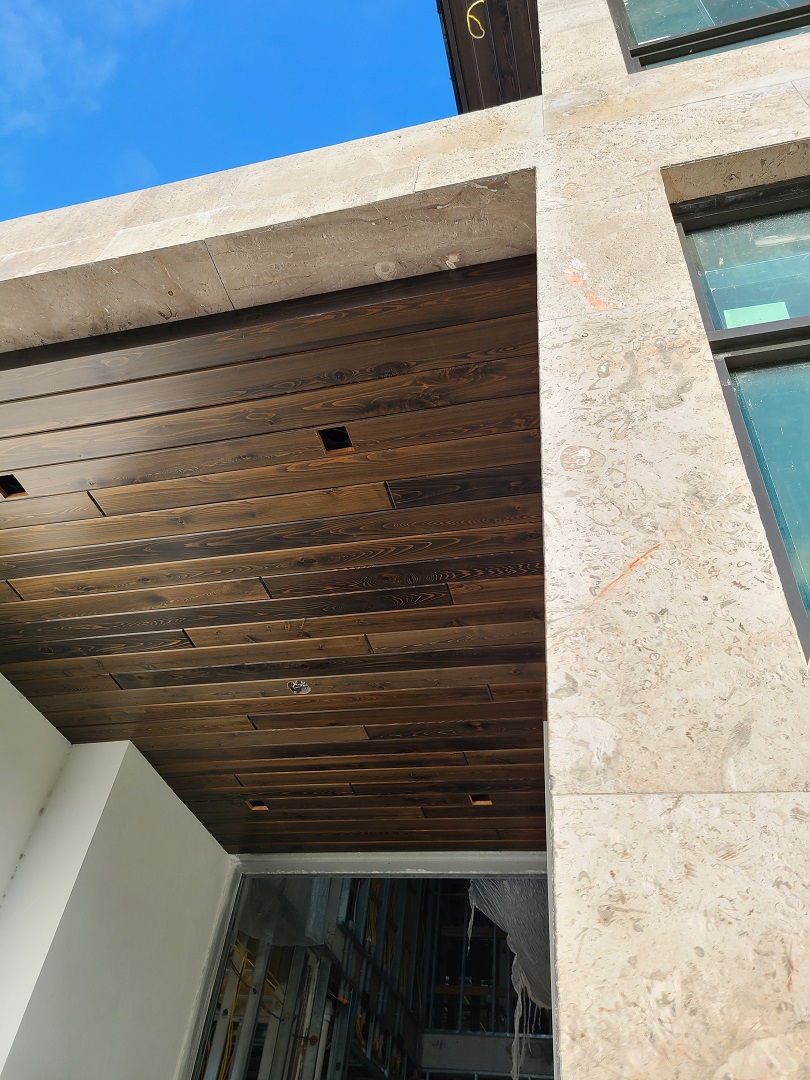
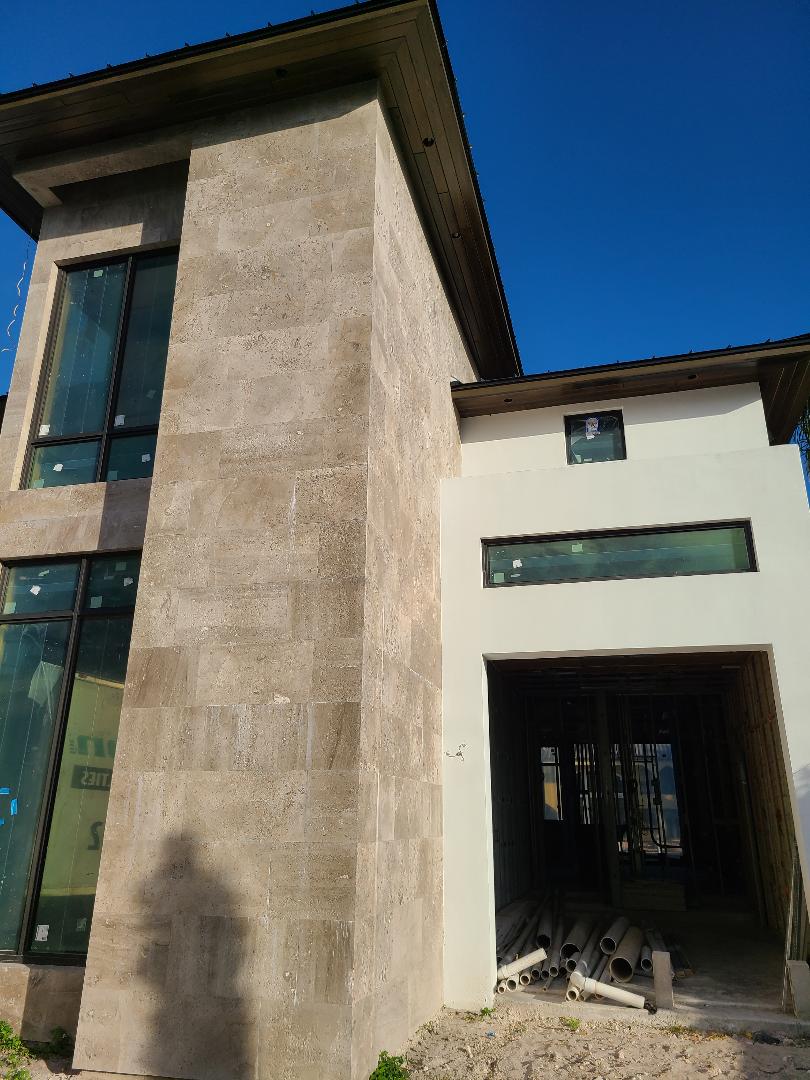
As the reference for the materials of exterior wall tiles, Stan sent photographs from the construction site.
And for garage doors, Stan sent us a drawing with material specifications. It indicated that the doors had to be made of frosted glass with a bronze-colored trim.
Using all this information, our CG artist chose appropriate textures and applied them to the 3D objects. After all the elements were textured, our specialist proceeded to set the illumination in the scene.
#3. Setting the lighting
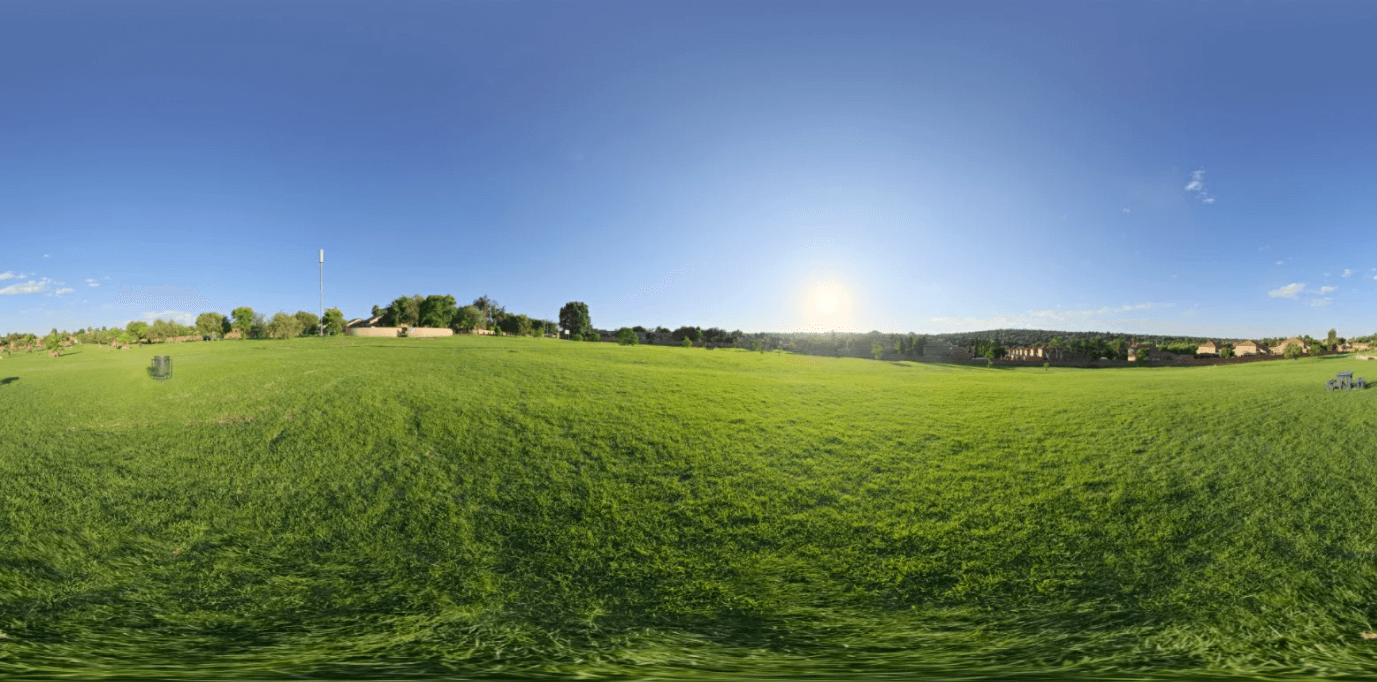
To set the light, our artist used an HDRI map – a panoramic photo. When such a photograph is uploaded to 3Ds Max, the program automatically recreates the sky, light, and shadow patterns from the map in the 3D scene. Our artist tried around 20 HDRI maps until he chose a photo of a warm sunny day with a clear sky. It is shown above.
#4. Choosing Views and Rendering
With the 3D scene all ready, our artist proceeded to pick the best angles for CG visualization. According to the scope of work, he had to select two angles: one front view and one rear view. The composition needed to highlight the most essential benefits of the house – a primary requirement for a luxury real estate marketing asset.
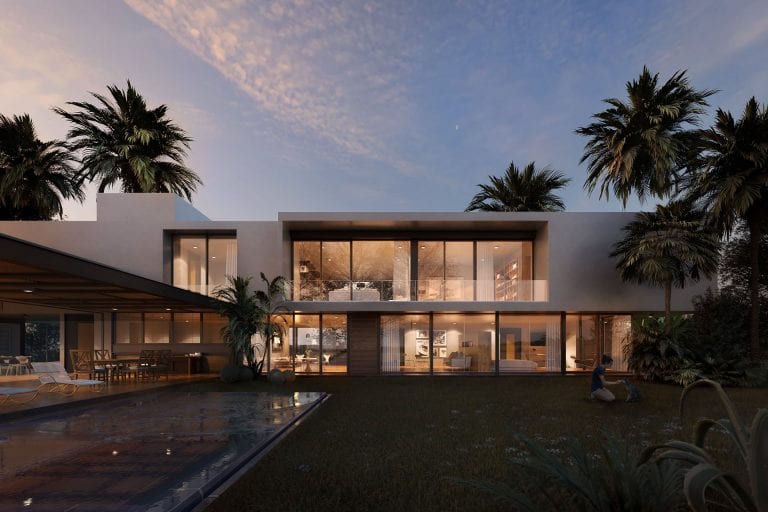
So, the artist selected views that showed off the elegant contemporary design of the facade, the beautiful landscape design, and the premium comforts such as a large pool and a private dock. Then, he rendered images in the 4k resolution using the Corona Renderer engine.
#5. Post-production
After 3D rendering for real estate was complete, it was time to add finishing touches to the imagery. To ensure the wow-effect with the viewers, the 3D artist adjusted colors and contrast in each CG visual using Photoshop.
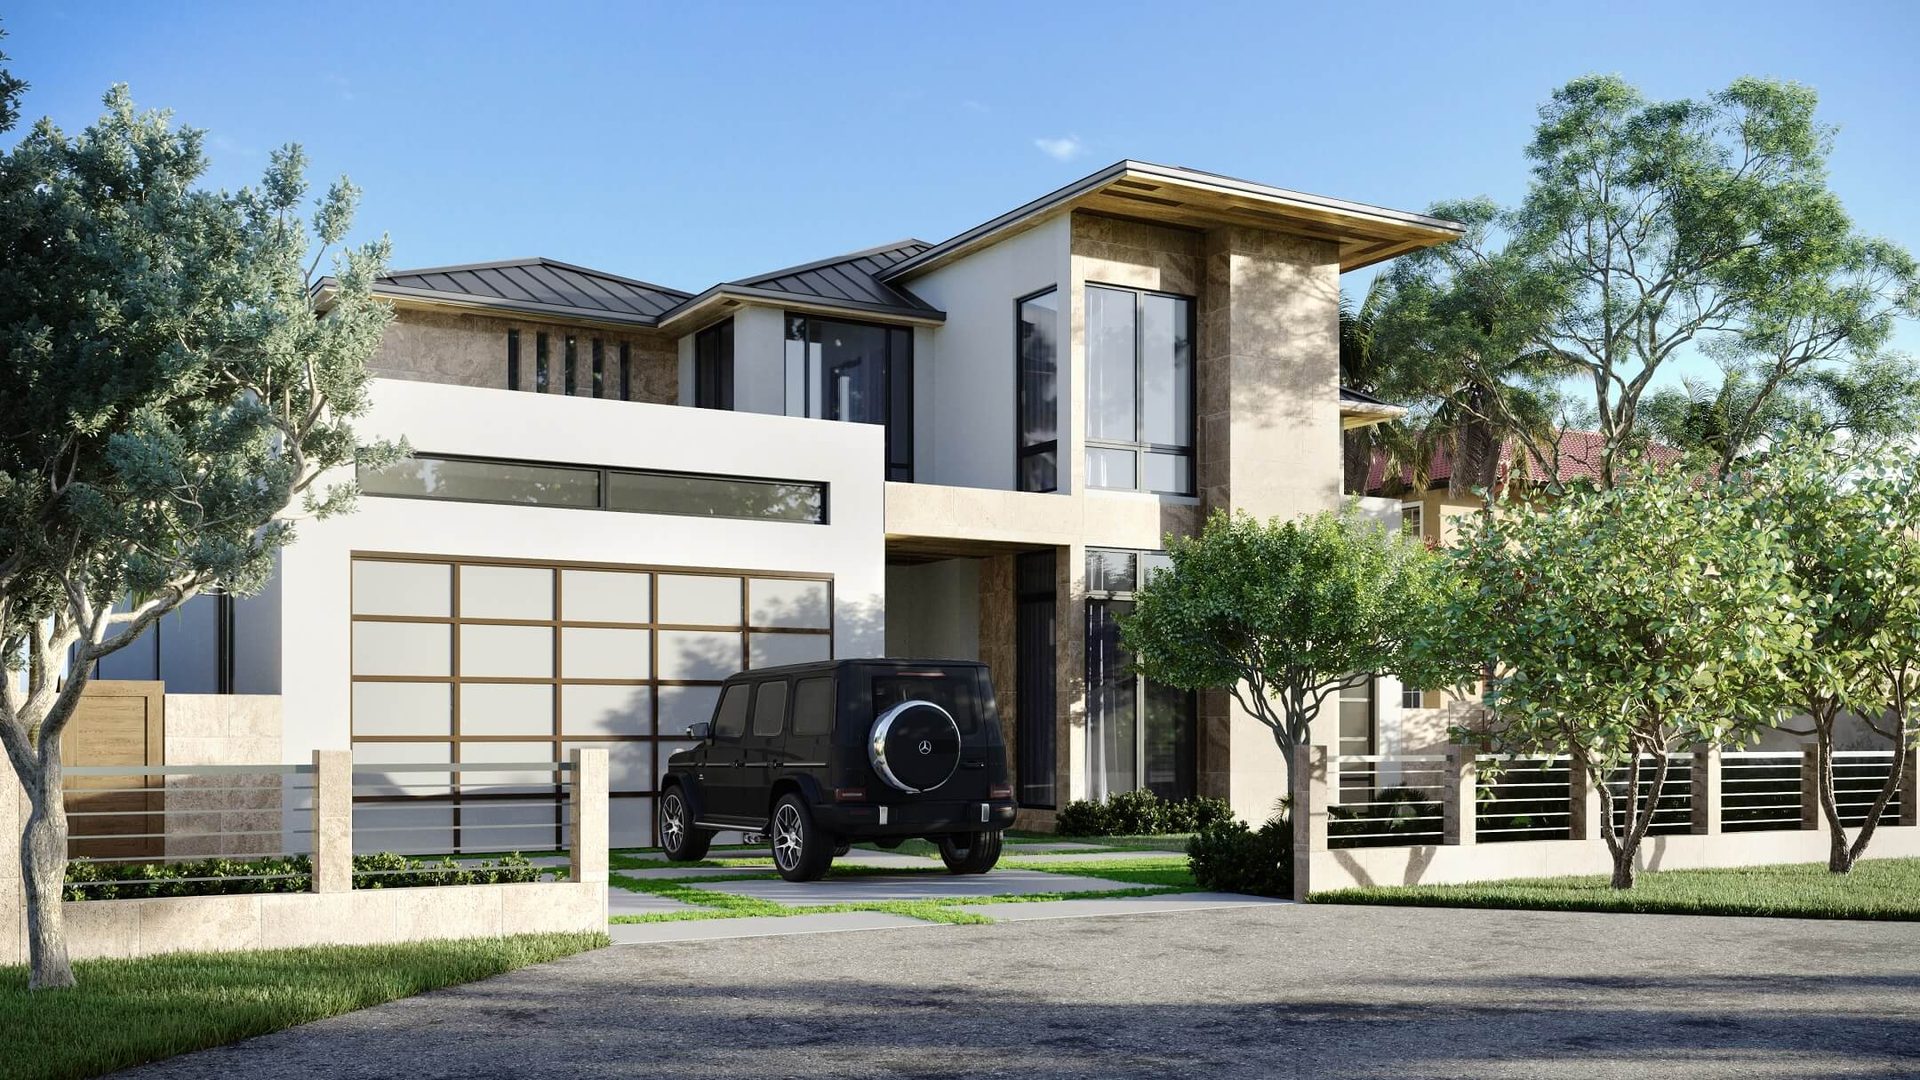
One of the resulting CG images is shown above.
#6. Getting Stan’s Feedback
Stan liked the renders and asked for only two minor adjustments to the front view 3D rendering:
- to replace the wall in front of the garage with a low hedge;
- to make the frames of the garage doors look similar to ones of the windows.
We updated the render and proceeded with creating a bird’s-eye view of the residence.
#7. Making of the Bird’s-Eye View 3D Rendering
Out of 22 photos attached to the scope of work, we selected 4 options suitable to serve as a background for a bird’s-eye view. We showed them to Stan and he chose this picture.
We created a bird’s-eye view 3D rendering for real estate property using the photo-matching technique. It is when a CG render is seamlessly combined with a real photo of the property. This method allows eliminating the need for additional modeling and texturing of the environment in 3D and achieving show-stopping photorealism and beauty.
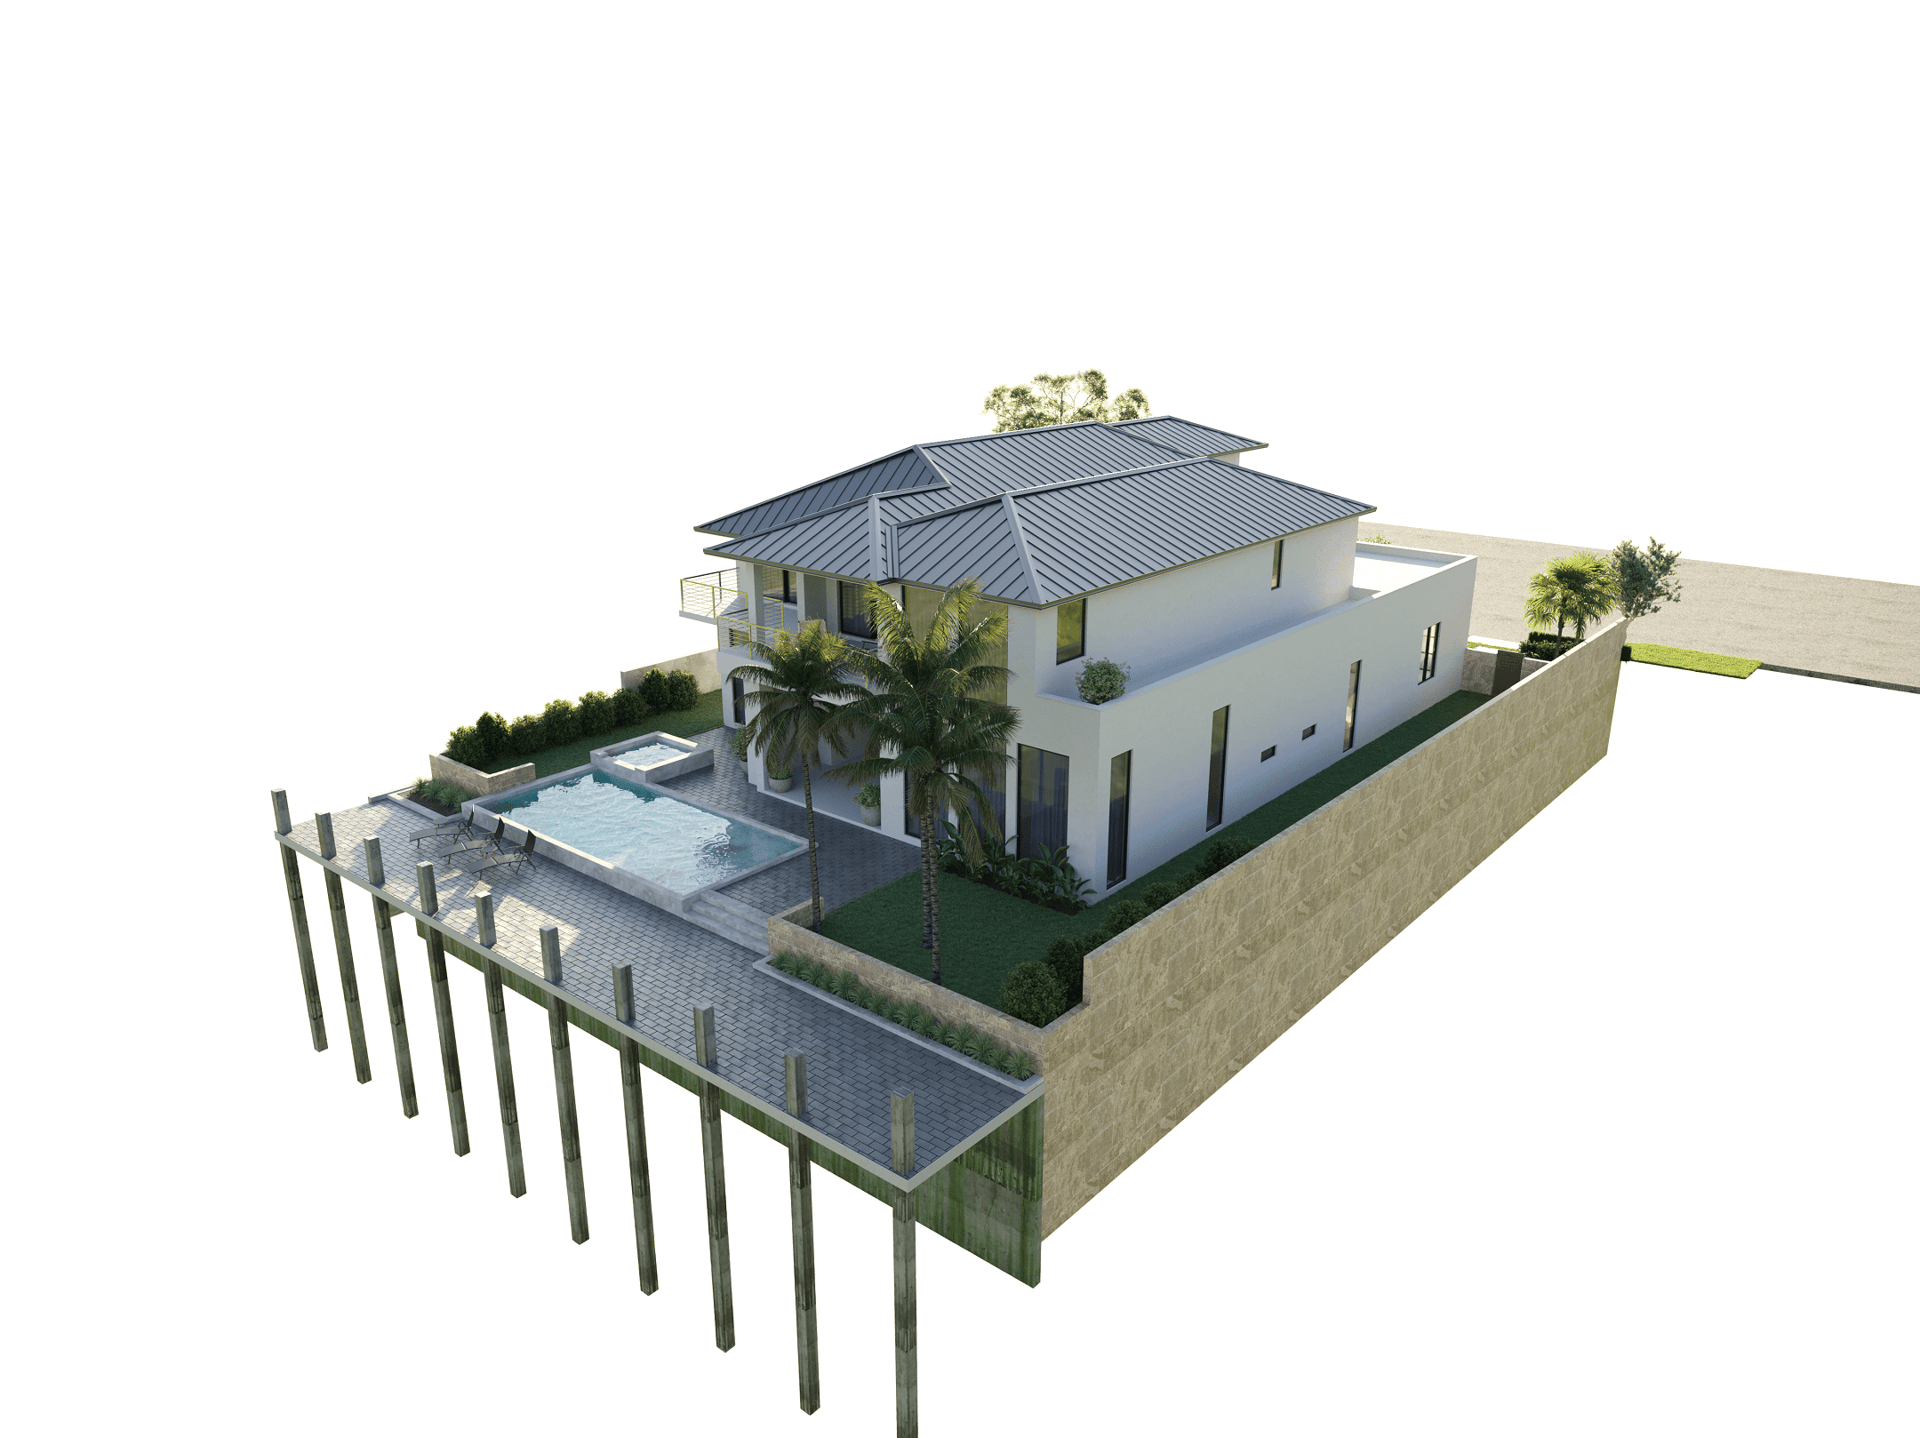
First, our artist had to create a rendering for photo-matching. This meant that he needed to adjust the camera in the 3D scene to get the exact same angle as in the photo. After doing it, he recreated the lighting shown in the photograph and rendered the image of the residence without the surroundings. Here is the resulting render.
Then, he combined the photo and the 3D rendering in Adobe Photoshop. This way, he created a 100% photorealistic bird’s-eye view of the real estate.
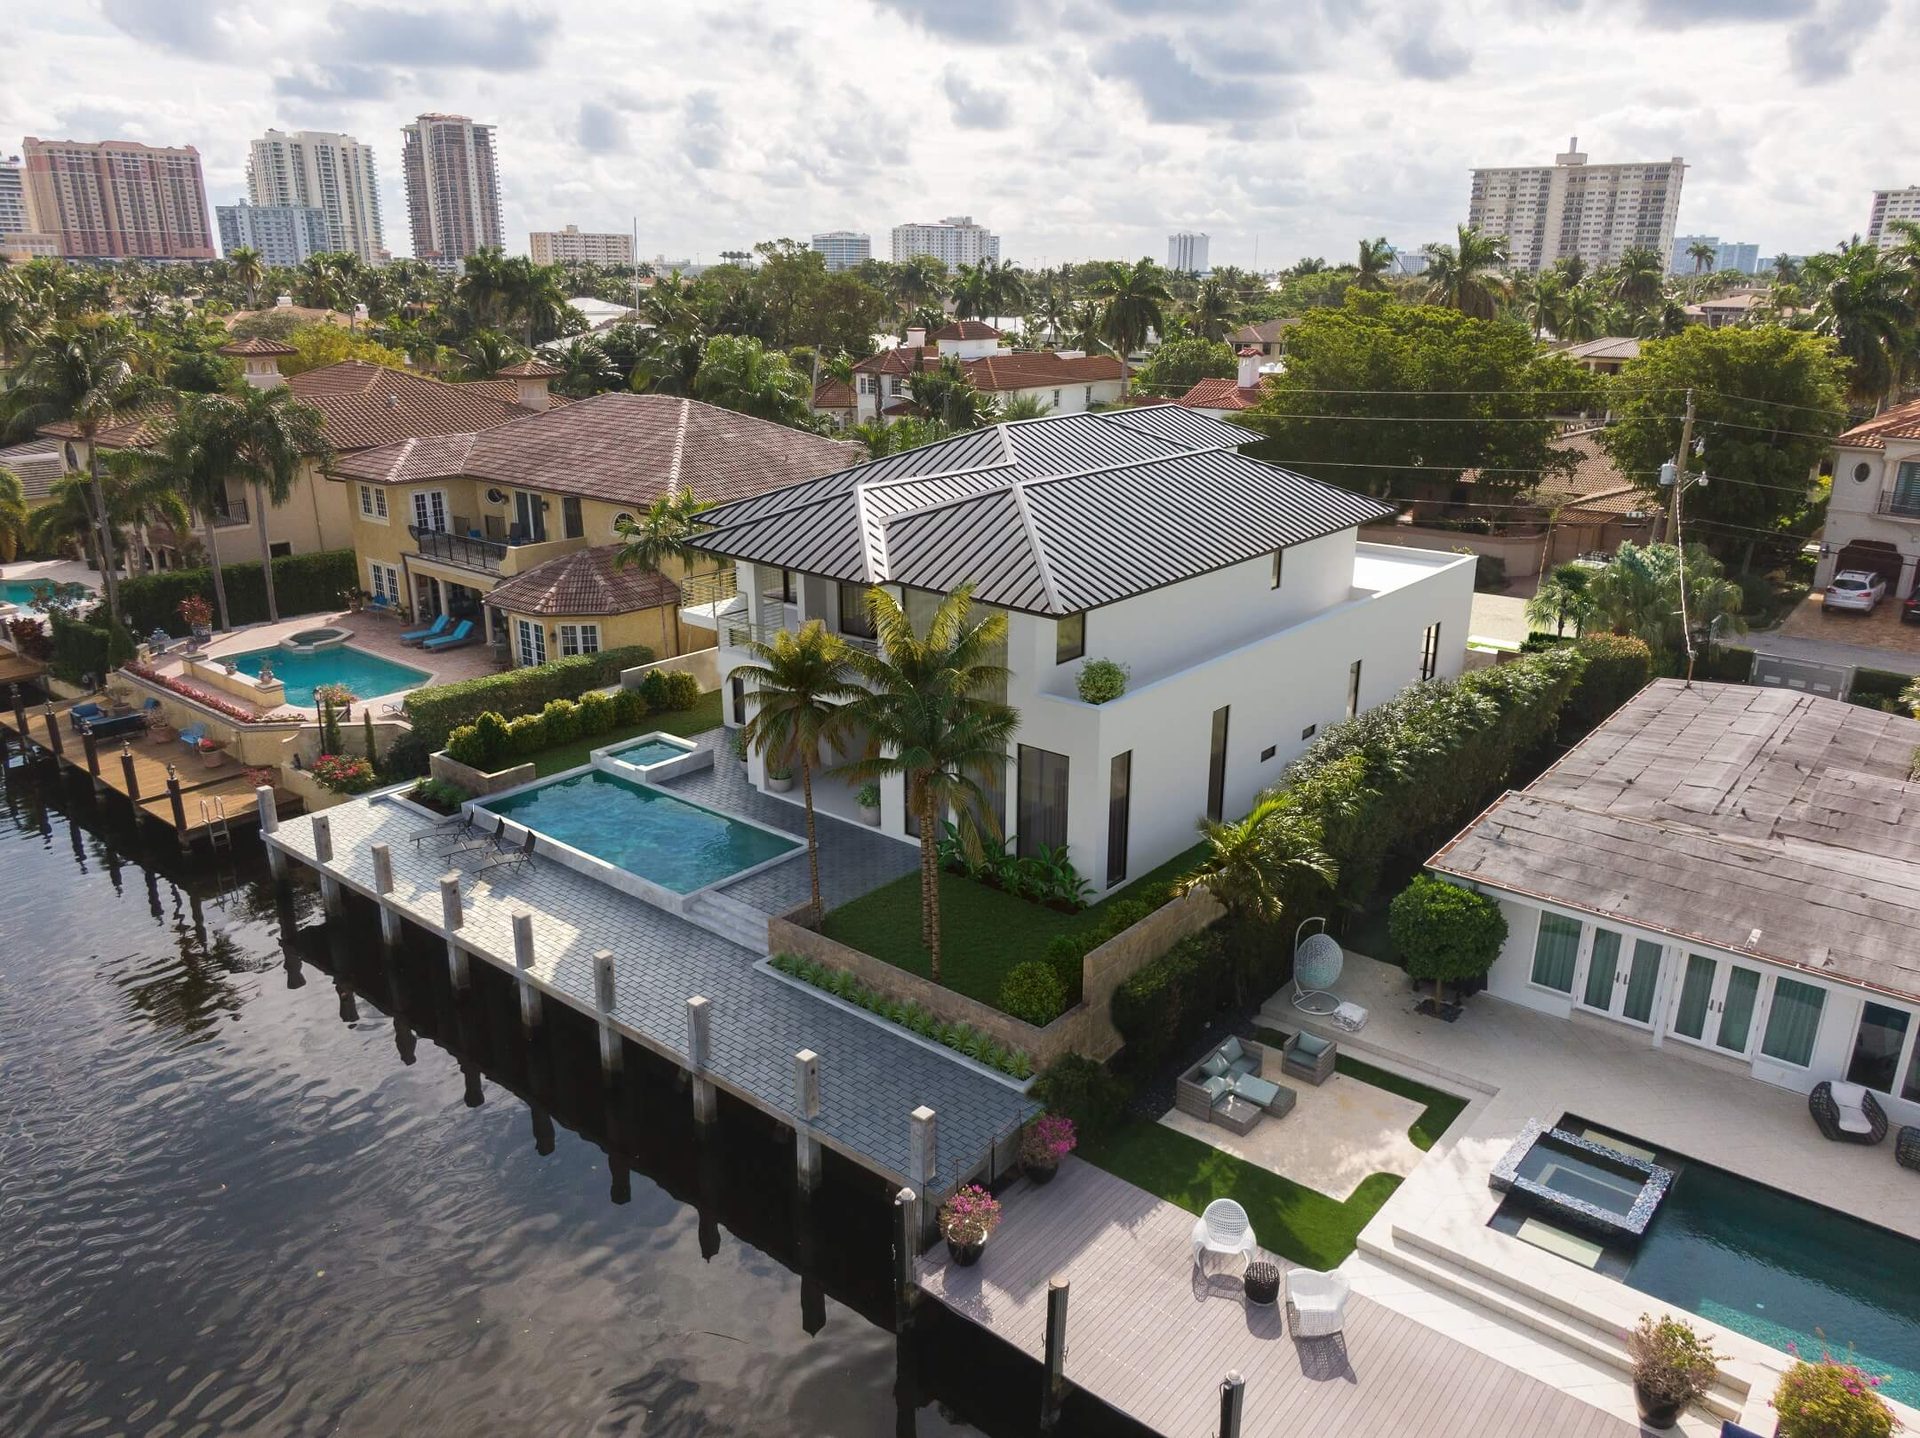
We showed the result to Stan. He approved it and asked us to make an additional bird’s-eye view rendering showing the house front. So, we made one more aerial CG image – also with the help of photo-matching. This way, all the tasks within this project were completed. Let’s see the results of 3D rendering for this real estate property!
The Outcome
We created 4 photorealistic images of the luxury real estate in 4k resolution. Two of them showed the front and back of the property at a human-eye level.
And other two shots showcased the real estate from above, providing beautiful views over the Sea Island neighborhood.

With such CG images, Stan was fully equipped for marketing this high-end home. Let’s show how he did it.
How Stan Marketed the Property with 3D Renders
The broker used CGI to present the listing on large real estate platforms, such as Zillow. Here is how 3D renders looked there.
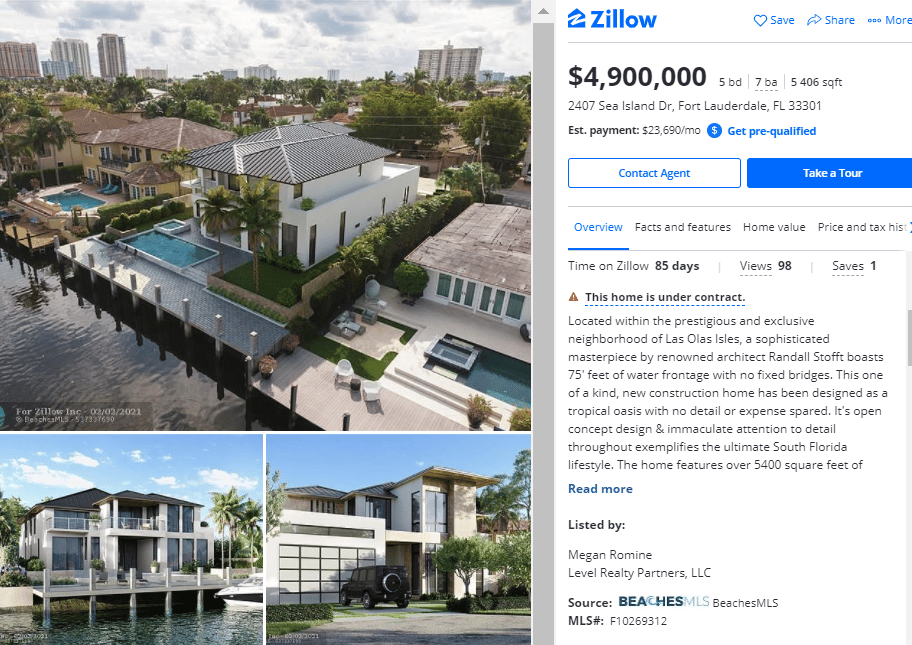
Also, the listing included a slideshow compiled of CG renders and photos of the house. Accompanied by lovely music, it provided a truly engaging experience for potential homebuyers.
As you can see in the Zillow screenshot, the real estate is now under contract. It has already found its owners! Looking to achieve similar results? Learn more about how 3D rendering for real estate agents can help market properties before construction is complete.
Photorealistic Florida 3D architectural renderings show not just the design but also the lifestyle prospects would have in this place. In this case, CGI helped them picture mooring their sleek boat at the private dock, relaxing in a comfy SPA by the pool, enjoying the warm sun of Florida and peaceful views over the waterway from the balcony. Overall, 3D visuals let the viewers feel what a comfortable, happy life they would live in this house. This is what a perfect luxury real estate marketing asset is about!
Why 3D Rendering Wins in Florida’s Real Estate Market
Fort Lauderdale’s luxury real estate market remains one of the most competitive in Florida, with waterfront properties in Seven Isles and neighboring areas trading at $1,000–$1,500 per square foot and the $2–3M segment seeing multiple offers on well-presented listings. In this environment, 3D rendering for the Florida market gives brokers, agents, and developers a decisive edge — especially when marketing properties that are still under construction. Whether you’re marketing a $1M condo or a $10M waterfront estate, high-end architectural visualization in Florida can be the difference between a listing that sits and one that sells.
Need realty promo imagery that is perfectly tailored for the preferences of your ideal clients? Contact ArchiCGI for real estate rendering services. We’ll study your requirements and target audience to offer you CGI solutions that would work best for your project. As a result, you will get real estate renderings filled with an atmosphere and story. With such visuals, your listing will get tons of attention, and you will get tons of calls and emails from prospective buyers! We also create 3D rendering for architects looking to present their designs with the same level of photorealism and attention to detail.

Catherine Paul
Content Writer, Editor at ArchiCGI
Catherine is a content writer and editor. In her articles, she explains how CGI is transforming the world of architecture and design. Outside of office, she enjoys yoga, travelling, and watching horrors.
Like this project? We’ve got plenty more! Check out these CGI beauties.
