

3D Building Rendering for a Veterinary Clinic in Hawaii: Project Overview
When it comes to civic architectural projects such as veterinary clinics, precise visualization is key to a successful design presentation. A photorealistic 3D building rendering allows architects to showcase every aspect of the concept with immaculate precision. Most importantly — in a way that is easily understandable for any viewer. It is particularly necessary when the project requires fundraising before it can be realized.
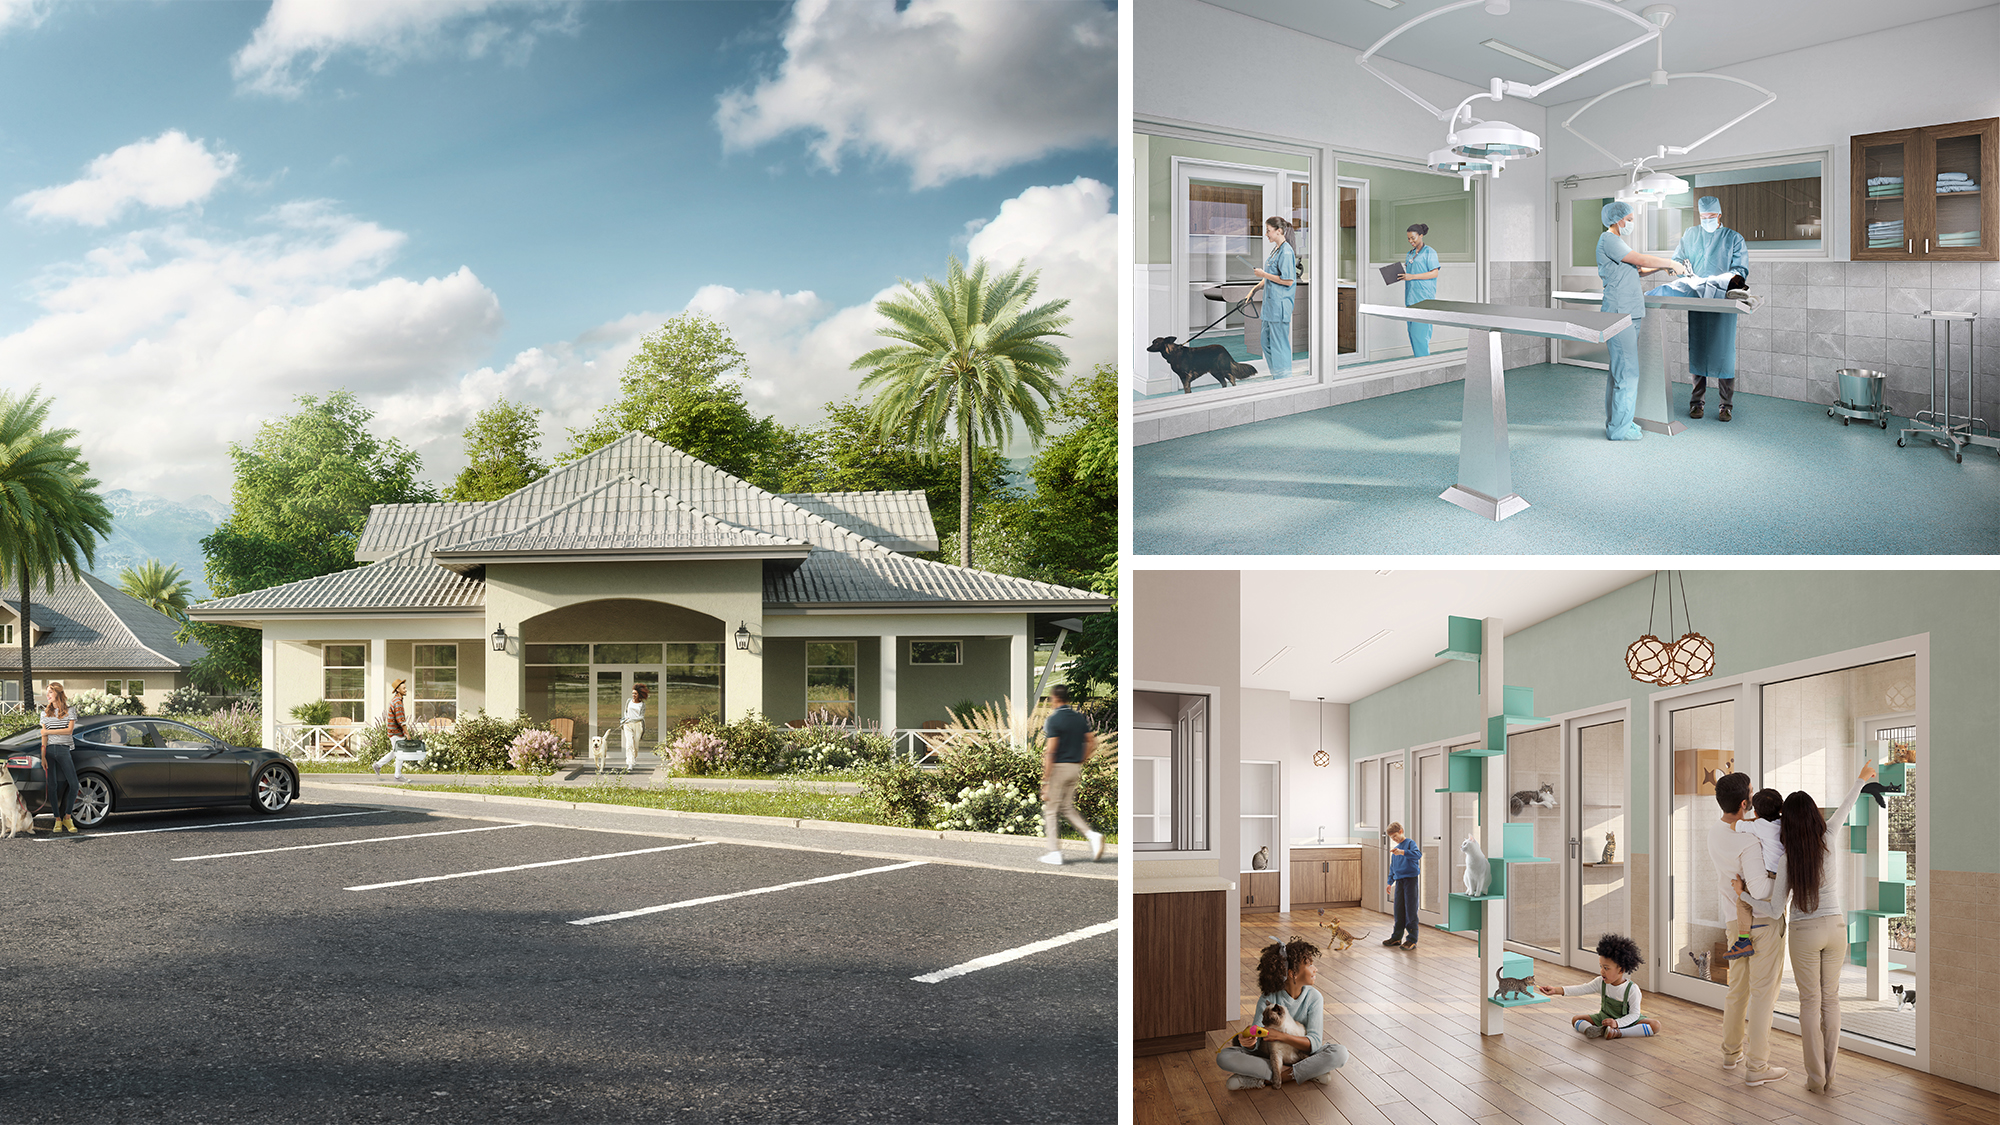
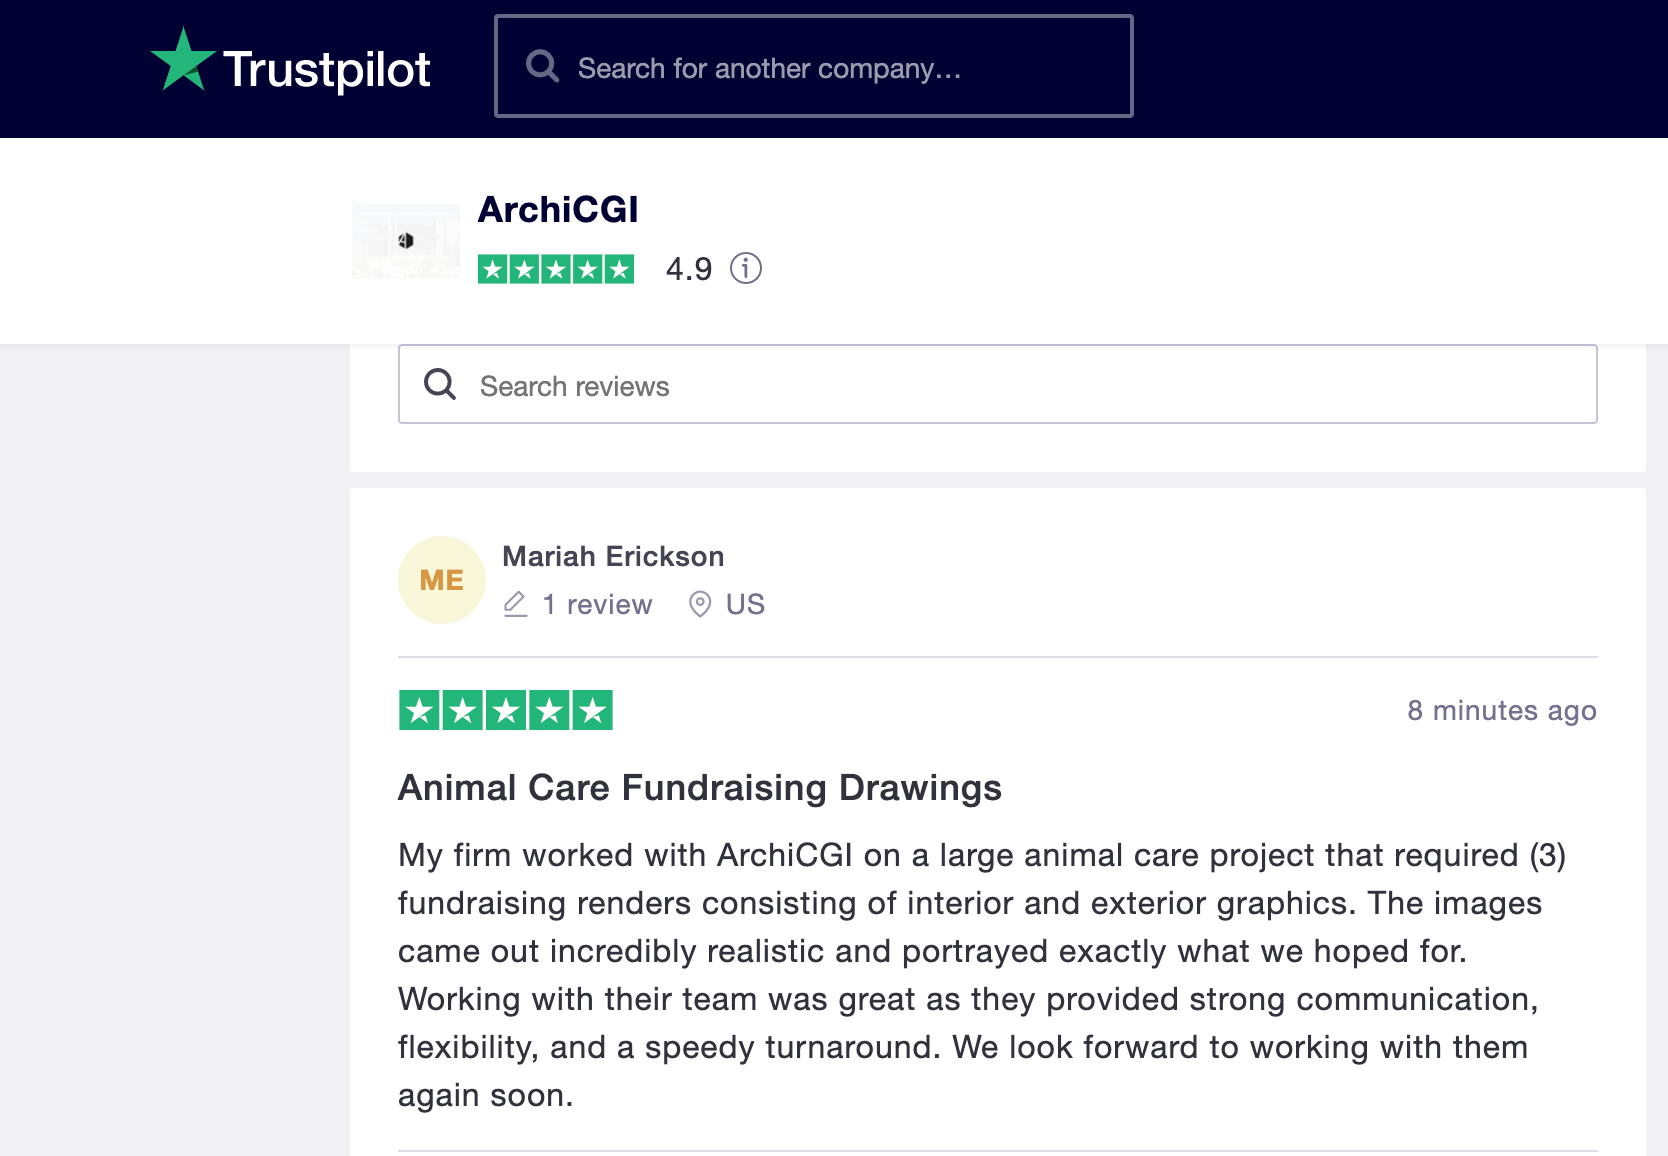
And that is exactly why Animal Arts, an architectural firm specializing in designing veterinary hospitals and animal shelters, contacted our studio for exterior and interior visualisation services. In August 2021, the firm’s project manager Mariah Erickson reached out to us to get CGI for a remodeling and expansion project for the Kauai Humane Society campus in Lihue, Hawaii. Animal Arts were redesigning the existing building, as well as designing a new community clinic, boarding facility, and cat sanctuary. Our architectural rendering company was to produce three renders in total: an exterior view of the community clinic and interior views of the surgery suite and the cat adoption area. You can see the preview of all the results below.
In this case study, we described the entire process step by step, so that you could see what goes into a visualization project for a veterinary institution. Check it out!
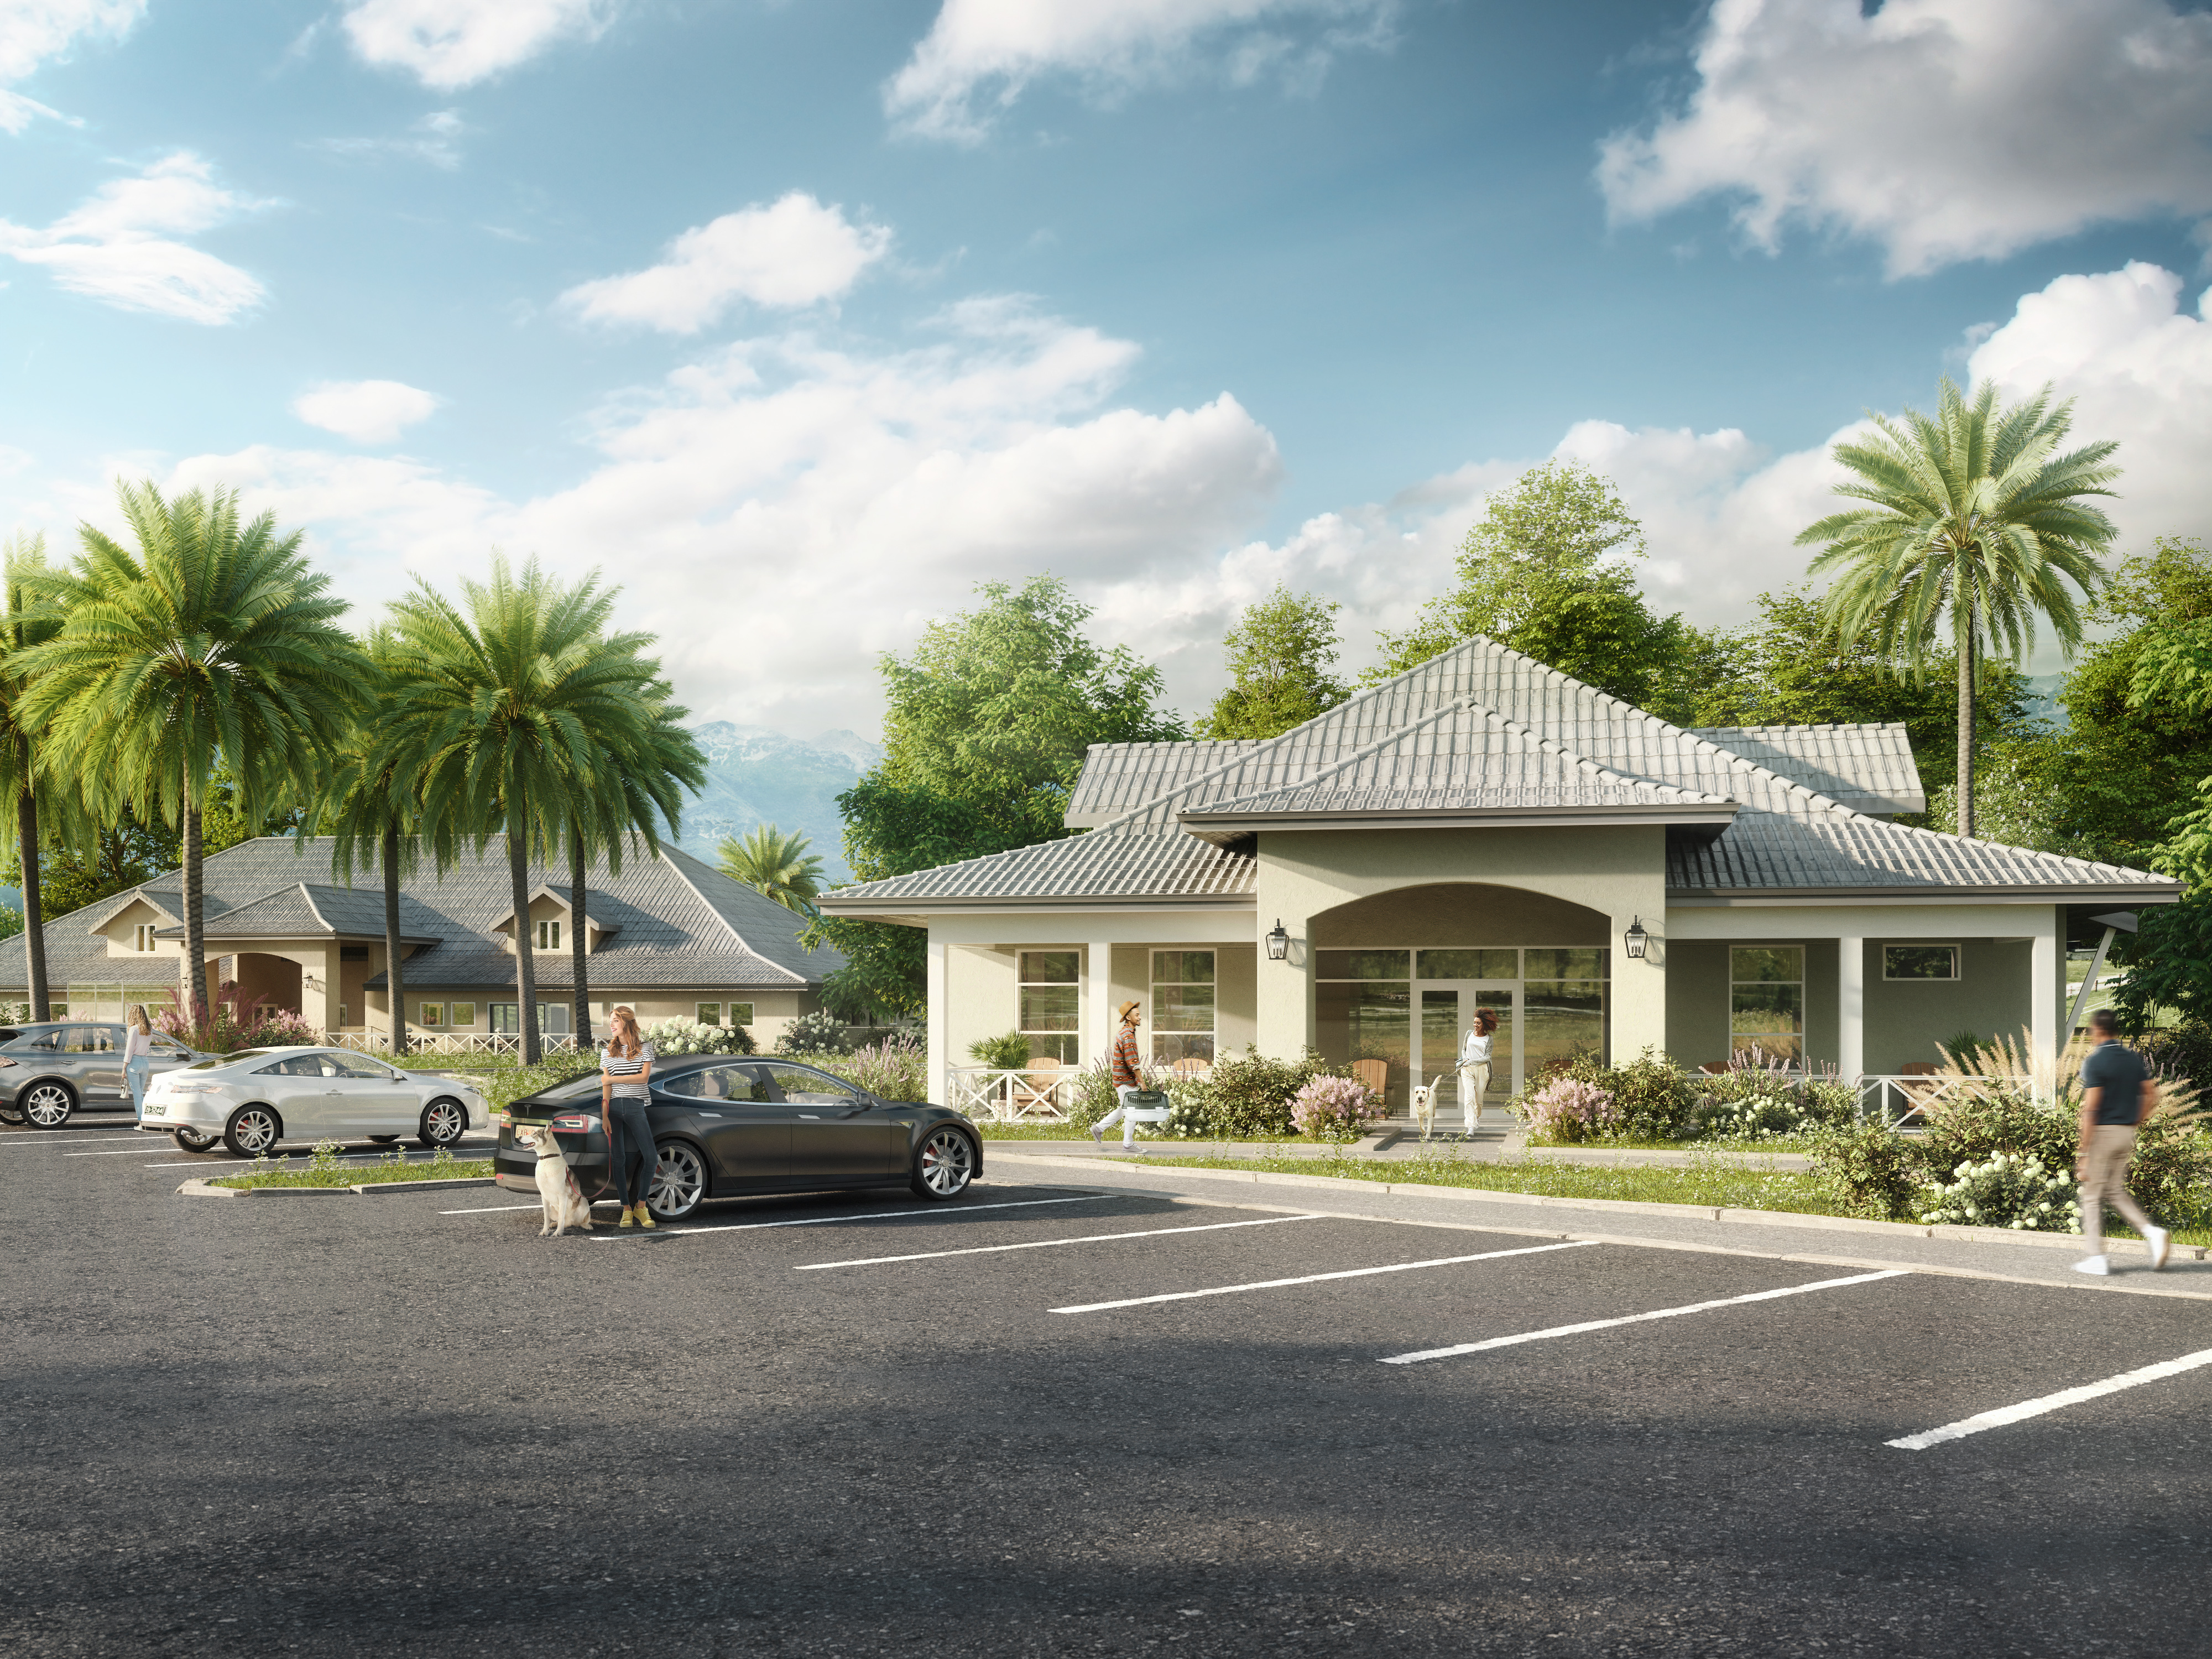
#1. Exterior 3D Rendering
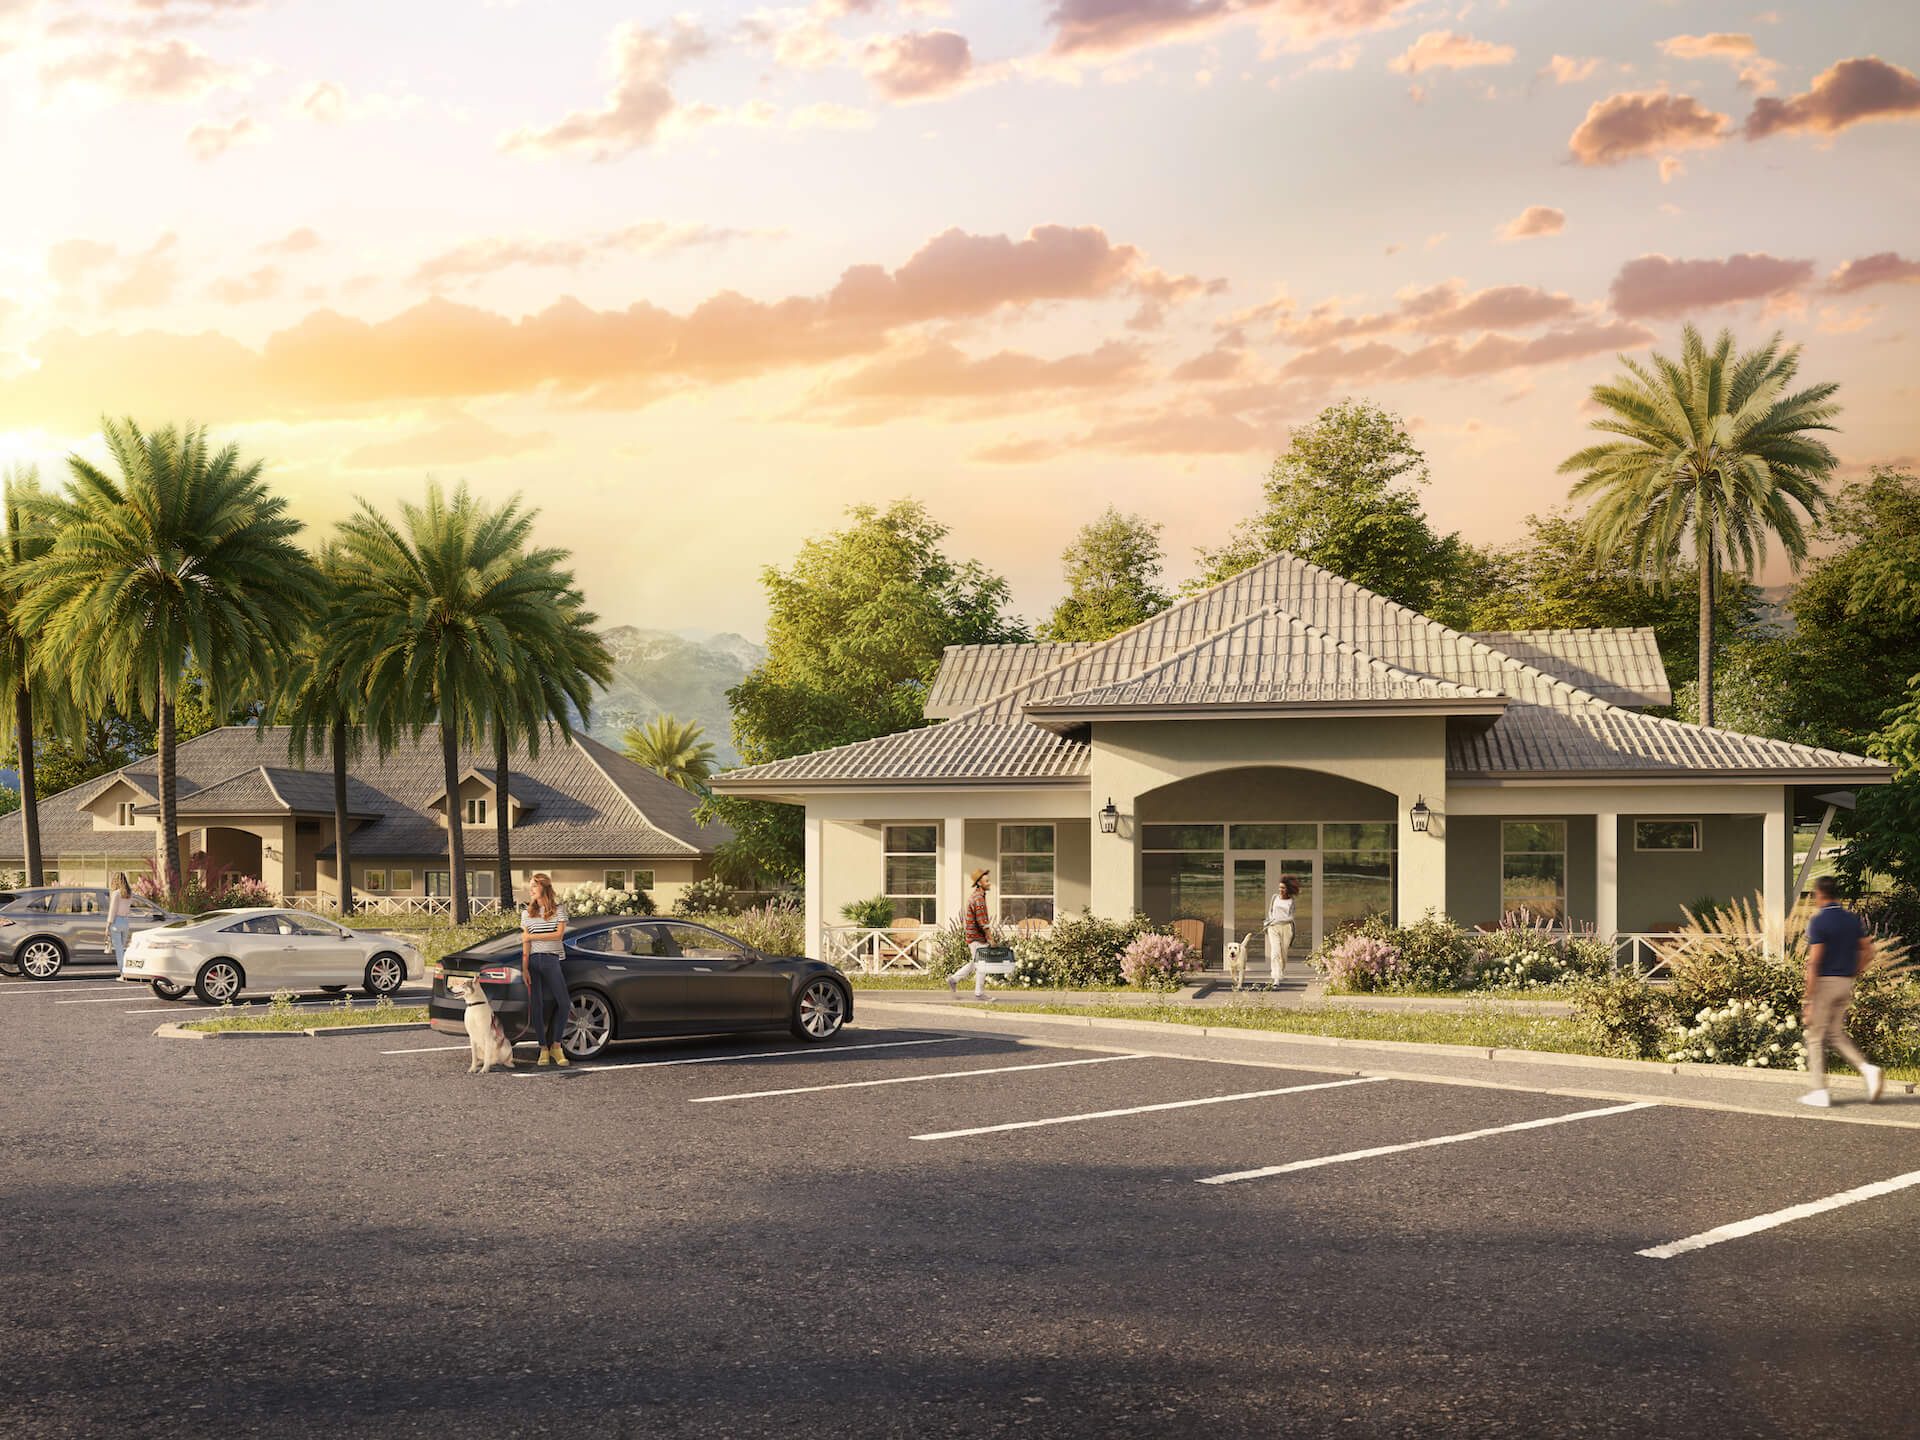
First, let’s talk about the exterior 3D building rendering of the clinic. The work on this task was divided into two main stages. Namely, the creation of architecture and environment in 3D, as well as adding the images of people and animals in post-production. Altogether, it took the 3D artist and the Photoshop specialist 36h to complete this assignment.
#1.1. References


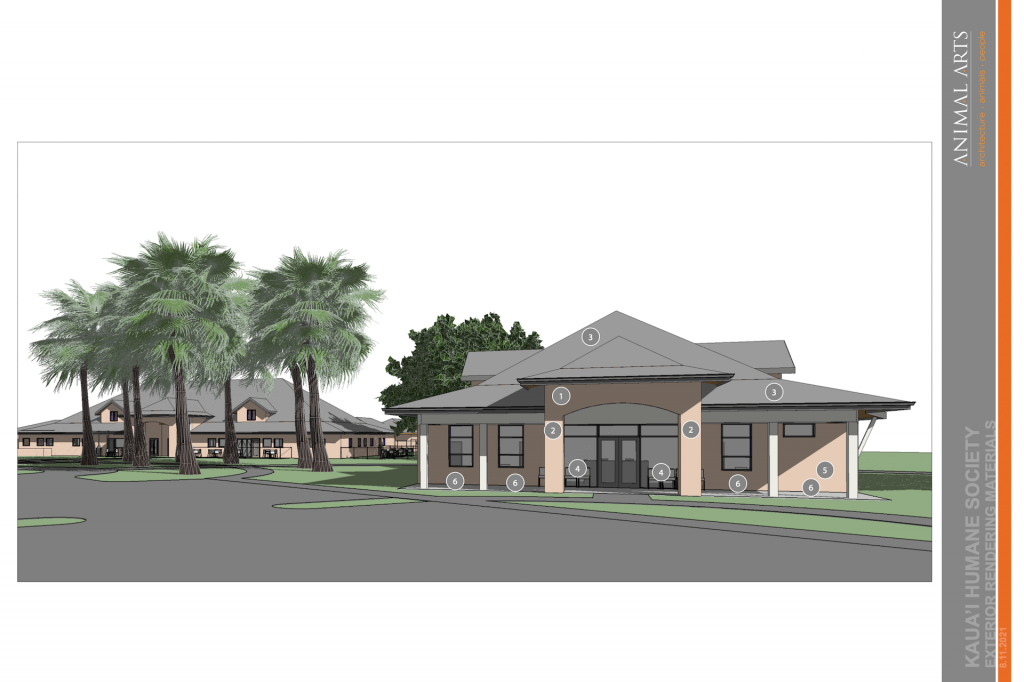
For the exterior visualization part of the project, the client submitted a very informative set of references, which included:
- a filled-in STA (Standard 3D Technical Assignment) form with building location details and requirements for the rendering;
- a Revit 3D model file;
- a materials specification;
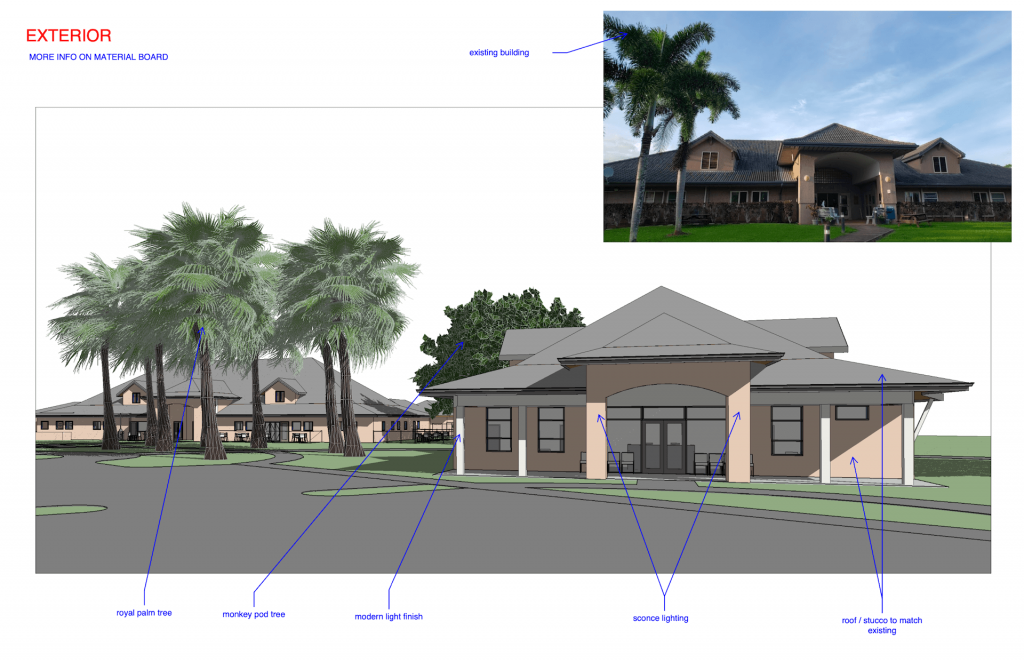
- a photo of the existing building;
- a site plan with indicated camera angles.
Our CGI specialist carefully studied all the requirements and the files that Mariah provided. After that, the 3D artist started working on creating the first draft 3D rendering.
#1.2. First Version of the Rendering
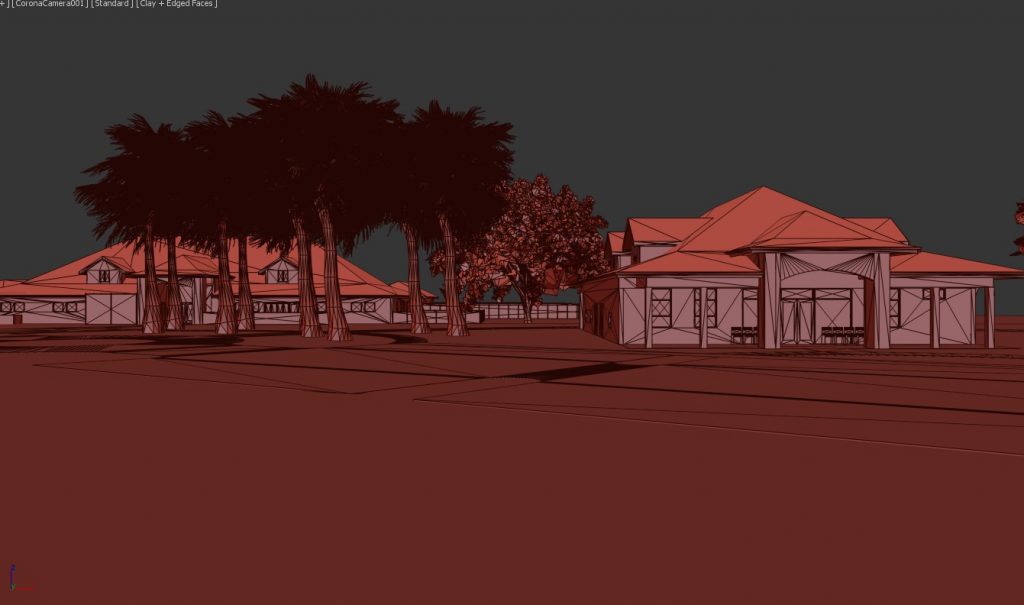
This is the first draft render our CGI specialist created. In particular, she:
- modeled the architecture of the building based on the Revit model;
- designed the environment based on the geographical references;
- set up the lighting in the 3D scene;
- added textures to every item and adjusted material properties to make every object look photorealistic;
- rendered the image.
Then, we sent the rendering to the client. She reviewed it with her team to see if the building geometry, its surroundings, and the camera angle were correct. This was the start of the revision process.
#1.3. Revisions
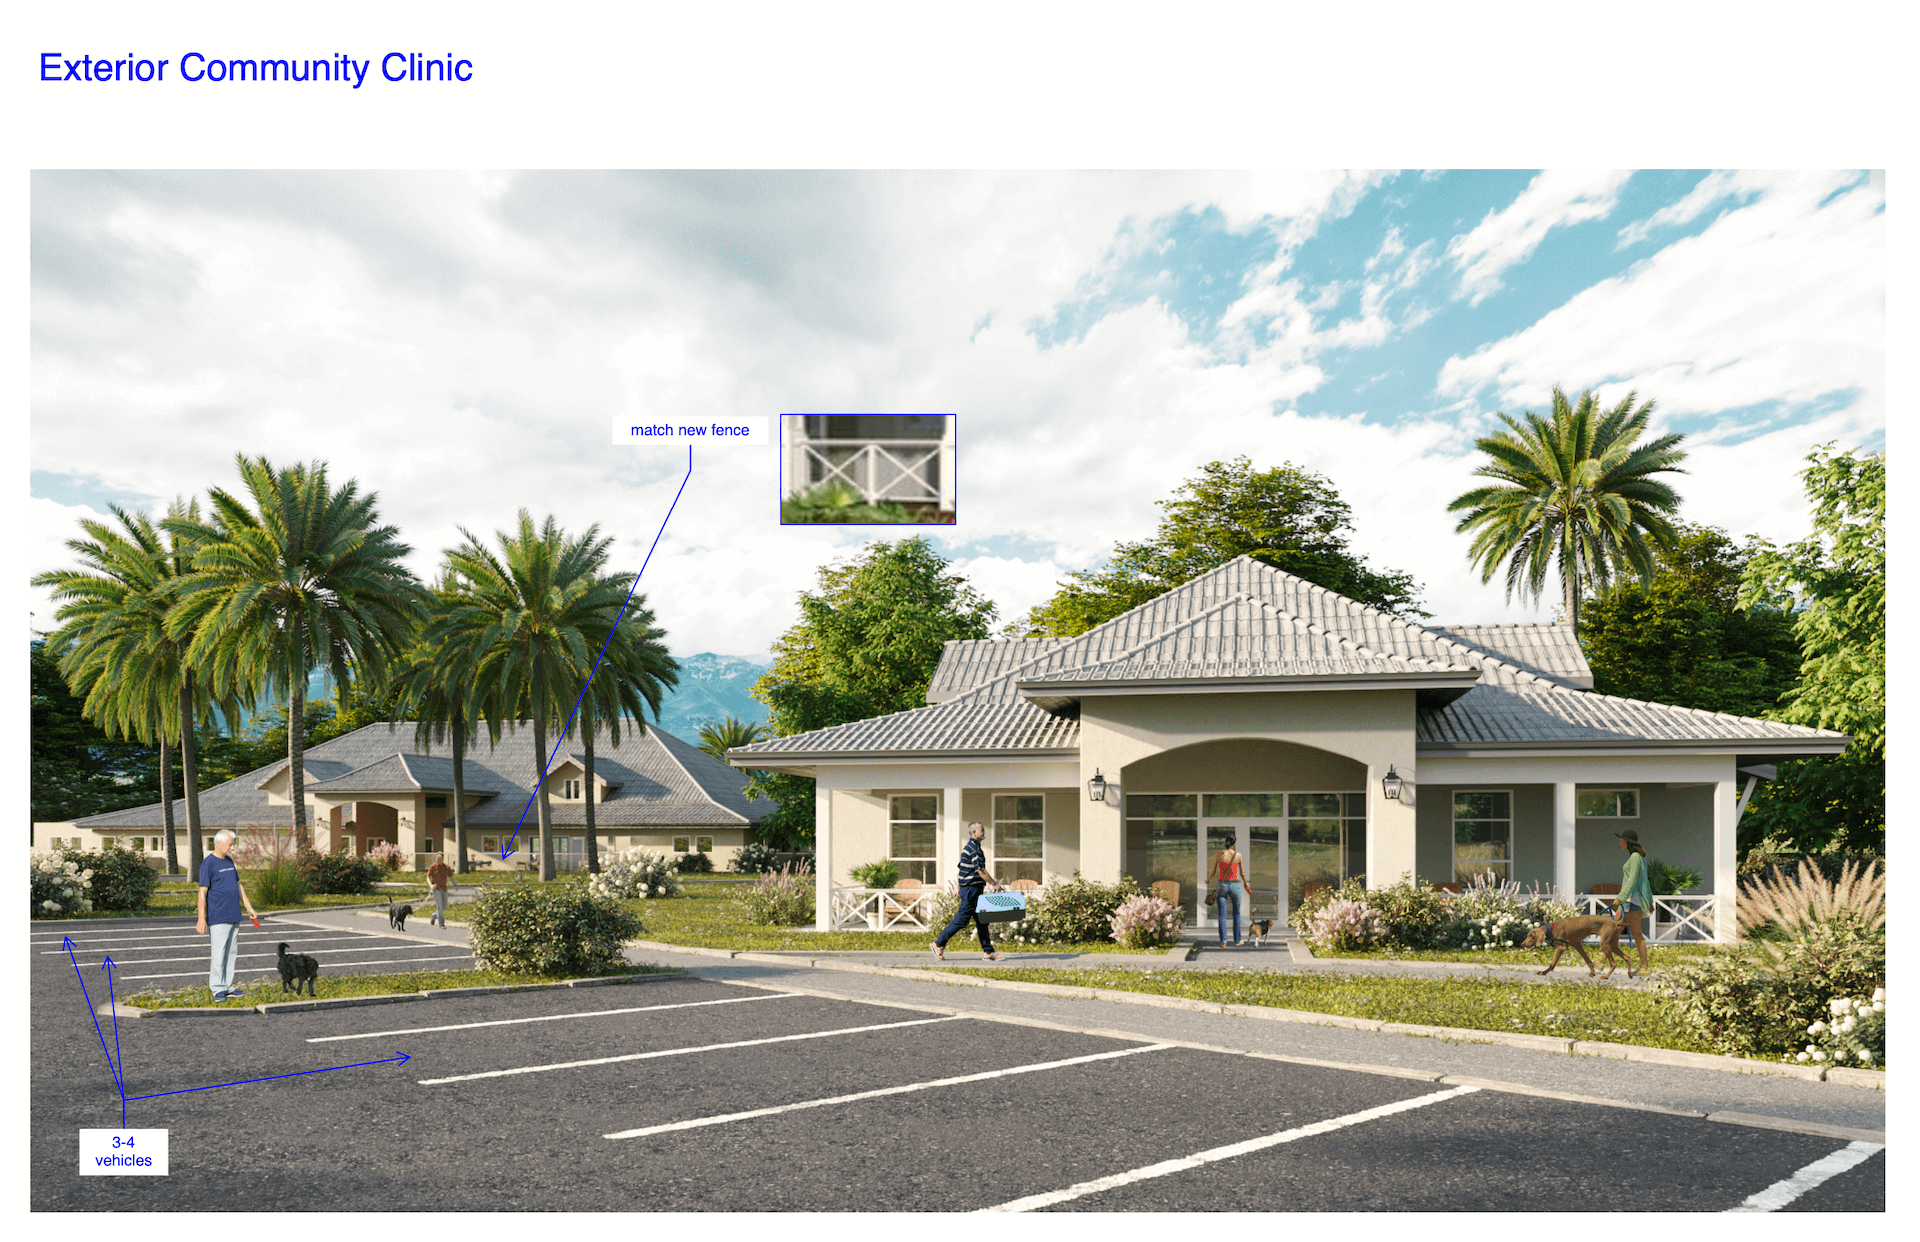
Having taken a look at the first intermediate result, Mariah sent us some notes, which you can check out below. As you can see, she also gave us suggestions regarding the placement of people and animals in the rendering. We used those later, in the post-production stage.
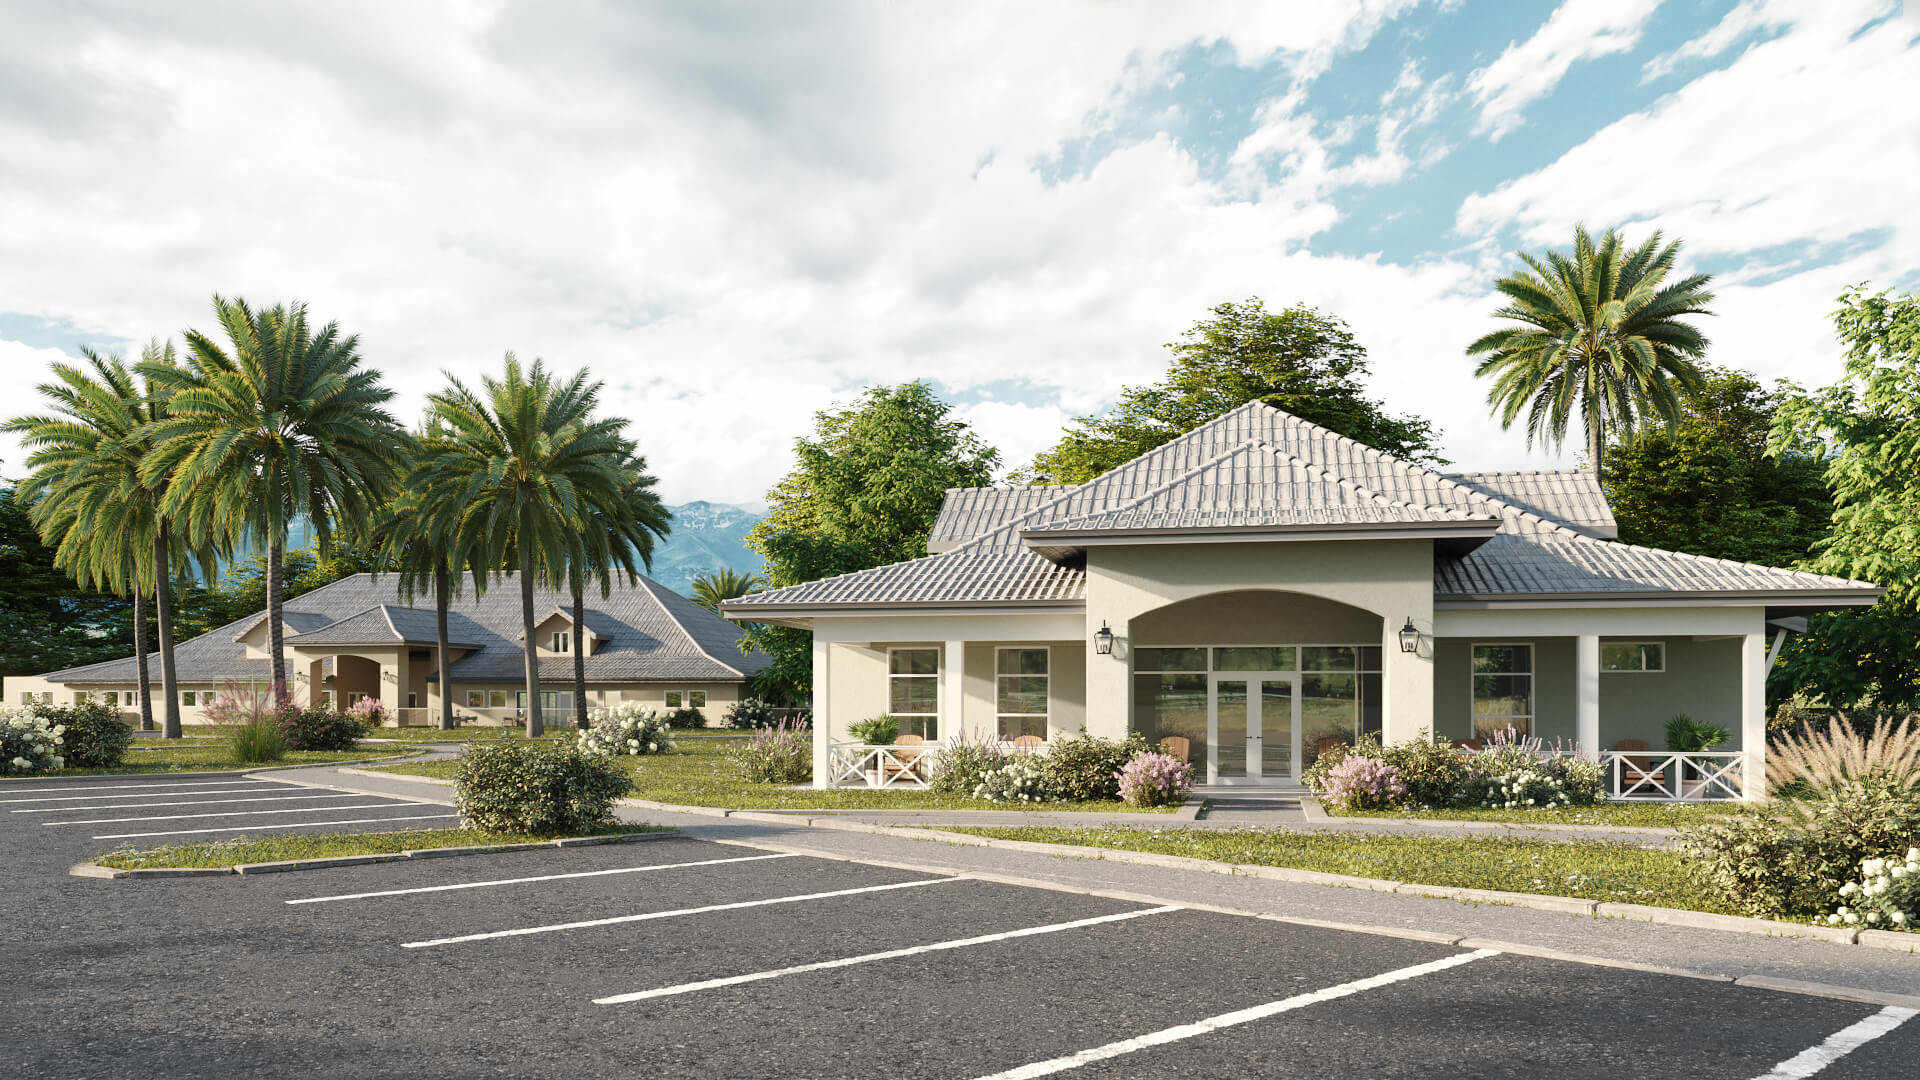
Our CGI specialist took all the comments into account and made the necessary changes in the 3D building rendering of the clinic’s exterior. Here’s what the result looked like.
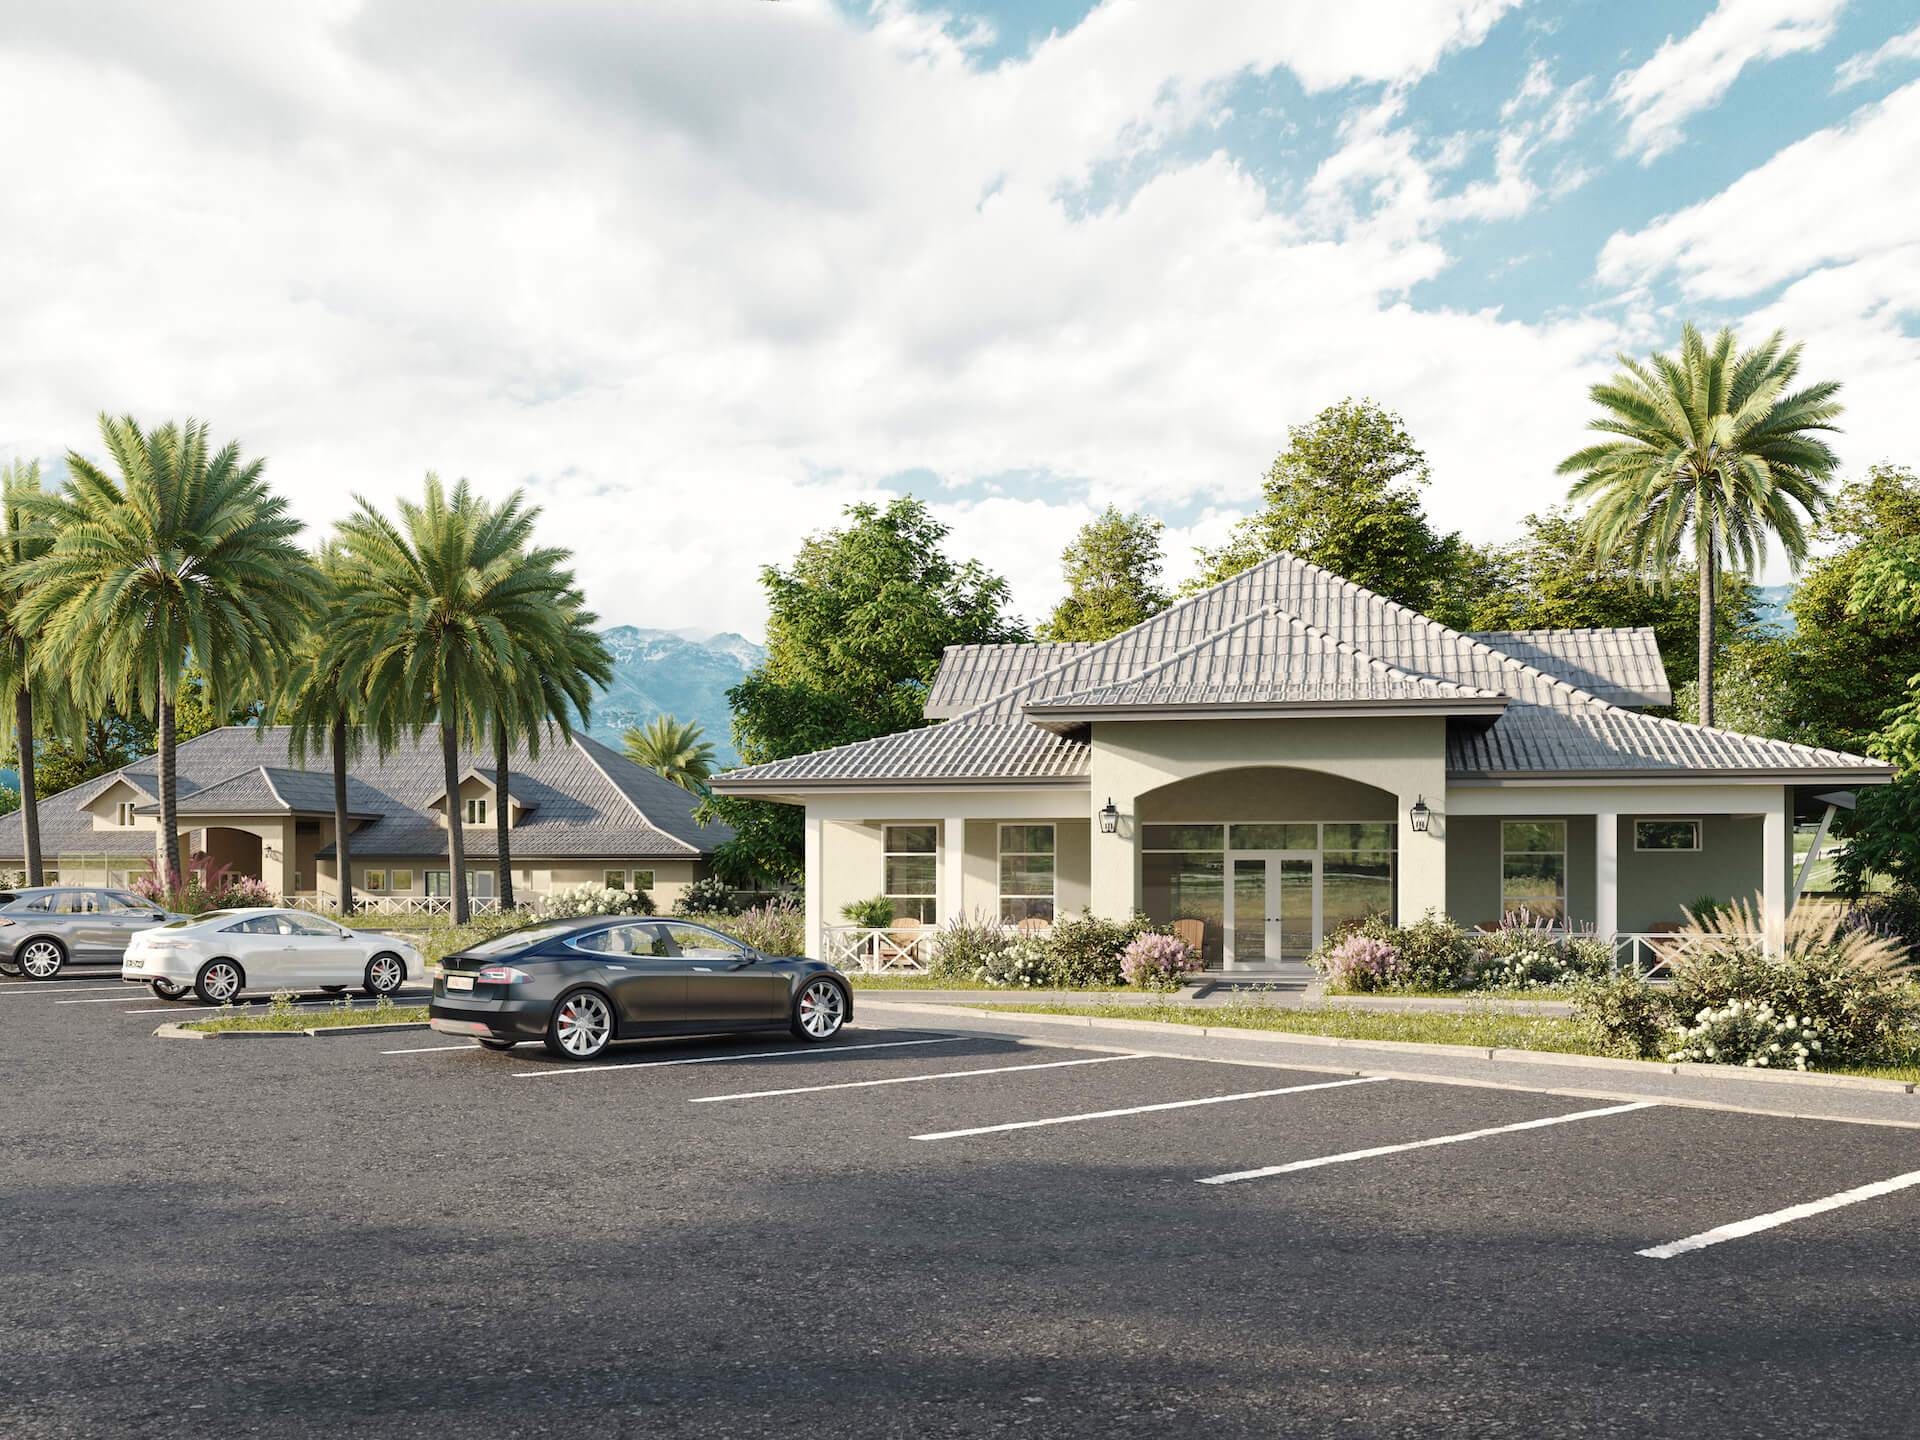
The client liked everything about the image, so we moved on to the final part of the exterior rendering task.
#1.4. Post-Production
All there was left to do was to put figures of people and pets into the rendering to make it look more life-like. For this, our post-production expert selected some ready-to-use cut-out pictures based on Mariah’s visual reference. Then, he added them to the 3D exterior render using Photoshop. Once he had achieved a seamless and photorealistic look by adjusting colors, light, shadows, and other parameters, the CG image was complete.
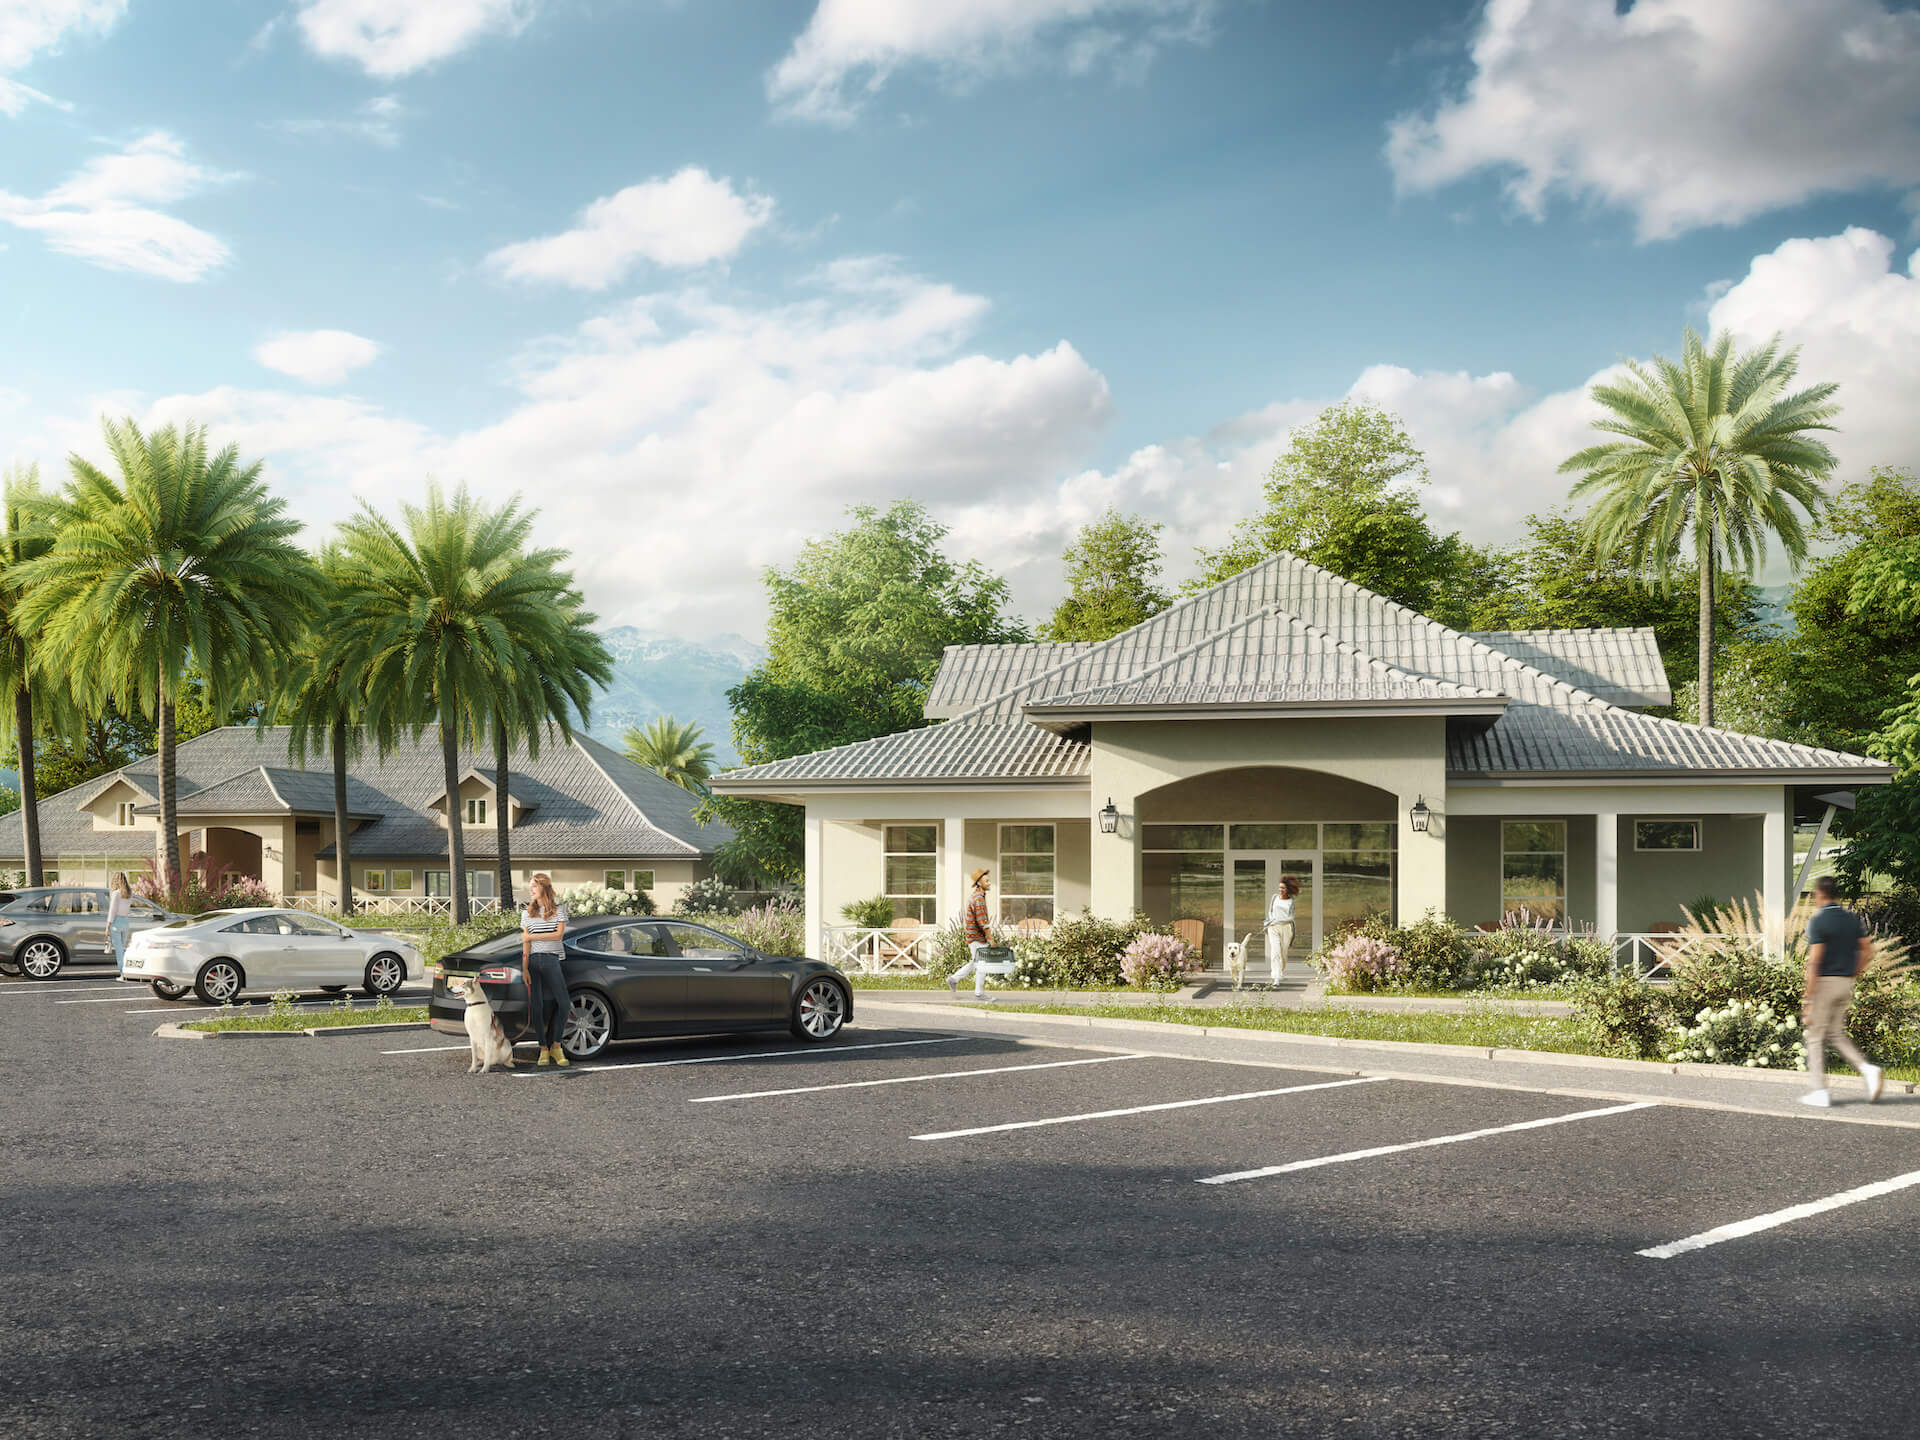
The client loved how this clinic building rendering came out. And so, this part of the project was done.
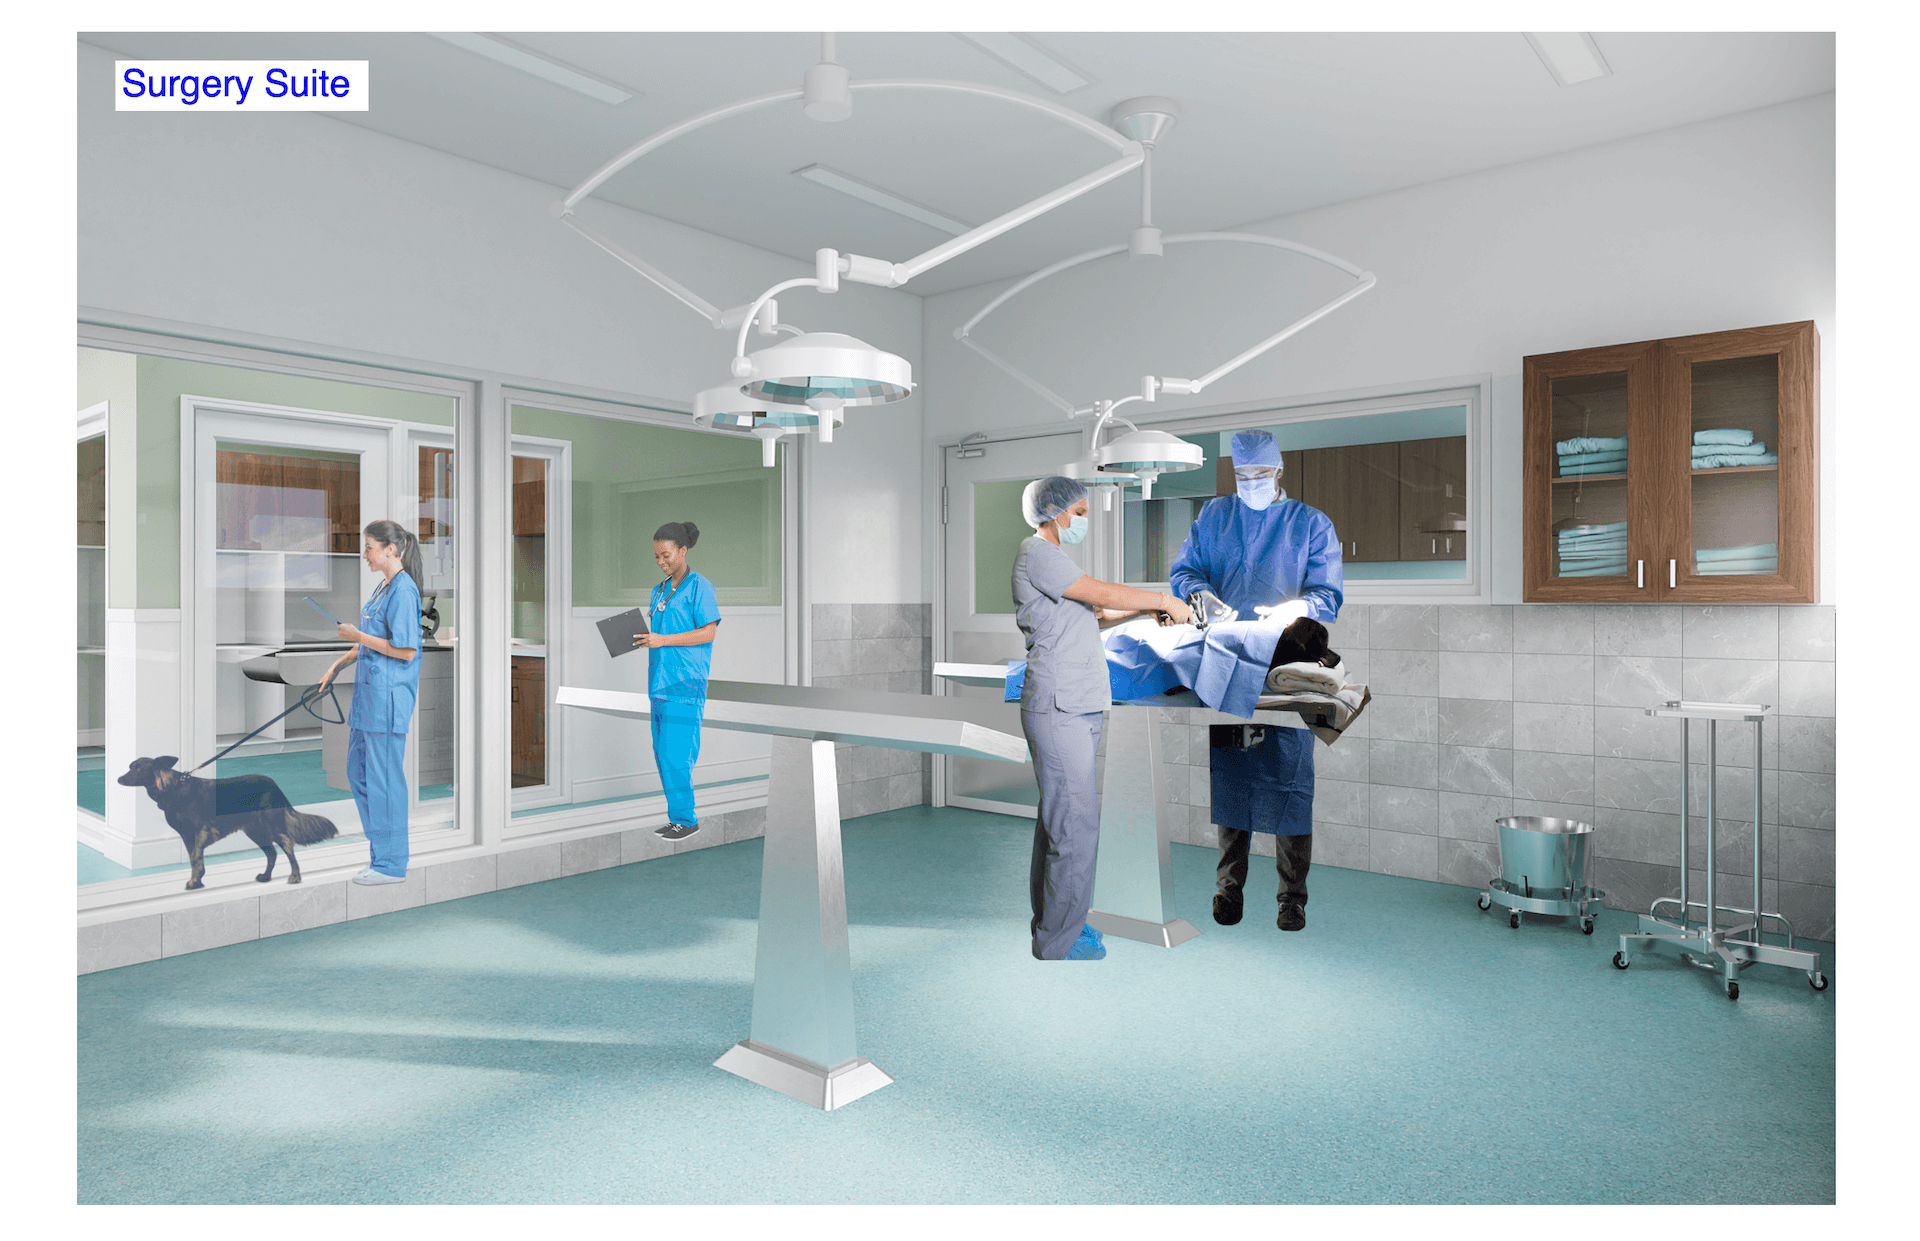
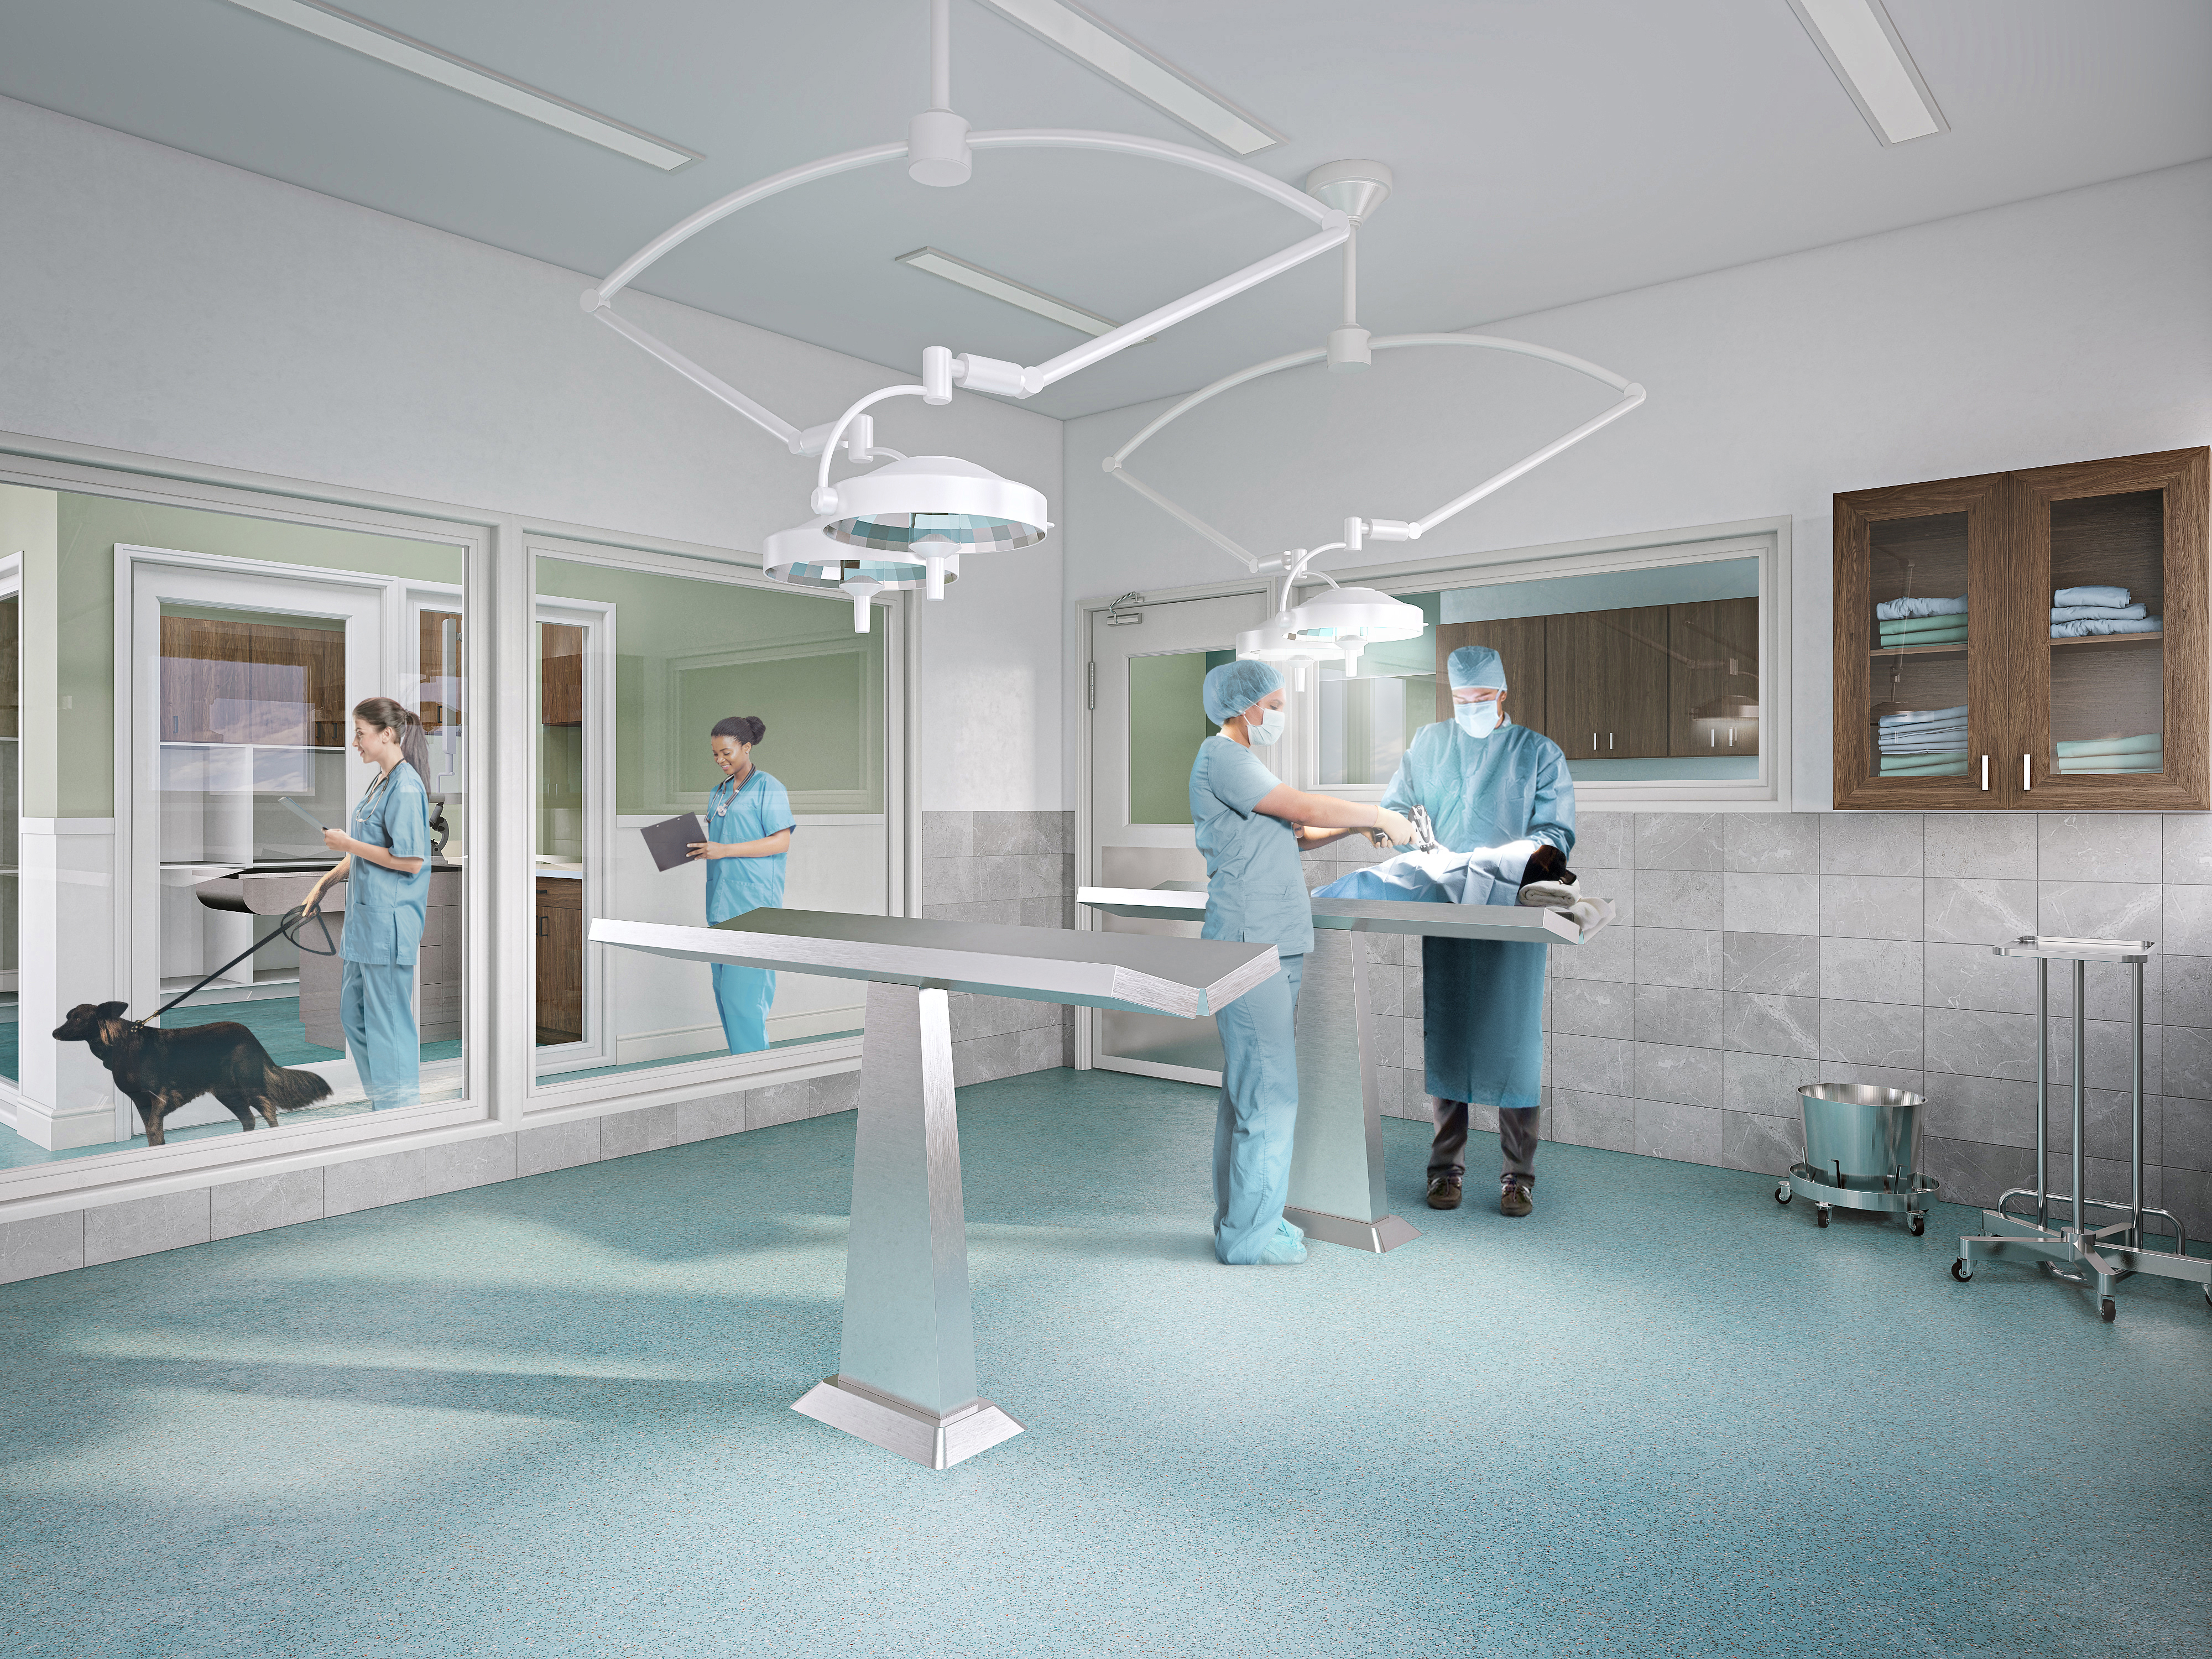
#2. Interior 3D Rendering: Surgery Suite
Now, let’s talk about the second task — the creation of a 3D interior rendering showing the surgery room. Just like the previous assignment, this one included not only design visualization but also adding people and animals at the post-production stage. Overall, the making of this interior 3D building rendering took 22h.
#2.1. References


For the making of the interior rendering of the surgery room, Mariah provided the following references:
- a filled-in STA form;
- CAD floorplan and elevations drawings;
- a CAD reflected ceiling plan with lighting specification;
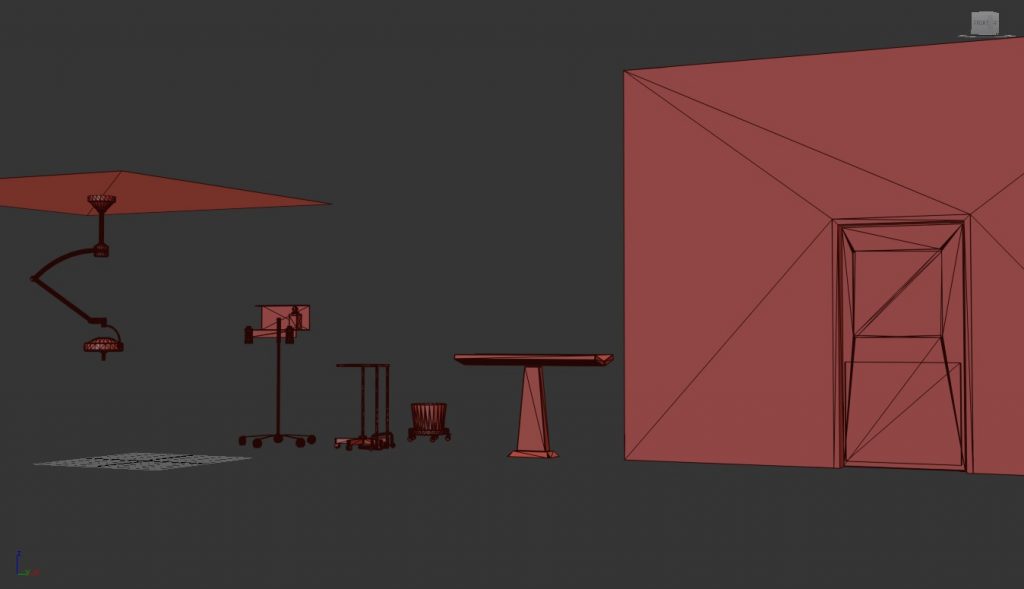
- Revit models of surgical equipment;
- photos of the referenced equipment in a real-life hospital environment;
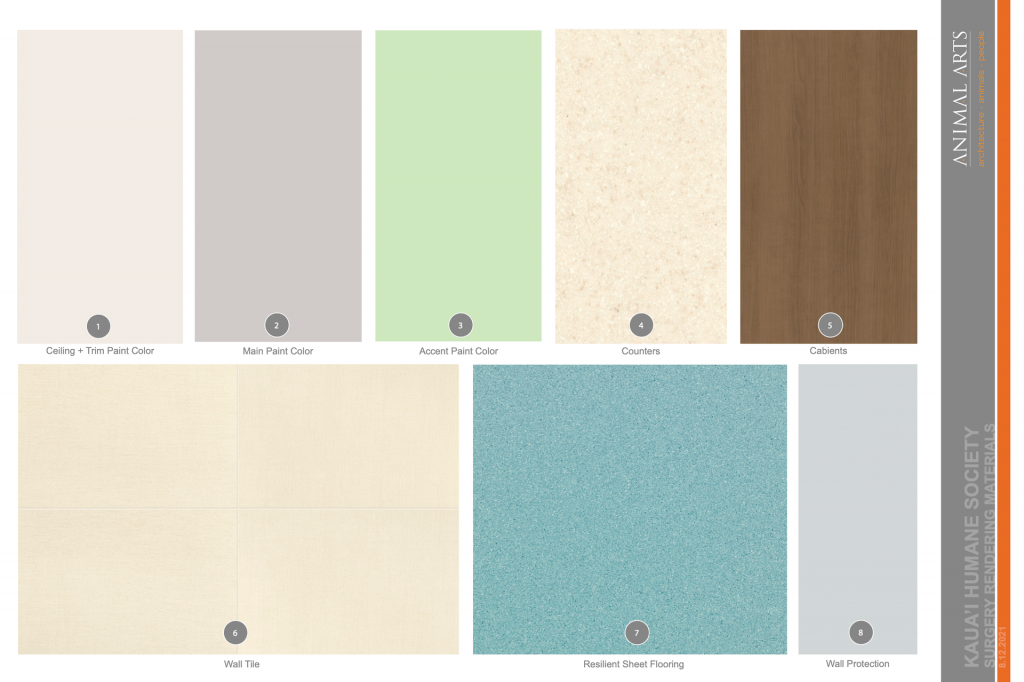
- a materials specification.
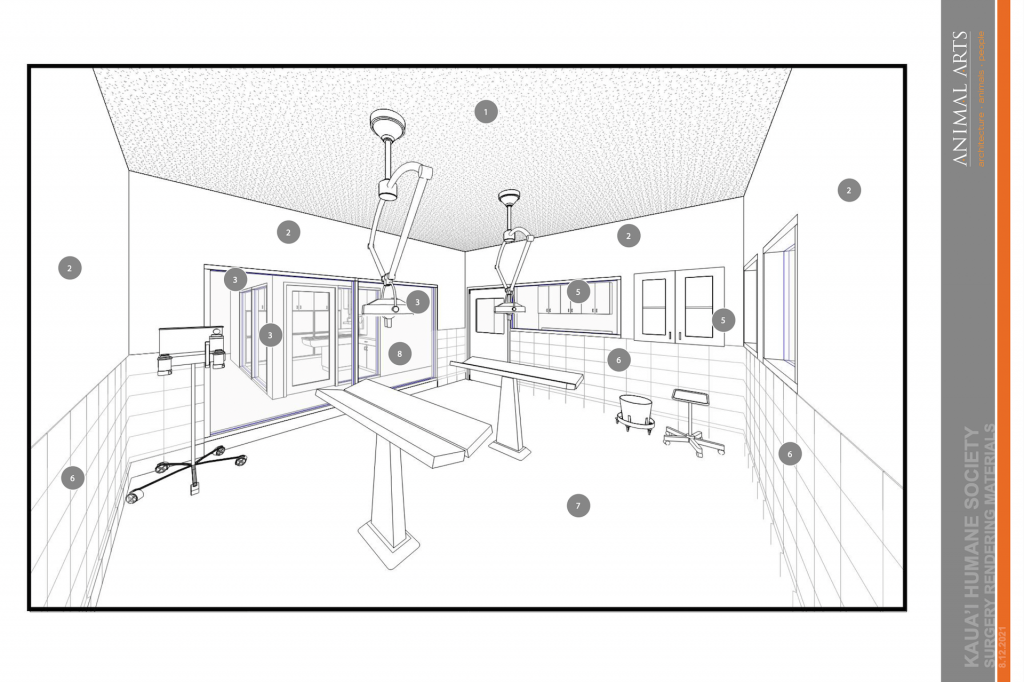
#2.2. First Version of the Rendering
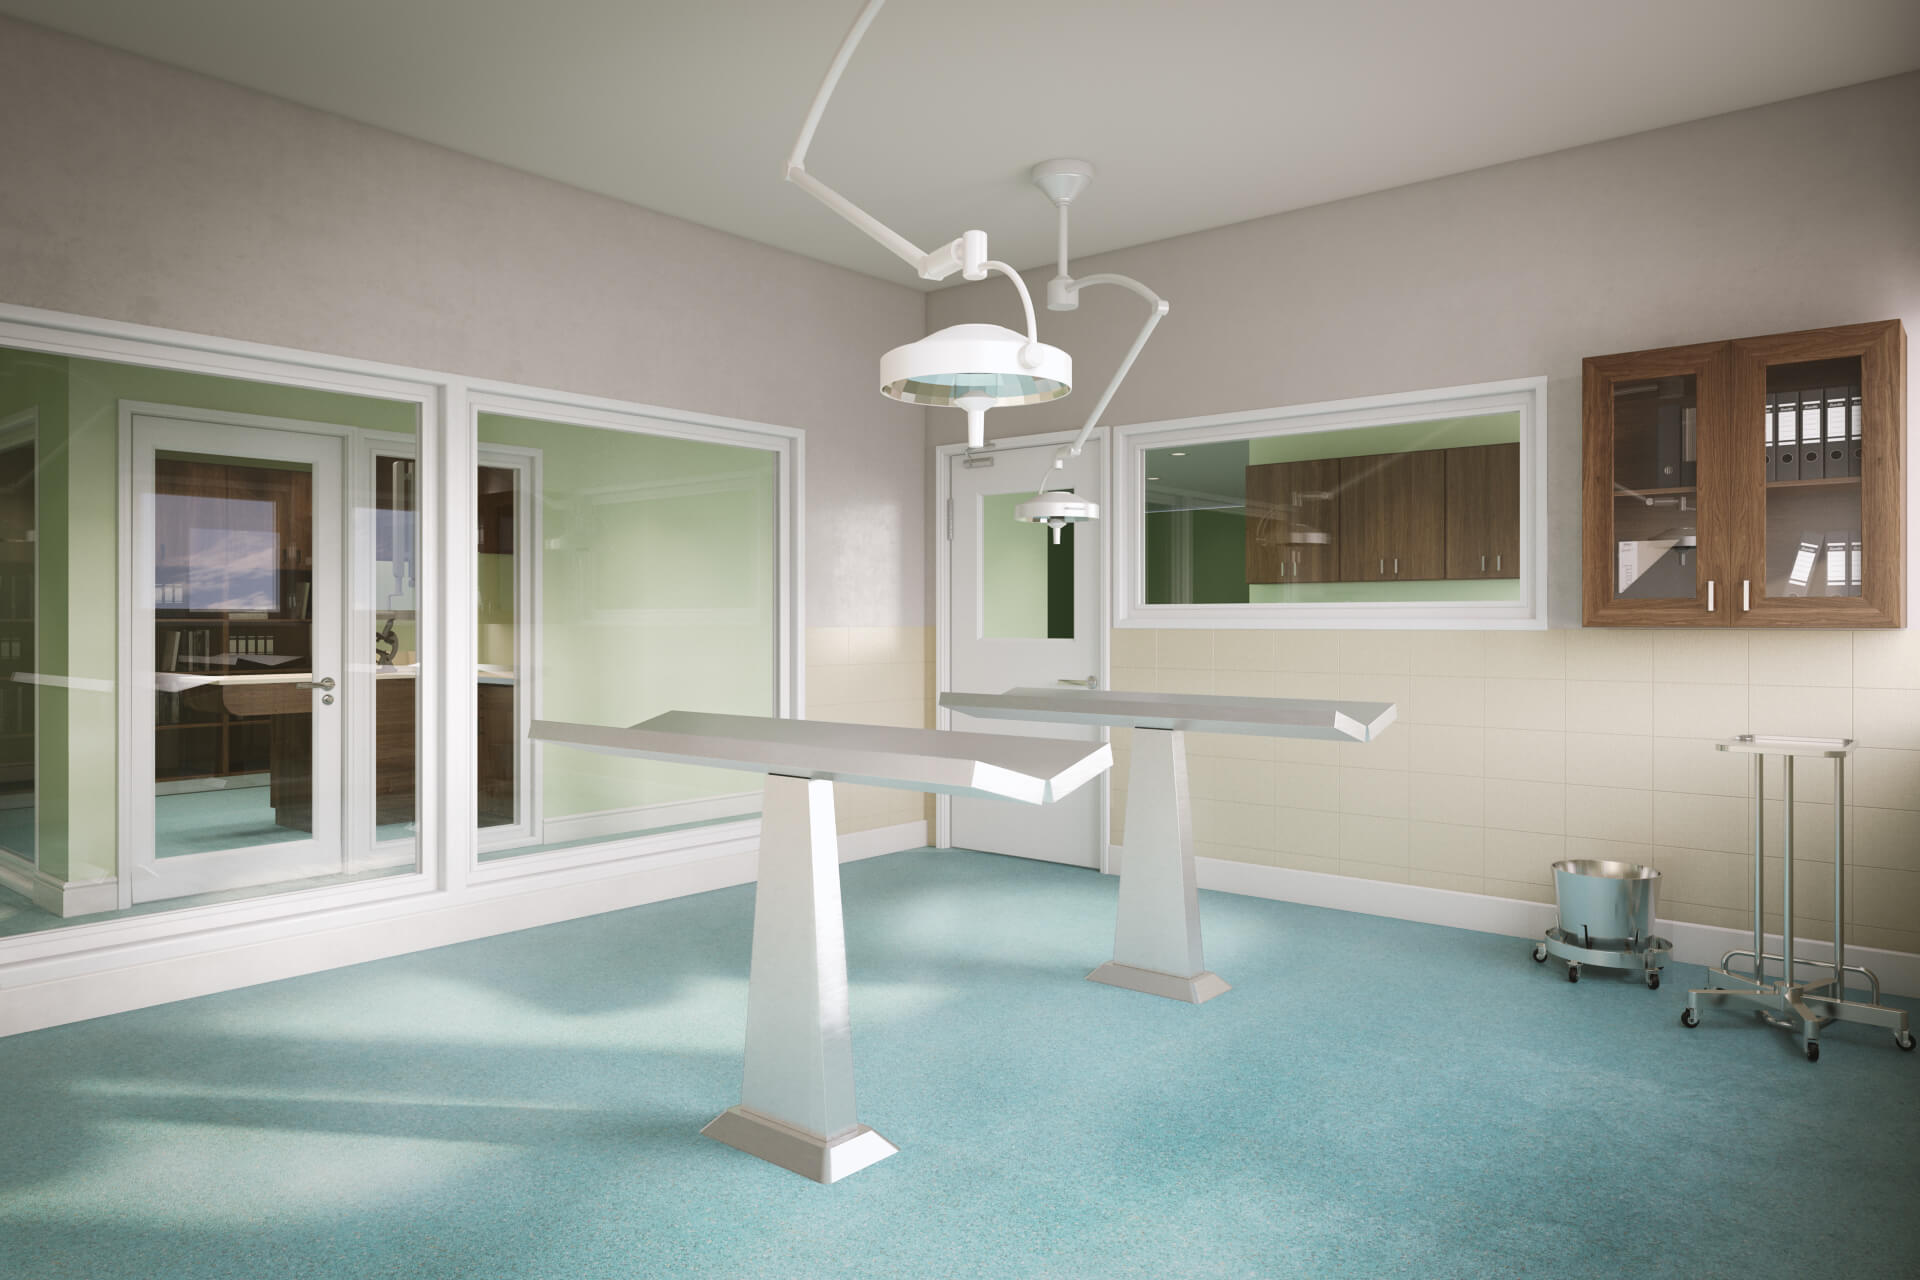
Above is the very first draft image of the building interior our 3D artist created based on the initial references. She sent it for the client to check.
#2.3. First Revision Round
These are the notes Mariah gave us on the draft rendering.

At that point, she sent us a new RCP, replaced the models of the main surgery lights, and suggested adjustments to the color palette to make the suite look less bright. So, those were the main aspects the CGI specialist had to work on.
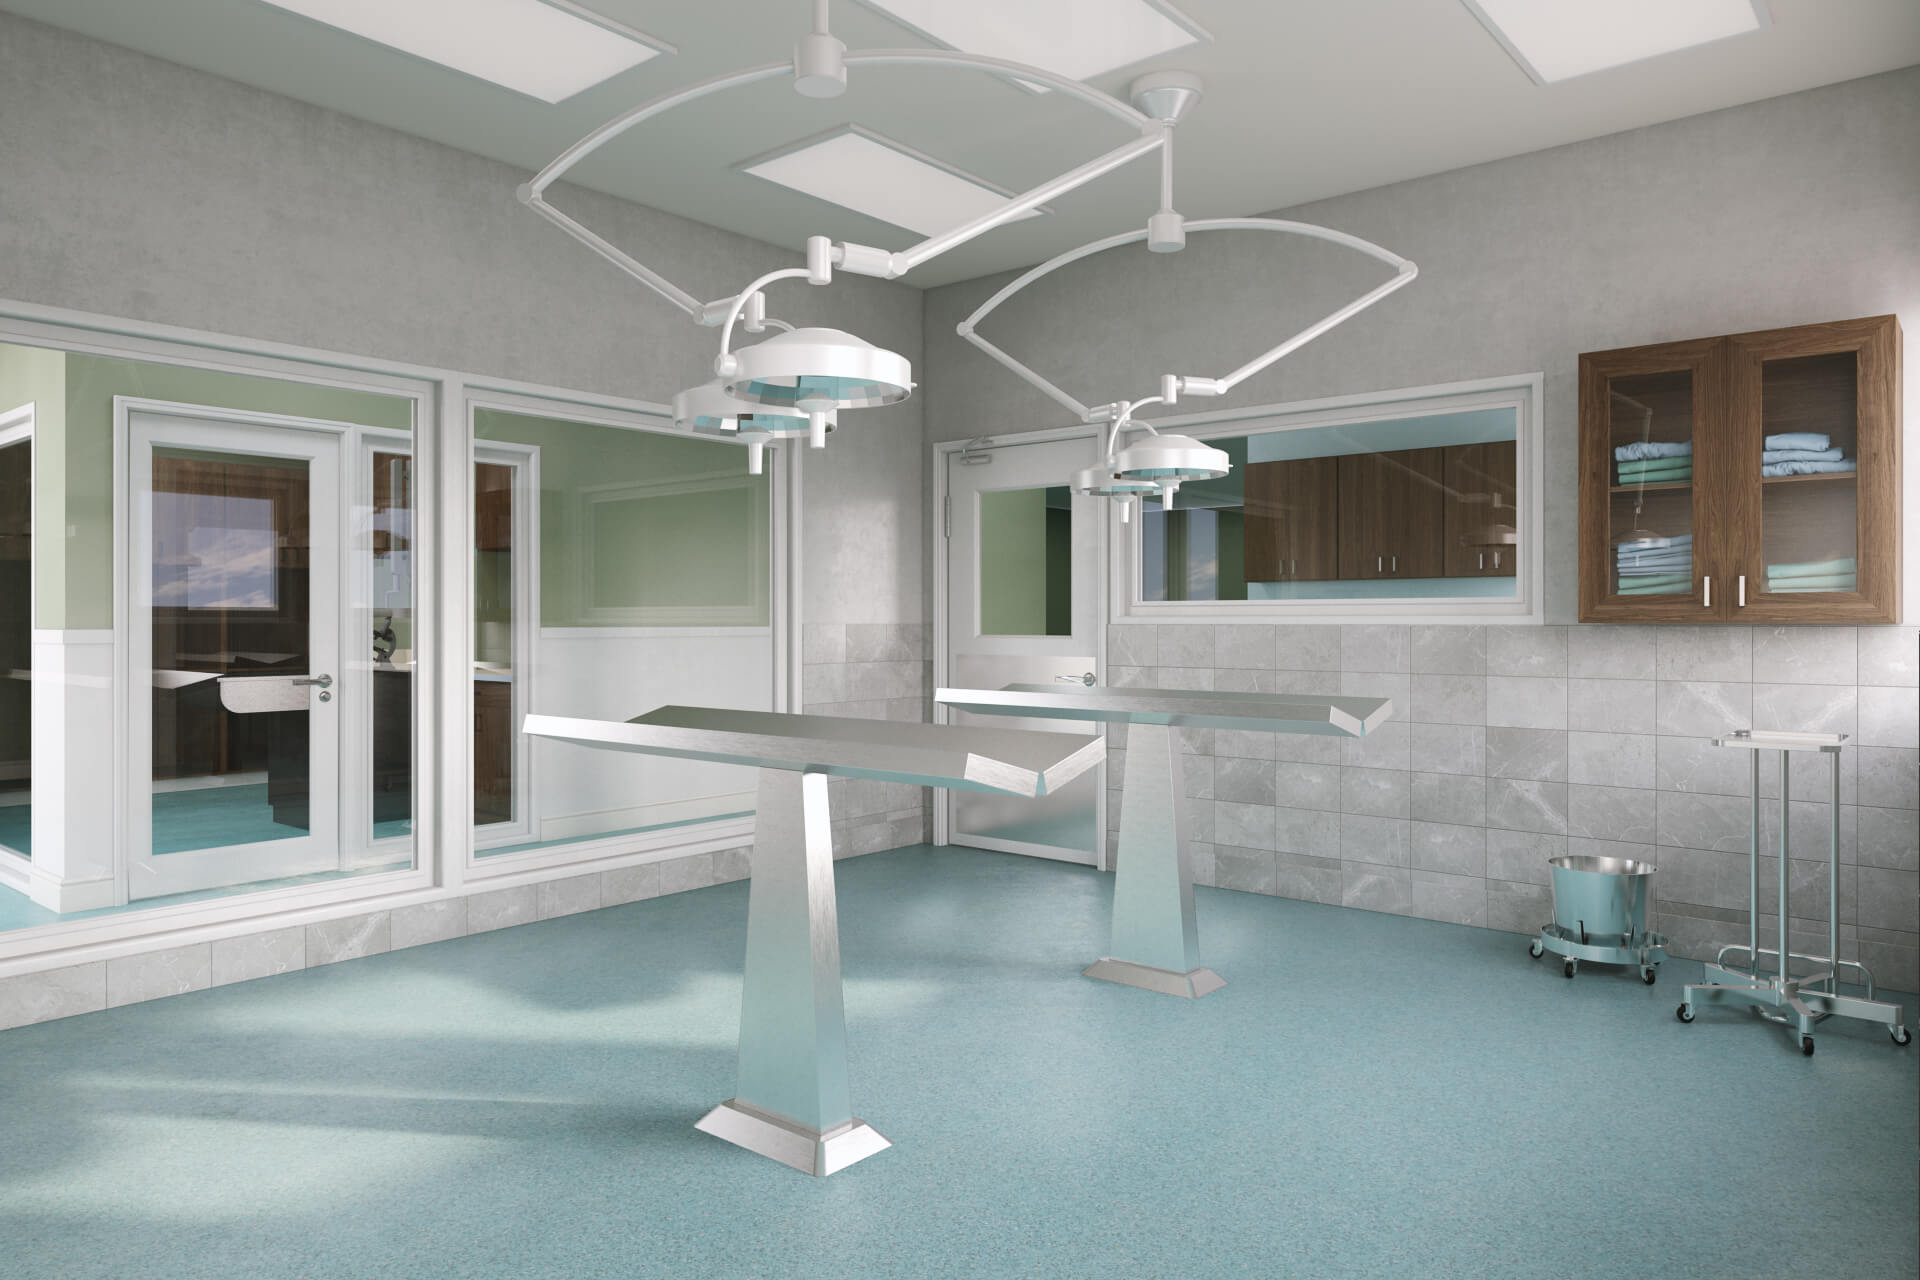
Above, you can see the updated image we sent to the client for another revision round.
Showcase your architectural project with photorealistic CGI powered by modern AI-assisted workflows
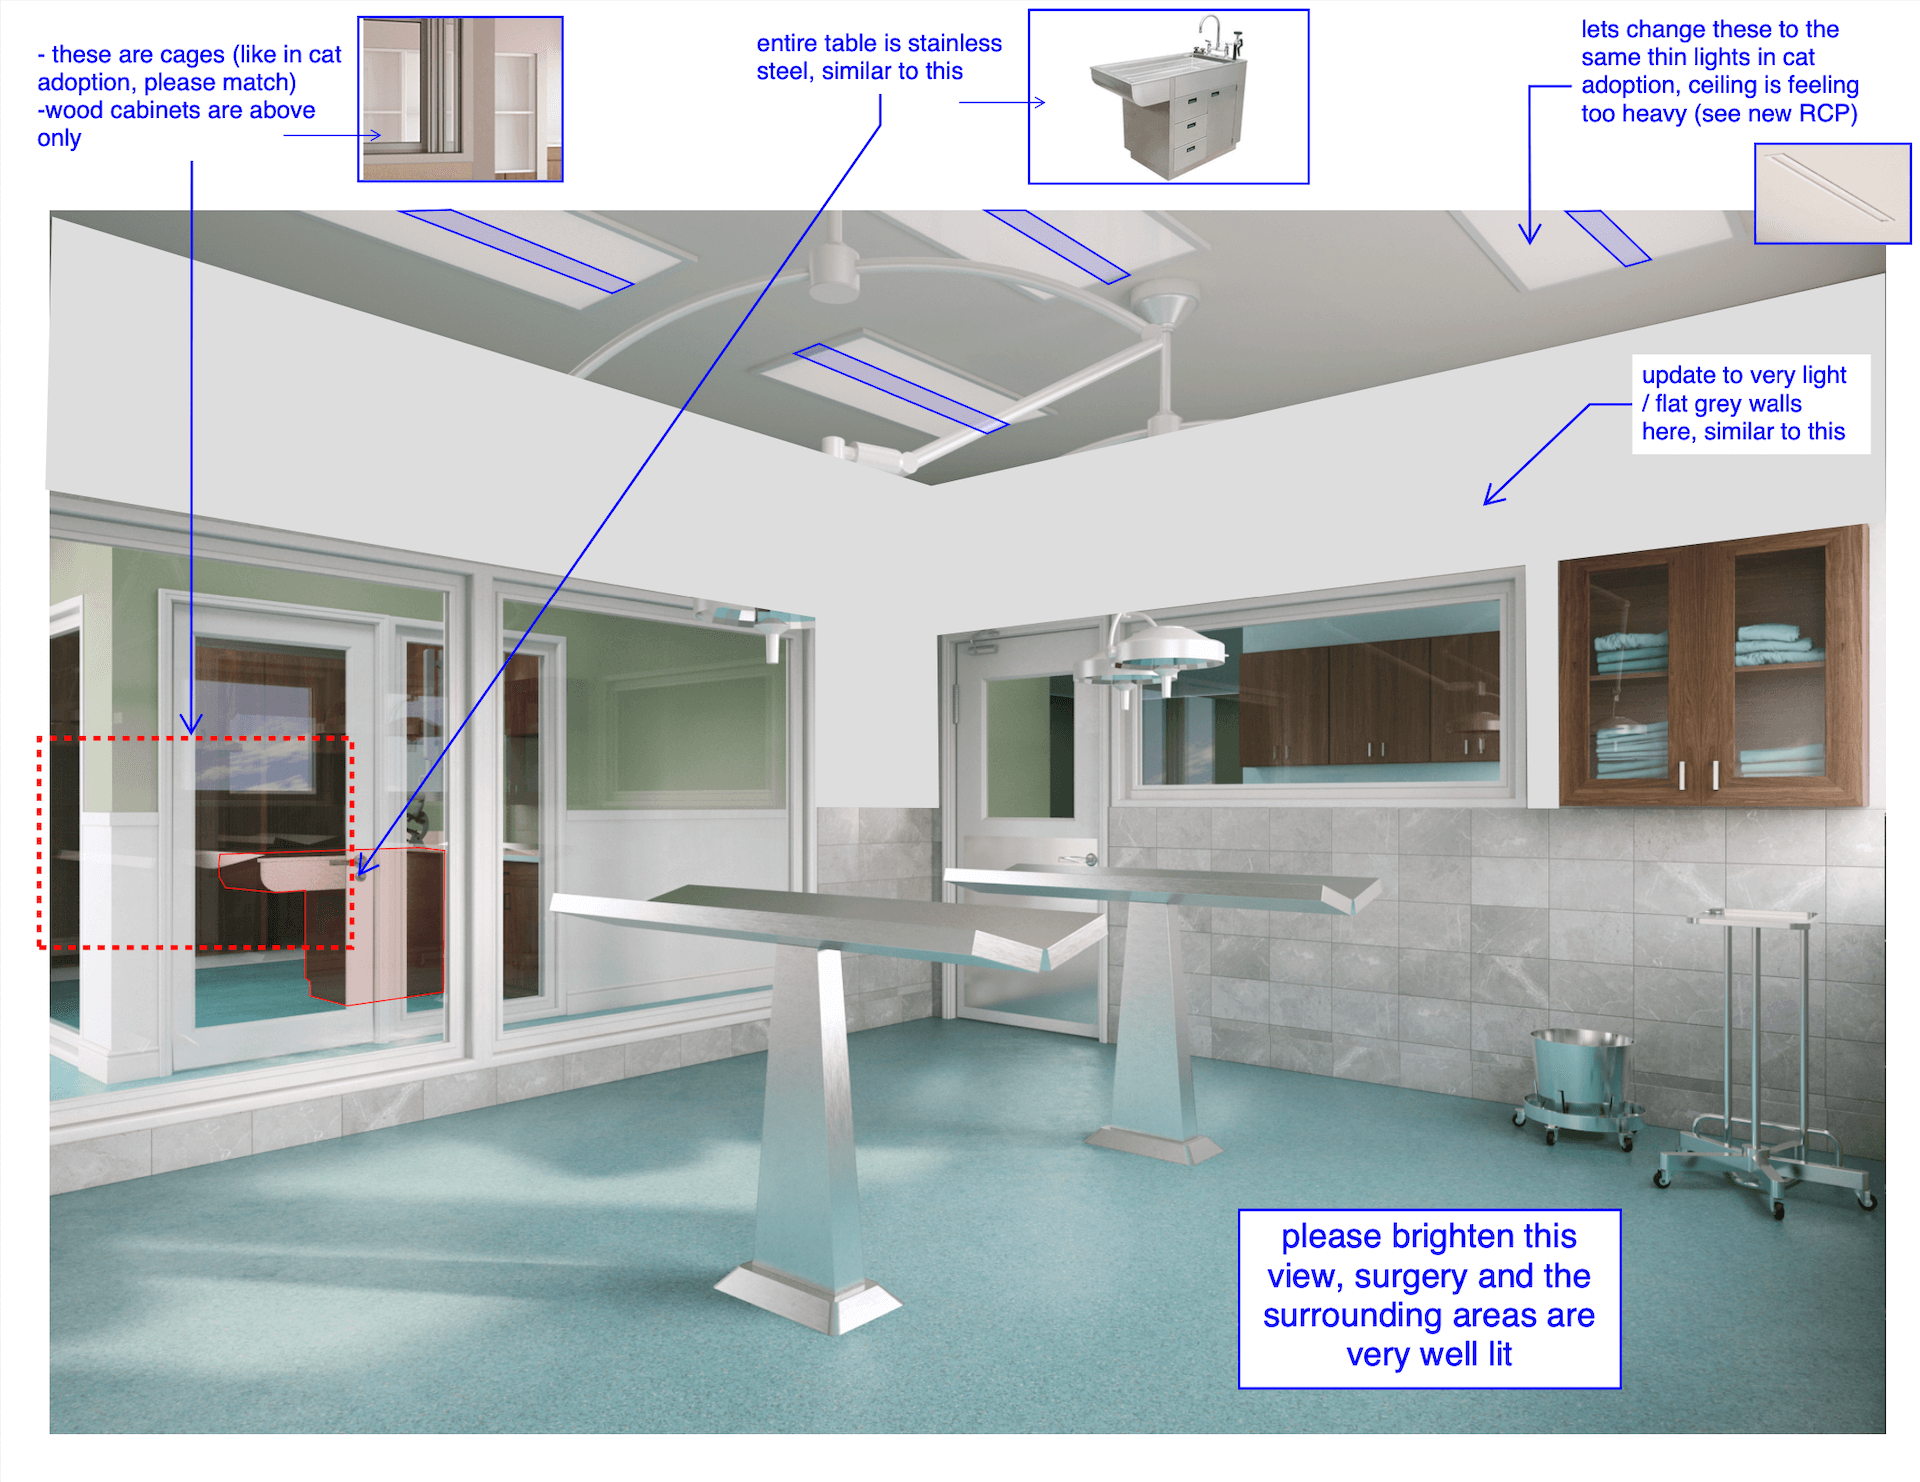
#2.4. Second Revision Round
This time, Mariah had just a few more notes on the interior 3D building rendering.
And this is what the 3D render looked like once the 3D artist has made all the required adjustments.

Next, the creation of the rendering went to the final stage.
#2.5. Post-Production
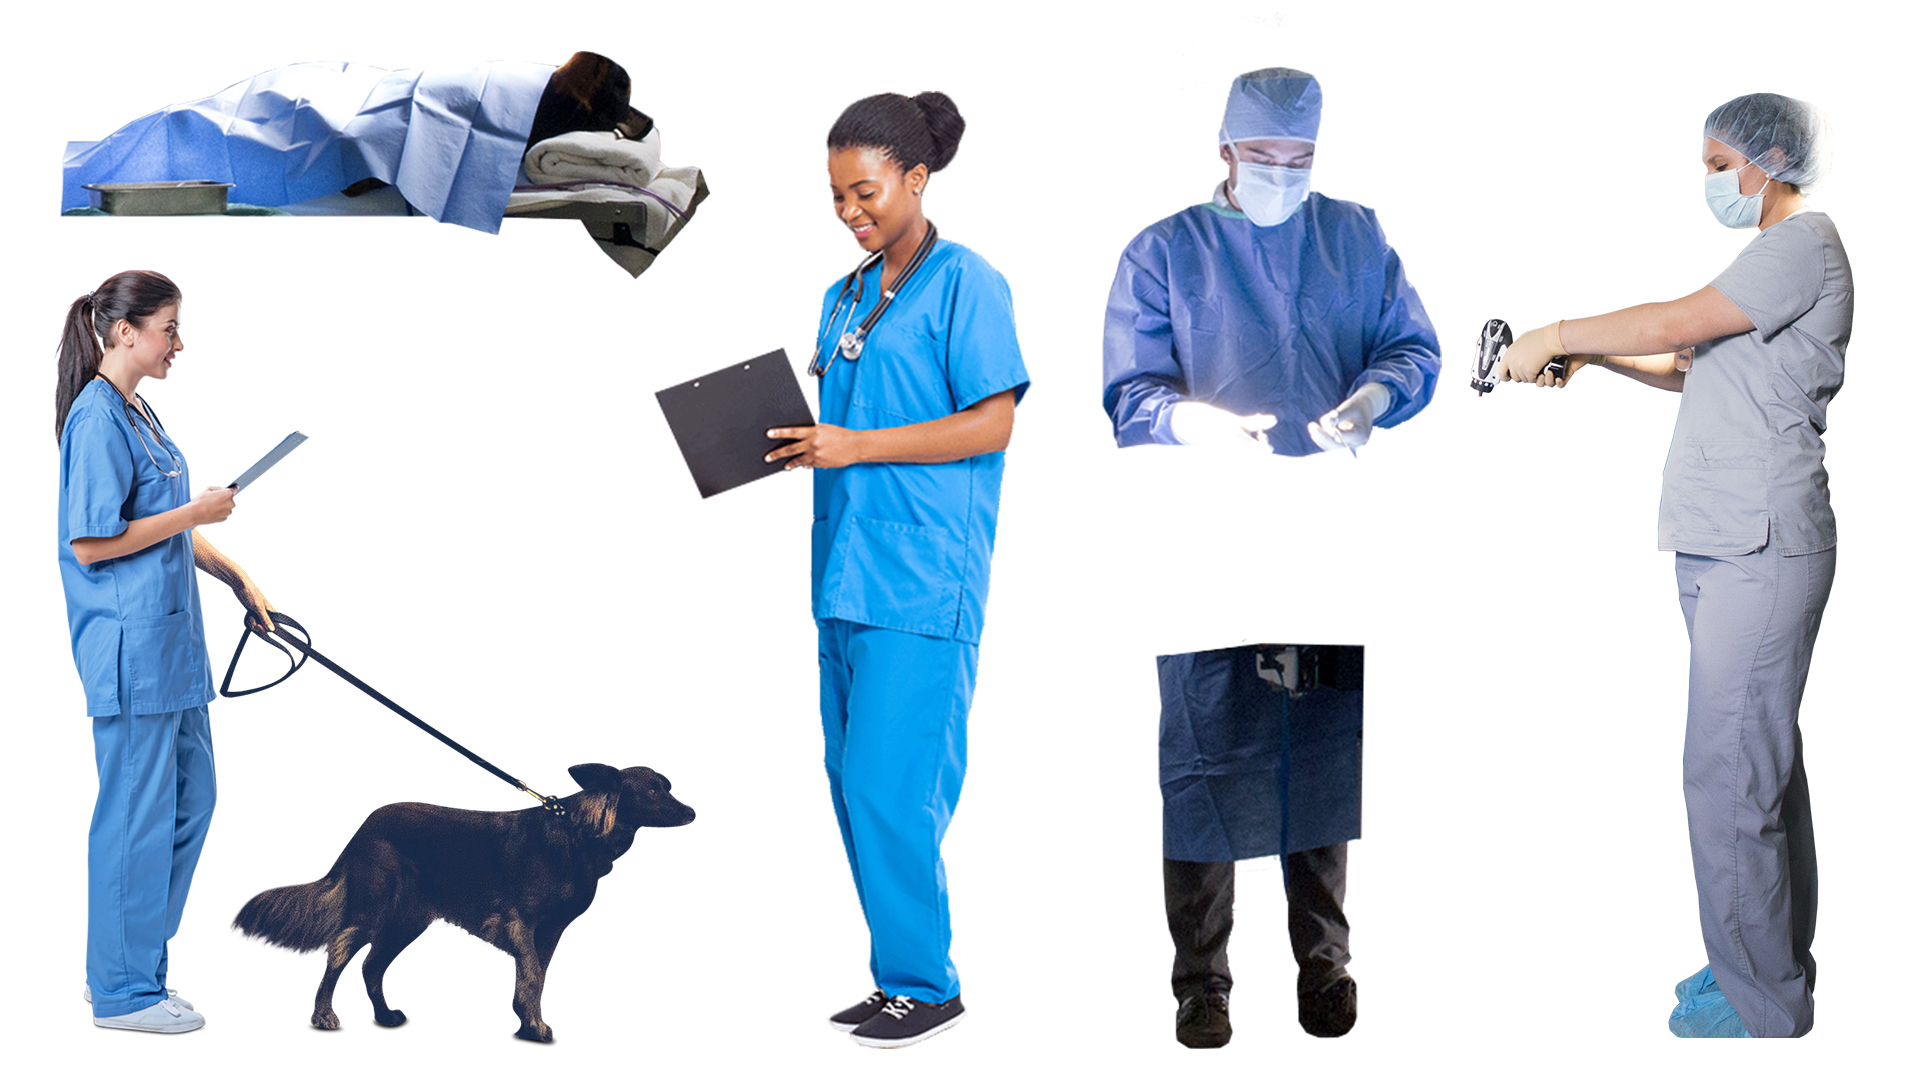
To give us a full understanding of what the work of veterinary surgeons looks like, the client sent us some real-life hospital photos, such as the ones below.
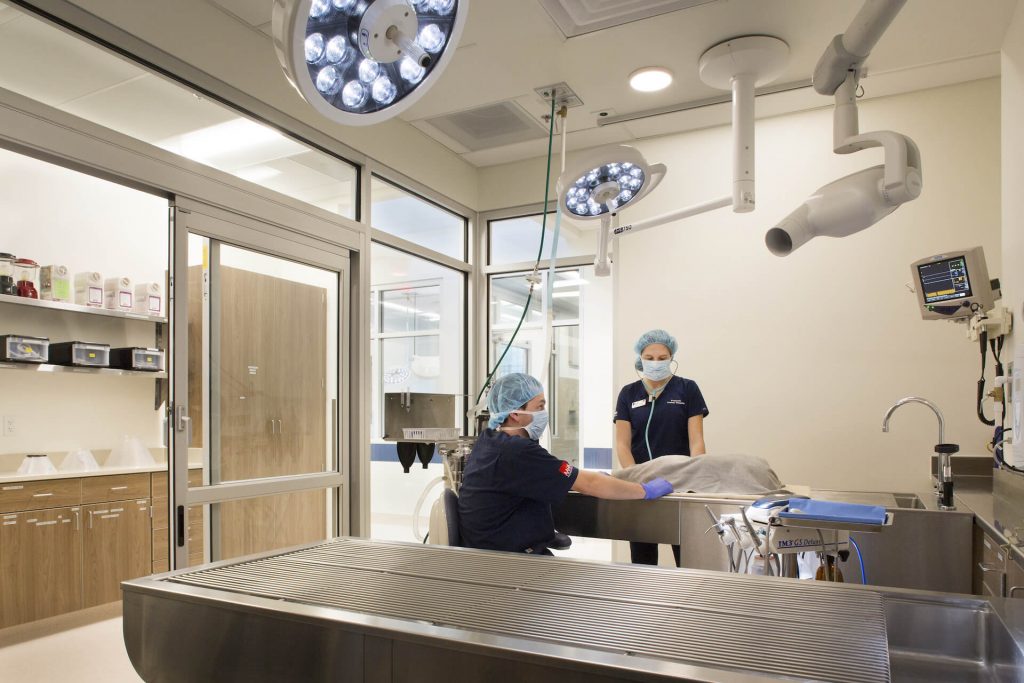
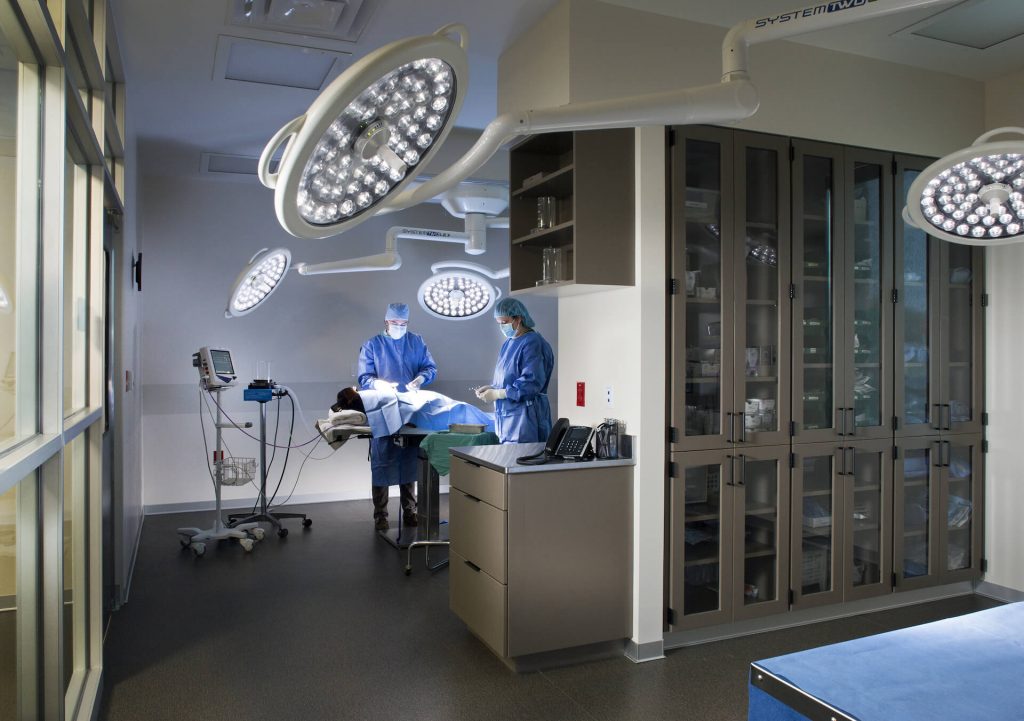
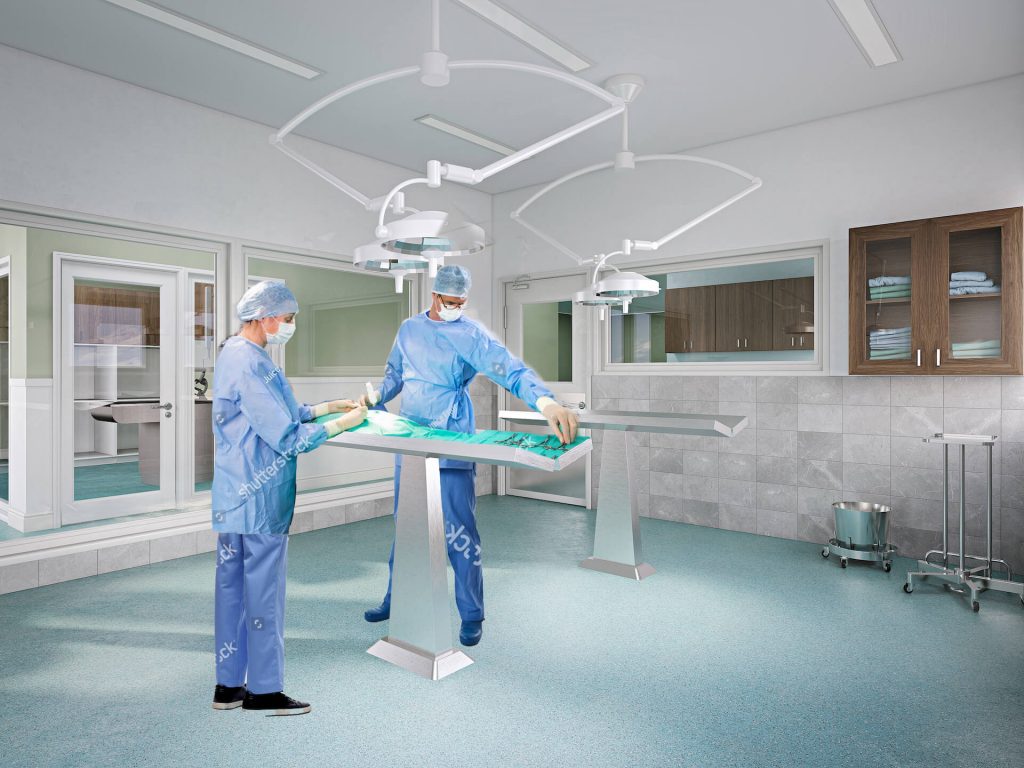
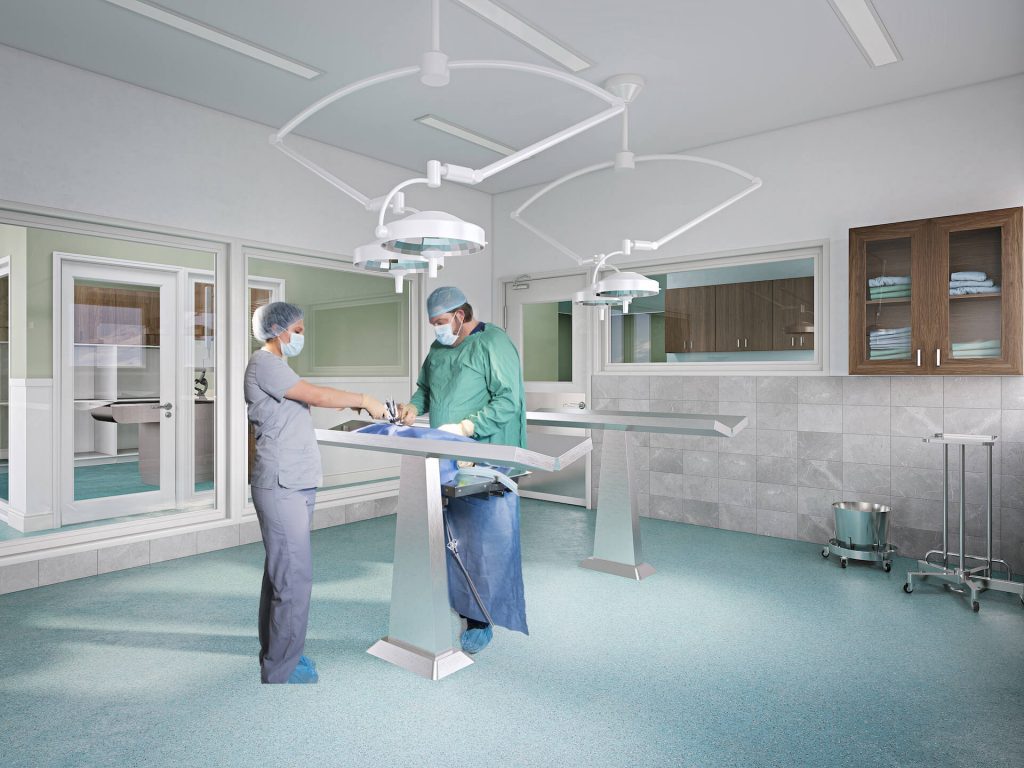
Using these initial references, the post-production specialist created two draft images showing doctors at work in the surgery room. At that moment, he didn’t blend the photos into the CG visuals yet, as the selection of pictures wasn’t final.
Mariah reviewed the drafts and sent a new piece of reference — a layout with the positioning of people and animals that she preferred.
She kindly provided the photos she used in the layout as separate files, so that our Photoshop expert could place them in the rendering right away.
Below is the final render our specialist submitted for revision.
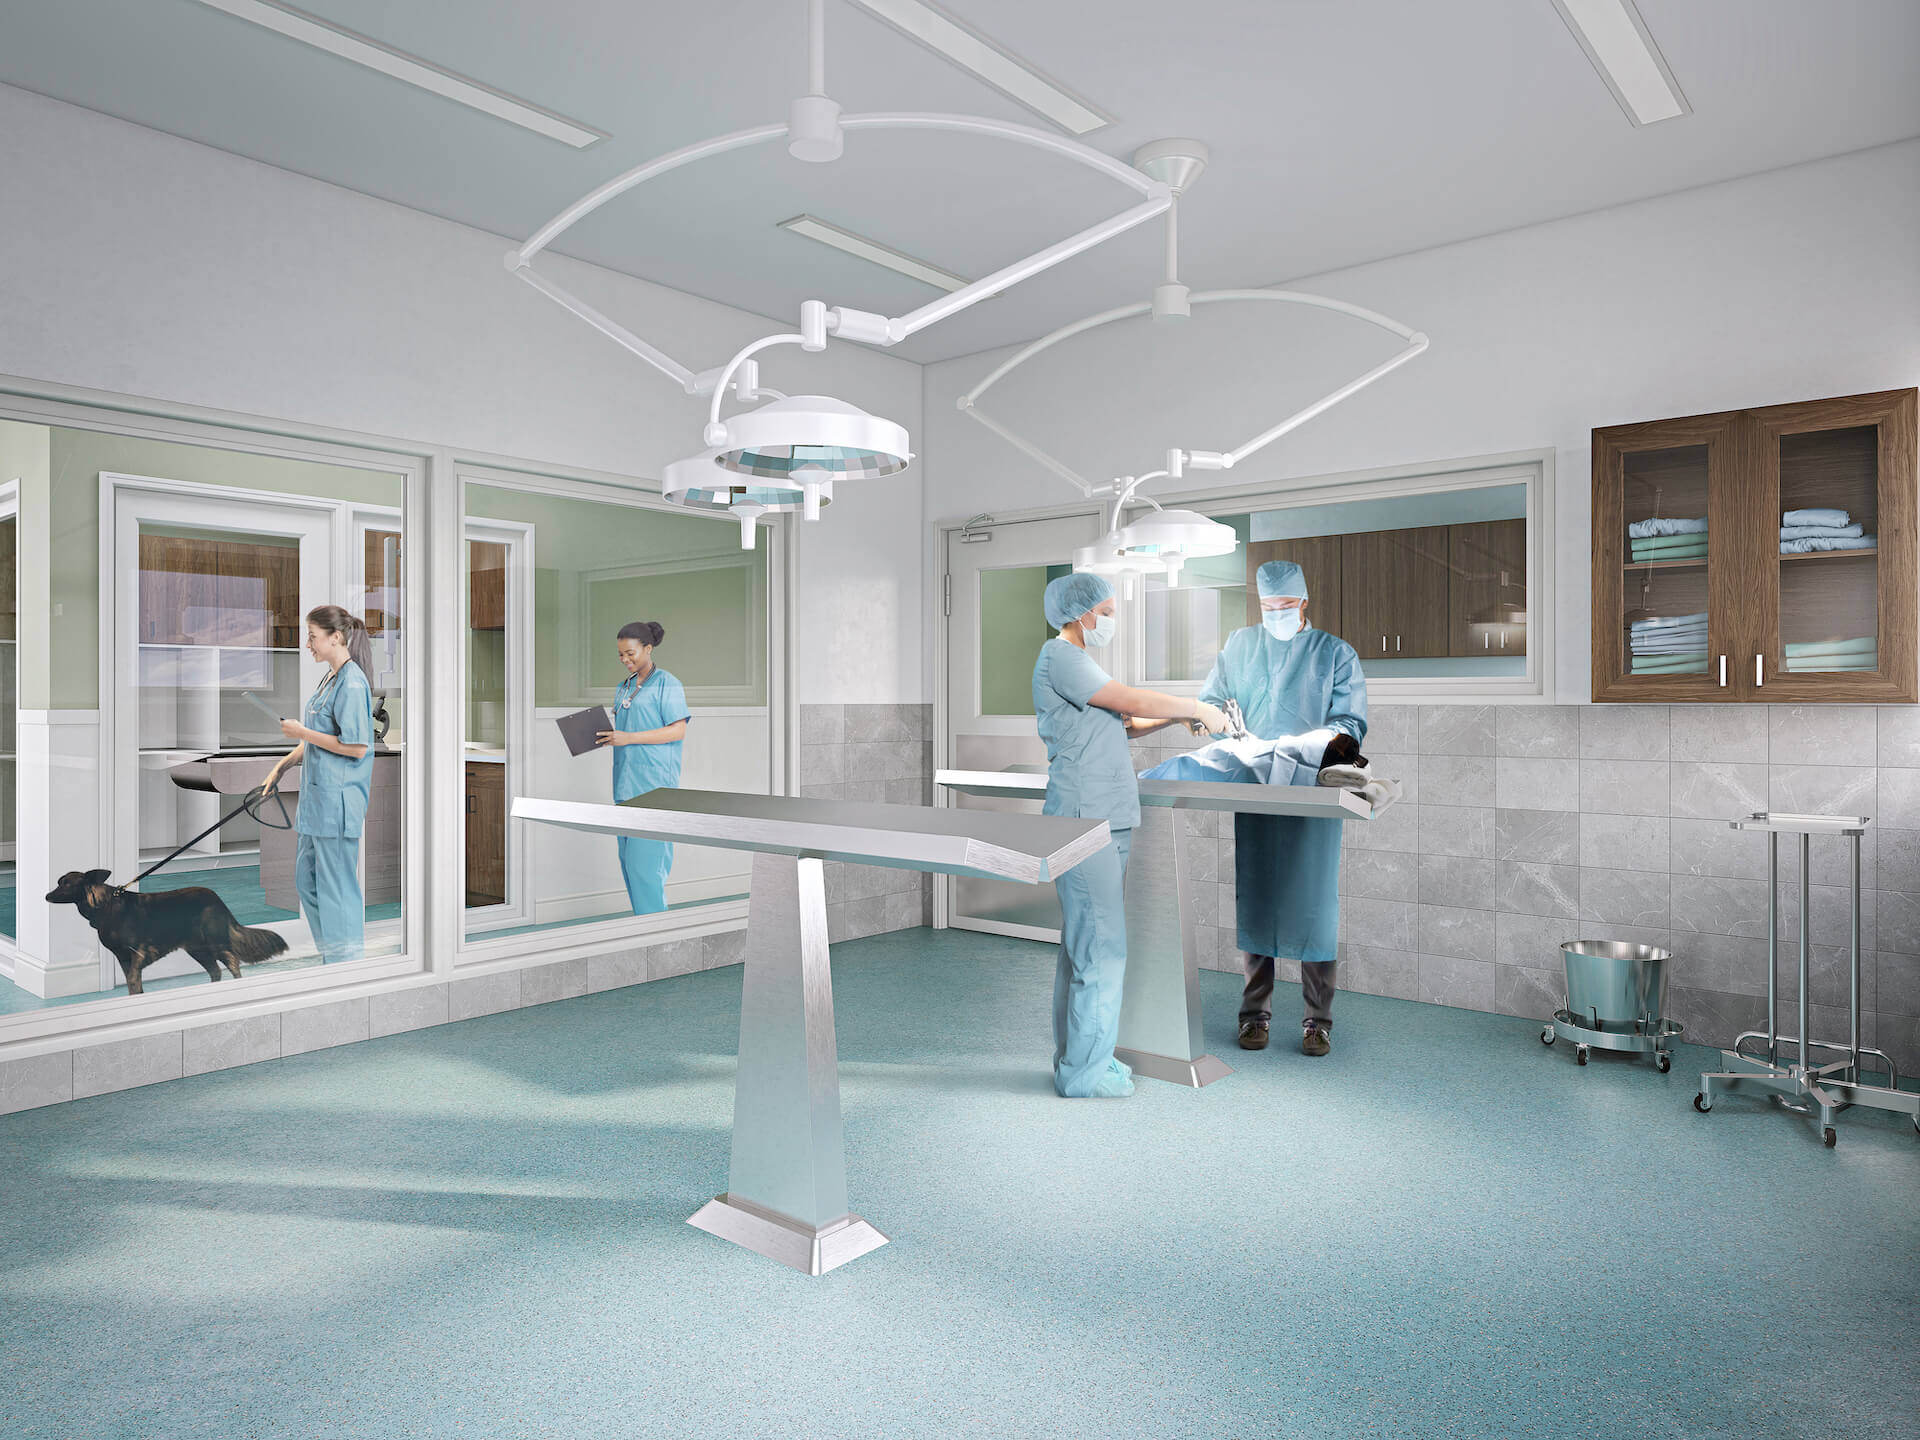
The client liked everything about the result, so this task was completed.
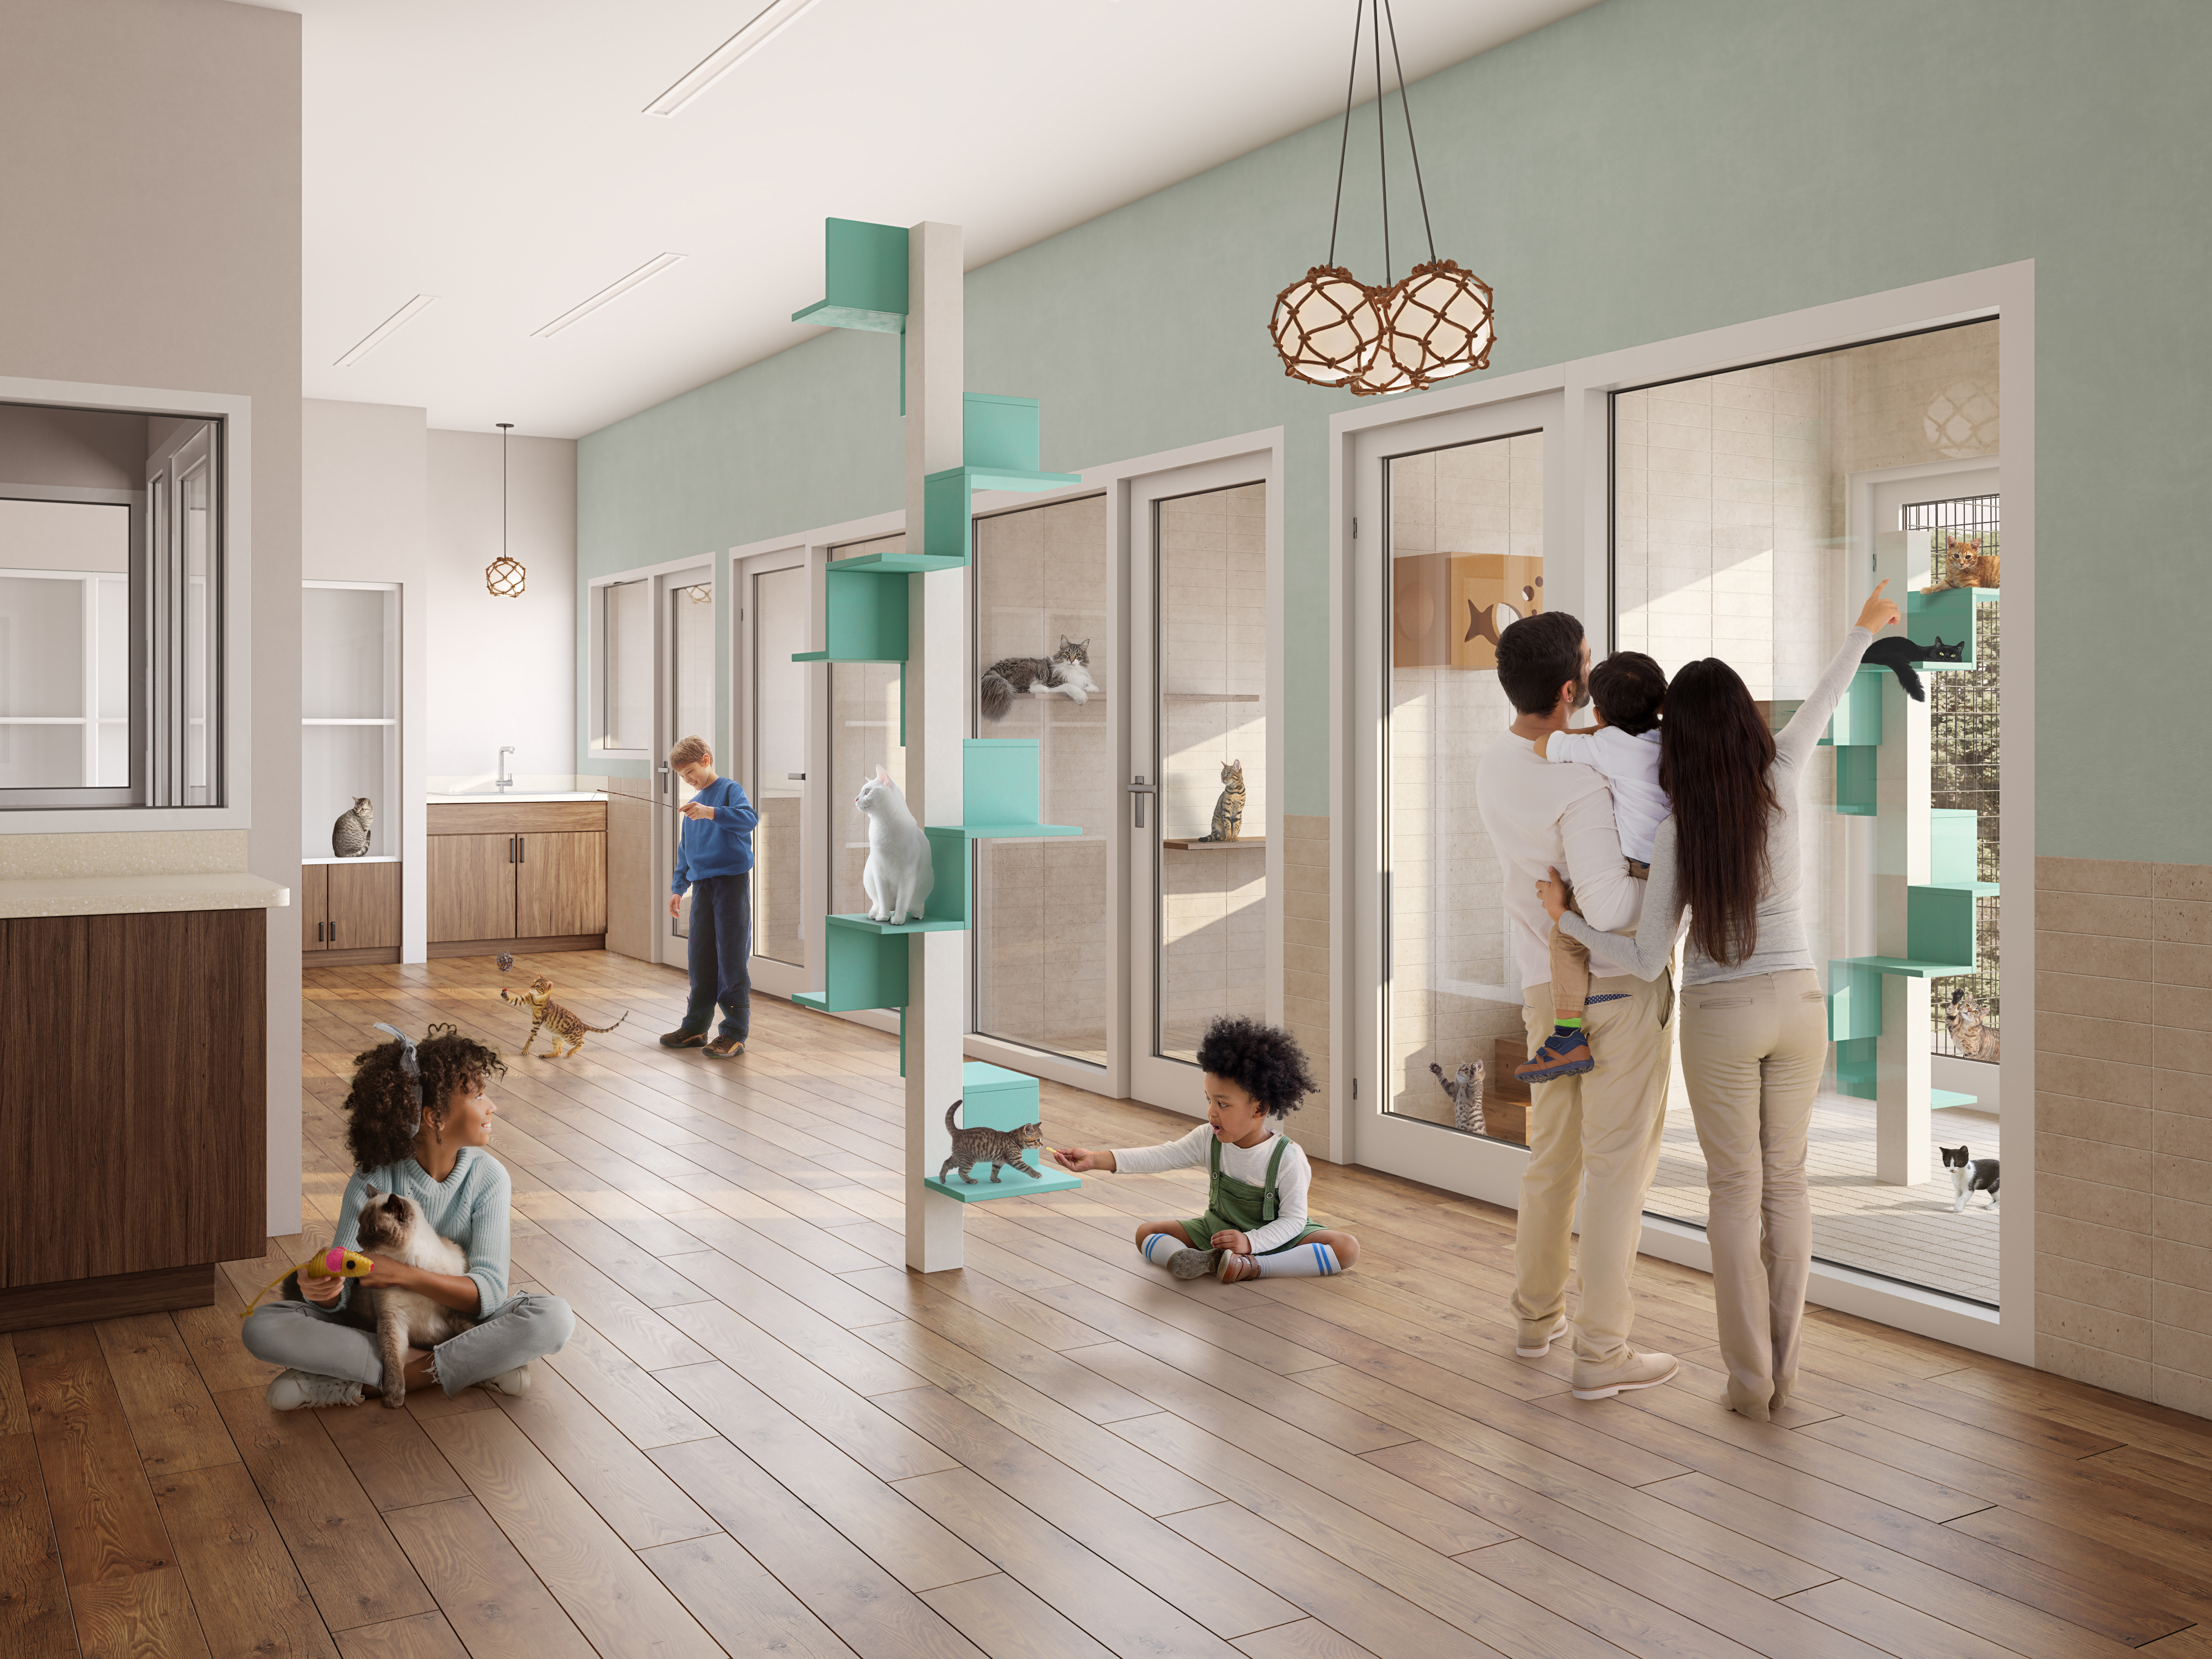
#3. Interior 3D Rendering: Cat Adoption Area
The third and final 3D building rendering we did in this project was another interior image showing the proposed cat adoption area. Here, our post-production specialist had to add the largest number of people and animals compared to the other two visuals. That made the space feel exceptionally alive and welcoming, which is so important for a shelter where people come to adopt animals. The work on this task took 23h in total.
#3.1. References
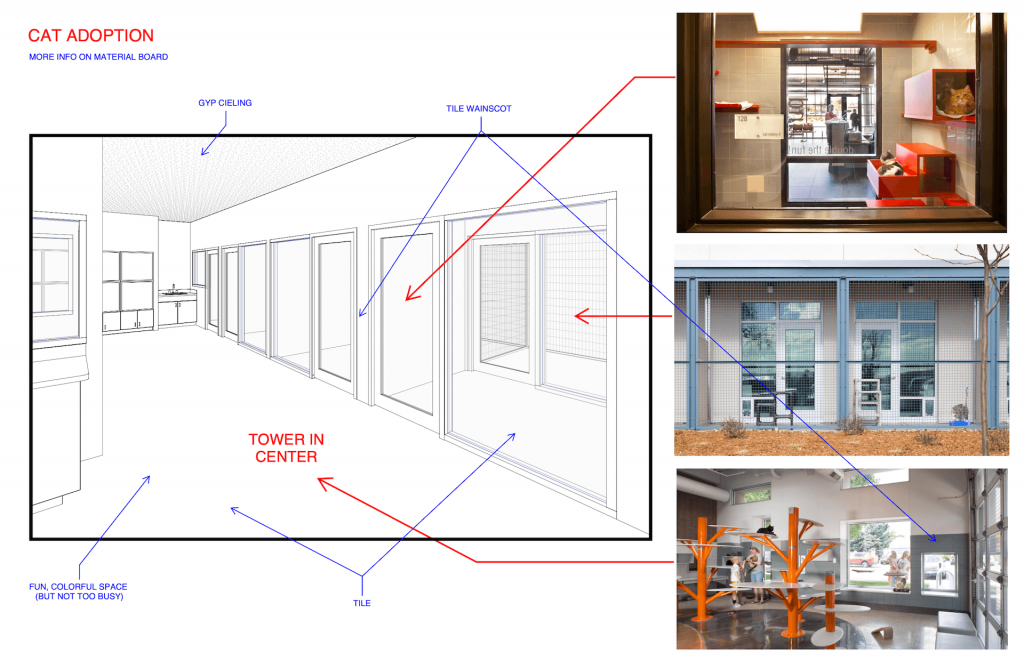

The references for this assignment included:
- a filled-in STA form;
- real-life photos of similar shelters;
- CAD floorplan and elevations drawings;
- a CAD reflected ceiling plan with lighting specification;
- a Revit model of the room;
- Revit models of accessories for cats;
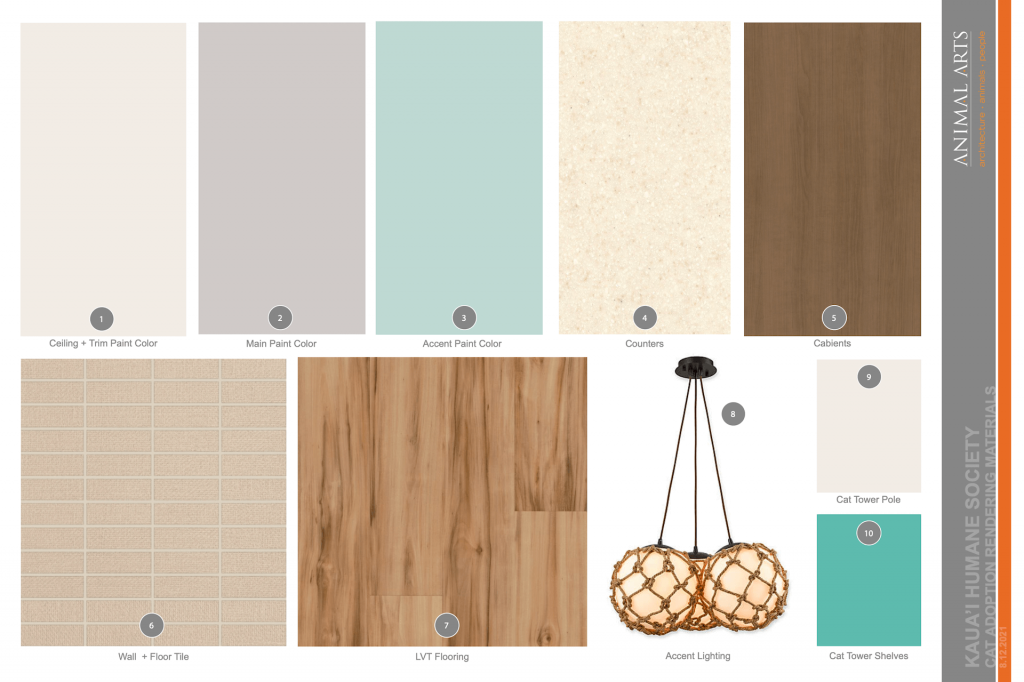
- a materials specification.
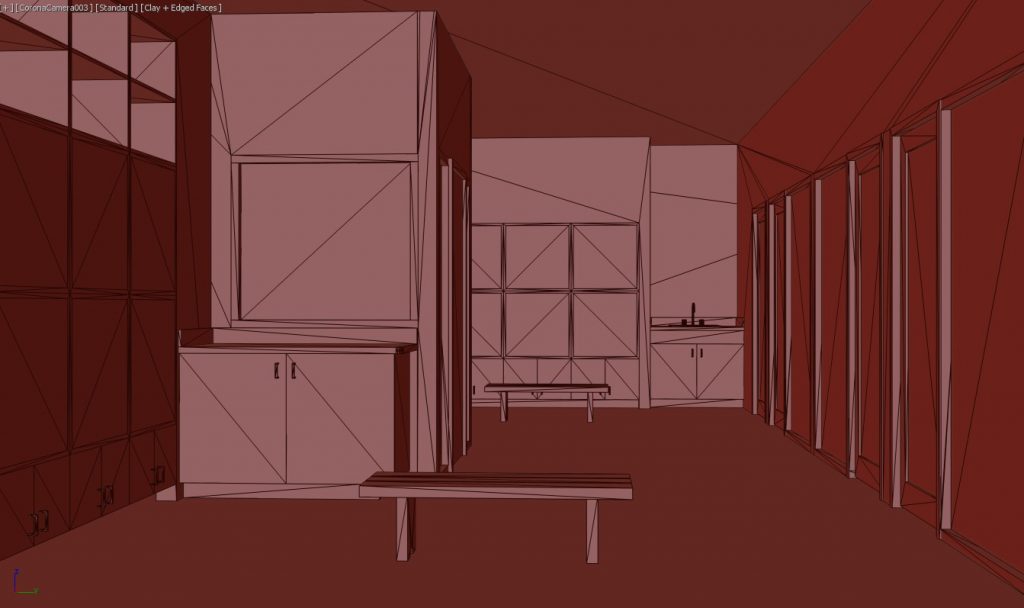
#3.2. First Version of the Rendering
Just like with the other two renders, we sent a colored draft image to Mariah first. We needed her opinion on the interior geometry of the building, as well as colors, materials, and lighting.
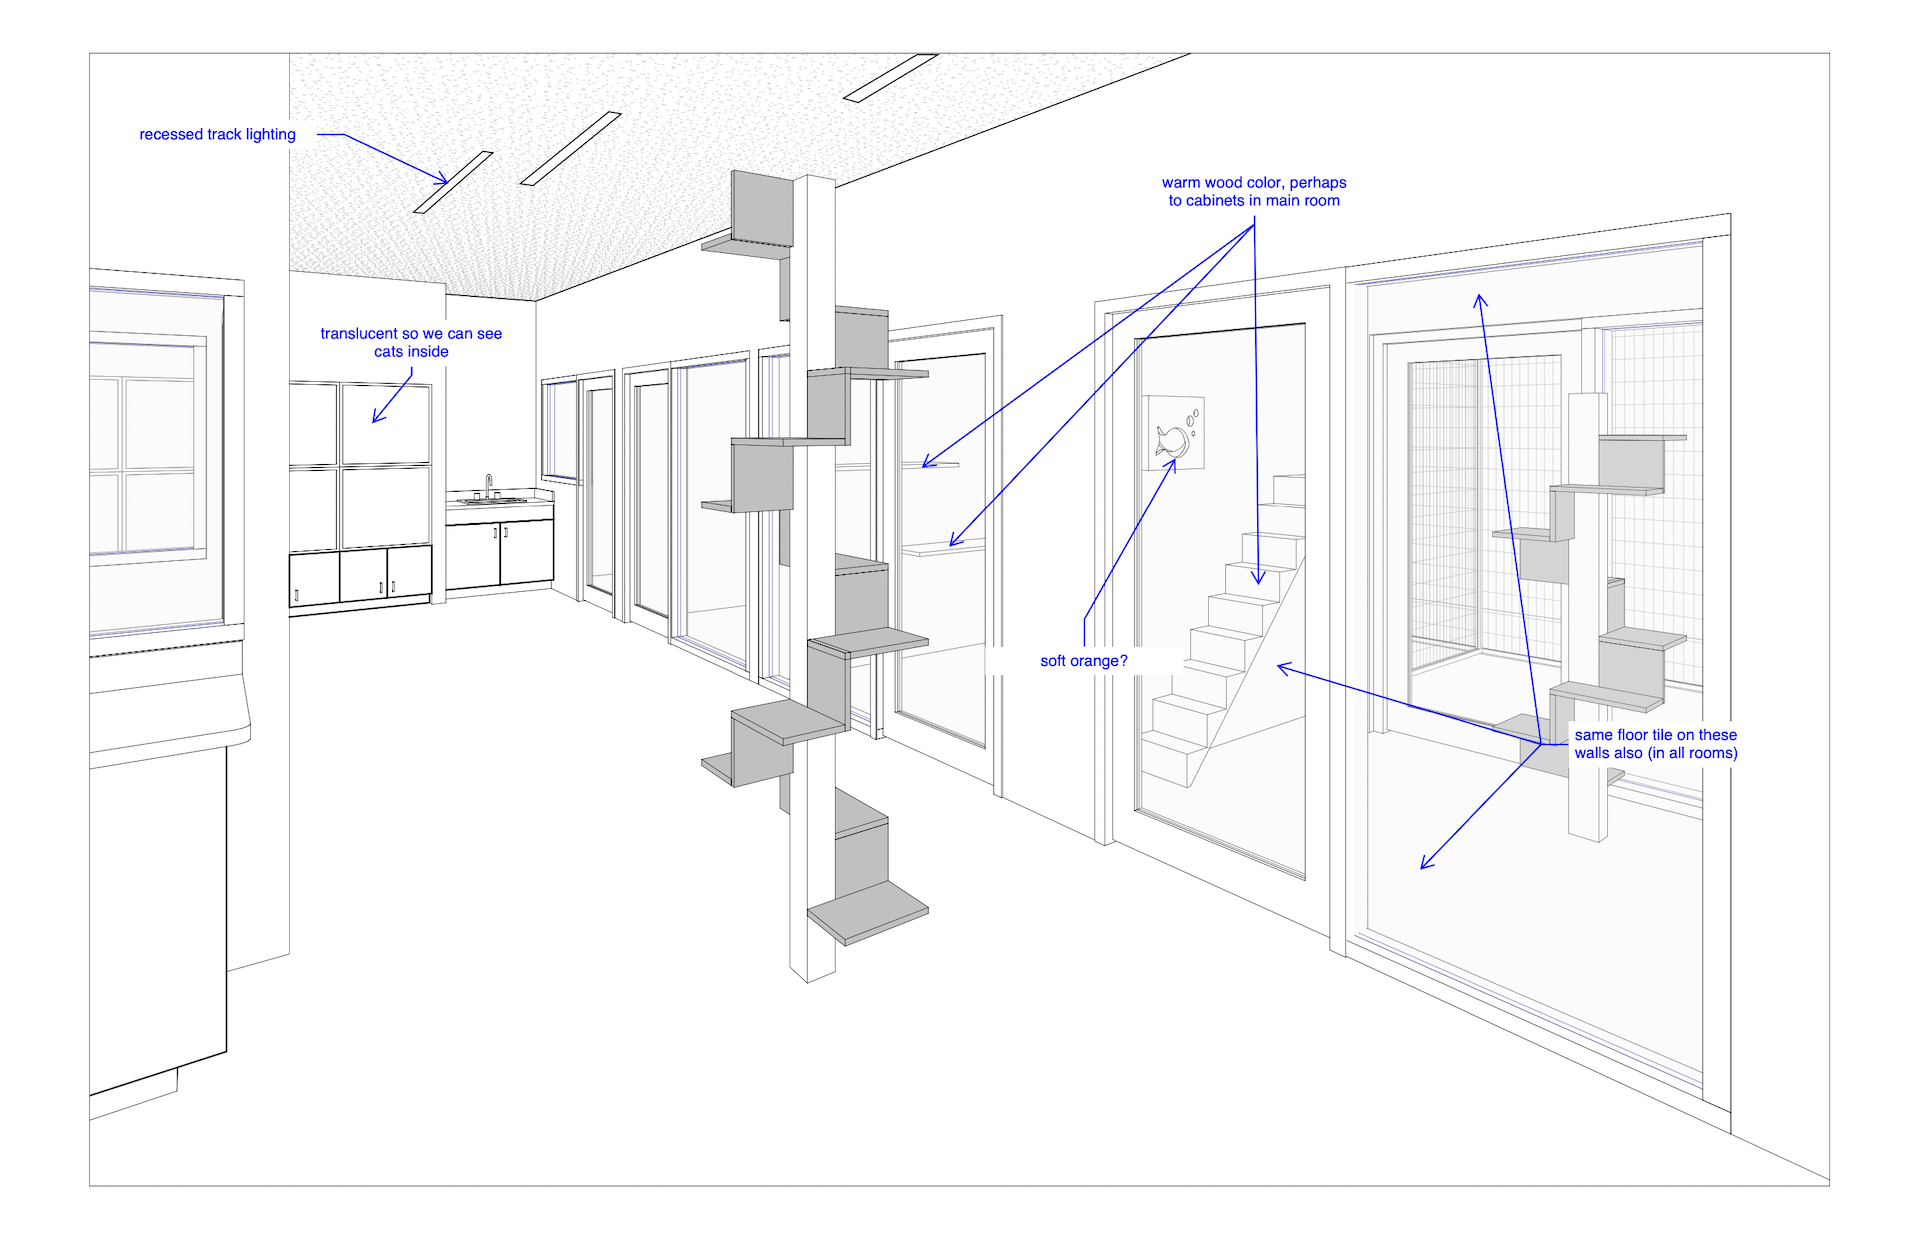
#3.3. Revision
Here are the notes we received from the client. As you can see, there were very few of them. She also sent us an updated Revit model with some new elements we needed to add. Those were pointed out in the scheme below.
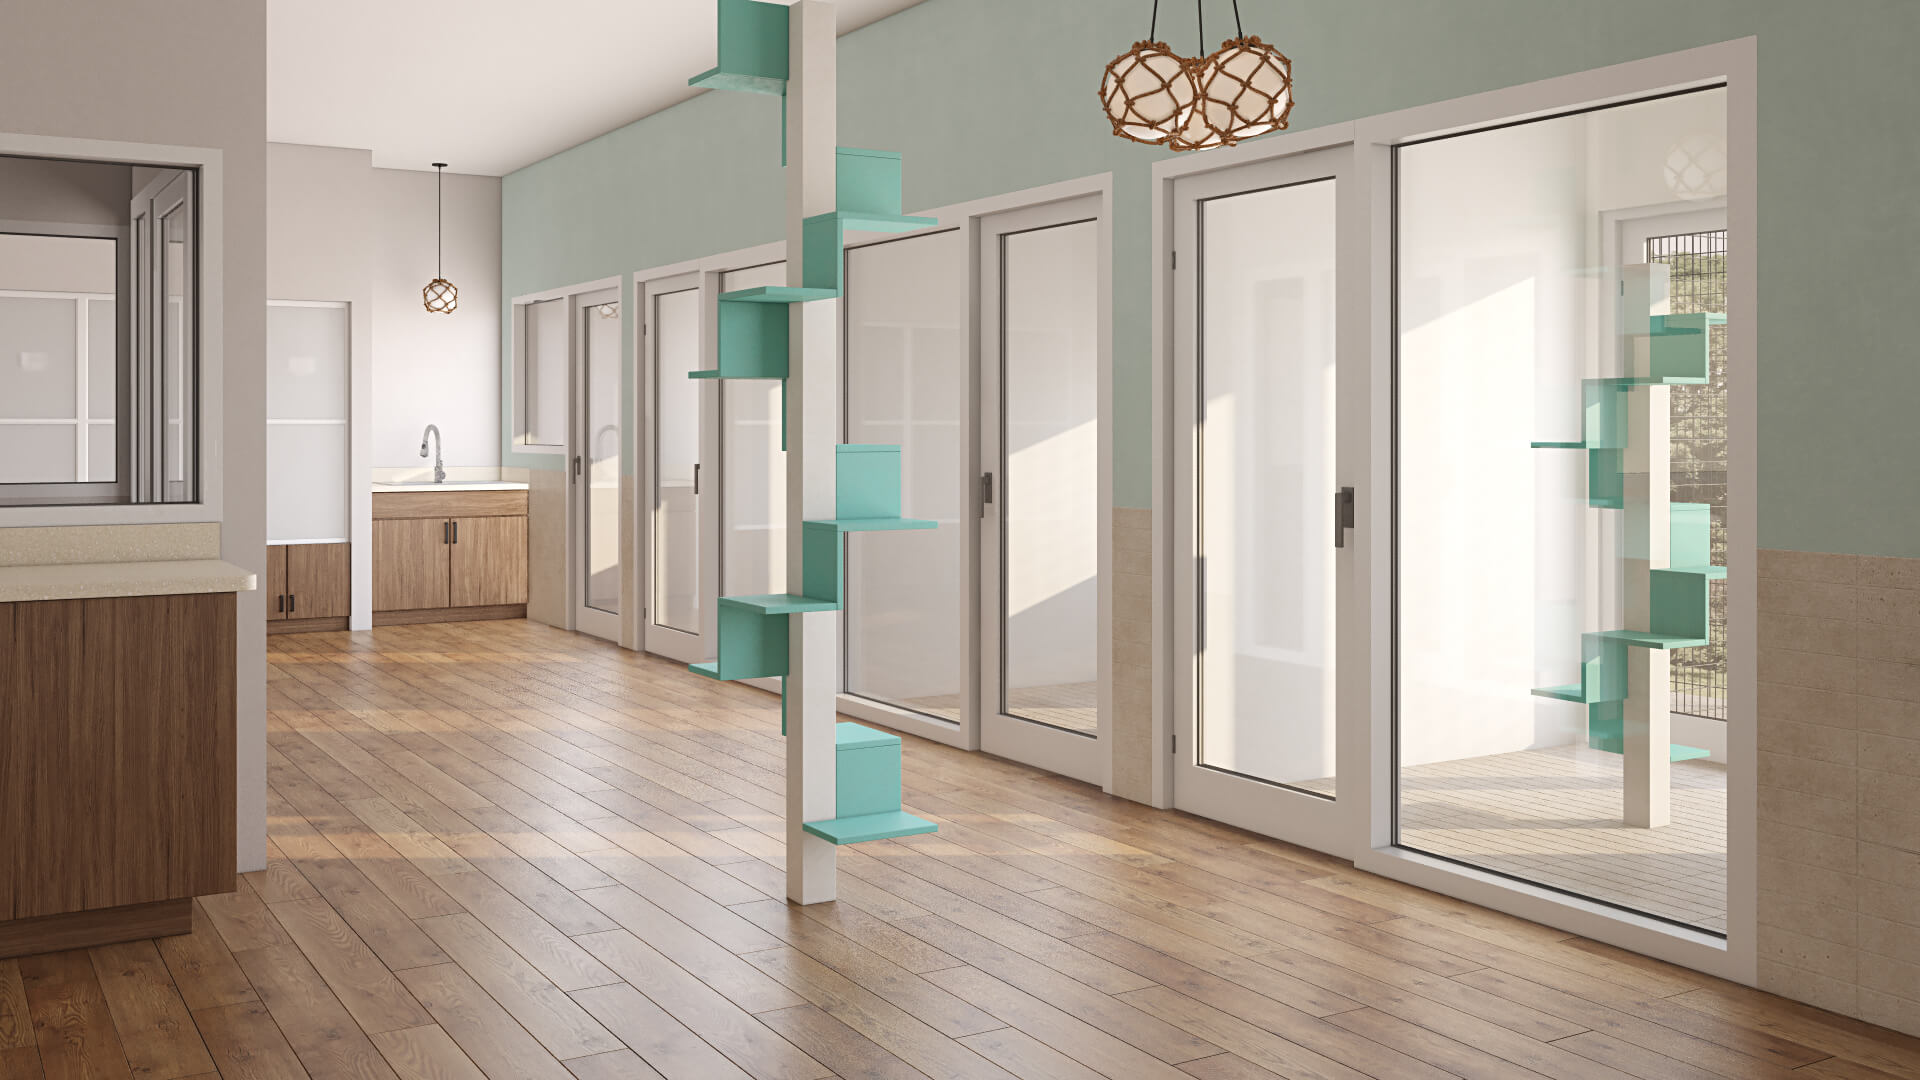
The 3D artist quickly made all the requested changes and sent Mariah the updated 3D rendering for a check-up the next day.

She loved the result and gave us the green light to proceed with finalizing the image.
#3.4. Post-Production
Now, it was time to fill the space with life by adding pictures of people and cats to the 3D rendering. Mariah made a draft layout showing their positioning in the room, and we appreciated the help.
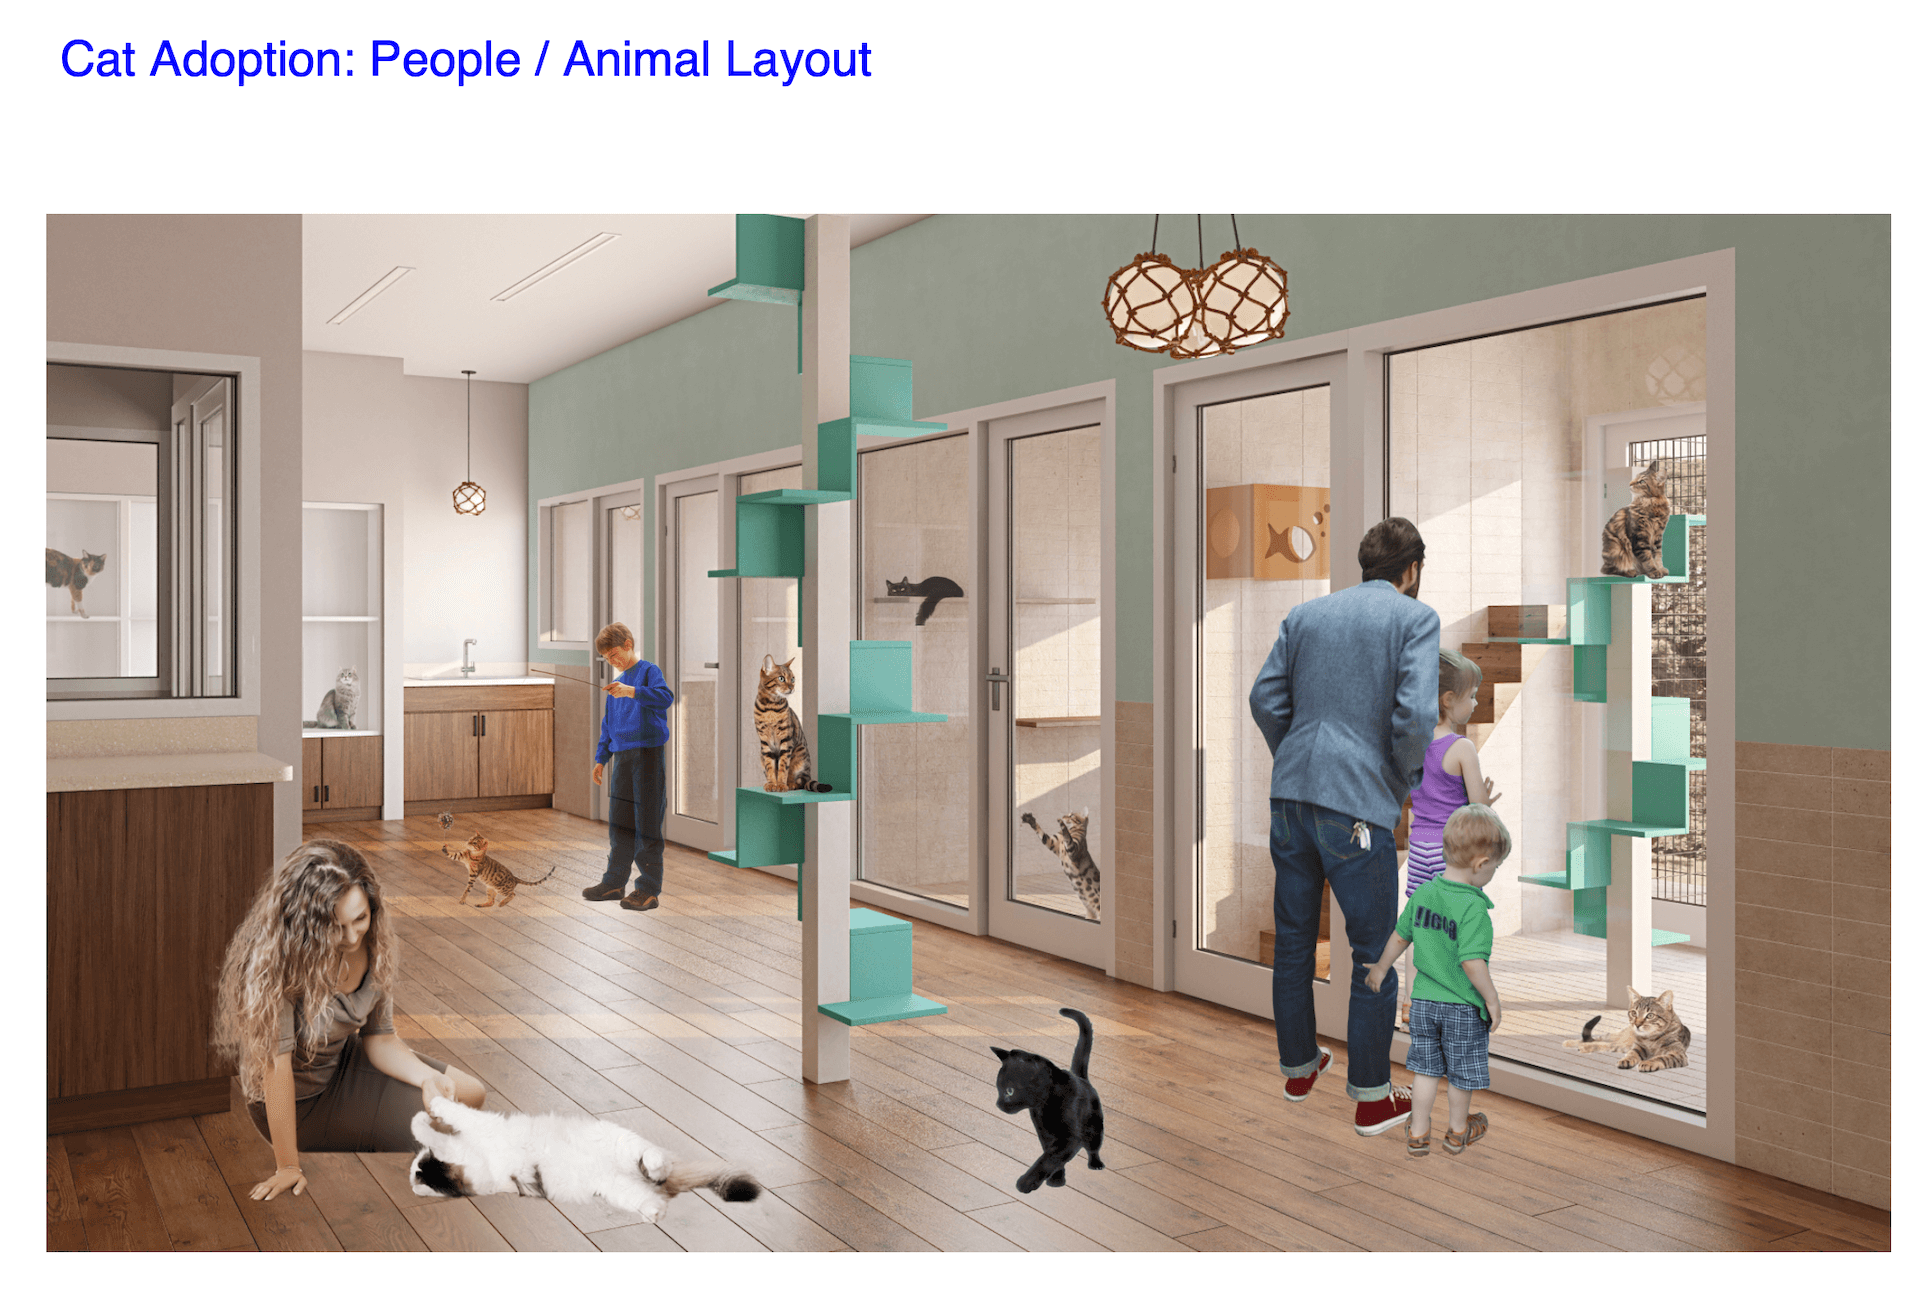
Below is the first draft image we sent for revision. At this point, the stock pictures were approximate, so they haven’t been blended in seamlessly yet.
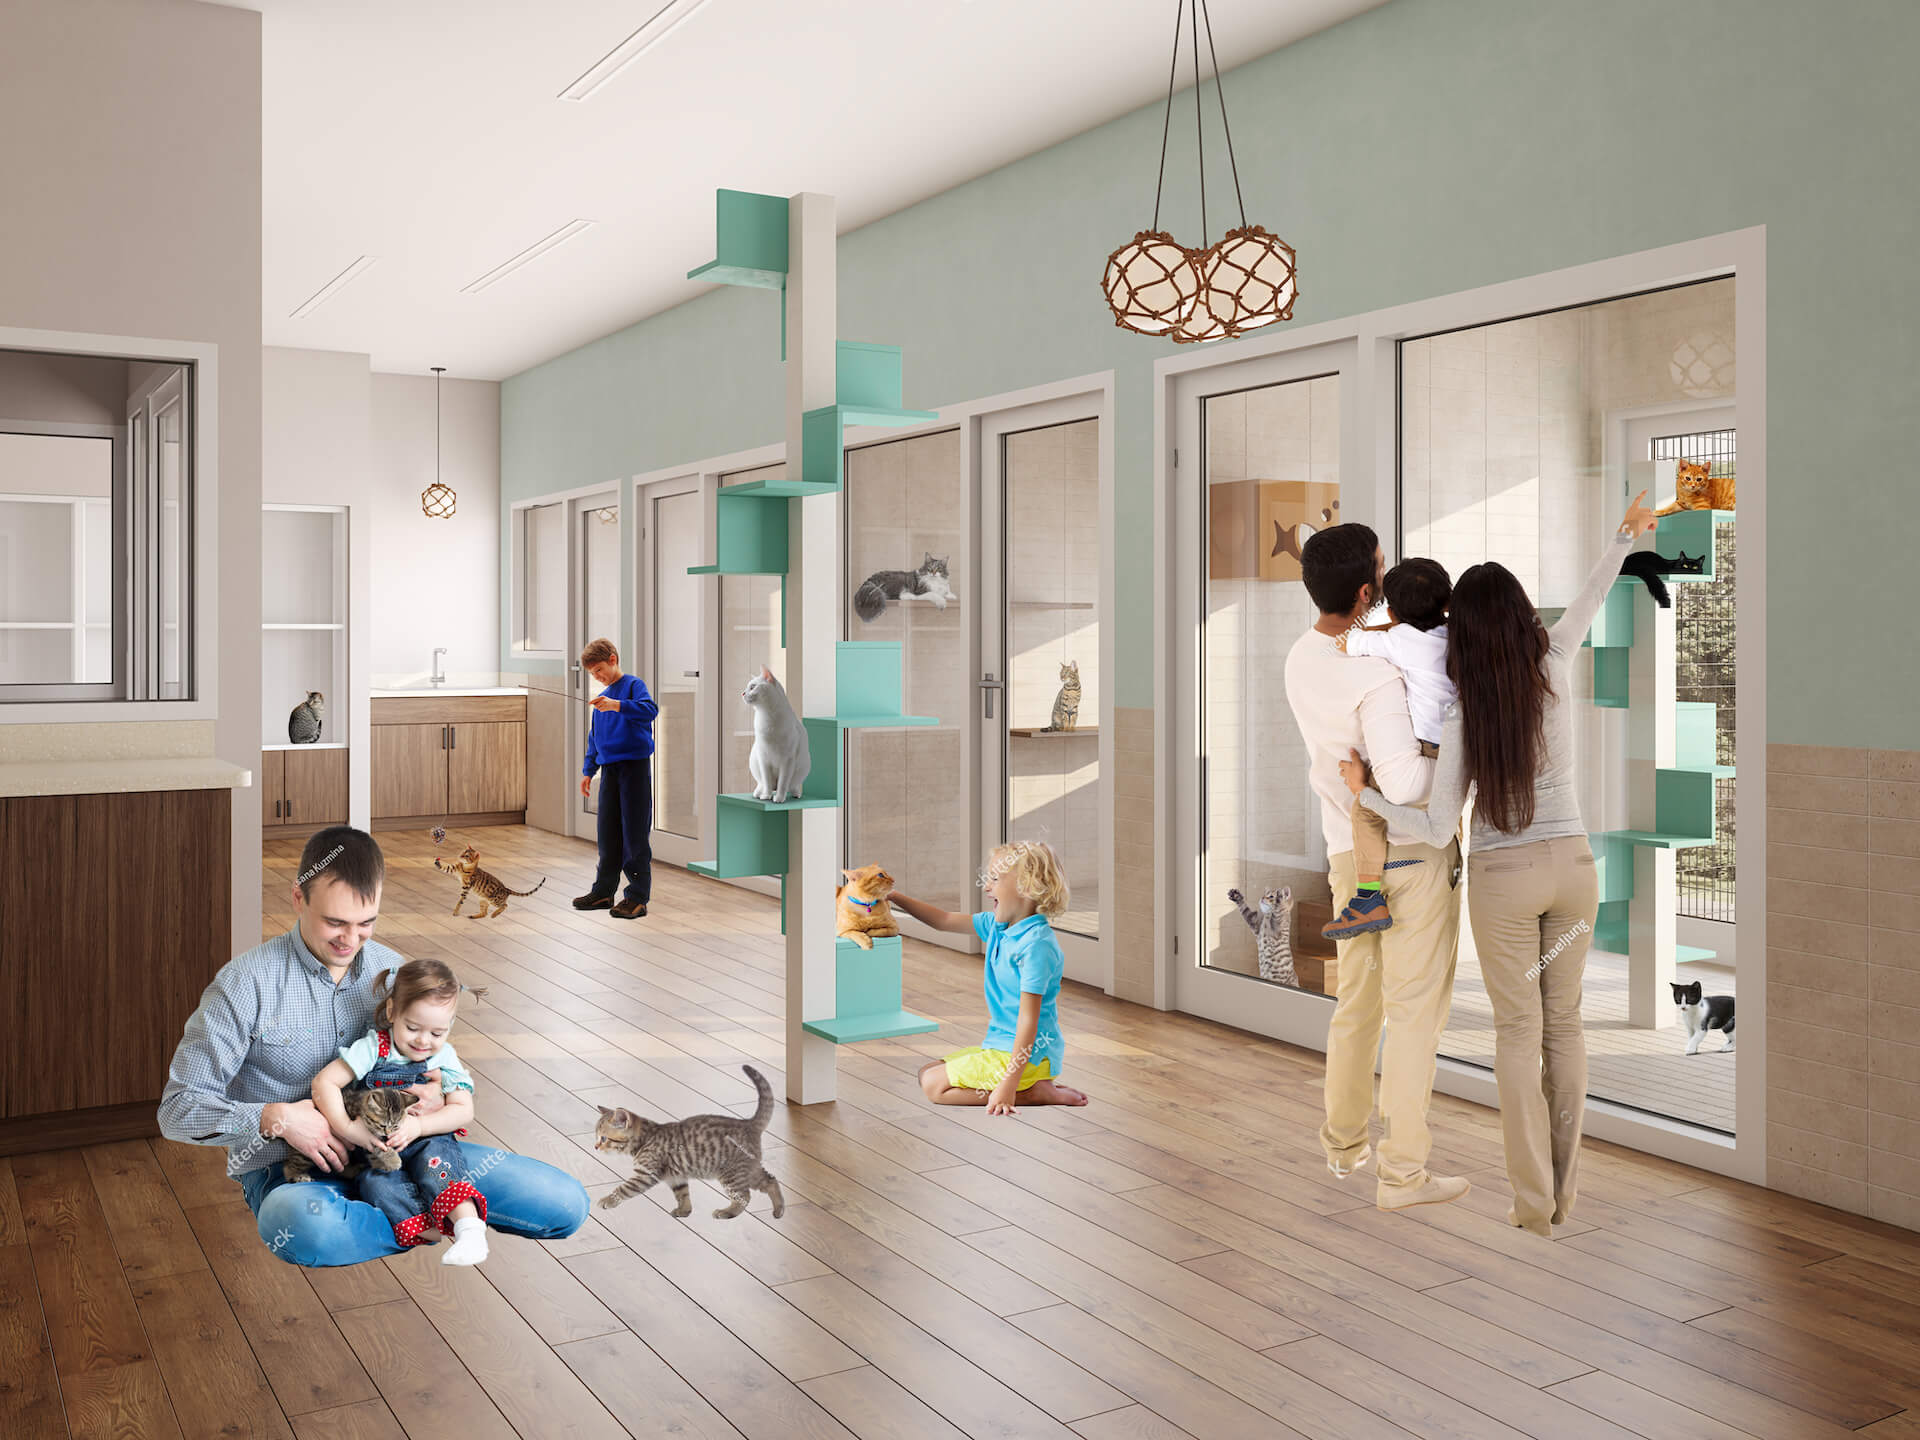
The client liked the positioning of the photos but asked us to replace some of the people. She also wanted us to place a cat or two in the cages in the background window.
This time, our Photoshop expert created two options for Mariah to choose from. You can see them below.
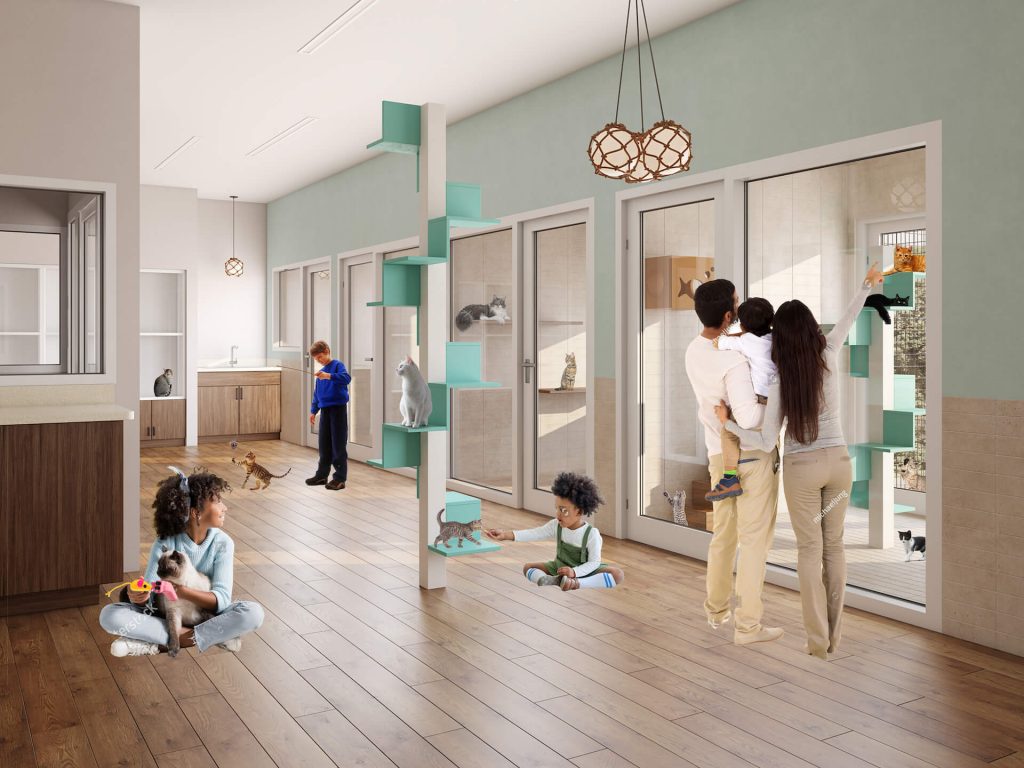
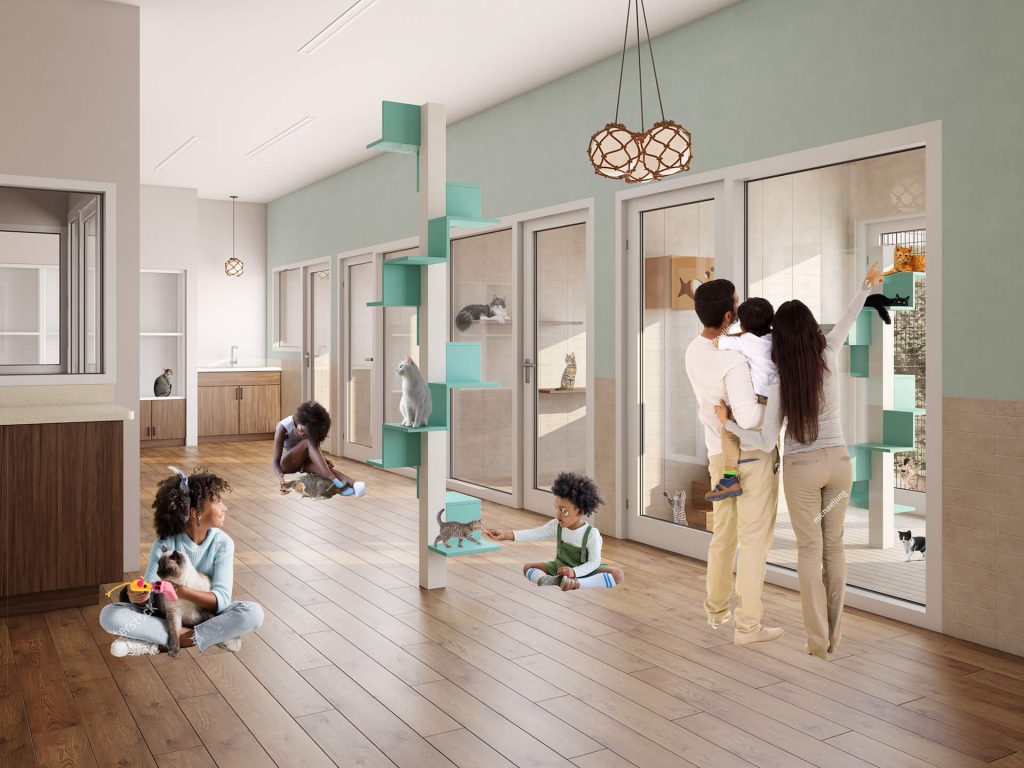
She chose the first image, and the post-production specialist went on to finalize it.
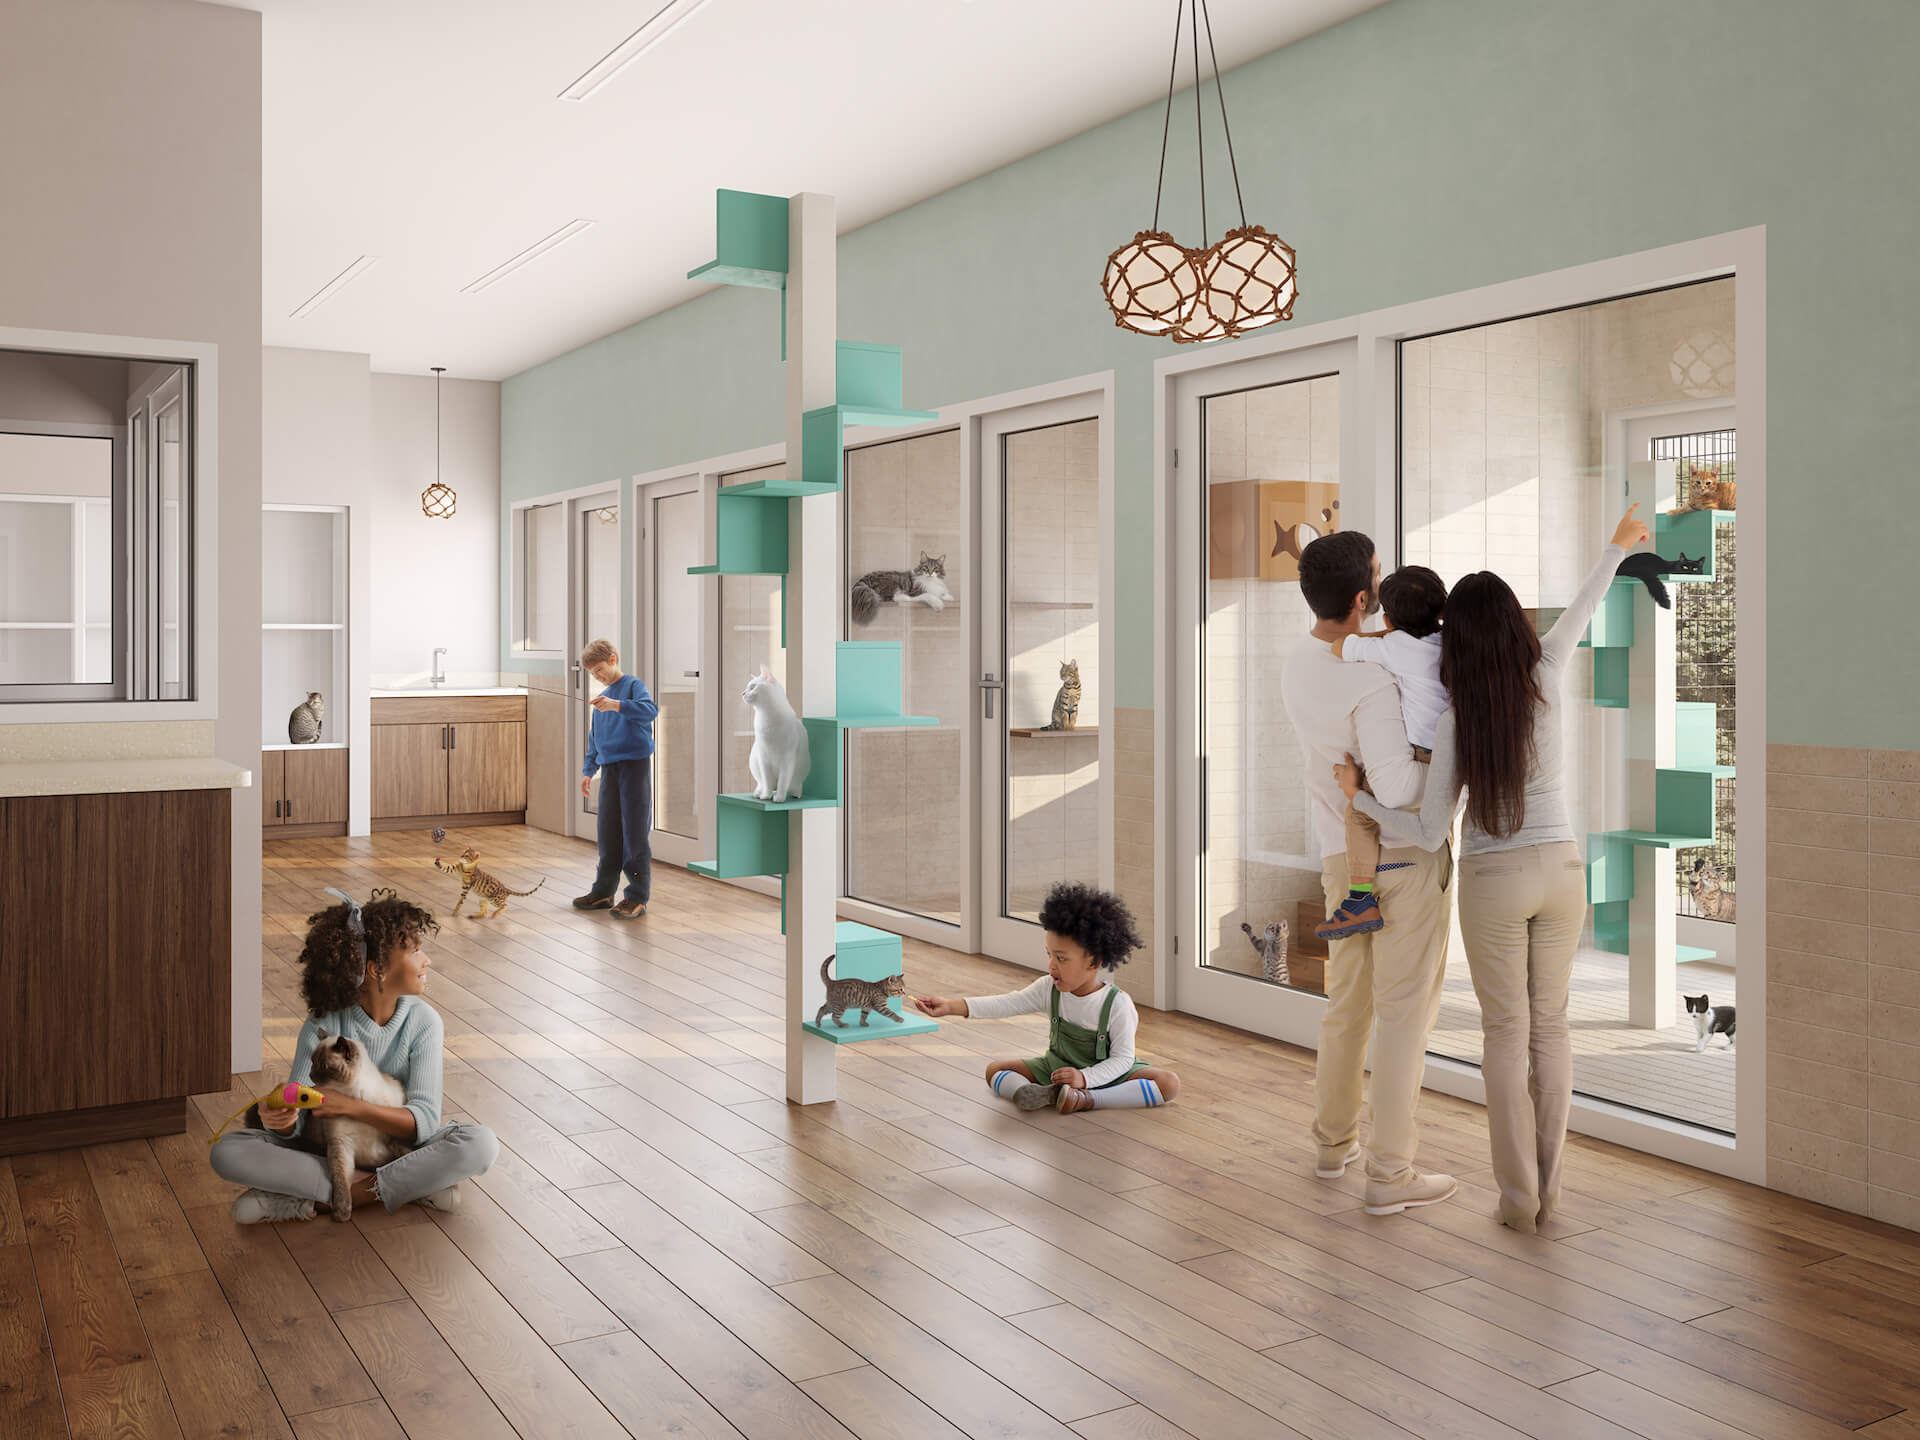
And this is the final look of the third and last 3D building rendering in this visualization project.
All Final Results in 4k
Now, we’d like to show you all the final renders together, in one place. So, here they are, in 4k resolution. We’ve made sure to convey the welcoming atmosphere of both the exterior and interior design of the building in these visuals. And we’re certain that once this project is realized, this beautiful institution will be a place where animals can get top-level treatment, as well as find new loving families.
Click to see the full-size images.
We wish success to Mariah and her team in this and all the other projects they do. Also, we fully support the cause, which is all about helping animals, whether they are pets or strays.
Our team is very grateful for the amazing review Mariah wrote about ArchiCGI on Trustpilot. We can’t wait to work with Animal Arts again at any time.
Looking for professional CGI services? Contact us at ArchiCGI and get photorealistic visuals for any type of residential and non-residential building design!
Ana Wayne
Content Writer, Copywriter
Ana is a content writer for ArchiCGI. She has a passion for design and architecture - and for talking about it. Outside of work, she is a fan of sci-fi movies and a street food connoisseur.
Like this project? We’ve got plenty more! Check out these CGI beauties.