Interior and Exterior Renderings for a Villa in Georgia, US
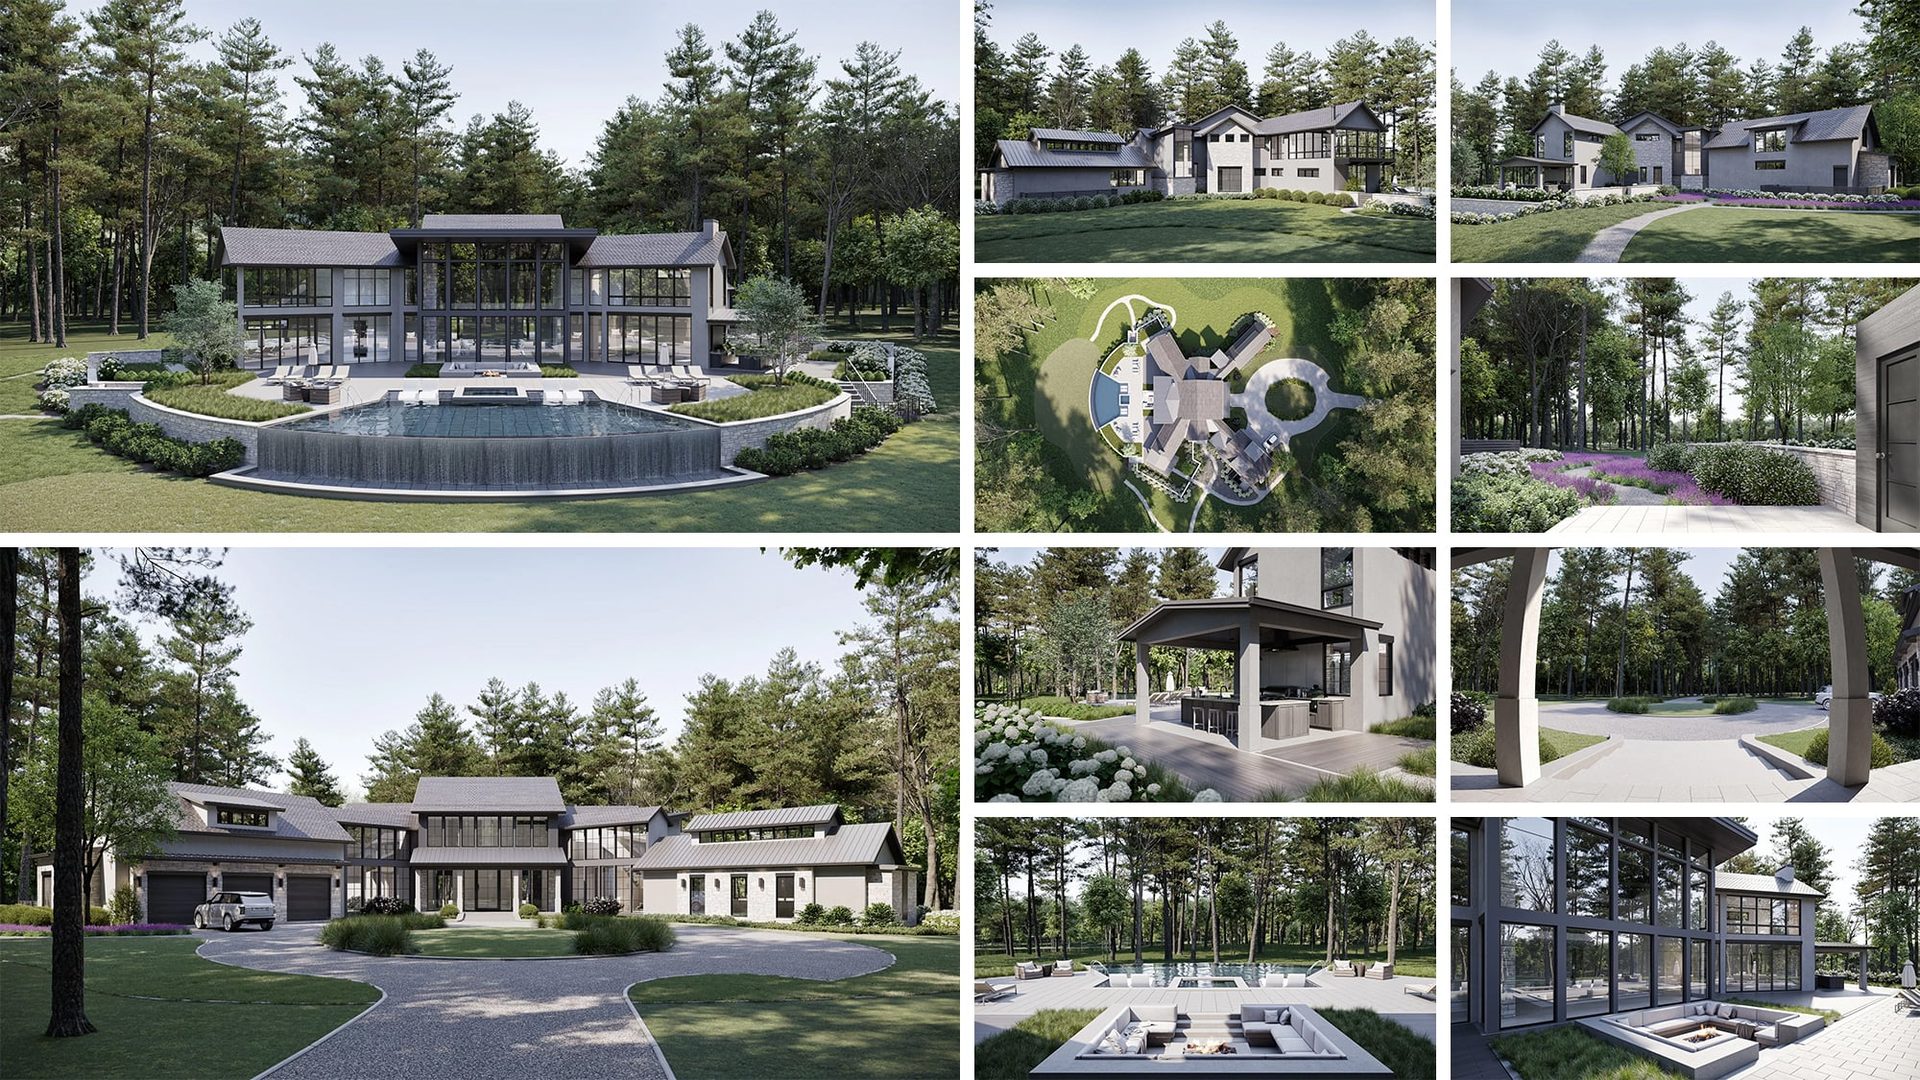
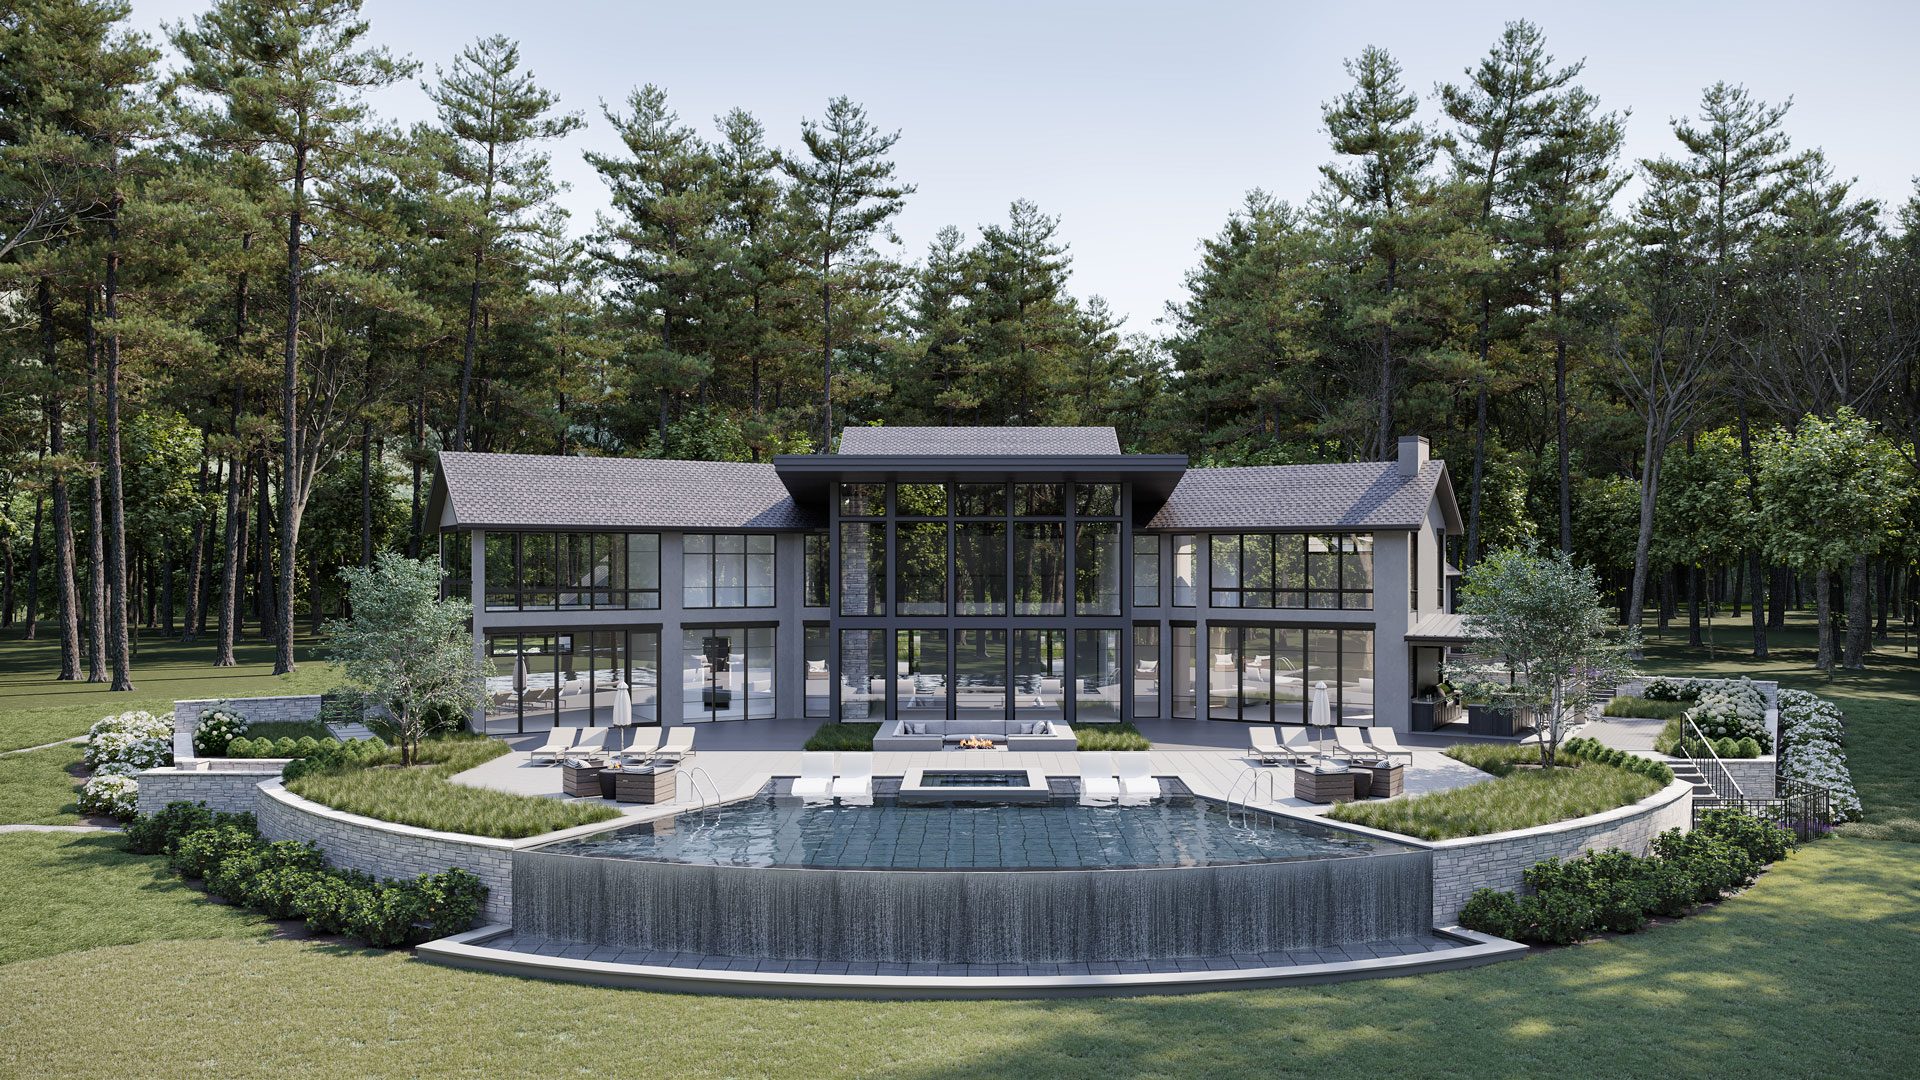
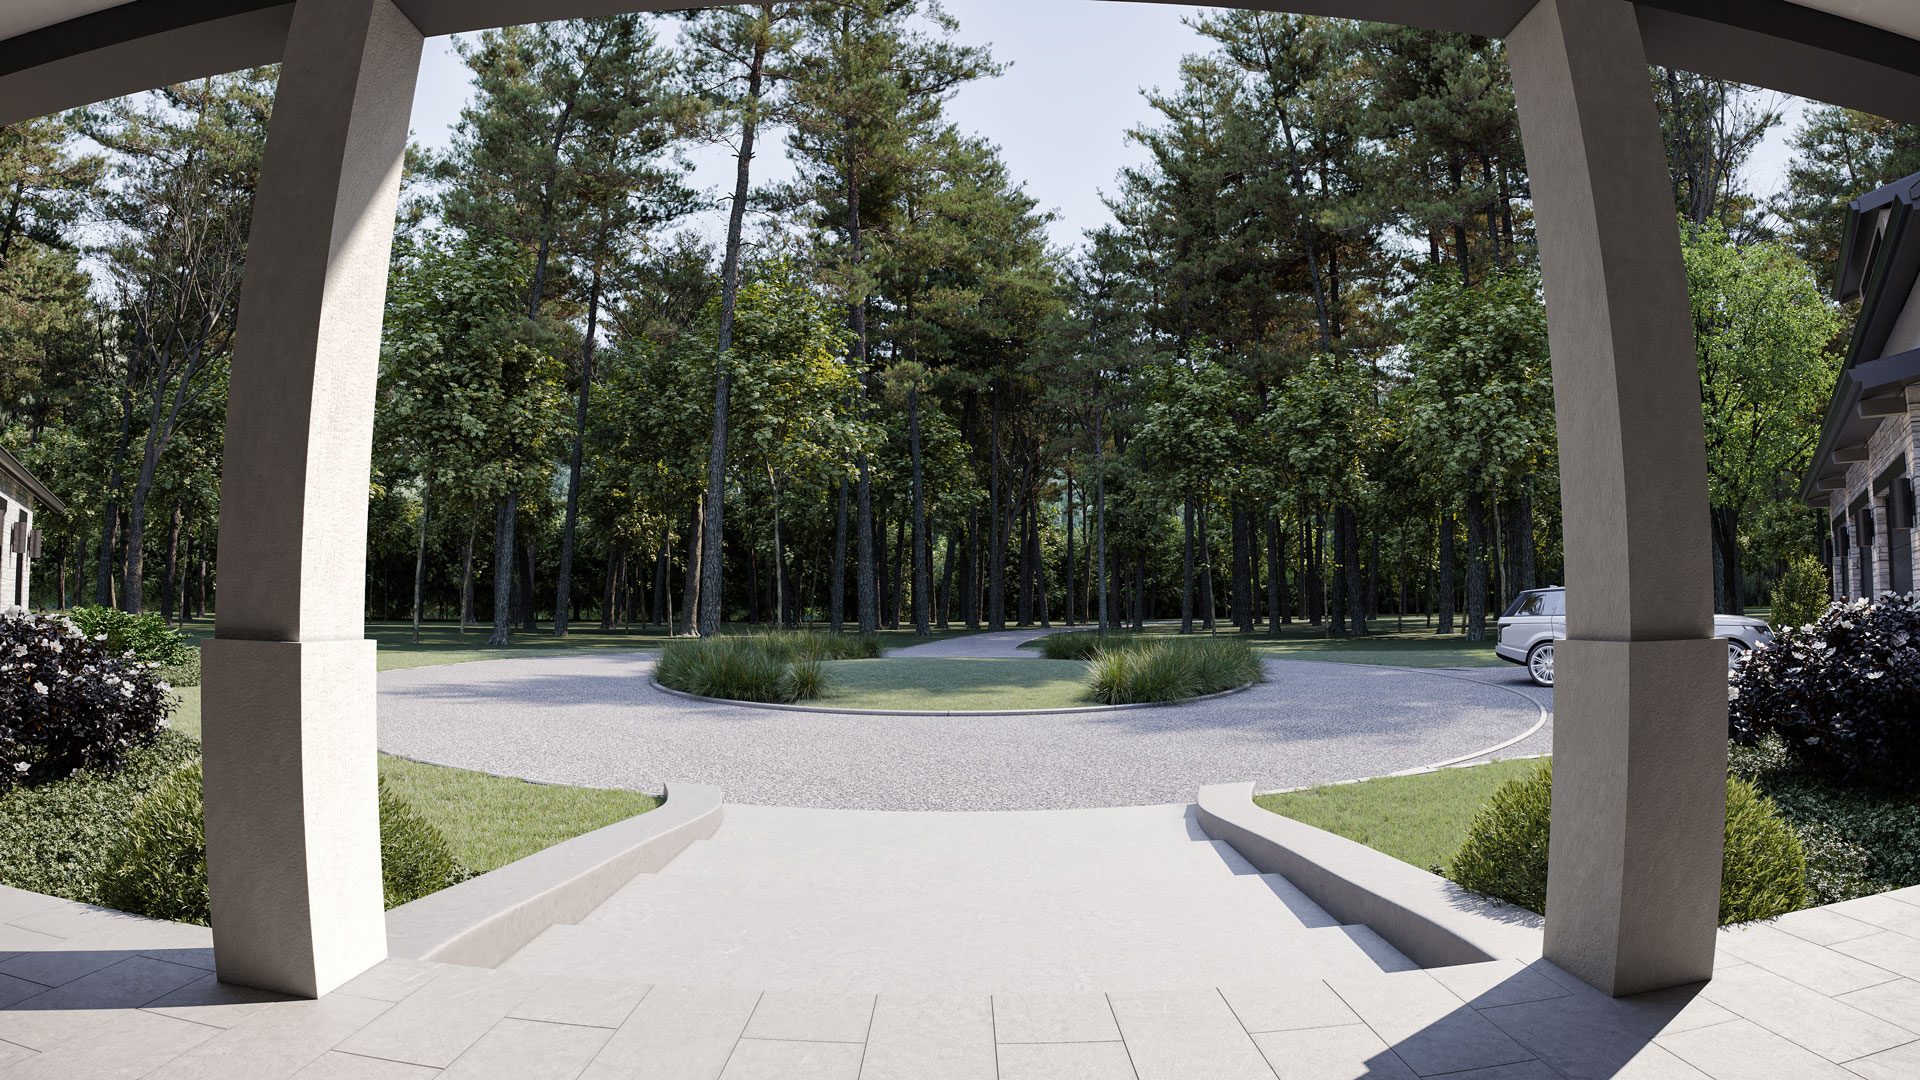
Interior and exterior renderings can show architectural designs of any scale. Visual aesthetics, functionality, powerful atmosphere — CGI will show everything in photorealistic quality. Just look at the 3D render above. Don’t you feel like you are standing by the villa, feeling the warm sun on your face? You can practically hear the rustling of the leaves, birds chirping, and the trickling of water. That’s the effect lifelike 3D architectural rendering has on viewers.
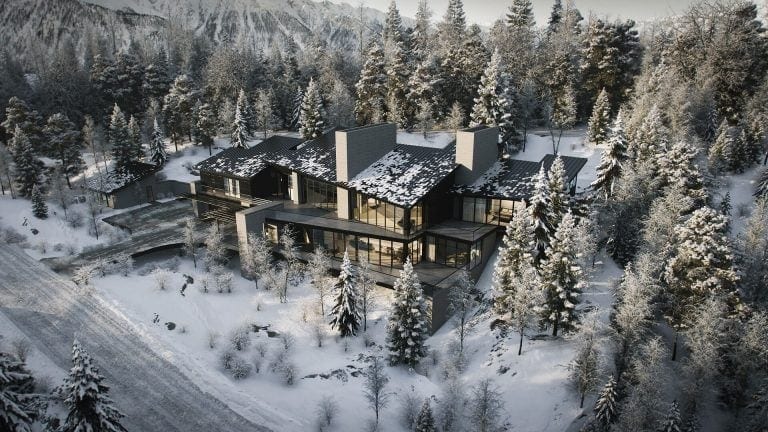
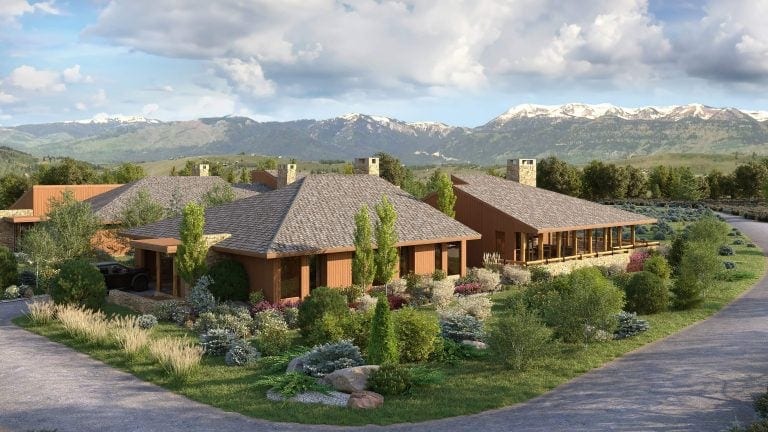
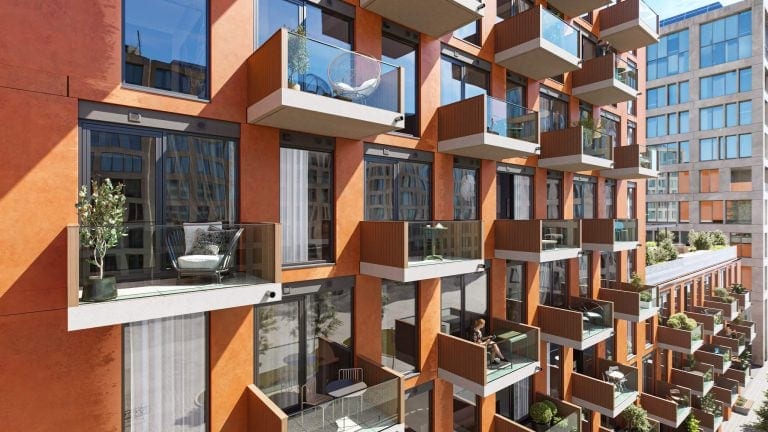
This project started when Mark Shattuck from Cornerstone Design Studio contacted us in February 2022. We had already been working together for 5 years and created interior and exterior renderings for about 20 houses designed by the studio. Below you can see some of the results of our collaboration.
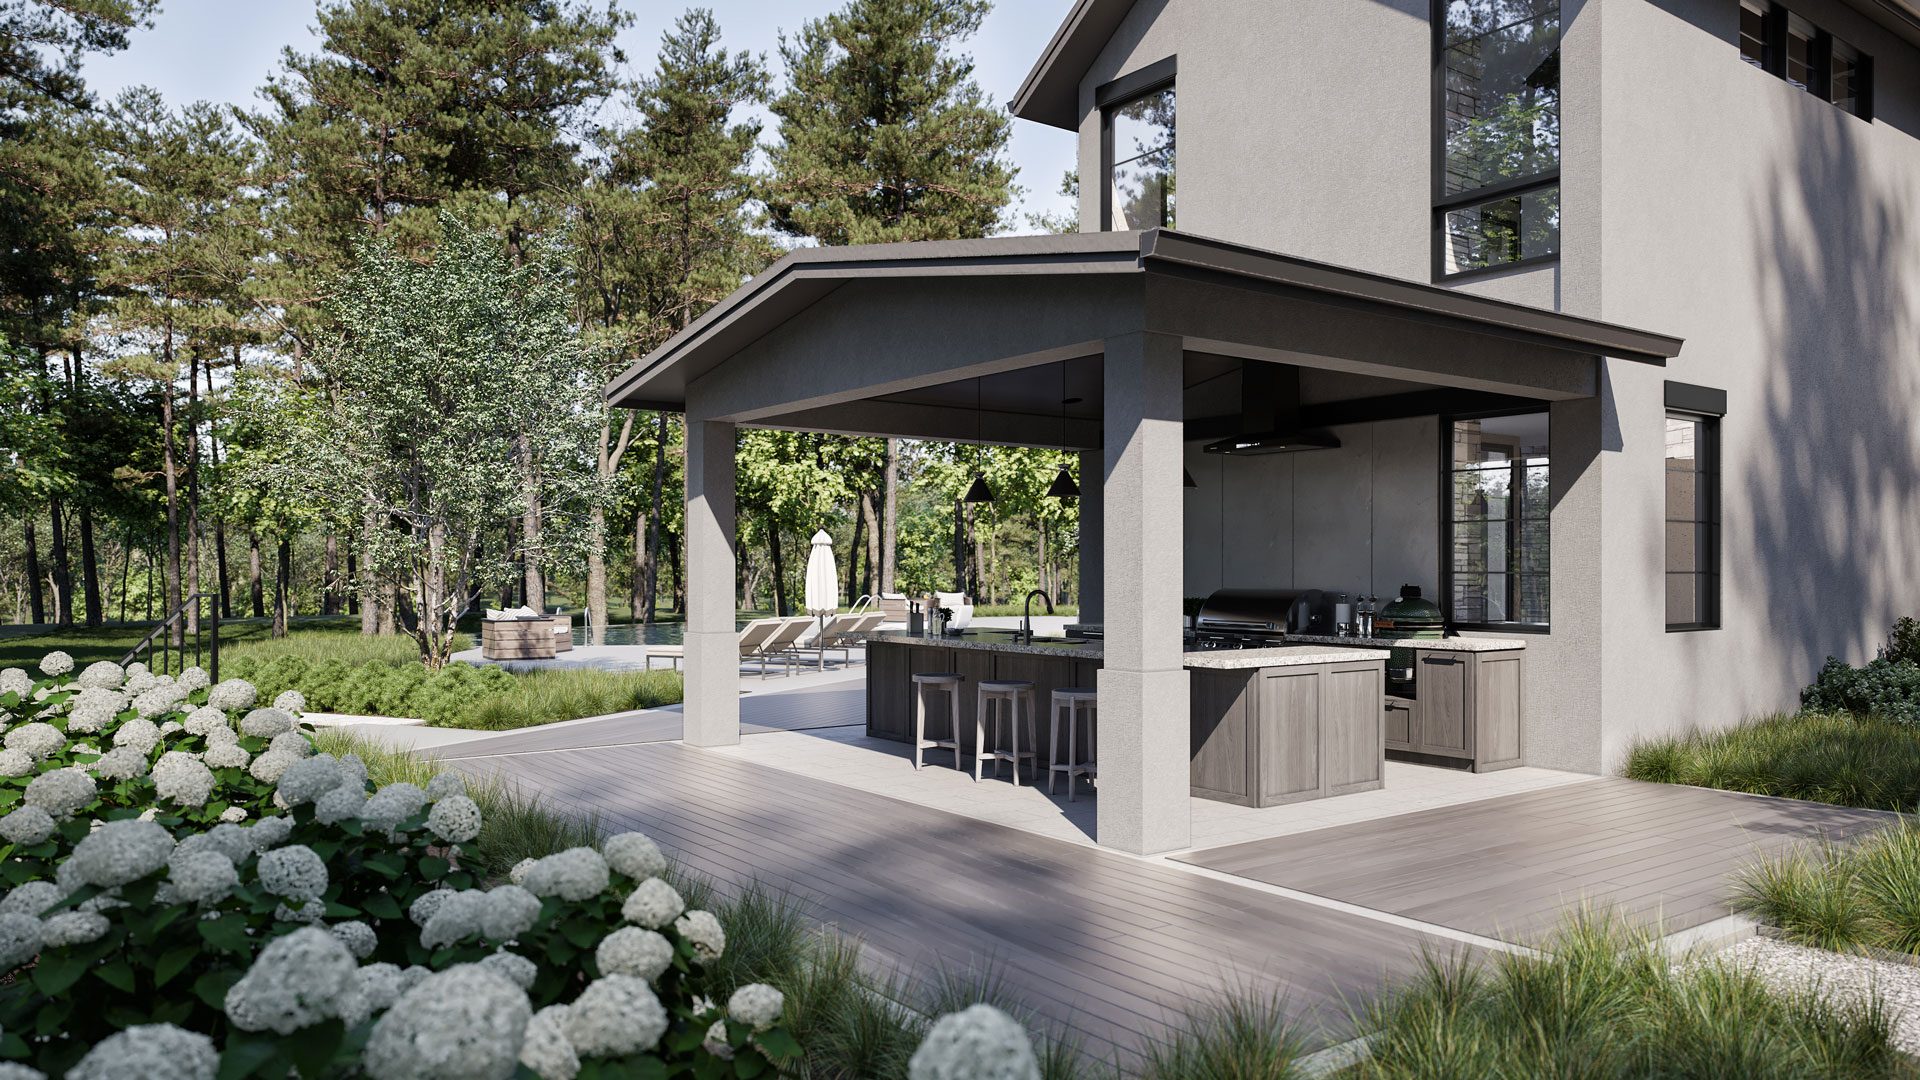
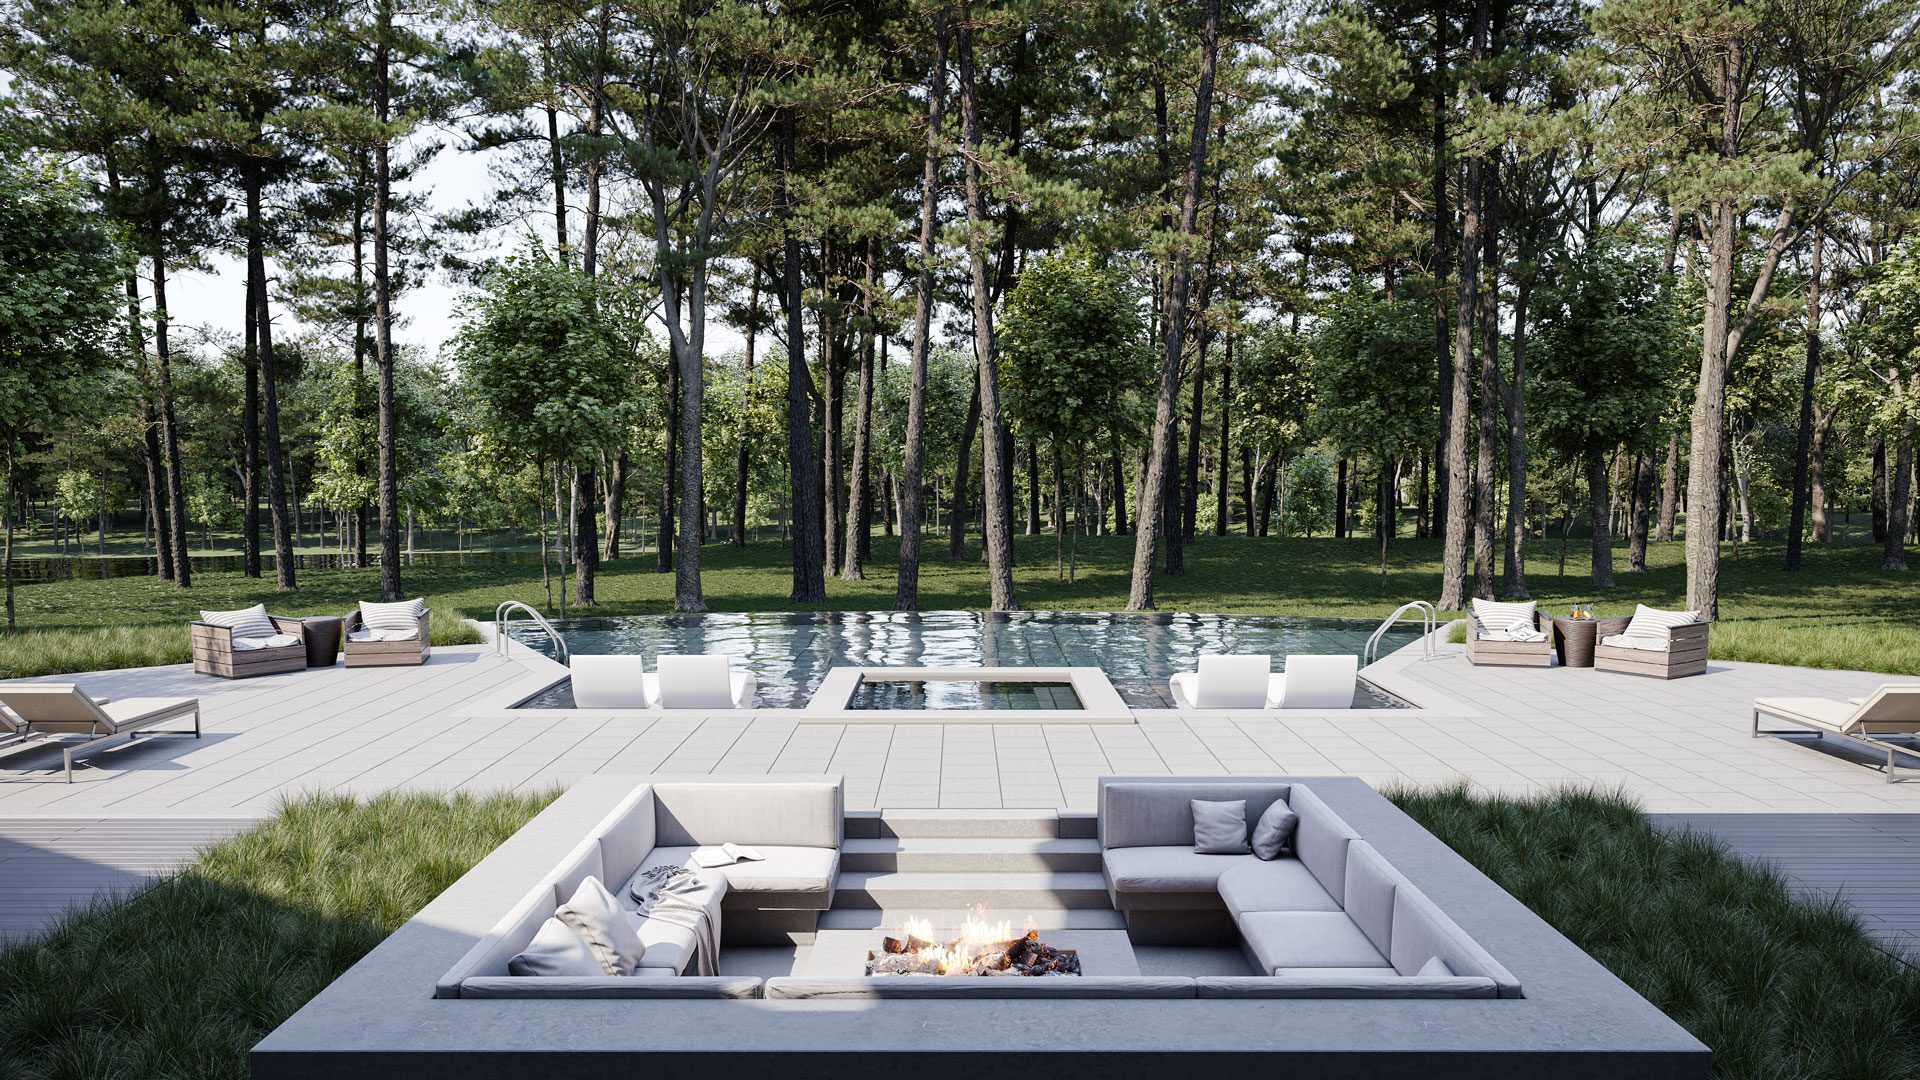
So this time, Mark needed imagery for a mansion that would capture 250 degrees of lake views from practically every room. The project included a pool, a fire pit, and an outdoor kitchen for the ultimate entertainment. A dream about to come true! You can see it from the 3D renderings.
CGI Project Details
Before discovering the technical aspects, intermediate and final 3D renderings produced at every stage, let’s look at what we had at the outset.
Purpose
The interior and exterior renderings were commissioned to show the project to the client and adjust it to their liking whenever needed. Also, the final images were to be given to construction workers for a better understanding of the architectural design.
CGI Production Workflow

Overall, the process was close to our standard 3D rendering production pipeline. It allowed the CGI team to go back to any stage at any time and make the necessary changes while keeping the processes easy to coordinate. The project included 3 review rounds free of charge.
We have agreed with Mark to submit grayscale 3D renderings within 5-6 days. We could generate about 8 views at once so that the client could choose 4 out of them. Then, we would send fully textured renderings.
As for the process, we were to split the workload between senior 3D artists so they model the landscape, the house interior and the exterior at the same time.
Task
We needed to produce:
- 4 exterior elevation renderings;
- 1 rooftop rendering;
- 4 detailed close-up renderings — for the outdoor kitchen, fire pit, front porch, outdoor shower and stairwell. The latter should include all landscaping, pool, decks, and firepit in accordance with the attached drawings.
The deliverables were to have a resolution of 4000 by 2250 px, 300.0 dpi, and the png file extension.
Critical Requirements
When a client has requests for the process or output, our PM records and puts them in a special block in our CGI CRM for all the CGI team to see. This block is called Critical Requirements.
In this project, the requirements were the following:
- 4K resolution;
- photorealistic quality;
- communication time had to start at 18.00.
Dedicated Visualization Team
At ArchiCGI, every client is assigned a CGI team with a PM and Mentor who organize the processes and ensure the two-round QA. So Mark worked with their usual CGI team on interior and exterior renderings.
Scope of Work
The brief for such a complex and multi-faceted project was detailed, specific, and well-written. It included the following information and attachments.
- Site photos;
- Site videos;
- Landscape designs;
- Revit 3D model;
- Reference photos for interior and exterior design;
- The view map for choosing the right angles for 3D renderings. Also, this map allows for a fast and accurate estimation of the work volume, time and cost;
- The landscape design in drawings;
- Google map coordinates with a screen capture attached;
- Detailed interior elevations, 2 full sections showing wall elevation details.
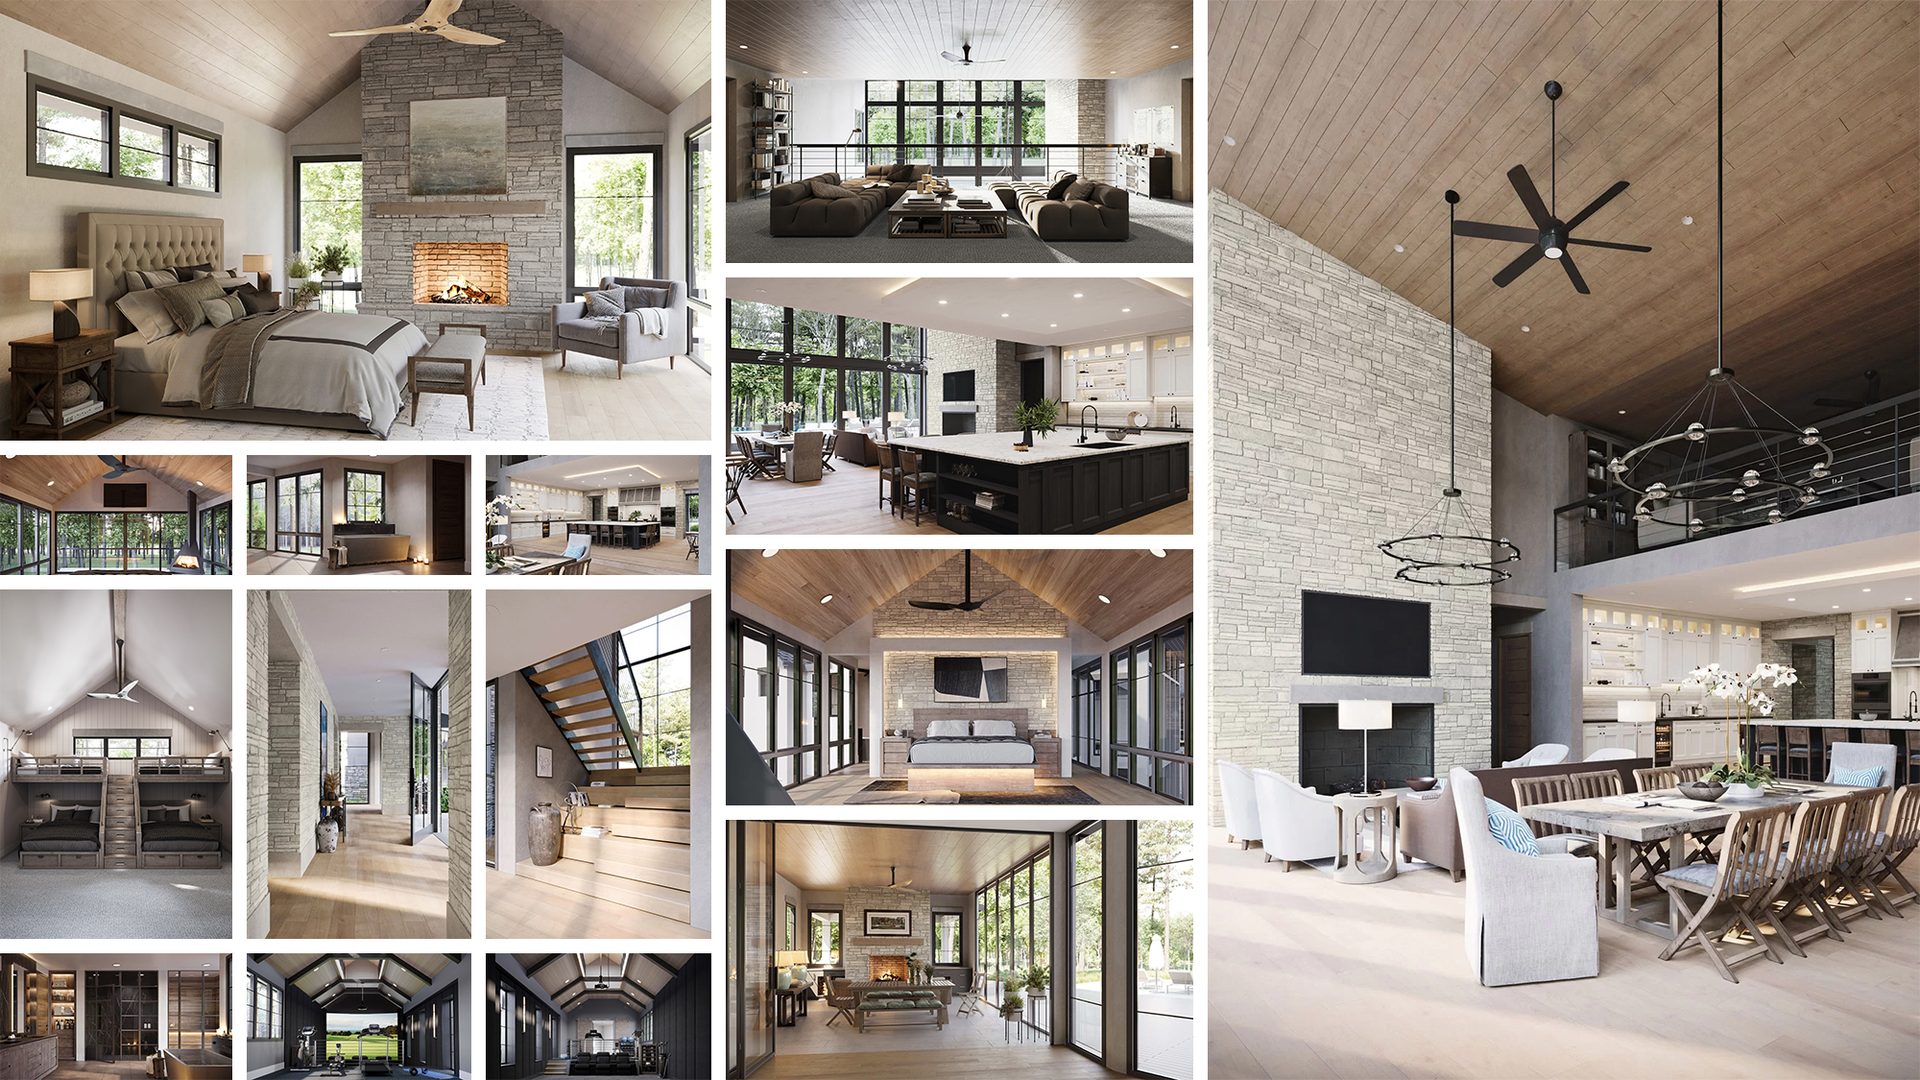
3D Interior Renderings Production
The CGI team worked on the interior and exterior renderings simultaneously. For convenient reading, we will separate these two categories. The interior visualizations will be broken by the spaces, while the exteriors will be examined in one batch.
Golf Simulator and Fitness Room Renders
In addition to the materials mentioned in the Scope of Work paragraph, the CGI artist working on this room had the link to flooring material, reference photos, and some notes.
We delivered resutls and made adjustments that Mark requested. Some of them included:
- golf end extended by 36”
- the spread of beams changed
- vaulted ceiling beyond clerestory changed.
- fans on the walls removed.
In addition, Mark’s client supplied drawings. We have clarified a few moments about materials, made the required changes, and submitted new interior renderings.
Weather Room Interior Render
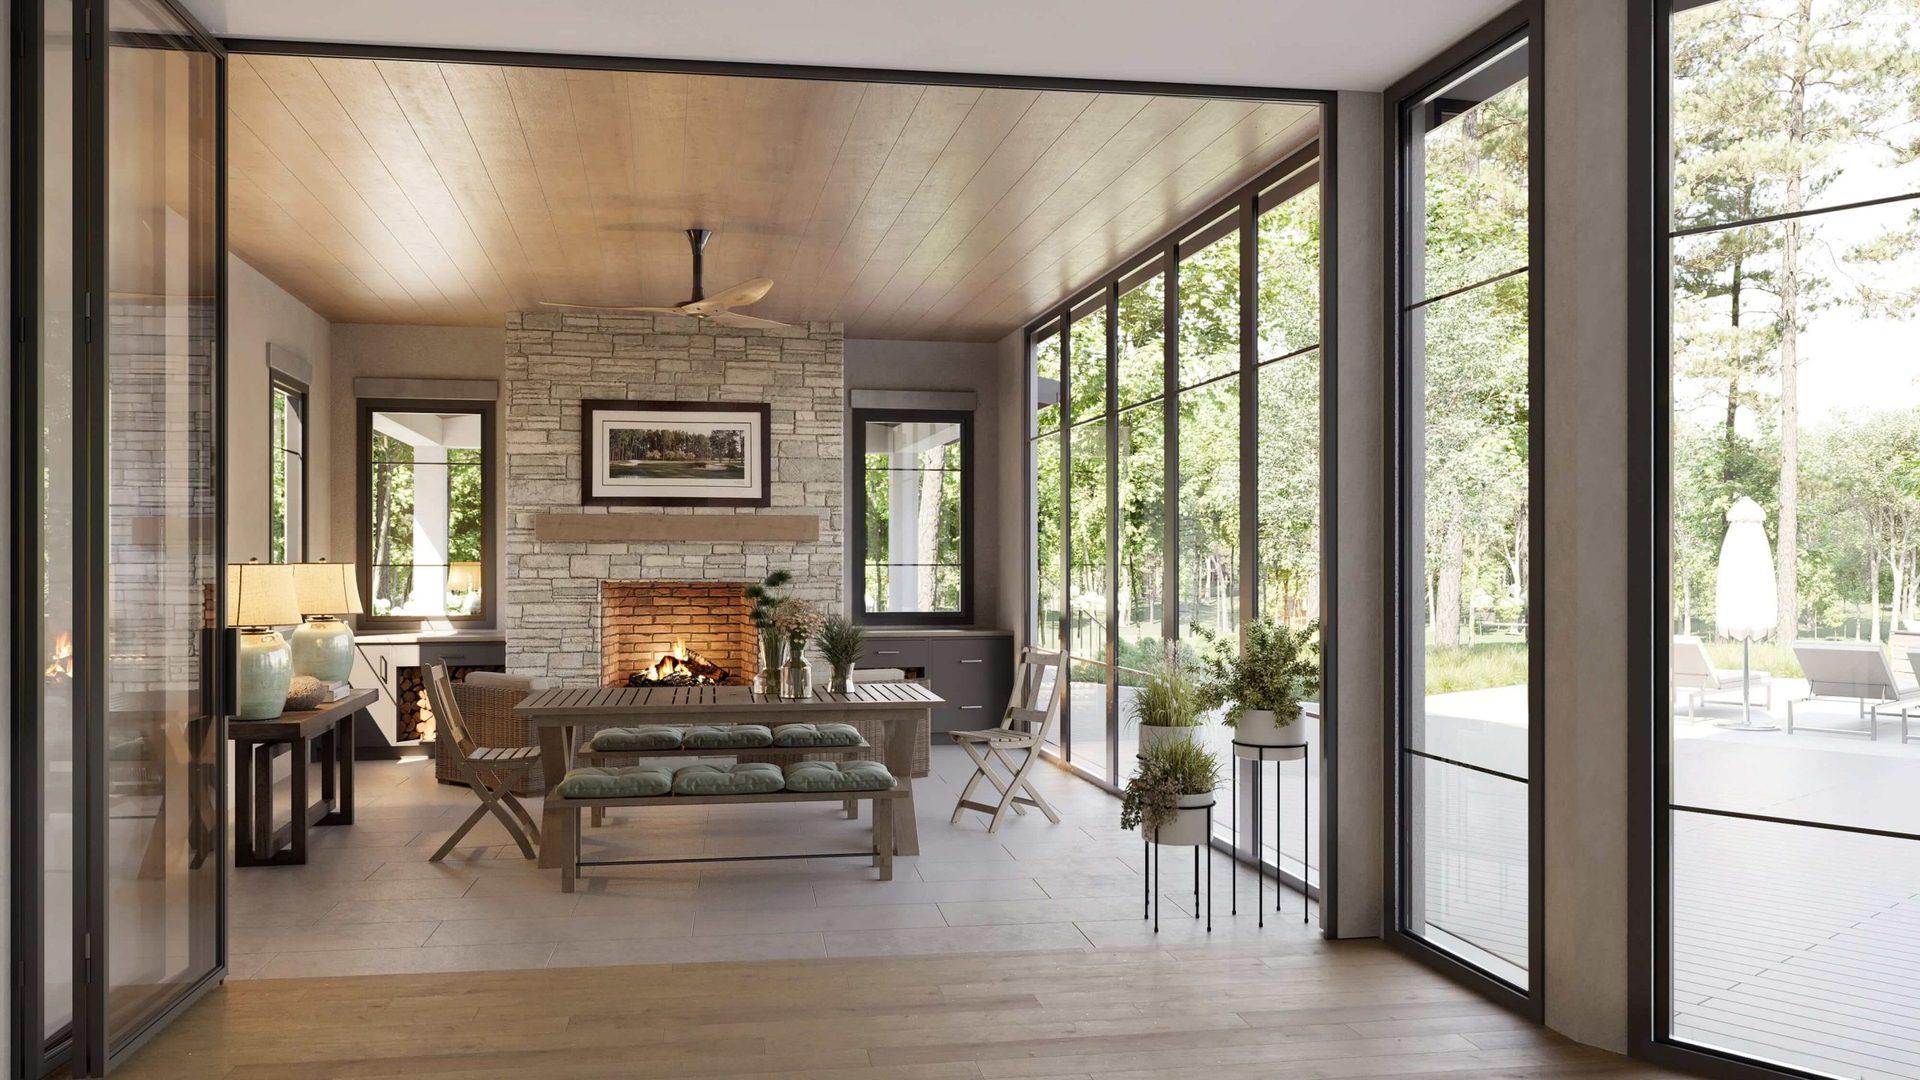
Based on the brief, which among other things included the floor plan and reference photos, we have provided interior rendering service for the Weather room. Mark responded that he liked the look and left some comments, too.

We were happy that Mark liked how the windows showed the exterior. A beautiful landscape is a major asset for a real estate piece, and the 3D render conveyed that.
As for the corrections, we were asked to change the ceiling height, doors, fireplace design and materials, ceiling fan model, the floor tiles placement. Also, we worked on the stone finish of the fireplace, flooring texture, and windows casing and size.
Mark approved the interior renderings and sent them to his client. The latter requested a few changes. Overall, there were two rounds of updates and then, we delivered the final version.
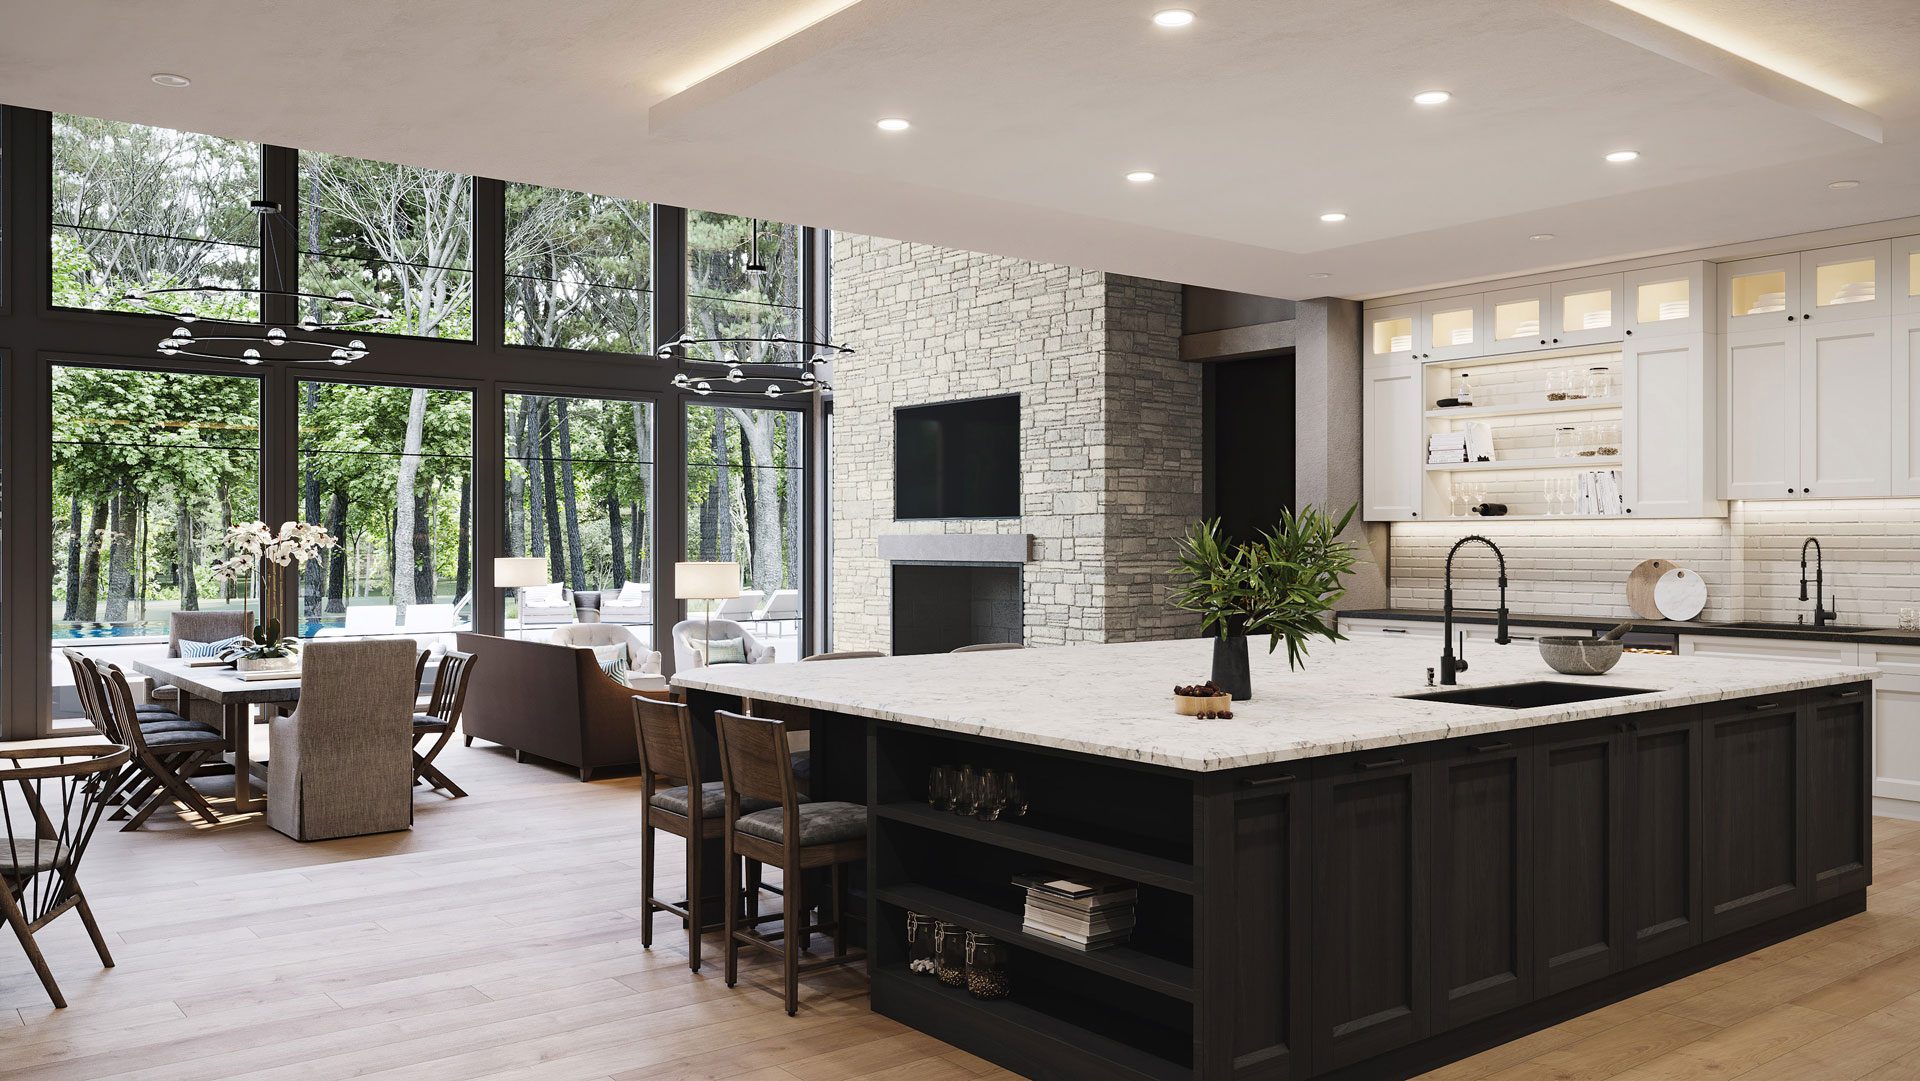
Kitchen and Great Room Interior Renders
The assignment included a lot of materials, in particular the house plan with view angles, reference photos, and design notes. So we just asked whether we should view sketch or plan as the primary source of information and started work.
When building the interior scene, the 3D visualizer selected the furniture and decor from our 3D library. This library includes whopping 67 332 items. One can find there everything any exterior and interior scene requires — indoor and outdoor furniture, decor, tableware, cookware, plants, light fixtures, even food and beverages. As usual, these came in handy in this task and the project in general. As for the kitchen set and island, our 3D artist modeled them from scratch.
When it came to lighting the scene, the 3D artist was absolutely delighted. The reason was that the space had exquisite lighting scenarios. First, there was a double-height ceiling that let in oceans of sunlight. Second, every functional zone had its own lighting source chosen for the function of the area specifically.
The challenge was to make the natural and artificial light layer beautifully. For that purpose, the 3D artist switched on the lights yet kept the natural illumination predominant. He then played with the temperature of light, and the resulting multi-layered lighting filled the space with brightness and joy. Another positive effect of this lighting arrangement was that it made every functional zone readable, so one can examine the kitchen in every detail.
When the interior renderings were ready, the 3D artist submitted them for approval. After two review iterations, we produced the final results.
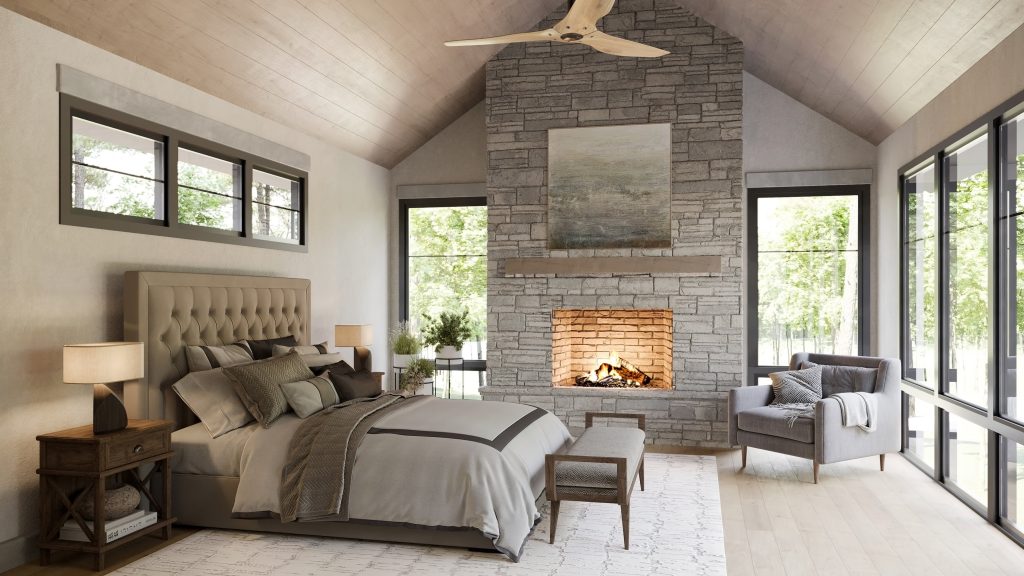
Interior Renderings for the Main Bedroom and a Bath
Based on the assignment and files attached, we have created the first versions of interior renderings for the main bedroom with a bath. Mark viewed the images and sent the following feedback.

As soon as we made the required changes to the interior renderings, we submitted them for checking. There were three more rounds of modifications, plus a request for an additional view of the bedroom interior. After all the updates were ready, we rendered the final 3D visualizations.
One thing we are particularly proud of here is how the interior and exterior combine. The renders show how the landscape is part of the design and how it elevates the beauty of architecture and enhances the house occupants’ experience.
Guest Bedroom Rendering
In addition to the main bedroom, the mansion would include a comfortable bedroom for guests with a fireplace and panoramic views of the surrounding landscape. We created one 3D visualization to convey this elegant and comfortable interior design.
After Mark and his client viewed the 3D rendering, there were two rounds of corrections. They included updates to the fireplace design and finish material, and replacing light fixtures. After we made the changes, the image was approved.
Overlook Study and Bunkroom
The 3D visualizer examined the assignment, then produced and sent for approval the grayscale interior renderings for this overlook study and bunkroom.
Mark left a comment about materials and approved the grayscales. When the images were ready, there were two rounds of corrections. The main updates were:
- changing the color of the walls to the grey hue from the swatch attached
- adding a ceiling fan and a couple of swing arm lamps
- lightening the stained wood by 20%
- changing the width of steps and nightstands
- adding additional space to the width of the nightstands.
Also, we needed to create an additional view of the seating area in the bunk room. The view would be identical to the previous one except for the ceiling finish. This way, the interior renderings would demonstrate wood ceiling finishes in 2 patterns.
The 3D artist worked hard to make the changes. He also rendered the additional view and delivered photorealistic interior renderings that both Mark and his client liked.
Interior Renderings for Stairs and Entry Hall
The entry hall and stairs were modeled from scratch according to the specifications in the assignment. For technical information, the 3D artist consulted the sections and interior elevations. For information on materials and aesthetics, he viewed the design notes. Below are the excerpts from the documents attached to the brief.
There was one review round only. The 3D visualizer changed the rail posts materials, tweaked the color of stone and grout, and delivered the final interior renderings for the stairs and entry hall.
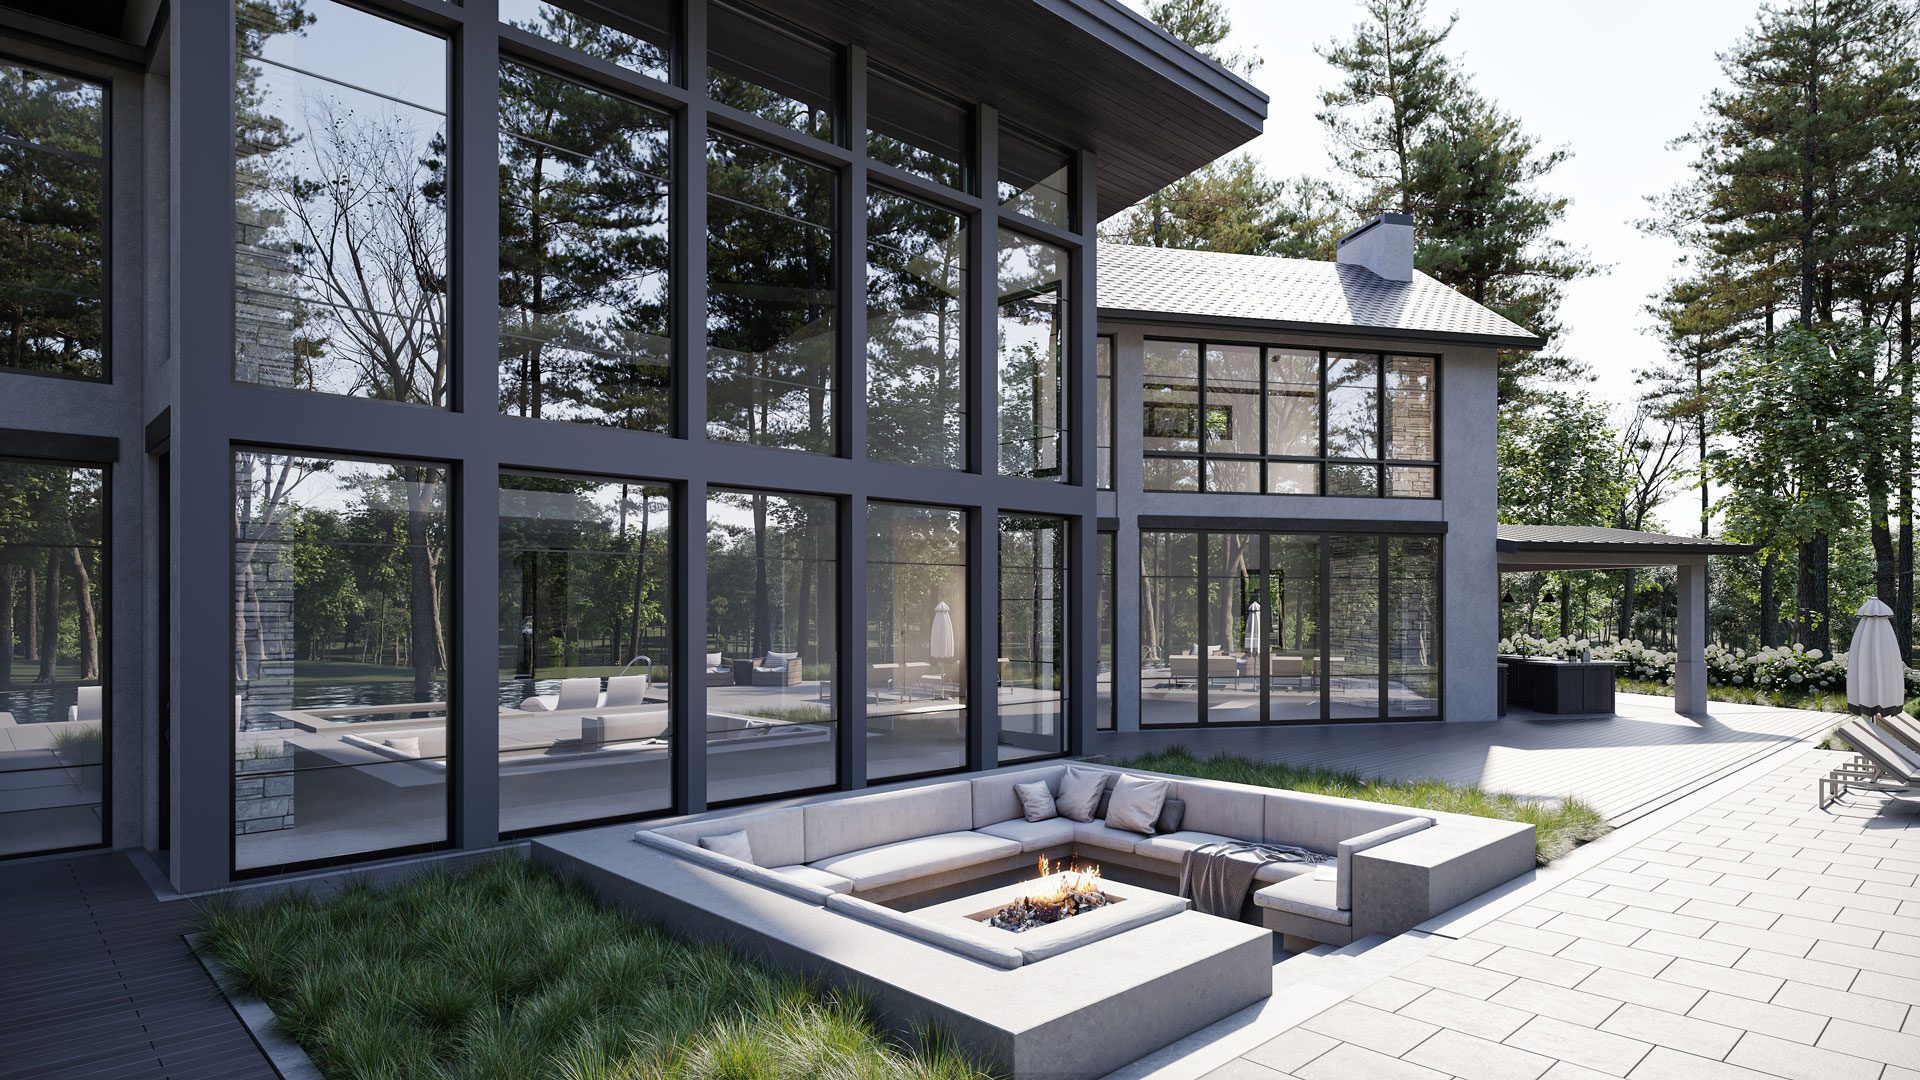
Exterior Renderings: Production and Results
Within this task, the 3D artist needed to create 5 views of the exterior:
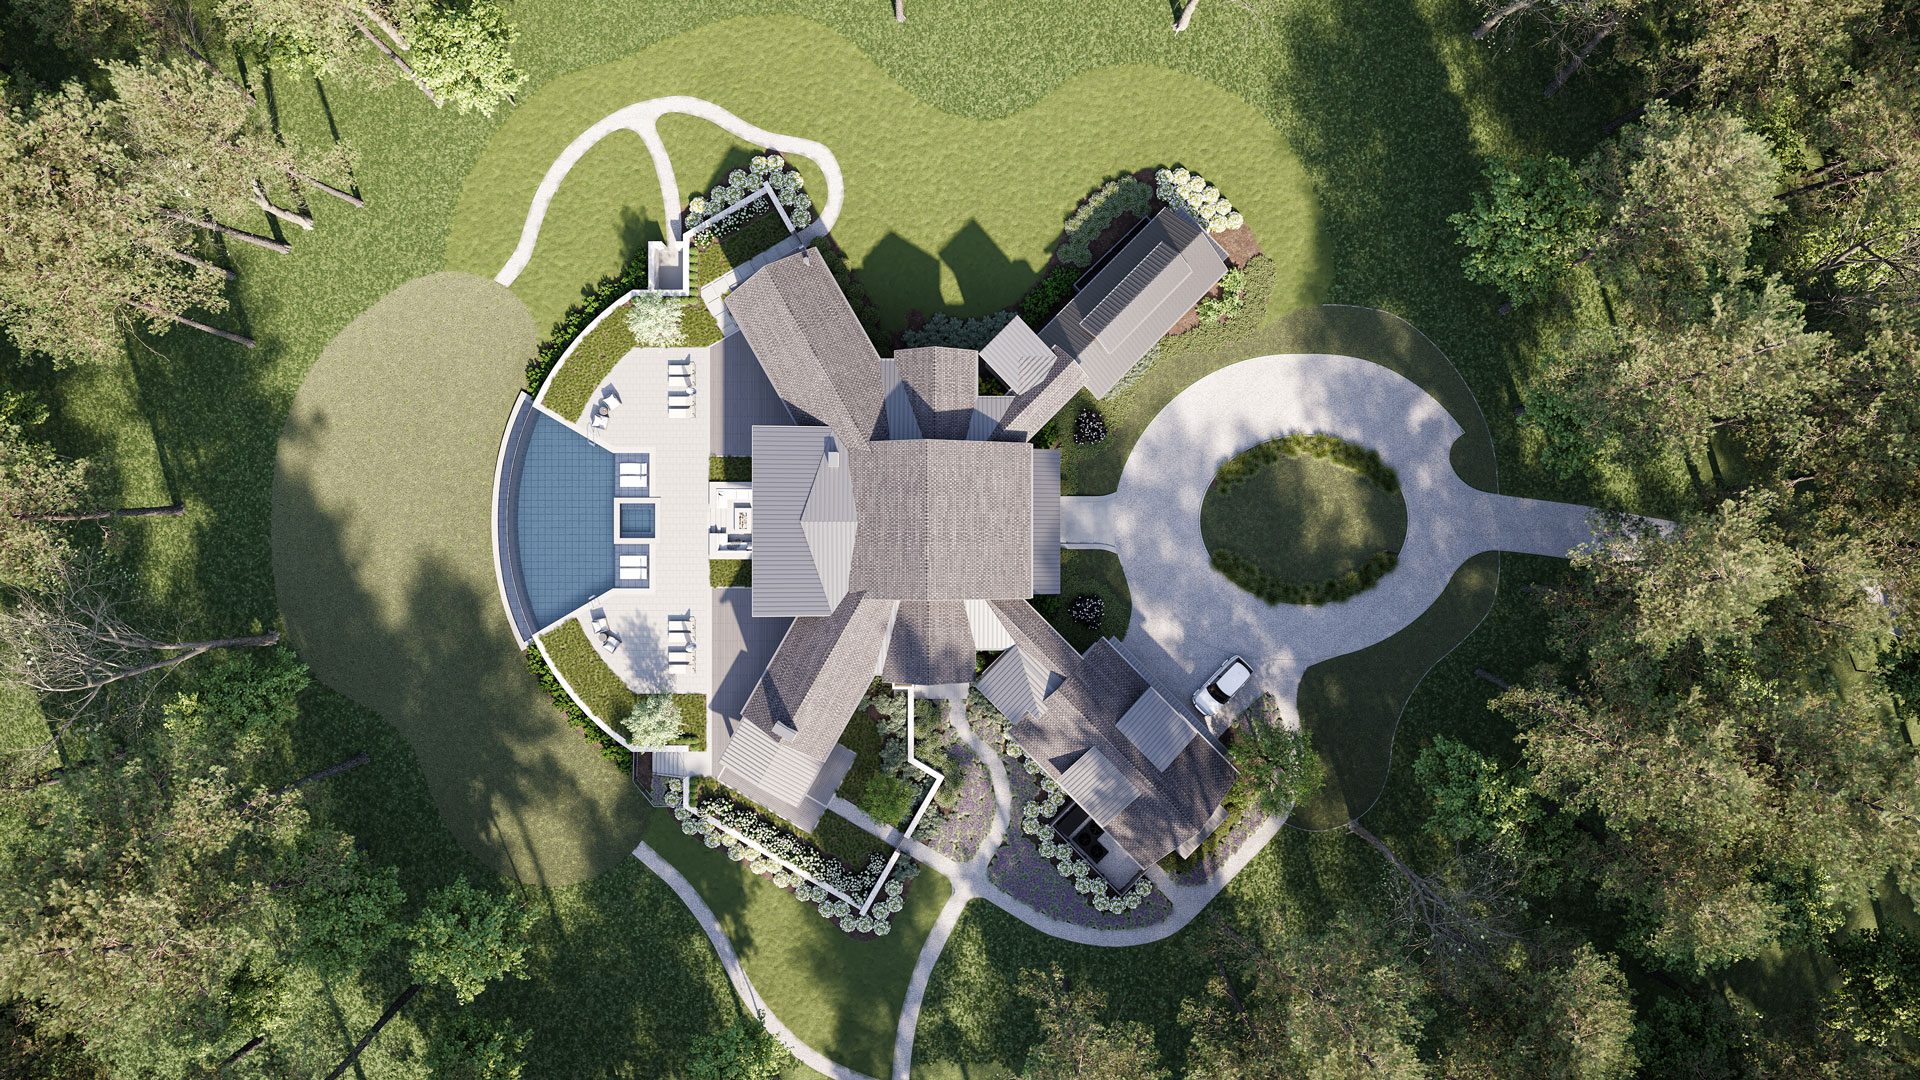
- One rooftop 3D exterior rendering showing the pool, driveway, and adjacent landscaping
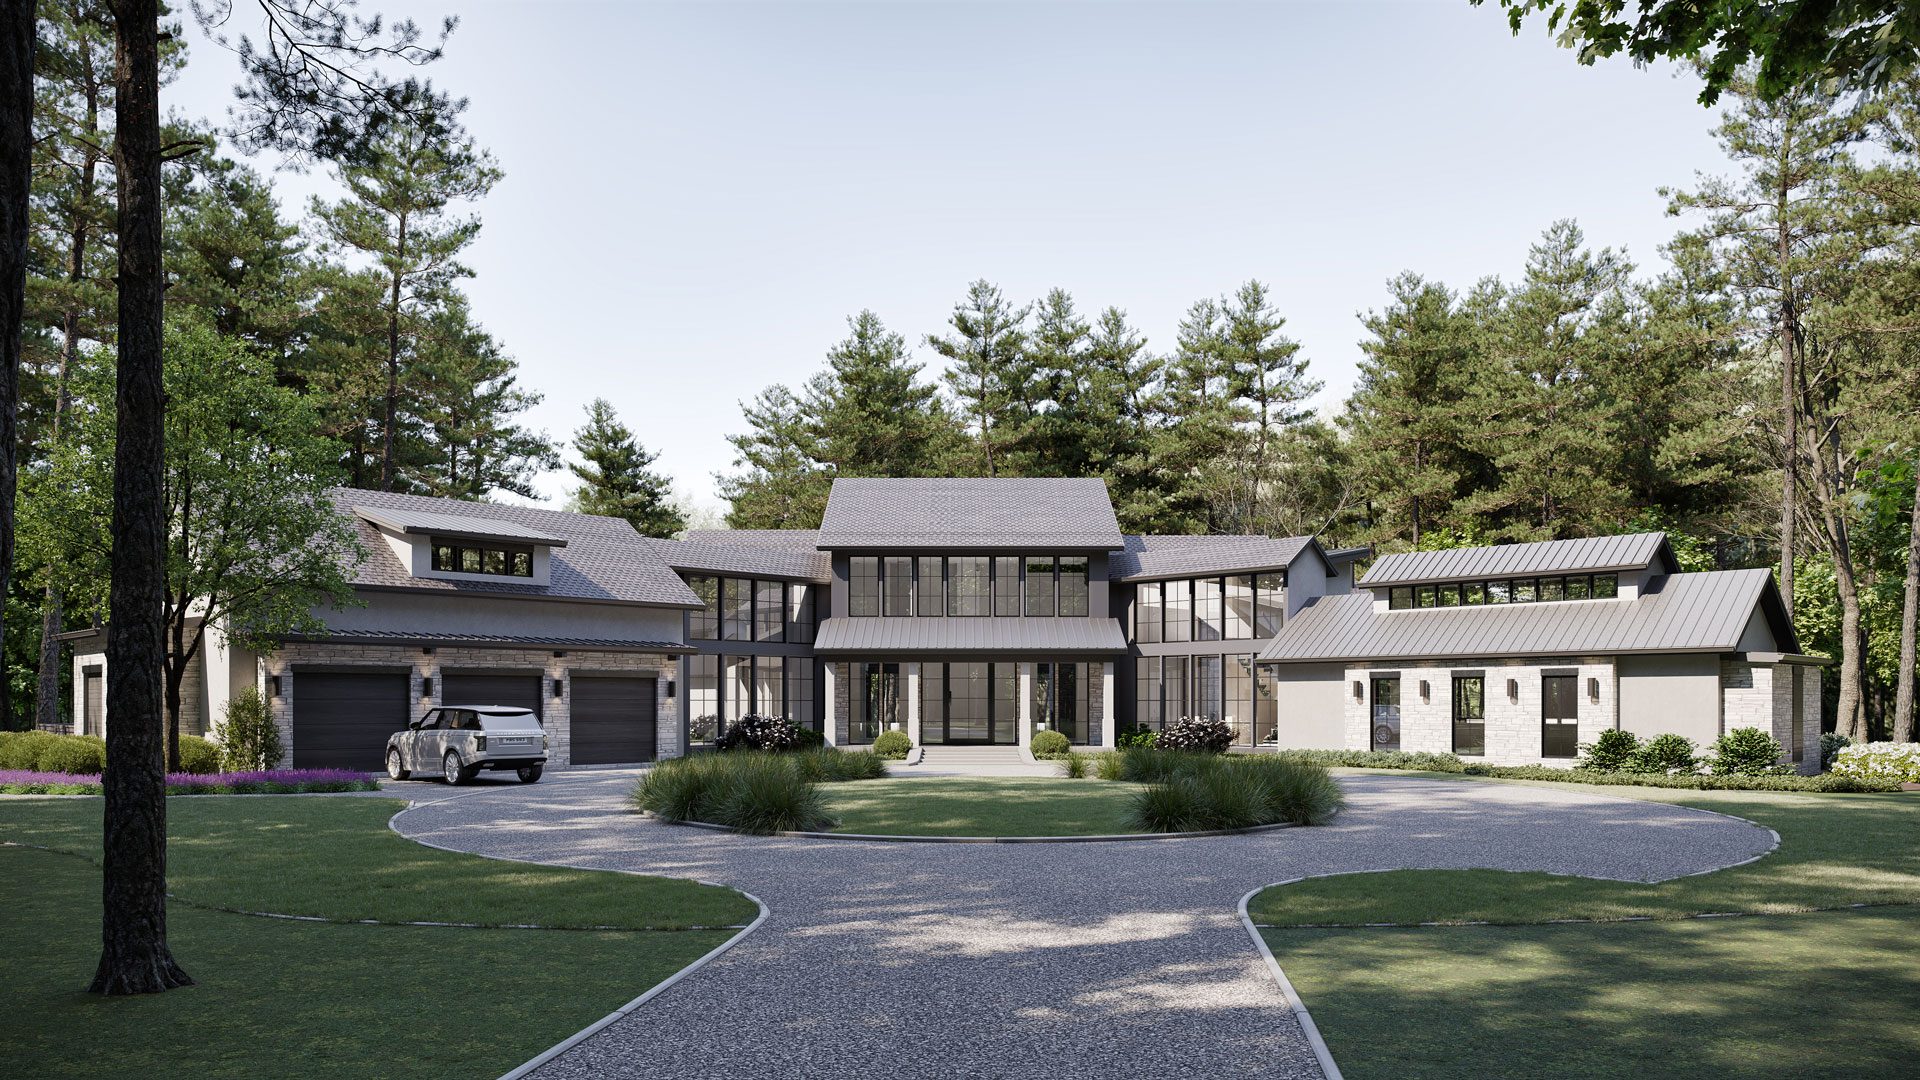
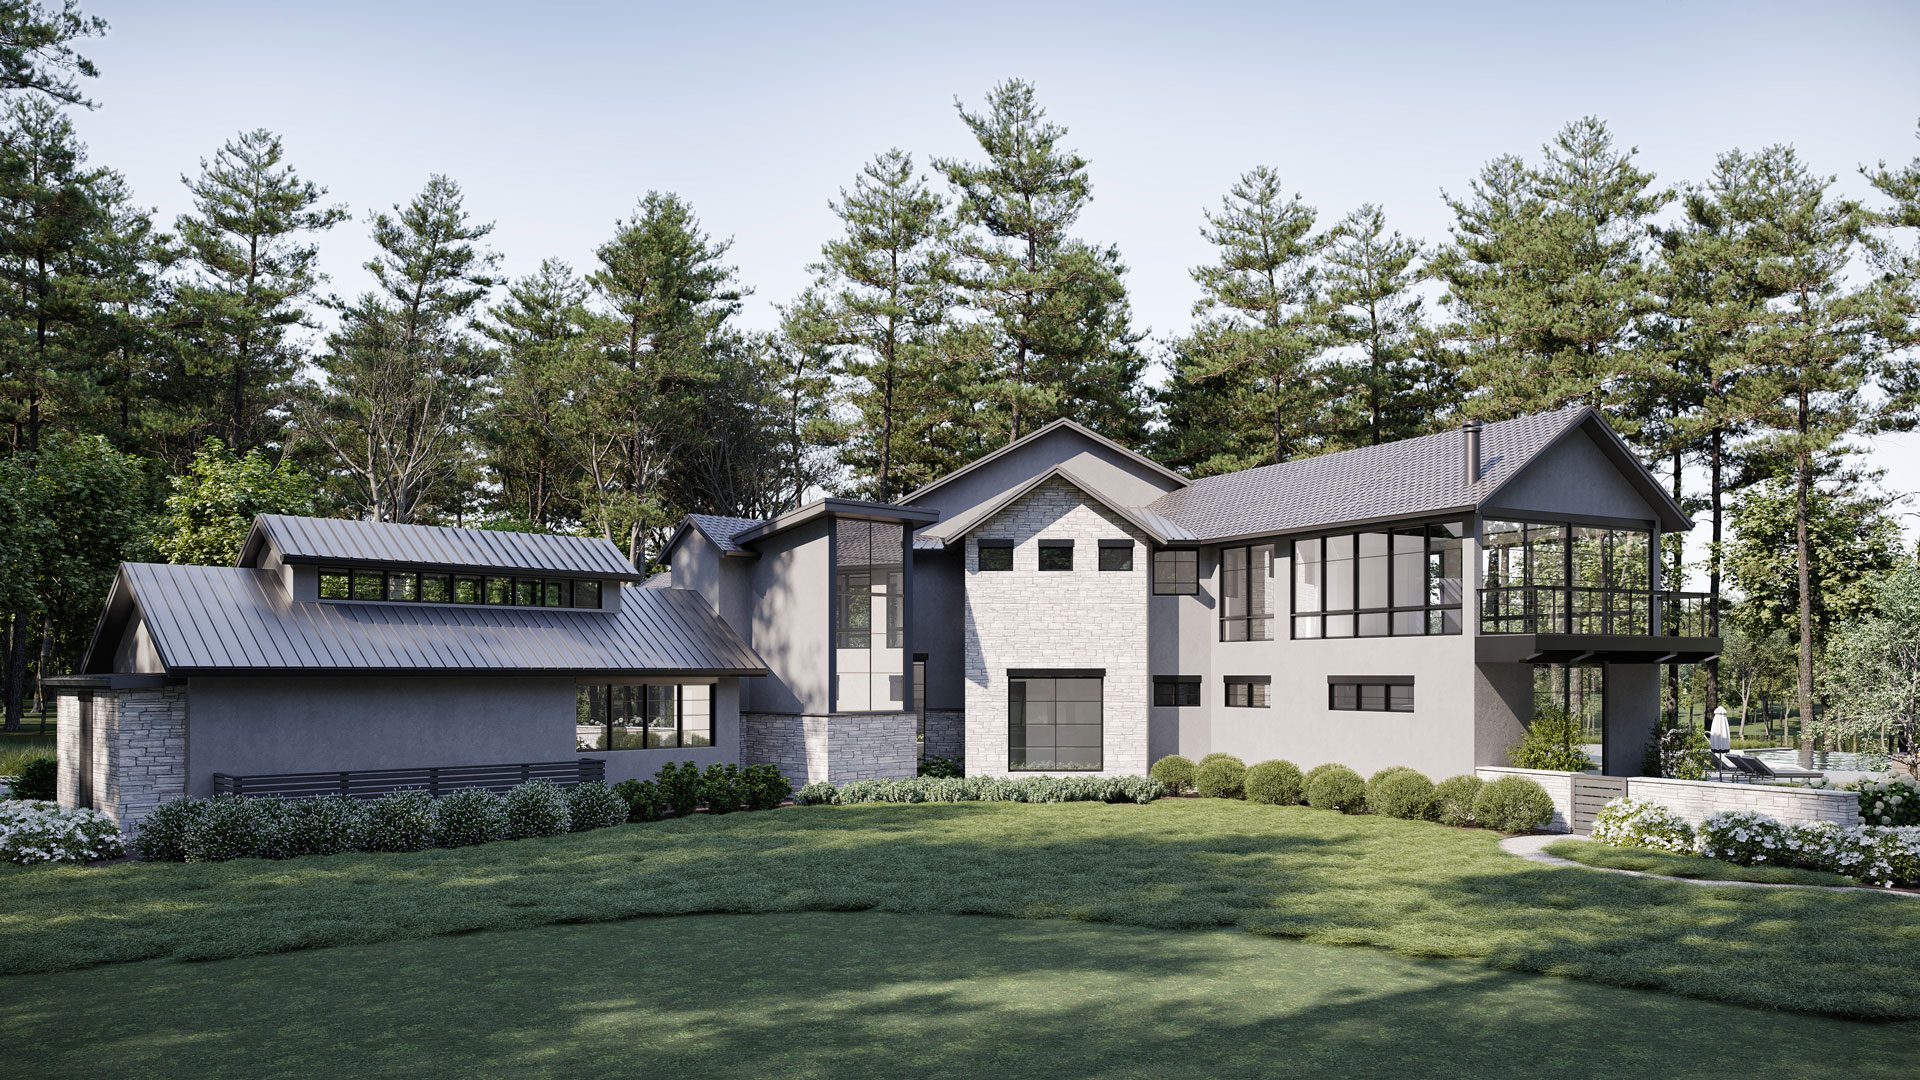
- four elevation views — front, rear, left, and right.
As sources of information, our 3D artist used the site survey, elevations, landscape plan and design. The brief was very informative and detailed, which always helps to speed the work up and optimize exterior rendering cost.
Mark approved the geometry, so the 3D visualizer textured every 3D exterior rendering, set the lighting, and sent the results for approval. There were a few review rounds, which involved among other things:
- replacing all exterior headers and soffits around the entire house with different models
- changing stucco to stone per attached markups
- adding the stucco texture to all the headers so they look like cast concrete. The colors should remain as they were
- adding Timber Tech to all surfaces of the fire pit as shown in markups
- changing all gutters and downspouts to be Tuxedo Grey per the attached sample.
While the exterior renderings were being reviewed, we received some super inspiring feedback.

Then, we got some more corrections, updated the final results, and submitted them for approval.


Here is what Mark wrote us about the deliverables when they had been reviewed.
It was a sheer pleasure to work on these interior and exterior renderings. The project had scale, ambition, and a show-stoppingly beautiful design. Most importantly, the atmosphere was incredible throughout all the work, and we kept warm memories about it.
Need to present your design in detail? Contact us for 3D visualization services. We will provide you with the most accurate and spectacular persuasion tools there are — interior and exterior renderings. Your clients will appreciate being able to see the future in photorealistic quality, and you will find that explaining and negotiating using CGI is a breeze.

Irma Prus
Content Writer, Copywriter
Irma writes articles and marketing copy for ArchiCGI. Her dream is that more people discover the power of CGI for architecture. Irma is into neuromarketing, ruby chocolate and Doctor Who series.
Like this project? We’ve got plenty more! Check out these CGI beauties.