


Restaurant 3D Rendering: Interior CGI for Clay in Manama, Bahrain
Restaurant 3D rendering is a powerful tool helping to present and get approval for the concepts of dining places. This is why it is appreciated by designers. One of them is Tristan du Plessis – a renowned interior architect, an insanely talented person, and our long-term client. ArchiCGI has completed multiple 3D rendering projects for him.
The architect tasked us with 3D visualization for Clay restaurant design in fall 2018. The eatery was to be located in Manama, the capital of Bahrain, and celebrate Nikkei cuisine – an amazing fusion of the culinary traditions of Peru and Japan. Accordingly, the interior design of Clay combined Peruvian and Japanese cultures. The restaurant concept won our hearts right away, and we loved the process and result of visualizing it in 3D.
However, most of all we were happy to know that our 3D renderings helped to bring this mesmerizing design to reality. The Clay restaurant opened its doors in 2020, and it looks just like in renders made by our 3D architectural visualization company! Want to see for yourself and learn what happened behind the scenes of this 3D rendering project? Then let’s read on!
The Purpose of the Project
Tristan required restaurant rendering to effectively showcase the concept to investors in Dubai. For this purpose, he ordered:
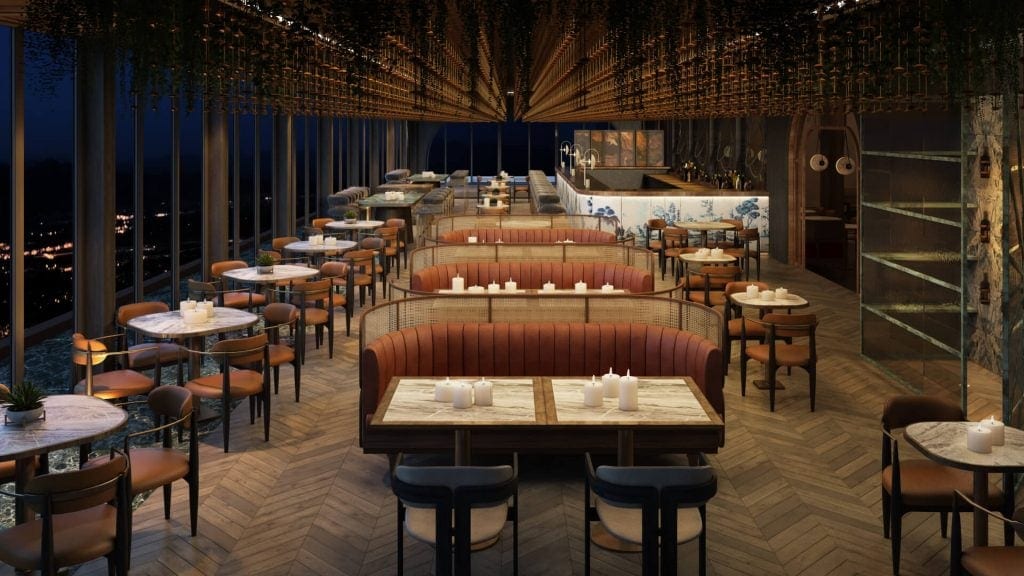
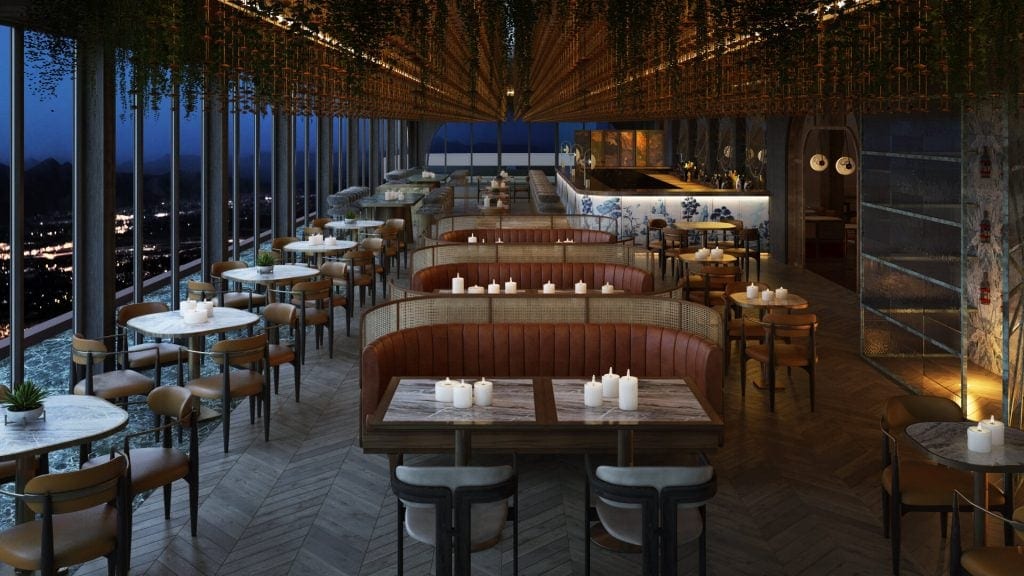
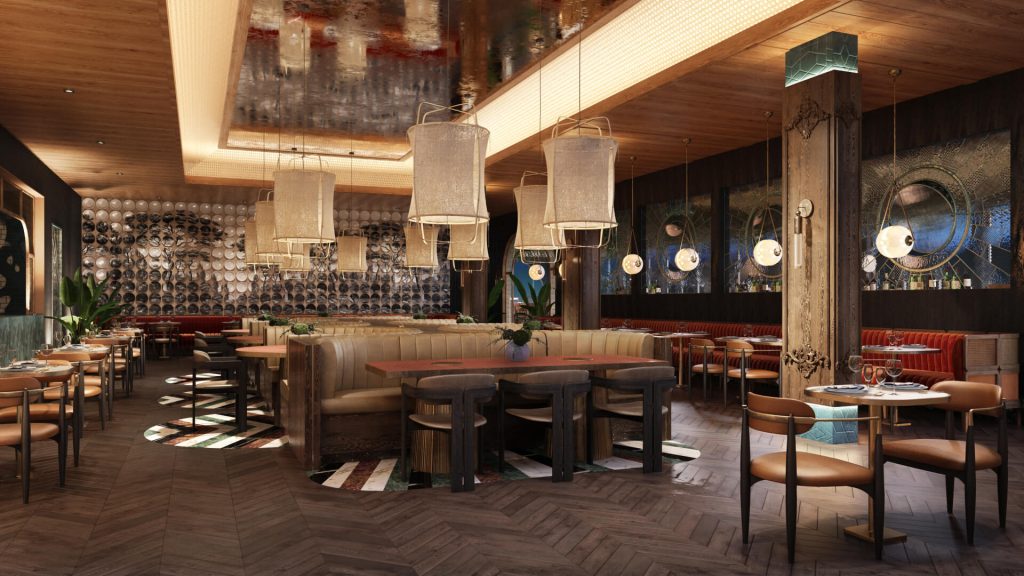
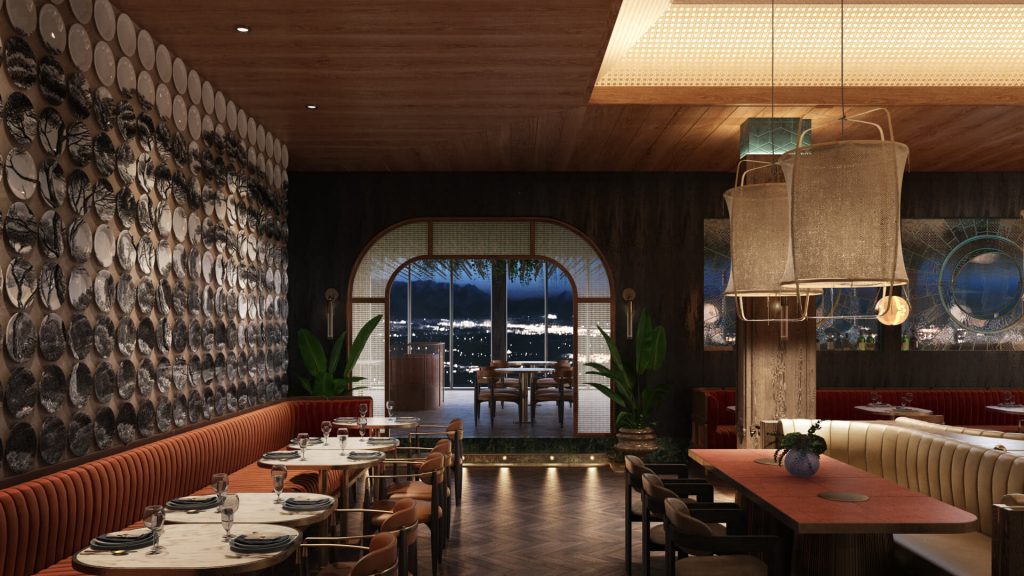
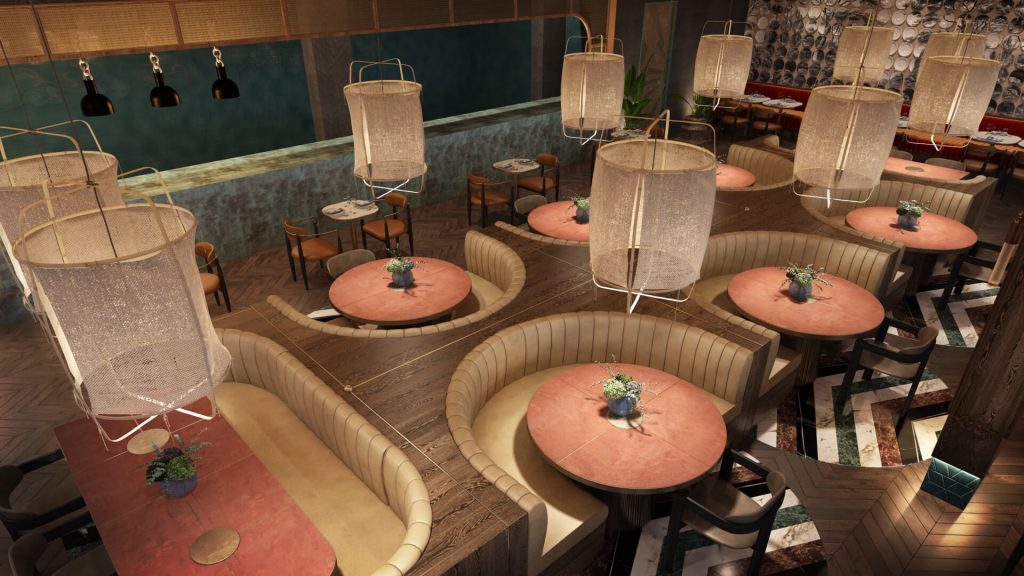
- 3D renders showing the main hall and the terrace from different angles – to showcase the restaurant’s layout;
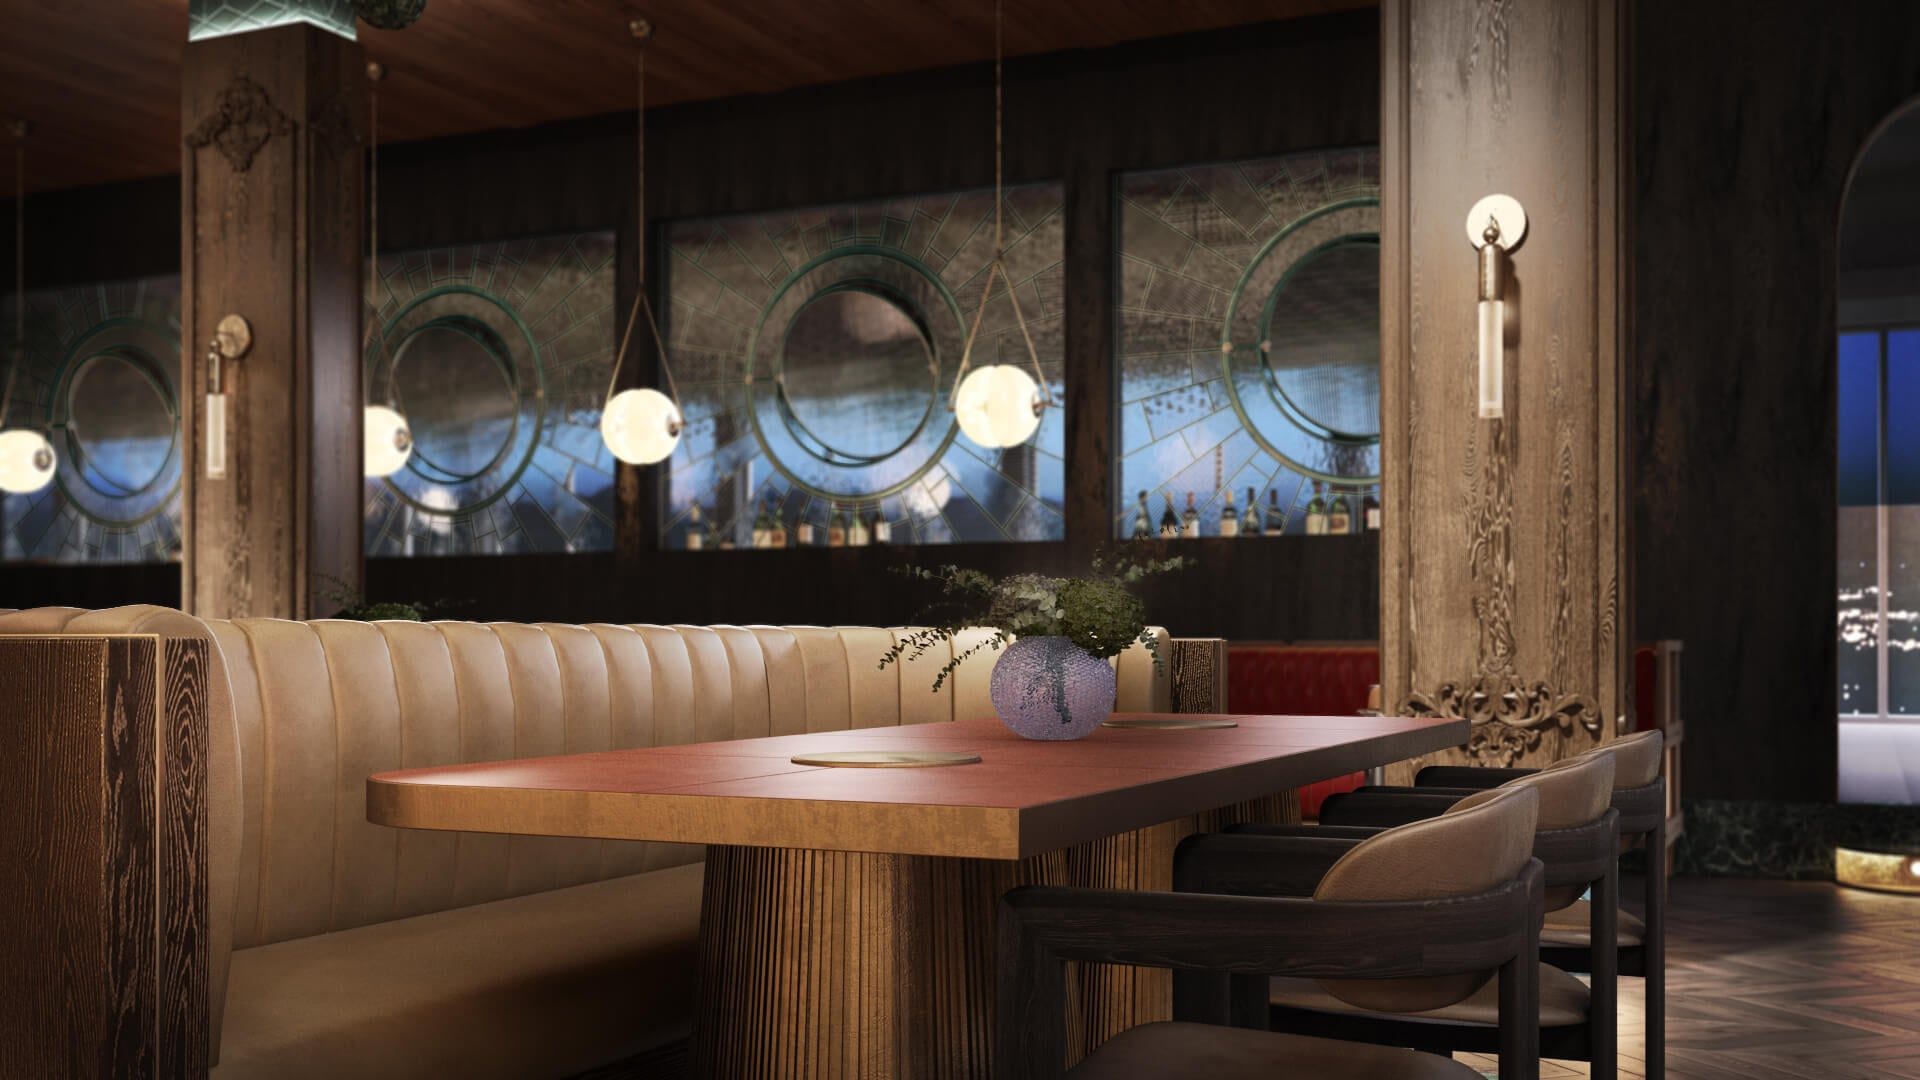
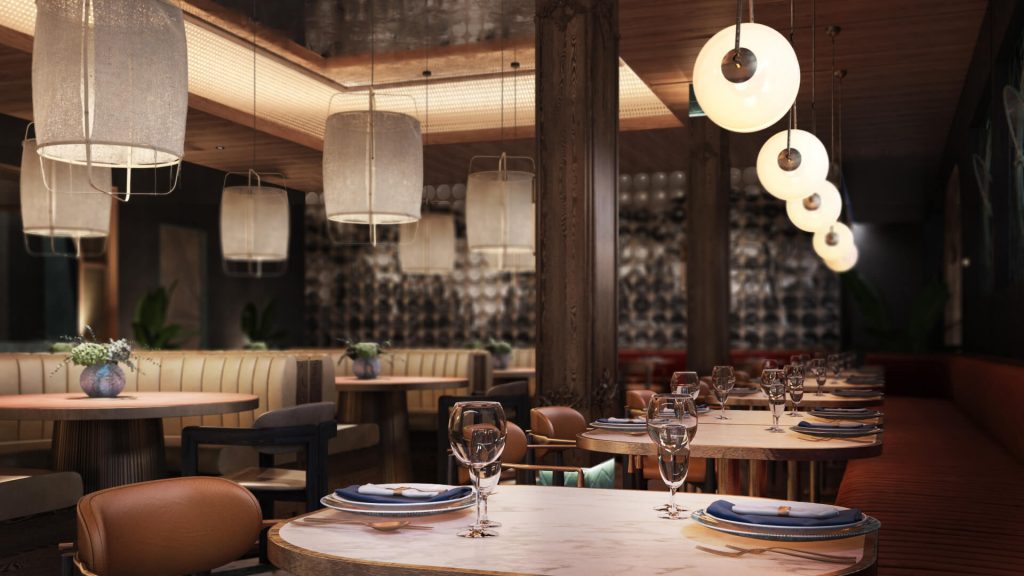
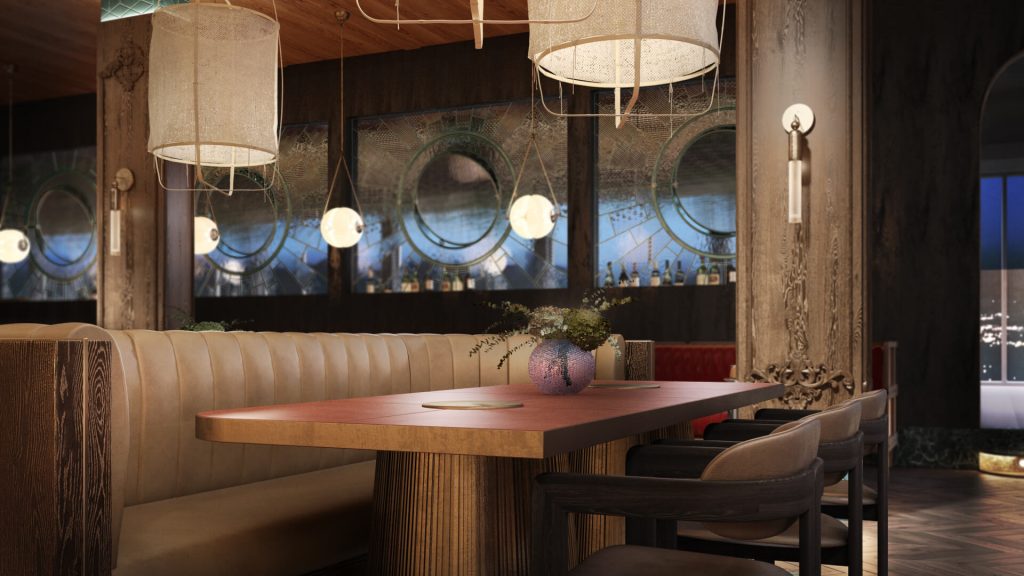
- close-up 3D renders with set tables – to give viewers a taste of the refined atmosphere and show off the custom furniture design.
We are happy to say that the renders helped the architect to achieve his goal. The investors were impressed with the presentation and gave their approval. Moreover, the restaurant owners further used CG images in their pre-opening campaign on social media.
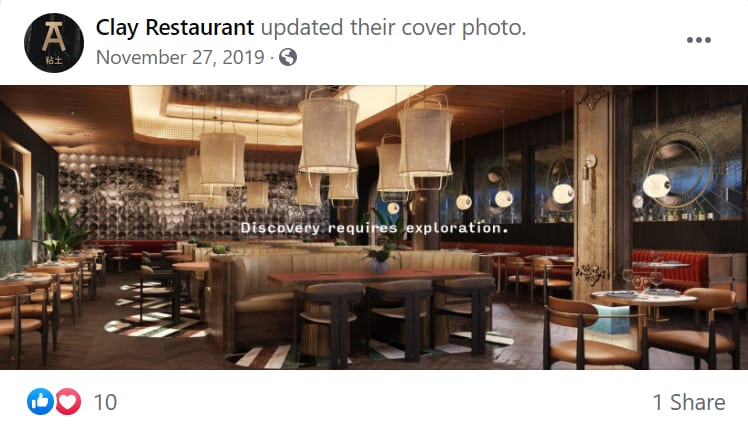
Above, you can see our 3D rendering captioned and shared on the Facebook account of Clay shortly before its opening.
And now, let us tell you in detail about how we created the 3D imagery for this beautiful restaurant design. Naturally, we started by studying the technical assignment.
The Scope of Work for Restaurant 3D Rendering
Tristan sent a comprehensive scope of work with lots of visual aid. The latter included:
- A 3D scene depicting the future restaurant interior. It helped us learn about the layout of the rooms, sizes, shapes, proportions, and relative position of all the architectural elements and furniture items.
- References for materials, furnishings, and decor in the form of a large PDF file with photos of the required items.
- References for lighting and atmosphere. Tristan made the collage you can see below to show us the atmosphere to be recreated in this restaurant 3D rendering project. The place was to exude luxury, coziness, and warmth.

Having studied the brief, we asked the architect a few clarifying questions and set to work.
The workflow
Tristan needed 3D renderings as soon as possible. So, to speed up the project, we split the workload between two 3D artists. One of them was making the hall 3D rendering, while the other was in charge of the terrace visualization. This allowed us to finish the task right on time. Following are the steps we took.
#1. Setting up the 3D Scene and Remodeling
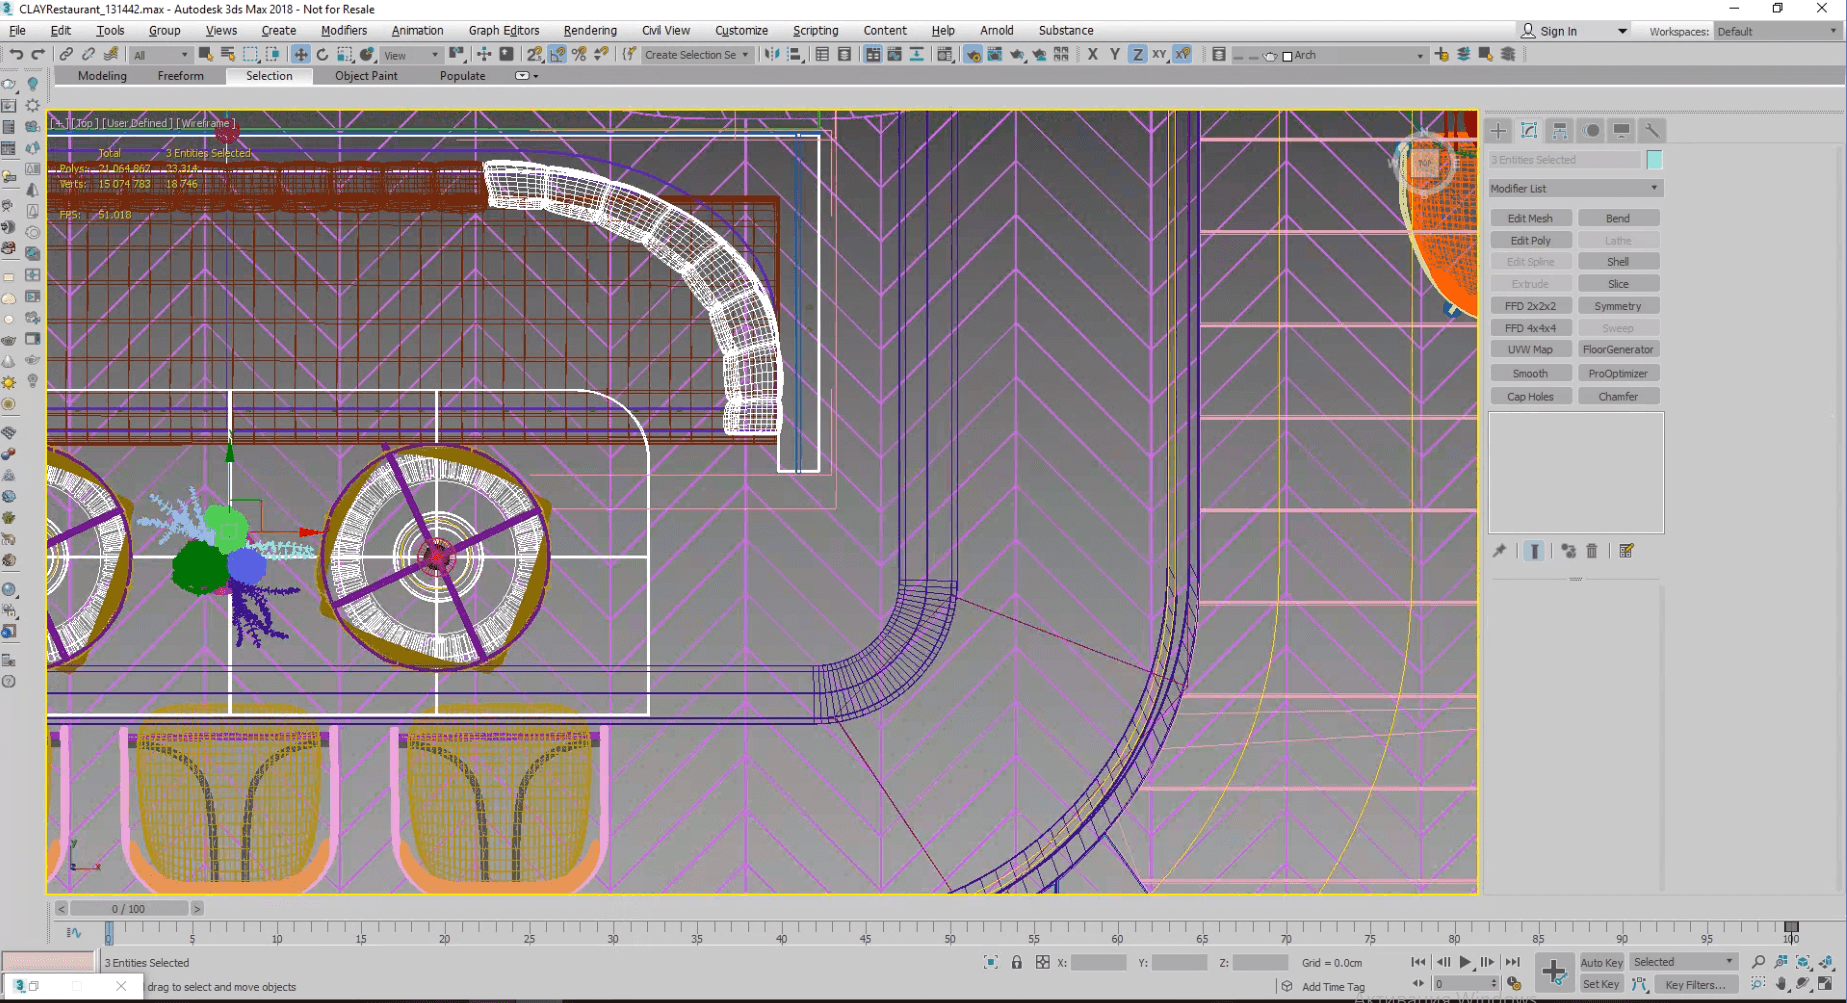
First, the 3D artists imported the scene to 3ds Max software. Then, they optimized it for further application of the materials. For this, they used Reset XForm – a 3ds Max tool that helps to reset scaling and rotation values previously applied to objects.
After that, the artists checked the geometry and polygon meshes of all of the CG architectural elements and furniture models in the scene. They found out that some of those were unsuitable for photorealistic restaurant rendering. So, our artists partially or fully remodeled them.
#2. Setting Lighting and Main Materials
With the scene optimized and partially remodeled, our 3D artists proceeded with setting the lighting in it. They recreated an evening lighting scenario requested by Tristan in the scope of work. Then, they set the main materials. The latter included finishings of flooring, walls, as well as some metal elements and fabrics used in the hall and terrace interiors.
#3. Filling the Scene with 3D Models
When the lighting and main materials were all set, the CG specialists proceeded with working on 3D models of furnishings and decor. None of those had to be built from scratch. Some of the necessary 3D models, like custom-made couches, were already exported by our artists from the initial scene. And the other ones could be found in two external sources.
First, there were 3D models from our virtual stock. Our 3D rendering company has its own library of 56k CG models. We selected the similar or exact matches to furnishings and decor that Tristan showed us in the photos. Before using those models, we sent them to the architect for approval.
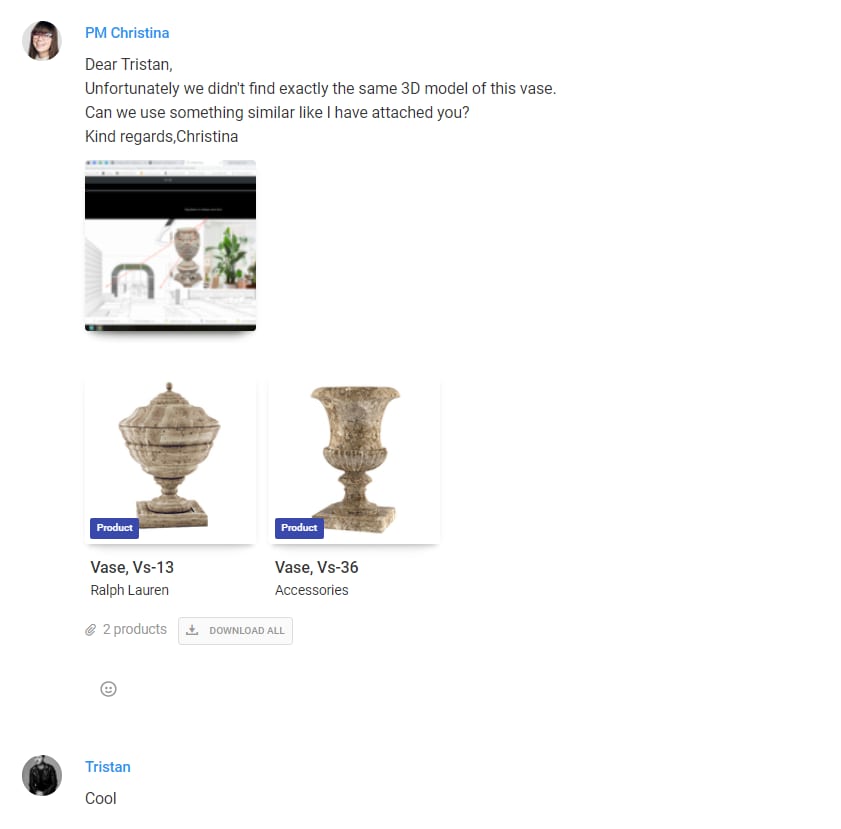
Also, there were 3D models from Tristan’s previous projects. Clay interior included items that had been used in the other designs of the architect that we had visualized before. Those objects were lovely clay balls on the bar ceiling, couches with curved backs, and lighting fixtures on the bar. We just took ready CG models of those from the older 3D scenes.
Strengthen your design presentations with professional interior rendering
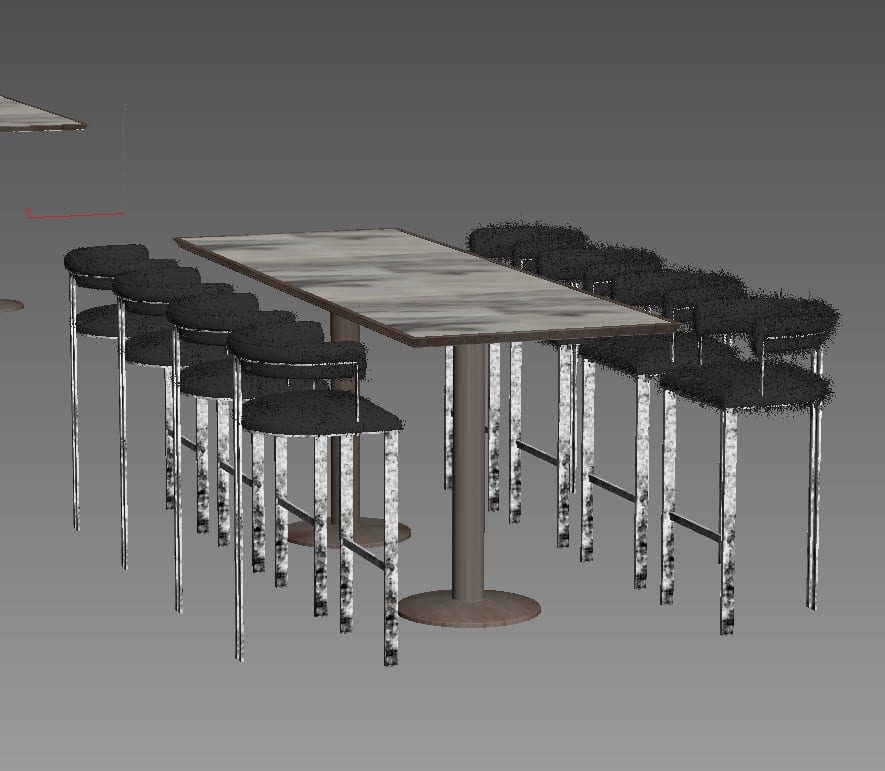
#4. Texturing
At this point, we had the 3D scene with lighting, all the necessary architectural elements, and furniture 3D models in it. And the next thing that we needed to do was texturing.
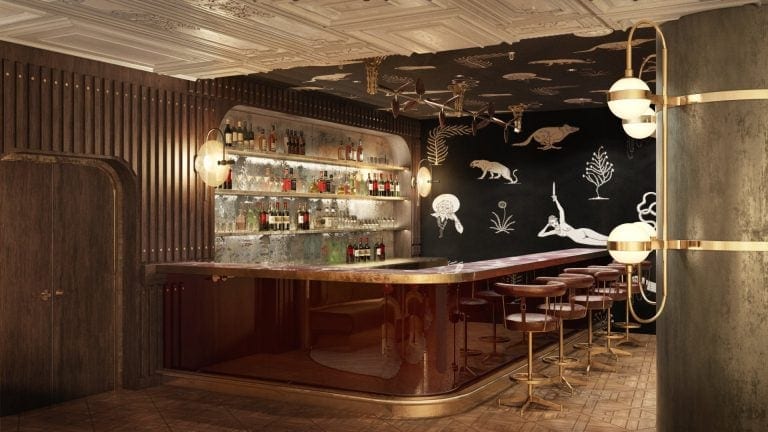
Based on the detailed visual references for textures, our artists found suitable options for almost all the surfaces in our library or online sources. Except for a custom texture of a white and blue Japanese painting on the bar. It couldn’t be found anywhere. So, our artist created this texture herself based on the picture that Tristan had provided.
#5. Setting Camera Angles and Rendering


Finally, we had an interior scene with all 3D models textured and in their places. So, it was time to select the best angles for showing the restaurant concept. With Tristan’s guidance, our 3D artists chose 3 best views for the main hall and 2 — for the terrace with a bar. They rendered them in the 1920X1080 resolution and sent them to the architect. Above are the results of their work.
#6. The First Review Round
Tristan looked at the preliminary restaurant 3D rendering results and told us it was a great start. Shortly, he sent us the comments, in which he asked us to:
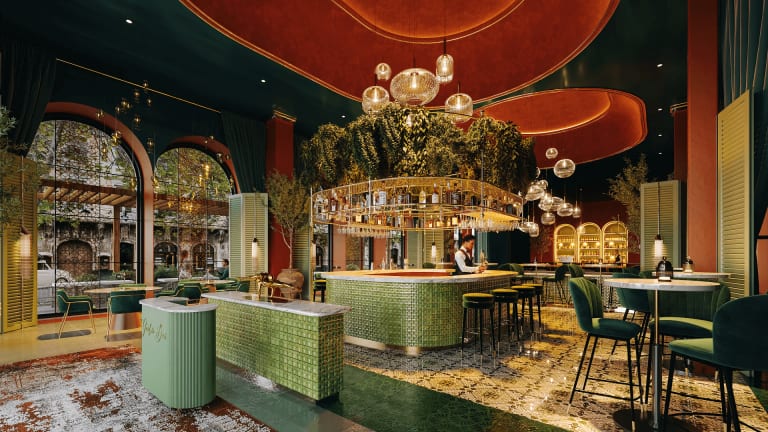
- Adjust some materials and add new ones. For example, to add green marble to the floor in the bar and desaturate the orange tone of the wooden ceiling in the hall.
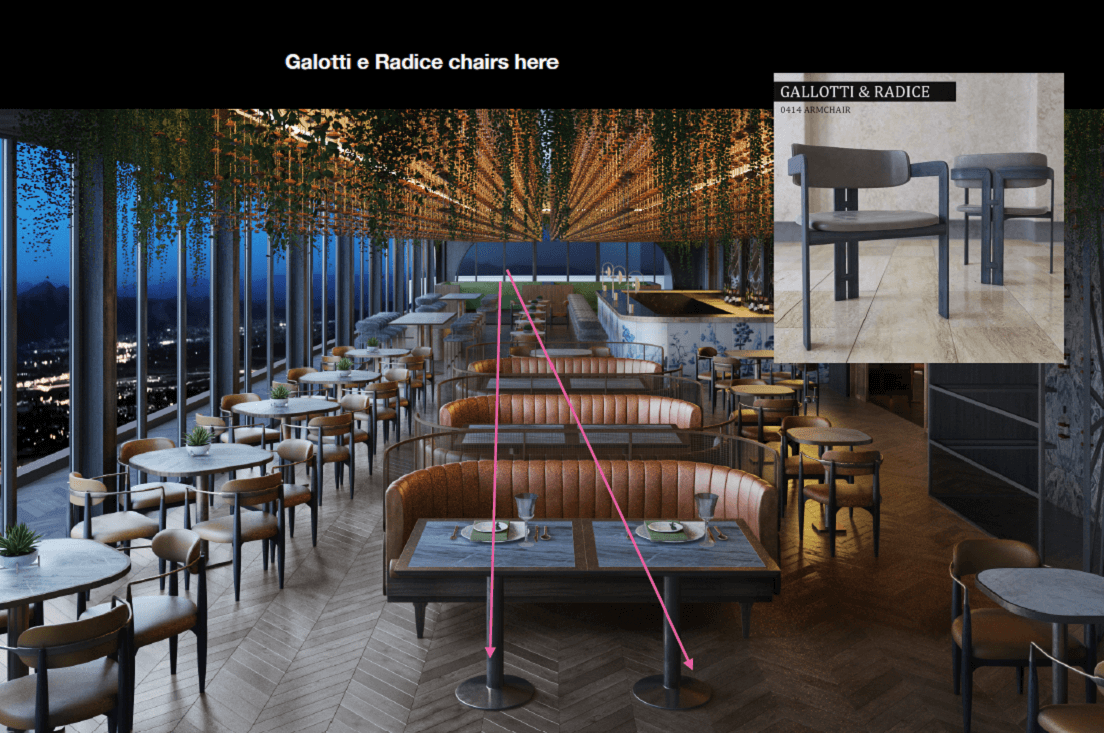
- Adjust and add some 3D models of furniture, decor, and lighting fixtures. This included “dropping” the clay balls on the terrace ceiling 500 mm lower, adding uplighters to the walls in the bar, as well as adding a Japanese screen and Galotti e Radice chairs to the bar interior.
- Darken the light and add burning candles to the bar interior to make the ambiance moodier.
- Adjust the angle in two renderings to fine-tune the composition.
Also, we were asked to make 3 additional CG visuals:
- 2 artistic close-up renders focused on the set tables. The architect showed the required angles by drawing arrows in one of our preliminary renders.
- 1 rendering of the hall with a different selection of lighting fixtures. The architect attached a photo of them as a reference.
As he urgently needed the general views of the hall and terrace, we focused on them first.
#7. The Second Review Round
The artists got to work right away after receiving the comments. So shortly, they delivered the prioritized views. Those included the updated renderings, and also the alternative view with new lighting fixtures below.
The architect liked the result and asked for one more additional restaurant 3D rendering. It must be an image of the booth with custom-made couches shown from the top.
Also, he asked to make some minor corrections to the renders we already delivered:
- Adding more uplighters to the wall and the bar ceiling;
- Making wood flooring in the hall less textured;
- Increasing the size of lighting fixtures hanging from the mirrored ceiling in the hall;
- Removing the Japanese screen in one of the bar views.
Our 3D artists updated the renders according to comments and made the requested additional CG images: a rendering showing the custom furniture from the top, and two close-ups with table settings.
This way, all the restaurant renders were 99% ready. There was only one step to take.
#8. The Post-production
At this stage, the 3D artists fine-tuned restaurant 3D rendering results in Photoshop. They adjusted the colors of flooring, couches, vases on the tables, and some other details. Also, our CG specialists made the illumination warmer and brighter to ensure a cozy, inviting feel.
Tristan was happy with our work and approved the outcome. He was fully equipped for conducting an impressive presentation of Clay design!
A Few Days Later
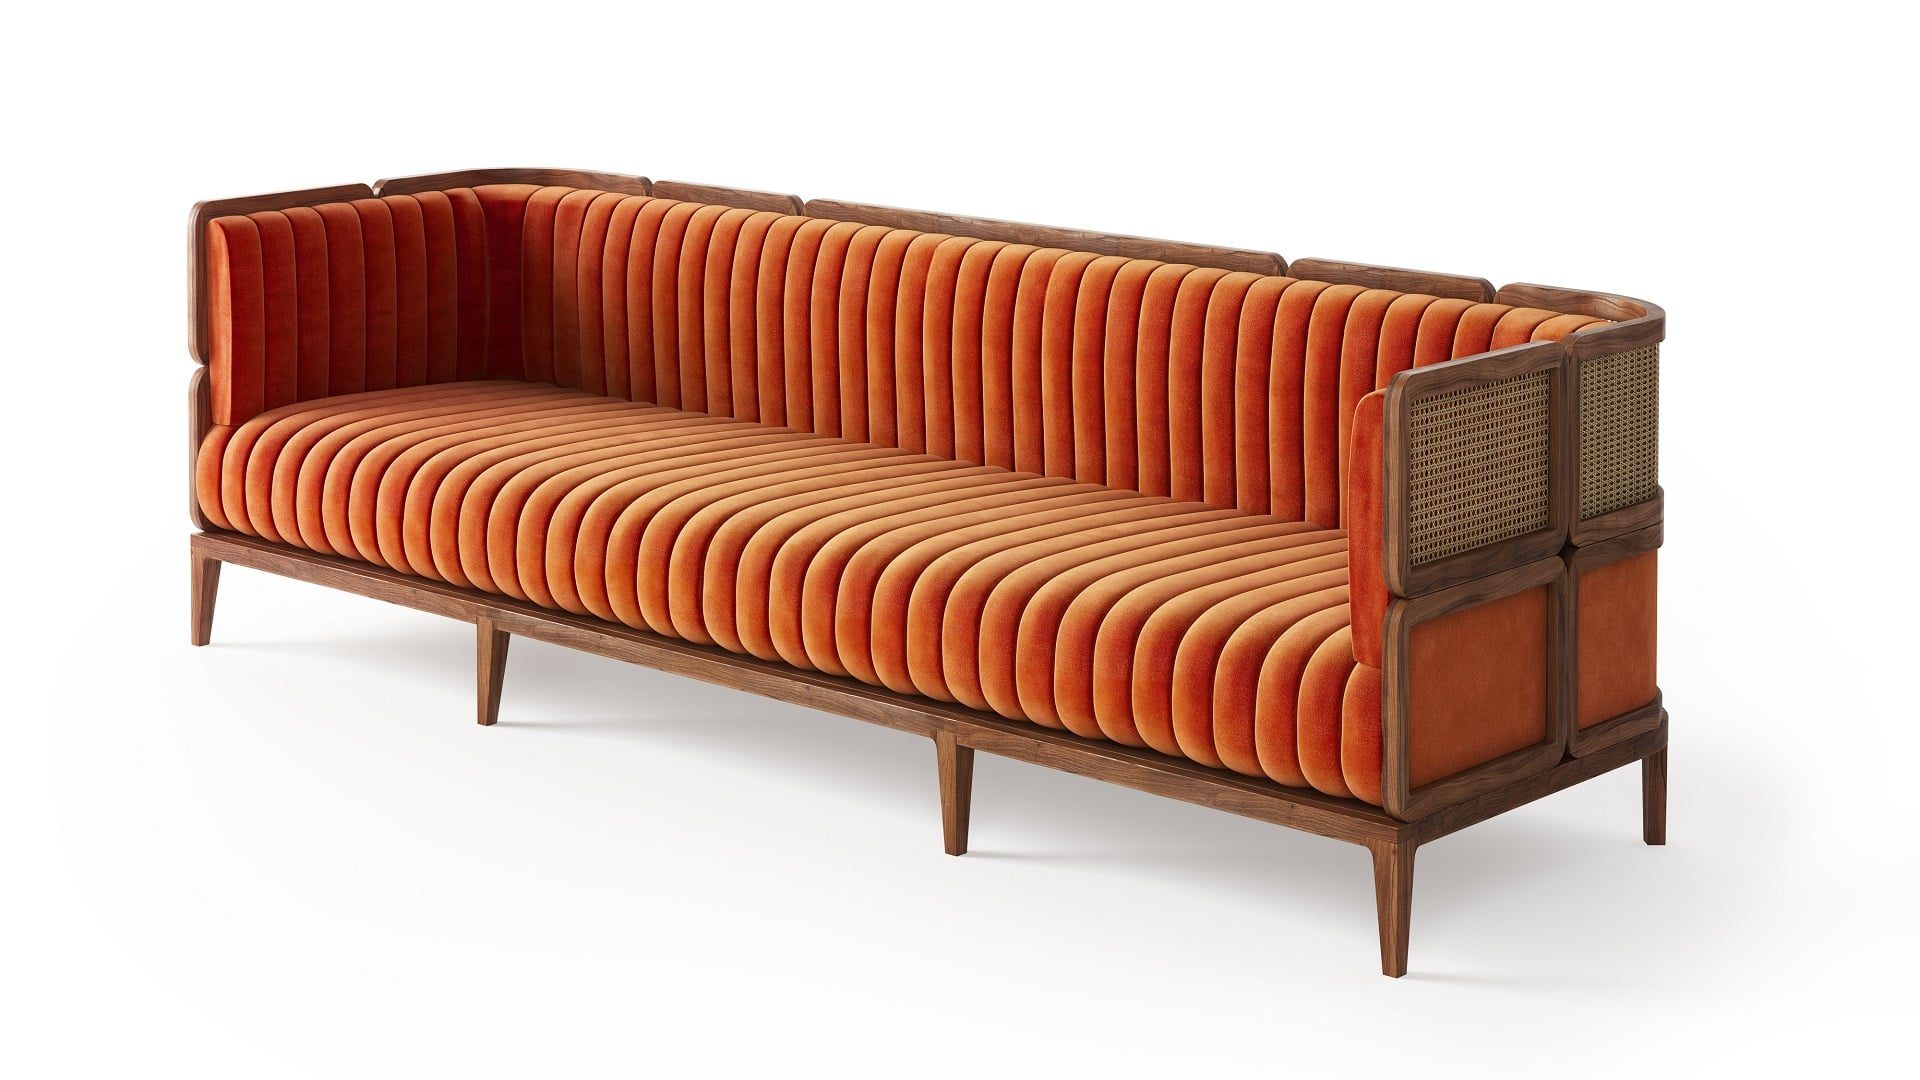
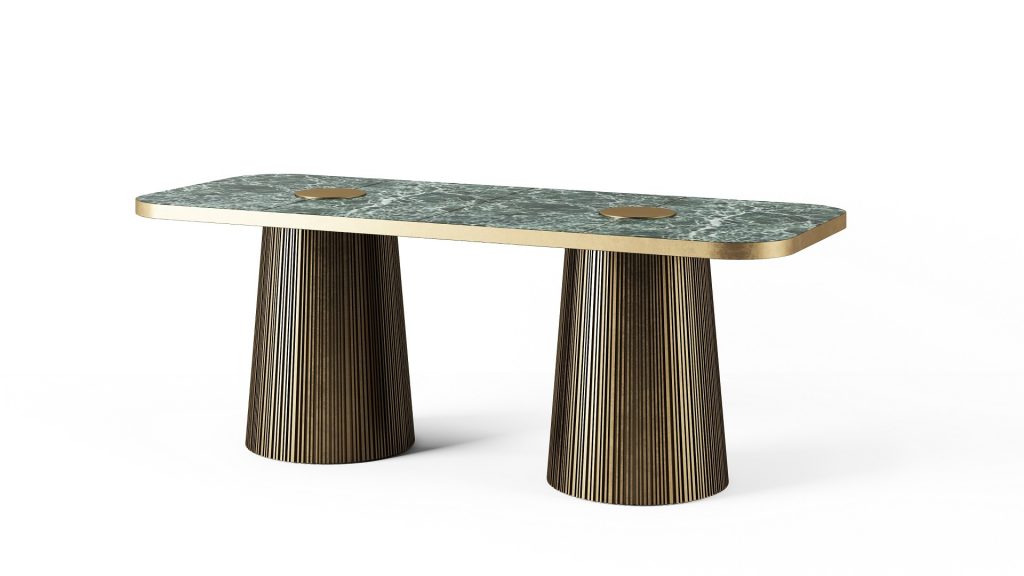
Tristan designed some beautiful couches, tables, and chairs exclusively for this project. So, after the investors approved the design, the architect needed some visual aid for manufacturers that were going to produce the furniture. That is why a few days after the completion of the Clay visualization project, he asked us to make CGI that would show those pieces separately on a white background.
Our artists already had the 3D models of the required furniture since they were a part of the previous Clay project with our 3D interior renderings company. So, they put them on a plain background and rendered the images in 4K.
A Few Months Later
A few months after the task completion, Tristan contacted us once again. He decided to modify the design a little bit and needed to show a new version to the restaurant owners. Namely, he wanted to:
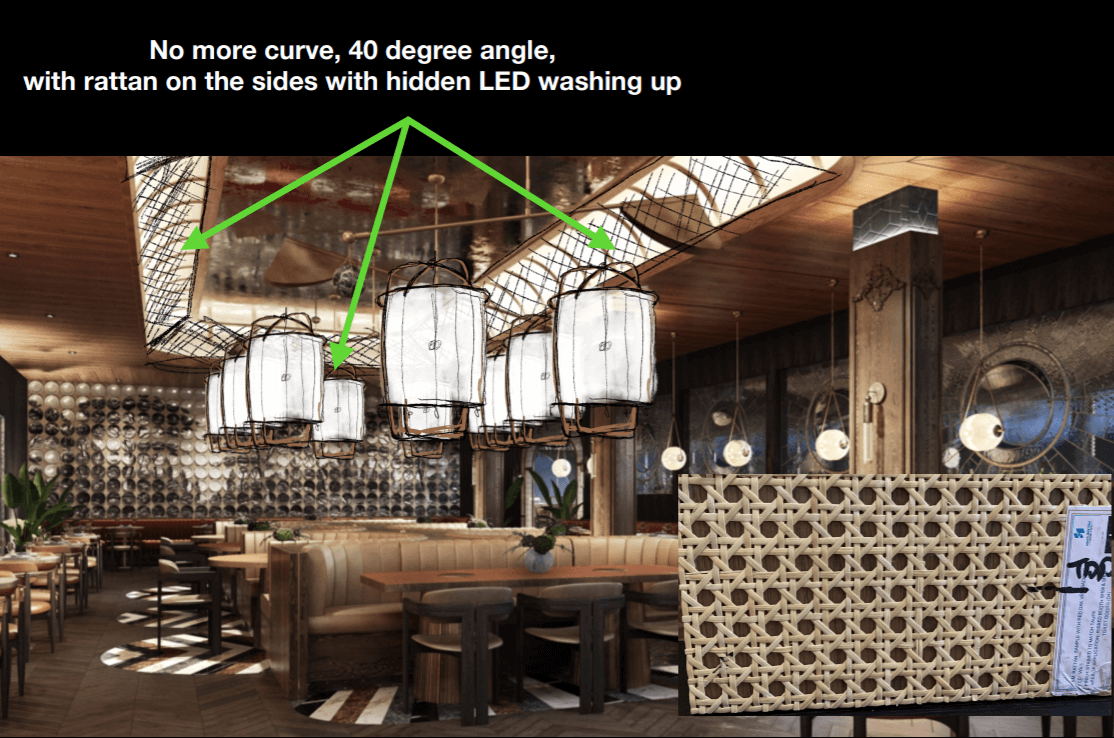
- slightly change the material and shape of the ceiling above the main table in the hall;
- replace lighting fixtures above that table with Japanese-style hanging lanterns.
To convey the task, the architect sent our previously made CG visuals with written explanations and photos of the new items in them.
Our 3D artist altered the ceiling and replaced the lighting fixtures in the scene according to the references. After that, she rendered the updated CG images.
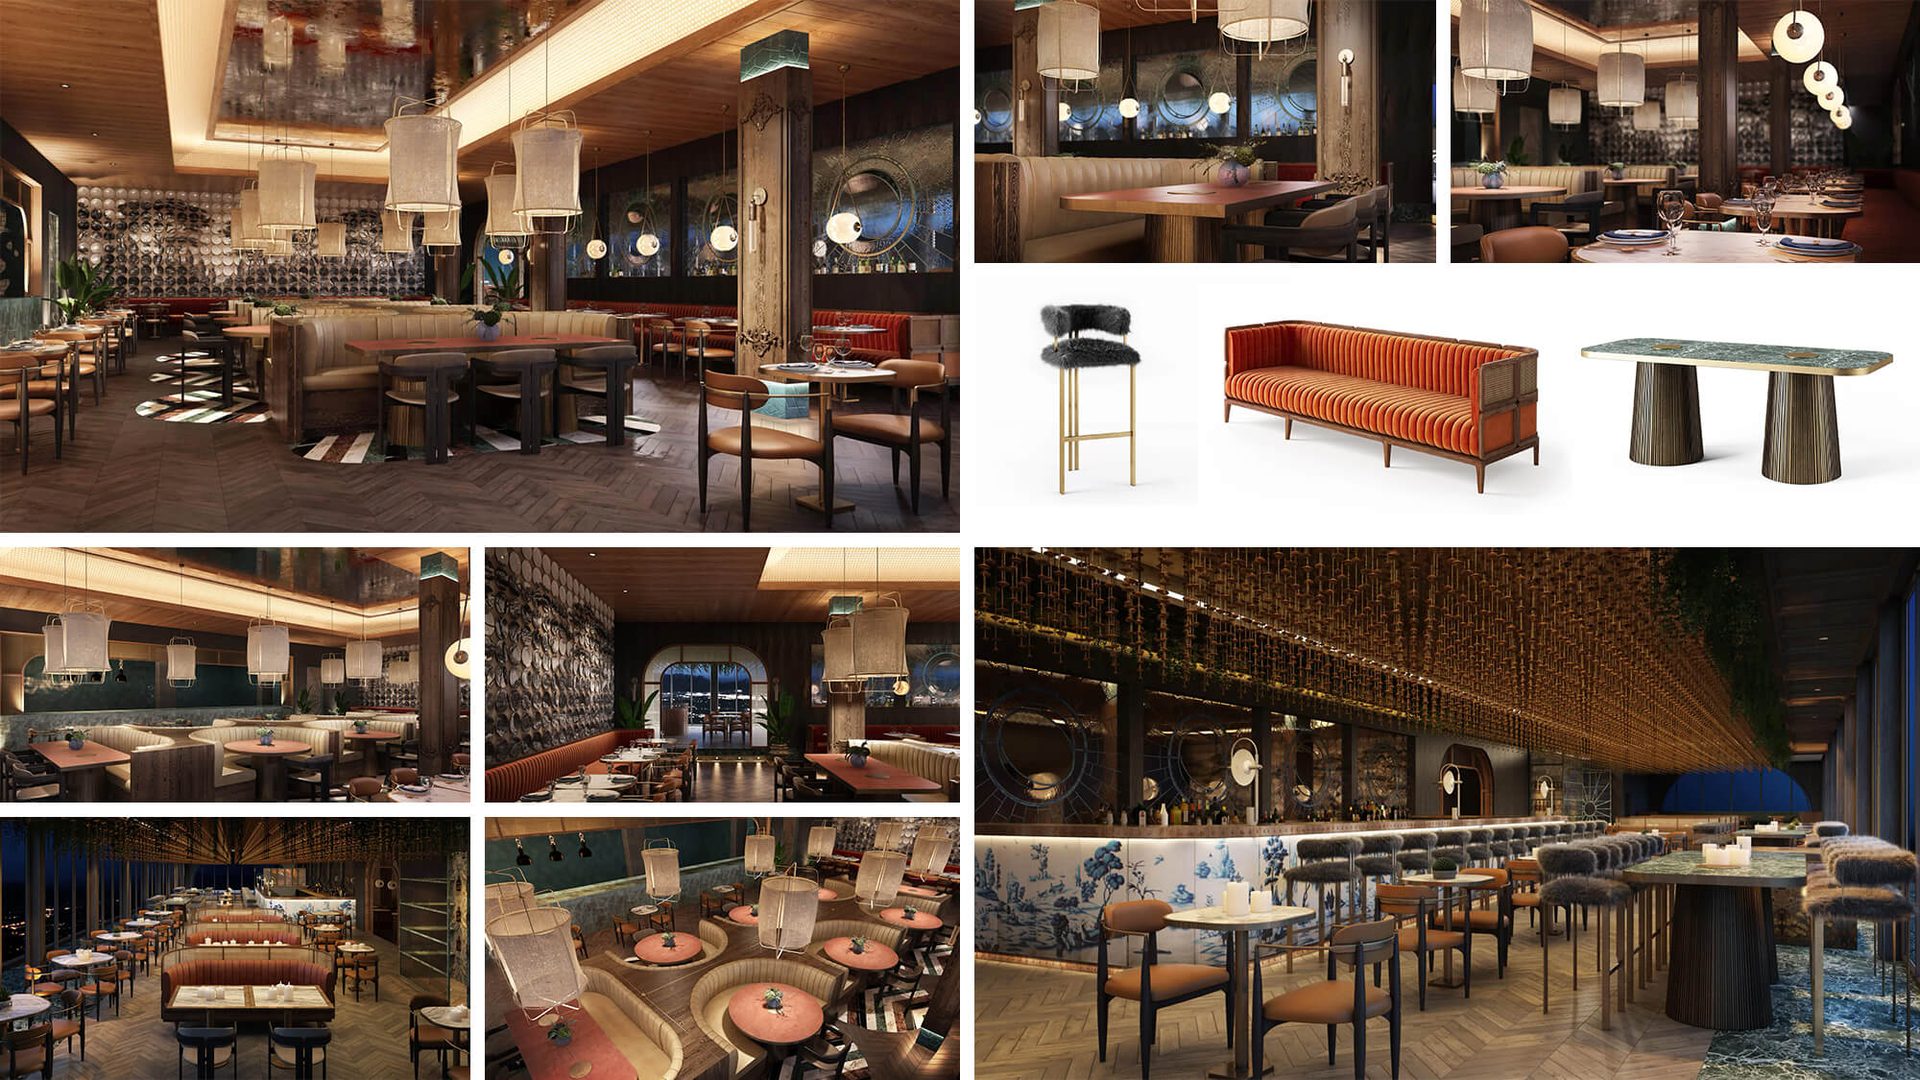
The 3D Rendering Project Results
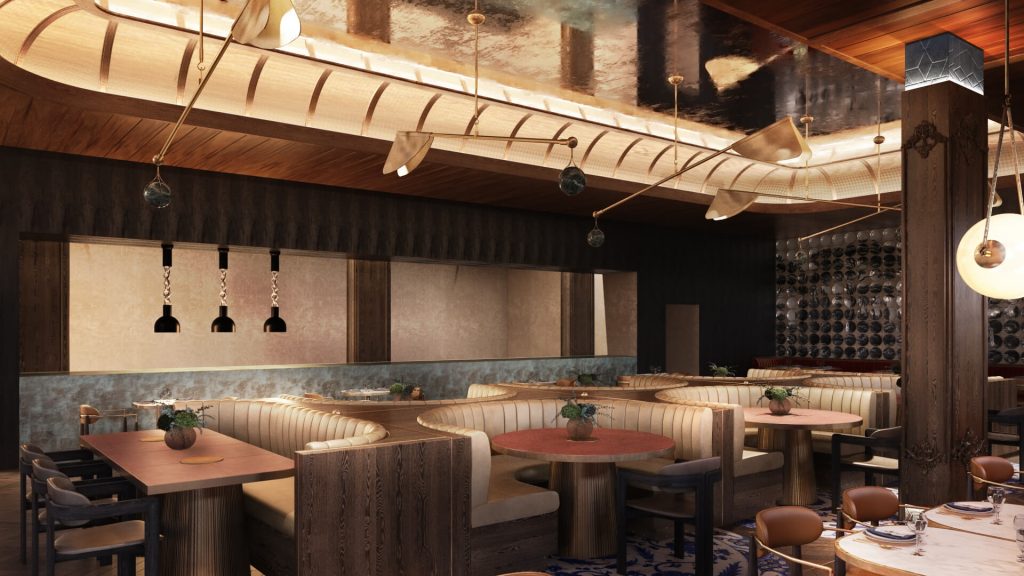
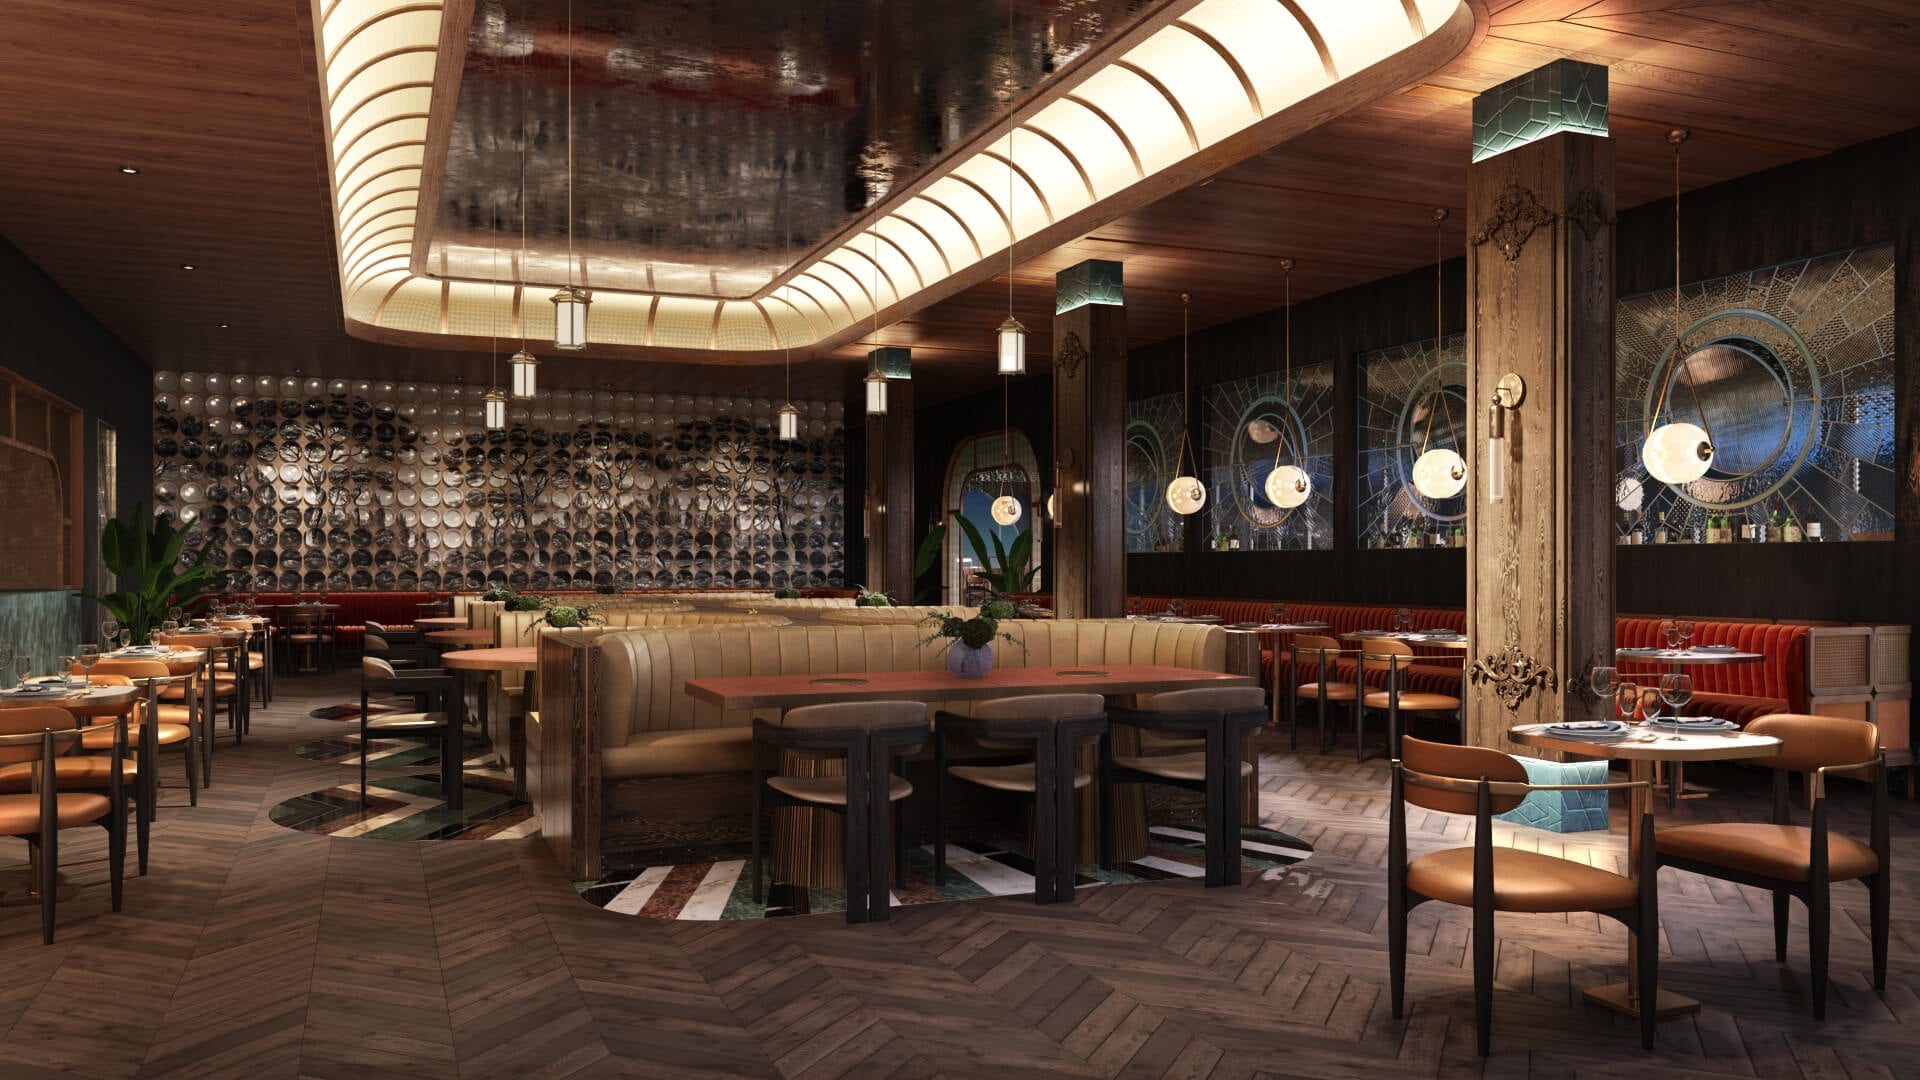
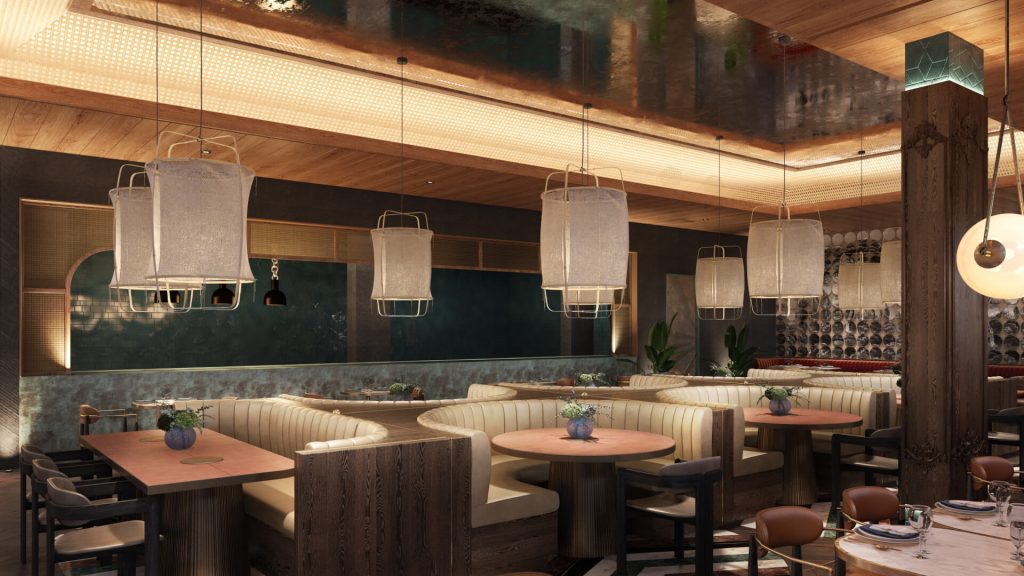
In total, we created 11 CG images. Below, you can see the 3 renders showing the main hall.
And below are 3 CG pictures showcasing the close-up views of tables setting and custom-made furniture.
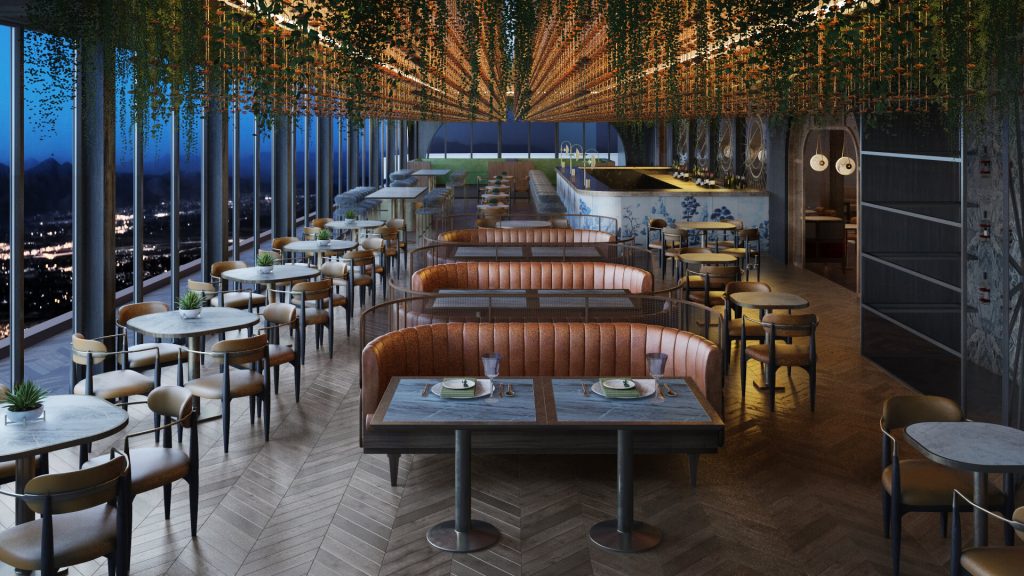
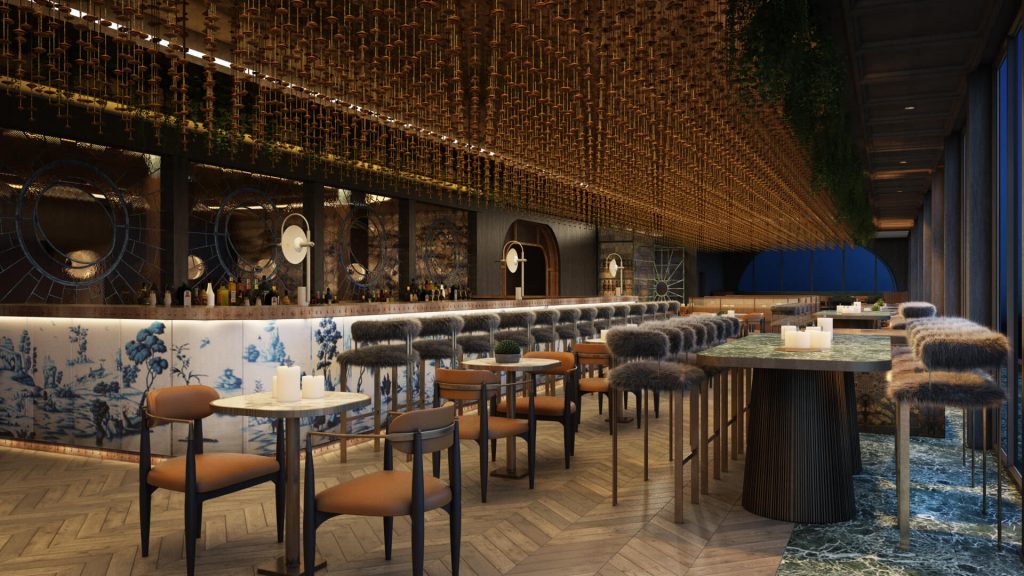
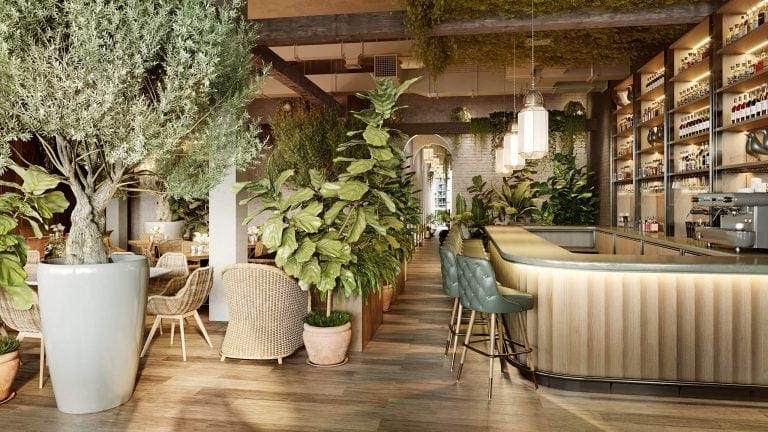
The two CG visuals below unveil the gorgeous interior of the terrace with a bar.

The following 3 renderings show the design of custom-made furniture pieces.


These CG visuals helped Tristan to showcase that Clay would attract the target audience not only with sophisticated fusion cuisine but also with a exceptional interior inspired by two great cultures. It would not be just another place to have a nice dinner. Thanks to the unique blend of Peruvian and Japanese aesthetics, it would be a place to remember, fall in love with, and come back to enjoy its splendid atmosphere again and again. With photoreal CGI, the architect could prove that the outstanding design was a guarantee of the restaurant’s popularity. Which was exactly what the investors were looking for.
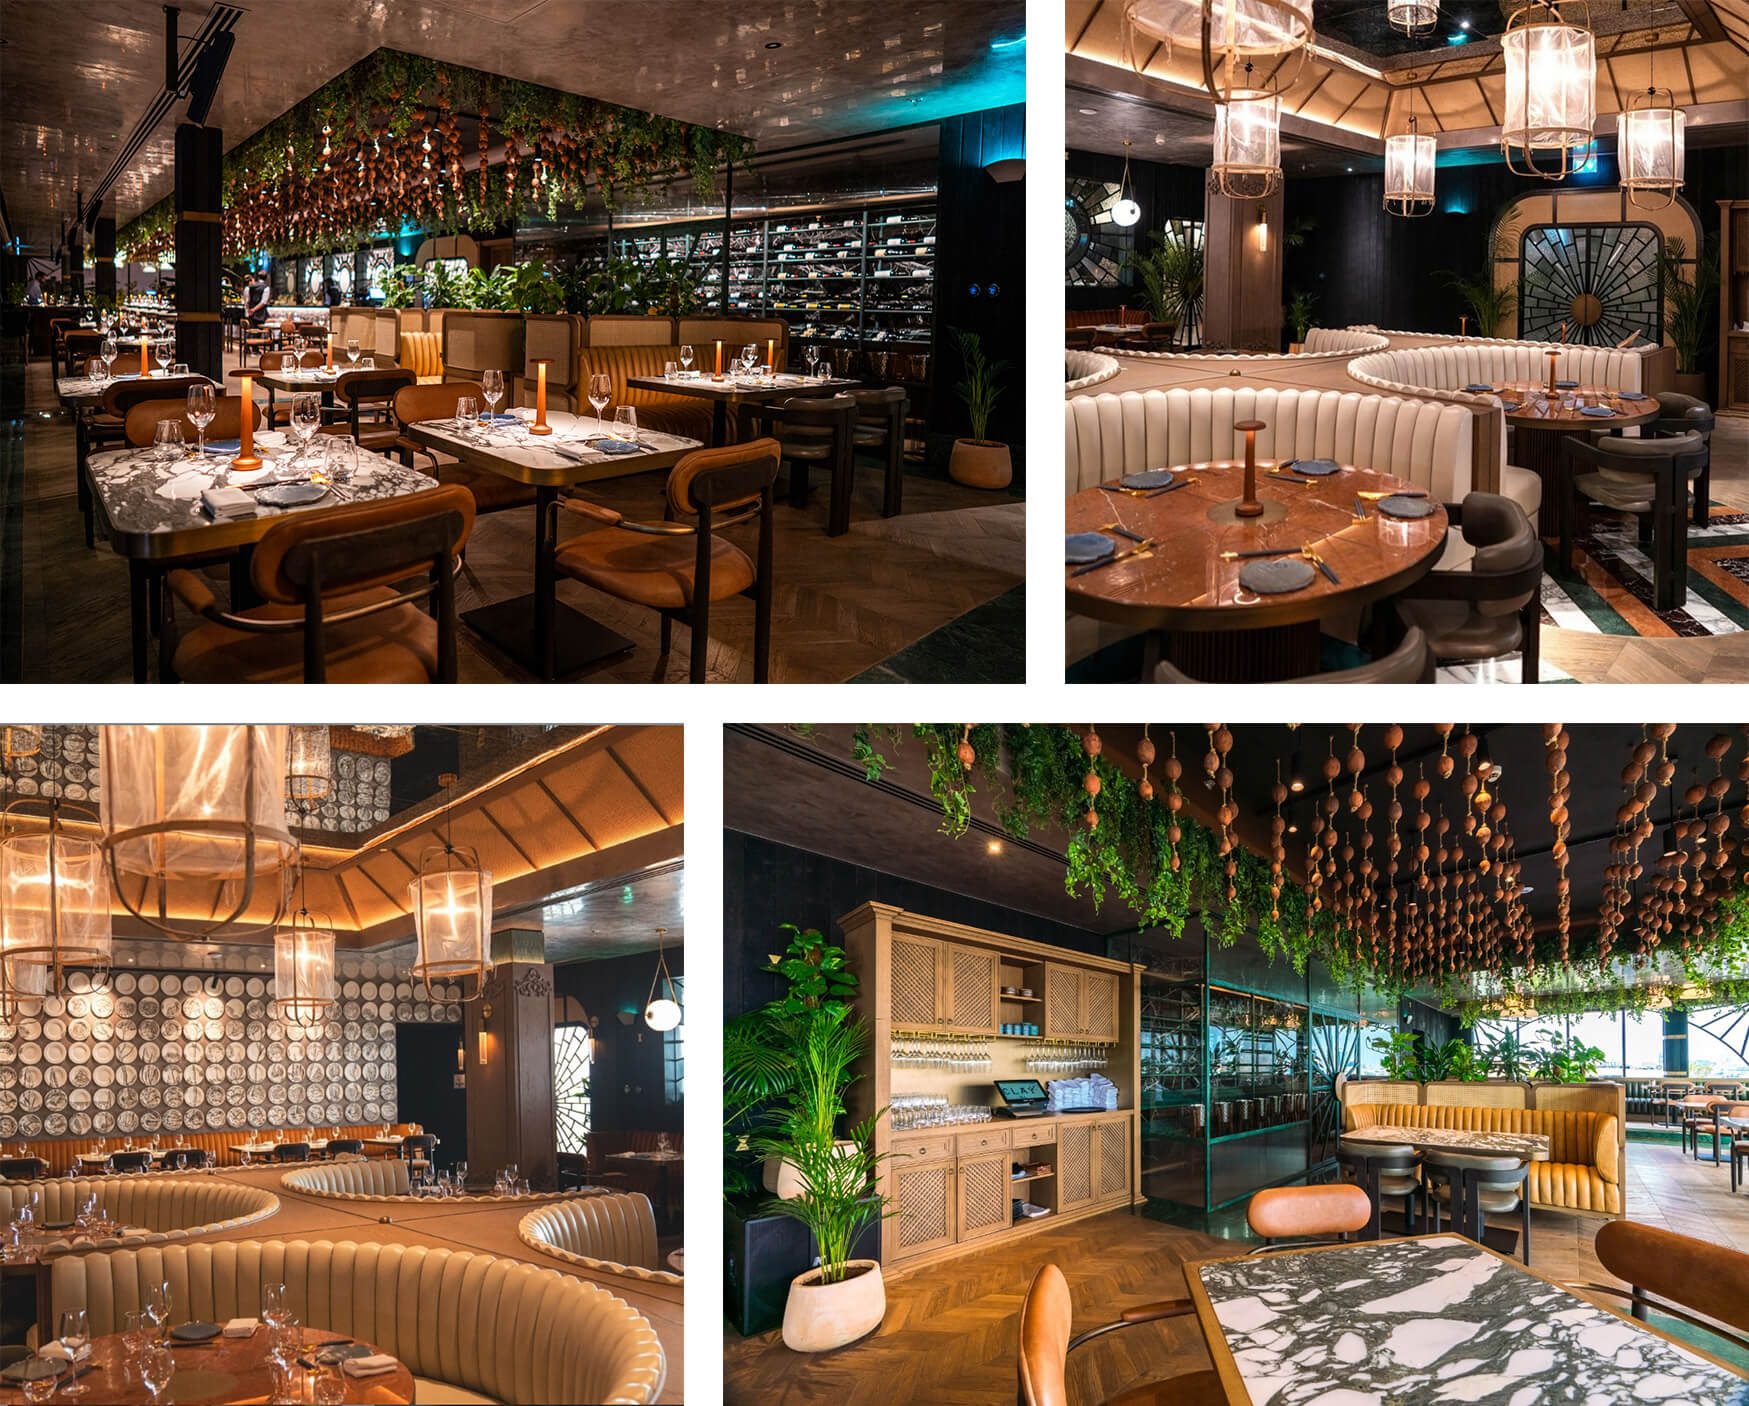
The Photos of Clay Restaurant
And now, let’s get to the most interesting part. Which is comparing our 3D visuals with the actual photos of Clay – already built and waiting for guests!
The restaurant opened its doors on January 17, 2020. We were so excited to see that our restaurant 3D rendering came true. Just take a look at these photos.
We are happy to have been a part of this beautiful project. We would love to visit Clay one day to have dinner in a magnificent setting that we recreated in 3D. And, of course, we are eager to create more CGI for Tristan’s next masterpieces. Our team always loves working on restaurant renderings of such gems as award-winning Alice and Fifth and Clay designed by him.
Get your project estimated in just 1 hour - fill out this brief!
Need to bring your interior projects to life before your audience’s eyes? Want to convey the layout, colors, materials, textures, lighting, and the atmosphere of the space with 100% photorealism? Book a demo call with ArchiCGI to discuss your project. You can also browse our restaurant 3D rendering examples for a closer look at what we deliver.

Catherine Paul
Content Writer, Editor at ArchiCGI
Catherine is a content writer and editor. In her articles, she explains how CGI is transforming the world of architecture and design. Outside of office, she enjoys yoga, travelling, and watching horrors.
Like this project? We’ve got plenty more! Check out these CGI beauties.
