


The computer 3D rendering technology has been actively used in the architecture and interior design industries since the 2000s. Yet, not everyone knows what it truly has to offer today. We’re talking about impeccable photorealism, subtle conveyance of atmosphere, spectacular animations, interactive 3D architecture rendering, and more. According to Mordor Intelligence, 75% of architects use real-time rendering weekly; architectural visualization leads the 3D rendering market with 41.90% share in 2025.
As a professional outsourcing architectural visualization company, we want our clients to have clear visuals, faster alignment, and stronger results. That’s why we prepared this article, where all of your main questions about architectural CGI will be answered. Namely, we’ve covered everything from the basics to the variety of CG products to the process of creating a flawless 3D render. Take a look!
What Is Computer 3D Rendering?
Computer rendering is a digital visualization technology that allows producing three-dimensional photorealistic imagery of any object or environment. It requires the use of specialized software, such as Autodesk 3ds Max, Maya, Blender, etc. In the field of architecture and interior design, ultra-realistic CG renderings are used for project presentations, portfolio entries, and marketing campaigns.
History of 3D Rendering
We can’t possibly fit the entire history of computer graphics in this short article. So, instead, let’s take a look at the most iconic and pivotal moments in the evolution of CGI.
1960s
The term “computer graphics” appeared way back in 1960. It was coined by William Fetter, a graphic designer at Boeing, and his team’s supervisor Verne Hudson. And in 1963, computer scientist and CGI pioneer Ivan Sutherland wrote a program called Sketchpad. It allowed the user to draw, edit and manipulate simple shapes with a light pen. Also, it was the first software to introduce object-oriented programming and geometric constraints. The program laid the basis for the rapid development of computer 3D modeling, visual simulation, and CAD.
1970s
The 70s were a decade of some real breakthroughs in the field of computer rendering. It all began when Ivan Sutherland joined David C. Evans — another computer scientist — at the University of Utah. There, they began teaching a revolutionary computer graphics class, which made a significant contribution to the founding research in the field. The course had many remarkable alumni, including future co-founders of Pixar and Adobe Systems.
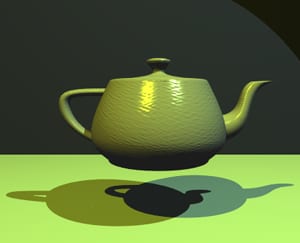
Also, this was the time when the most famous 3D model of all time was created. The so-called Utah teapot was made by Martin Newell, who also studied computer graphics at the UU, in 1975. It was one of the very first 3D objects modeled with bézier curves — the modern CG tool we still use today — instead of precise measurements.
Since then, the teapot became so iconic that it was featured in museums and various software. It even made appearances in several animated movies and series, including Toy Story, The Simpsons, and Monsters, Inc.
1980s
In the 80s, computer 3D rendering stopped being a solely scientific and academic field. Home computers became more common, the Star Wars franchise gained millions of fans, kids started playing the first video games from Nintendo, Atari, and Sega. All of that, plus the new technological advancements, increased the commercial use of 3D graphics.
1990s-Present time
From the 90s and until today, we saw a consistent improvement of quality in computer rendering. The modern hardware is powerful enough to process more data and within a much shorter time than before. The software too became a lot more sophisticated. All of that gradually led to greater photorealism, more natural-looking animation, the emergence of interactive visual formats such as VR and AR, and a lot more.
Showcase your architectural project with photorealistic CGI powered by modern AI-assisted workflows
CGI Products for Architects and Designers
Now that we’re all caught up on the history of 3D rendering for architects, let’s take a look at the actual products you can have thanks to this technology. Here, we’ll briefly tell you about each kind of visuals and how you can use them to showcase your designs in the best ways possible.
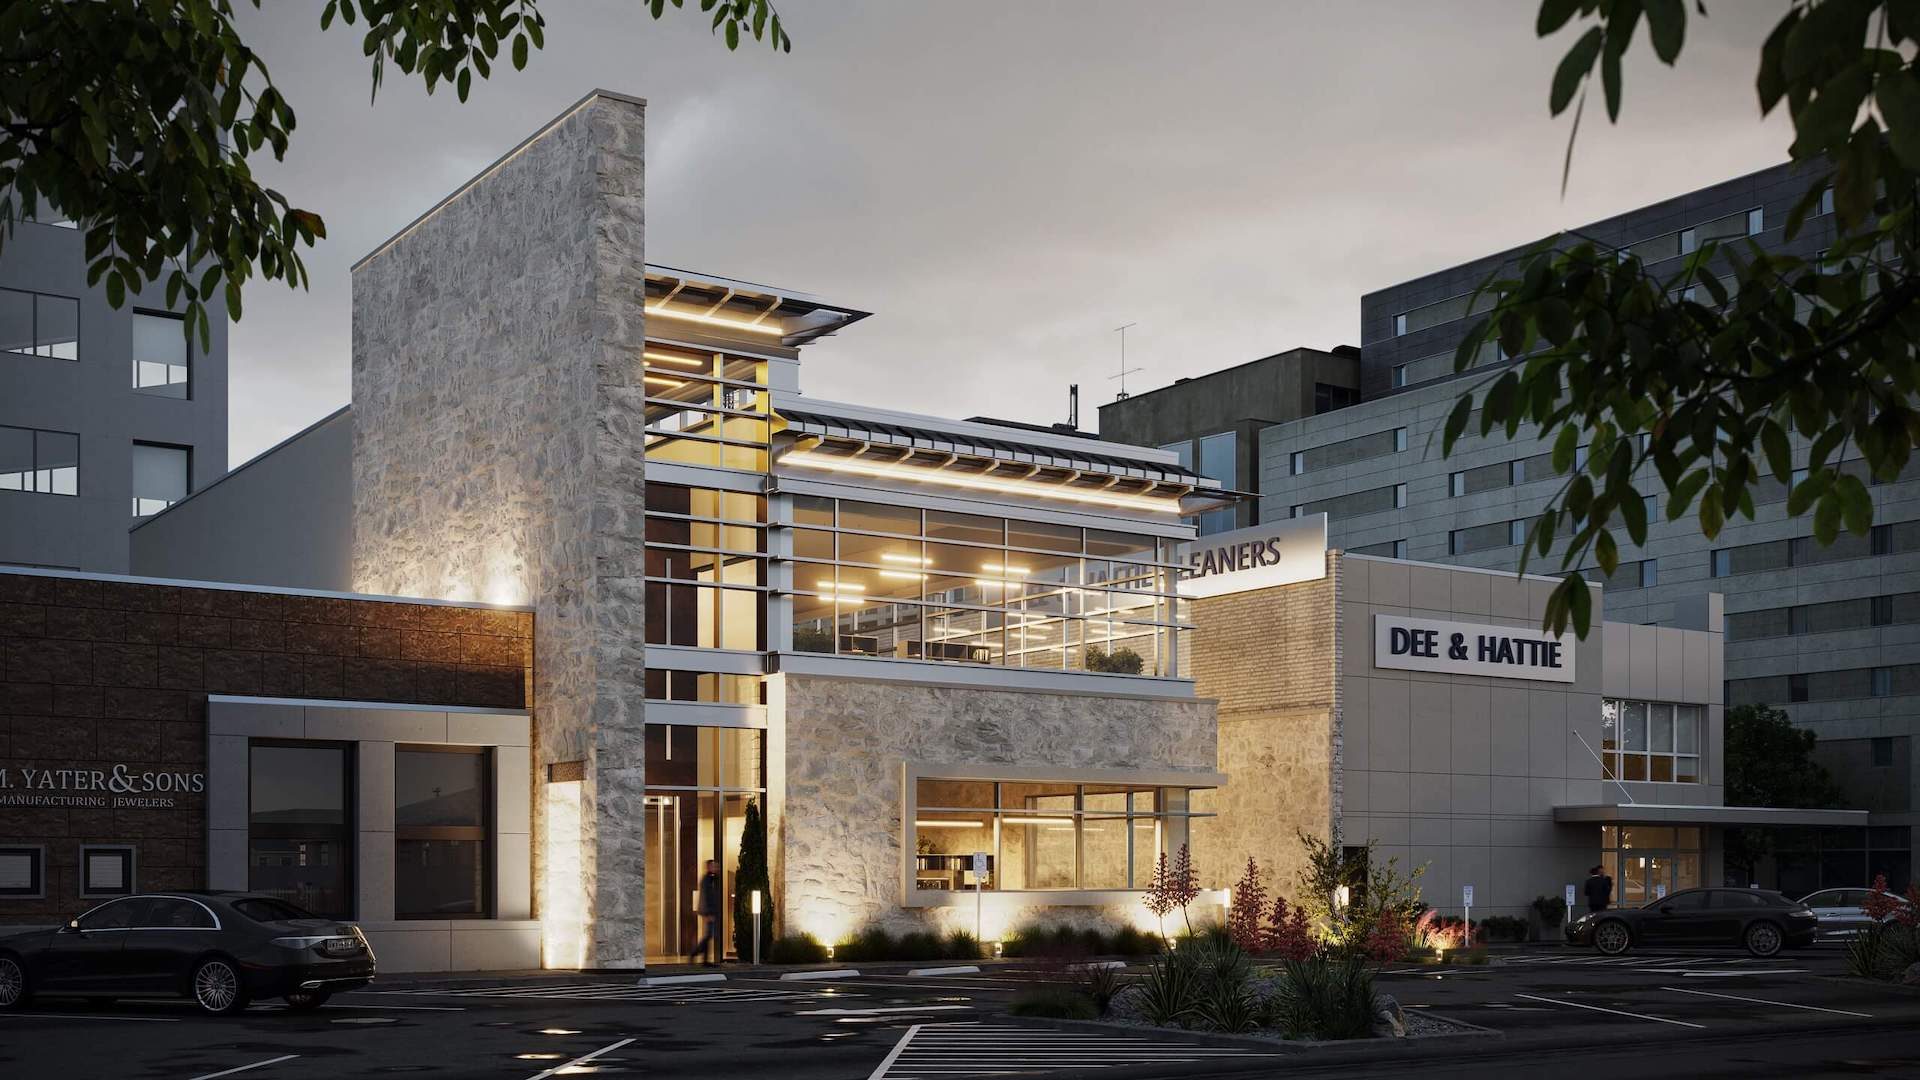
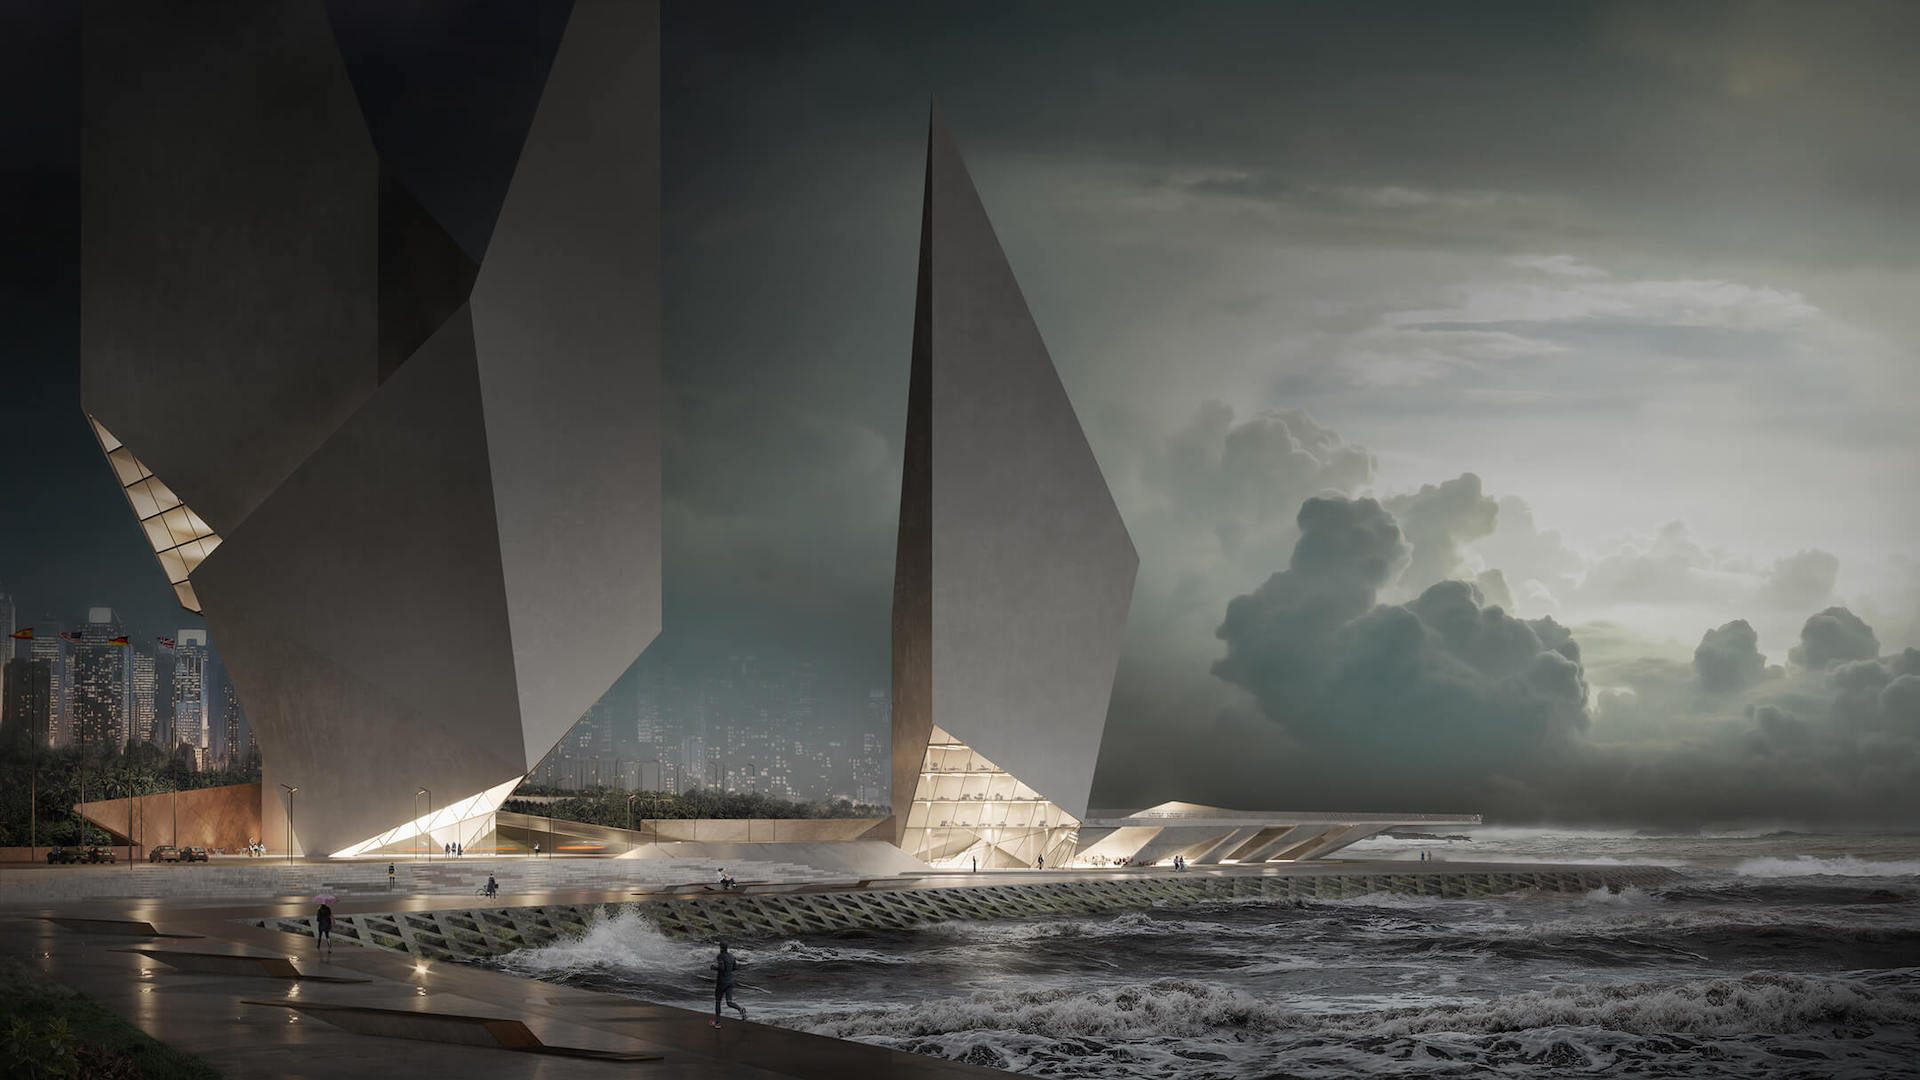
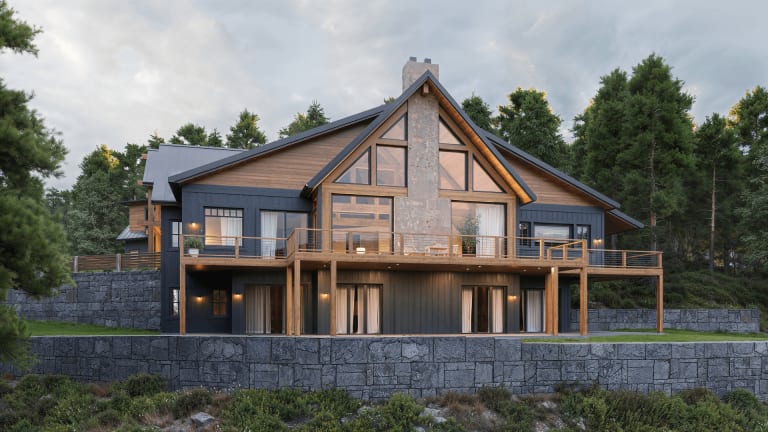
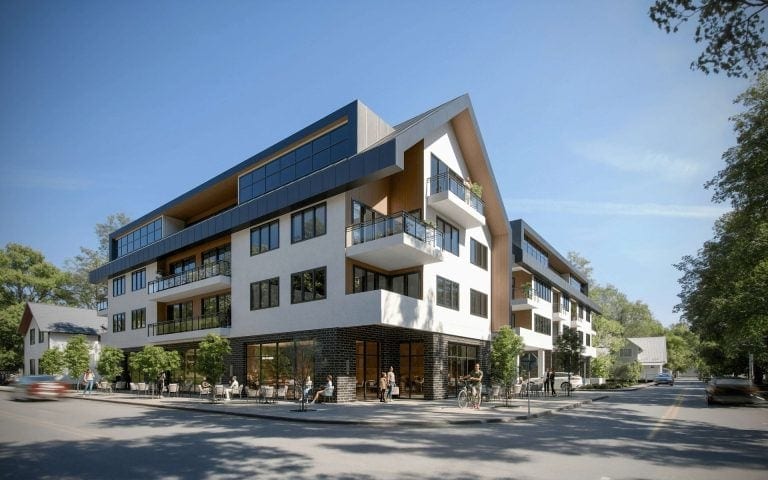
#1. Exterior 3D Visualization
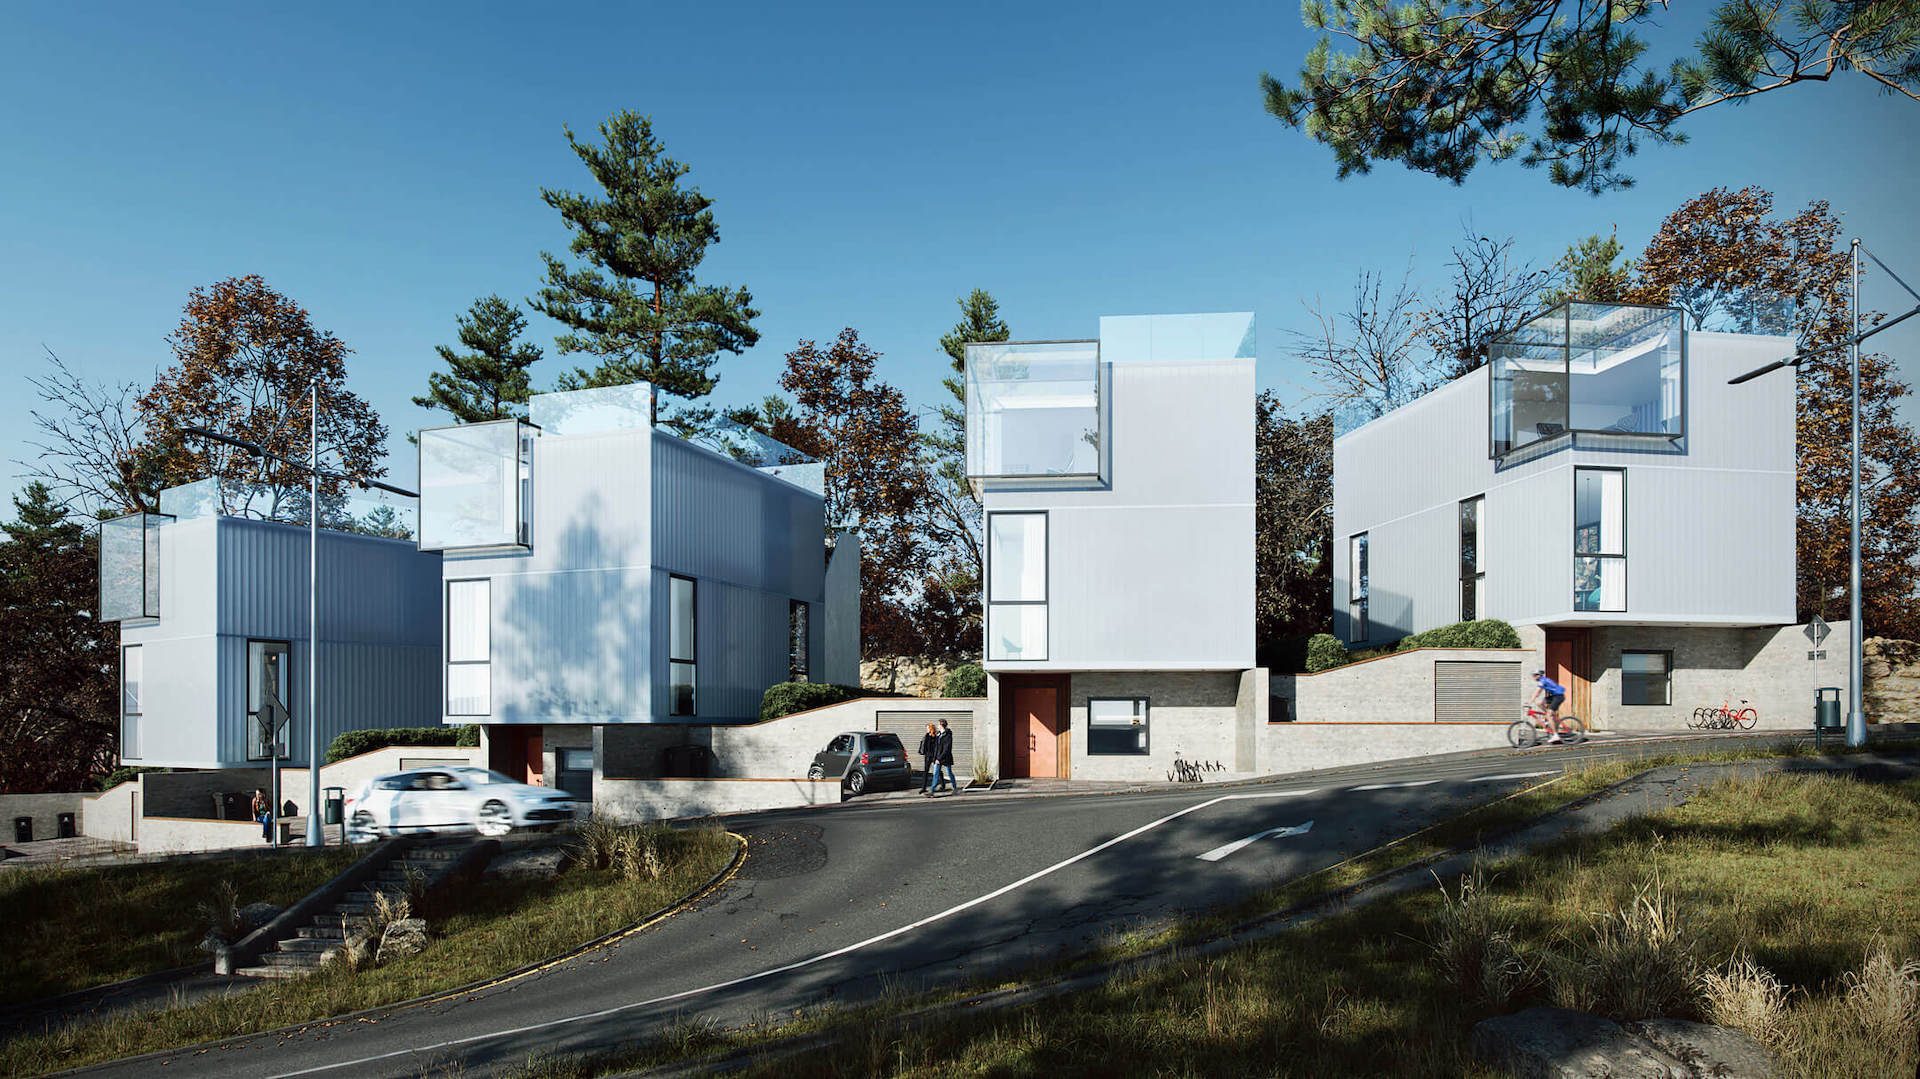
Highly realistic exterior rendering is a powerful visual asset for architectural presentations. With this type of CGI, you can effectively present your projects to clients, showcase design concepts at competitions, regularly update your professional portfolio, and strengthen your social media presence. Depending on what design features you want to highlight, you can get different views:
- street/human eye level;
- close-up;
- aerial/bird’s-eye level;
- ground/worm’s-eye level.
#2. Interior 3D Visualization
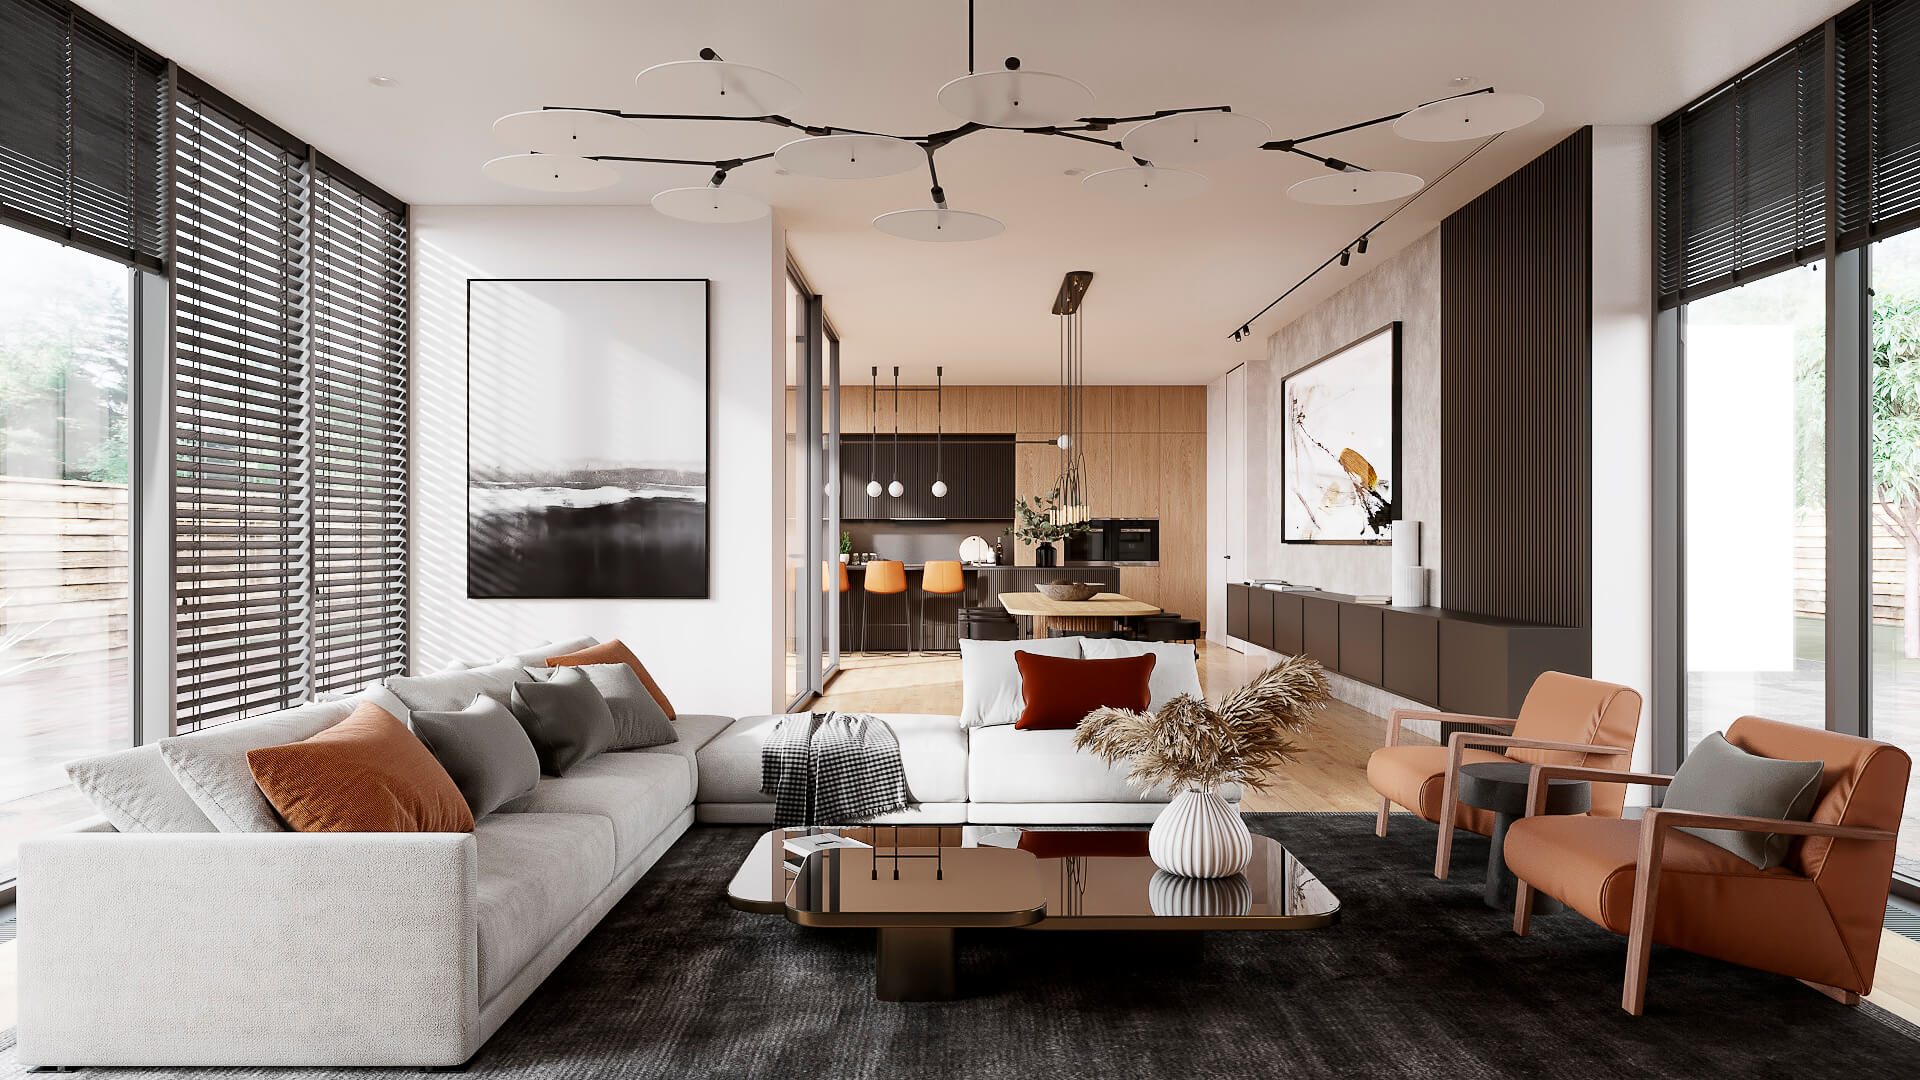
This type of computer 3D rendering is useful for both architects and interior designers. It allows them to have photorealistic CG imagery of their concepts with precisely depicted room dimensions and layouts. Moreover, it allows them to showcase the exact pieces of furniture, decor, and materials they are going to use. Interior 3D rendering services allow for the creation of indispensable presentation and marketing assets for both residential and commercial projects.
#3. Interactive 3D Panoramas and Virtual Tours
A 3D panorama is an interactive 360-degree view of a space with one viewpoint. A virtual tour is basically the same thing, only with multiple viewpoints. That means the viewer can click on so-called hotspots to move around the place. This type of CGI is mostly used by real estate agents and developers to pre-sell properties that are under construction. A 3D rendering virtual tour can feature an actual design the buyer’s going to get. At the same time, it can show a sample design to help the prospect picture their life in the place and feel more confident about the purchase.
#4. CG Animation
This type of 3D rendering takes any architectural and/or interior design presentation to the next level. It allows you to show both the exterior and the interior of a place in a dynamic way. We’re talking about spectacular camera movements, soundtrack, and visual effects. With the use of architectural animation services, you can create a unique atmosphere for your presentation and make it memorable and highly engaging.
The Process of Making a Still 3D Render
If you’re interested in outsourcing computer 3D rendering or are already using this kind of service, you might be wondering how exactly a professional team of 3D artists works. So, we’ll now share with you our process of creating photorealistic 3D renders. Let’s take a look!
#1. Reviewing the Scope of Work

Every 3D rendering project starts with the team receiving a scope of work from you. It should contain all of your requirements as well as visual references. Those include drawings, SketchUp or Revit models if you have them, furniture and materials specification, lighting and mood references, background images, location references, etc.
Get your project estimated in just 1 hour - fill out this brief!
#2. Modeling
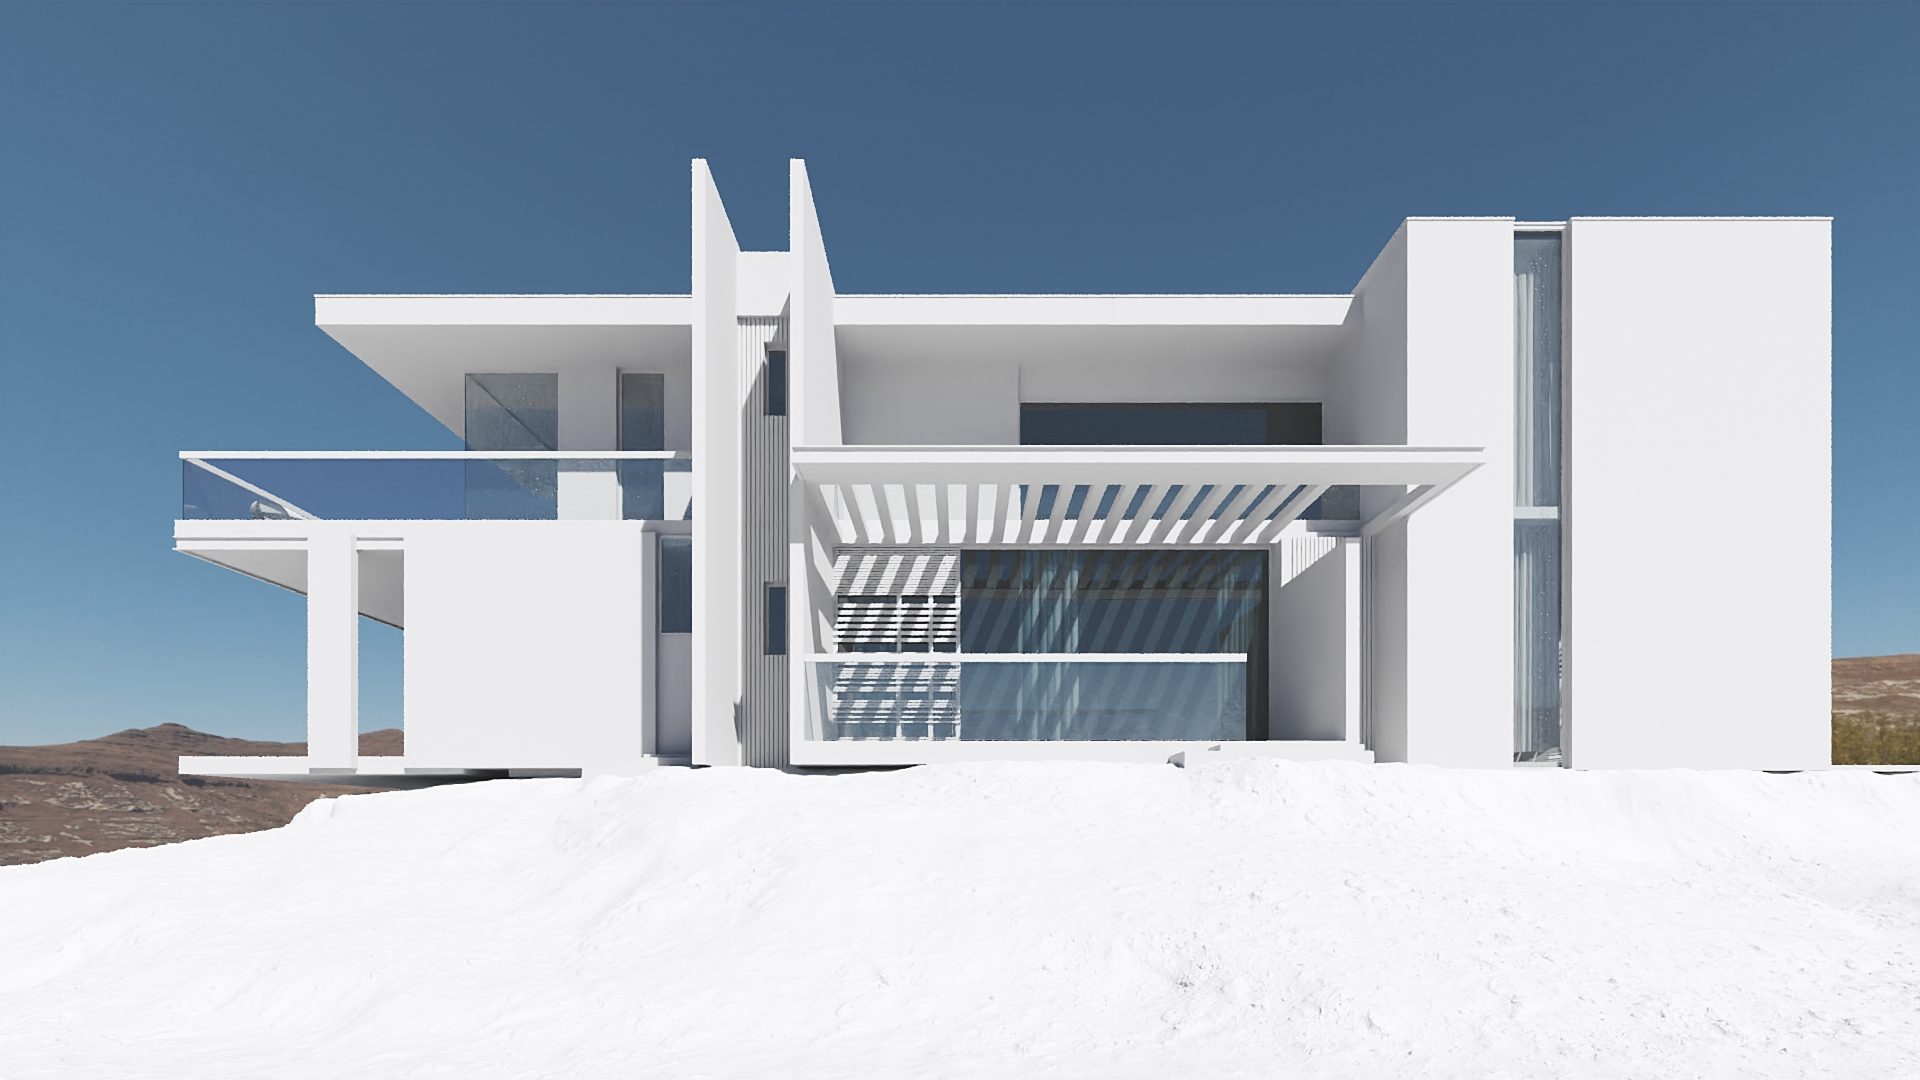
At first, a CG artist will recreate the building in 3D without applying any textures or materials to it. They’ll send you a grayscale 3D rendering, such as the one above, to get your approval on the geometry of the 3D model. Once they get it, they move on to the next step.
#3. Setting Lighting and Texturing
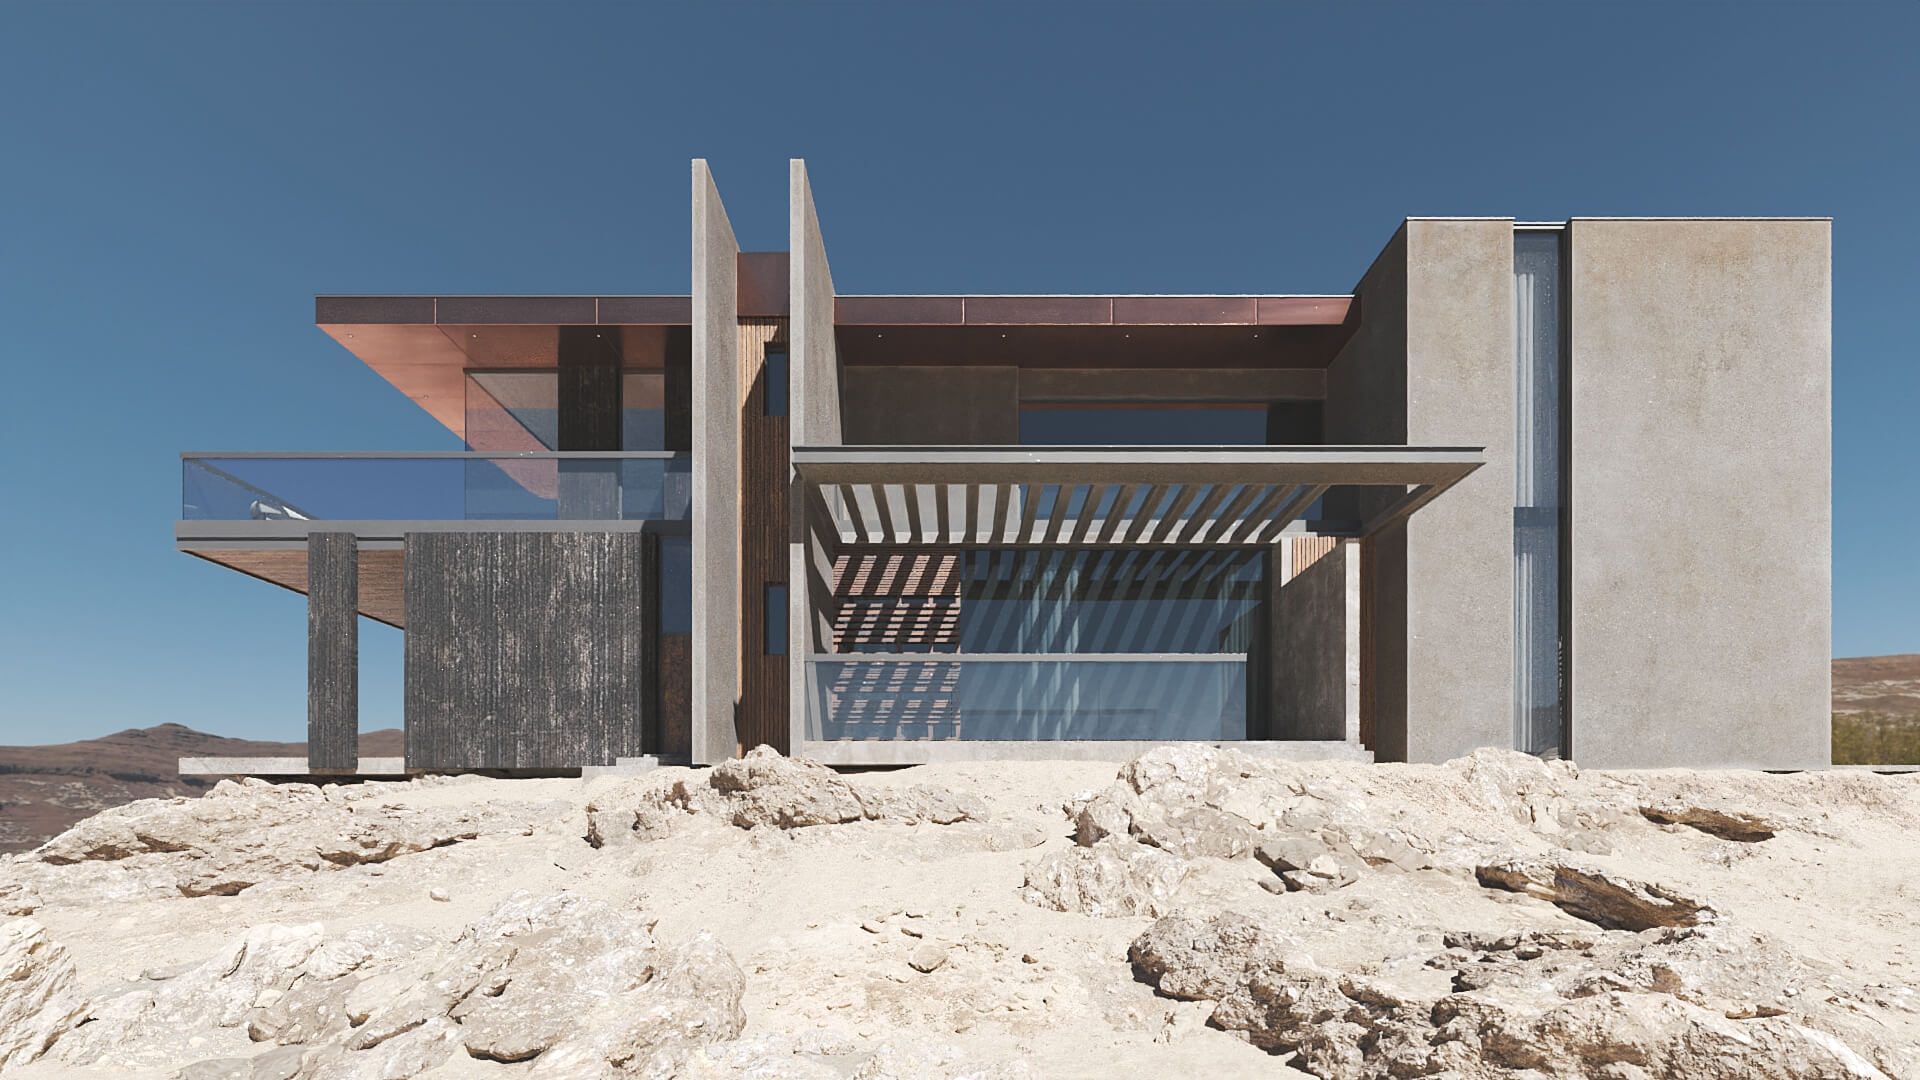
At this point, the 3D artist sets the lighting in the scene. Right after that, they apply textures and materials to all the elements in the scene according to your specification. As you can see, the computer rendering above already looks very realistic. But the CGI specialist still has some more work to do.
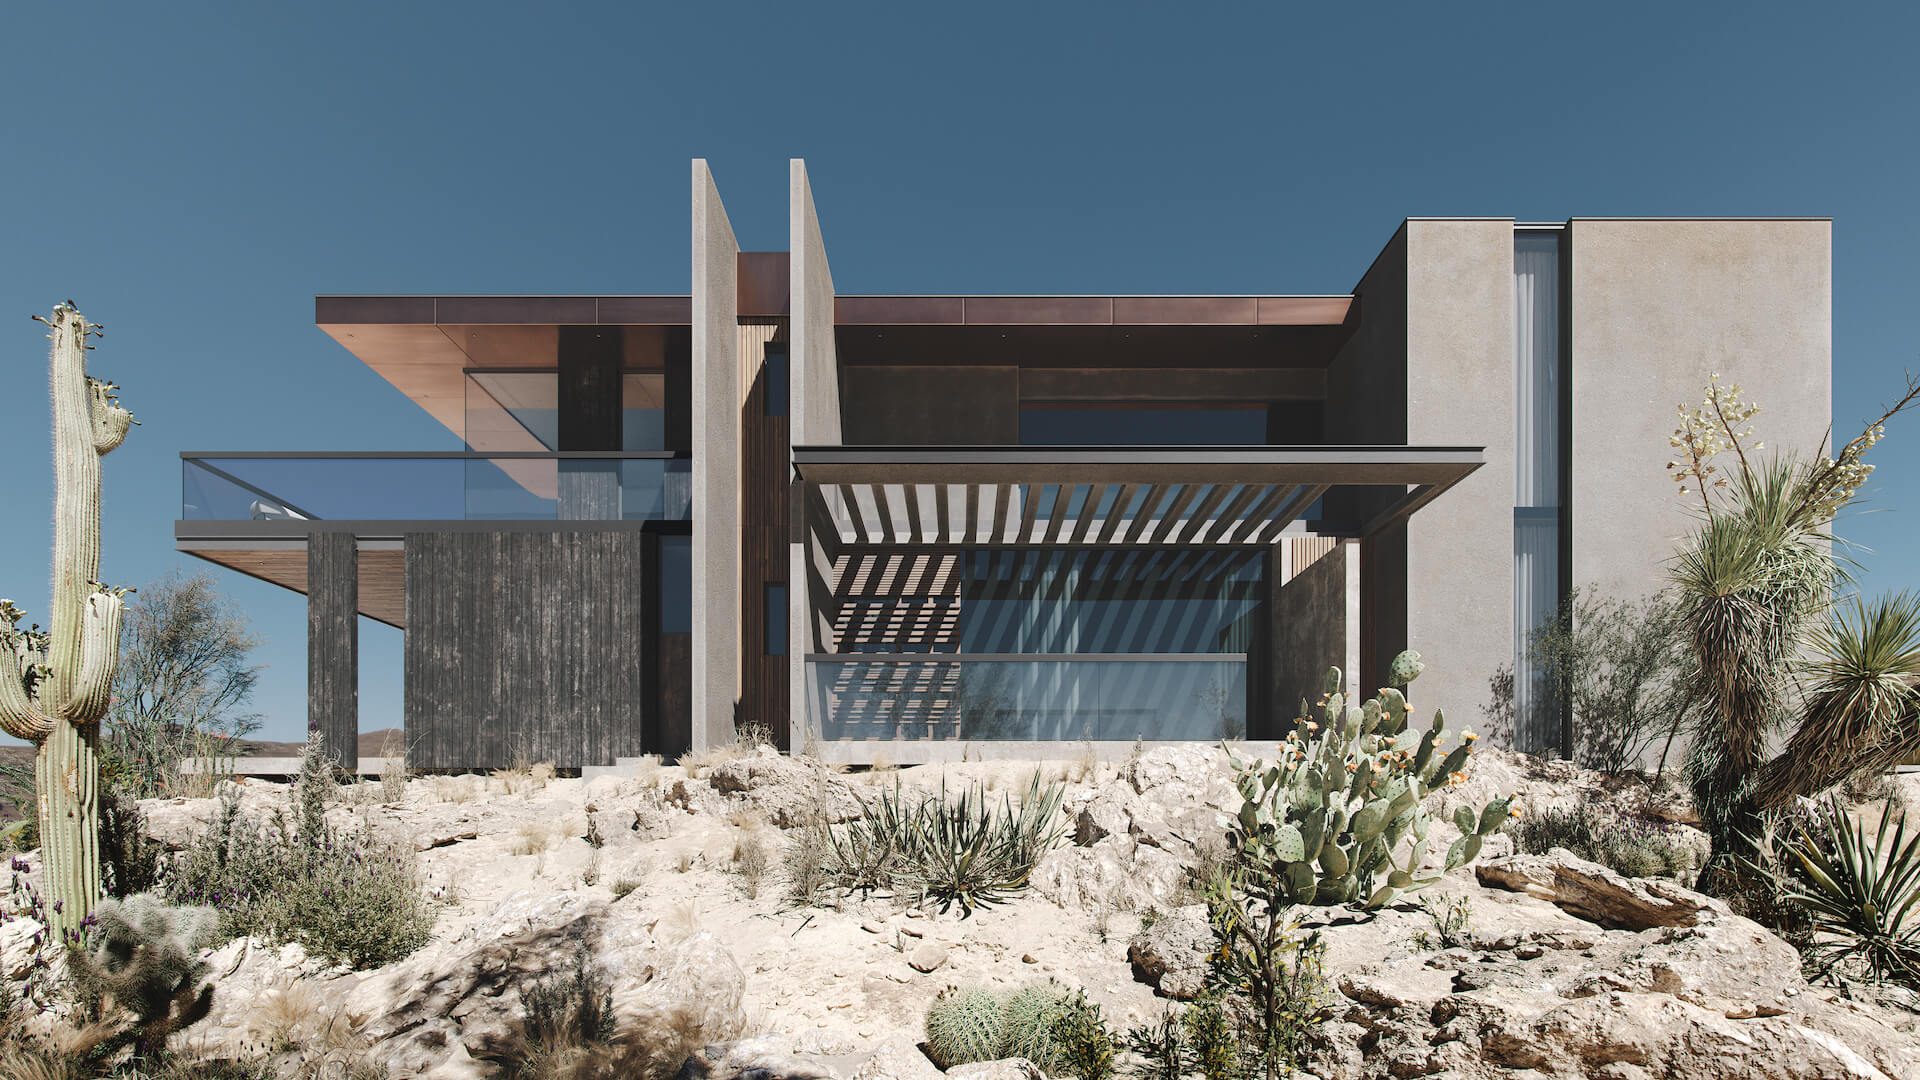
#4. Adding Details and Rendering

At this stage of the project, the CG expert adds all the secondary details to create the required environment. And finally, when everything is in its place, they start the rendering process. It’s performed entirely by the computer, so the only thing to do at this point is to wait.
#5. Post-Production
When the 3D render is ready, the 3D artist will add the final tweaks in Photoshop. Usually, that includes color correction and contrast adjustment. After that, the photorealistic CG image is complete.
To learn more details about the process of making architectural CGI, check out our articles on exterior 3D rendering project and interior 3D rendering project workflow, as well as the 3D architectural rendering guide.
What is computer rendering in architecture?
Computer rendering in architecture is the process of creating visual representations of a building or space using 3D software. It transforms drawings, CAD models, or concepts into images or animations that show how a project will look in reality.

How long does computer 3D rendering take?
The timeline for computer 3D rendering depends on the complexity of the project, level of detail, and number of views required. Simple images can take a few days, while more detailed scenes or multiple perspectives may take one to two weeks. Larger projects with animation or revisions can extend timelines further, especially when multiple approval stages are involved.
What software is used for computer 3D rendering?
Computer 3D rendering typically involves a combination of modeling, rendering, and post-production tools. Common software includes 3ds Max, Blender, SketchUp, and Revit for modeling, along with rendering engines like V-Ray, Corona, and Unreal Engine. Post-production is often done in tools like Photoshop to refine color, lighting, and final presentation quality.
Computer 3D rendering has become the standard tool for architecture and interior design presentations — from still images and floor plans to immersive virtual tours and 3D animations. If you are looking for a reliable outsourcing partner, ArchiCGI has over 15 years of experience delivering photorealistic CGI for architects and designers worldwide. Contact us for professional CGI services.

Ana Wayne
Content Writer, Copywriter
Ana is a content writer for ArchiCGI. She has a passion for design and architecture - and for talking about it. Outside of work, she is a fan of sci-fi movies and a street food connoisseur.
