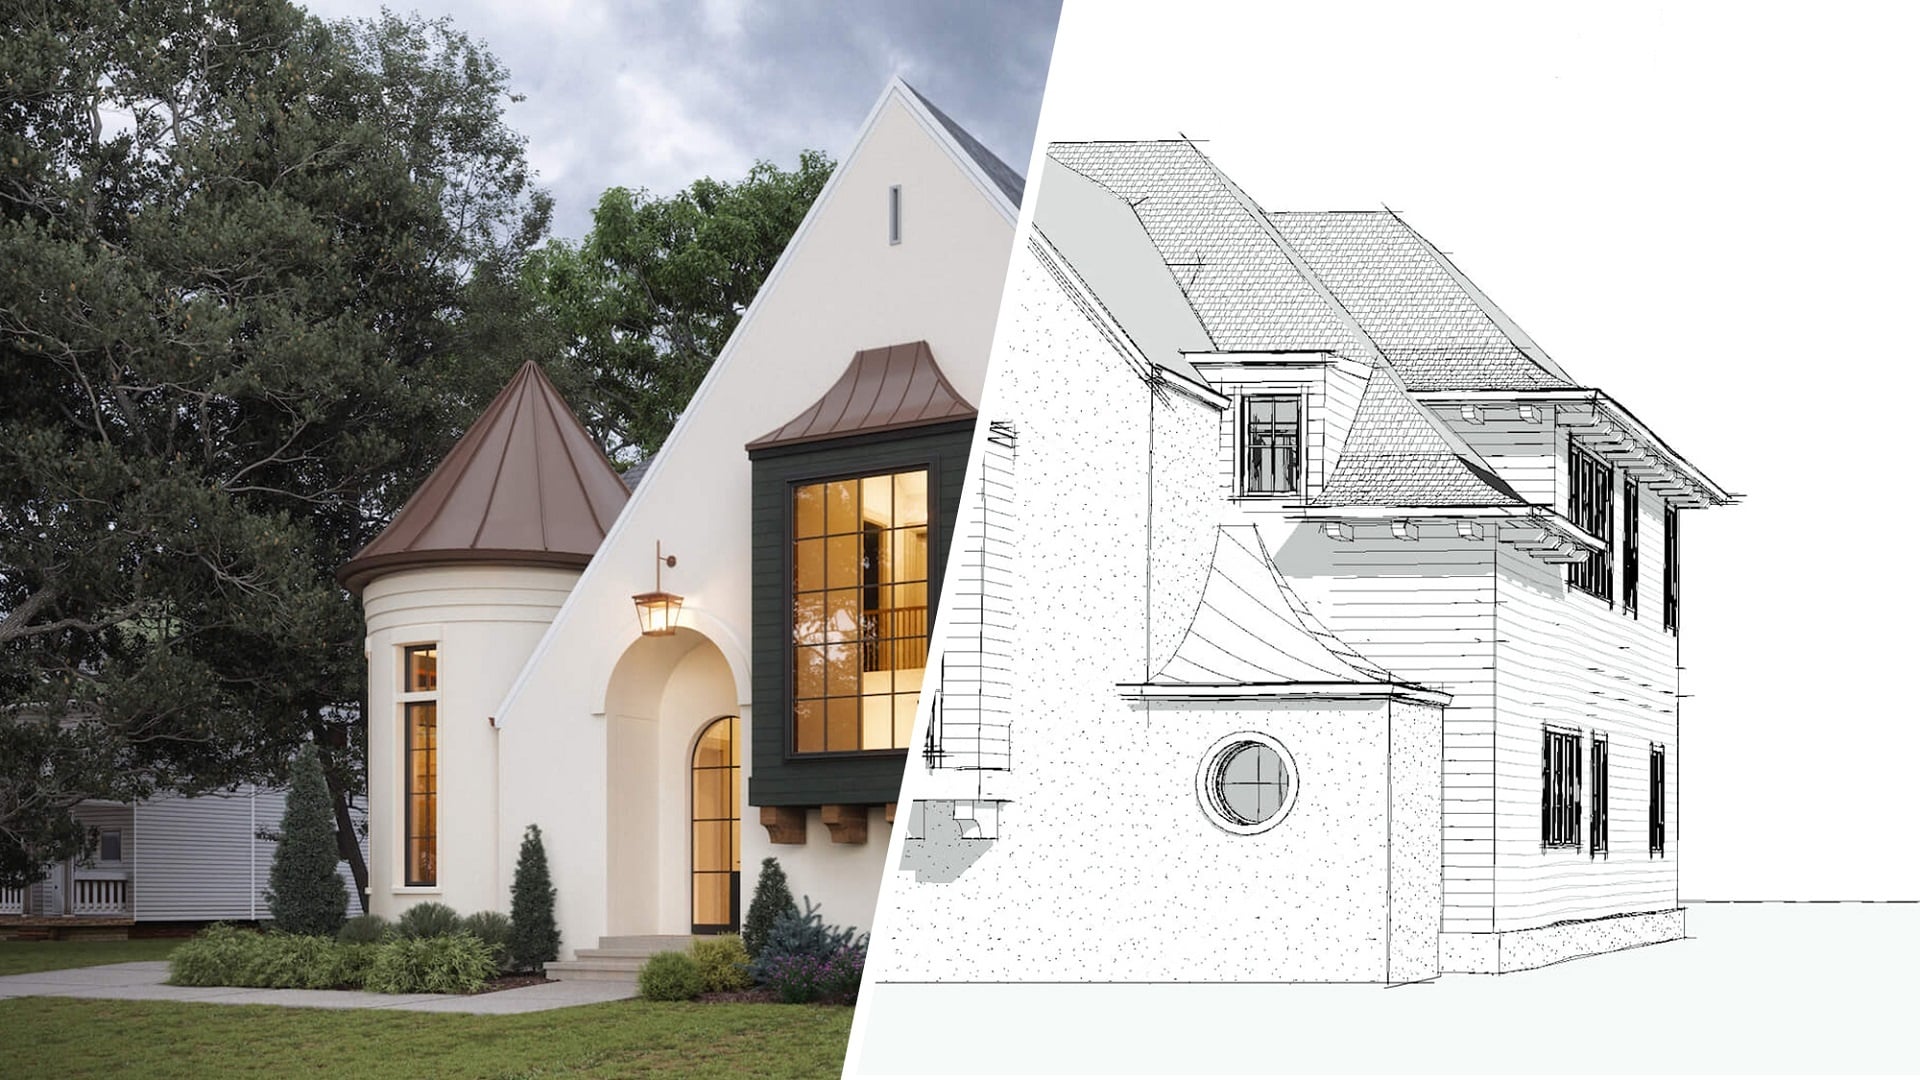
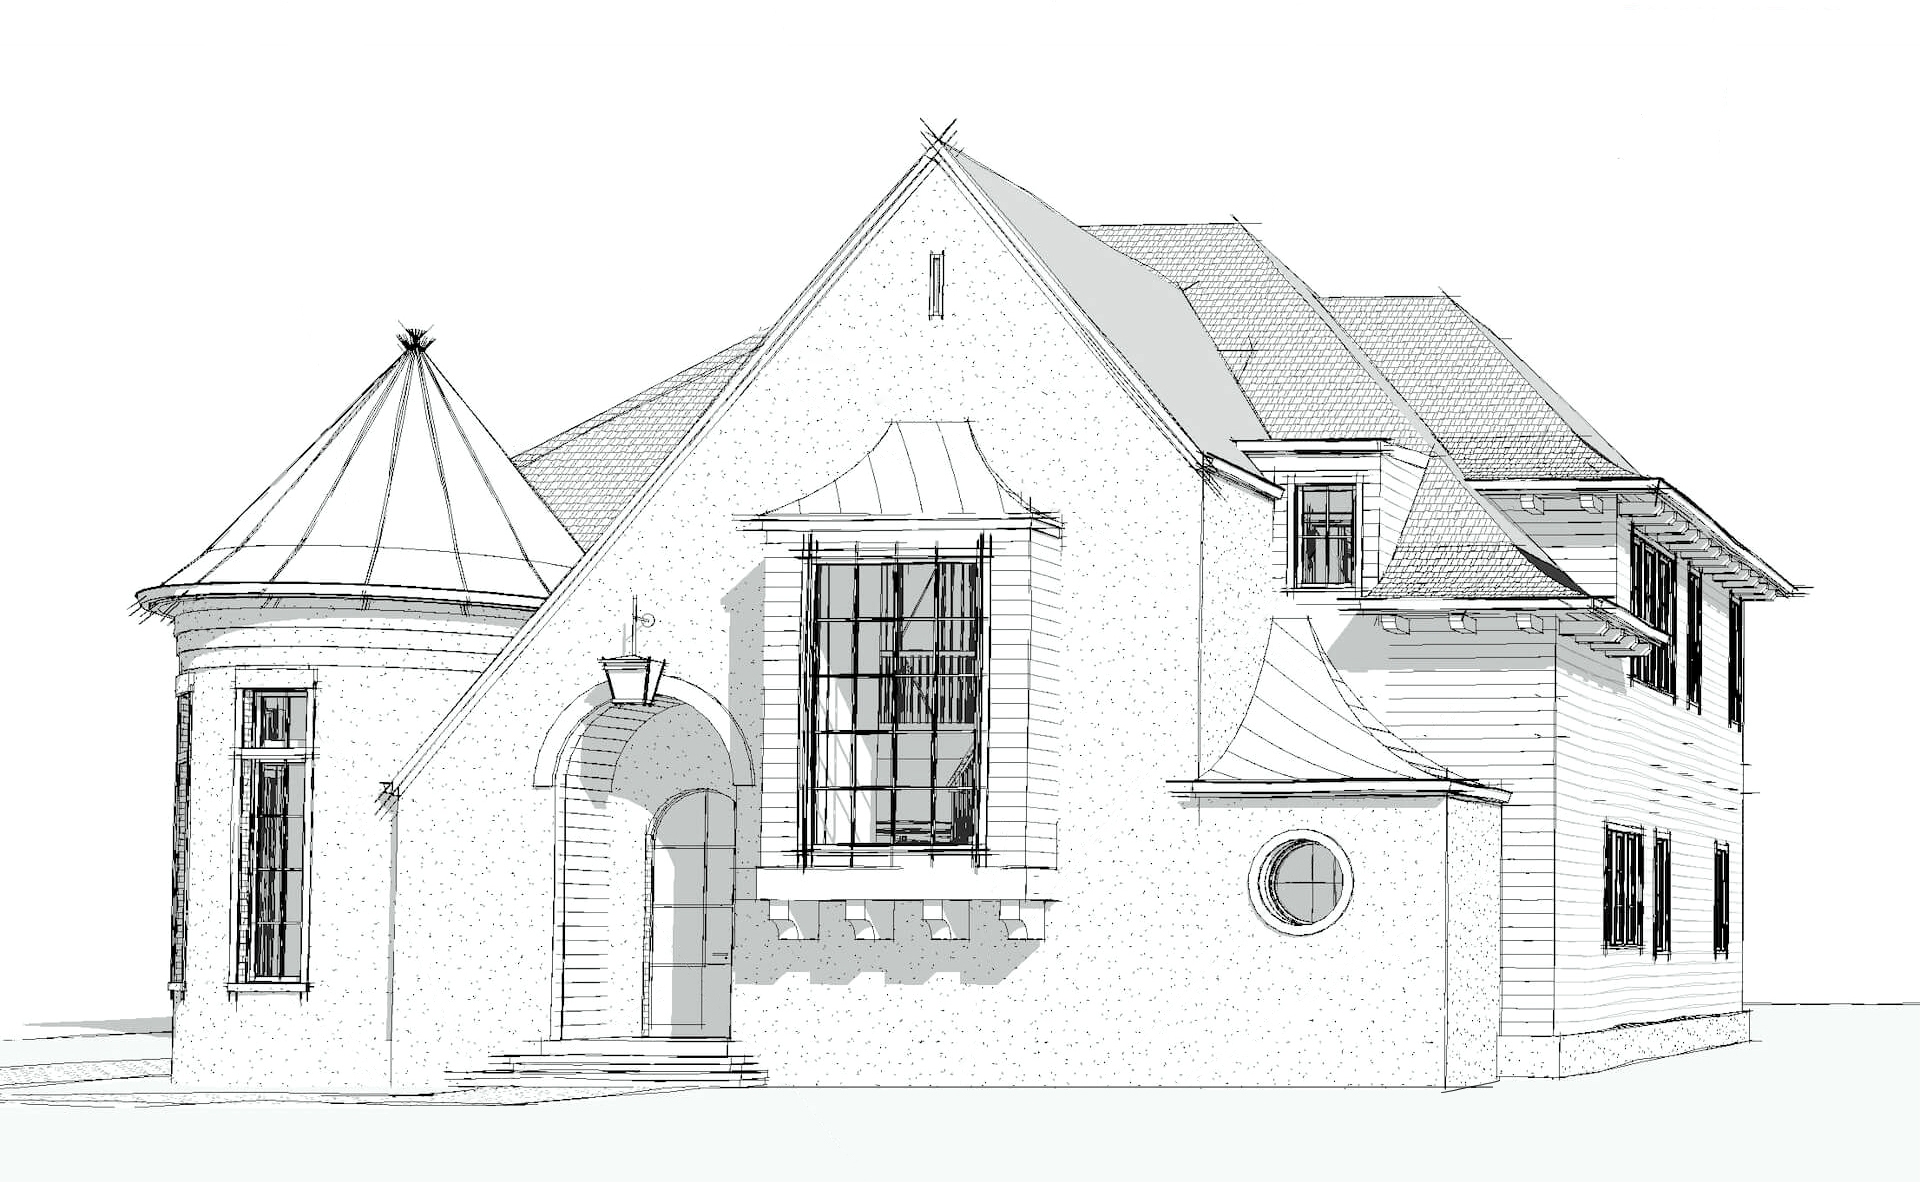
For 3D exterior rendering services, an architect needs to provide a little more information. Namely, location specifics, facade elevation, floor plan, roof plan, drawings of complex assemblies, materials, and style references. This way, an architect can get the most accurate representation of their ideas without making a ton of costly corrections.
What Is a 3D Rendering Brief?
A 3D rendering brief, also called a technical assignment, sets the stage for any CGI project to succeed. This document takes the architect’s vision and turns it into clear, workable steps for a 3D artist.
Basically, it spells out exactly what should be visualized, how it ought to look, and what materials will bring the scene to life realistically. If the brief is solid, there’s less back-and-forth, faster turnaround, and everyone knows what to expect from the final render.
If you want to get familiar with the terms you’ll see in these briefs, check out the guide on rendering terminology.
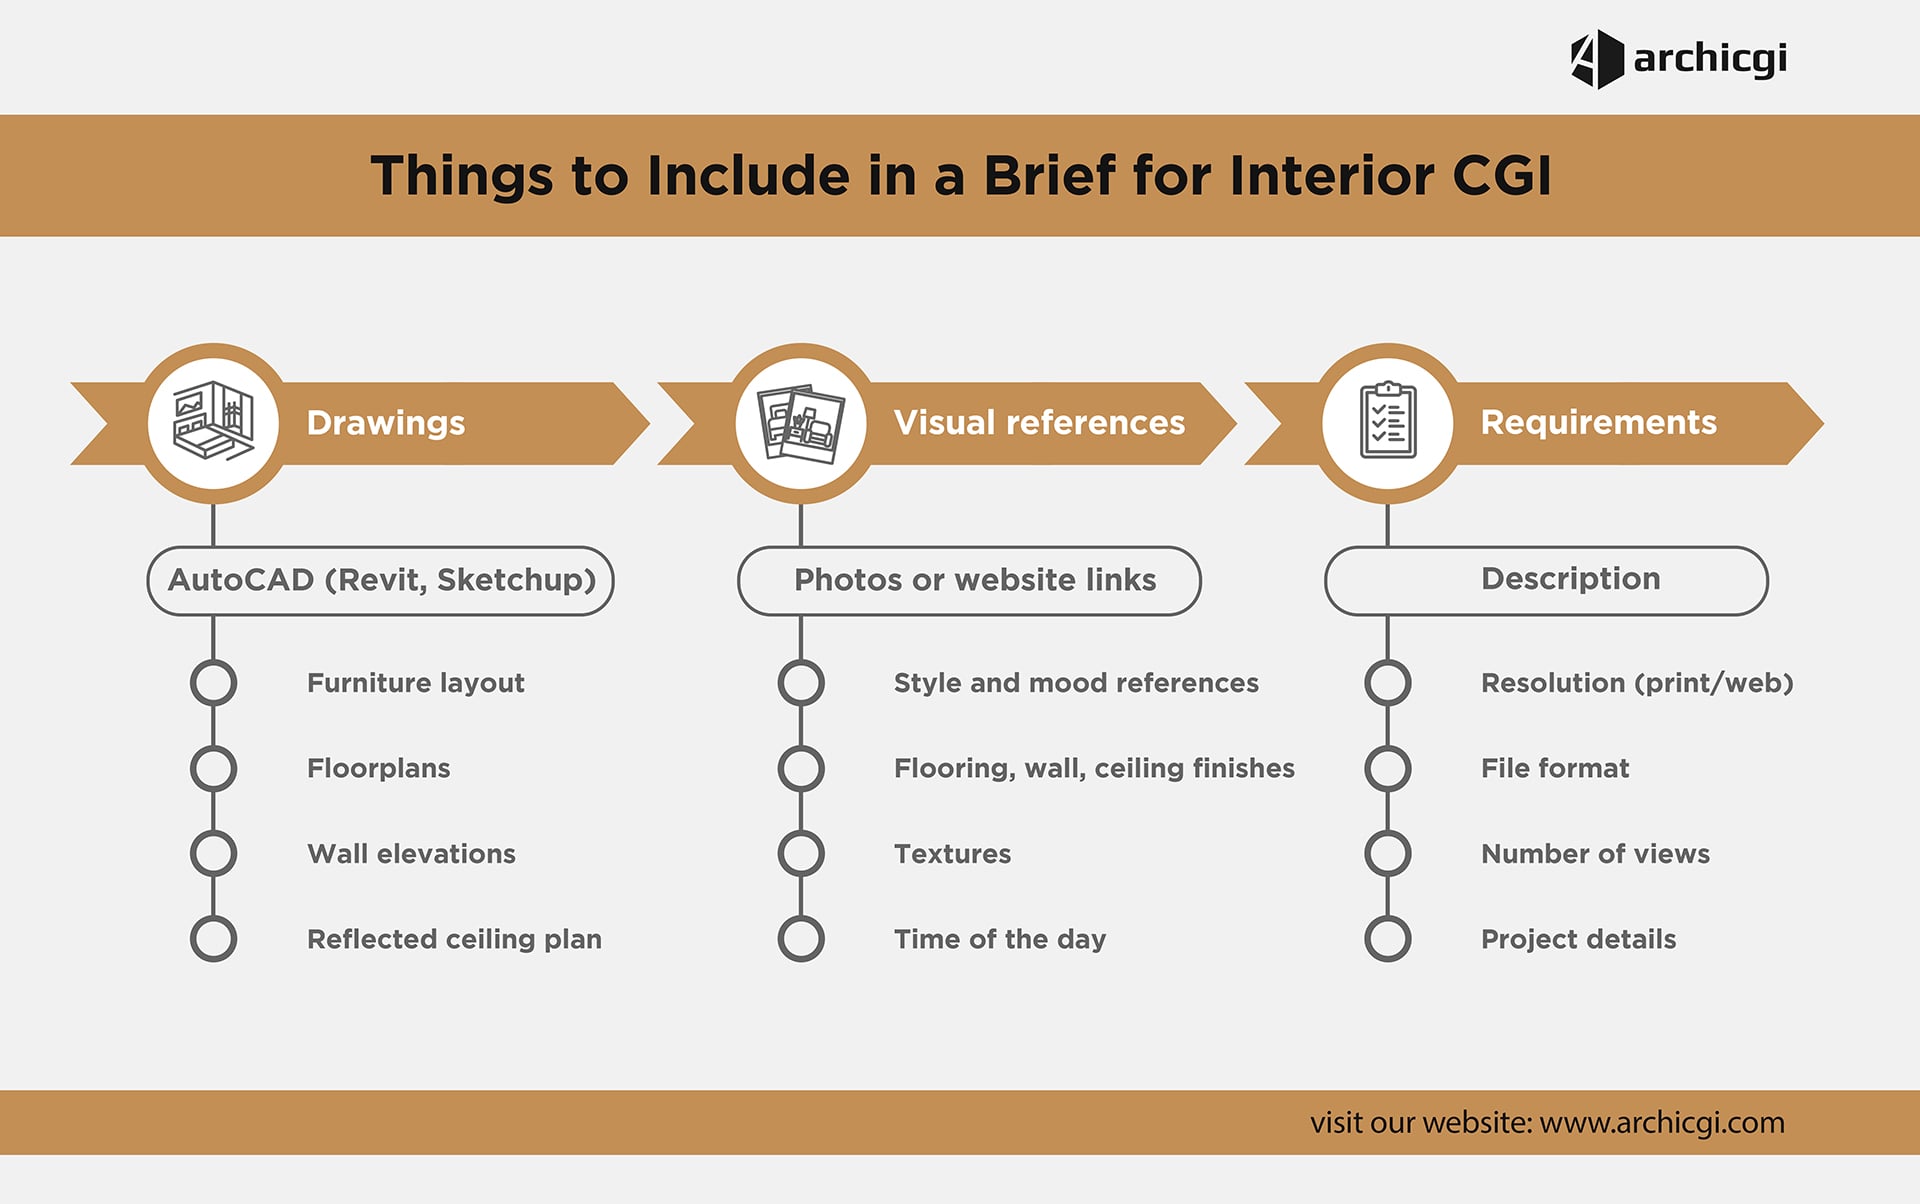
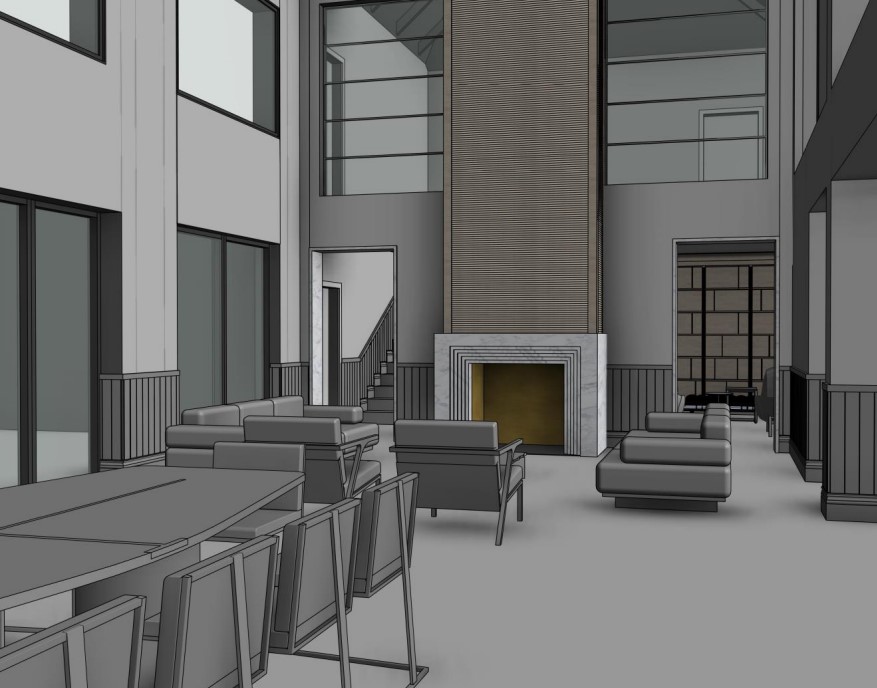
What to Include in an Interior Rendering Brief
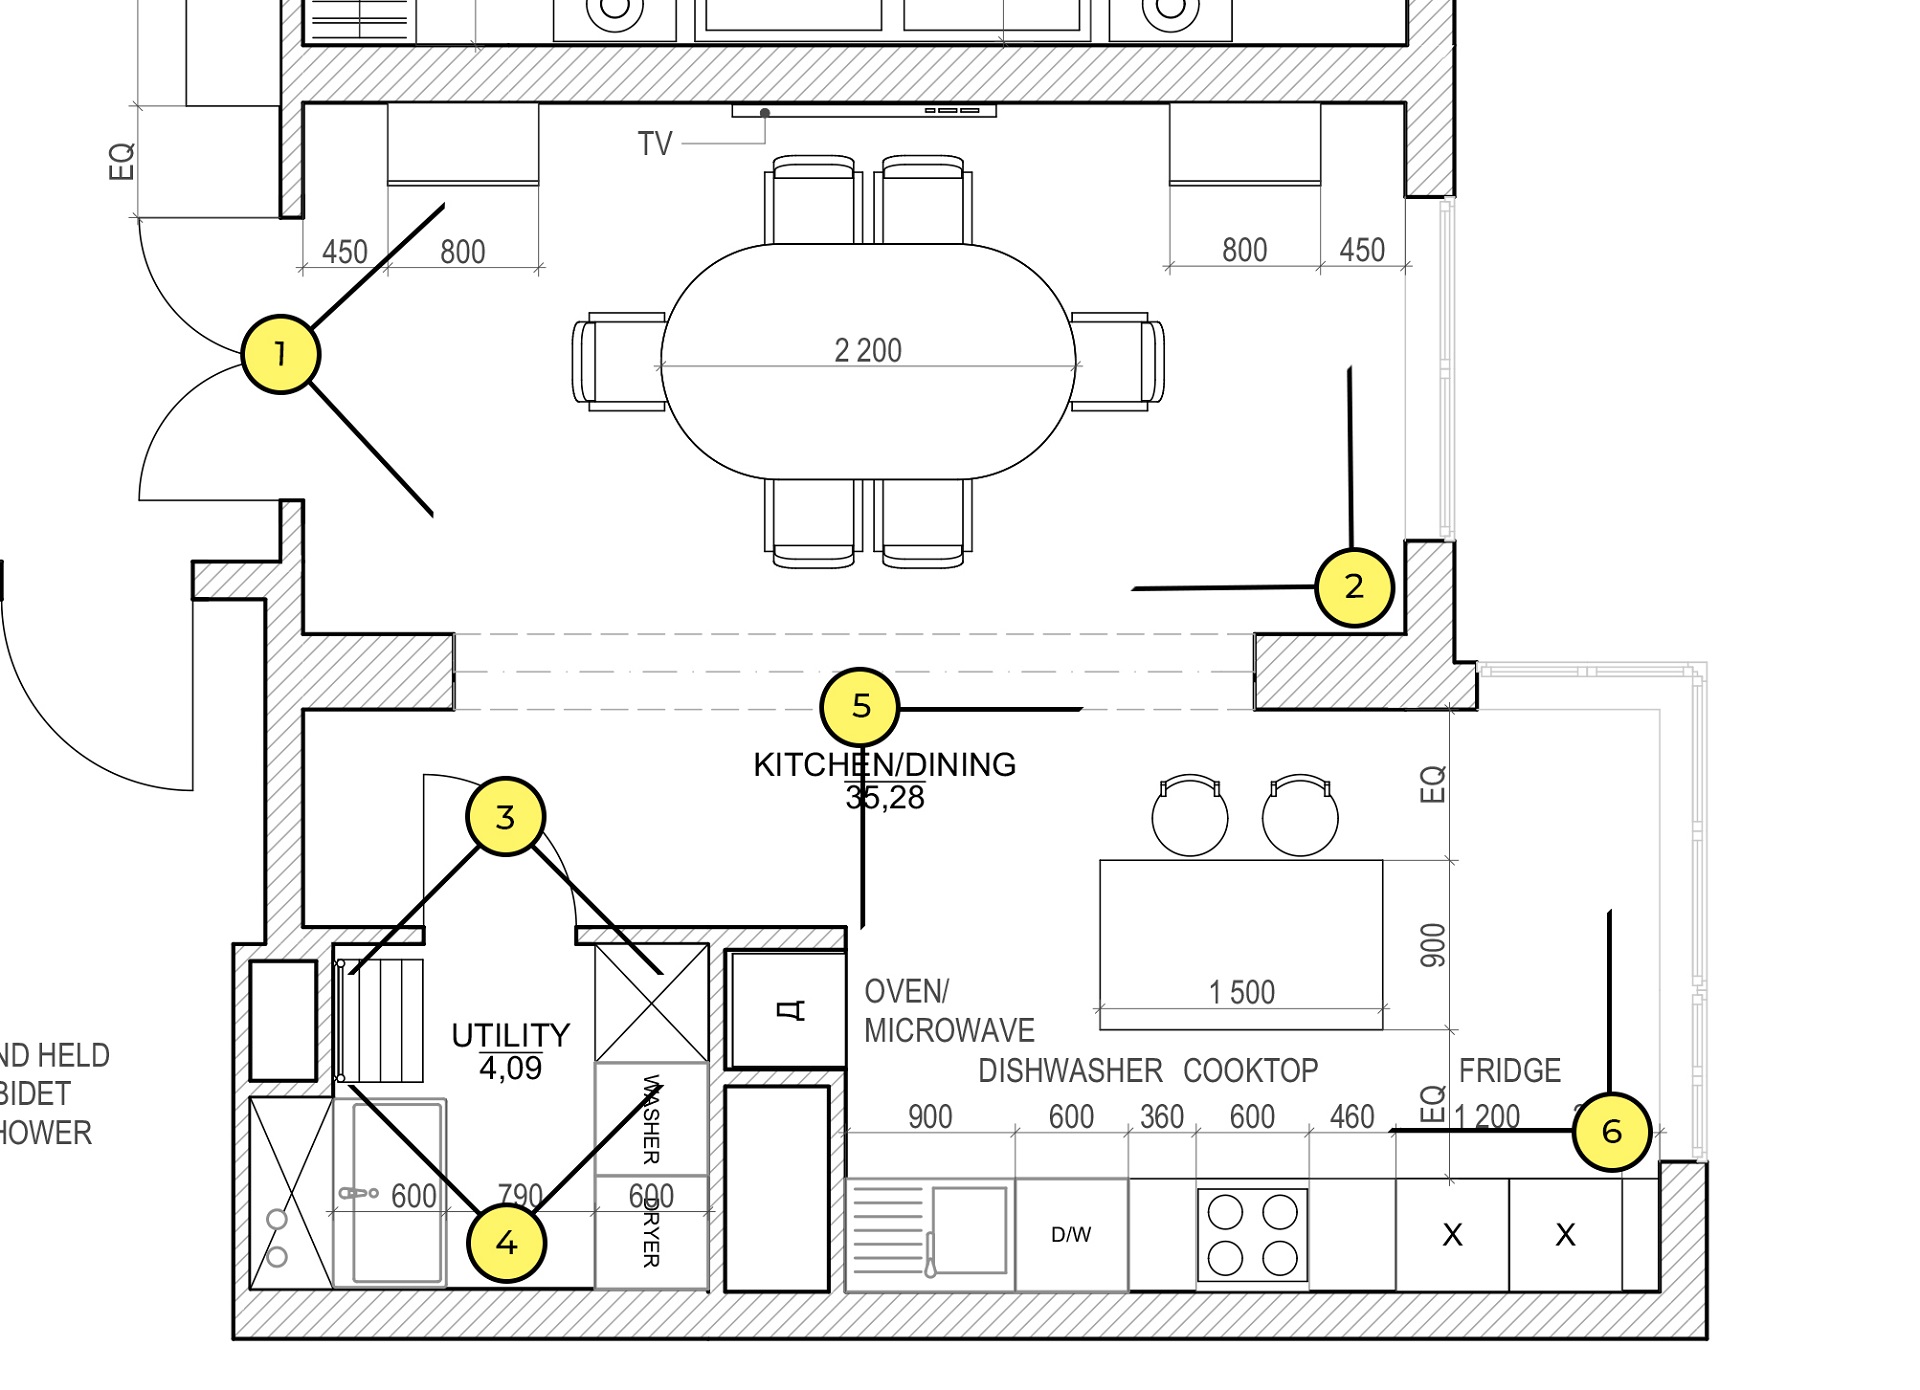
When you put together an interior rendering brief, you’re not just laying out the bones of the space, but painting a picture of the atmosphere, design vision, and materials. The point is to help the CGI artist really get how the place should feel, not just how it’s supposed to be structured.
A complete interior brief typically includes:
- Floor plan with functional zoning (clearly defined areas and purpose of each space)
- Architectural drawings, such as sections or elevations
- Style references (mood boards, Pinterest boards, Houzz collections, magazine references)
- Materials and finishes specifications (flooring, wall treatments, textures)
- Furniture requirements (custom-made vs. catalog items, key brands if applicable)
- Lighting preferences (daylight, artificial lighting, mixed scenarios)
- Preferred camera angles (key viewpoints or focal compositions)
- Delivery requirements (resolution, formats, deadlines)
Style references are especially important, as they visually communicate design intent and eliminate ambiguity in interpretation.
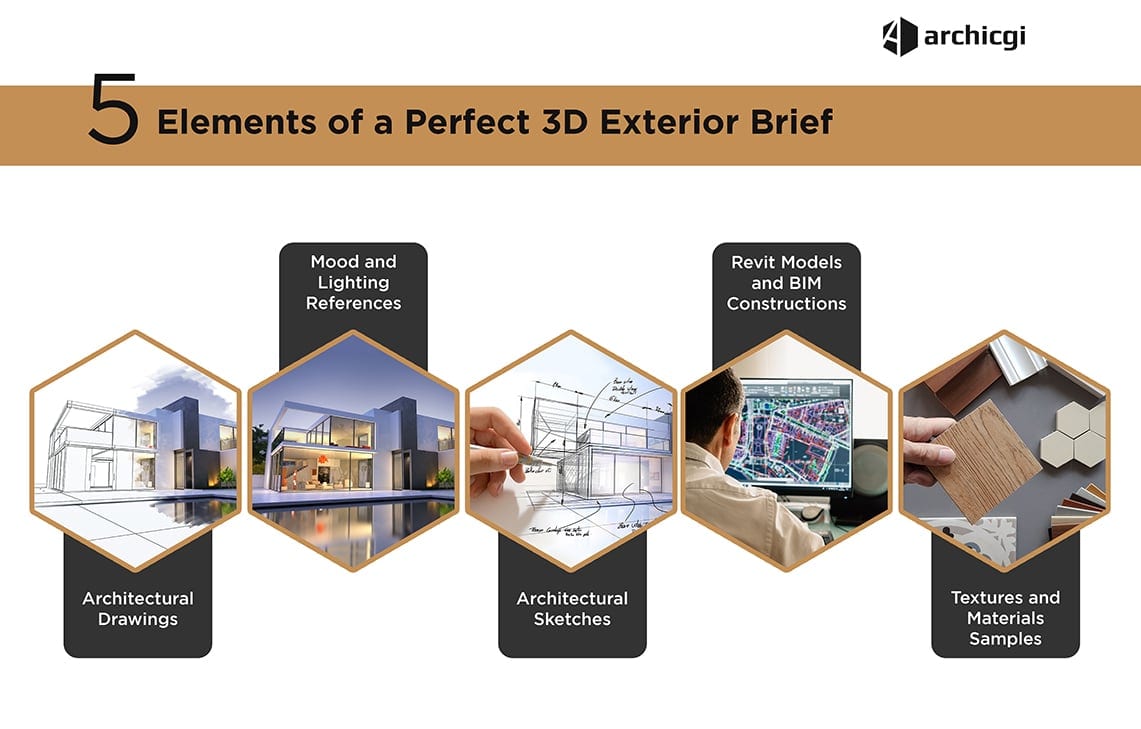
What to Include in an Exterior Rendering Brief
Exterior visualization requires a broader architectural and environmental context. Unlike interiors, the surrounding landscape, light conditions, and structural detailing play a critical role.
A structured exterior brief should include:
- Location specifics (address, surroundings, reference photos)
- Facade elevations (all sides of the building)
- Floor plan (horizontal structure overview)
- Roof plan (roof geometry and structure)
- Complex assembly drawings (architectural details and junctions)
- Materials and textures (facade finishes, cladding, glazing systems)
- Style references (similar buildings, architectural inspiration)
- Time of day and season preferences (affects mood and lighting conditions)
Each of these elements helps ensure that the final visualization is not only accurate but also contextually grounded in its environment.
For additional reference materials, explore exterior rendering brief references and exterior visualization services.
How to Show Camera Angles in a Brief
Camera angle definition is one of the most overlooked yet critical parts of a rendering brief. Without clear direction, even well-modeled scenes may fail to match expectations.
Method comparison
- 3D model views → highest precision
- Floor plan markings → widely used alternative
- Elevation drawings → best for exterior views
- Hand sketches → fallback when no technical files exist
Method 1: 3D Model Views (SketchUp, Revit, Rhino)
The most accurate way to communicate camera angles is through a 3D model. Artists can extract exact viewpoints, ensuring precise composition and perspective.
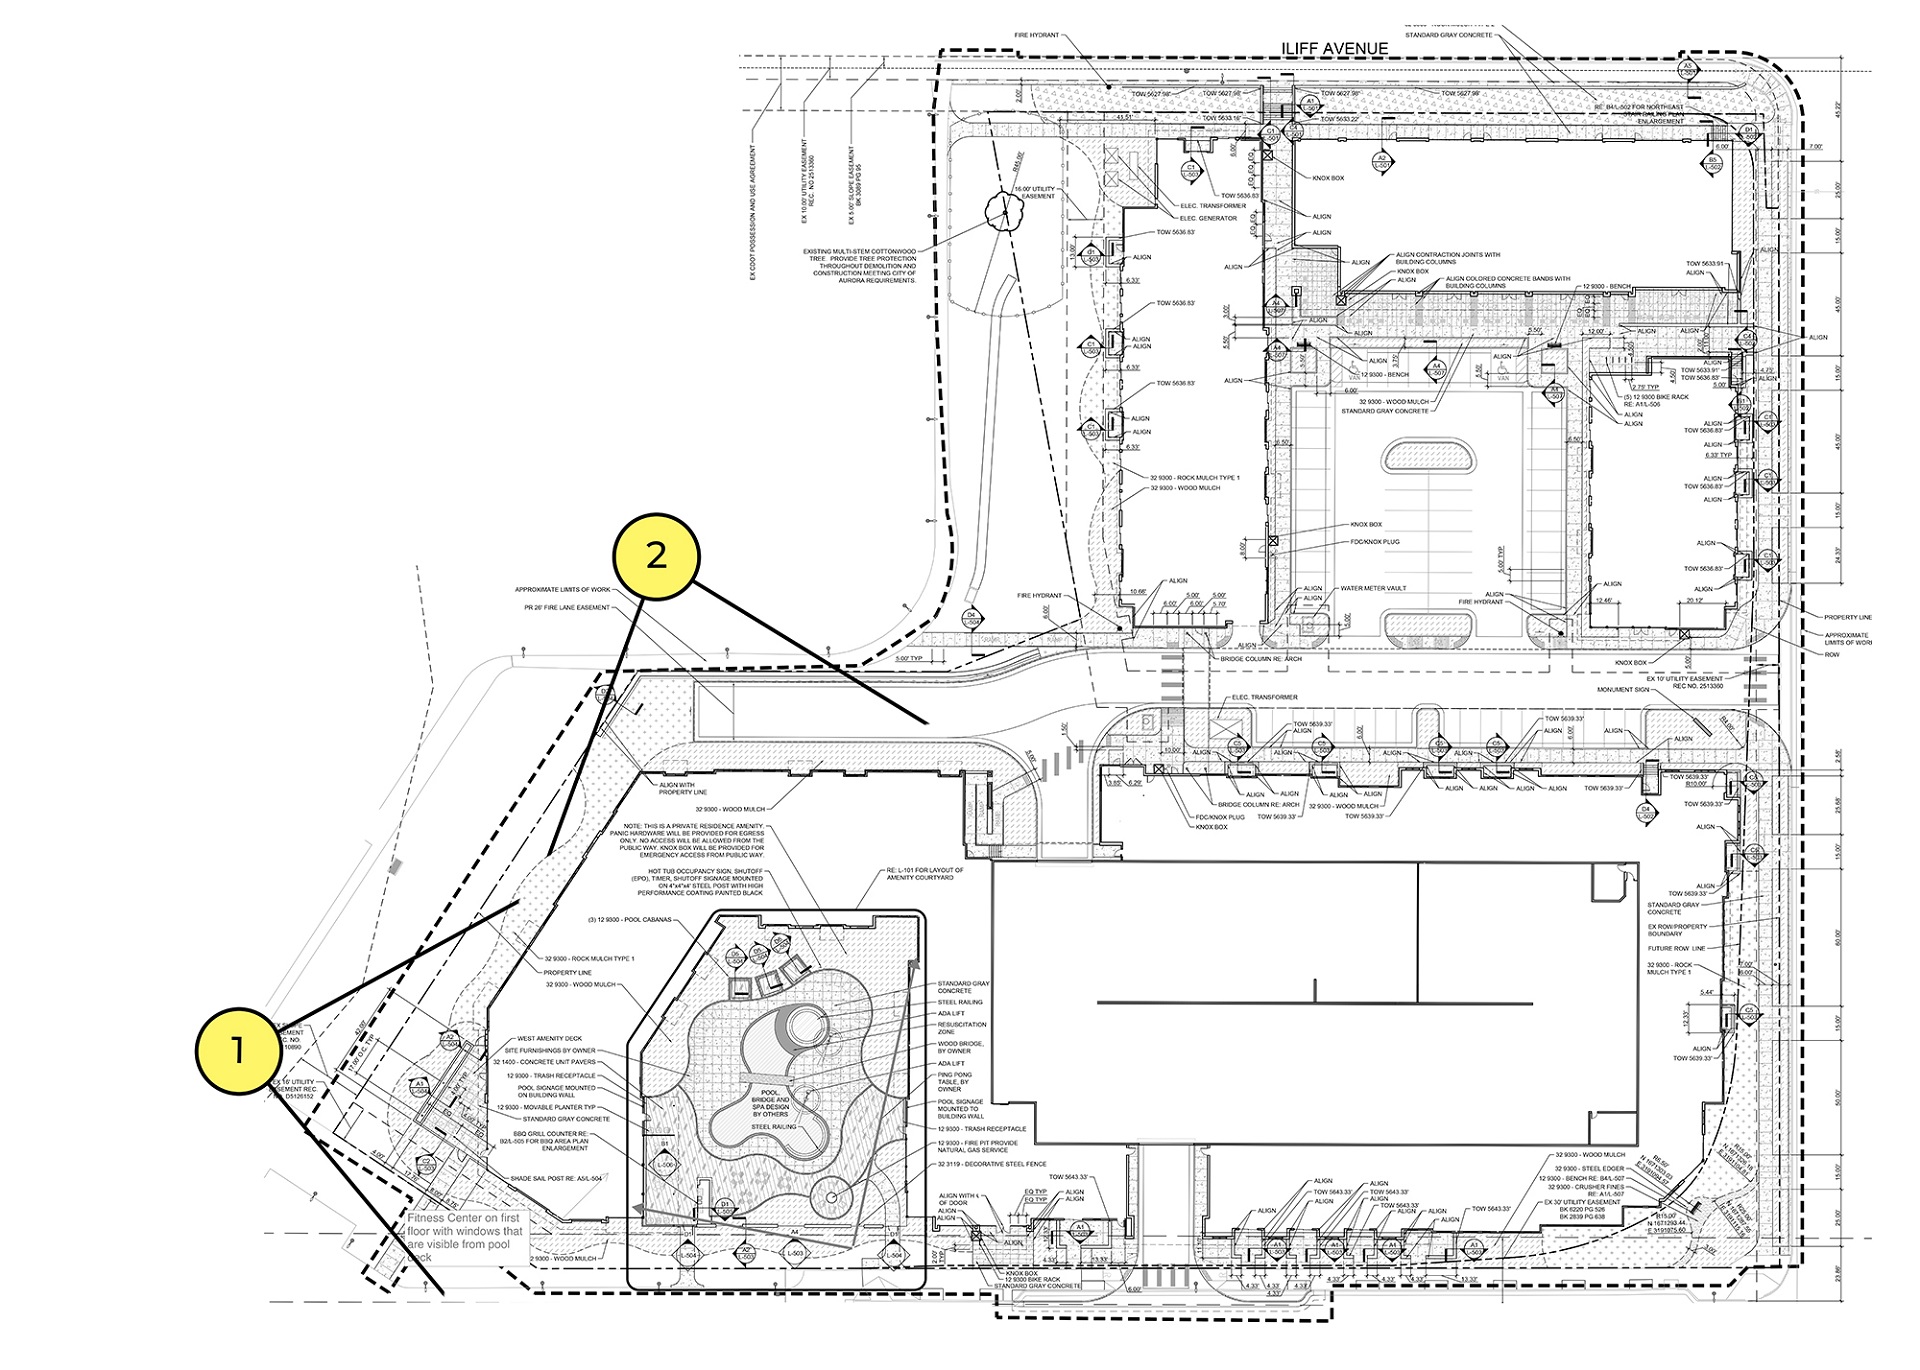
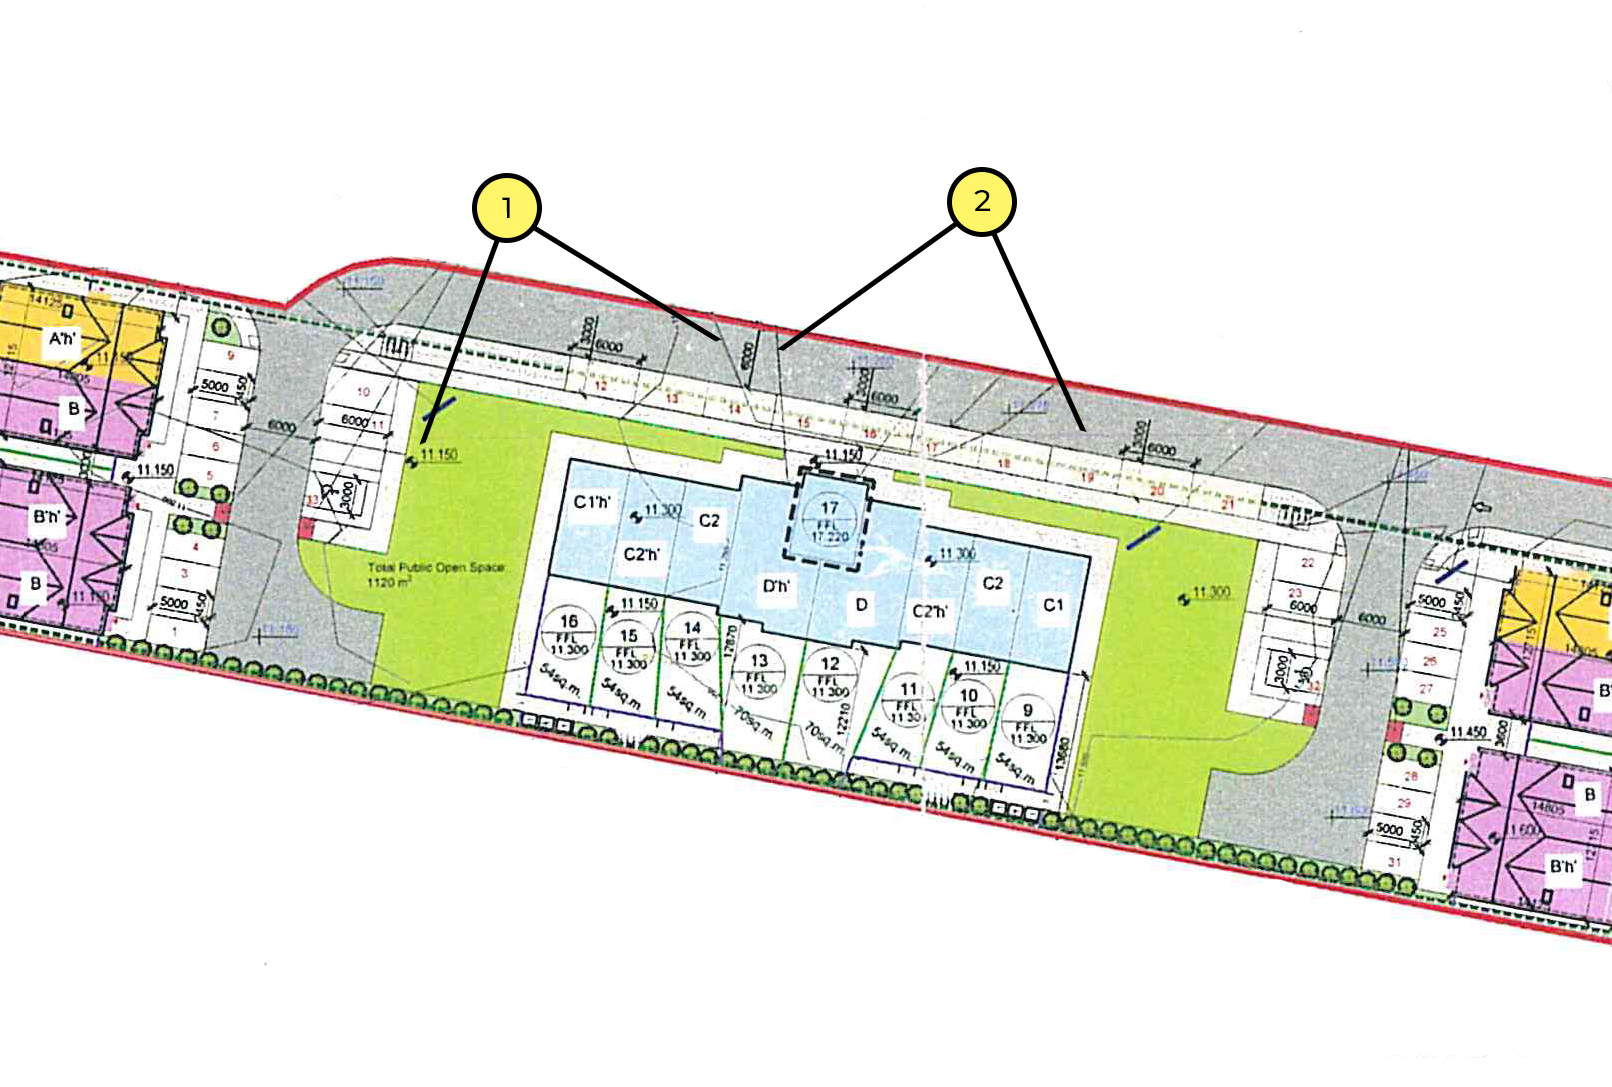
Method 2: Indicate on the Floor Plan
If no 3D model is available, camera positions can be marked directly on the floor plan. Arrows and cones are typically used to indicate direction and framing.
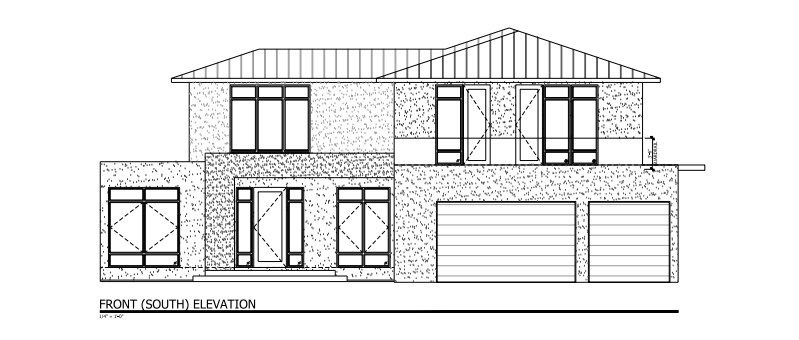
Method 3: Elevation Drawing
For exterior visualizations, elevations help define which facade or architectural side should be rendered and from what perspective.
Method 4: Hand-Drawn Sketch
When technical drawings are unavailable, simple sketches can still effectively communicate intent. Even rough perspective drawings help avoid misinterpretation.
Common Mistakes to Avoid
A poorly prepared brief is one of the main reasons for delays and revisions in CGI production. The most frequent issues include:
- Insufficient reference materials → leads to subjective interpretation
- Unclear style direction → results in inconsistent visual output
- Missing camera angle definitions → causes incorrect composition
- No material specifications → slows down production workflow
- Unrealistic deadlines → reduces quality or increases cost
- Low-quality CAD files → forces manual reconstruction
- Unit confusion (metric vs imperial) → causes scaling errors
Each of these mistakes can be avoided by treating the brief as a structured production document rather than a casual description.
For better preparation, review best practices in creating a perfect 3D technical assignment.
Use a Ready-to-Fill Brief Template
Instead of assembling requirements from scratch, it is more efficient to use a structured template designed specifically for CGI production workflows.
A professional brief template typically includes:
- Pre-defined sections for interior and exterior data
- Structured fields for materials, lighting, and camera angles
- Checklist-based formatting to avoid missing information
- Standardized structure understood by 3D artists
Using a template helps reduce communication errors and ensures all critical project data is included from the start.
Final Note
A well-structured 3D rendering brief is not just documentation—it is the communication bridge between architectural intent and visual execution. The clearer it is, the more predictable and efficient the production process becomes.
For context on how this fits into the broader pipeline, see the architectural rendering process and results of a well-written brief in practice.


